

Telnyx AI — Full Documentation
Inference, AI assistants, missions, and LiveKit integrations. Complete page content for the AI section of the Telnyx developer docs (https://developers.telnyx.com). Root index: https://developers.telnyx.com/llms.txt · Lightweight index for this section: https://developers.telnyx.com/development/llms/ai-llms-txt.md
Inference
Models
Source: https://developers.telnyx.com/docs/inference/models.mdOpen-source LLMs hosted on Telnyx GPU infrastructure. All models accessible via the Chat Completions API (OpenAI-compatible).
Chat Models
Embedding Models
Regions & Availability
Source: https://developers.telnyx.com/docs/inference/models/regions.mdGPU infrastructure across four regions on three continents. Telnyx will endeavor to process requests in the region nearest the ingress domain you call, but this is not guaranteed.
Current Regions
Routing
Inference processing is latency-based, influenced by the ingress domain you call, not by your account’s data locality setting. Telnyx will endeavor to process in the preferred region, but does not guarantee it:
Calling a regional ingress domain (for example,
api.telnyx.eu) directs requests to the nearest GPU region for that domain under normal conditions. Telnyx does not guarantee processing location: during failover or capacity events, requests are processed at the next-lowest-latency region rather than failing. A region-selection API parameter is on the roadmap.
Data Residency
Processing location and storage location are controlled separately:- Processing in transit is latency-based, influenced by the ingress domain you call (see Routing above). Telnyx will endeavor to process in the preferred region, but it is not a guaranteed processing location.
- Storage at rest depends on the endpoint. The chat completions endpoint does not store request or response data. The responses endpoint stores conversations, and that storage is governed by your Data Locality setting.
Roadmap
- Region selection API parameter
- Per-region model status and latency metrics
- Edge inference for sub-50ms response times
Pricing
Source: https://developers.telnyx.com/docs/inference/models/pricing.mdPay-per-token. No minimums, no commitments. For current per-model pricing, see telnyx.com/pricing/inference-api.
Data Residency & Compliance FAQ
Source: https://developers.telnyx.com/docs/inference/data-residency.mdThis page answers common customer questions about where data is processed and stored, which providers are used, retention, and model training. Telnyx AI spans two products that handle processing location differently:
- Inference API — chat completions, the responses endpoint, and related model APIs.
- Voice AI Assistants — telephony-based conversational agents.
Processing vs. storage: the key distinction
Data Locality governs storage at rest for covered data types. Neither the data locality flag nor the anchorsite is a hard guarantee of where live processing happens.
Inference API
Where is Inference processing performed?
Inference processing in transit is latency-based, influenced by the ingress domain you call, not by your data locality setting. Telnyx will endeavor to process in the preferred region, but does not guarantee it:
Calling a regional ingress domain (for example,
api.telnyx.eu) directs requests to the nearest GPU region for that domain. Telnyx will endeavor to route to that region, but does not guarantee the processing location: during failover or capacity events, requests are processed at the next-lowest-latency region rather than failing. See Inference Regions & Availability for the underlying GPU regions.
Does Inference store my data?
It depends on the endpoint:- Chat completions endpoint — does not store request or response data.
- Responses endpoint — stores conversations. For stored data, your Data Locality setting dictates the storage region.
Can Inference traffic be pinned to a specific region?
Not as a hard guarantee. Routing is latency-based: calling a regional ingress domain (for example,api.telnyx.eu) directs requests to that region under normal conditions, and Telnyx will endeavor to keep them there, but Telnyx does not guarantee processing location. During failover or capacity events, requests are processed at the next-lowest-latency region rather than failing. If you have a strict compliance requirement for guaranteed processing location, contact support to discuss what is possible for your account.
Voice AI Assistants
Where is Voice AI Assistant processing performed?
For Voice AI Assistants, processing location is influenced by the anchorsite configured on the assistant’s TeXML application — not by the data locality flag. Setting the anchorsite (for example, Frankfurt for the EU) directs media/processing to that region under normal conditions. The anchorsite is not a hard control. Telnyx will endeavor to honor it, but does not guarantee processing location: under failover or capacity events, processing can shift to another region rather than failing the call.Where is Voice AI Assistant data stored?
Storage location at rest is a hard control, governed by your Data Locality flag. Retention of conversation content is further controlled by the data-retention setting (see Data retention). Recording storage can also be directed to your own storage destination, which Telnyx respects.Are call audio, transcripts, prompts, responses, summaries, or recordings ever handled outside the configured region?
- Processing location is influenced by the assistant’s anchorsite; Telnyx will endeavor to honor it, but it is not guaranteed.
- Storage at rest is a hard control, following your data locality flag. Recordings can be directed to a customer-controlled storage destination, which Telnyx respects.
Example: EU-focused Voice AI setup
A typical EU-oriented configuration combines:- Data locality: EU (Germany) — a hard control over storage at rest
- Anchorsite on the TeXML app: an EU site (for example, Frankfurt) — Telnyx will endeavor to influence media/processing location, but it is not guaranteed
- Voice API endpoint:
api.telnyx.eu - SIP endpoint:
sip.telnyx.eu
STT, TTS, and LLM providers (Voice AI)
For Voice AI Assistants, the STT, TTS, and LLM providers in use depend on the models and voices you select. Some are self-hosted by Telnyx (run on Telnyx-operated infrastructure); others are third-party services that Telnyx integrates with. This distinction matters for compliance: self-hosted models keep that processing step within Telnyx infrastructure, whereas third-party models route that step to the vendor. Hosting (self-hosted vs. third-party) is about which infrastructure performs the step, not a guarantee of region. Processing region is not guaranteed for any provider — see the processing vs. storage note above.Speech-to-text (STT)
Text-to-speech (TTS)
TTS is delivered through Telnyx’s TTS gateway, which integrates multiple providers. The provider depends on the voice you select:
See Text to Speech voices for the current voice catalog.
Large language model (LLM)
The assistant’s model is served through Telnyx’s inference platform. The model in use is the one you configure on the assistant. Self-hosted by Telnyx (open models served on Telnyx infrastructure) include the Qwen and Moonshot (Kimi) model families — for example,Qwen/Qwen3-235B-A22B, moonshotai/Kimi-K2.5, and moonshotai/Kimi-K2.6.
Third-party models — including those from Anthropic (Claude), OpenAI (GPT), and Google (Gemini) — are not self-hosted. When you select one of these, the prompt is sent to that external provider to generate the response.
The available models evolve over time — for the current catalog and which models are recommended for assistants, see Models.
If data residency or third-party data sharing is a concern, choose a self-hosted model (a Qwen or Moonshot/Kimi model) to keep prompt and response generation on Telnyx infrastructure. Region is not guaranteed even for self-hosted models.
Can STT, TTS, or LLM processing be restricted to the EU?
There is no hard guarantee of processing region for any provider — Telnyx will endeavor to honor the configured region, but does not guarantee it. In addition:- Self-hosted providers keep that processing step on Telnyx infrastructure, but region is not guaranteed.
- Third-party providers route that step to the vendor, whose own region behavior applies.
Recordings
Are call recordings disabled by default?
No — for Voice AI Assistants, call recordings are enabled by default, and you can turn them off. When recordings are enabled, the recording is stored as Media Storage, which is subject to your Data Locality setting. Disable recording on the assistant (or per call) if you do not want recordings retained.Data retention and model training
What does the data-retention setting control?
Voice AI Assistants expose a data-retention privacy setting (privacy_settings.data_retention). It is enabled by default. When you disable it, the assistant stops persisting conversation content while continuing the minimum processing needed to run and bill the call.
When data_retention is disabled, conversation content is not retained:
A limited set of records is still retained even when conversation retention is off, because they are required to operate and bill the service:
The data-retention flag governs retention of conversation content for Voice AI Assistants. Disabling it stops persistence of conversation content and insights; it does not change where data that is retained lives — storage region is controlled by Data Locality. Recordings are governed separately by the recording setting (see Recordings above). For a guarantee tailored to your exact configuration (audio, tool inputs/outputs, memory, observability traces, and third-party provider logs), confirm in writing with your account team and DPA.
Can a customer opt out of model improvement / training / evaluation?
Customer data handling for model training is governed by Telnyx’s applicable terms and DPA. If you require an opt-out from model improvement, training, or evaluation — for both input and output data, and covering Telnyx and any third-party AI providers in your configuration — contact your account team to confirm the governing terms and document the opt-out.Usage reporting and billing
Can usage be broken down by assistant, phone number, or metadata/tag?
Usage and conversation data can be attributed using identifiers such as the assistant, the associated phone number, and metadata. For subscriber-level or per-tag billing breakdowns, contact support to confirm which dimensions are available and how to structure metadata/tags for clean attribution. See Agent Observability and Session Analysis.Related resources
- Data Locality
- Inference Regions & Availability
- Models
- Transcription Settings
- Text to Speech voices
- Agent Observability
Disclaimer
This FAQ is provided for informational purposes only and describes the current design, functionality, and operation of the products, services, and features discussed herein. It is not intended to, and does not, create any contractual commitment, representation, warranty, guarantee, service level, or other binding obligation on the part of Telnyx. The information in this FAQ reflects Telnyx’s current products, features, configurations, and operational practices as of the date of publication and may change from time to time. Any descriptions regarding processing locations, storage locations, data locality, service architecture, routing, infrastructure, providers, retention settings, product functionality, or the operation of the services should not be relied upon as contractual commitments or guarantees. References to particular regions, locations, providers, configurations, or operational outcomes do not constitute guarantees that data processing, storage, routing, or other service activities will occur exclusively in a particular location or manner. Customer rights and Telnyx obligations are governed exclusively by the applicable agreement(s) between the parties, including any Master Services Agreement, Data Processing Agreement, Order Form, and any other written contractual commitments expressly agreed by Telnyx. Nothing in this FAQ modifies or supplements such agreements. To the extent of any inconsistency between this FAQ and such agreements, the applicable agreement(s) shall control.Integrations
Source: https://developers.telnyx.com/docs/inference/integrations.mdOpenAI-compatible API. Swap
base_url and api_key in any framework that supports OpenAI.
Quick Reference
Environment Variables
Route all OpenAI SDK calls through Telnyx with no code changes:OpenAI Migration
Source: https://developers.telnyx.com/docs/inference/openai.mdSwap two environment variables and change the model name. That’s it.
Reasoning models
Reasoning models such aszai-org/GLM-5.2 add a reasoning_content field alongside
the usual content. It holds the model’s chain-of-thought and appears on message
(non-streaming) or delta (streaming). Read it the same way you read content:
Chat Completions Compatibility
Transcriptions Compatibility
Anthropic Migration
Source: https://developers.telnyx.com/docs/inference/anthropic.mdSwap the base URL and pass your Telnyx API key as a Bearer token. That’s it. The Telnyx Inference API now exposes an Anthropic-compatible Messages endpoint at
POST /v2/ai/anthropic/v1/messages. It accepts the same request body as the
Anthropic Messages API and returns
the same response shape — including streaming via Anthropic SSE event types
(message_start, content_block_start, content_block_delta, content_block_stop,
message_delta, message_stop).
Authentication
The Anthropic SDK sends requests with anx-api-key header by default. Telnyx
uses Authorization: Bearer instead. Pass the Telnyx key as a
default_headers override and set the SDK’s own api_key to any placeholder
value — the gateway ignores it.
api_key to be set to a non-empty string, even
when you override auth via default_headers. Use any placeholder — the
Telnyx gateway only reads the Authorization: Bearer header.
Quickstart
Python
JavaScript / TypeScript
curl
Streaming
The endpoint streams Anthropic-format Server-Sent Events. Use the SDK’s built-in streaming just as you would with the native Anthropic API:Tool Calling
Tool definitions and tool results follow the Anthropic tool use format:Extended Thinking
For models that support extended thinking (e.g. Claude reasoning models), pass thethinking parameter. On older SDK versions that reject unknown kwargs, use
extra_body to forward it into the request JSON:
System Prompts
Thesystem parameter can be a plain string or an array of content blocks,
matching the Anthropic API format:
Models
Anthropic models are available under theanthropic/ prefix. See
Available Models for the full list. Open-source models
hosted on Telnyx (e.g. zai-org/GLM-5.2, moonshotai/Kimi-K2.6) also work
through this endpoint — the request is translated to the OpenAI-compatible
format internally and the response is translated back to the Anthropic shape.
Telnyx Extensions
The endpoint accepts several Telnyx-specific fields alongside the standard Anthropic request body:
These fields pass through as extra body parameters in the SDK:
Compatibility
LangChain
Source: https://developers.telnyx.com/docs/inference/langchain-integration.mdOpenAI-compatible. Use
ChatOpenAI with a base_url swap.
Setup
Usage
Function Calling
Streaming
LlamaIndex
Source: https://developers.telnyx.com/docs/inference/llama-index.mdOpenAI-compatible. Use
OpenAILike with api_base swap.
Setup
Usage
RAG with Embeddings
Combine with Telnyx Embeddings for retrieval-augmented generation. See the Embeddings guide for document upload and indexing.CrewAI
Source: https://developers.telnyx.com/docs/inference/crewai.mdOpenAI-compatible. Use as LLM backend for CrewAI agents.
Setup
Usage
Set environment variables for global routing:Tool Calling
LiveKit
Source: https://developers.telnyx.com/docs/inference/livekit.mdLiveKit’s agent framework lets you build real-time, programmable voice agents. Telnyx integrates with LiveKit through the OpenAI plugin for LLM inference and through
livekit-plugins-telnyx for native STT and TTS.
Voice assistant example
This example is based on LiveKit’s agents examples repo, modified to use Telnyx for LLM inference.Set up and activate a virtual env
Install requirements
Download files
This downloads model weights for voice-activity detection:Agent code
The following code uses Telnyx for LLM inference viaopenai.LLM.with_telnyx(), with Telnyx STT and TTS.
Set environment variables
Run the agent worker
Test with a LiveKit frontend
Use the LiveKit Agents Playground to test your agent without building a frontend.Telnyx STT & TTS plugin
Thelivekit-plugins-telnyx package provides native Telnyx STT and TTS plugins for LiveKit agents.
STT
Usetelnyx.STT() for real-time speech-to-text via Telnyx’s WebSocket streaming API:
TTS
Usetelnyx.TTS() for real-time text-to-speech. Pass a voice parameter to select a specific voice:
Related resources
Inference API
Source: https://developers.telnyx.com/docs/inference/getting-started.md
Prerequisites
- Telnyx account
- API Key
- Python 3.8+
base_url swap.
Python
zai-org/GLM-5.2 return their chain-of-thought in a
separate reasoning_content field (on message for non-streaming responses, or
delta when streaming). Models without reasoning simply omit it, so the
getattr(..., "reasoning_content", None) guard works for every model.
Core Concepts
Messages
Chat history passed to the model.Roles
Every message has a role: system, user, assistant, or tool.- system — model behavior instructions
- user — end-user input
- assistant — model output
- tool — function call results. See Function Calling.
Models
Available Models lists all hosted LLMs with context lengths and capabilities.Streaming
Server-sent events, same as OpenAI.What Next?
Function Calling
Source: https://developers.telnyx.com/docs/inference/functions.mdIn this tutorial, you’ll learn how to connect large language models to external tools using our chat completions API. This includes:
- Defining a function
- Enabling the language model to choose the function
- Executing the function
- Sharing the results with the language model
Introduction
Using thetools field, you can enable a language model to choose functions to call. The chat completions API does not call the function itself. It will return the arguments you need to execute the function yourself.
Of the open-source language models hosted on Telnyx, zai-org/GLM-5.2 is especially good at calling functions. While we recommend you start with this model, every model in our API supports the tools interface.
Simple get_current_weather example
A popular toy example for function calls is the get_current_weather example.
The following code defines a function and passes it to the language model via the tools field.
Make sure you have set the TELNYX_API_KEY environment variable.
tool_choice of auto lets the language model decide to call a function (or not).
The options for tool_choice are:
required: this forces the language model to choose a toolnone: this forces the language model to NOT choose a toolauto: this lets the language model decide
tool_calls field populated.
Defining functions programmatically
In the next example, we will implement and executeget_current_weather. To do this cleanly, we are first going to define a helper function func_to_tool that extends the schema function from Jeremy Howard’s A Hacker’s Guide to Language Models.
Executing functions
Ok, it’s nice that the language model wants to execute theget_current_weather, but how do we actually do that, and incorporate the results back into the interaction?
Continuing from the chat_completion response in the previous example
Streaming and Parallel Calls
Source: https://developers.telnyx.com/docs/inference/streaming-functions.mdIn the previous tutorial, we learned the basics for defining and executing functions using our chat completions API. In this tutorial, we will introduce more advanced use cases:
- Streaming function calls
- Passing multiple functions
- Executing function calls in parallel
Defining our functions
First, we will define two functions we want to execute in parallel:sleep and dream.
Our goal is to use the dream function to make an API call to the Telnyx chat completions endpoint while we sleep.
We will also re-use the func_to_tool helped function we defined in the previous tutorial to easily convert between our Python functions and the JSON we need to pass to the tools field for our chat completions API.
Make sure you have set the TELNYX_API_KEY environment variable
Parsing Streaming Tools + Executing Tasks in Parallel
Next we will define a few functions to help us parse and execute tasks in parallel.handle_tool_calls
Thehandle_tool_calls function will iterate over streamed chunks from the chat completions endpoint. The language model may invoke multiple tool calls to be executed in parallel and will differentiate them using the index attribute on the chunk.
As we progress through the stream, we will build our local copy of this list of function calls in the tool_calls list.
The first chunk of a new tool call will contain the name of the function. This enables you to give early feedback to users that a function will be executed. In this example, we simply print the name of the function when it is detected.
As we build the arguments from the streamed chunks, we attempt to parse what we have built as JSON. Once we have a valid JSON object, we create an async task to be scheduled for execution (if we have not already done so).
NB: Telnyx guarantees valid JSON is returned for tool calls, so you don’t have to worry about lengthy retries or fuzzy matching.
execute_tasks
This function executes the tasks from the previous function and returns the results as they are completed, enabling users to receive feedback as soon as possible.func_wrapper
This is a trivial helper function that exposes the tool call ID and function name toexecute_tasks
Putting it all together
With our helper functions defined, we are ready to stream and execute multiple function calls in parallel. In this code, we:- Ask the language model to
sleepanddreamat the same time - Execute the returned tool calls in parallel
- Provide the results back to the language model and get a final response
sleep was detected and executed first, but dream still returned results first.
JSON Mode and Beyond
Source: https://developers.telnyx.com/docs/inference/json-mode.mdIn this tutorial, you’ll learn how to:
- Guarantee structured output using our chat completions API
- This can be done using JSON Schema / Pydantic models, (schemaless) JSON Mode, regular expressions, and multiple choice.
Sentiment Analysis using Multiple Choice
One of the simplest forms of structured output is multiple choice. The only possible outputs of the following code snippet arepositive or negative.
Make sure you have set the TELNYX_API_KEY environment variable
zai-org/GLM-5.2 is a reasoning model. Your structured output still arrives in
choices[0].message.content — the model’s chain-of-thought is returned separately in
choices[0].message.reasoning_content, so it never pollutes the JSON you parse. To
surface the reasoning, read it alongside content:
Building on this with guided_json
Now let’s say we want to capture an explanation for the classification as well. We can leverage the guided_json field for this.
Simplifying Schema Generation using Pydantic
The above is helpful to see the raw JSON Schema specification being sent via API. However, for practical purposes, using Pydantic models can help simplify generating the specs. The following is functionally equivalent to the previous example.Schema-less JSON Mode
We also support the schema-less JSON mode provided by OpenAIAnd now for something completely different (regular expressions)
You can do a lot with regular expressions, and now you can ensure language model outputs follow a regex. Something we see a lot, especially in a voice context, is wanting to limit the length of a response. Below is a toy example limiting a response to a sentence with 20 words or fewer.Fine Tuning
Source: https://developers.telnyx.com/docs/inference/fine-tuning.mdIn this tutorial, you’ll learn how to:
- Upload documents to Telnyx Storage
- Customize a language model for your unique needs, using those documents
- Chat with this fine-tuned language model in the portal or via API
.jsonl training file as input.
Unlike most fine-tuning providers, Telnyx will also use AI to generate a training file from your raw documents automatically. This is the workflow covered in this tutorial.
Upload your documents
You can upload objects to Telnyx’s S3-Compatible storage API using our quickstart or with our drag-and-drop interface in the portal.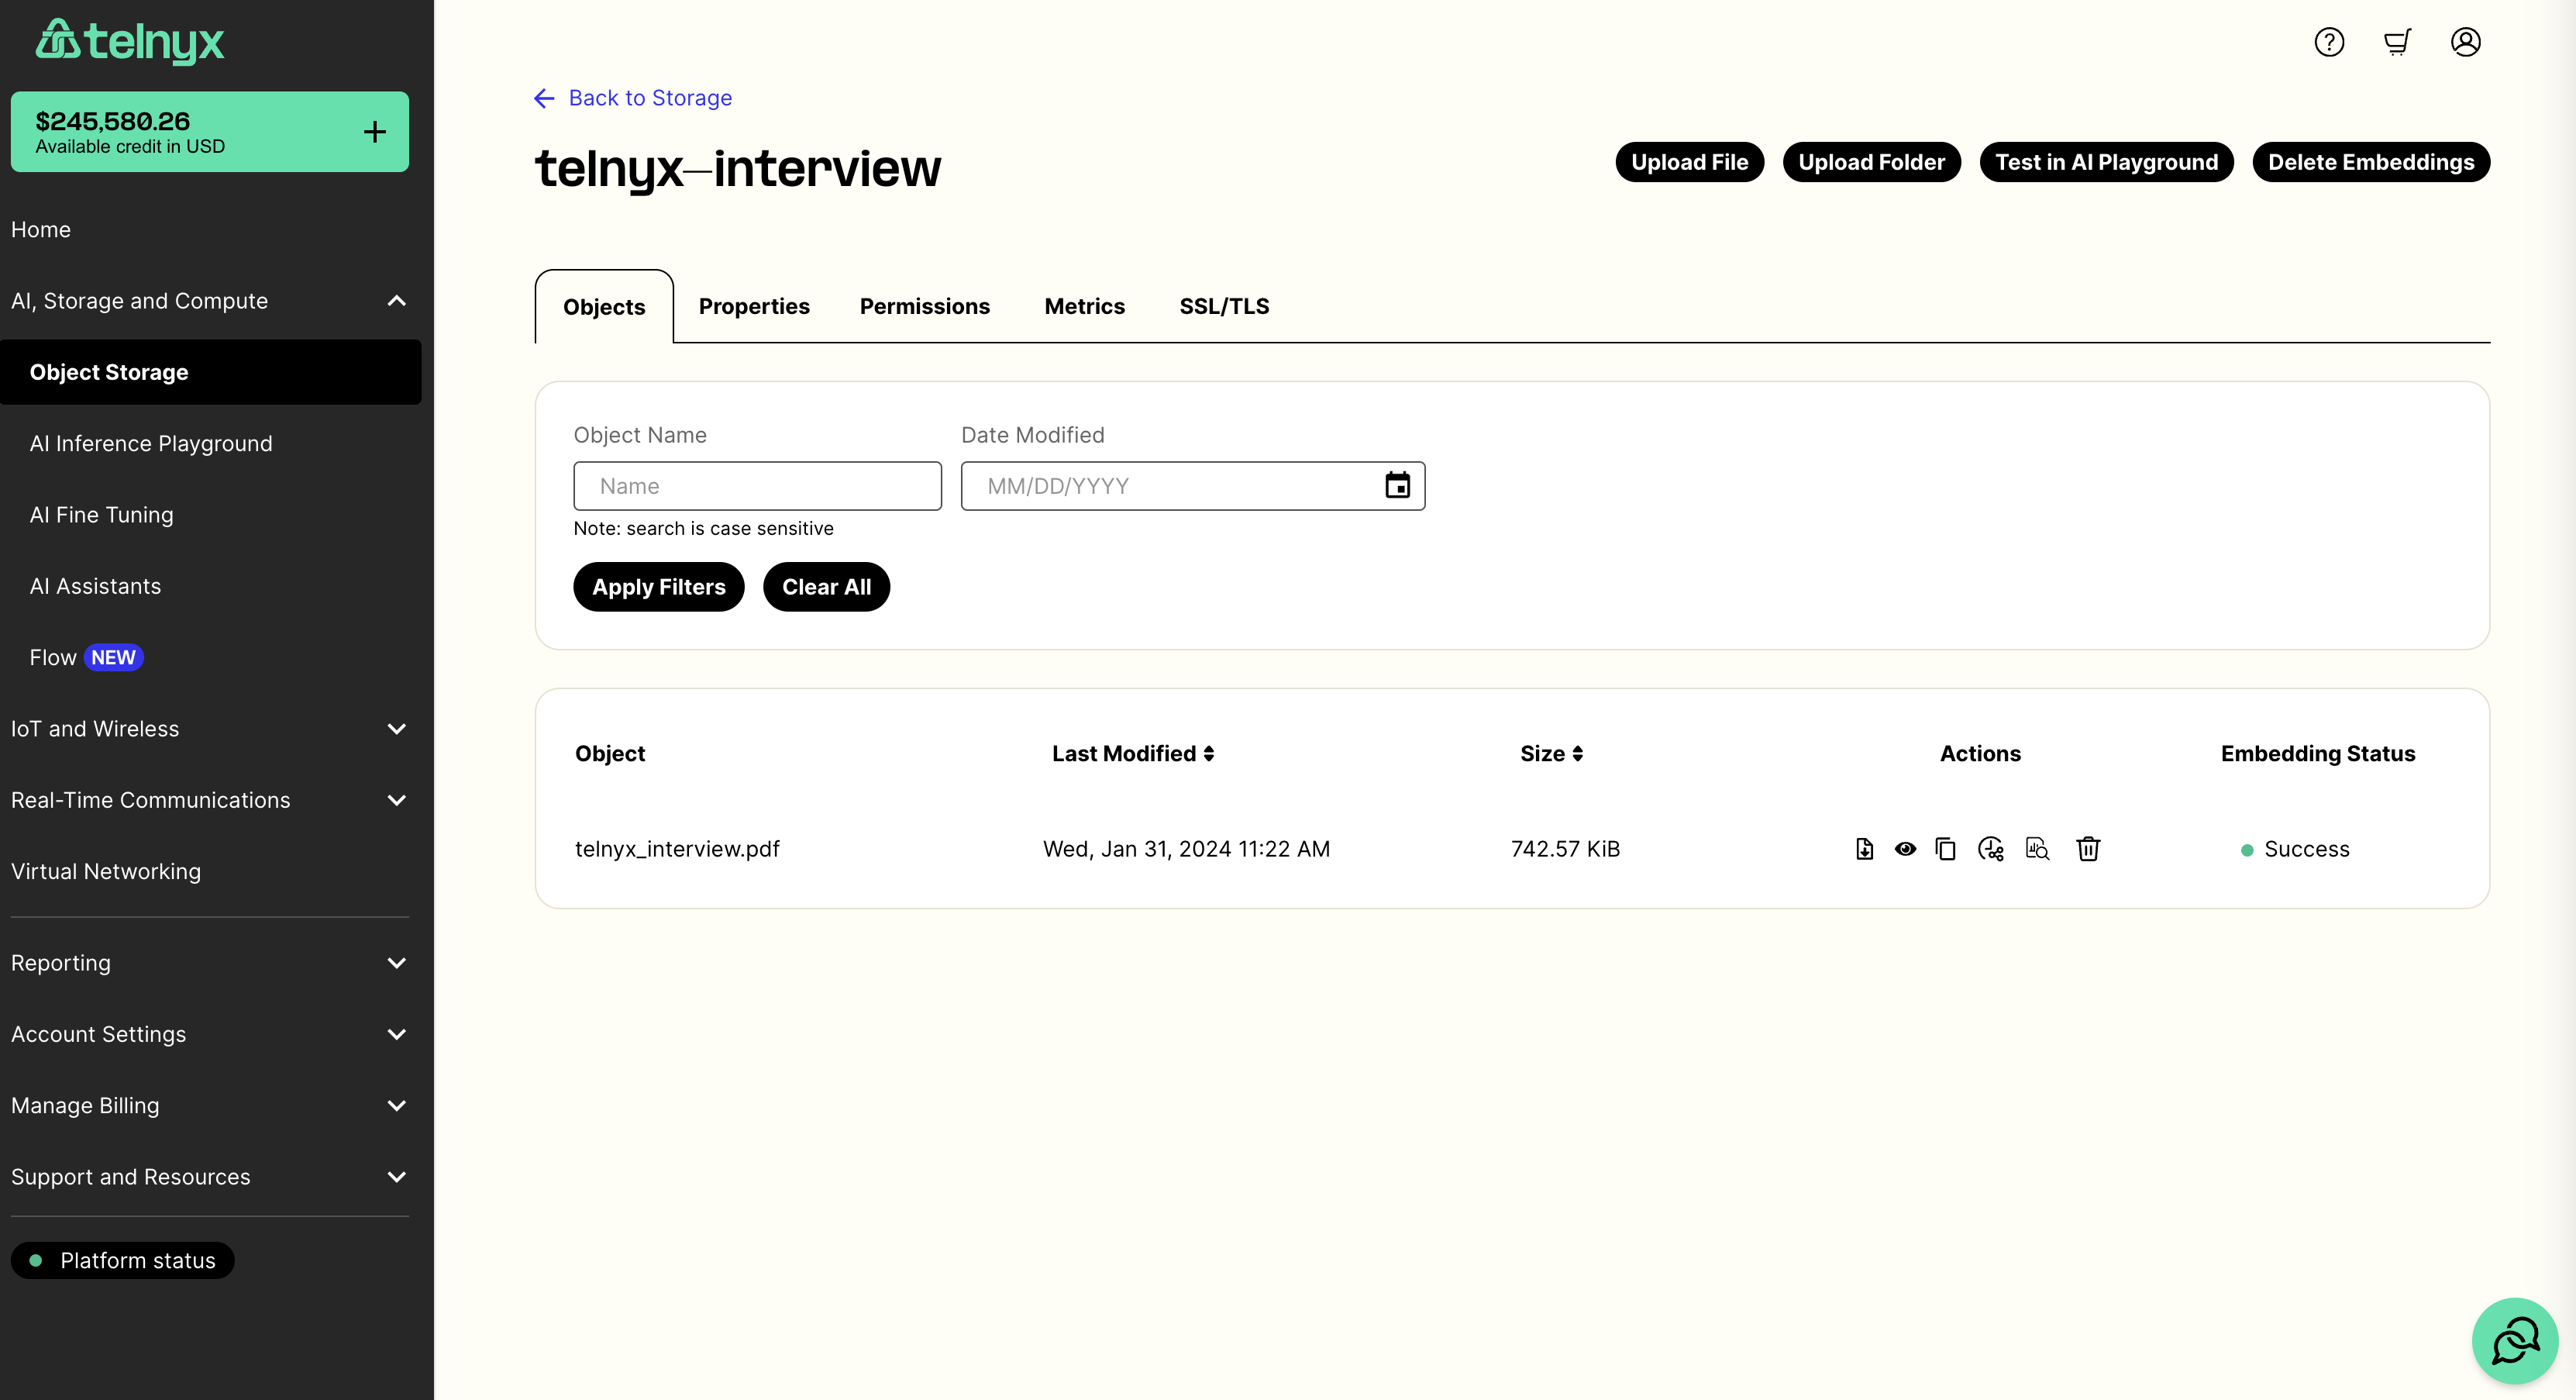
Fine-tune a language model on your documents
Once you’ve uploaded your documents, you can fine tune on them via API or by navigating to the fine-tuning tab in the portal. Once there you can select a base model to train and the bucket with your training documents.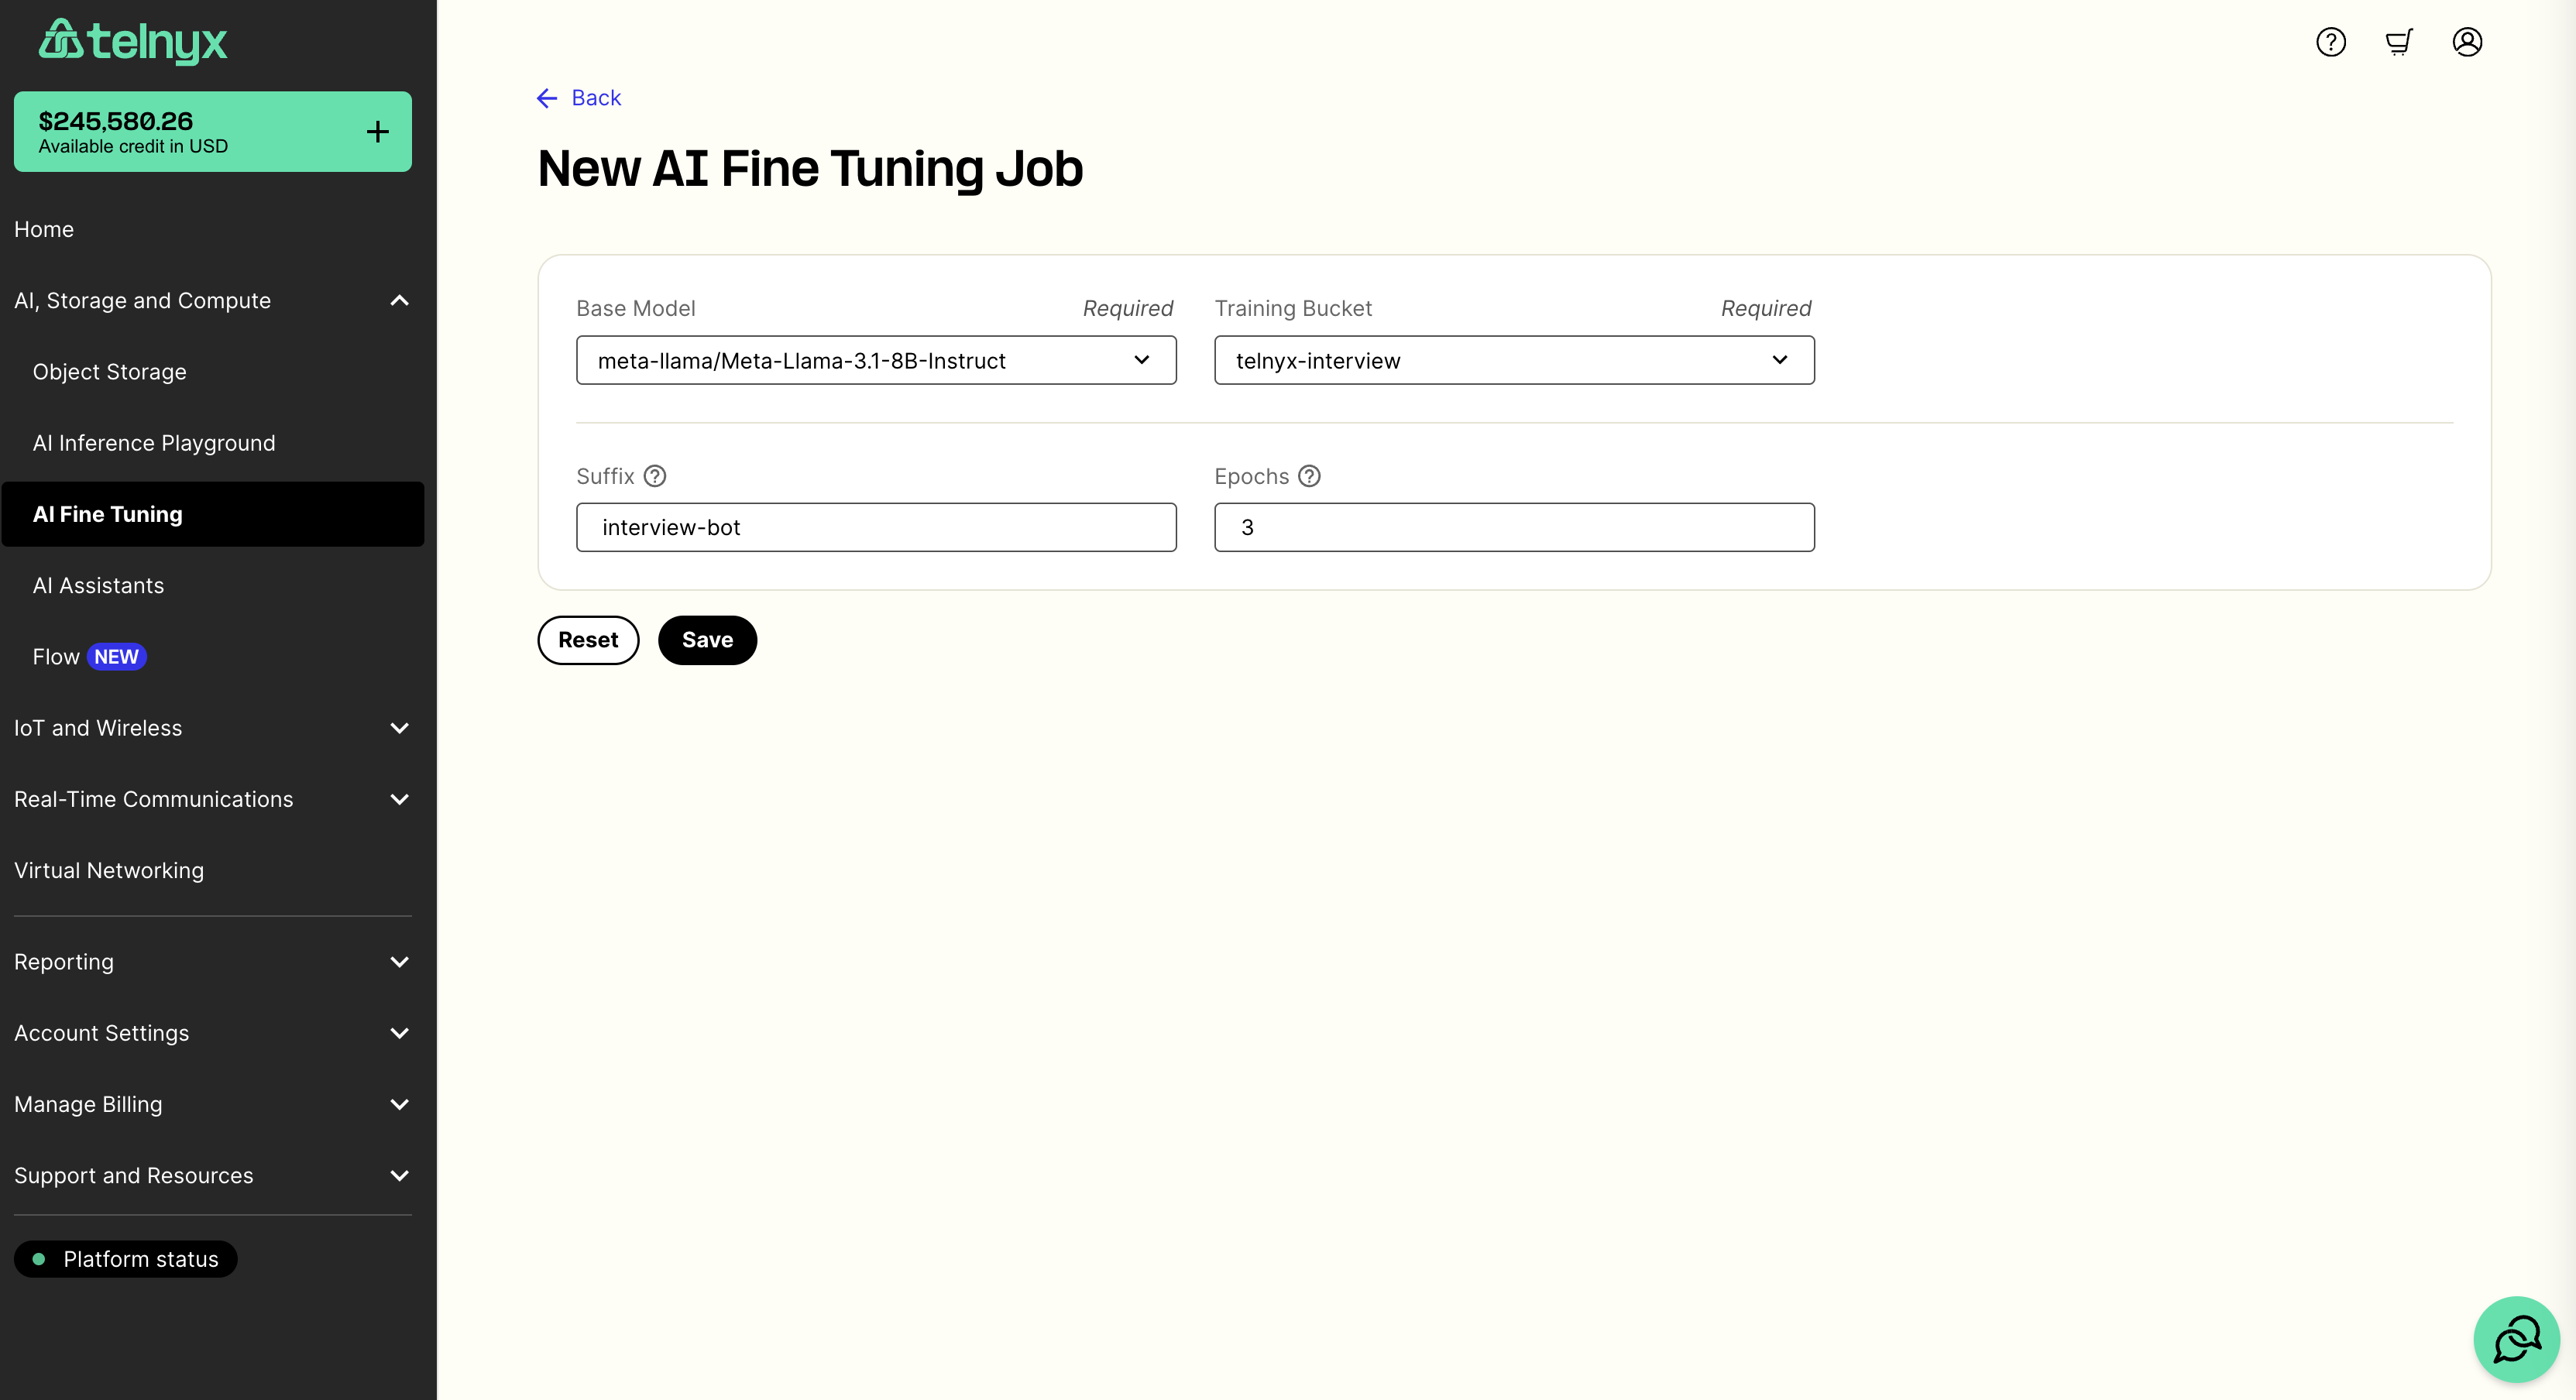
.jsonl training file. Immediately after, we will begin fine-tuning your model using this training file.
This whole process may take several minutes to complete. You can monitor the status of your fine-tuning job in the fine-tuning tab.
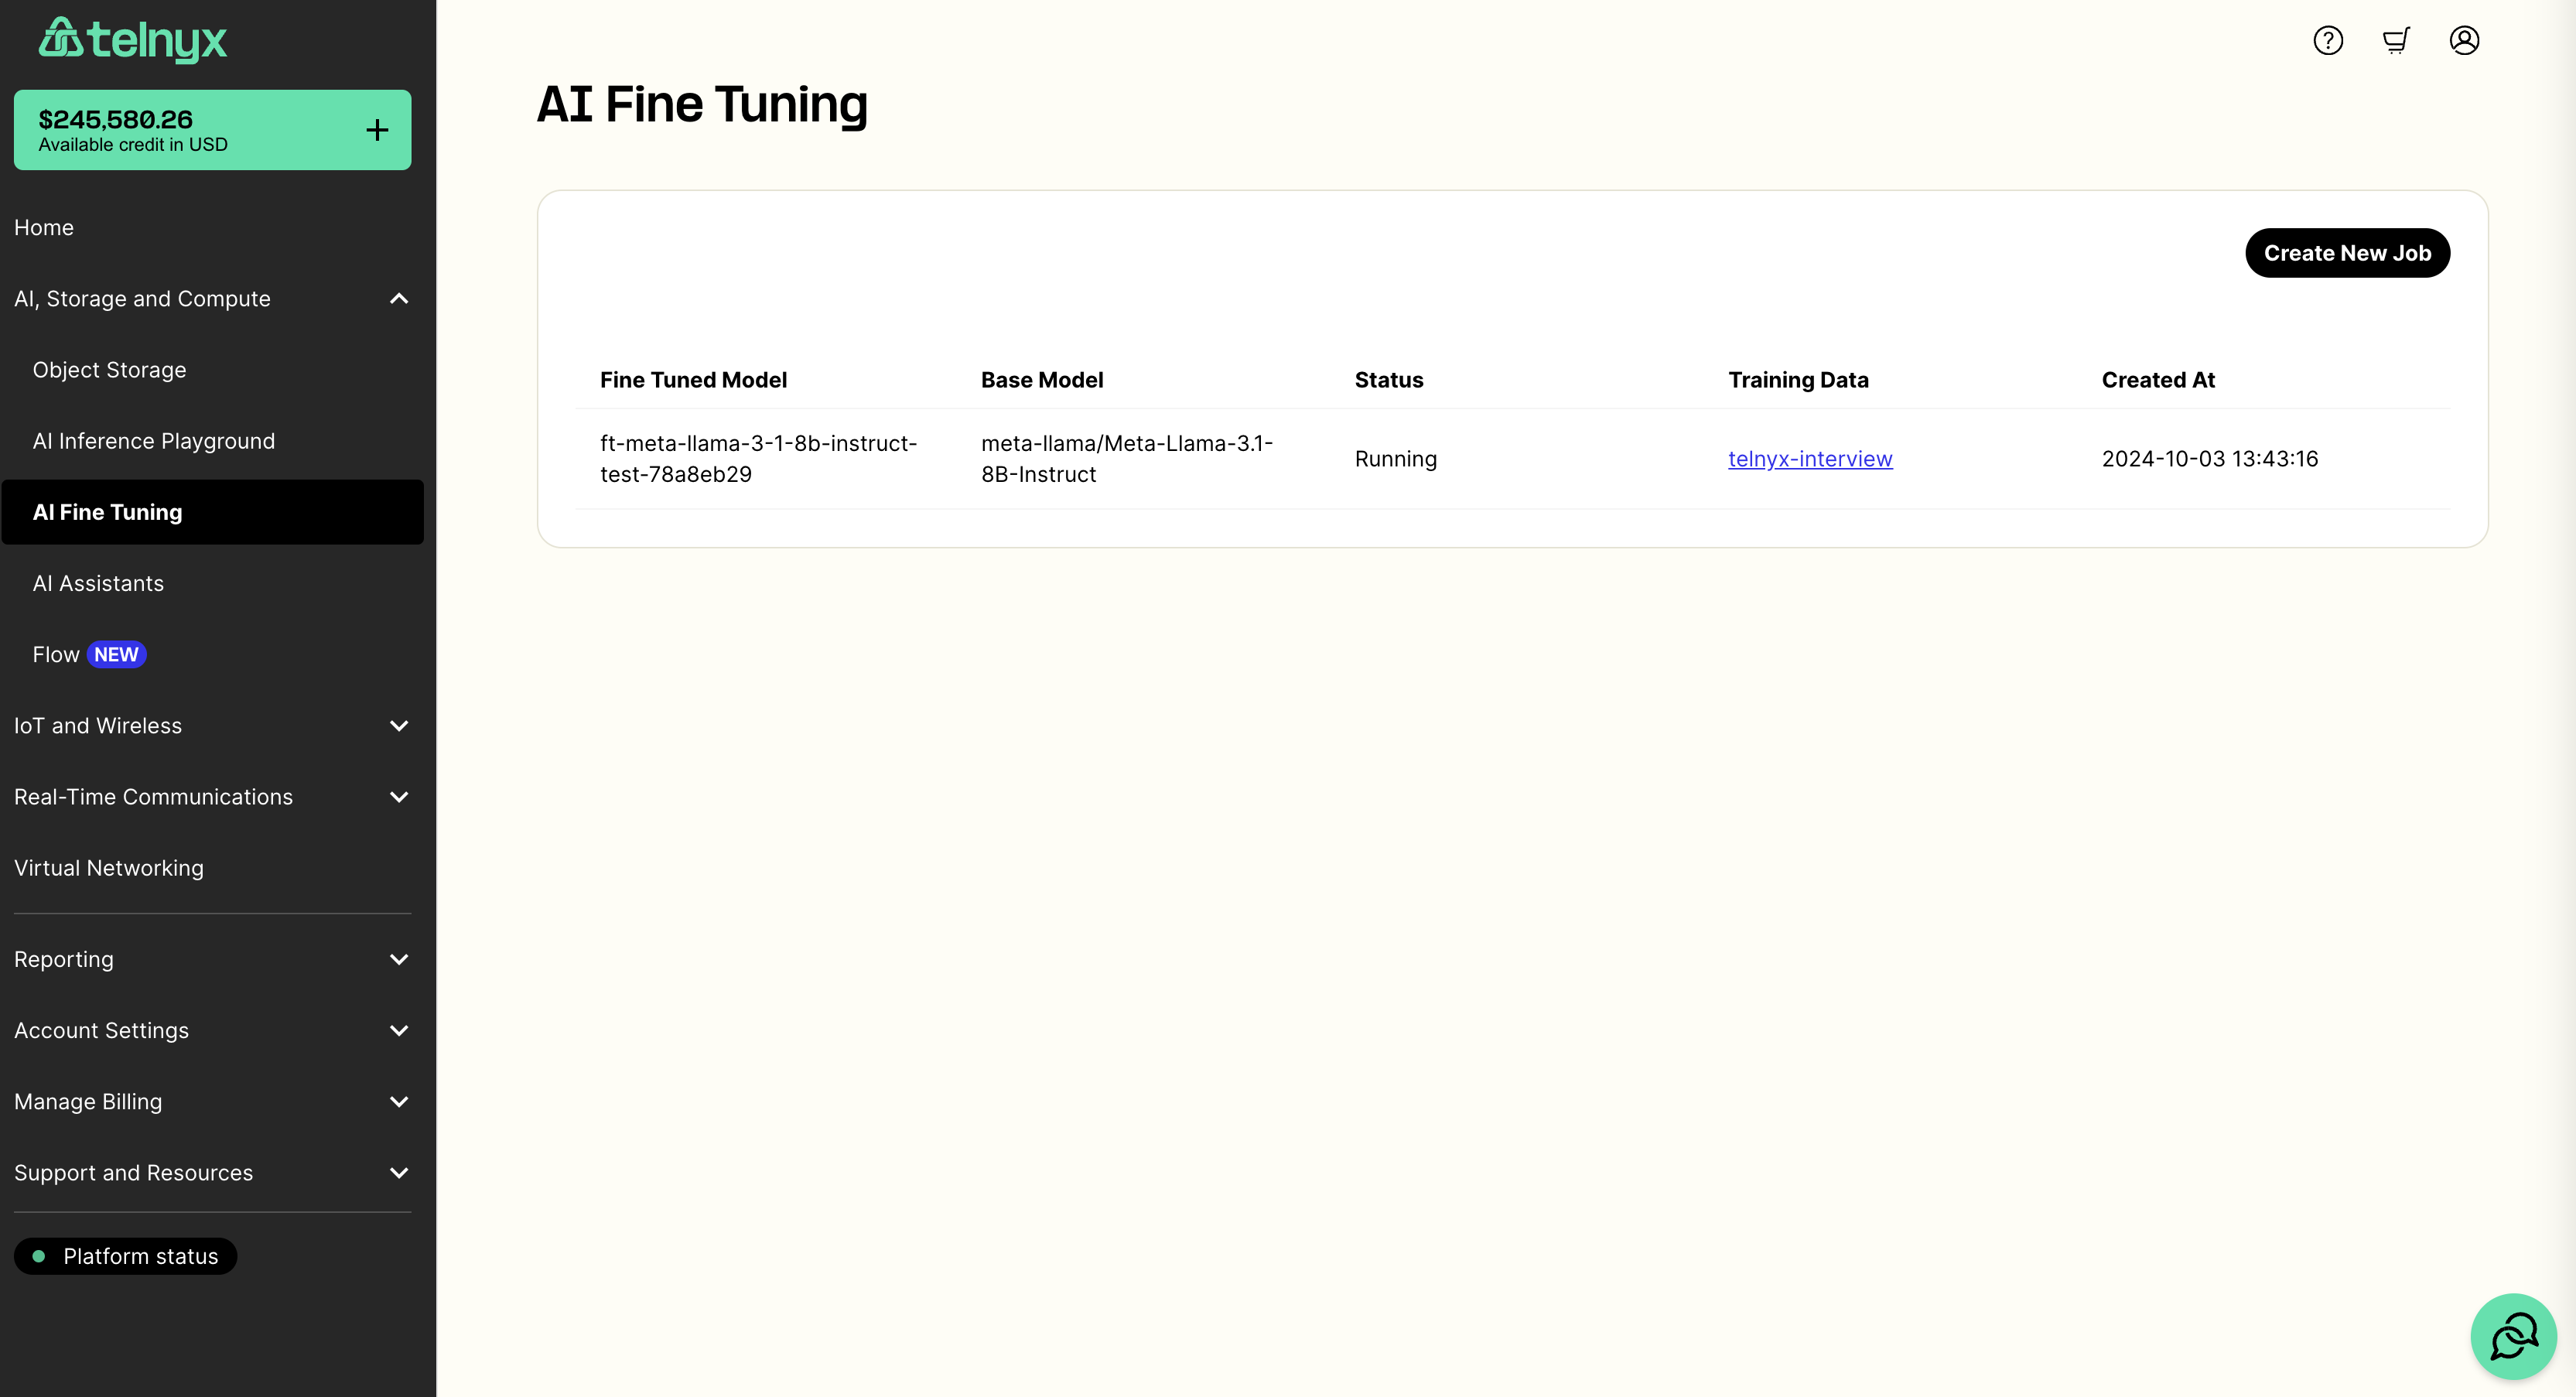
Chat with your new model
Once your model is fine-tuned, you can try it out in the AI Playground in the portal by selecting your model in the dropdown. You can also use your fine-tuned model via our chat completions API. Here is a Python example. Make sure you have set theTELNYX_API_KEY environment variable. Also, update the question and model variables in the sample code.
Audio Language Models
Source: https://developers.telnyx.com/docs/inference/audio-language-models.mdIn this tutorial, you’ll learn how to:
- Identify which Audio Language Models are available using our models API
- Chat with open source Audio Language Models using our chat completions API
Getting started
Audio Language Models are identified in our models API with atask type of audio-text-to-text.
Audio is made available to the model in two main ways:
- passing a link to the audio in a user message
- passing the base64 encoded audio directly in a user message
PR Reviewer - Github Action
Source: https://developers.telnyx.com/docs/inference/pr-reviewer.md
Introduction
Welcome to the PR Reviewer by Telnyx GitHub Action! This guide will teach you how to set up and use the PR Reviewer By Telnyx, which leverages open-source language models running on Telnyx GPUs to automatically review your pull requests.Prerequisites
- Sign up for a free Telnyx account if you haven’t already.
Setup guide
Step 1: Obtain Your Telnyx API Key
- Log in to your Telnyx account.
- Navigate to the API Keys section in the Telnyx portal.
- Click on Create API Key.
- Copy the generated API key and store it in a secure location.
Step 2: Add Your Telnyx API Key as a Secret on GitHub
- In your GitHub repository, go to Settings > Secrets and variables > Actions.
- Click on New repository secret.
- Name the secret
TELNYX_API_KEY. - Paste your Telnyx API key in the Value field and click Add secret.
Step 3: Create the GitHub workflow file
To integrate the Telnyx PR Reviewer into your project, follow these steps:-
In your repository, create a new file at
.github/workflows/review_pr.yml. -
Copy and paste the following configuration into the file:
- Commit the file to your repository.
Step 4: Optional Configuration
Themodel_name parameter in the workflow file is optional. If omitted, the action will use a default language model. If you wish to specify a different model, replace 'meta-llama/Meta-Llama-3.1-8B-Instruct' with your desired model from the Telnyx LLM Library.
Core Concepts
GitHub Actions
GitHub Actions automate workflows directly in your GitHub repository. In this case, the PR Reviewer By Telnyx is triggered by pull request events, such as when a PR is opened or updated.Telnyx Inference API
The PR Reviewer By Telnyx uses the Telnyx Inference API to analyze and review the content of pull requests. This API allows interaction with large language models (LLMs) hosted on Telnyx infrastructure.Model Selection
Your choice of LLM will affect the quality and behavior of the reviews. You can experiment with different models from the Telnyx LLM Library to find the best fit for your project.Automatic PR Reviews
Once configured, the PR Reviewer By Telnyx automatically generates a review for every pull request based on the content, providing suggestions or feedback powered by the chosen language model.Not sure how to get started?
Additional references
- Dive into our Telnyx Inference API documentation
- Explore our full API reference
- Review our OpenAI Compatibility Matrix
- Check out our pricing page
AI SMS Outfit Recommender with OpenMeteo
Source: https://developers.telnyx.com/docs/inference/ai-outfit-recommender.mdToday we will be making a fun script to text us a nice recommendation for outfits based on the weather every morning. It will look something like this at the end:
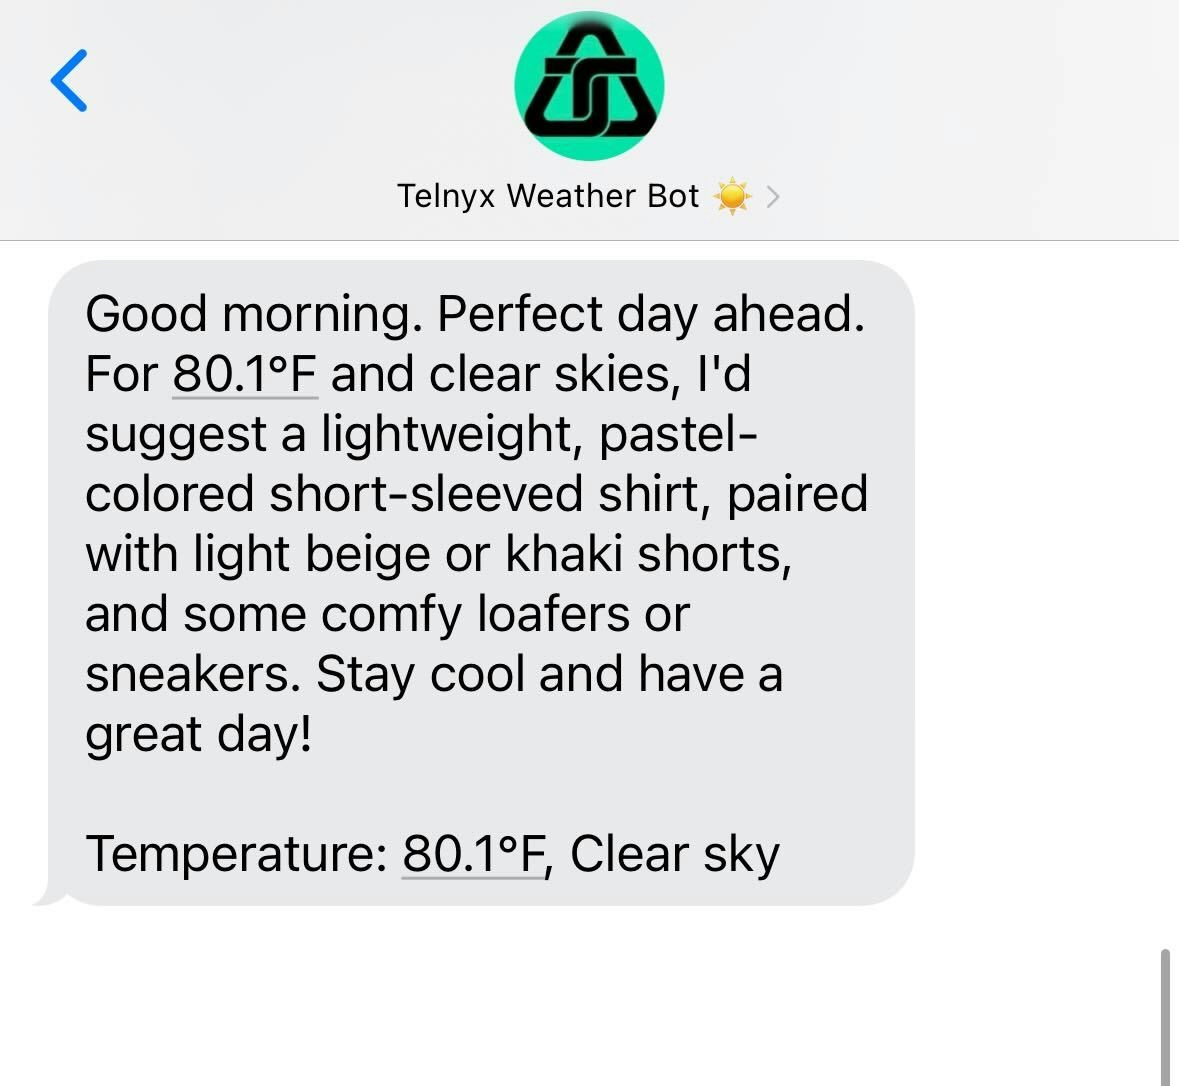
- Check the weather using the free OpenMeteo API
- Pass the weather info to Telnyx Inference using the model of our choice
- Send the recommendation to the user using Telnyx SMS
Checking the weather with OpenMeteo
OpenMeteo is a great free API that allows you to retrieve the forecast for the current day. They have a ton of options for what you can retrieve, but for this demo, we will stick with just the temperature and weather code (although feel free to experiment with other things like humidity!). The following functions can be used to retrieve a weather_description that we can feed into our Telnyx Inference model:Getting our recommendation text from Telnyx Inference
Now that we have the current weather, let’s make a call to Telnyx Inference to generate a text to send to our user. There are many state-of-the-art open source models available through the Telnyx API, so for this one we will select GLM-5.2 from Zhipu AI. Let’s write a function to retrieve a good weather recommendation from Telnyx Inference. We will just use therequests library to not add an additional pip requirement, but the Telnyx LLM API is also compatible with the OpenAI Python and JS SDKs, see the OpenAI Migration Guide Here.
TELNYX_API_KEY is set in your environment variables so that they can be loaded with os.getenv('TELNYX_API_KEY'). The API spec for chat completions can be found here if you would prefer to use HTTP requests instead of the OpenAI client or want to play around with some of the LLM parameters offered.
The output of this function will be a string with our recommendation, for example:
“Good morning. Perfect day ahead. Why not try a light, pastel-colored short-sleeved shirt, paired with some beige or light-gray shorts? Add some loafers or sneakers, and you’re all set for a sunny day. Have a great one!”
Sending our text to the user
Great! Now that we have our weather and text recommendation, we can send the text to the user. Sending a message with Telnyx SMS is easy, follow the tutorial here if you have not set up a Telnyx number yet. We can use the following snippet to send a text using Telnyx:Putting it all together
Now that we have all the pieces in place, let’s run the script! We can use the following sequence to chain everything together:cronjob or the task scheduler of your choice. Thanks for following along!
Embedding & RAG
Overview
Source: https://developers.telnyx.com/docs/inference/embedding-rag.mdEmbedding and retrieval-augmented generation (RAG) let your applications search prior knowledge before asking a model to respond. Use this section for primitives that add memory or searchable context to an AI workflow:
- Embeddings - Generate embeddings from documents stored in Telnyx Storage and use them as retrieval context.
- Conversation History - Search persisted conversation transcripts and messages.
Overview
Source: https://developers.telnyx.com/docs/inference/embedding-rag/conversation-history.mdConversation History stores and indexes conversation records so your agents can search previous interactions and use them as memory or retrieval context.
How It Works
- Enable conversation persistence on a supported source.
- Telnyx stores and indexes the conversation record.
- Search the indexed history by text, record type, region, and filters.
- Use search results as retrieval context for RAG.
Next Steps
Feature Coverage
Source: https://developers.telnyx.com/docs/inference/embedding-rag/conversation-history/feature-coverage.mdConversation History coverage is organized by communication channel. Voice records are currently available from SIP connections.
Voice
Voice coverage currently includes call history from SIP connections. Enableconversation_persistence on a covered SIP connection resource to store and index voice conversation history.
Supported Connection Types
ip_connectionscredential_connectionsfqdn_connections
Enable
Disable
Verify
conversation_persistence on the connection resource.
Messaging
Coming soon.Searching
Source: https://developers.telnyx.com/docs/inference/embedding-rag/conversation-history/searching.mdRun a semantic search across persisted conversation records with
GET /v2/ai/conversation_histories. Your query text is embedded into a vector and matched against indexed transcript chunks, so each result is a single chunk with a relevance score and its parent record’s metadata — ready to use as retrieval context for RAG.
q) and a record_type (use voice for SIP call history). Narrow results with the region, min_score, and filter[field][operator] parameters.
See the Search conversation histories API reference for the full set of parameters, filter operators, the response schema, and SDK code samples.
Retention
Source: https://developers.telnyx.com/docs/inference/embedding-rag/conversation-history/retention.mdConversation History includes 30 days of indexed retention for persisted conversation records.
Default Retention
Conversation History stores and indexes covered conversation records for 30 days by default. During the included retention period, records can be returned by the Conversation Histories API when they match the search query and filters.After 30 Days
After the included 30-day retention period, records are no longer retained for indexed Conversation History search unless extended retention is enabled.Retention Scope
This retention behavior applies to Conversation History indexing and search. It does not describe retention for the source product that generated the record, such as call recordings, messaging records, or other product-specific storage.Pricing
Source: https://developers.telnyx.com/docs/inference/embedding-rag/conversation-history/pricing.mdConversation History pricing has three parts: persisted text, extended storage, and search.
Rates
Example
A 10-minute call with about 10,000 transcript characters and one search within the free tier would be priced as:Embeddings
Source: https://developers.telnyx.com/docs/inference/embeddings.mdIn this tutorial, you’ll learn how to:
- Upload documents to Telnyx Storage
- Transform these documents into embeddings, enabling a language model to retrieve relevant sections of your documents
- Provide the storage bucket as context for the language model
Upload your documents
You can upload objects to Telnyx’s S3-Compatible storage API using our quickstart or with our drag-and-drop interface in the portal.Embed your documents
Once you’ve uploaded your documents, you can embed them via API or by clicking the “Embed for AI Use” button in the portal while viewing your storage bucket’s contents. Behind the scenes, your documents will be processed into sections and each section will be “embedded” based on its contents. Later, when a user asks a language model a question, it will automatically be provided with the most relevant sections of documents from the bucket to help answer the question.Chat over your documents
Once your documents are embedded, you can try it out in the AI Playground in the portal by selecting your embedded bucket from the storage dropdown. You can also use embeddings via our chat completions API. Here is a Python example. Make sure you have set theTELNYX_API_KEY environment variable. Also, update the question and bucket variables in the sample code.
Clusters
Source: https://developers.telnyx.com/docs/inference/clusters.mdIn this tutorial, you’ll learn:
- How Embeddings and Clusters work
- How to leverage them to identify common themes in your data
Embeddings and Clusters
Embeddings are numerical representations of concepts within text, image, or audio data. The representation is a real-valued vector that encodes the meaning of the word in such a way that the words that are closer in the vector space are expected to be similar in meaning Quantifying the semantic similarity of your data opens up several possibilities. For instance, by embedding a Telnyx storage bucket, you can search for similar content within your bucket. This tutorial is focused on another application of embeddings: analyzing how your semantic data is clustered, which provides insight into common themes and niche subtopics. For example, pictured below are clusters of embeddings computed for the novel The Great Gatsby.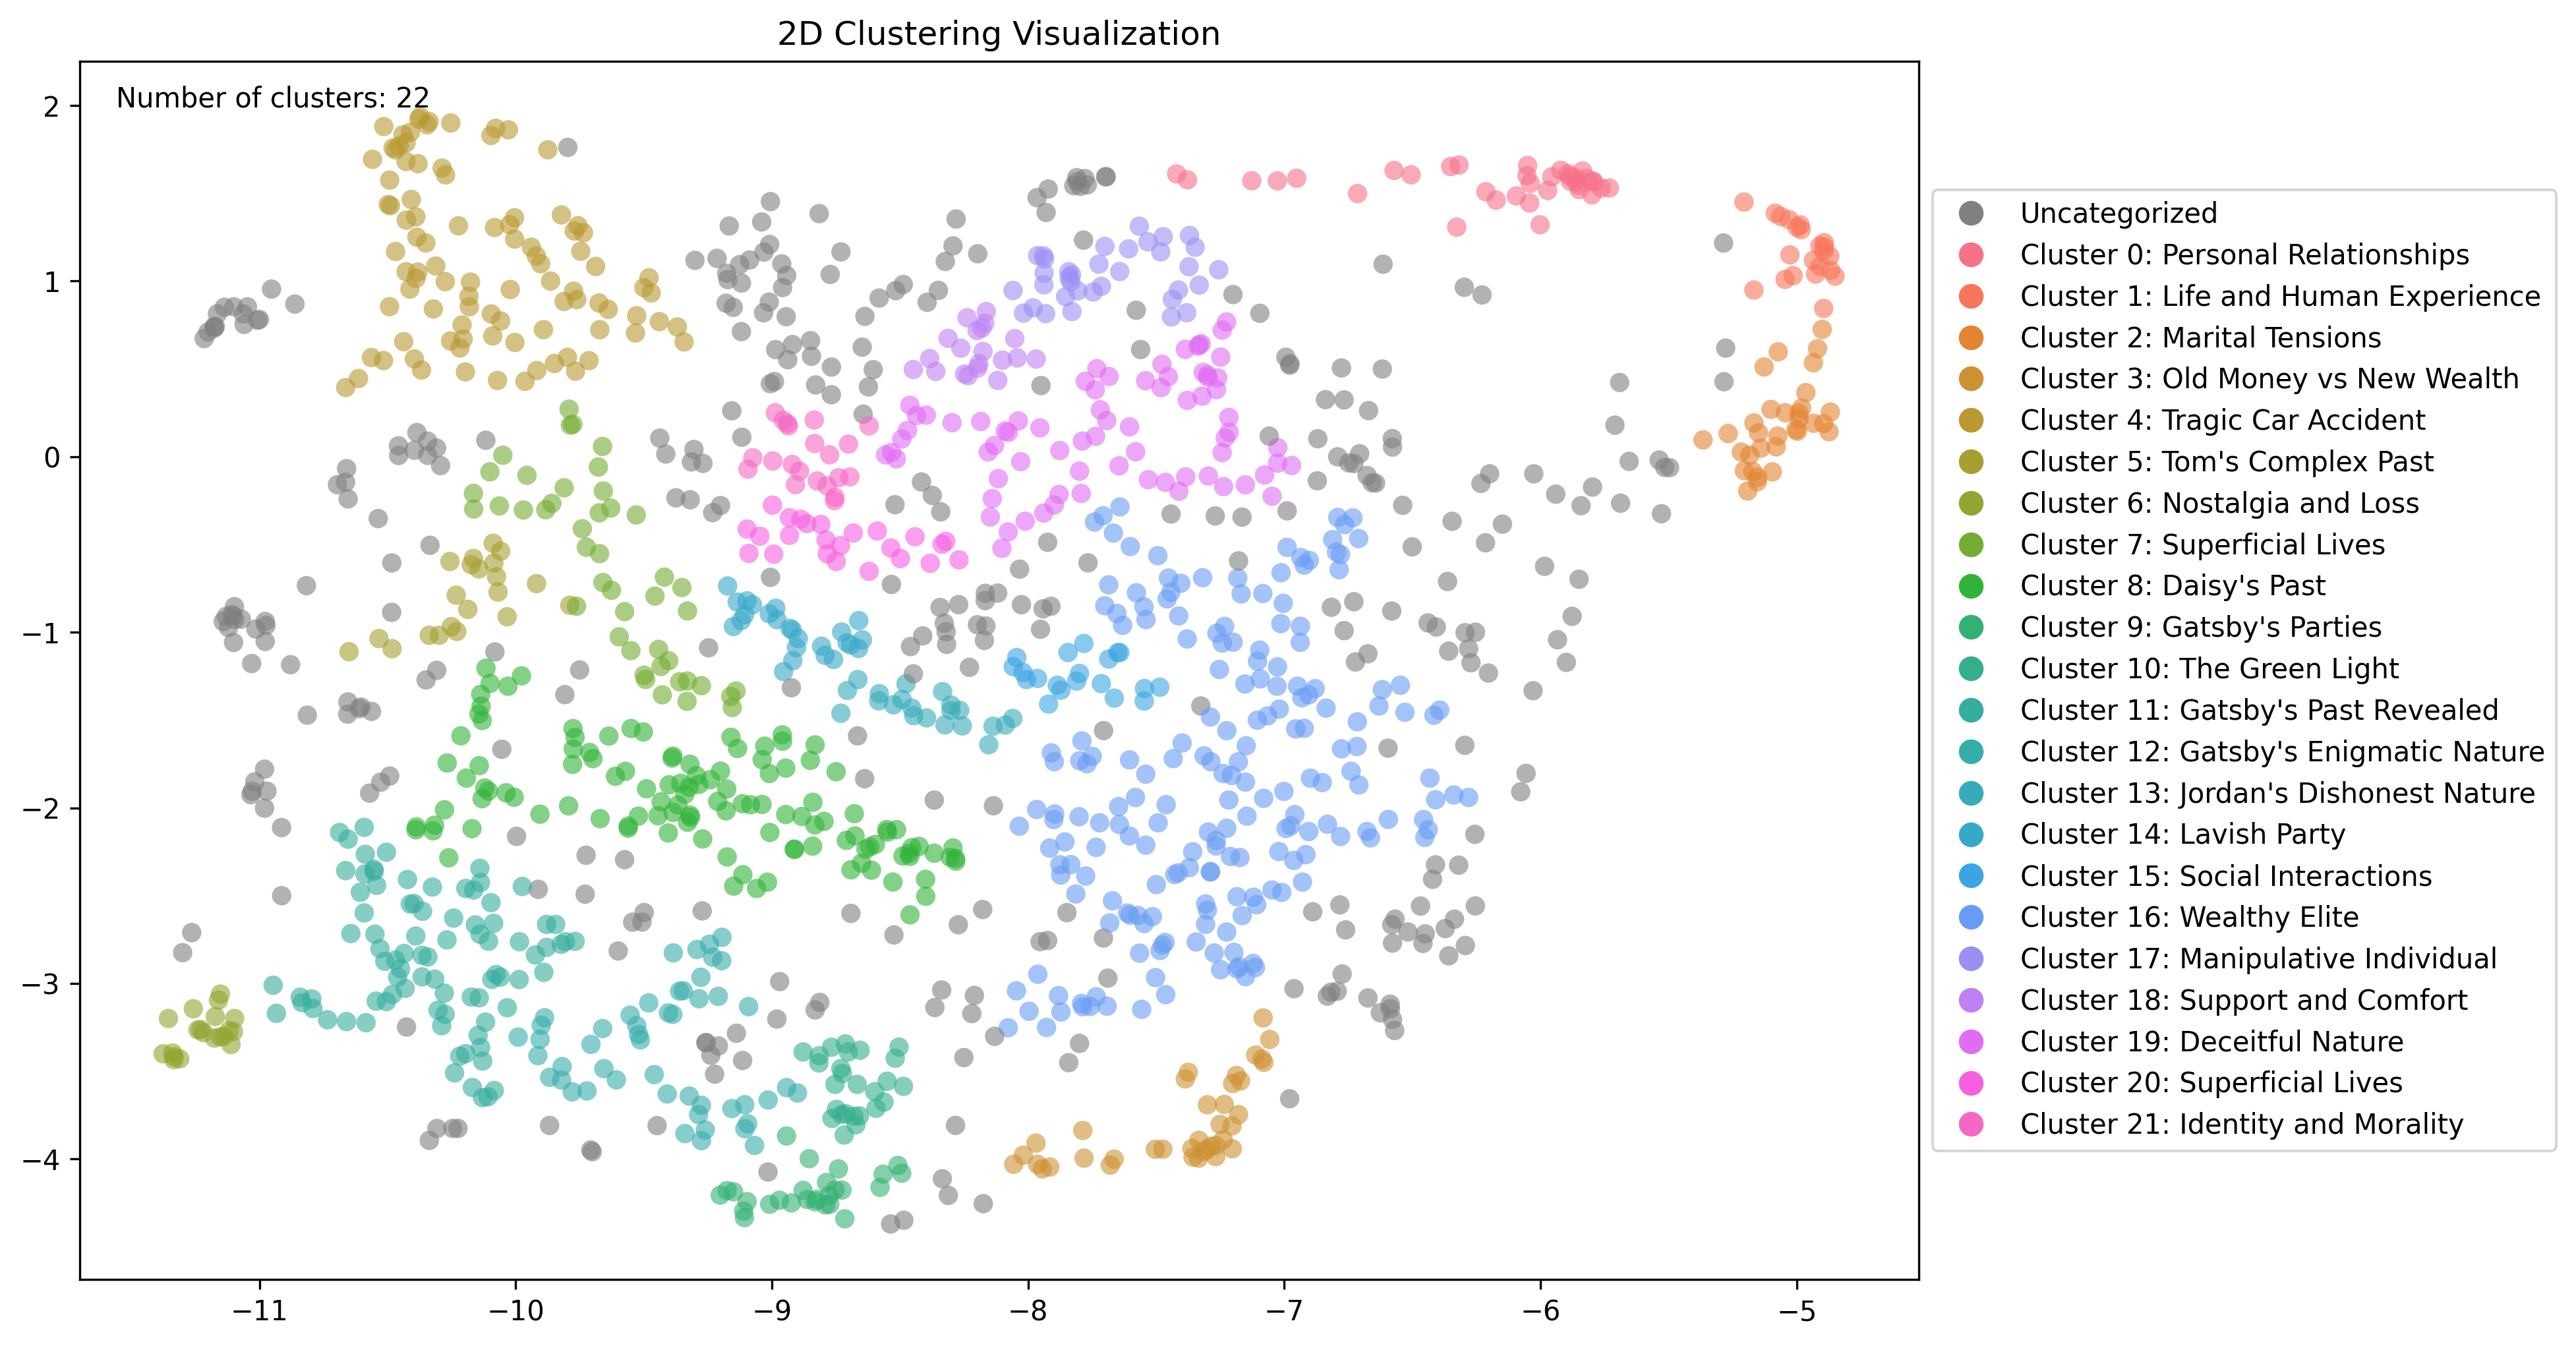
Clustering content with Telnyx
Embed your documents
Embedding your content in a Telnyx storage bucket is a prerequisite for computing these clusters. For more information, check out our Embeddings tutorial.Identify clusters
Once your documents are embedded, you can compute clusters via API. The optionalprefix and files parameters allow you to specfiy a subset of your bucket you would like to cluster.
The min_cluster_size and min_subcluster_size parameters control how clusters are identified.
Top-level clusters should be thought of as identifying broad themes in your data. Choose min_cluster_size based on the minimum data points you would like to constitute a broader theme.
Sub-clusters should be thought of as identifying more specific topics within a broader theme. Choose min_subcluster_size based on the minimum data points you would like to constitute a more niche subtopic.
Identifying themes in The Great Gatsby
To demonstrate embedding and clustering a Telnyx storage bucket, we will be using the text from The Great Gatsby.Upload to Telnyx Storage
You can upload objects to Telnyx’s S3-Compatible storage API using our quickstart or with our drag-and-drop interface in the portal.Embed your documents
Once you’ve uploaded your documents, you can embed them via API or by clicking the “Embed for AI Use” button in the portal while viewing your storage bucket’s contents. Behind the scenes, your documents will be processed into chunks and each chunk will be “embedded” based on its contents. Each chunk will be a single data point used in the clustering step.Compute clusters
You can compute multiple clusterings on the same data. This is helpful to tweak the parameters to find the best clusters for your data. Below is an example API requestInspect clusters
You can then take thattask_id and view the clusters structured as JSON via
top_n_nodes query parameter which will include the top N most central data points for each cluster.
You can also view a simple graph of the clusters via
cluster_id query parameter. Here is a closer look at the sub-clusters related to the cluster for “Daisy’s Past” using this endpoint
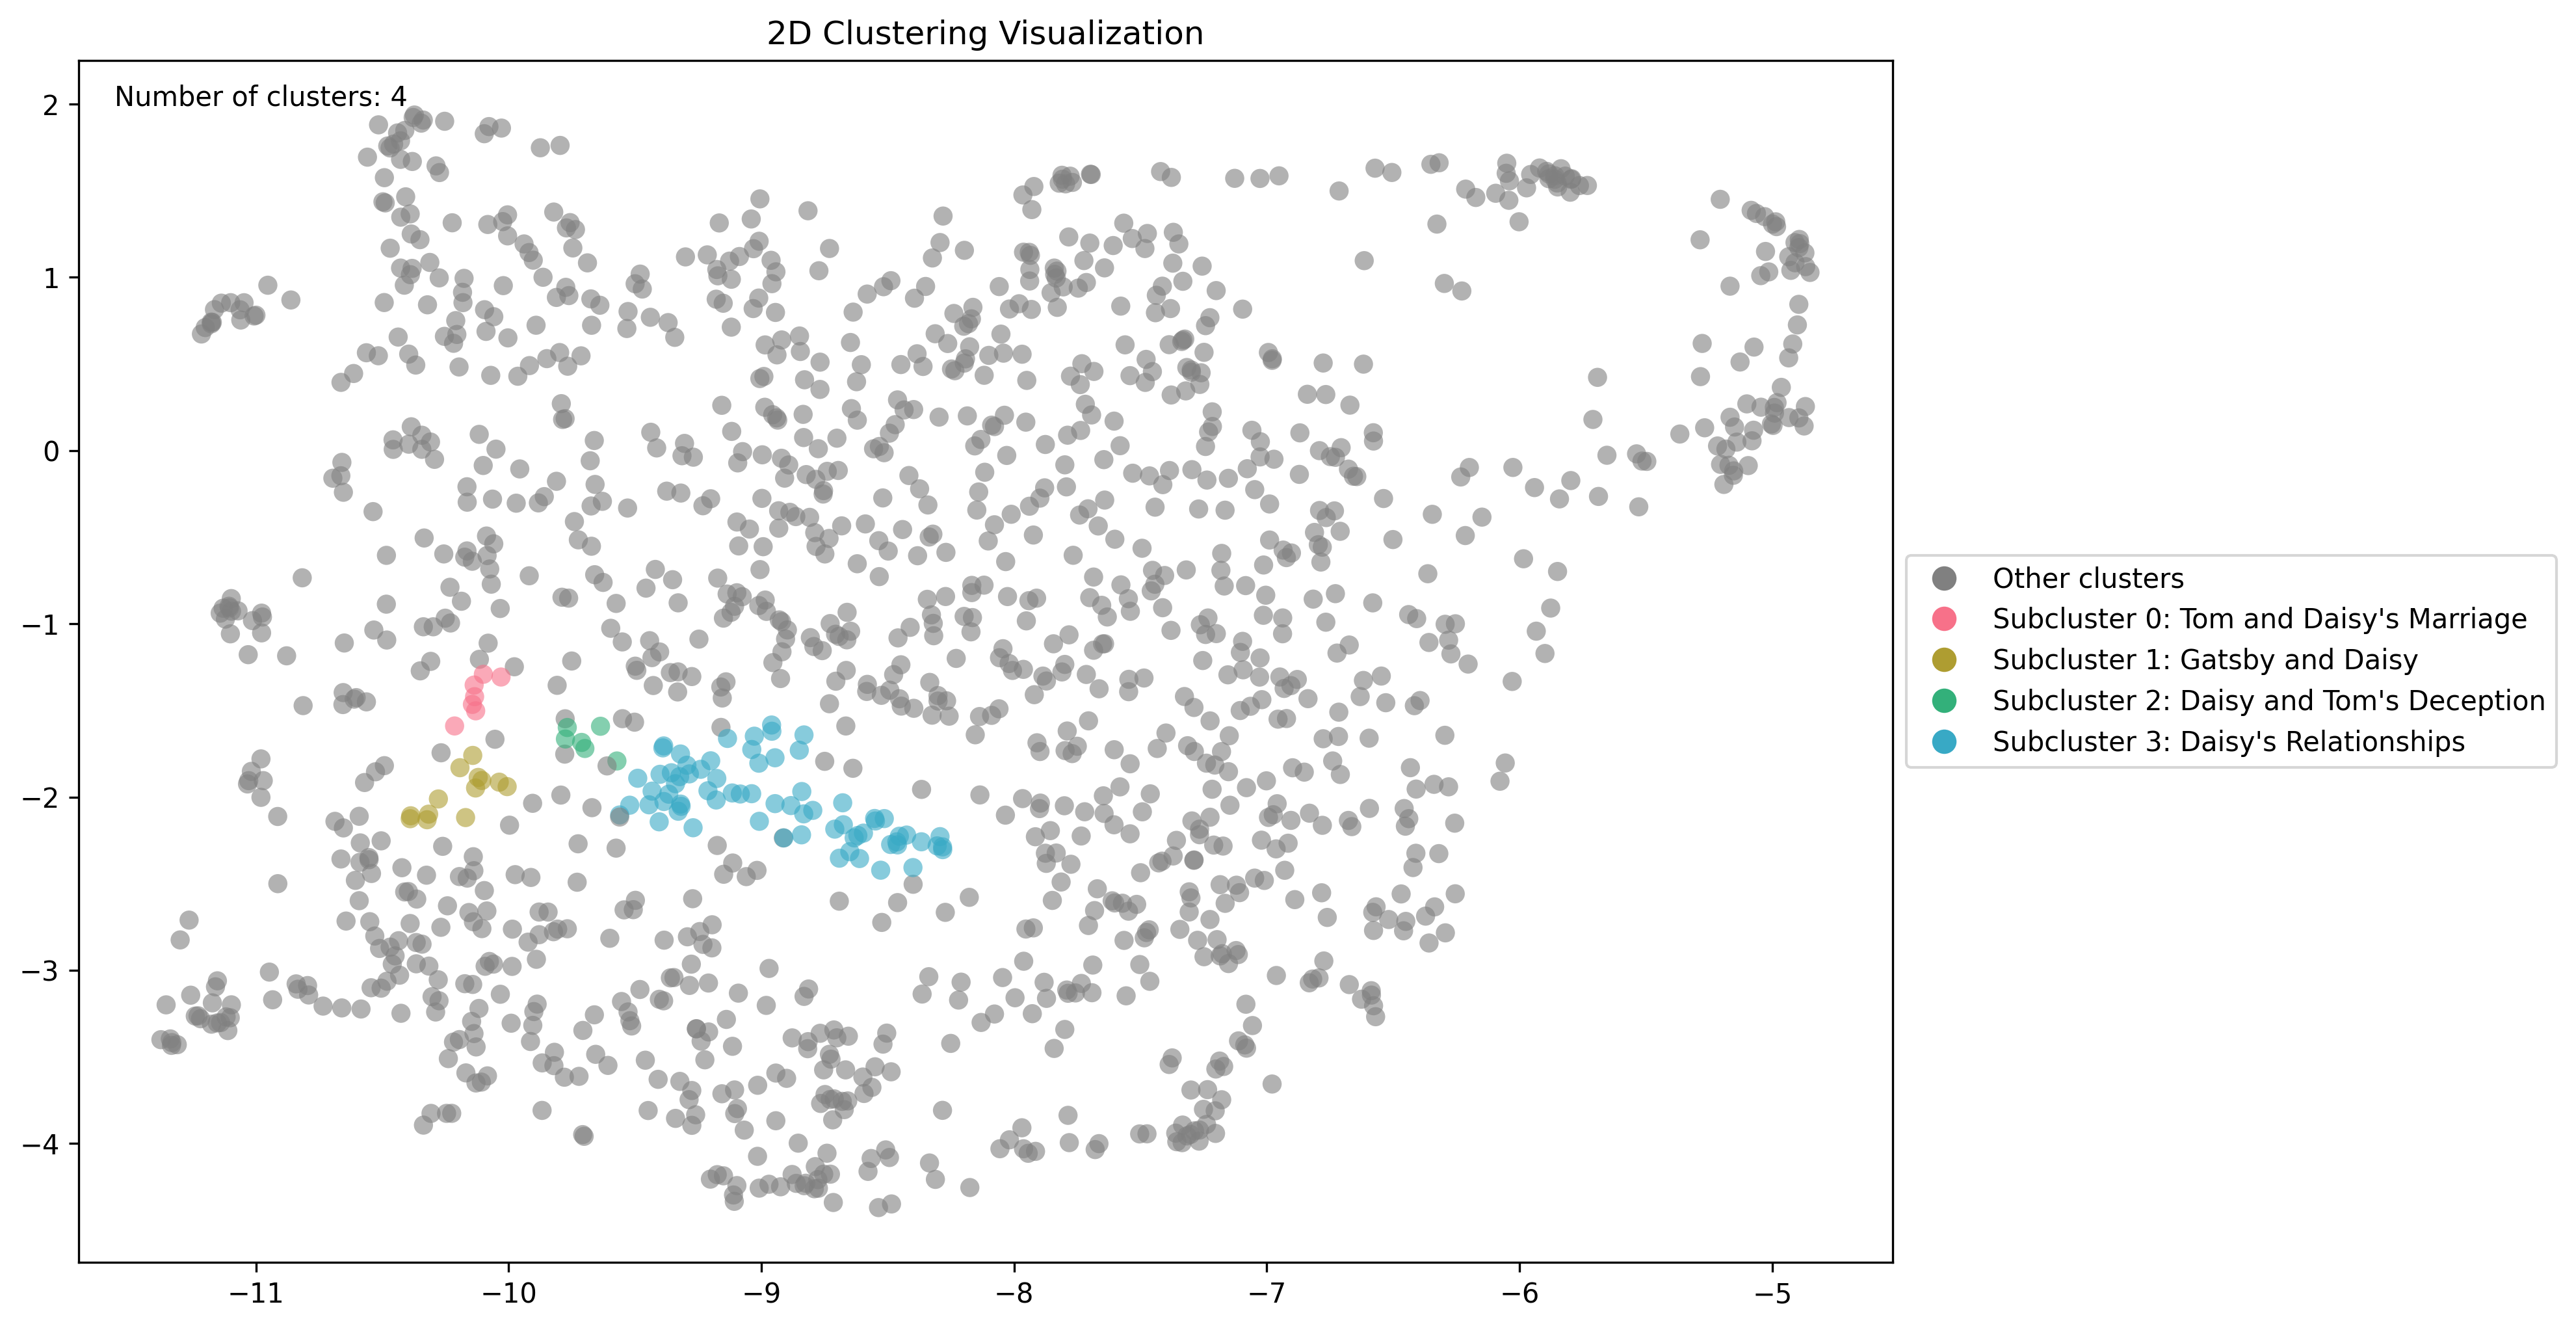
min_cluster_size will result in broader, more generic clusters.
You can also compute as many configurations over your data as you like so you have multiple ways of clustering your data if you’d like.
Assistants
Voice Assistant
Source: https://developers.telnyx.com/docs/inference/ai-assistants/no-code-voice-assistant.mdIn this tutorial, you’ll learn how to configure a voice assistant with Telnyx. You won’t have to write a single line of code or create an account with anyone besides Telnyx. You’ll be able to talk to your assistant over the phone in under five minutes. After this tutorial covers the basics, we will explore some optional enhancements, such as changing your voice or language model providers and empowering your assistant with built-in tools. Try out the public demos for a real example of the finished product.
Video Tutorial
Watch this step-by-step demonstration of creating a voice assistant:Requirements
There are 2 required steps for this tutorial- Configure your AI Assistant
- Configure the voice settings
Configure your AI Assistant
First, navigate to the AI Assistants tab in the portal. You will create a new assistant to configure what context your assistant has and how it behaves. For this tutorial, we will use a blank template.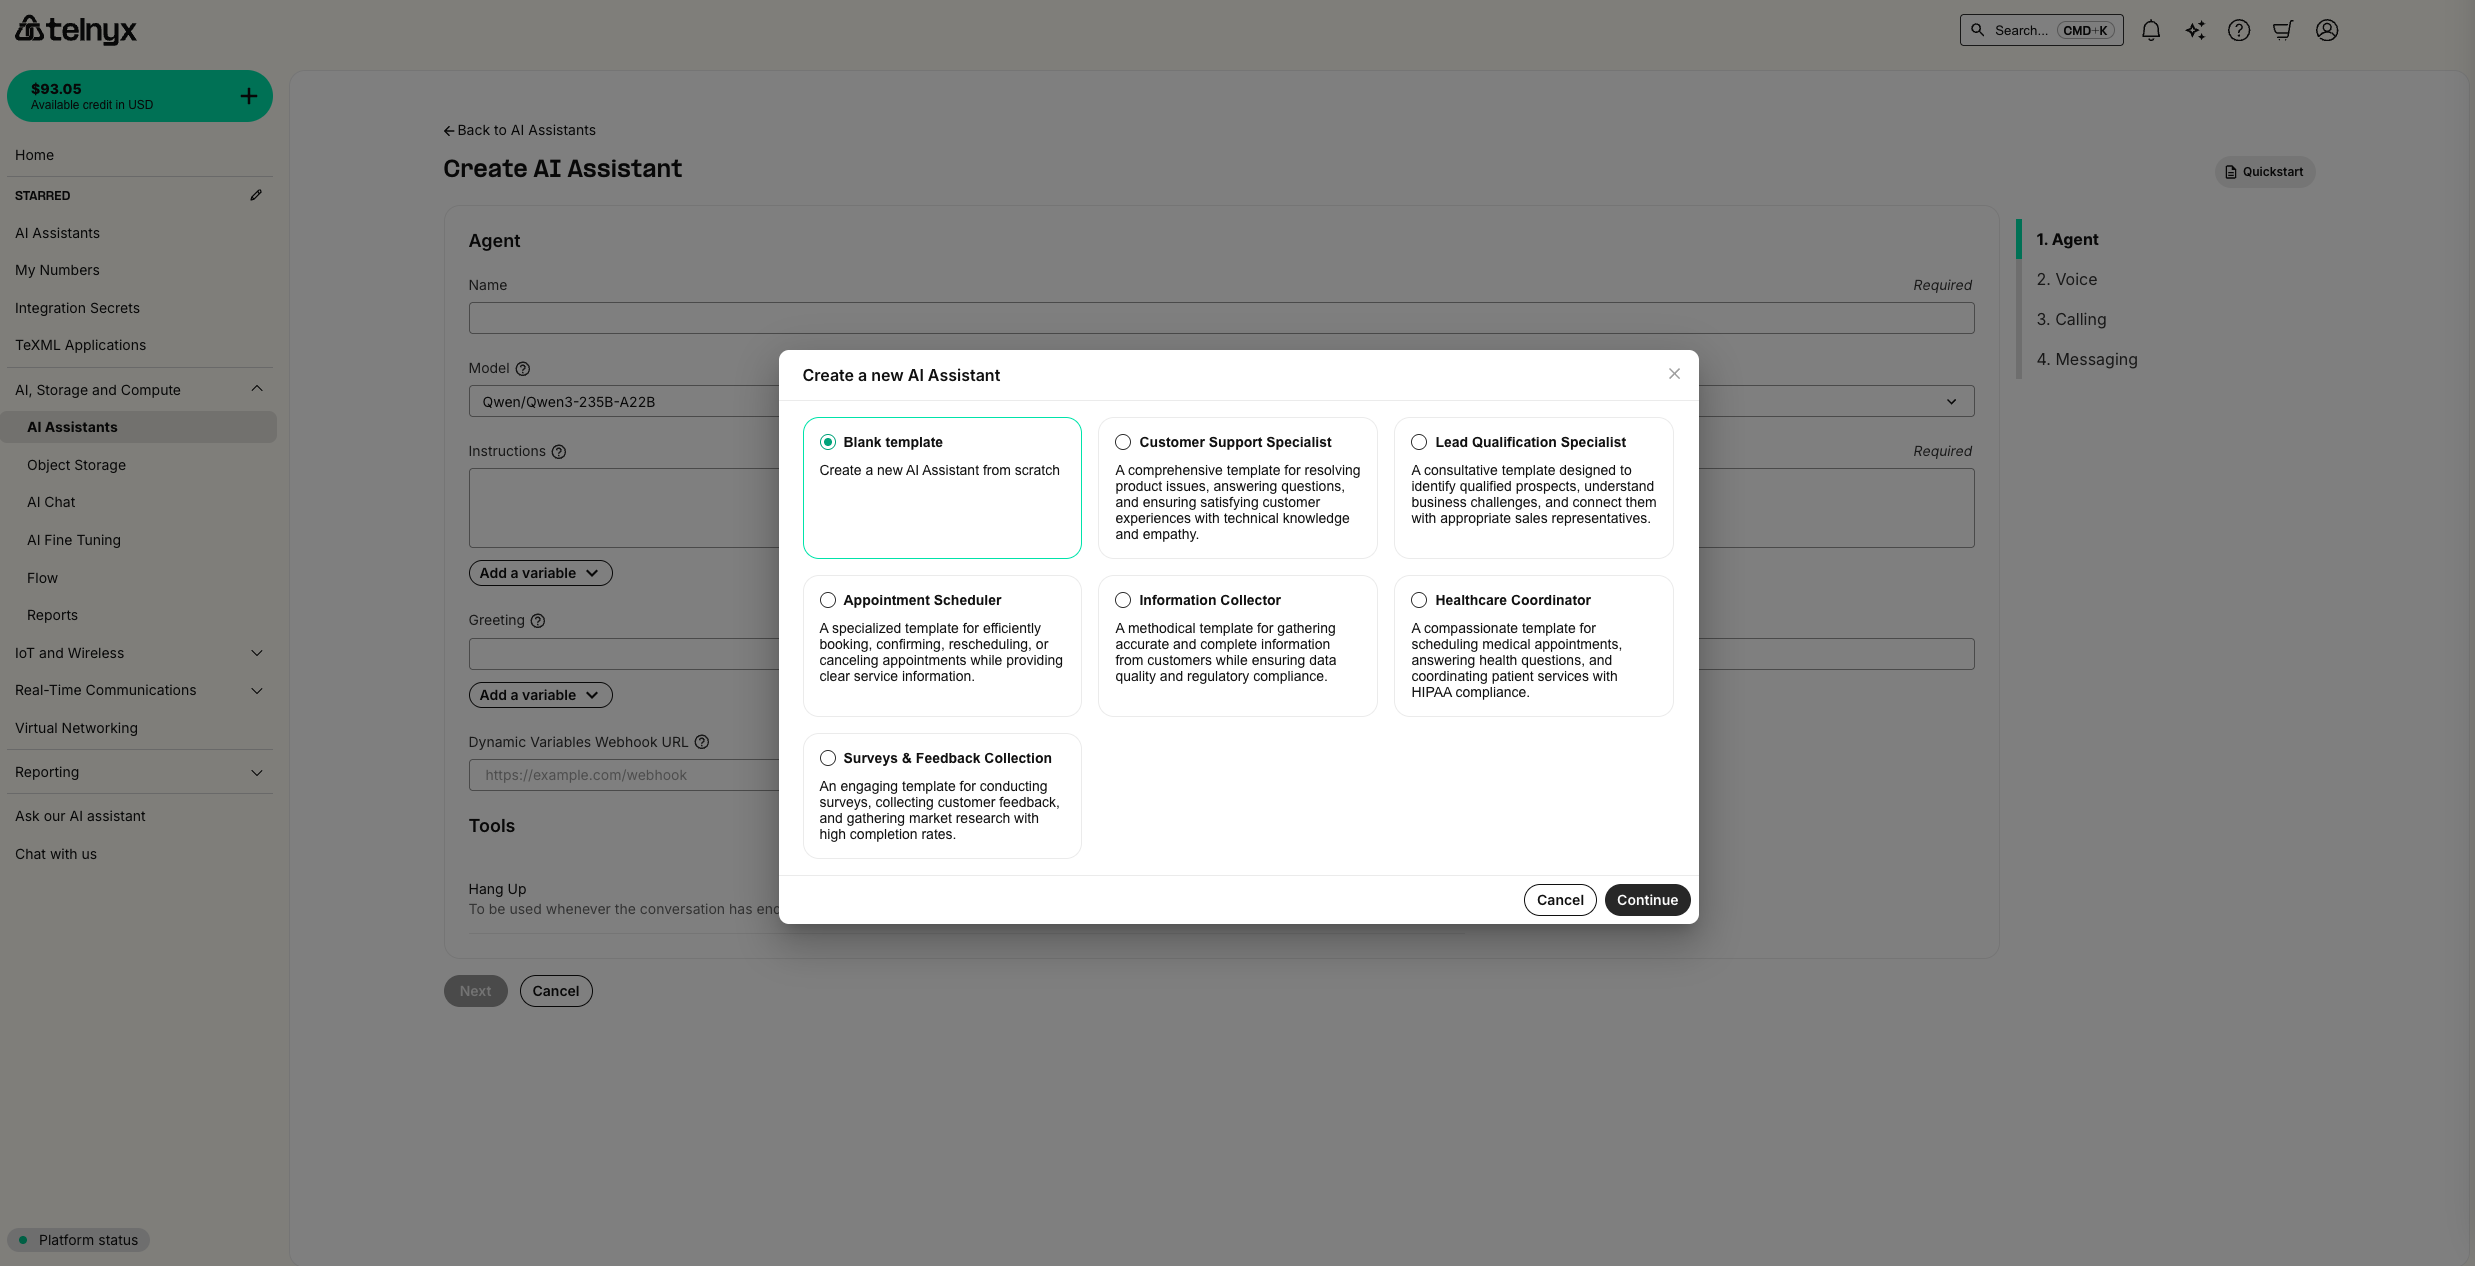
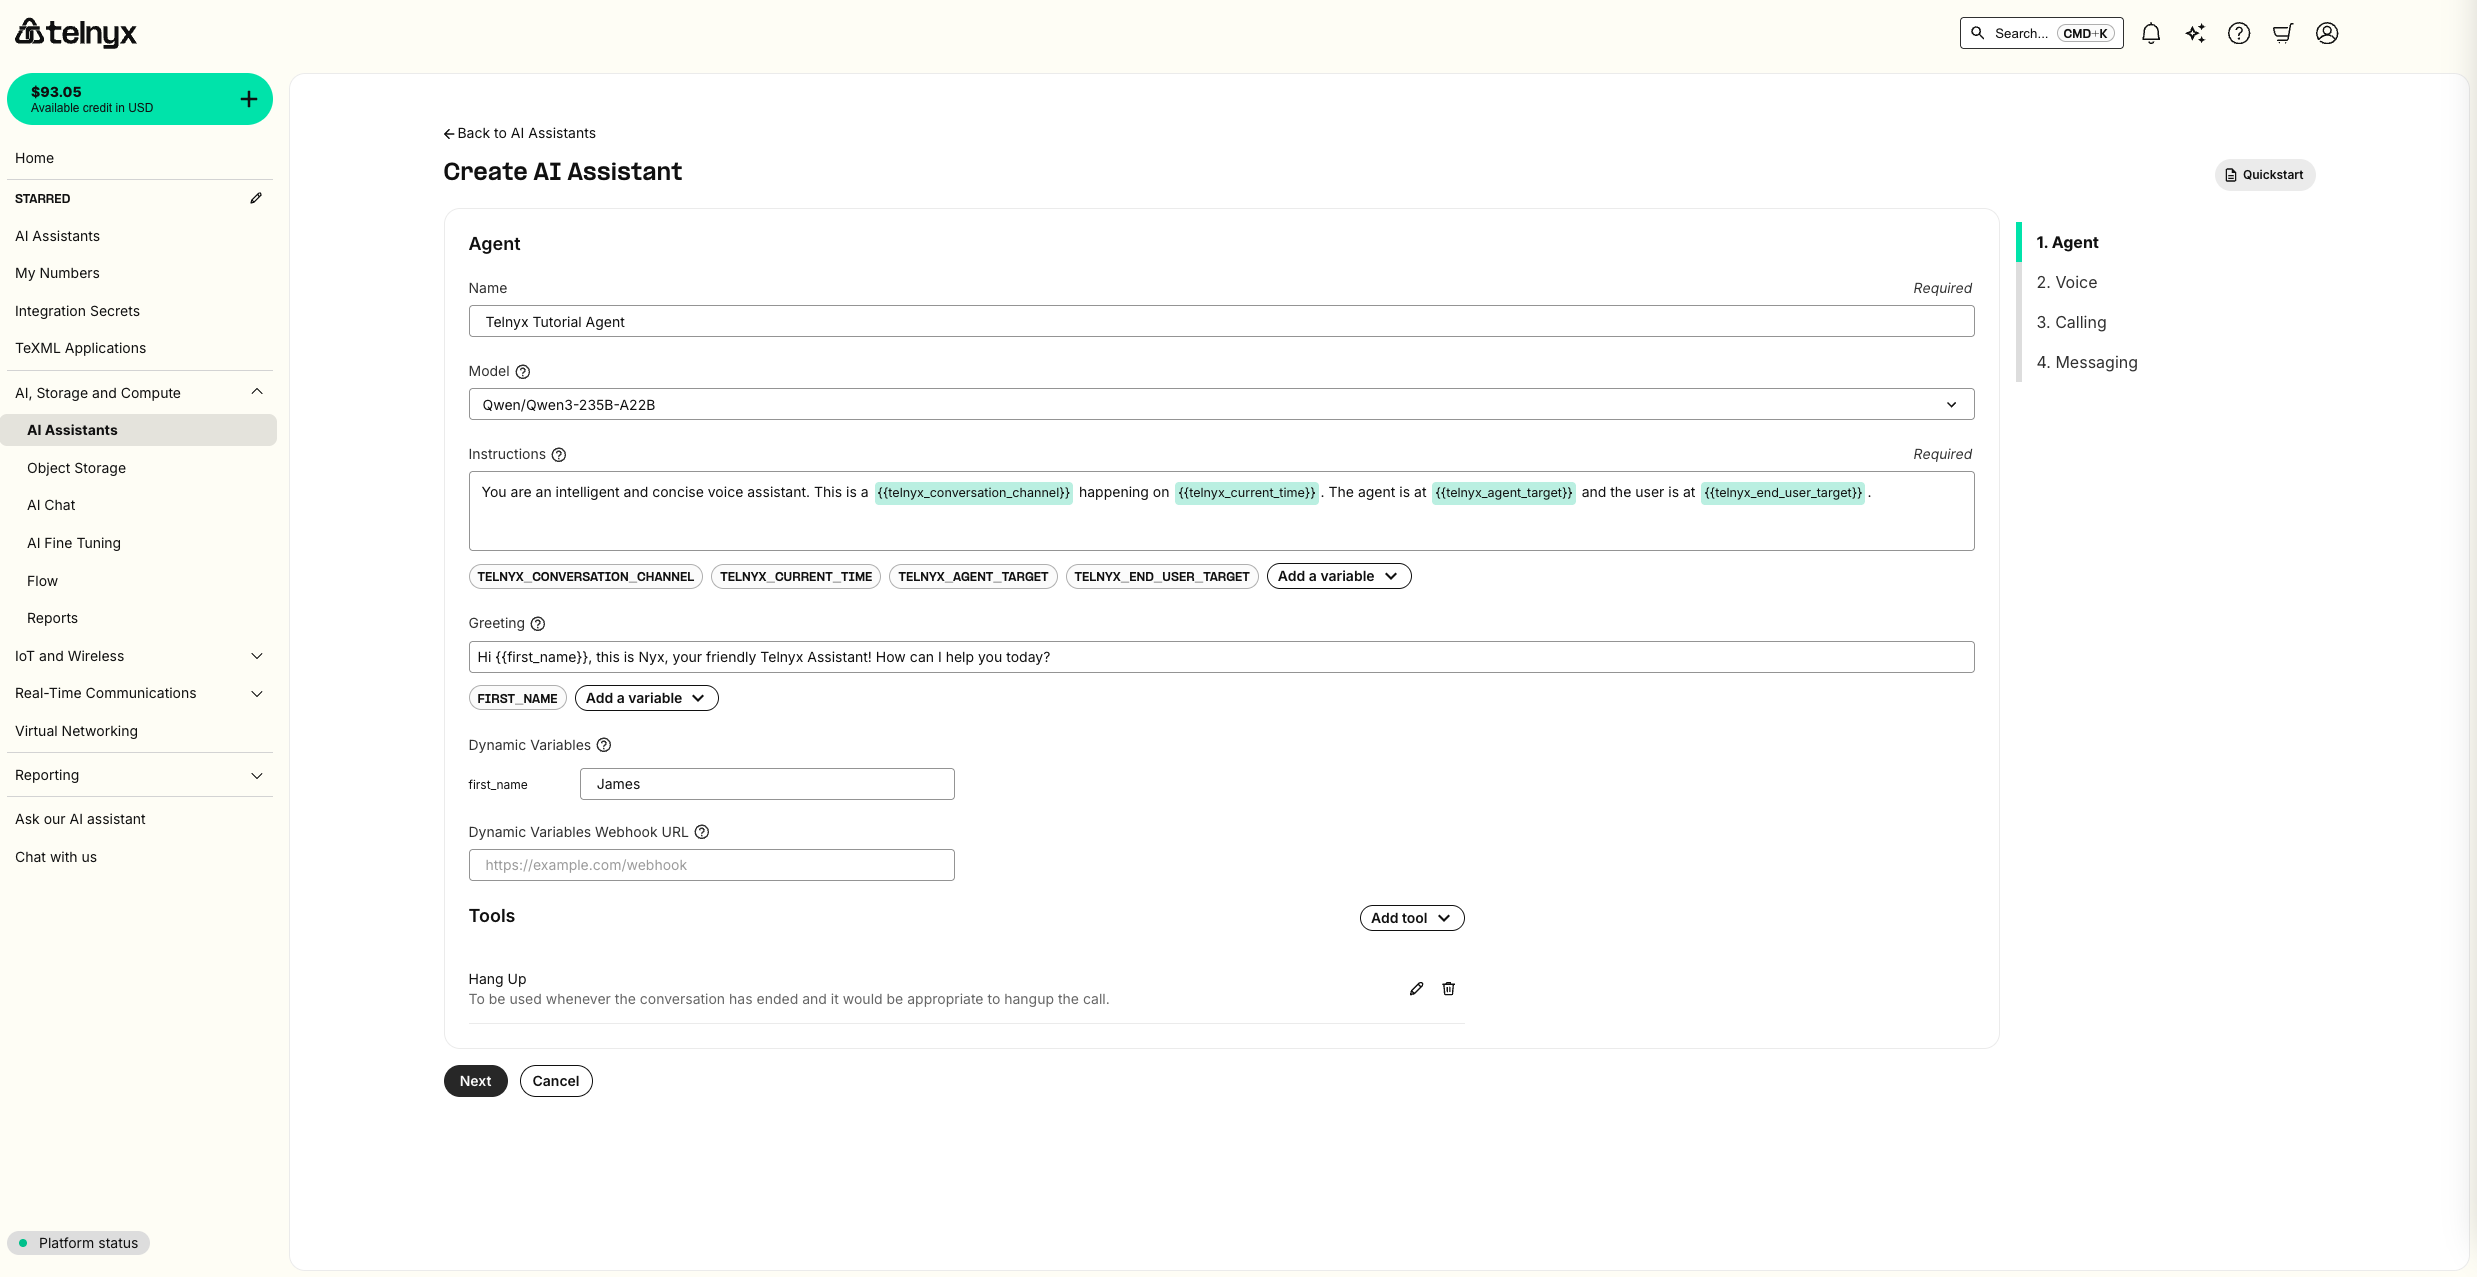
Telnyx also supports timezone-aware date/time variants (e.g.
{{telnyx_current_time_America/New_York}}), shorthands ({{telnyx_current_date}}, {{telnyx_current_weekday}}), and a custom date format filter. See dynamic variables for the full list.
You can also define your own custom dynamic variables and set them via webhook, custom SIP headers, or an outbound API call.
In this example, you’ve given the assistant access to the most commonly used system variables and a custom {{first_name}} variable in the greeting.
Notice that by default, the Hangup tool is configured. This enables your assistant to end the call at an appropriate time.
Configure the voice settings
In this step, you can use the default voice settings, clickCreate, and enable the agent for calls when prompted.
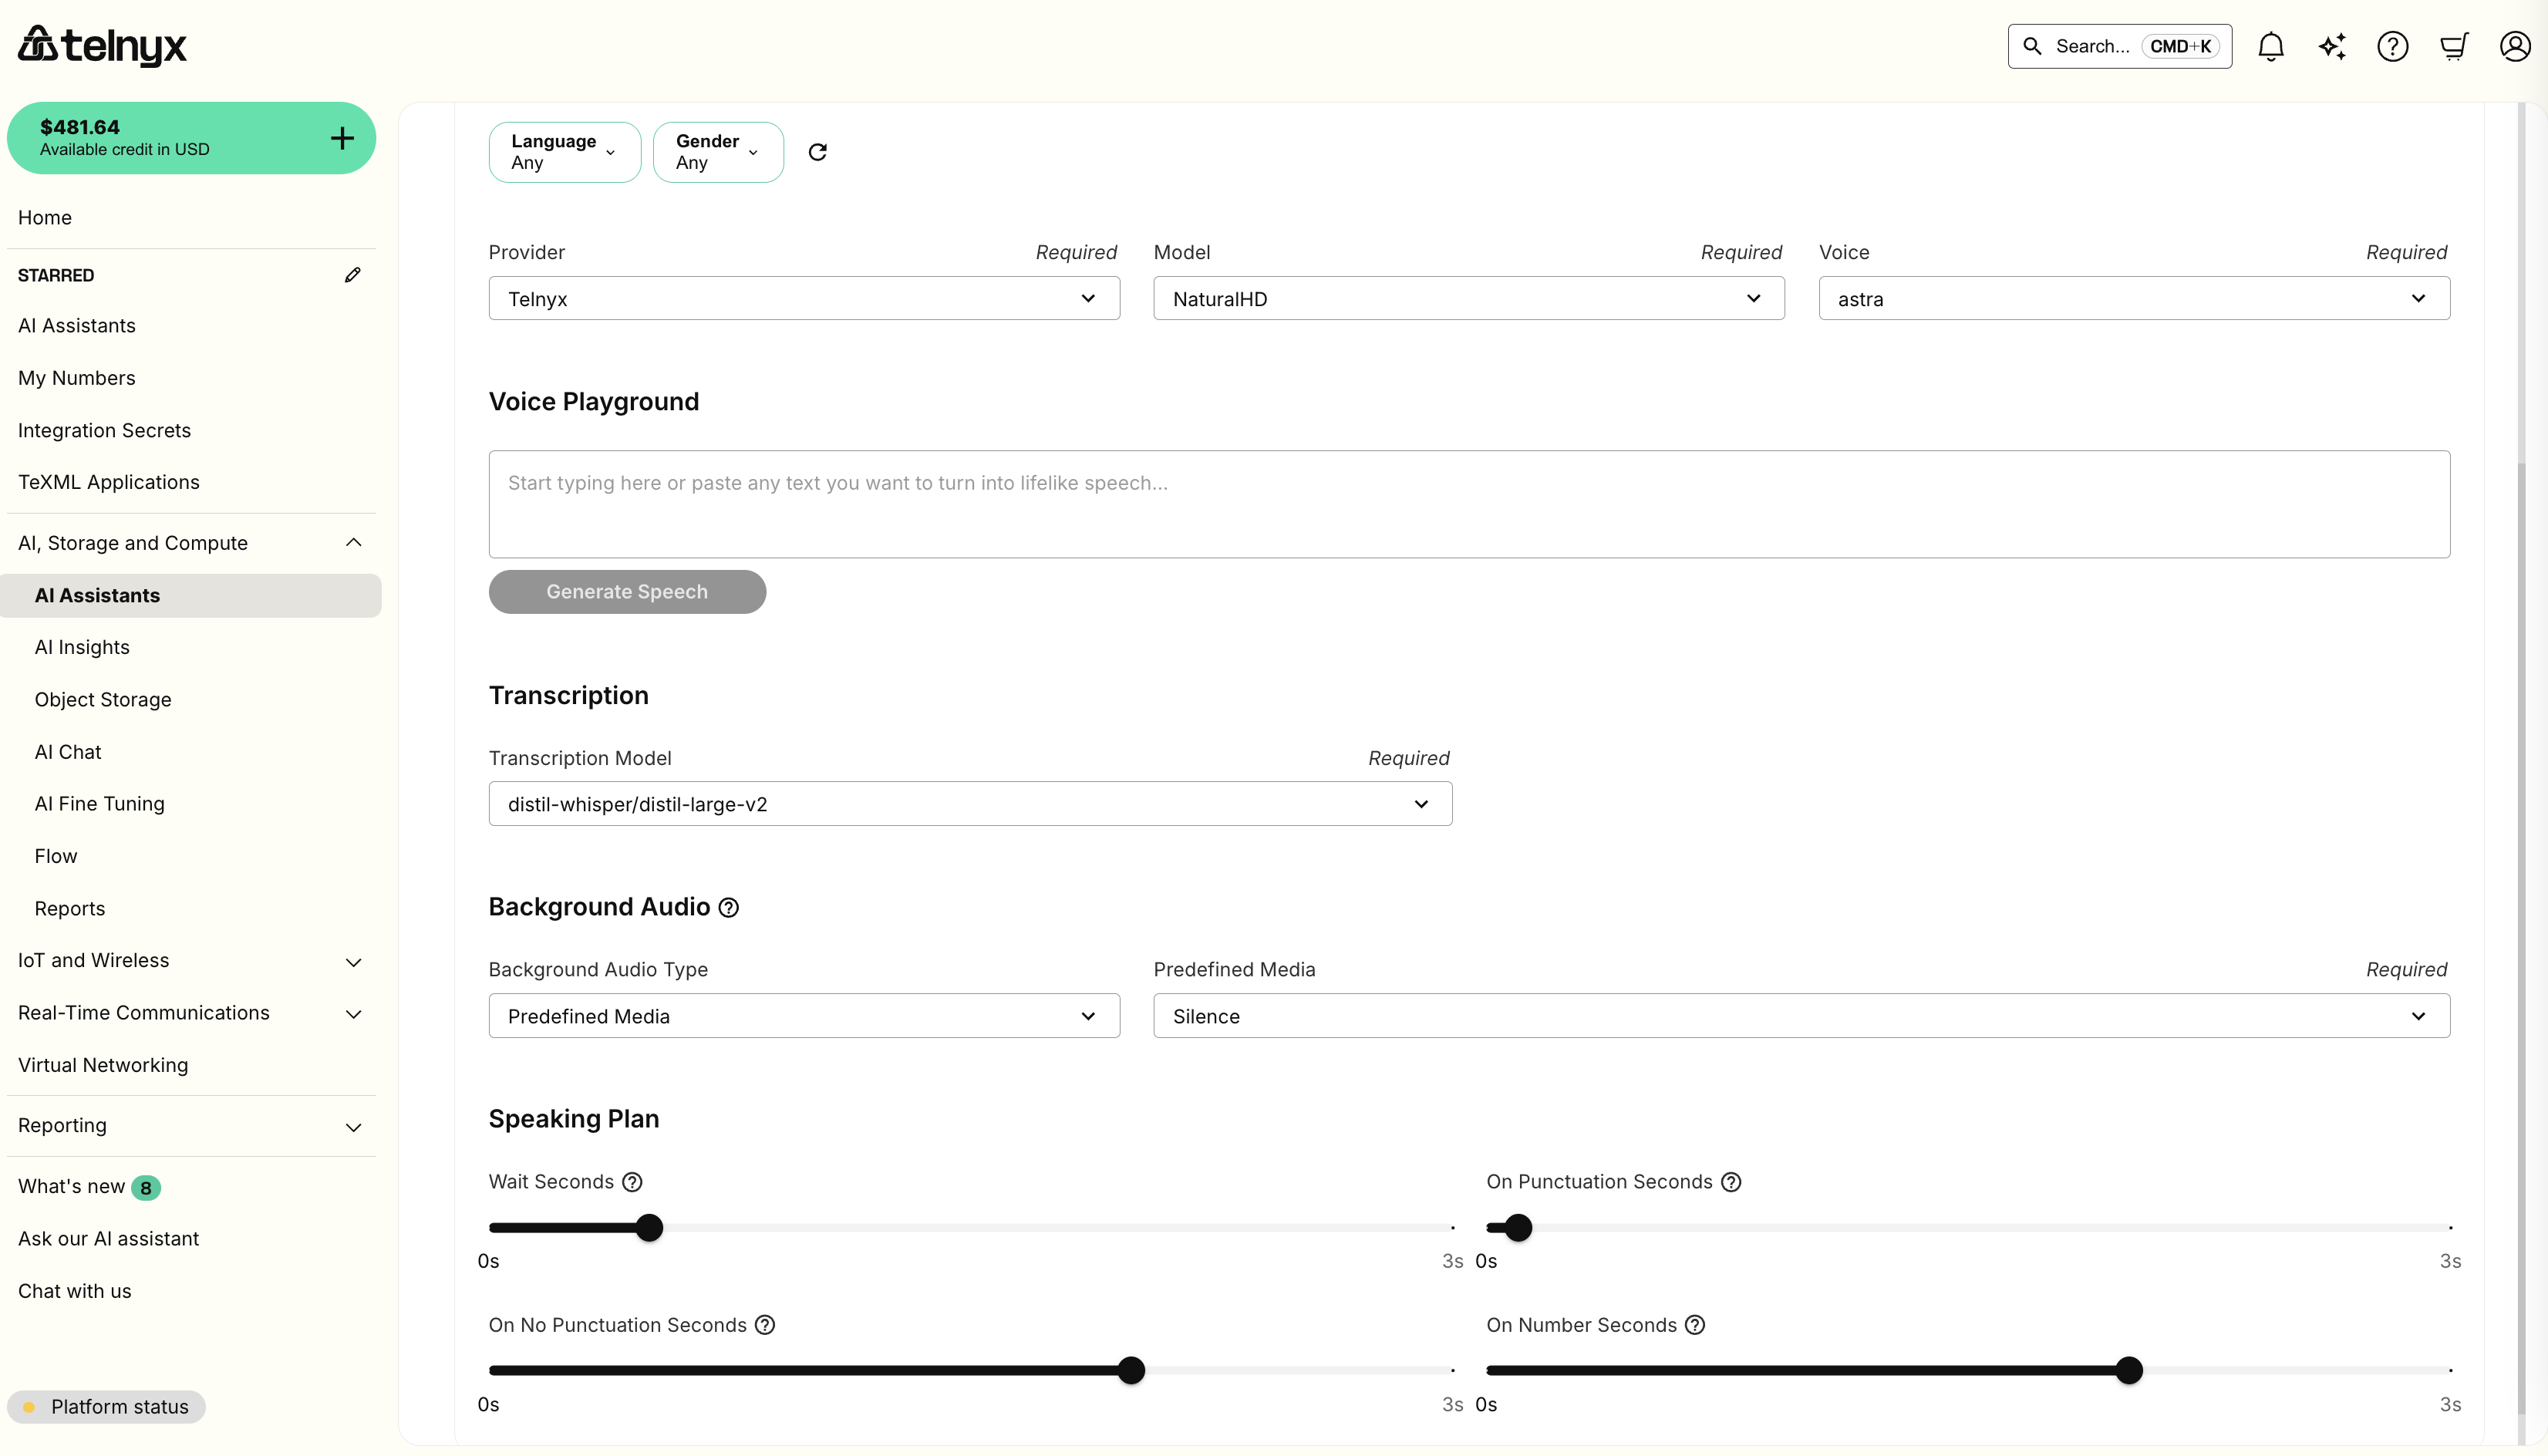
Or feel free to explore the wide range of voices in the playground.
- TTS (Text-to-Speech): Telnyx, AWS, Azure, Elevenlabs, Inworld
- STT (Speech-to-Text): Telnyx (whisper), Deepgram, Azure — see Transcription Settings for model details and configuration
[laughter].
Background Audio
You can also configure background audio to play during the call. This provides a more realistic noise environment for voice calls, making longer pauses from tool calls feel more natural.
Customers can select from our list of predefined options or share their own custom public URL.
Speaking Plan
Customers are in full control of when an agent starts talking and can distinguish between 4 types of pauses:
- Wait seconds sets your baseline. A customer service agent might use 0.3 seconds for snappy responses. An agent calling into an IVR system needs 1.5 seconds to account for slower robotic speech.
- On punctuation seconds handles high-confidence endpoints. When the transcription ends with a period or question mark, the user likely finished their thought. Set this to 0.1 seconds for minimal delay.
- On no punctuation seconds handles uncertainty. The user said “my order number is” and paused. They’re probably looking at their screen. Set this to 1.5 seconds so the agent doesn’t interrupt with “I didn’t catch that” while they’re reading the digits.
- On number seconds handles digit sequences specifically. People read numbers slowly: “4… 7… 2… 9.” Each pause could trigger a response. Extending this to 1.0 seconds prevents the agent from cutting them off at “4… 7…”
To enable via the Mission Control Portal, select the noise suppression engine under the voice settings when creating or editing your assistant.
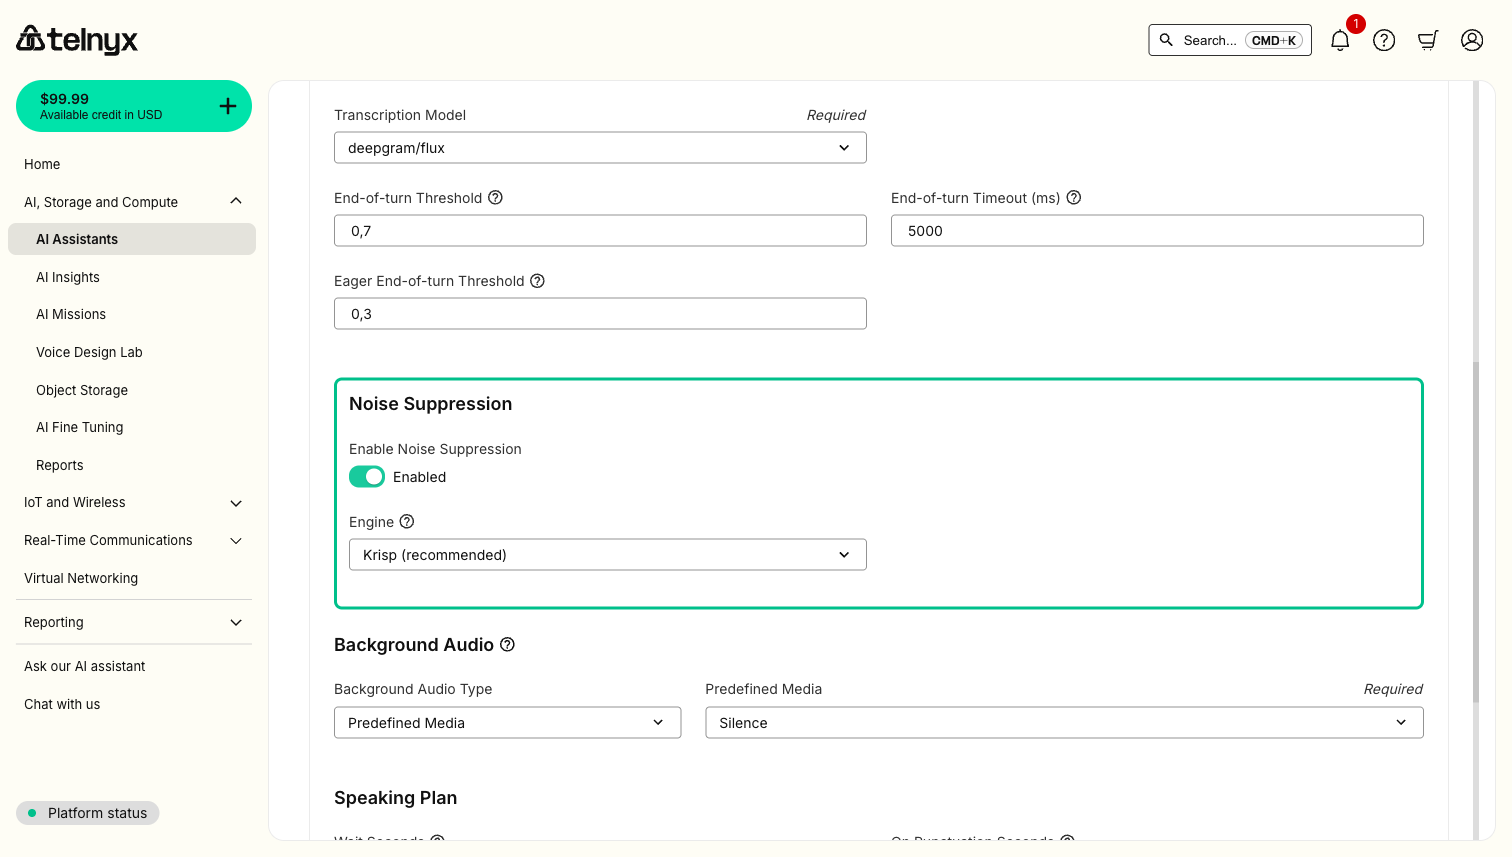
noise_suppression in telephony_settings:
"disabled" to turn off noise suppression. See the Noise Suppression guide for more details on engines and direction options.
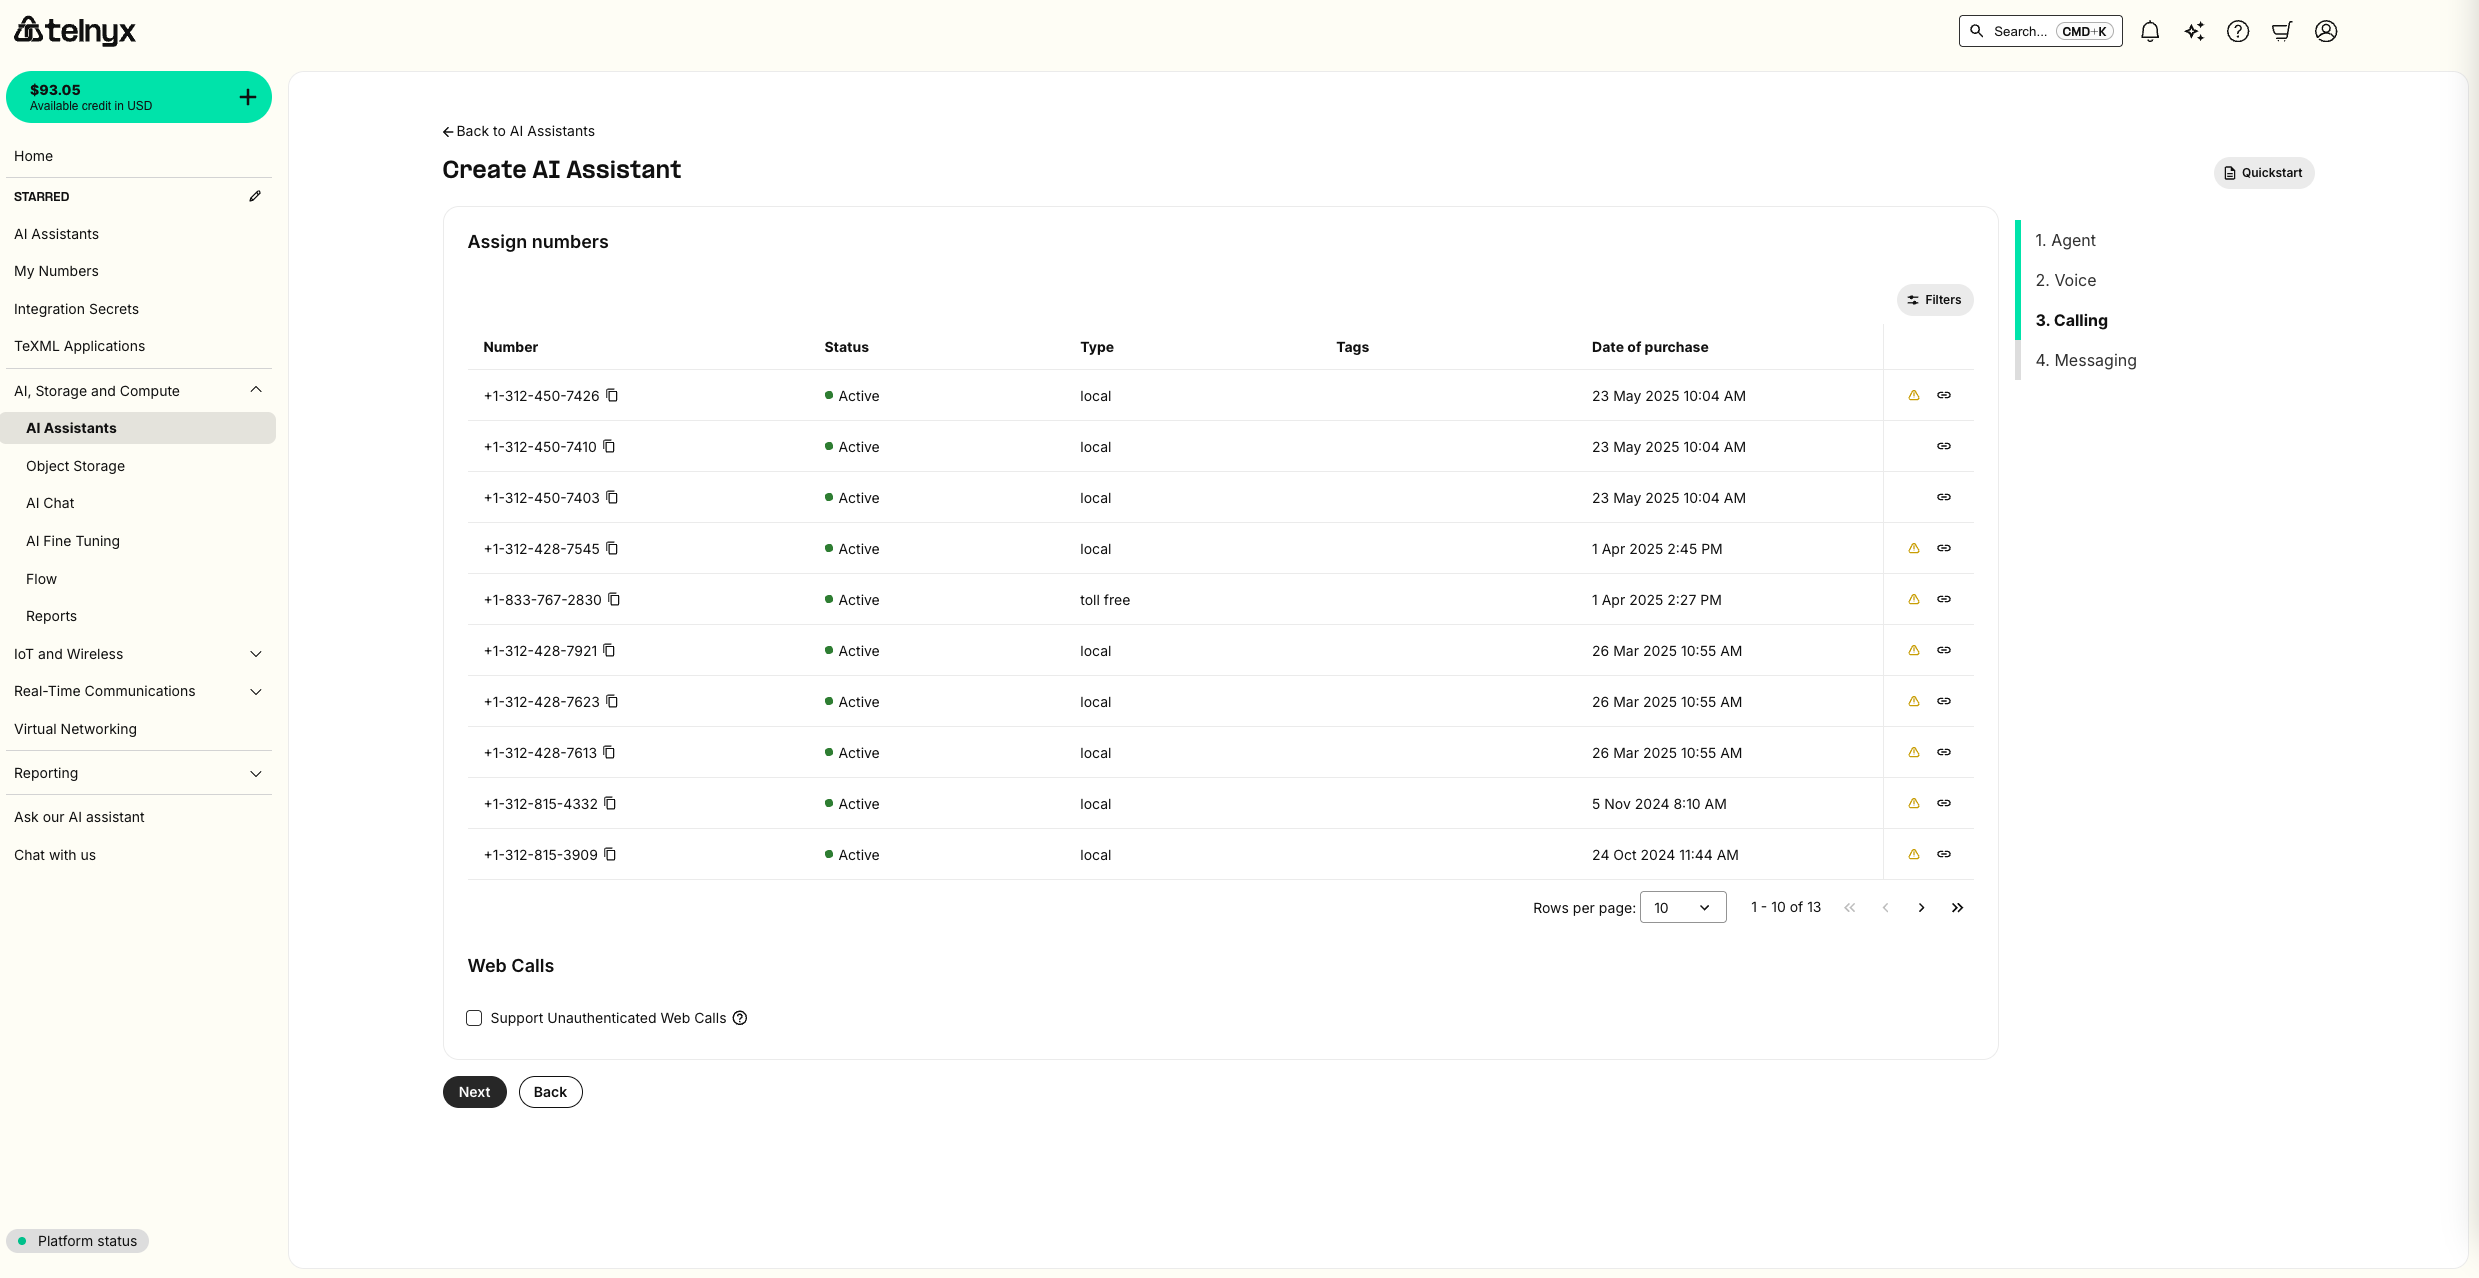
(Optional) Assign a phone number
If you have already purchased a Telnyx number with voice features, you can immediately assign it to your assistant. You can also clickNext, as completing this step is not needed for testing your assistant.
(Optional) Enable messaging
Telnyx assistants work with messaging as well. This is not covered in this tutorial.Test it out!
You should now be able to interact with your voice assistant. When you are ready, you can ask the assistant to hang up to test out the Hangup tool.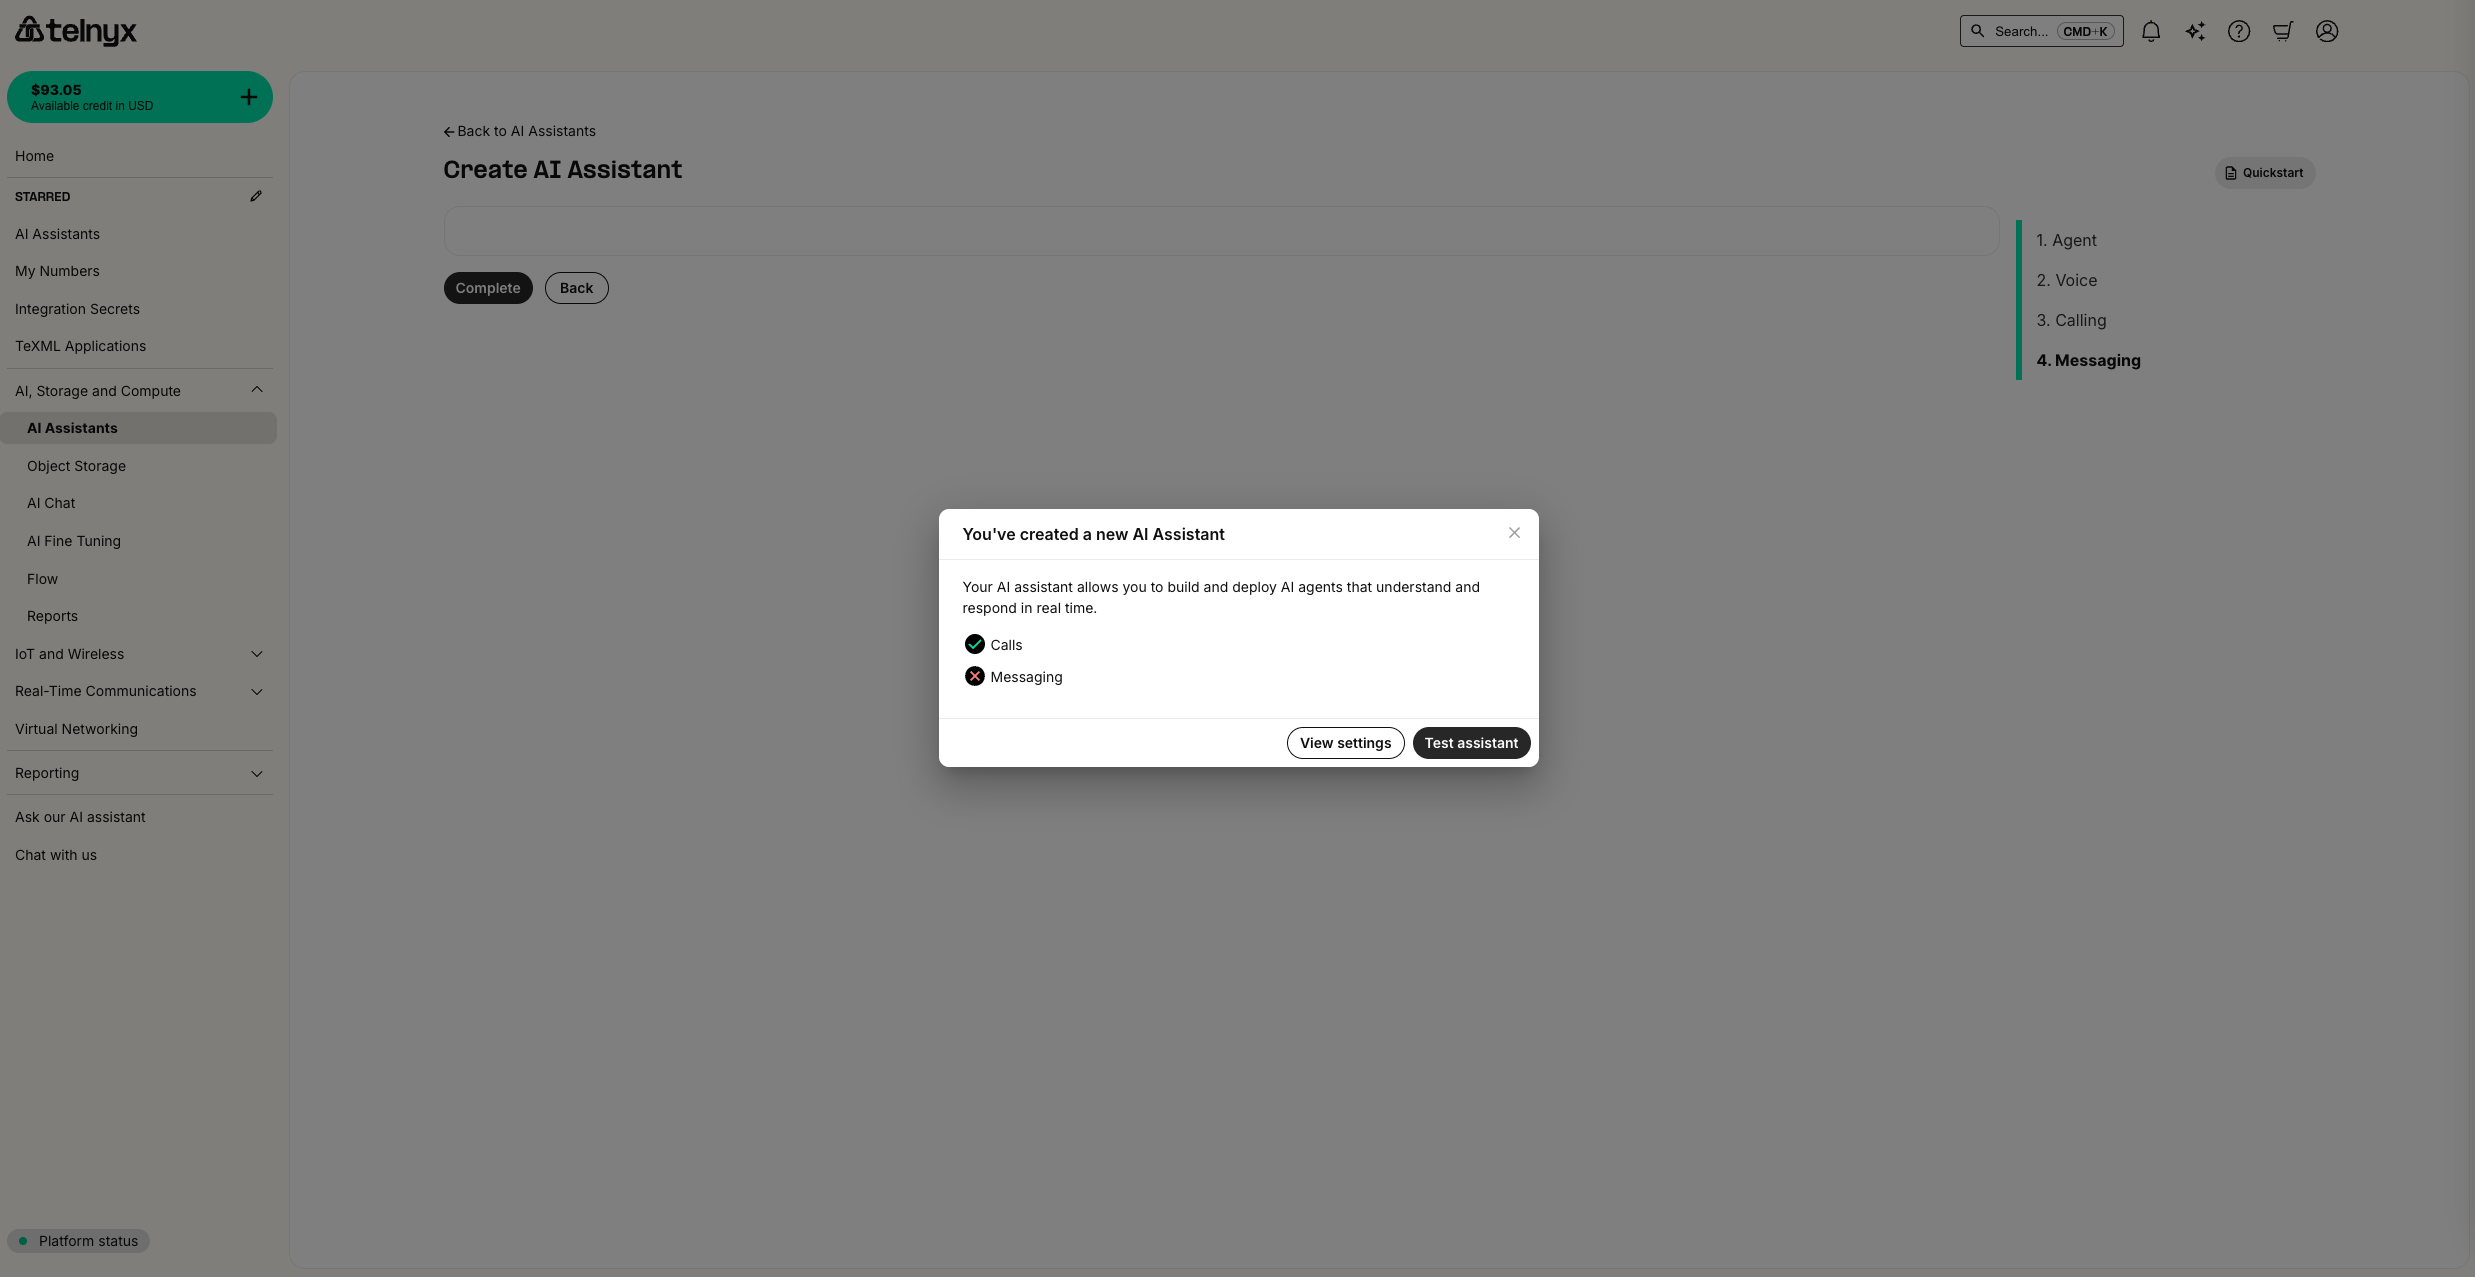
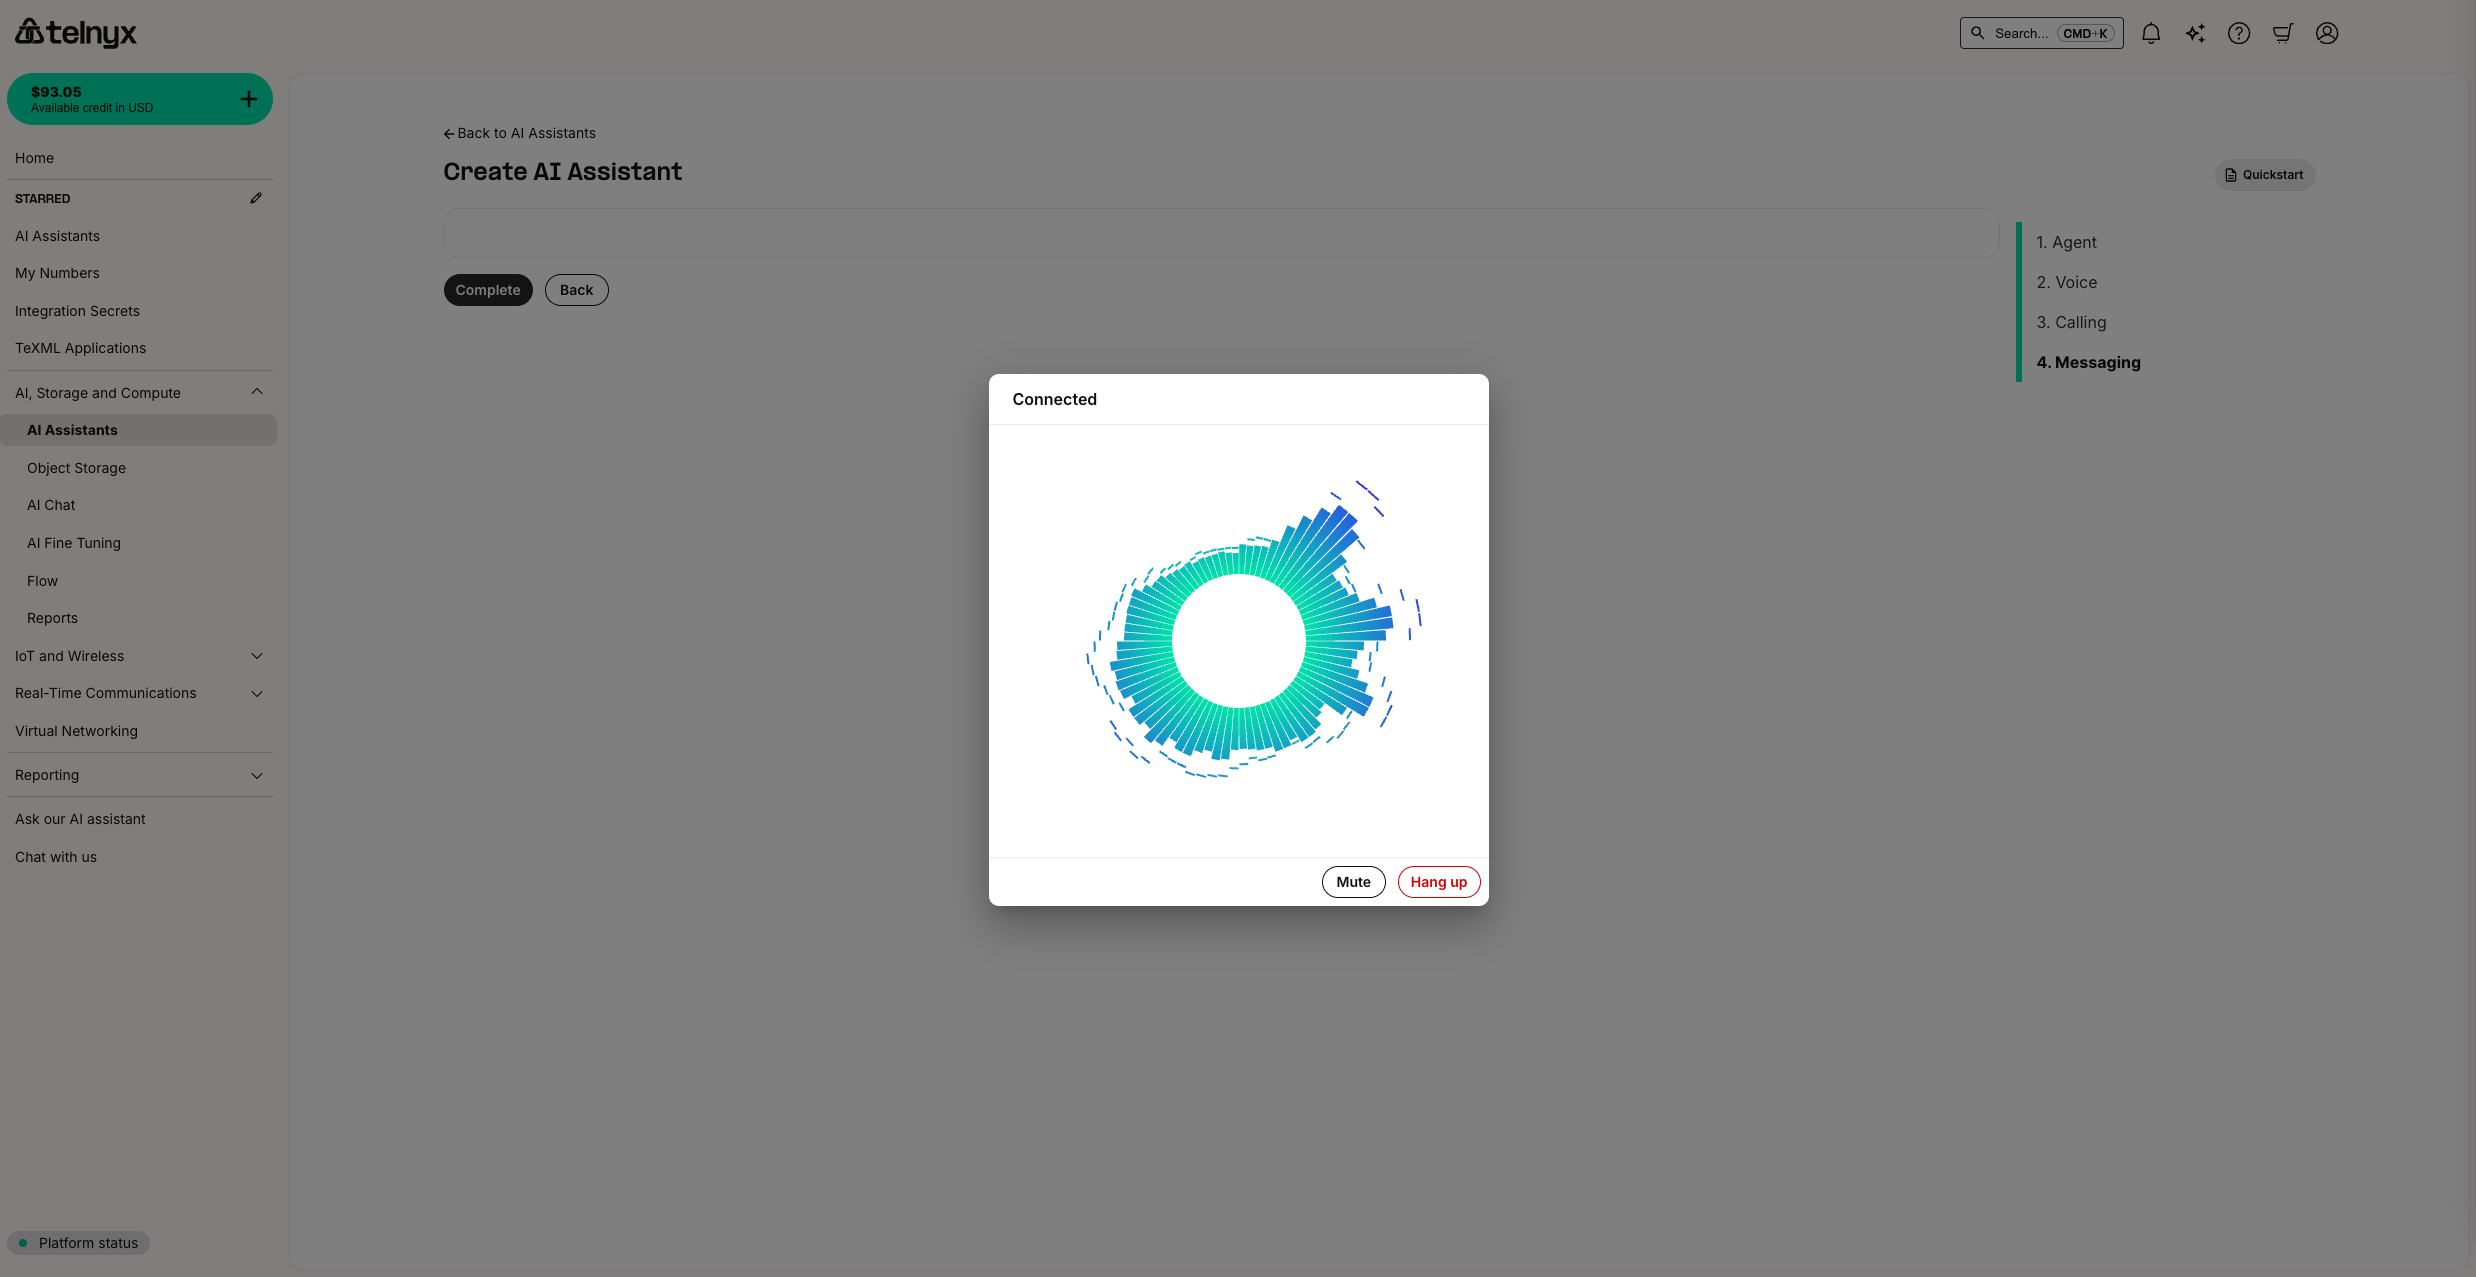
- from the portal
- via API/CLI
- in an automated workflow like Zapier using our TeXML Outbound Call action.
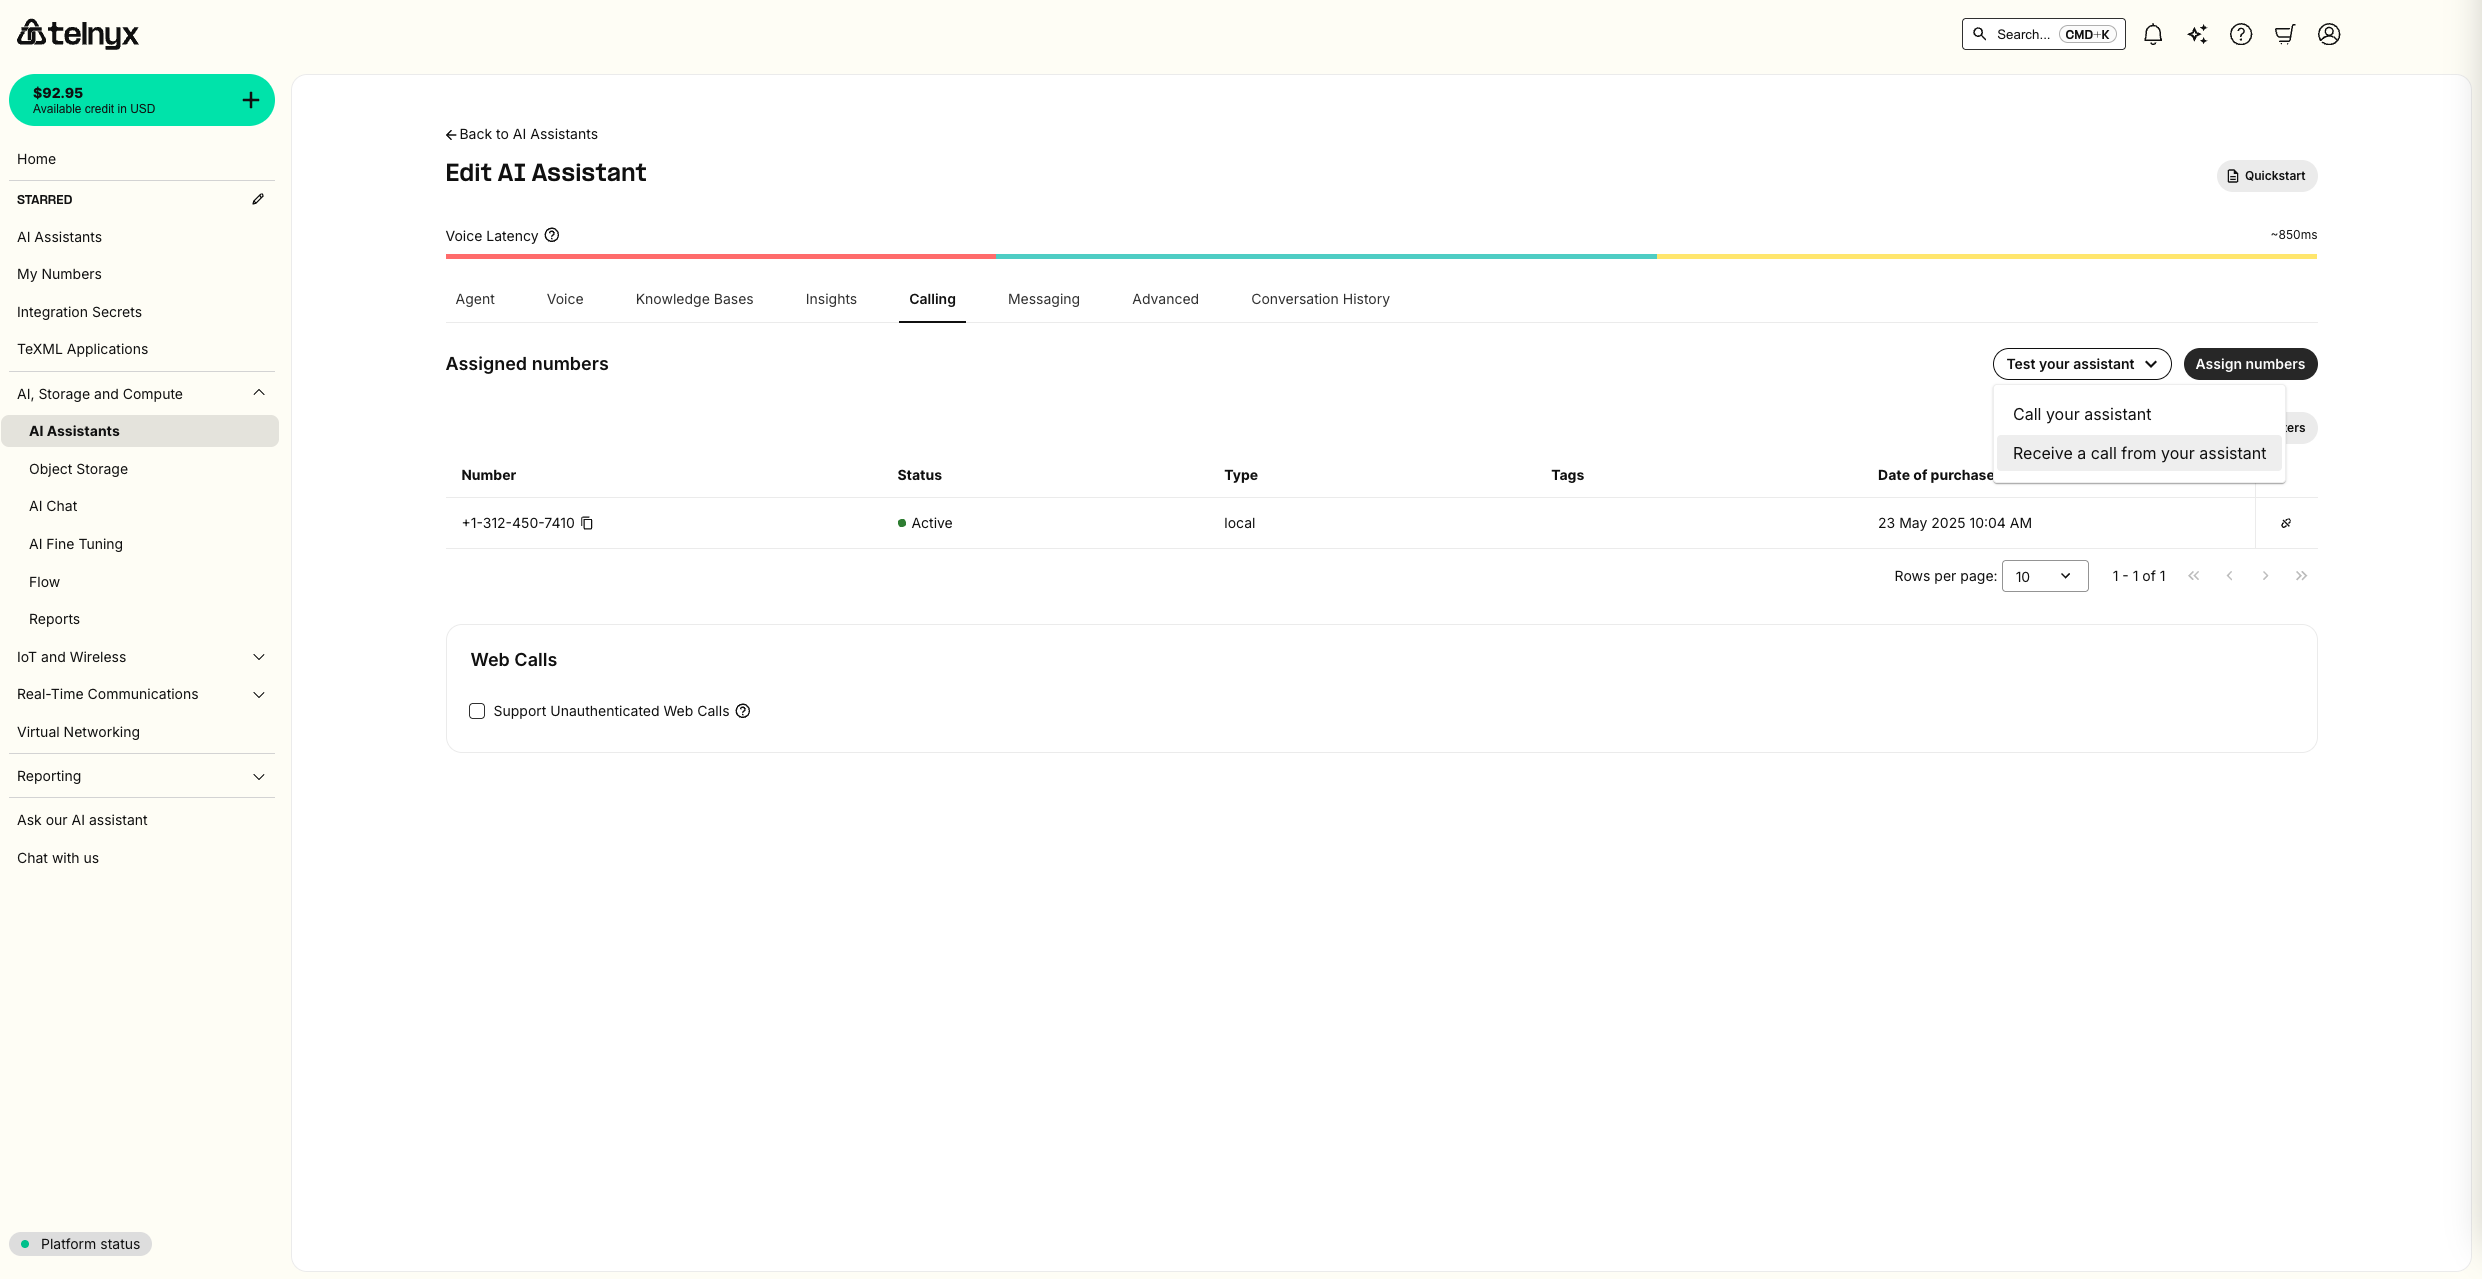
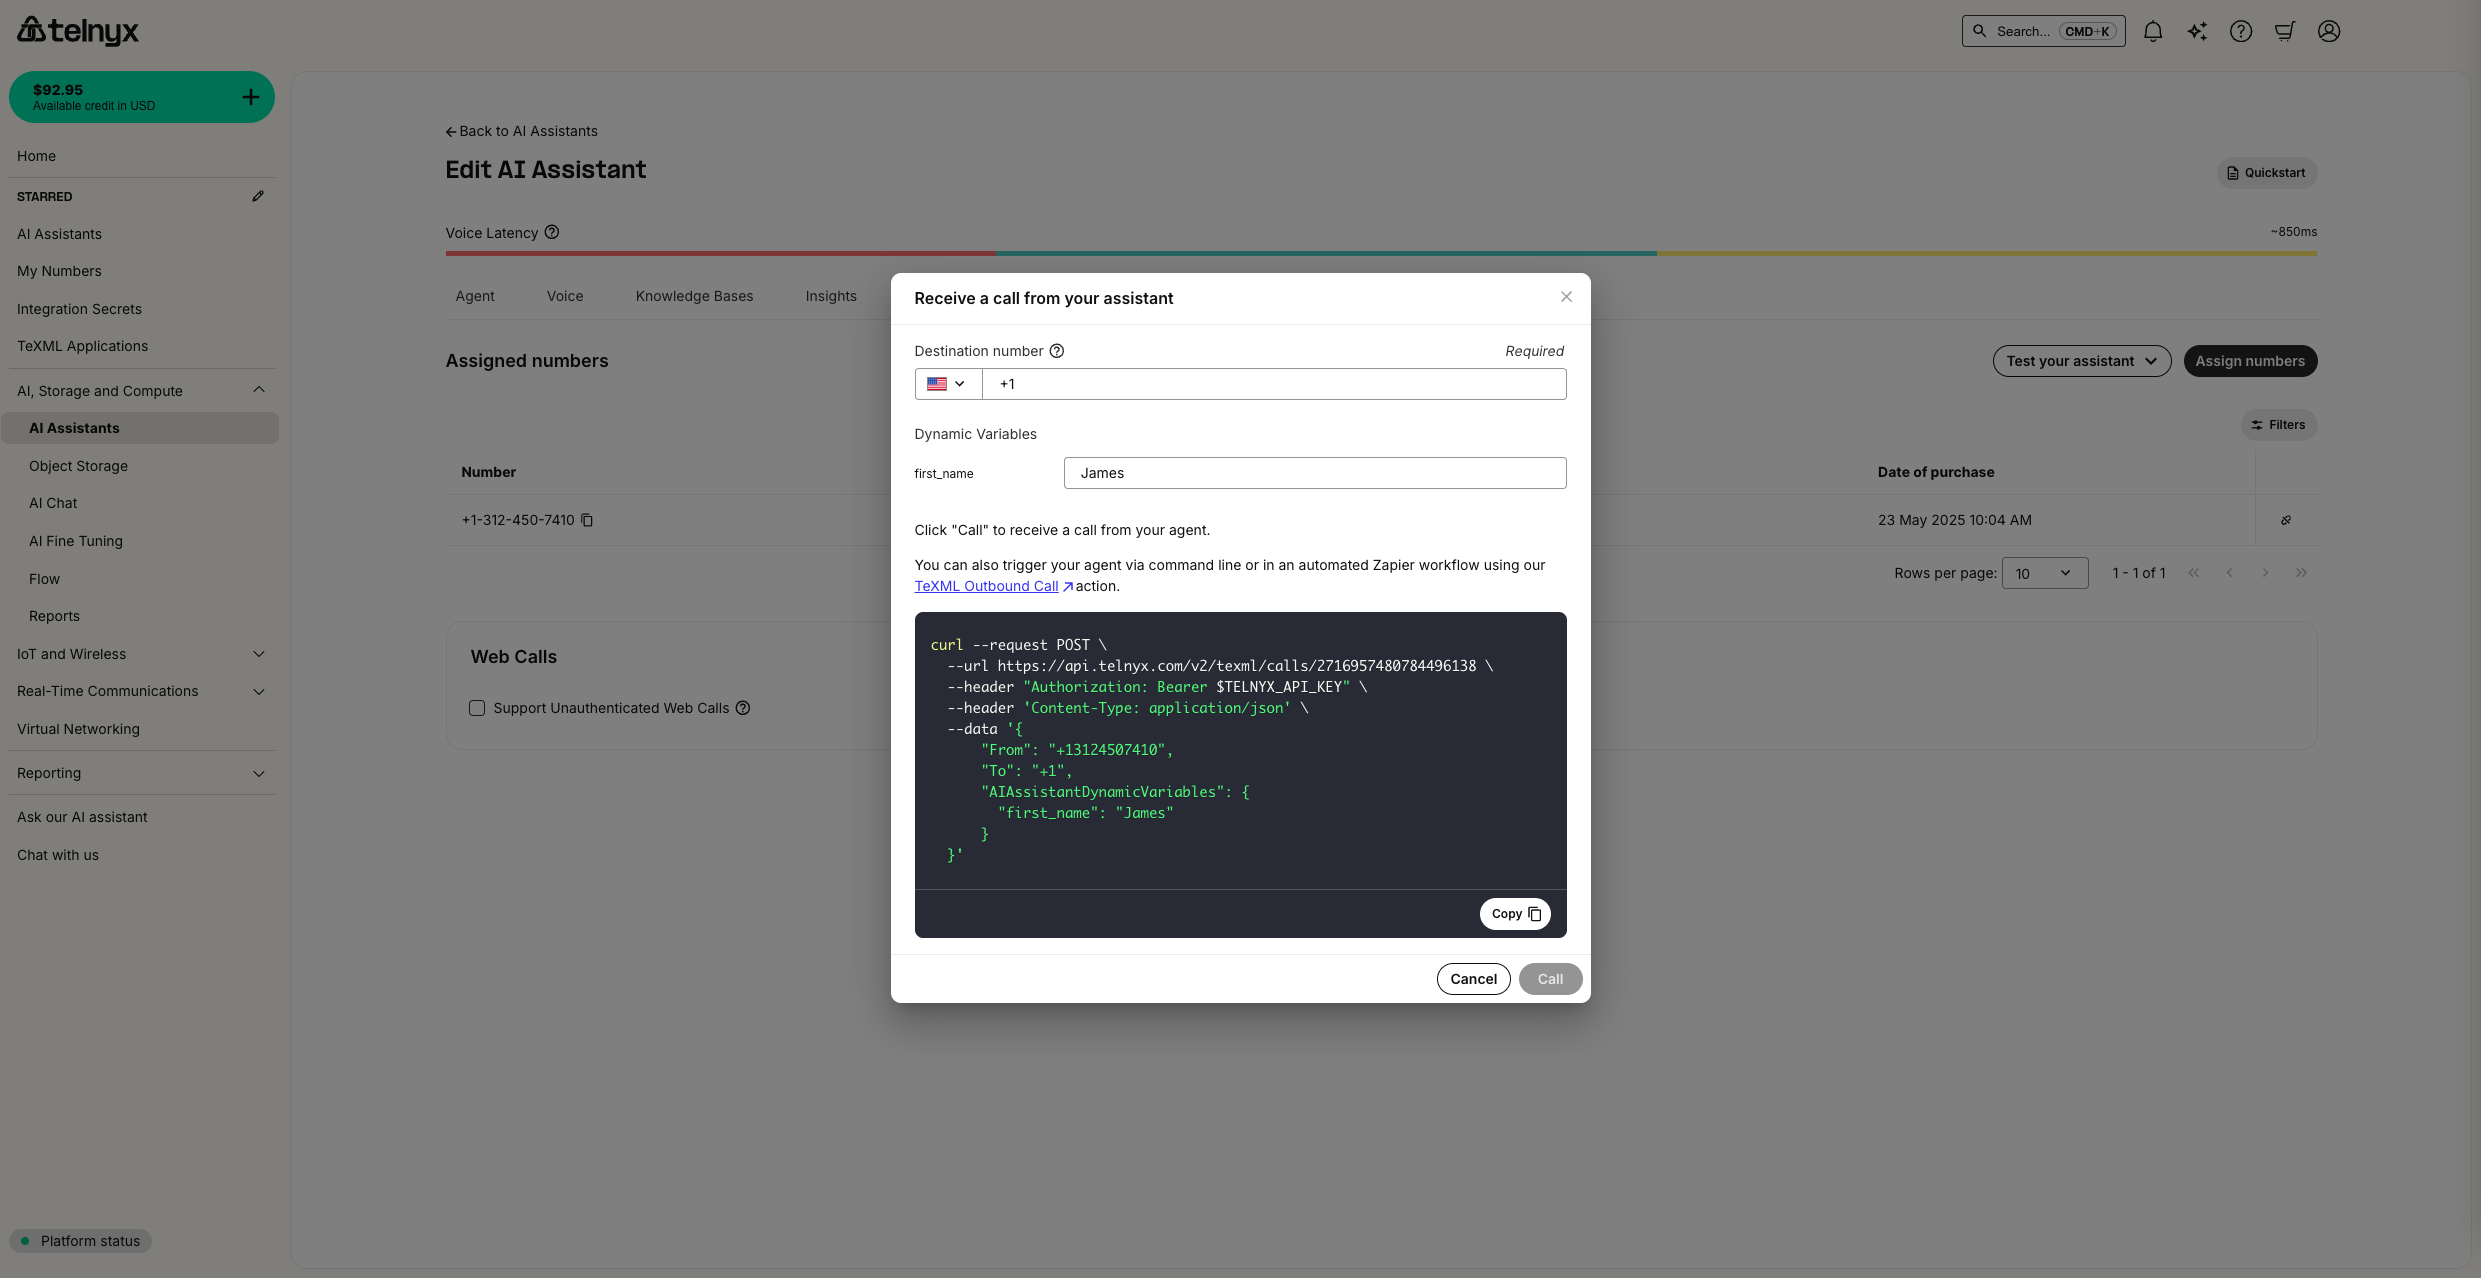
TELNYX_API_KEY environment variable with your API Key
Outbound calls via API
To initiate an outbound call with your AI assistant via API, use the/v2/texml/ai_calls/ endpoint:
Review the conversation
You can see all historical conversations in the Conversation History tab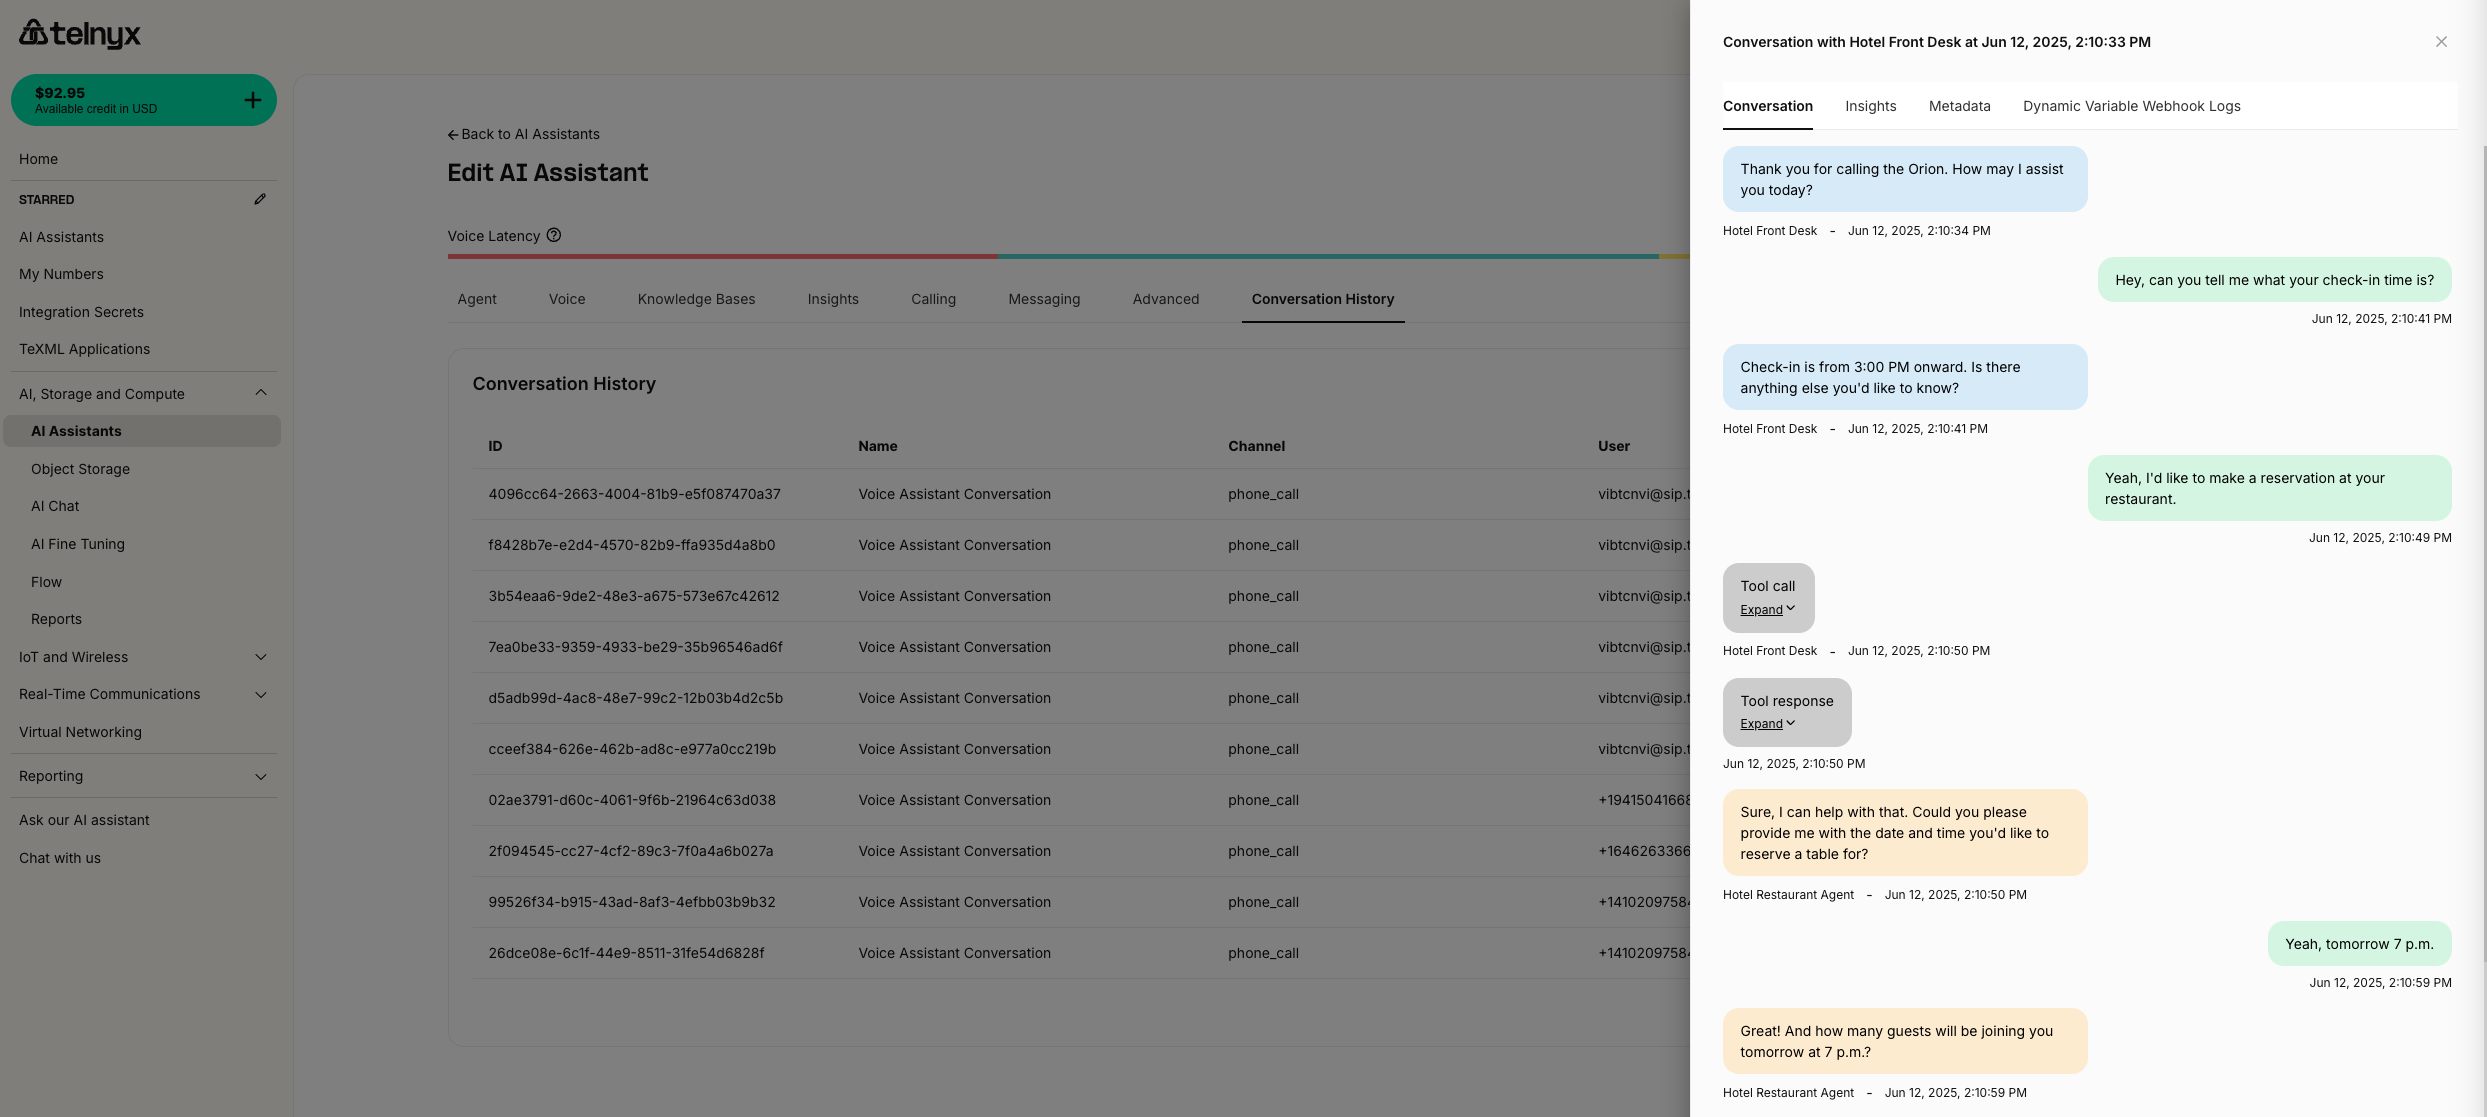
MMS integration during voice calls
Your AI Assistant can now receive and process MMS messages during live voice calls, enabling visual context and real-time image analysis. This powerful feature allows your assistant to handle complex scenarios where visual information is crucial.How it works
When a user sends an MMS message during an ongoing voice call with your AI Assistant, the agent can:- Automatically detect incoming MMS messages.
- Access and analyze attached images using vision-capable Language Models (VLMs).
- Provide real-time responses based on visual content.
- Continue the voice conversation with enhanced context.
Use cases
Configuration
MMS integration requires the following setup for your AI Assistant:- Messaging must be enabled - Ensure messaging is enabled for your Voice AI Agent to receive MMS during calls.
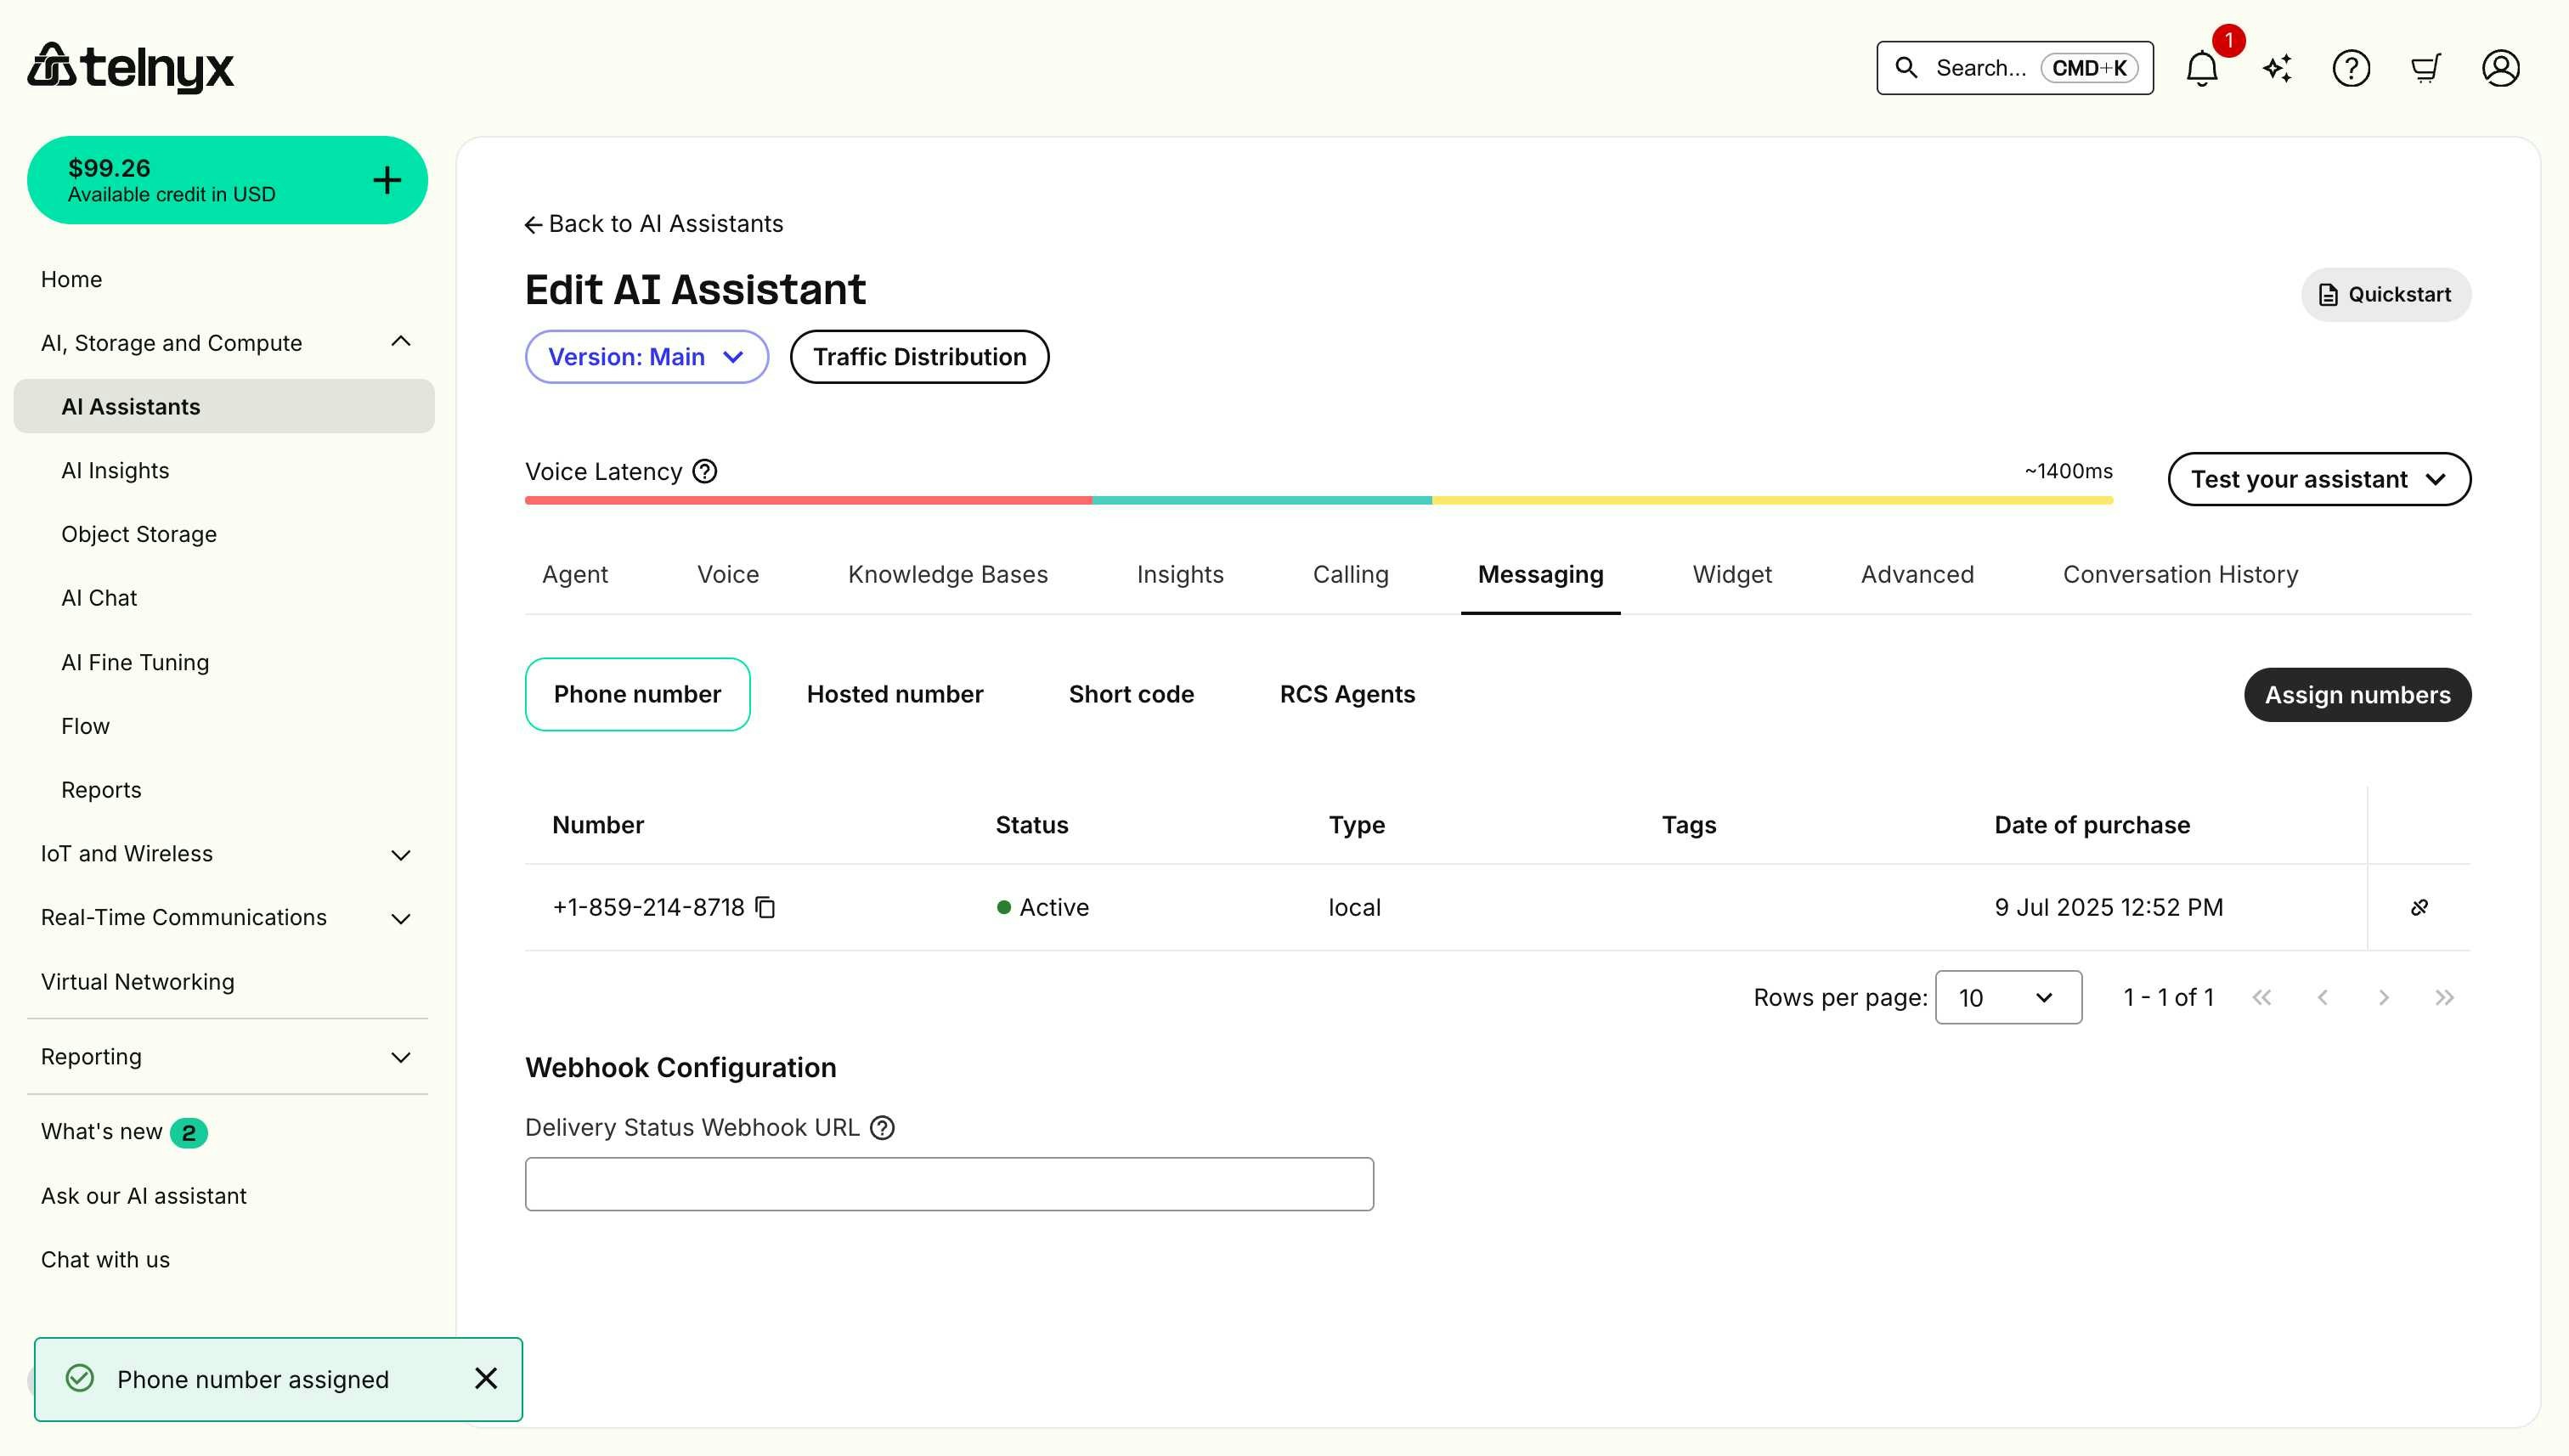
- Vision-capable models required - Use one of the two supported vision models:
Groq/llama-4-maverick-17b-128e-instructorOpenAI/gpt-4ofor image processing. - Image processing - The assistant can handle common image formats (JPEG, PNG, etc.).
Best practices
- Model selection: Choose one of the two supported vision models when configuring your assistant.
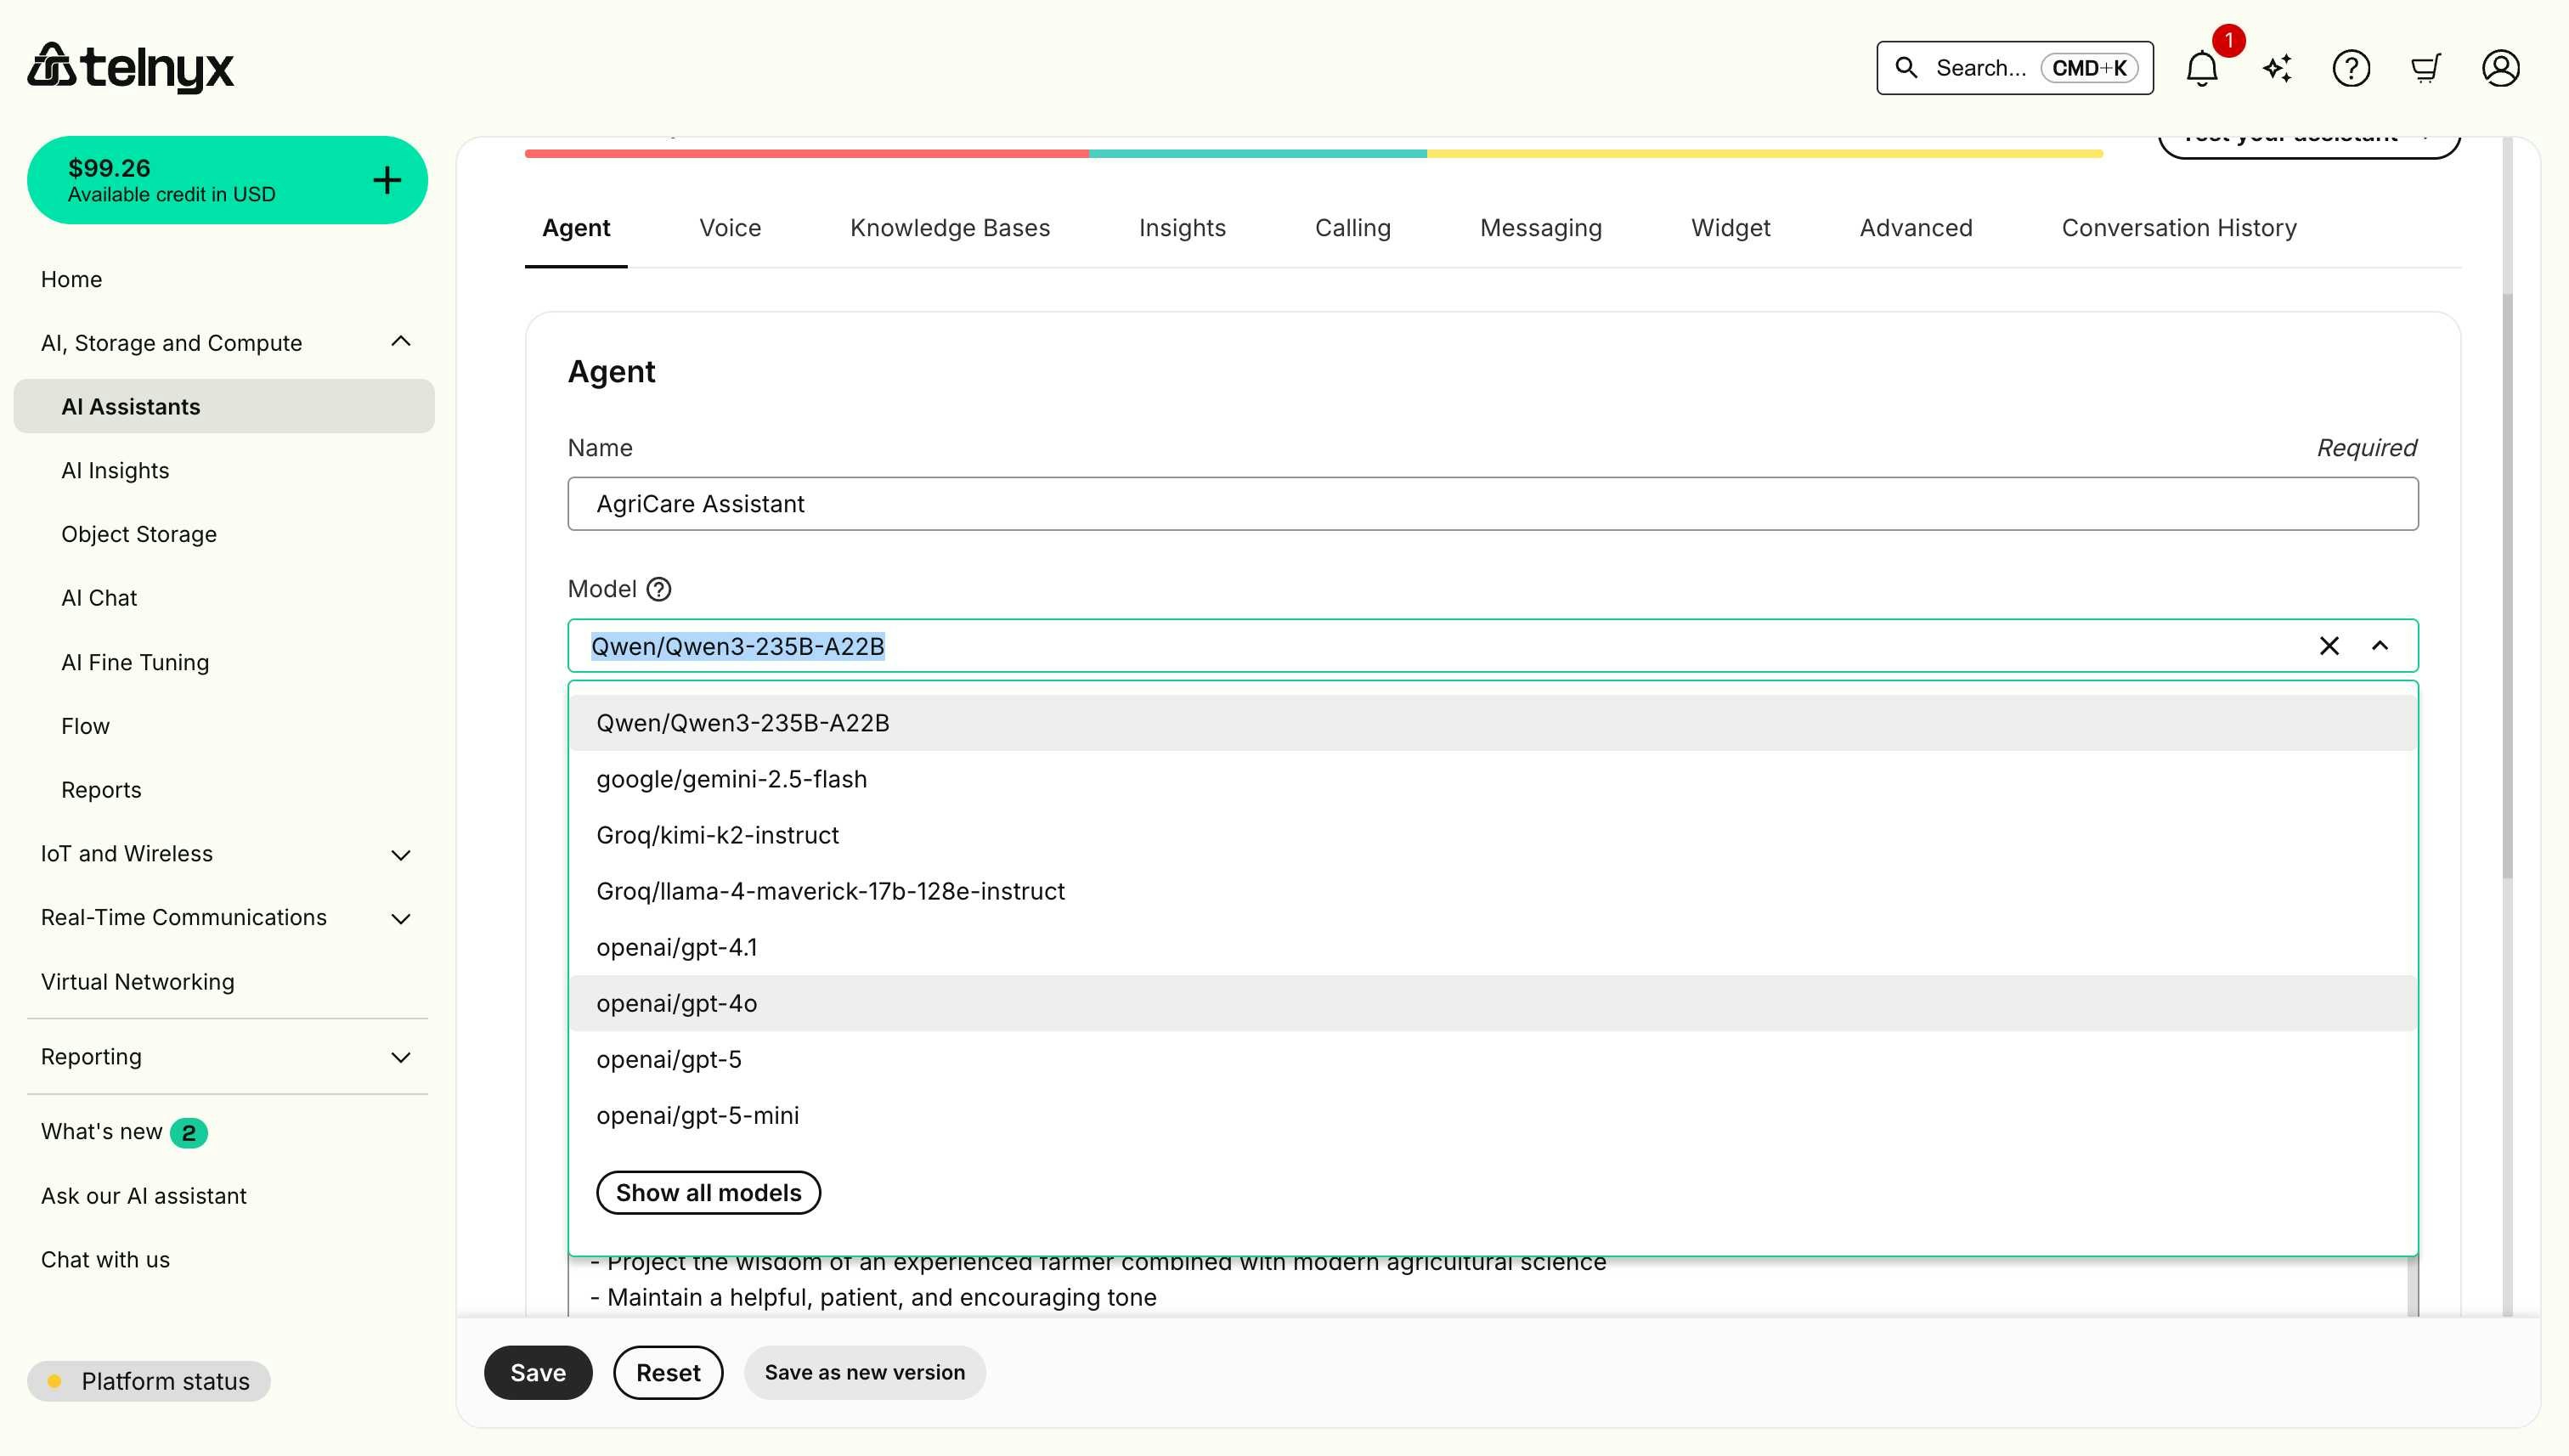
- Response timing: The assistant will process images and respond within the voice call flow.
- Image quality: Higher resolution images provide better analysis results.
- Context integration: The assistant seamlessly combines visual and conversational context.
Supported language models
Telnyx AI Assistants support multiple language models. You can select a model in the Agent tab when creating or editing an assistant.
For a complete list of available models, see Available Models.
Native models run on Telnyx infrastructure with no external API key required. For models from external providers, see Third-party integrations or Custom LLMs for Assistants.
Optional enhancements
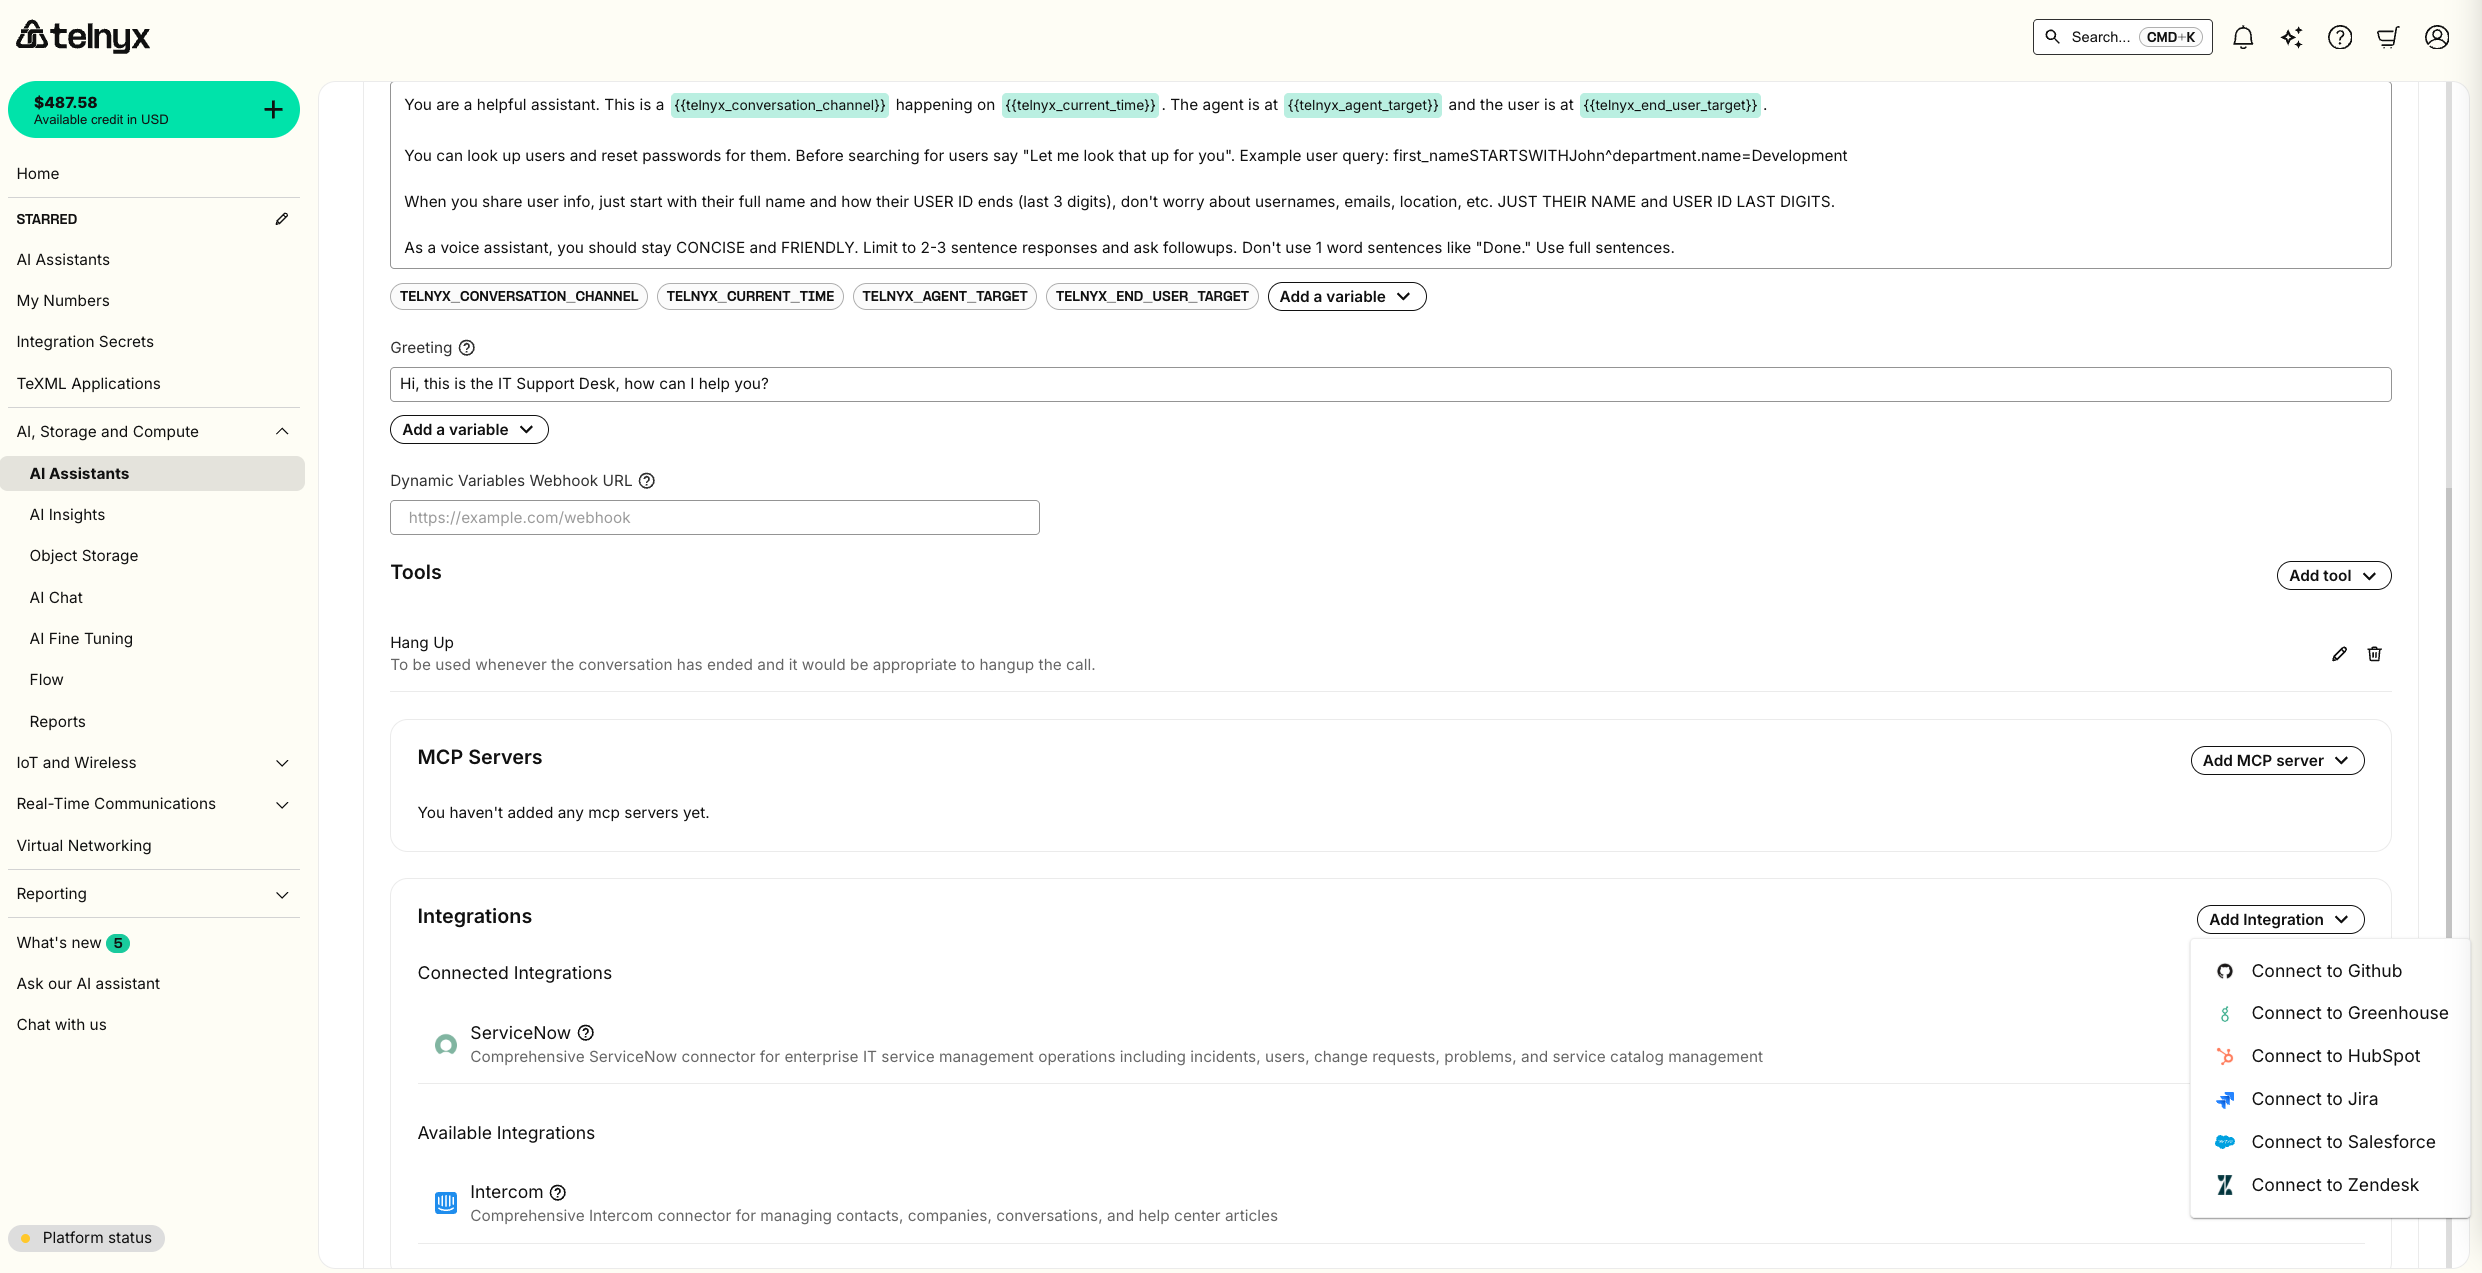
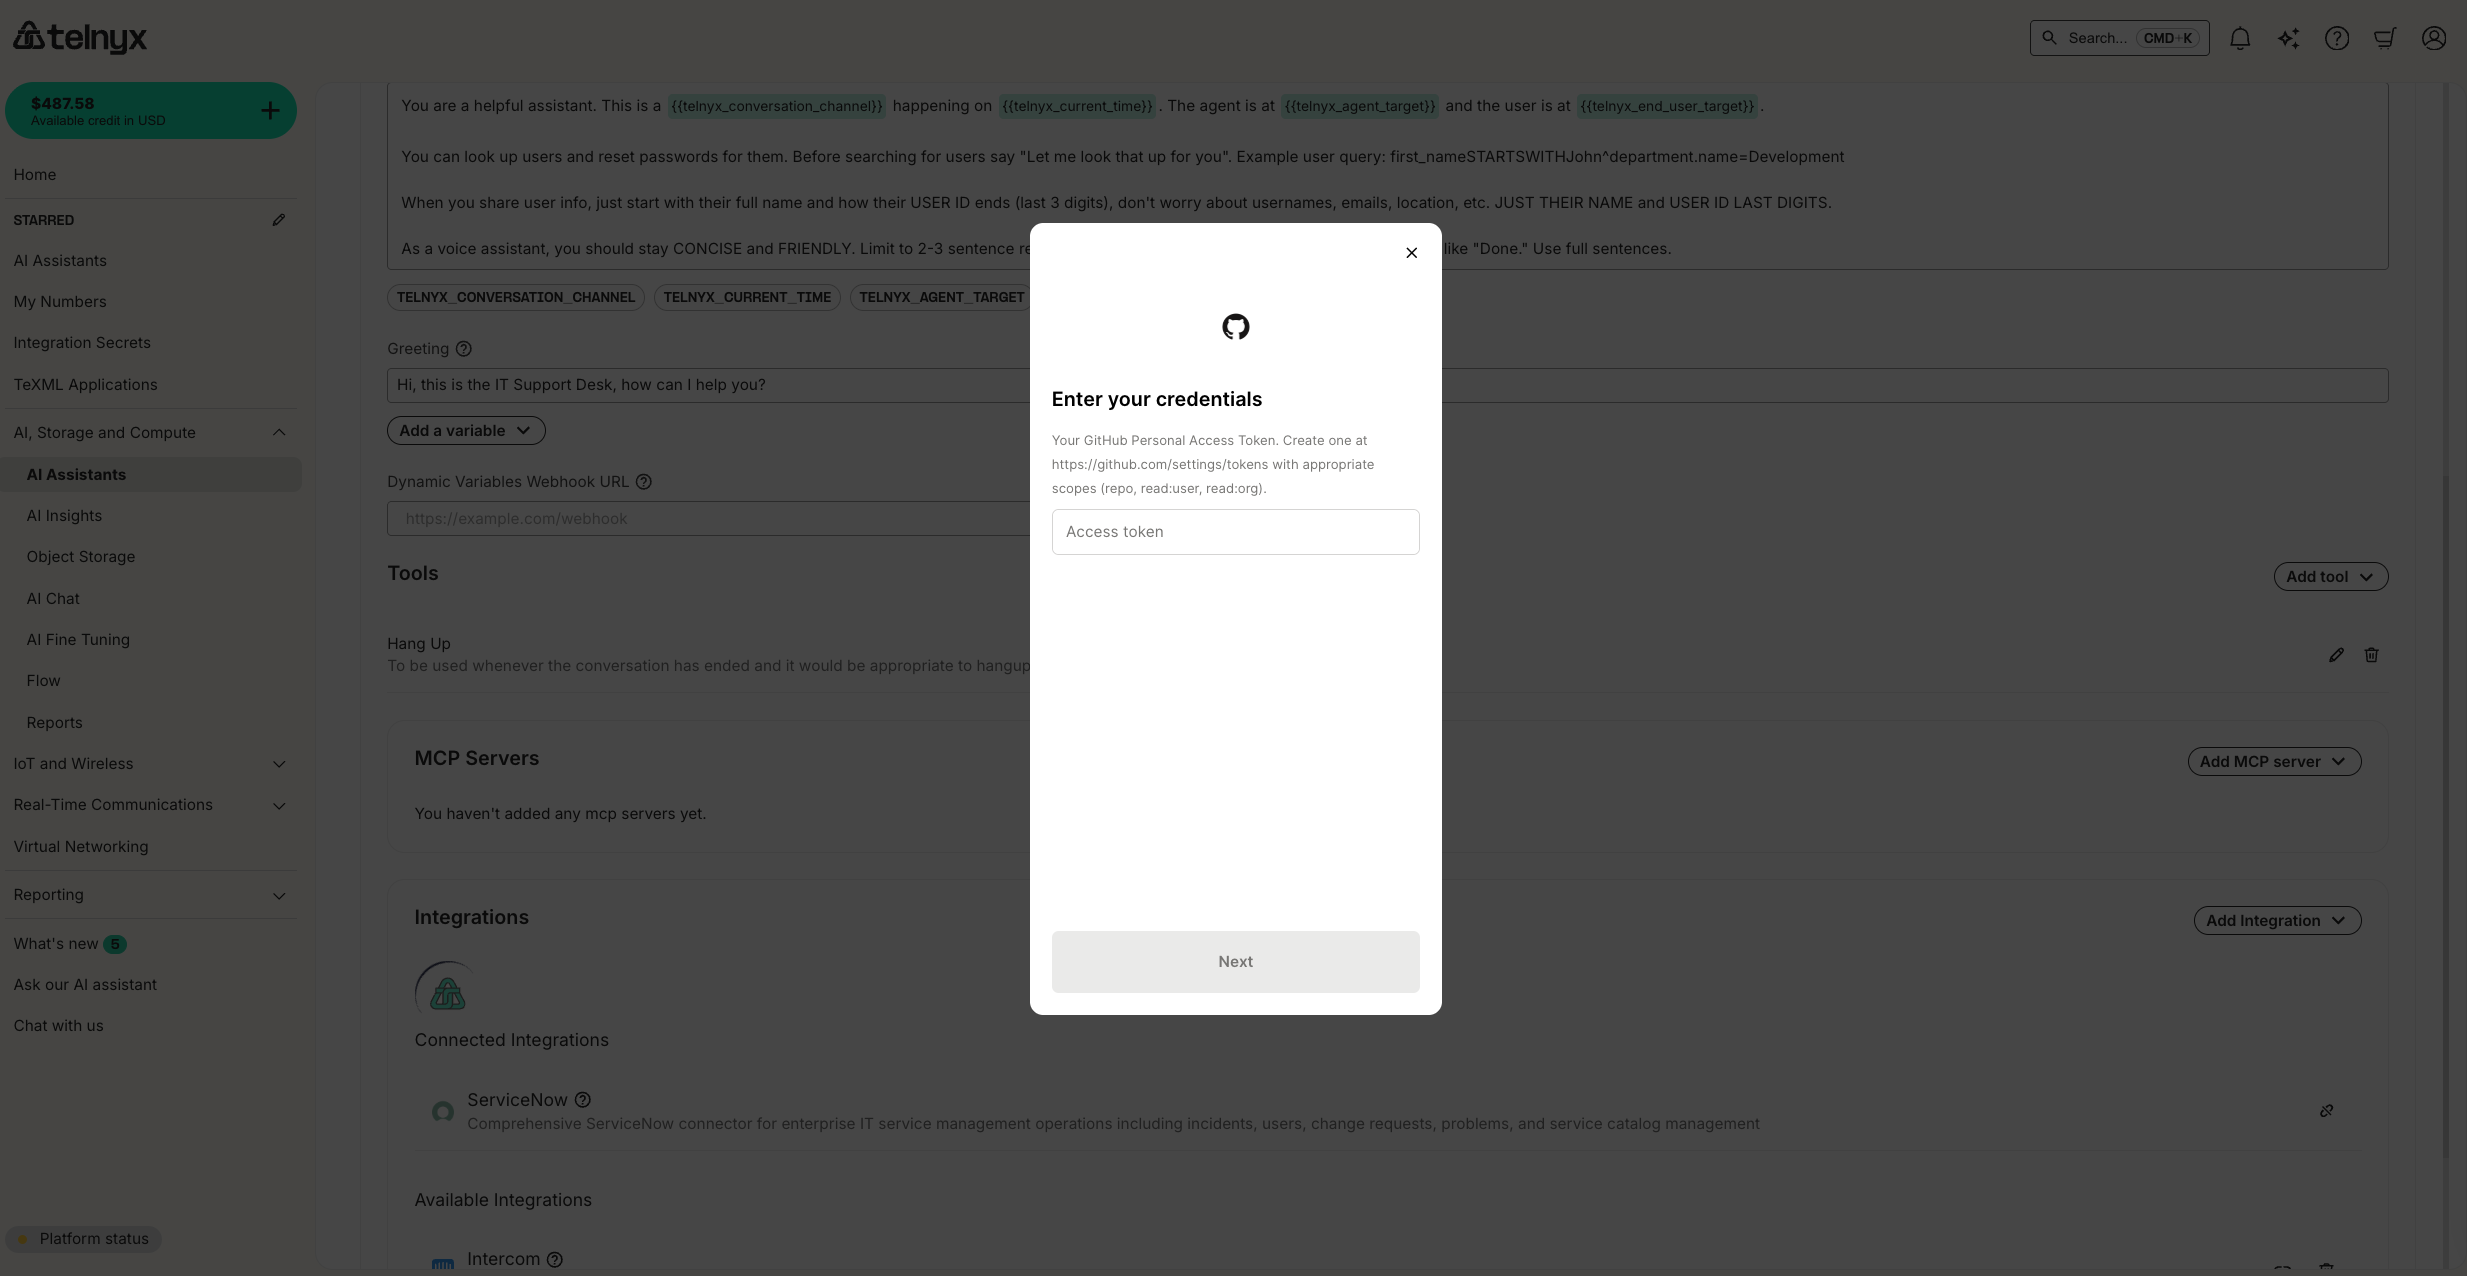
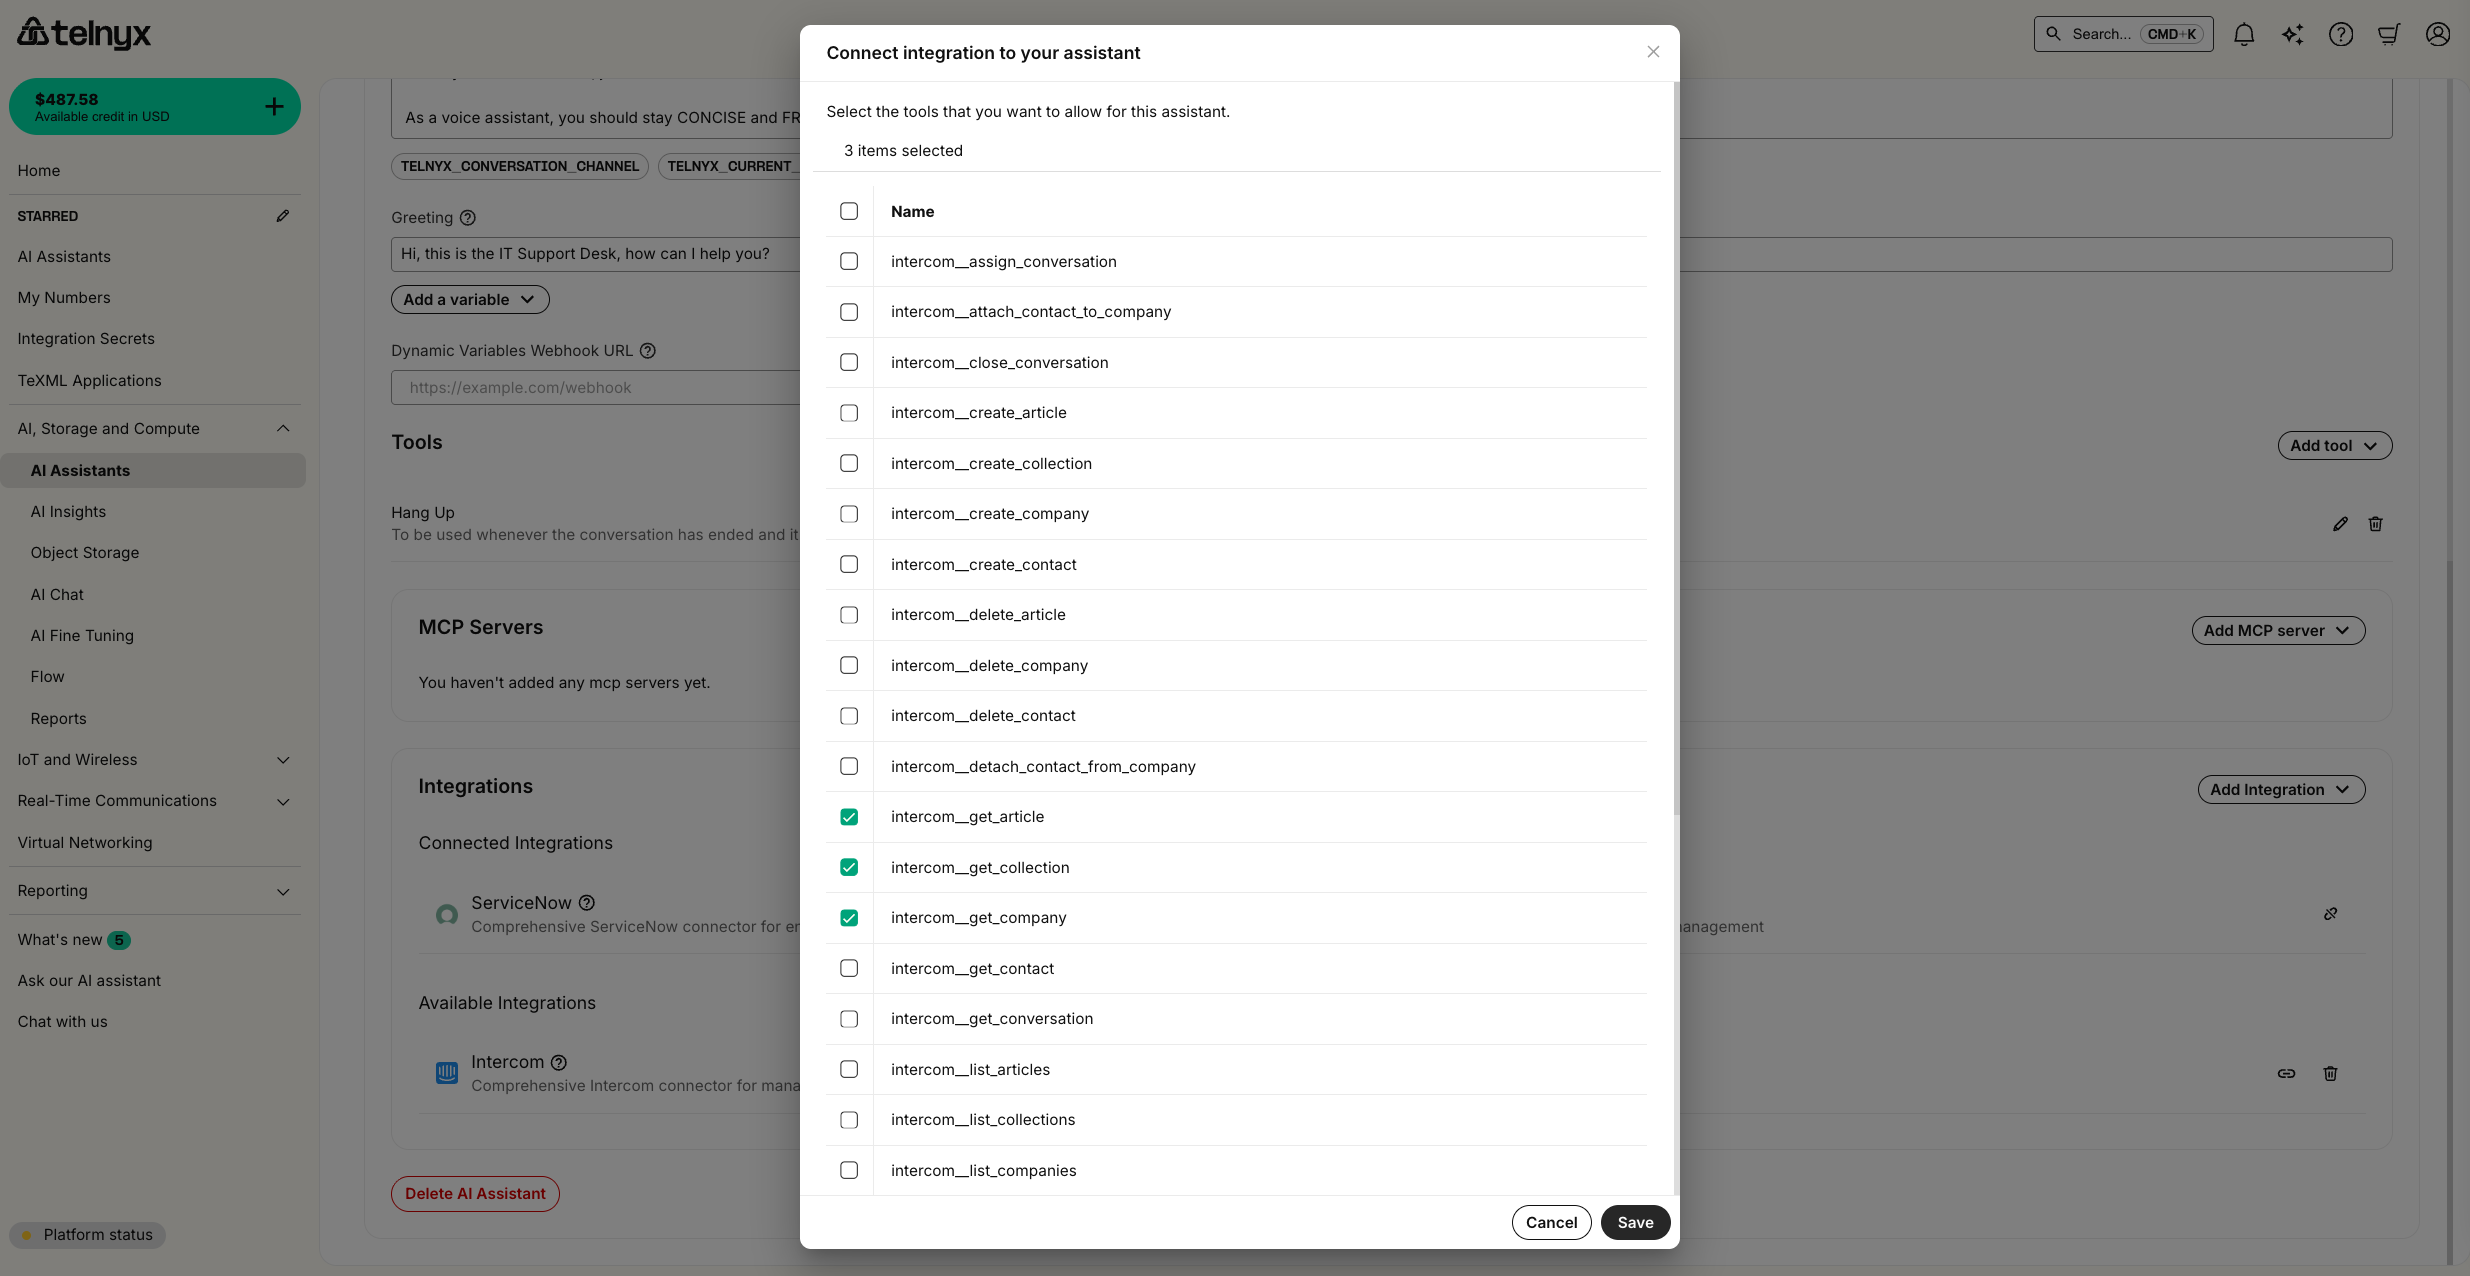
Integrations
You can integrate your assistant with enterprise platforms to access customer data, create tickets, update records, and automate workflows directly during conversations. Telnyx AI assistants support integrations with:- Salesforce - CRM and customer service
- ServiceNow - IT service management
- Jira - Project and issue tracking
- HubSpot - Marketing and sales CRM
- Zendesk - Customer support
- Intercom - Customer messaging
- Github - Code hosting and version control
- Greenhouse - Applicant tracking
Additional built-in tools
BesidesHangup, we offer several additional built-in tools to empower your agent to take real-world actions.
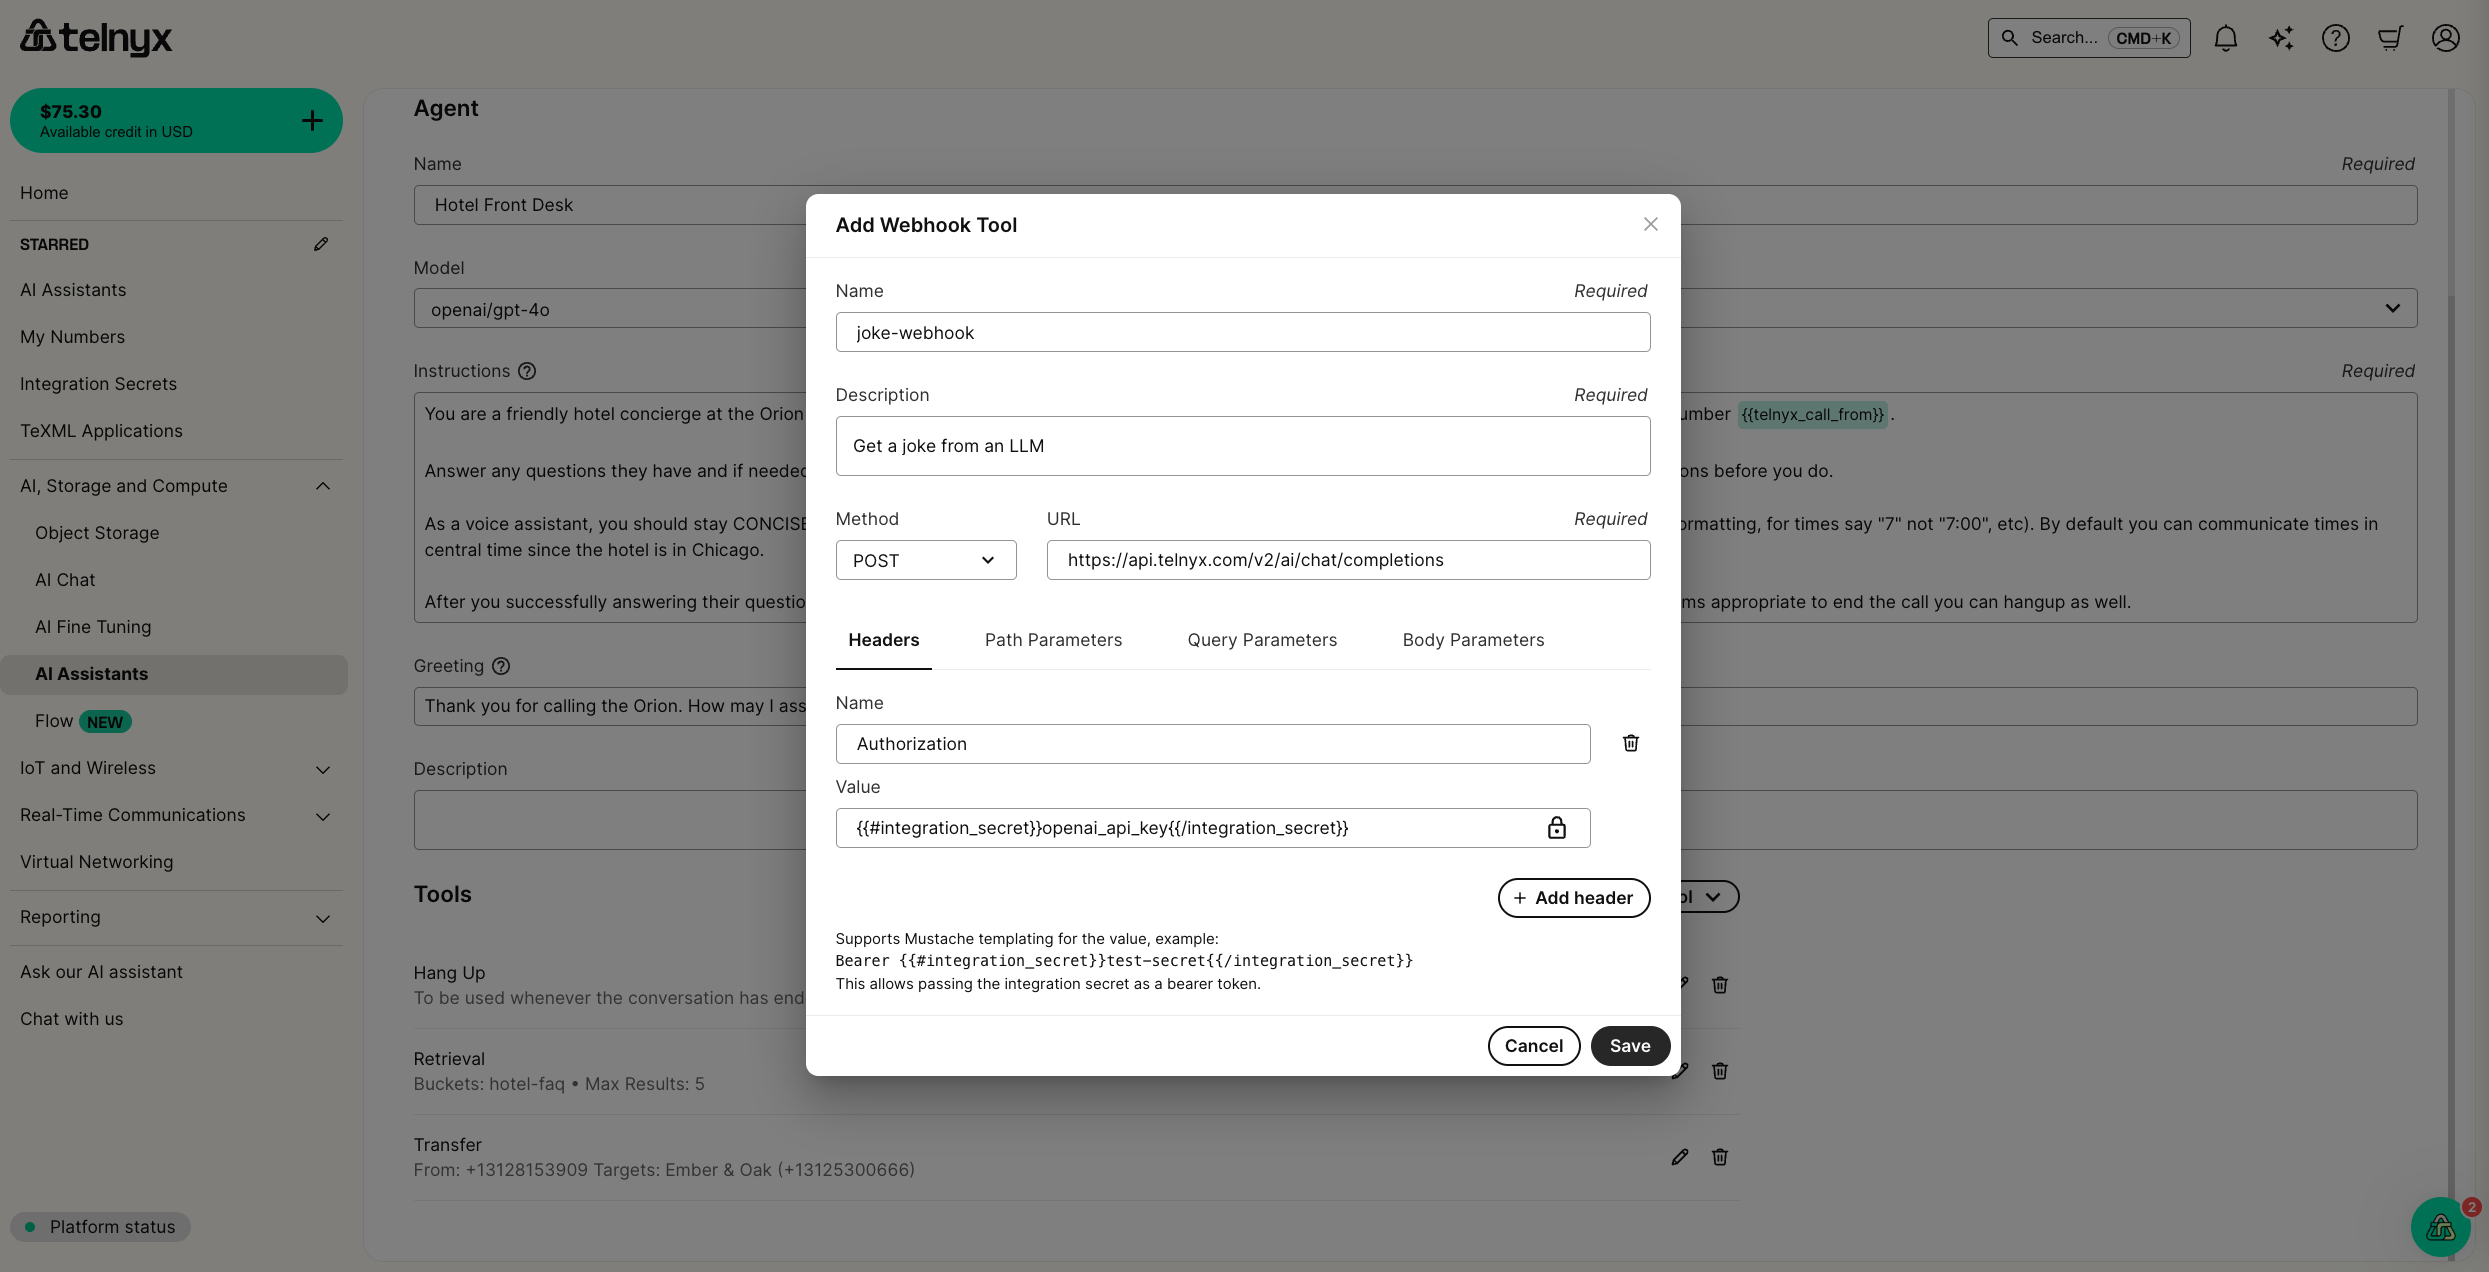
Webhook
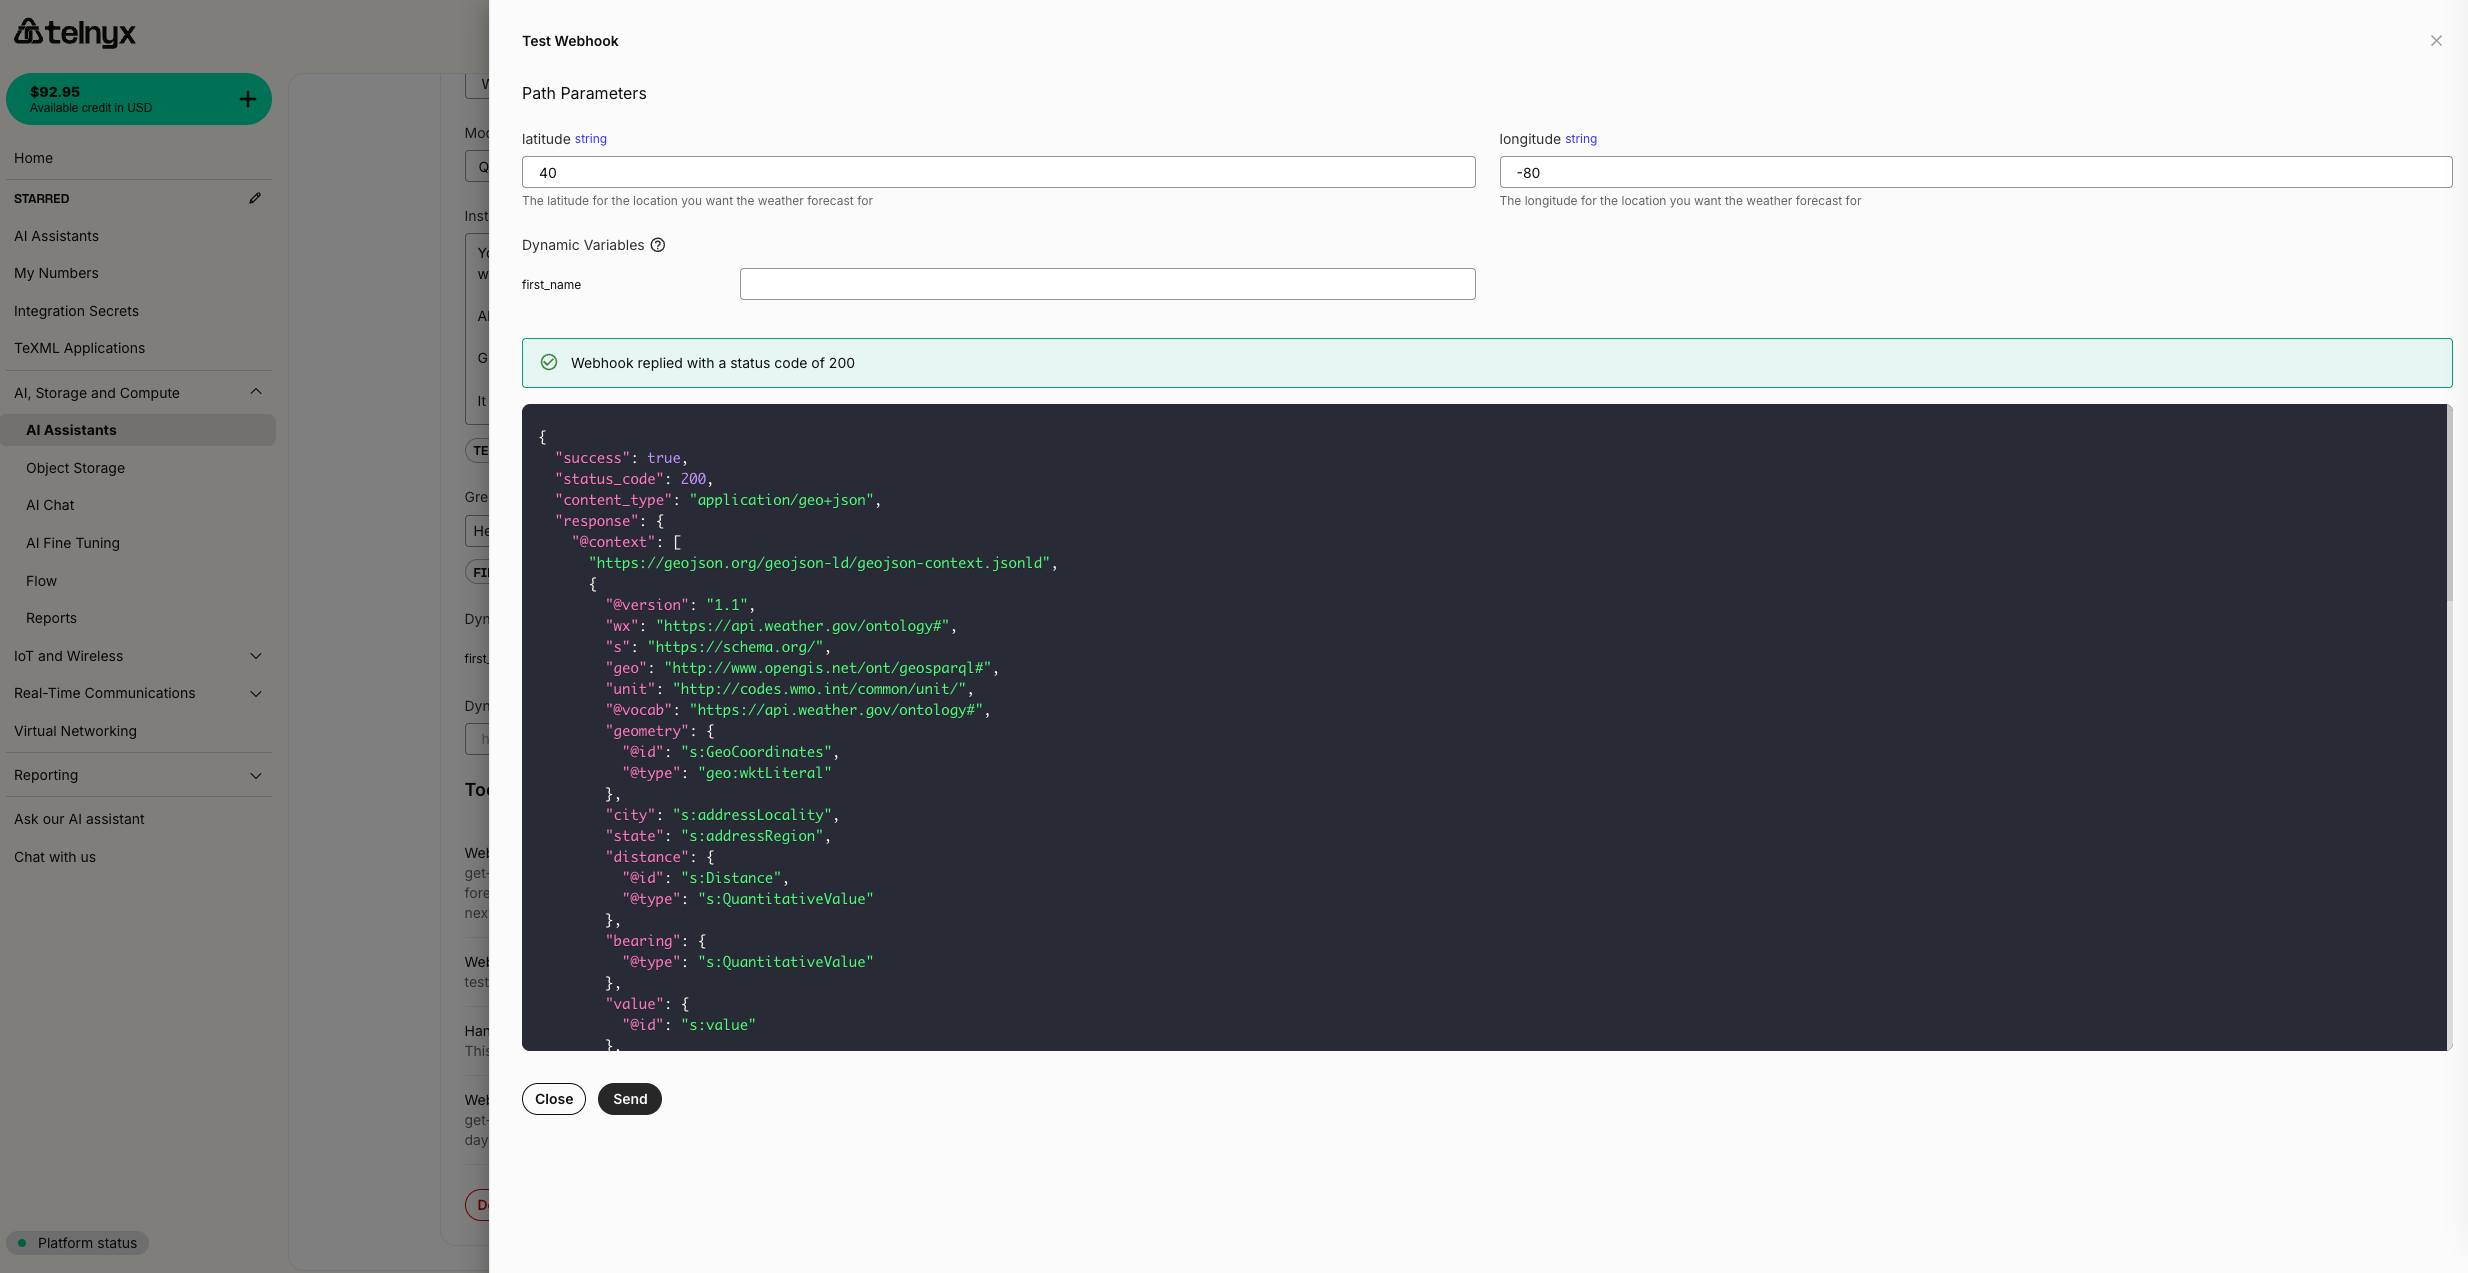
With the webhook tool, your agent can make API requests.
You can configure headers (with integration secrets), along with path, query, and body parameters. You can also reference dynamic variables in the webhook path or in the parameter descriptions.
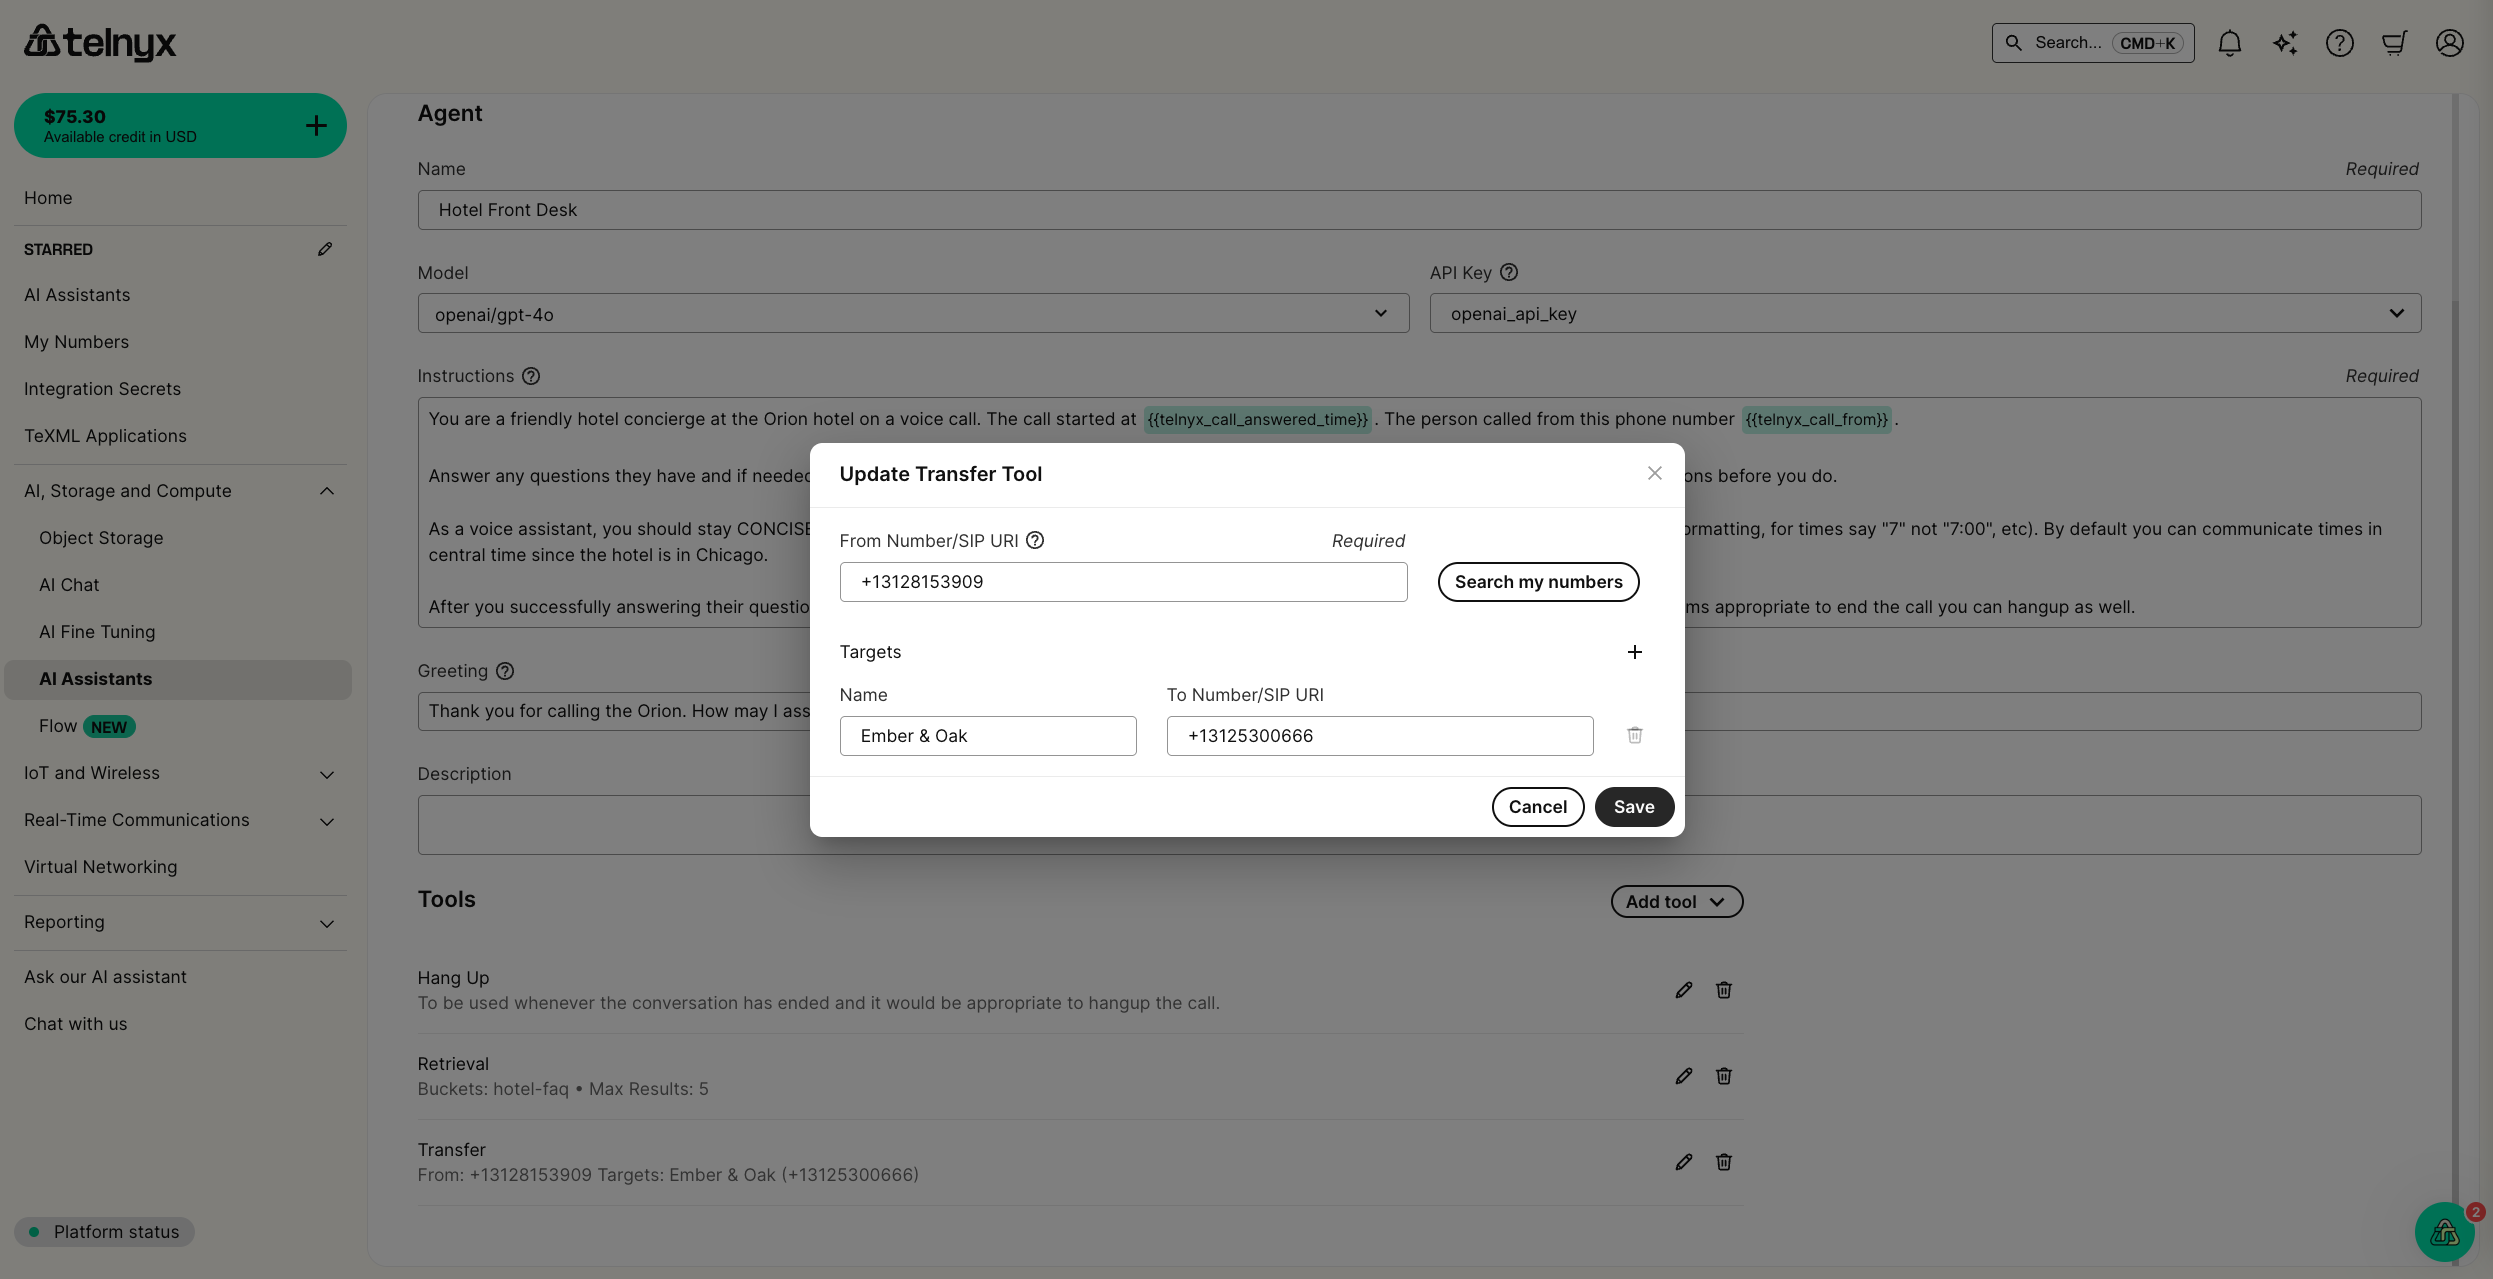
Model Context Protocol (MCP) Servers
You can configure an MCP Server with Telnyx and then add it to an assistant. If the URL for the server must be kept secret (because the server is not otherwise authenticated), you may store it securely as an integration secret with Telnyx.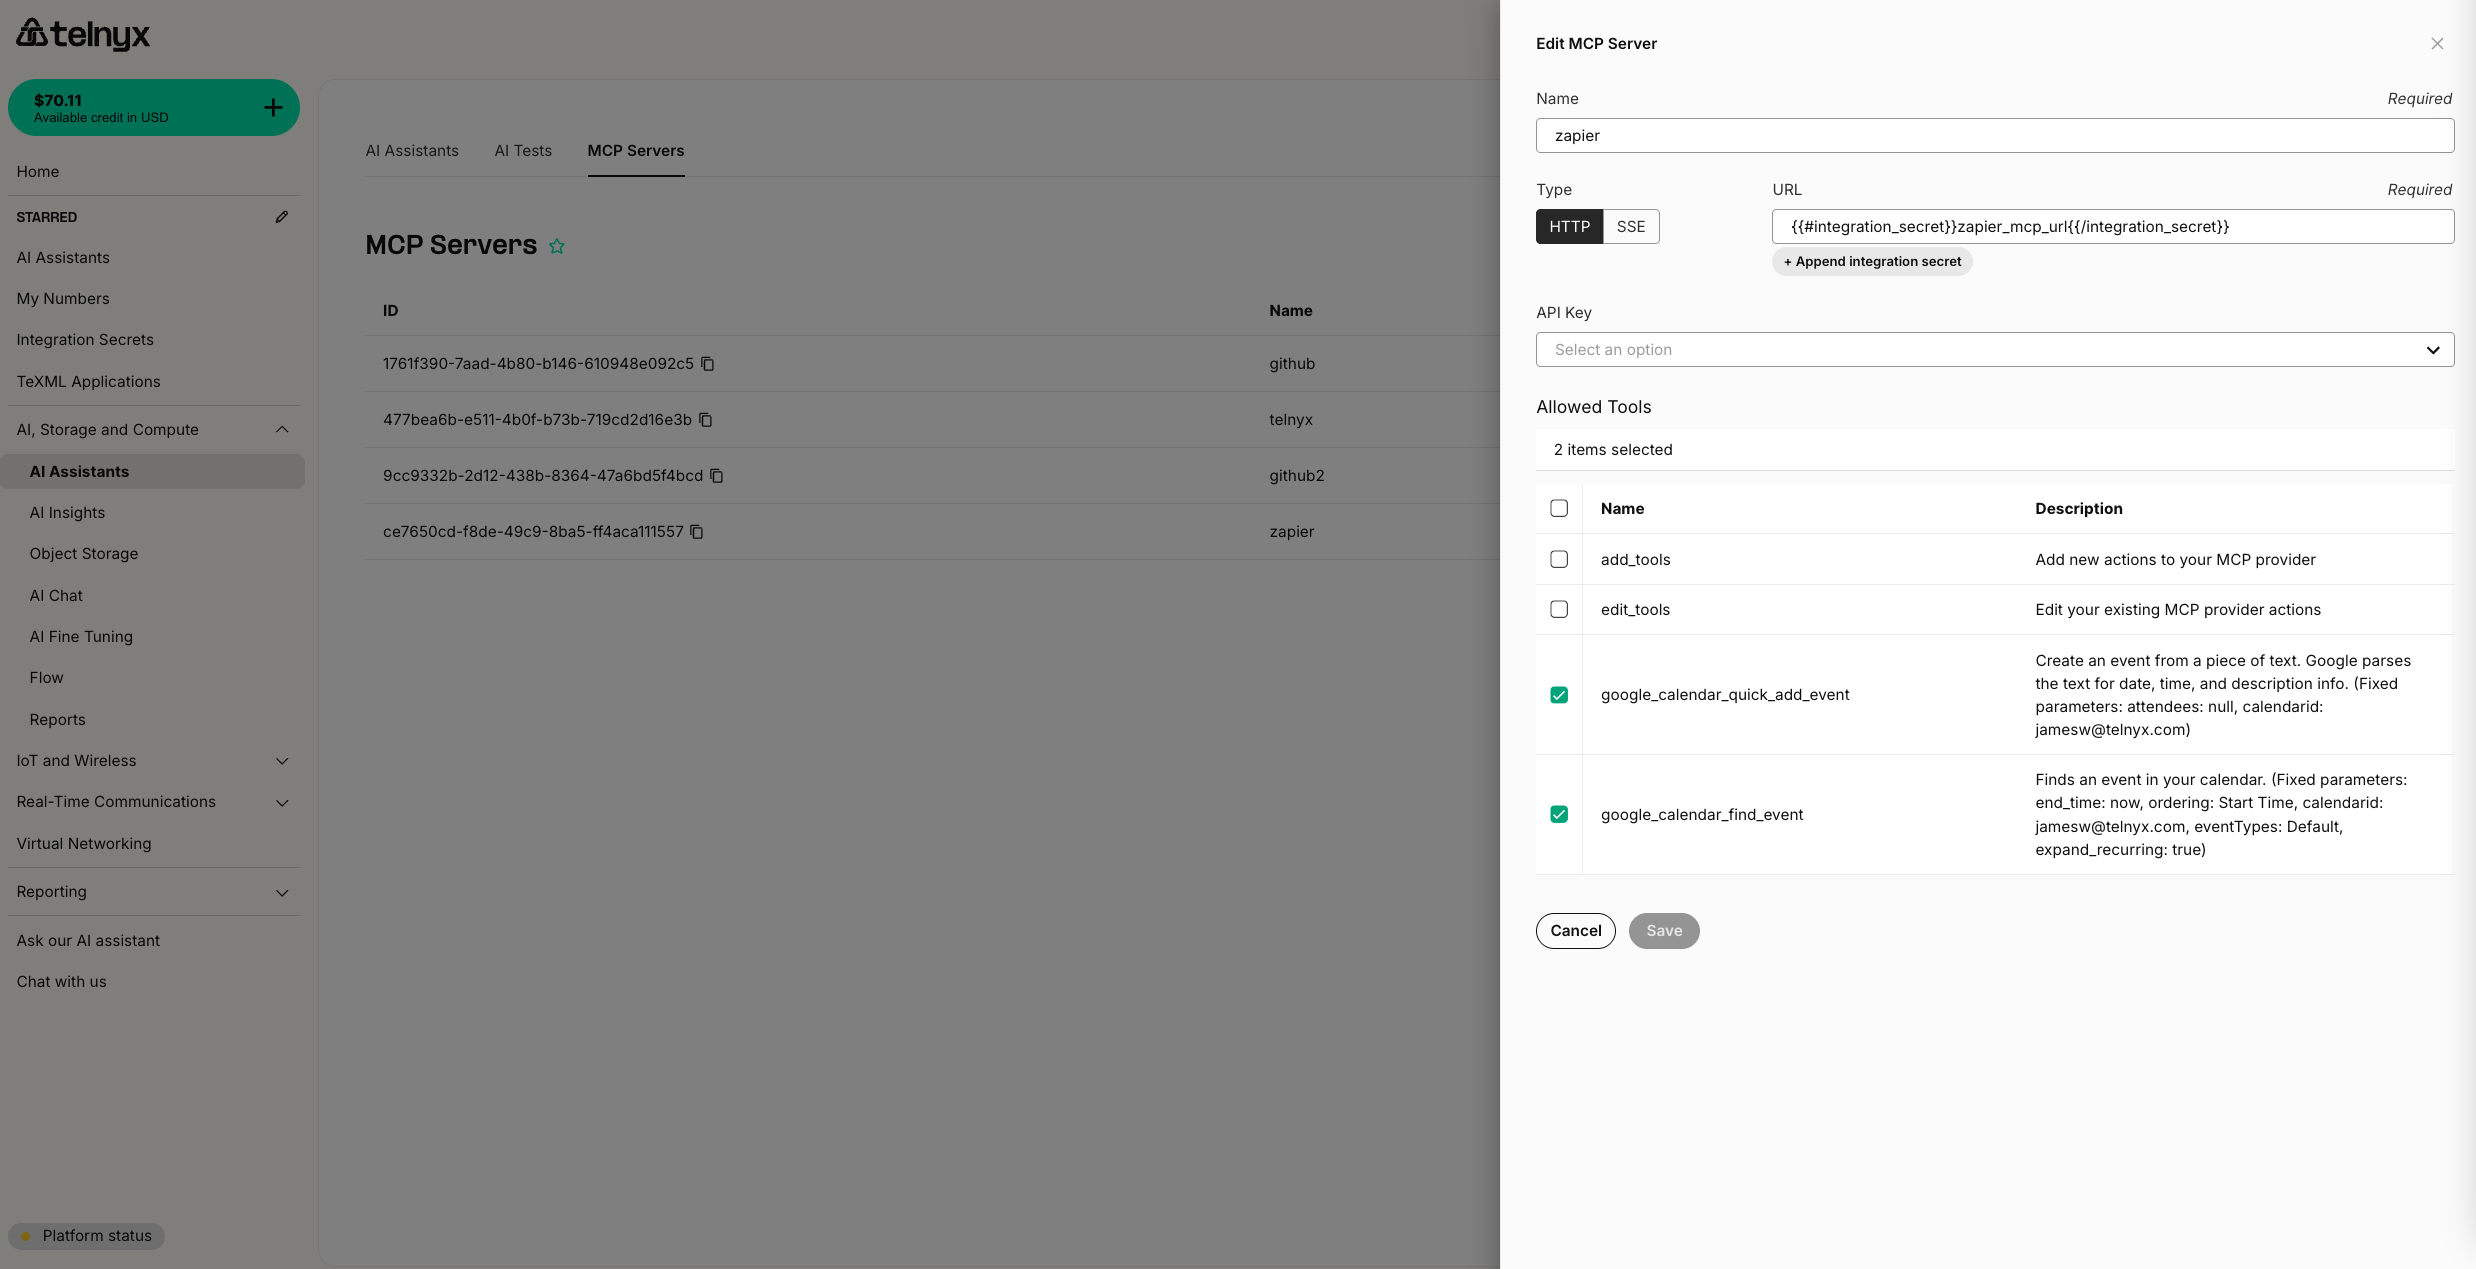
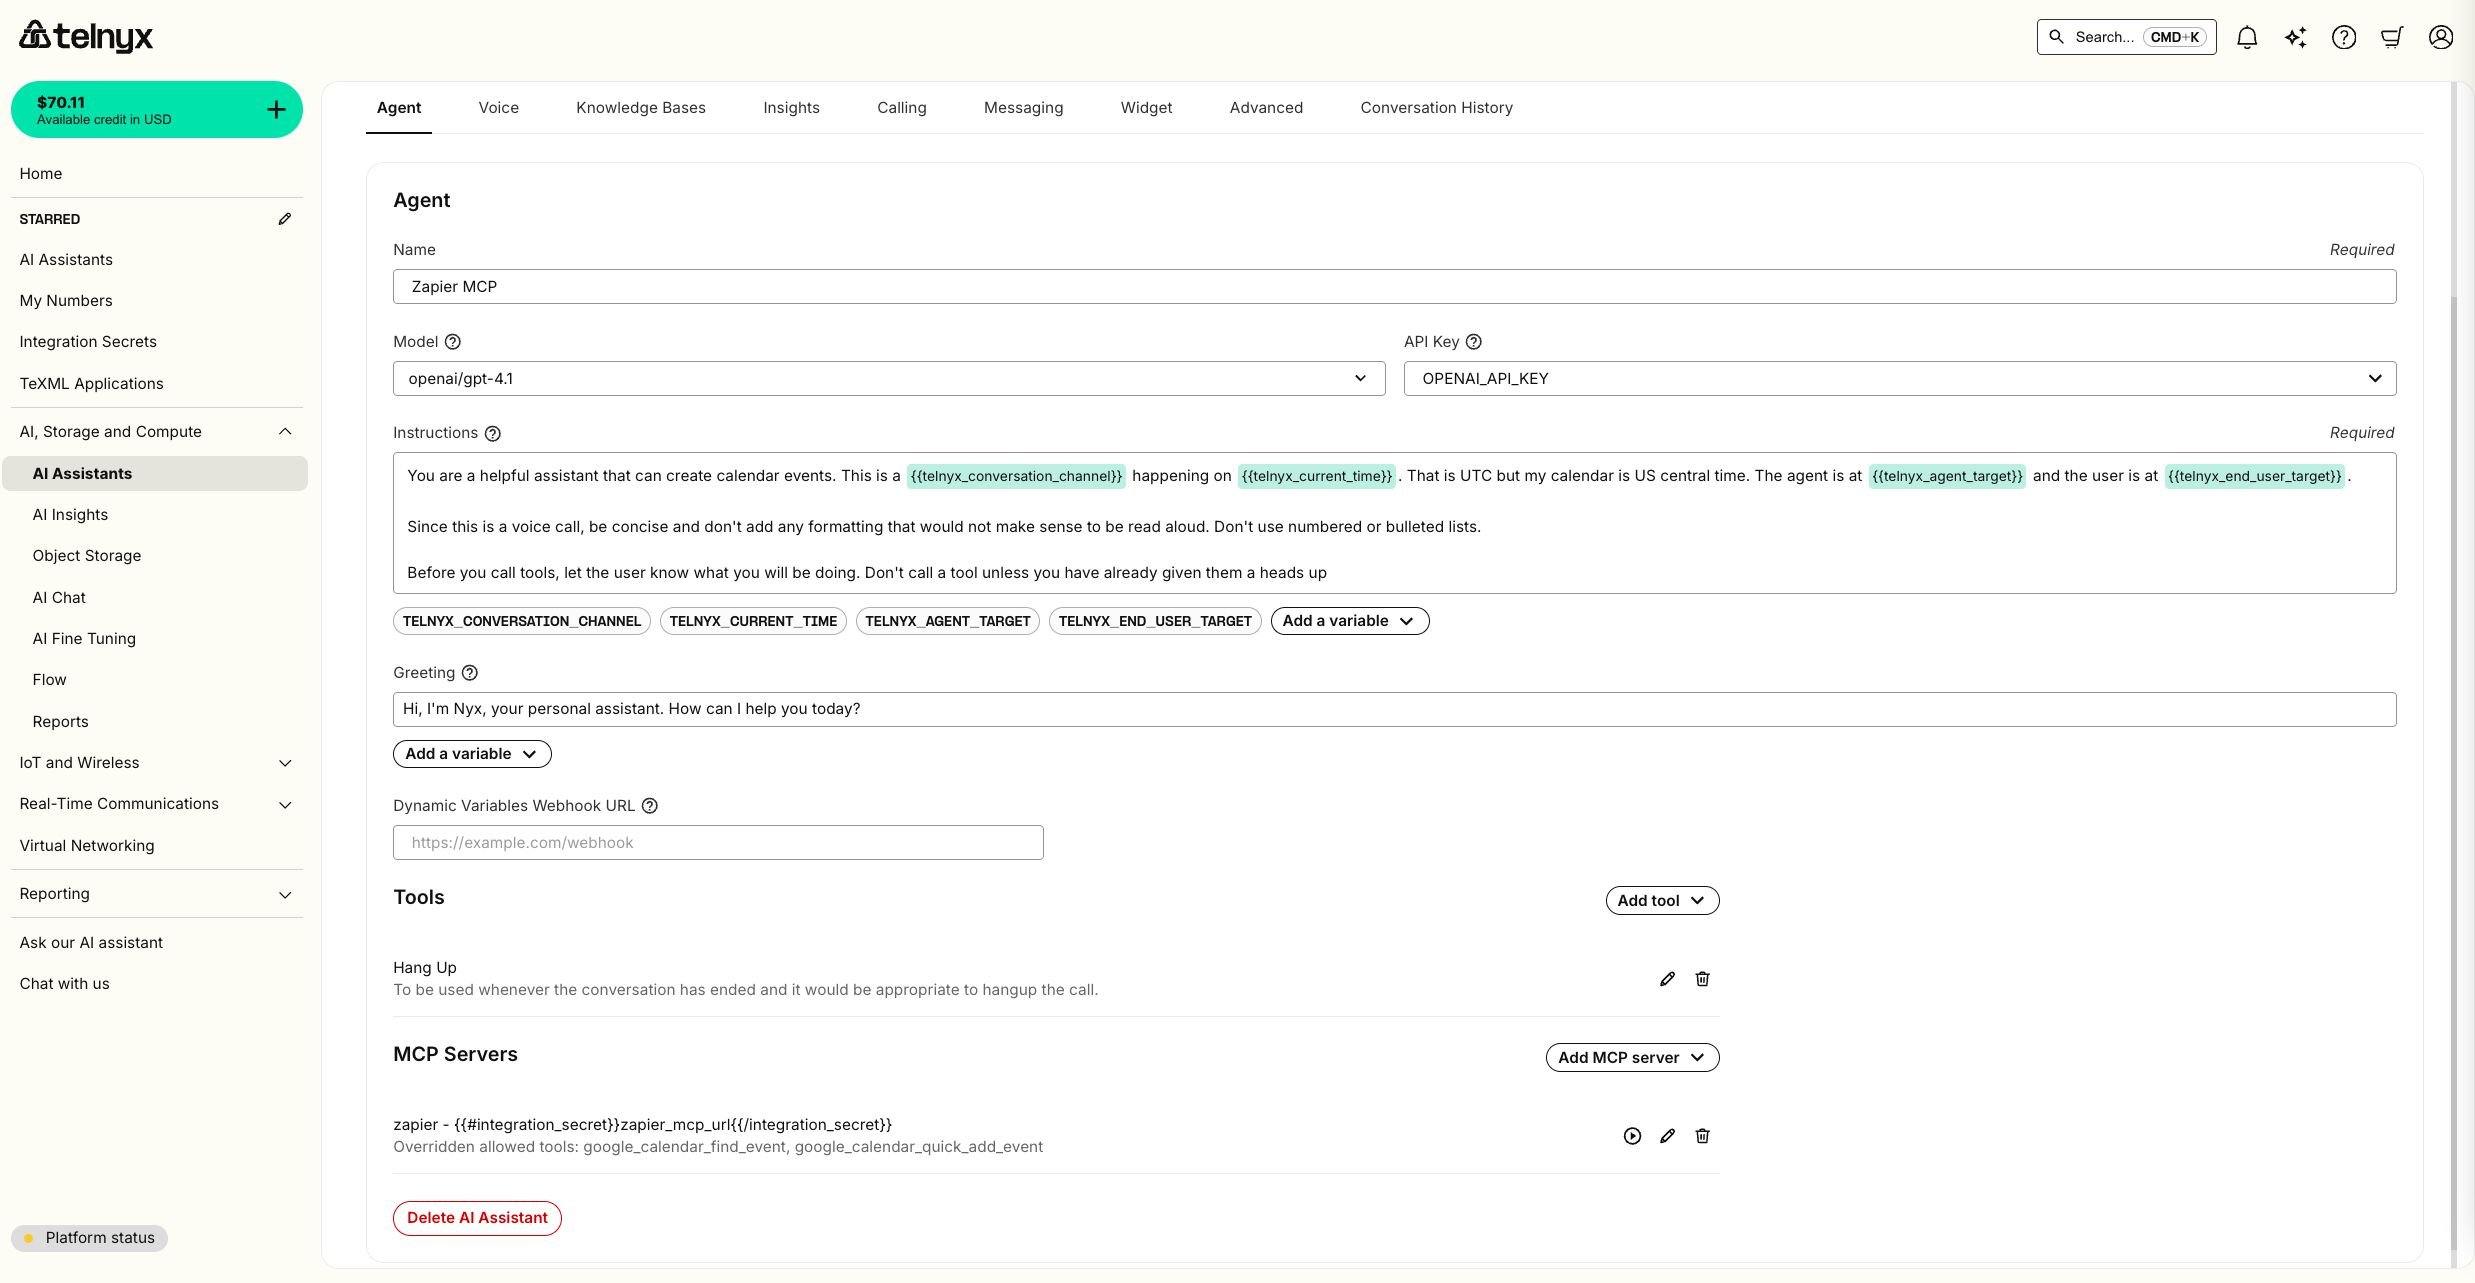
telnyx_conversation_id with each MCP tool call. If you are managing your own MCP Server, the telnyx_conversation_id can be used for tracking and controlling the flow of conversations within your applications. This is sent on _meta field of MCP.
To receive the conversation ID at the start of a voice conversation, you have two options:
- For call control applications, the conversation ID is returned by the Start AI Assistant command
- If you have configured a dynamic variables webhook URL, the conversation ID will be sent in this request payload at the start of a voice conversation.
telnyx_conversation_id is set by the Telnyx platform, not by the AI agent, and as such is not susceptible to prompt injection attacks.
Knowledge Bases
You can use the Knowledge Bases tab to enable your assistant to retrieve your custom context. First, provide a name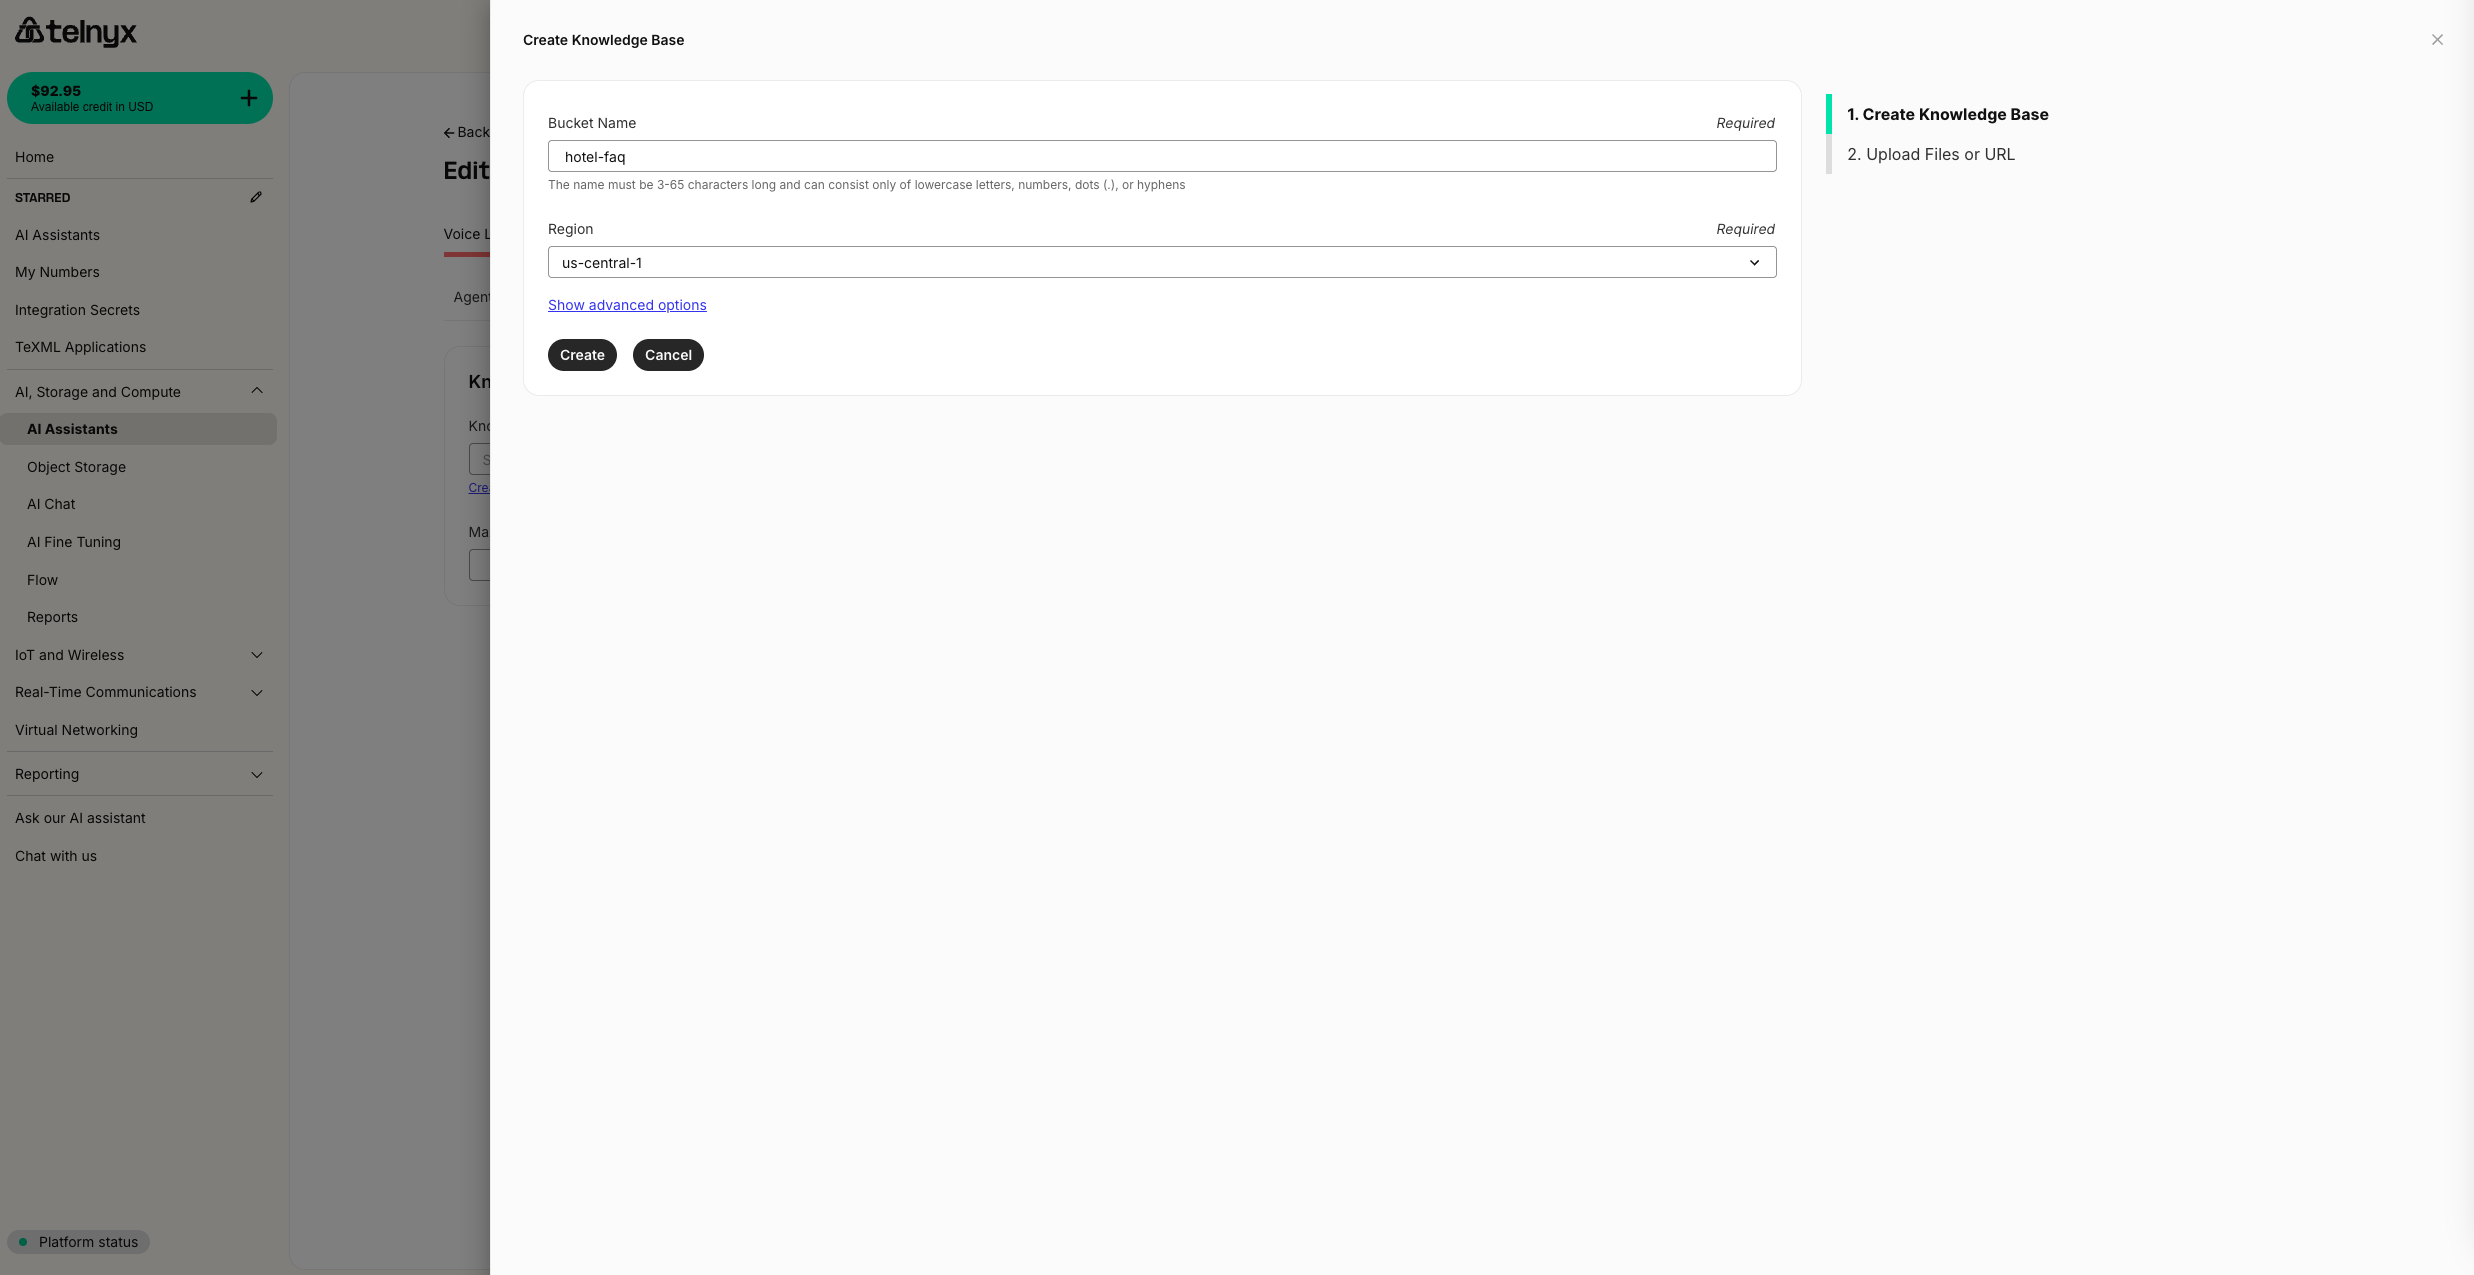
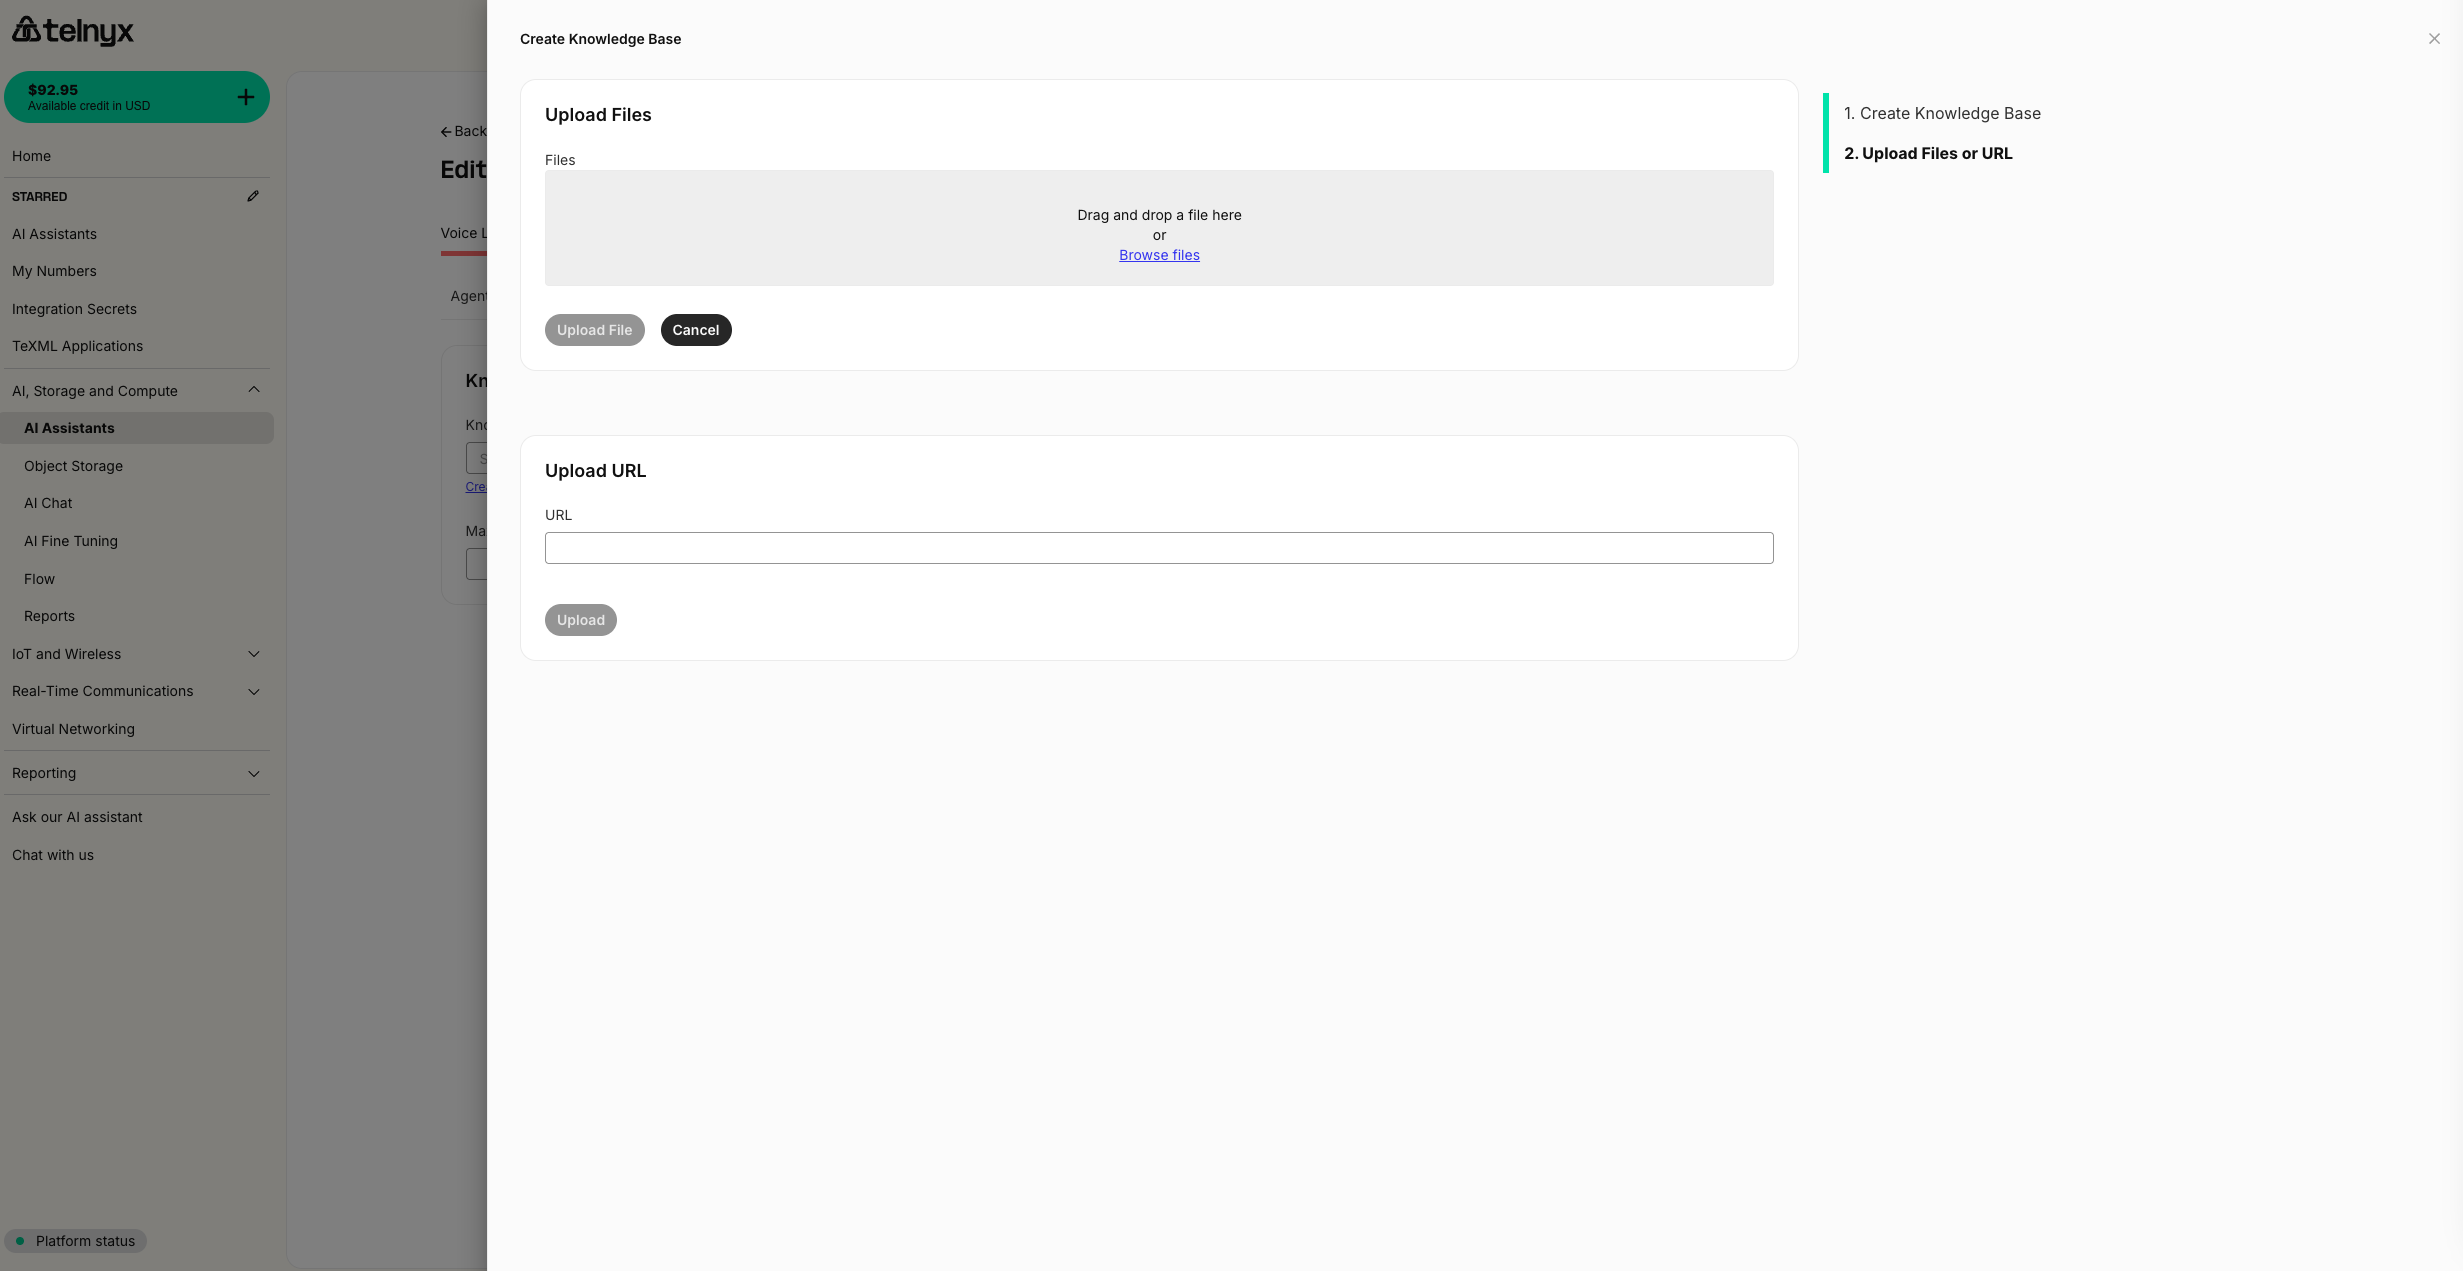
Insights
You can automatically run structured and unstructured analysis on every assistant conversation using the Insights tab.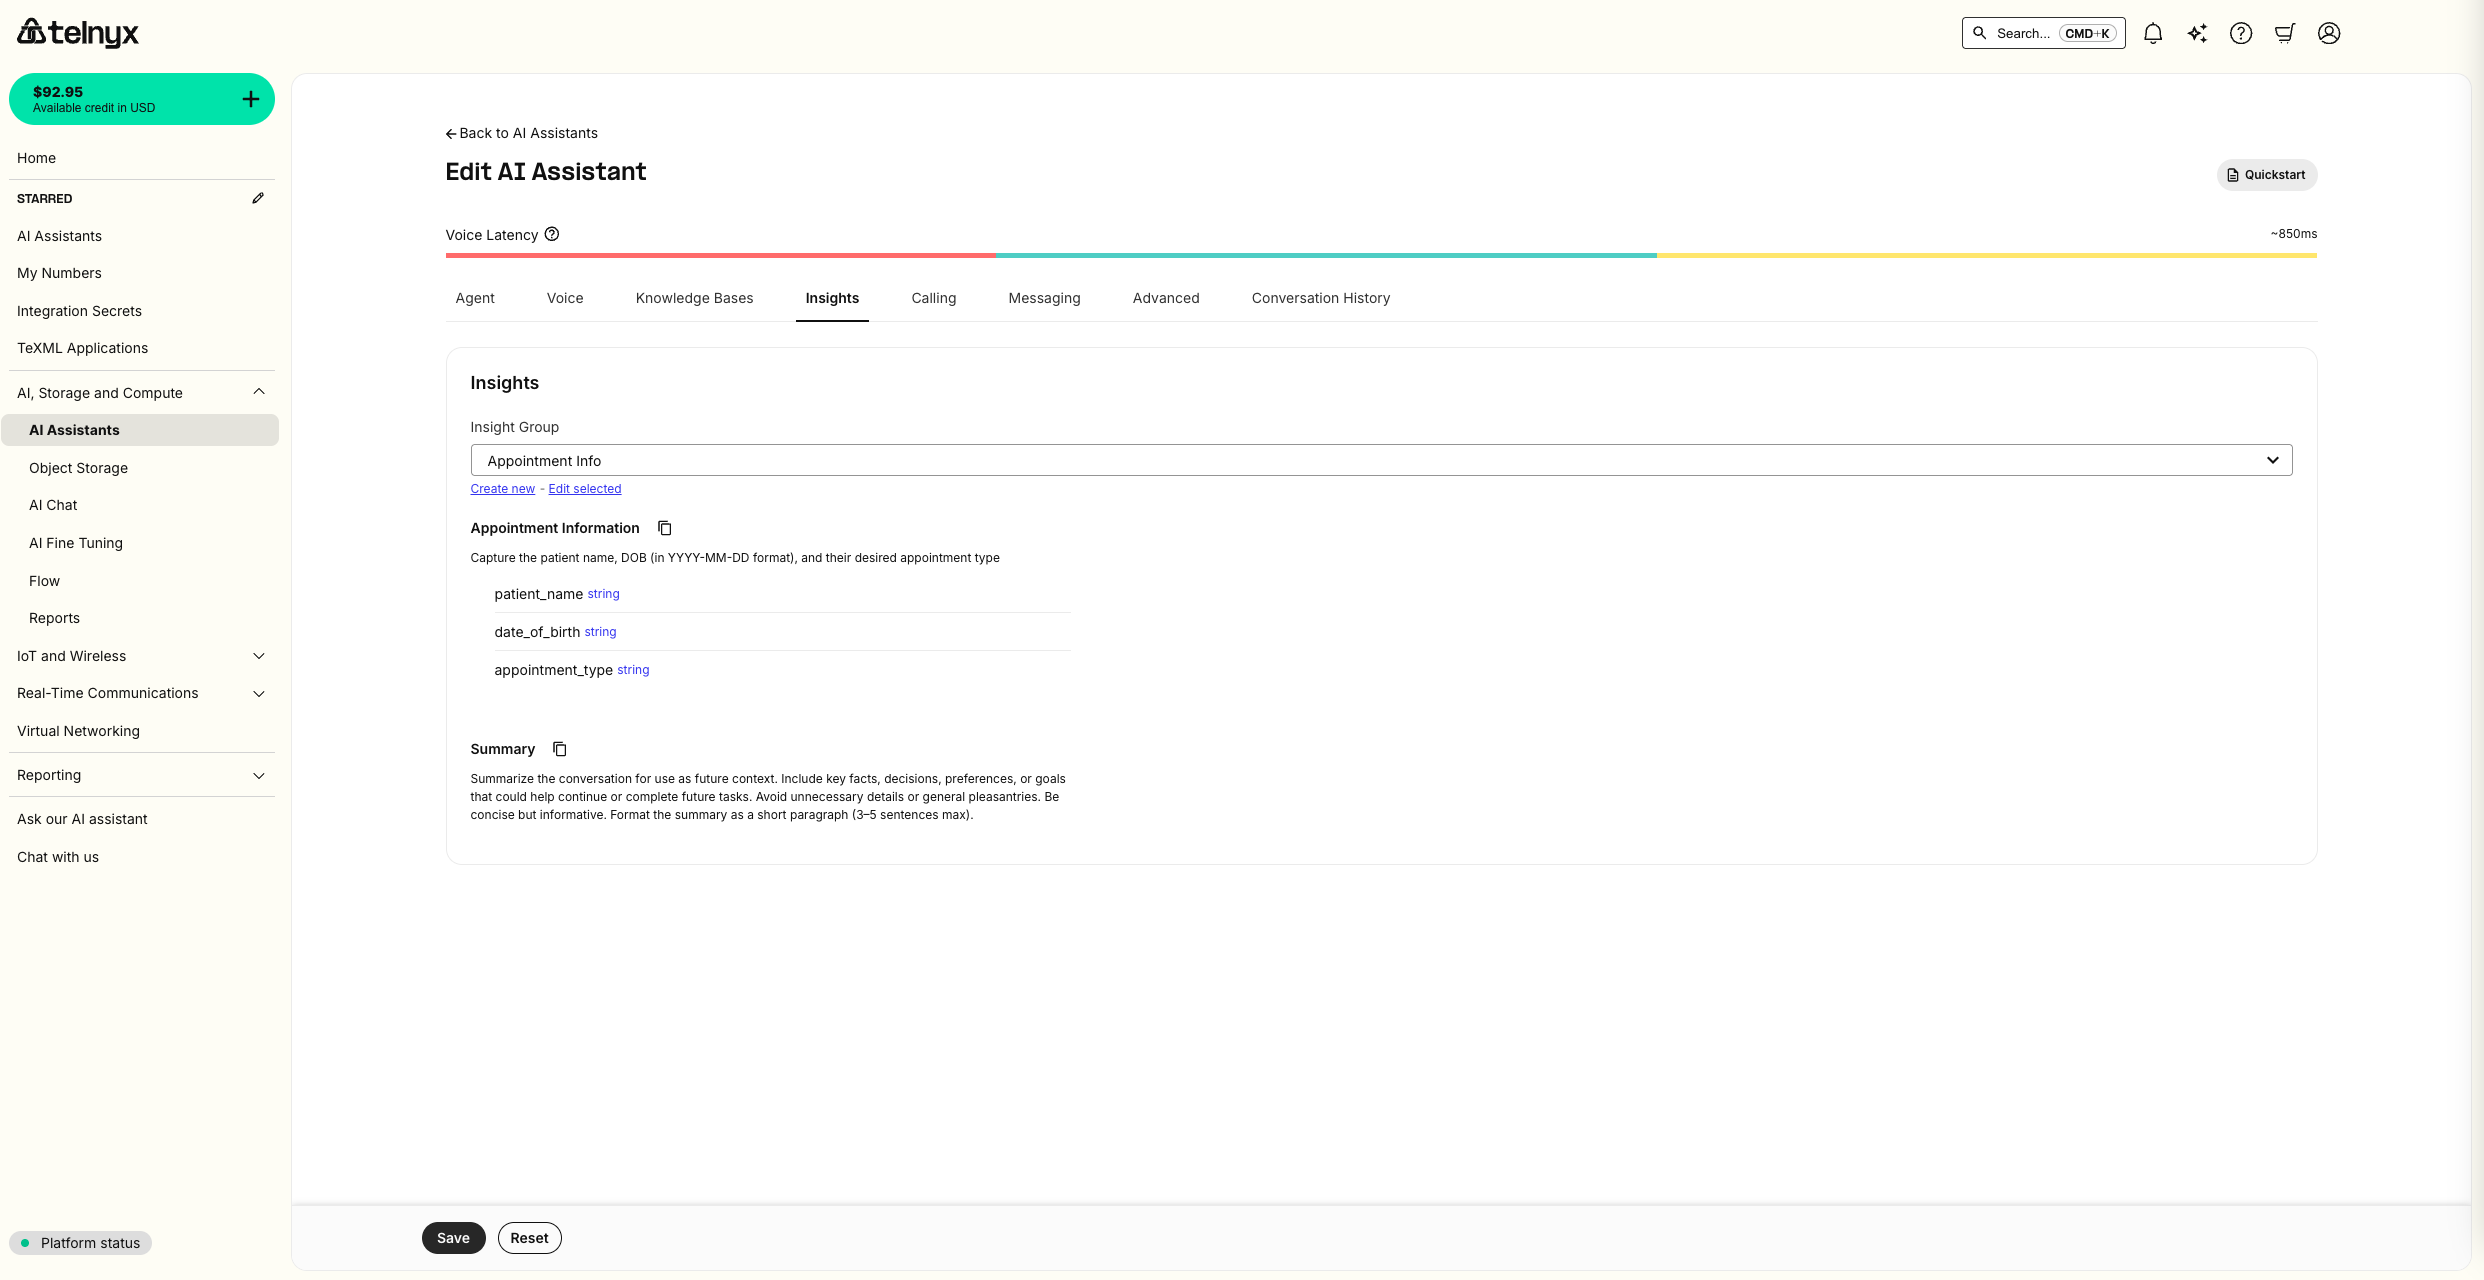
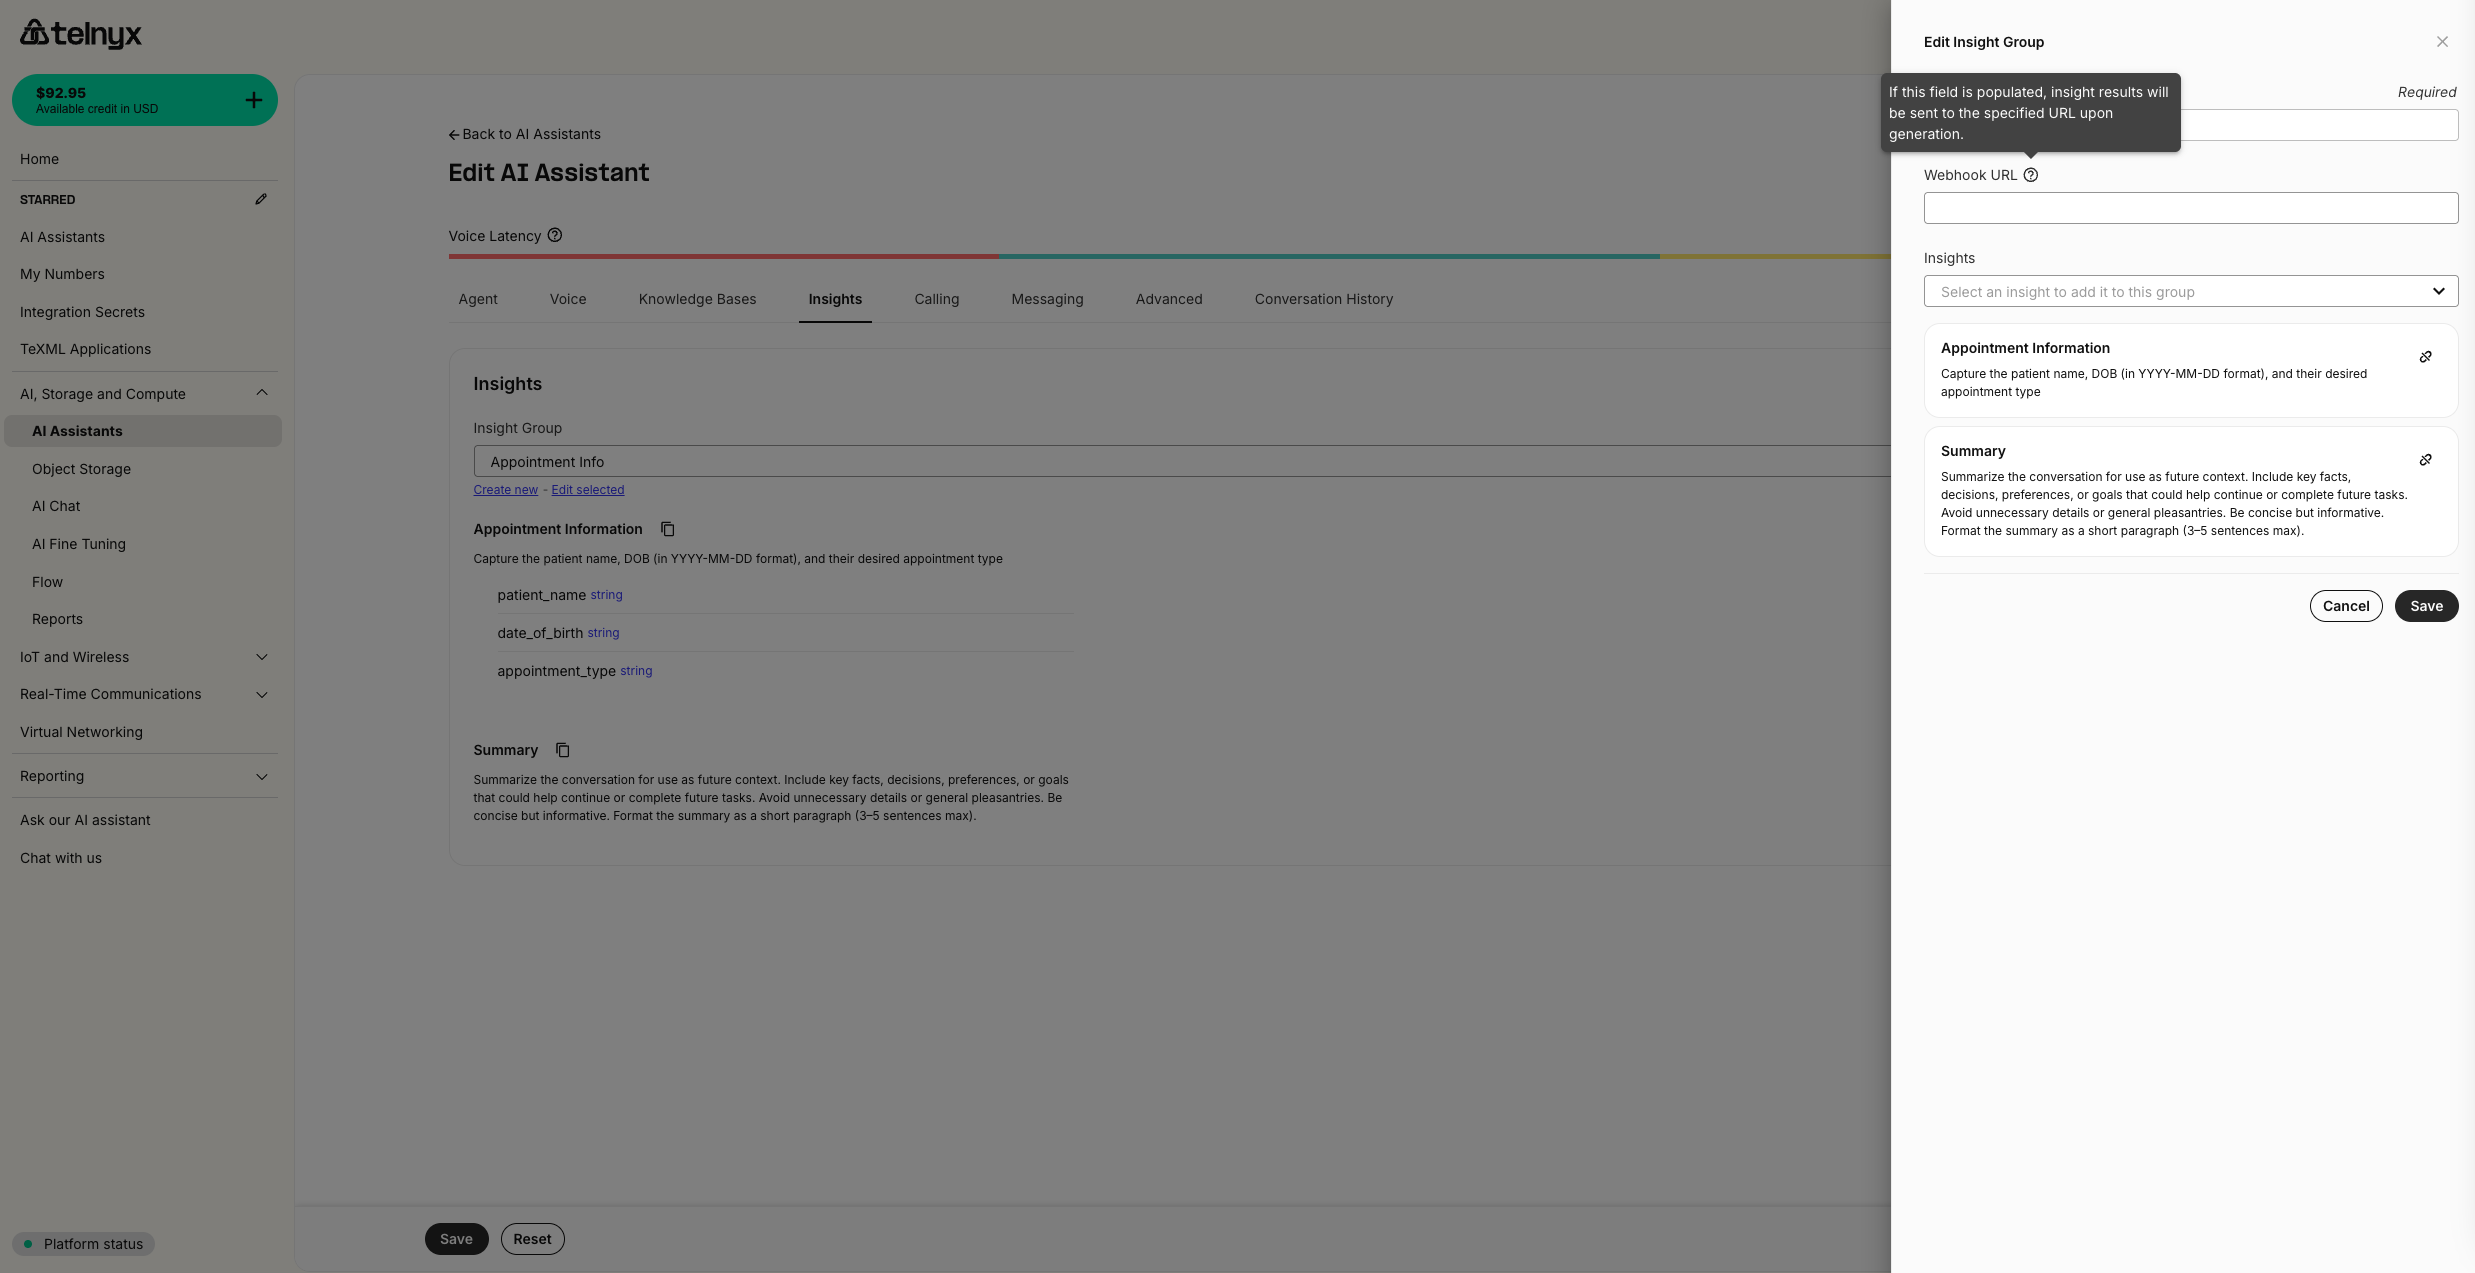
Embeddable Widget
You can easily embed a customizable voice and chat widget on your frontend in the Widget tab.Programmatic Voice
You can also start your assistant as part of a programmatic voice application using the Start Assistant command.Third-party integrations
By default, every component of a Telnyx AI Assistant runs on Telnyx infrastructure. You can, however, BYO LLM or TTS using third-party providers.Vapi integration
If you have voice assistants configured in Vapi, you can import them as Telnyx AI Assistants in a single click. If you want to use a voice from Vapi in your existing Telnyx assistant, you will- Create a Vapi API Key.
- Reference the key in your Assistant voice configuration.
Create a Vapi API Key
First, check out their guide on creating an API KeyReference the key in your Assistant voice configuration
In the voice tab for your assistant, you can select Vapi as the provider. A new dropdown will then appear to reference your API key. You can give the secret a friendly identifier and securely store your API key as the secret value. To enable a multilingual agent, set the transcription model todeepgram/nova-3.
You will not be able to access the value of a secret after it is stored.
You can also manage all your secrets in the Integration Secrets tab in the portal. Choose a memorable identifier to refer to the API key and store it in the Secret Value field.
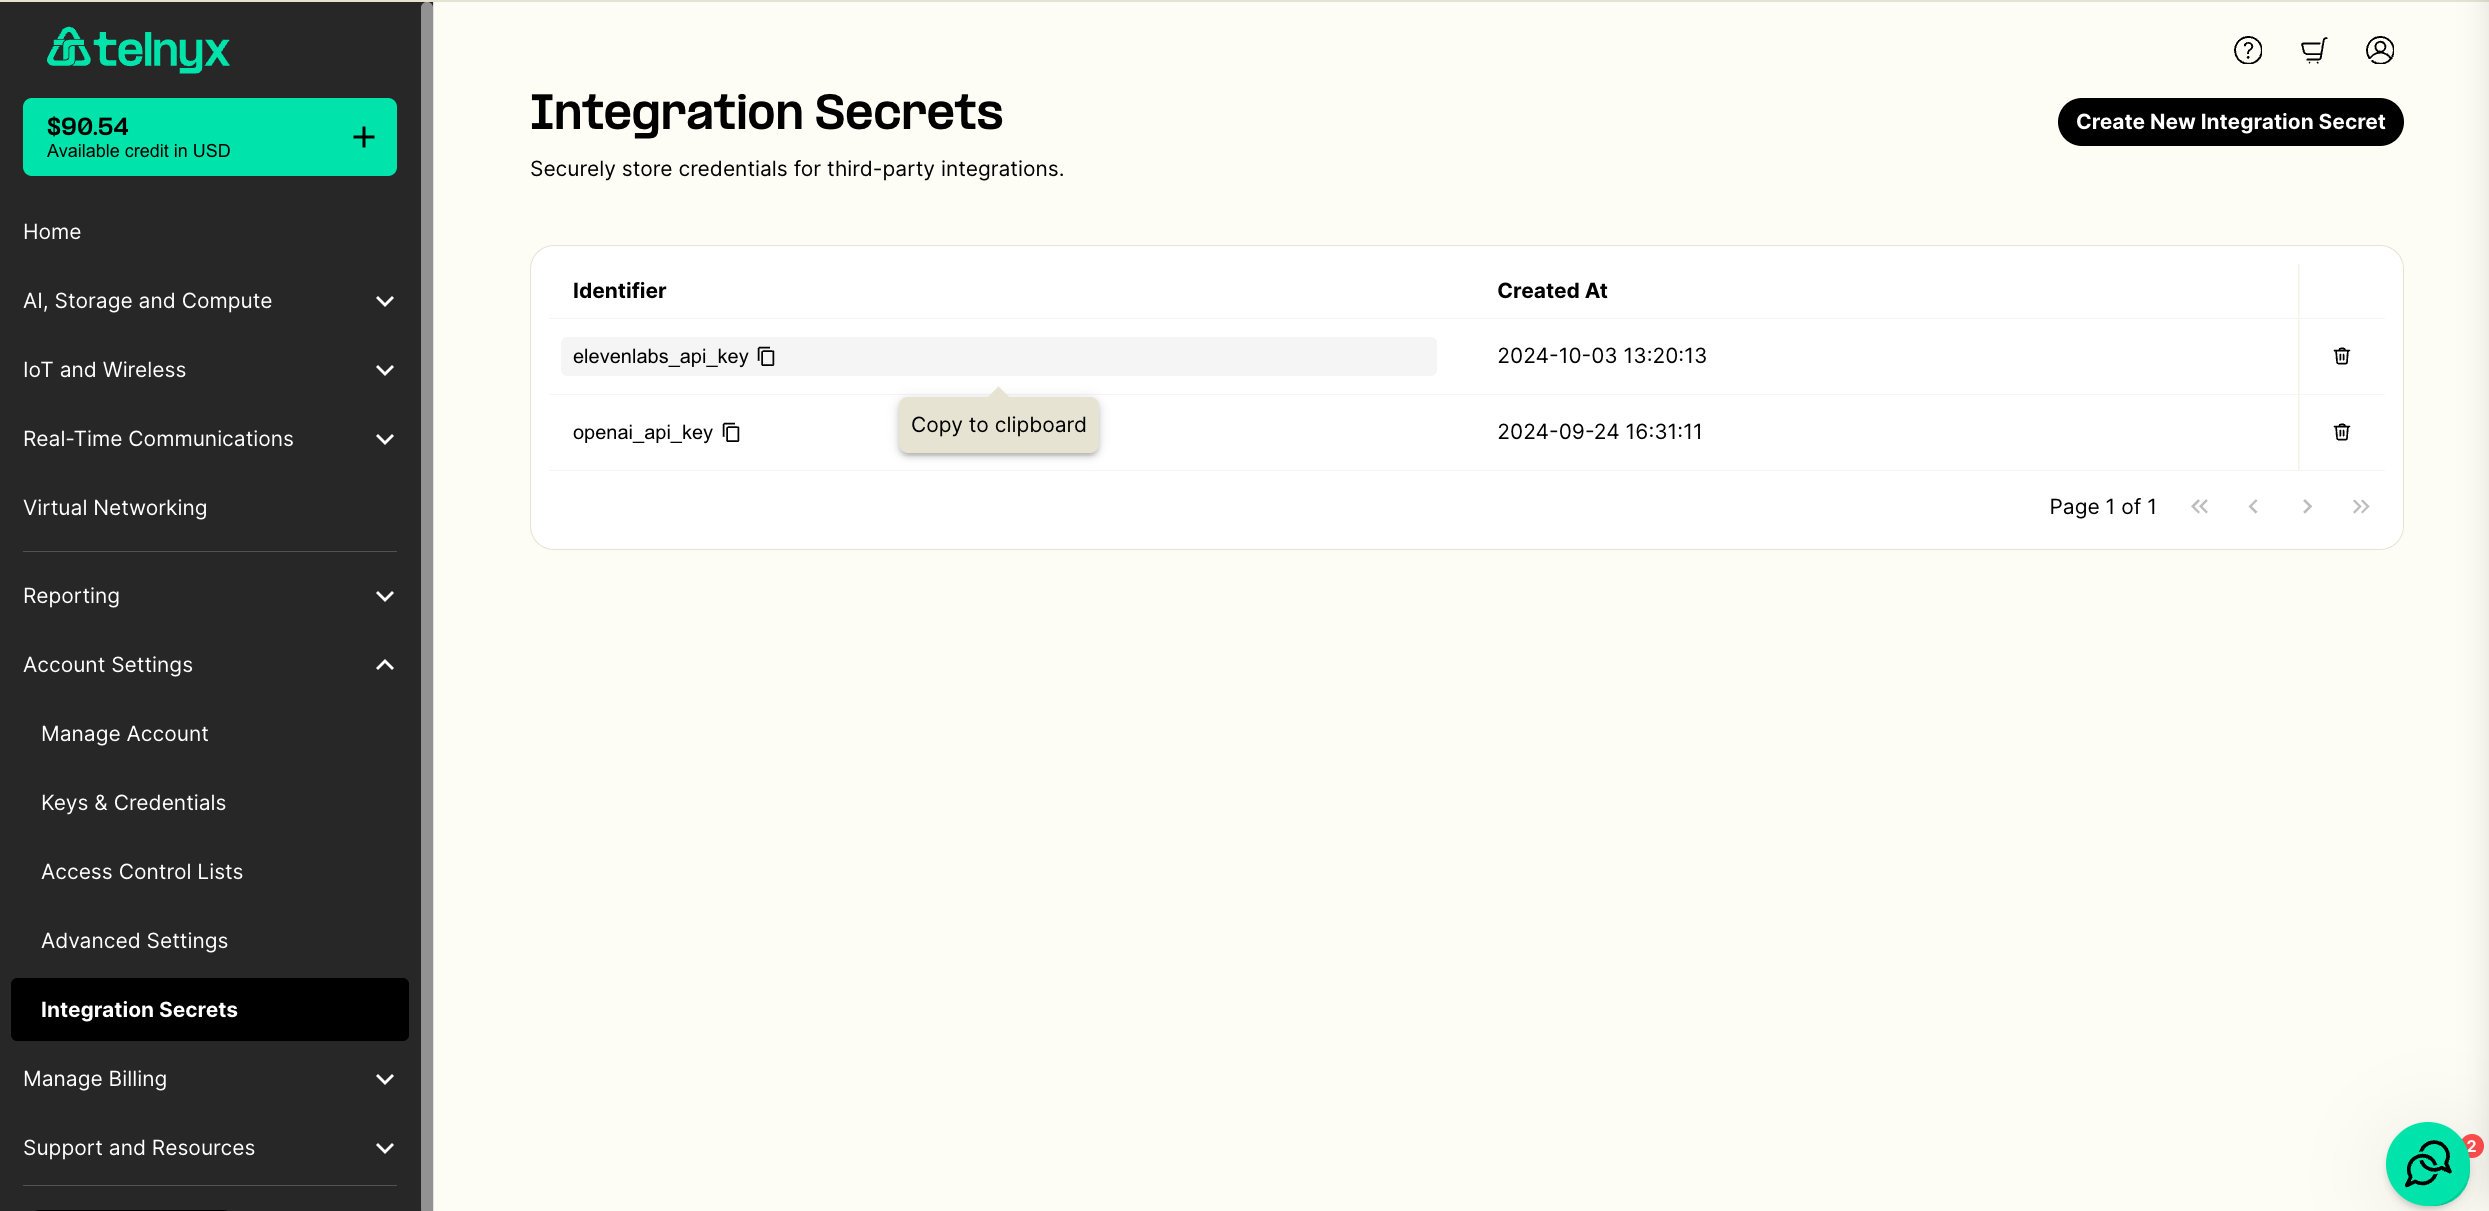
ElevenLabs integration
If you have Conversational AI agents configured in Elevenlabs, you can import them as Telnyx AI Assistants in a single click. If you want to use a voice from ElevenLabs in your existing Telnyx assistant, you will- Create an ElevenLabs API Key
- Reference the key in your Assistant voice configuration
Create an ElevenLabs API Key
First, check out their guide on creating an API KeyReference the key in your Assistant voice configuration
In the voice tab for your assistant, you can select ElevenLabs as the provider. A new dropdown will then appear to reference your API key. You can give the secret a friendly identifier and securely store your API key as the secret value. To enable a multilingual agent, set the transcription model todeepgram/nova-3.
You will not be able to access the value of a secret after it is stored.
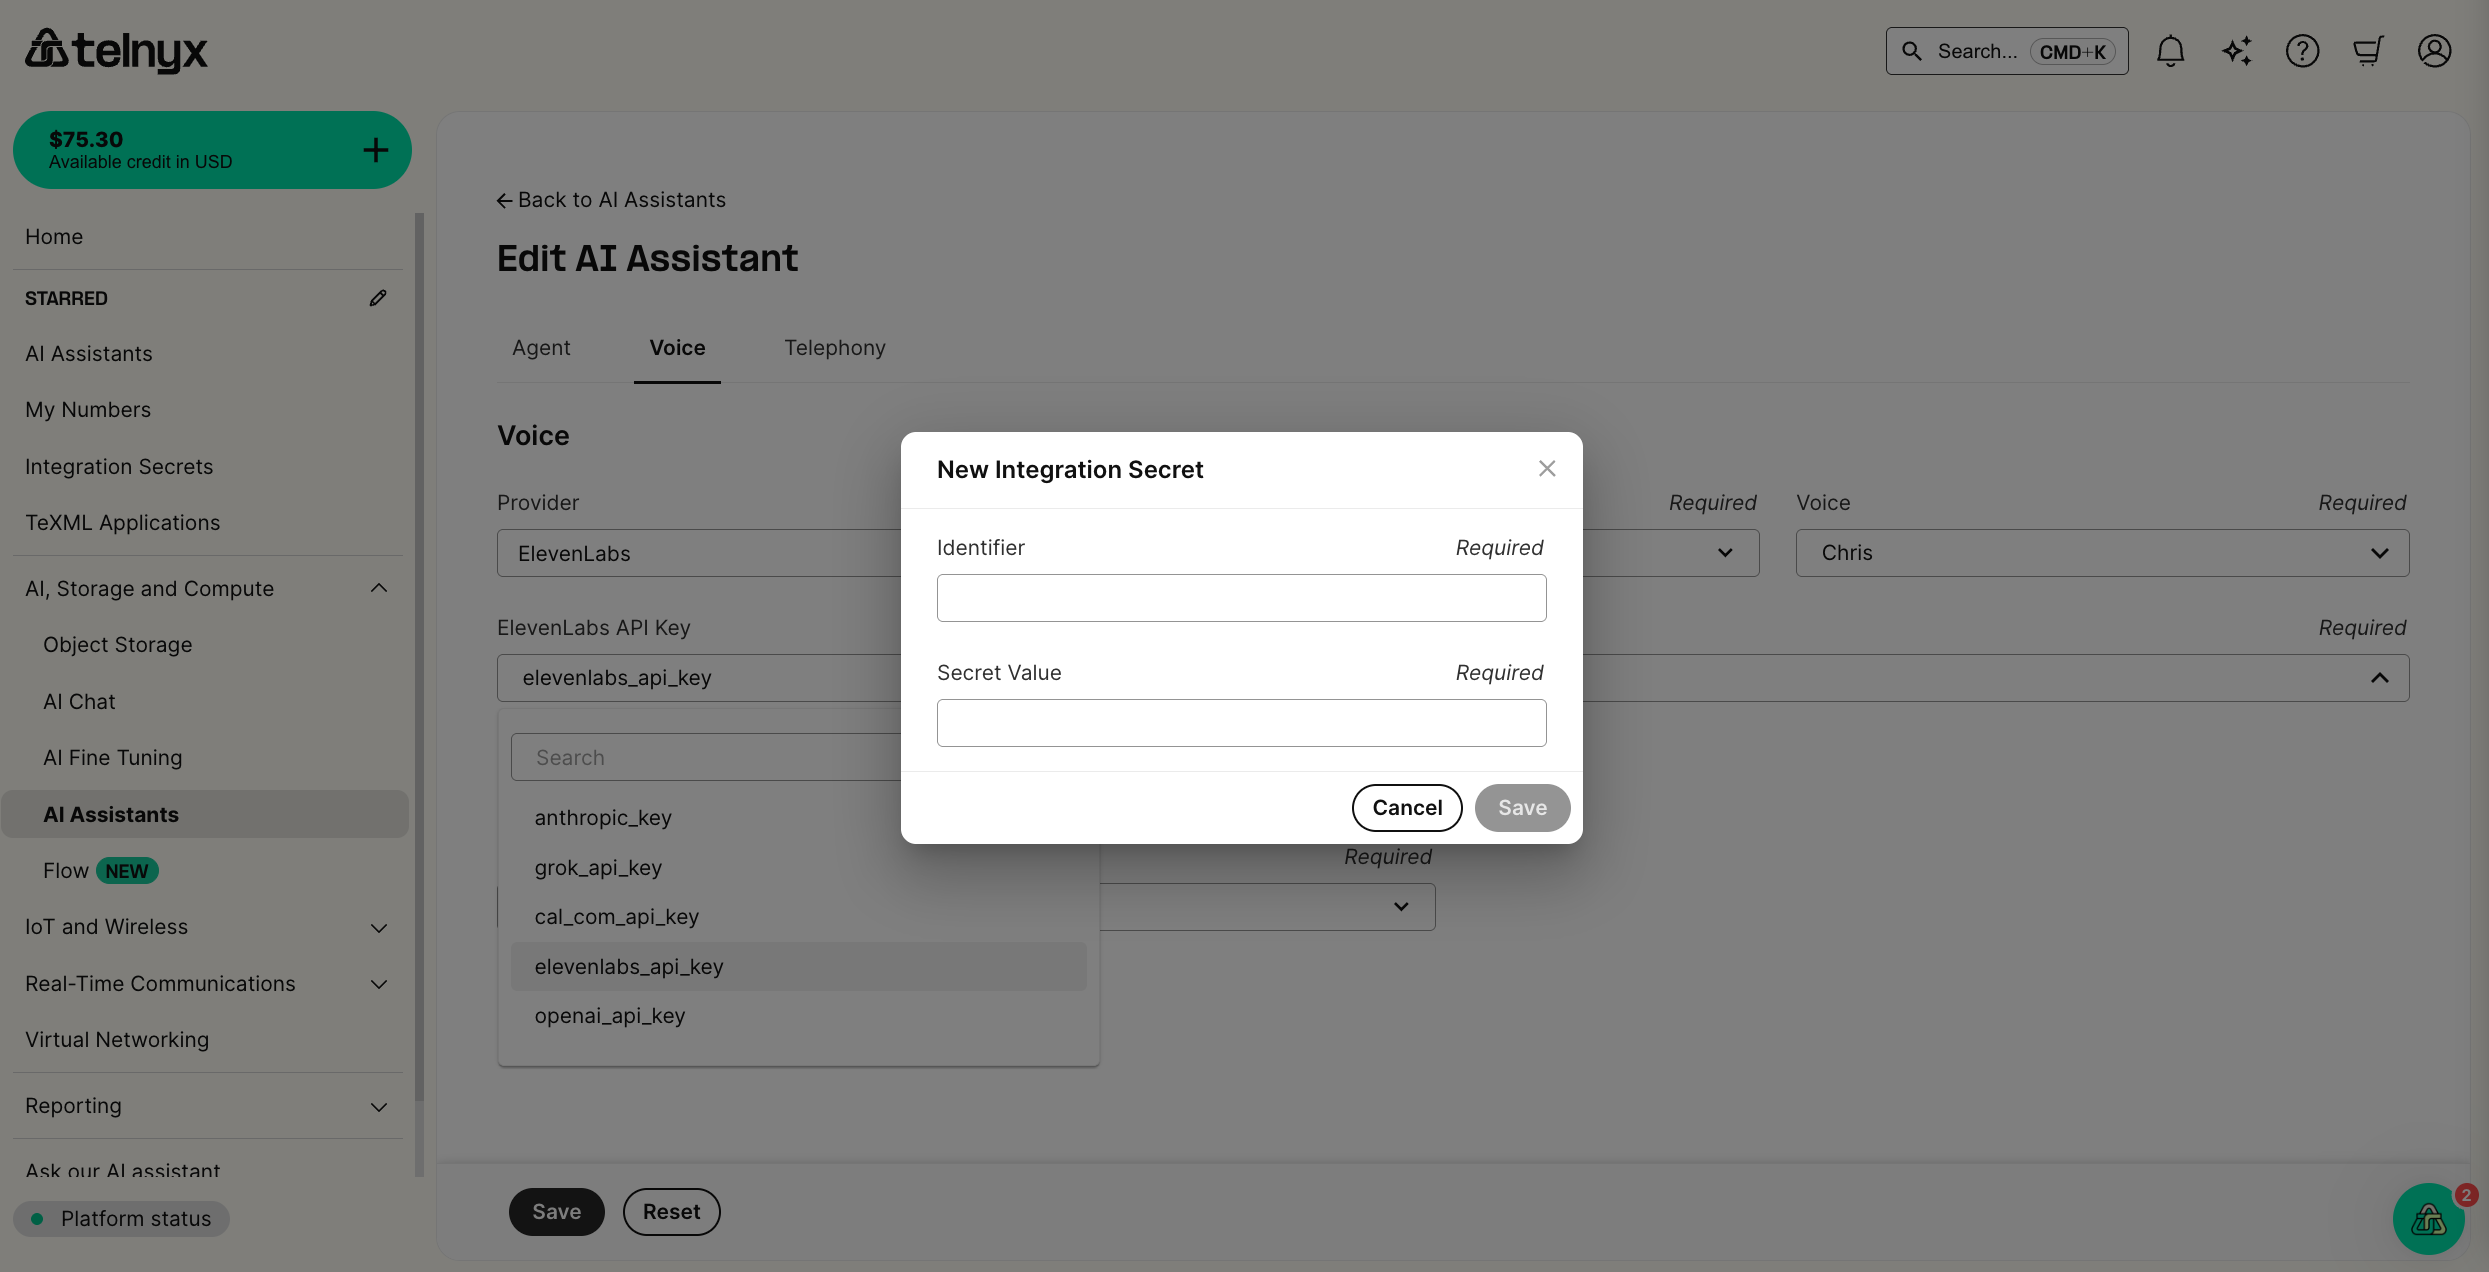
Secret Value field.
OpenAI integration
To use an LLM from OpenAI in your assistant, you will- Create an OpenAI API Key
- Configure the language model in your AI Assistant
Create an OpenAI API Key
First, check out their guide on creating an API KeyConfigure the language model in your AI Assistant
Back at the AI Assistants tab in the portal, edit your assistant. First, change the model to an OpenAI model likeopenai/gpt-4o. Then follow the same API Key steps as described in the ElevenLabs section above.
Multi-Participant Calls
Source: https://developers.telnyx.com/docs/inference/ai-assistants/multi-participant-calls.mdMulti-participant Voice AI calls let an assistant bring another person into an active call, follow who is speaking, and continue using the same tools and instructions it would use in a one-to-one voice conversation. Use this pattern when your assistant needs to coordinate between people in real time, such as scheduling a meeting, connecting a customer with a specialist, or letting multiple callers complete a task together. Listen to this example call to hear how an assistant can invite a participant, stay silent while people talk to each other, and resume when asked to take action. In this guide, you will learn how to:
- Add an Invite tool so your assistant can invite another participant to the current call.
- Design assistant instructions for multi-participant conversations.
- Use the Skip Turn tool so the assistant can stay silent while people talk to each other.
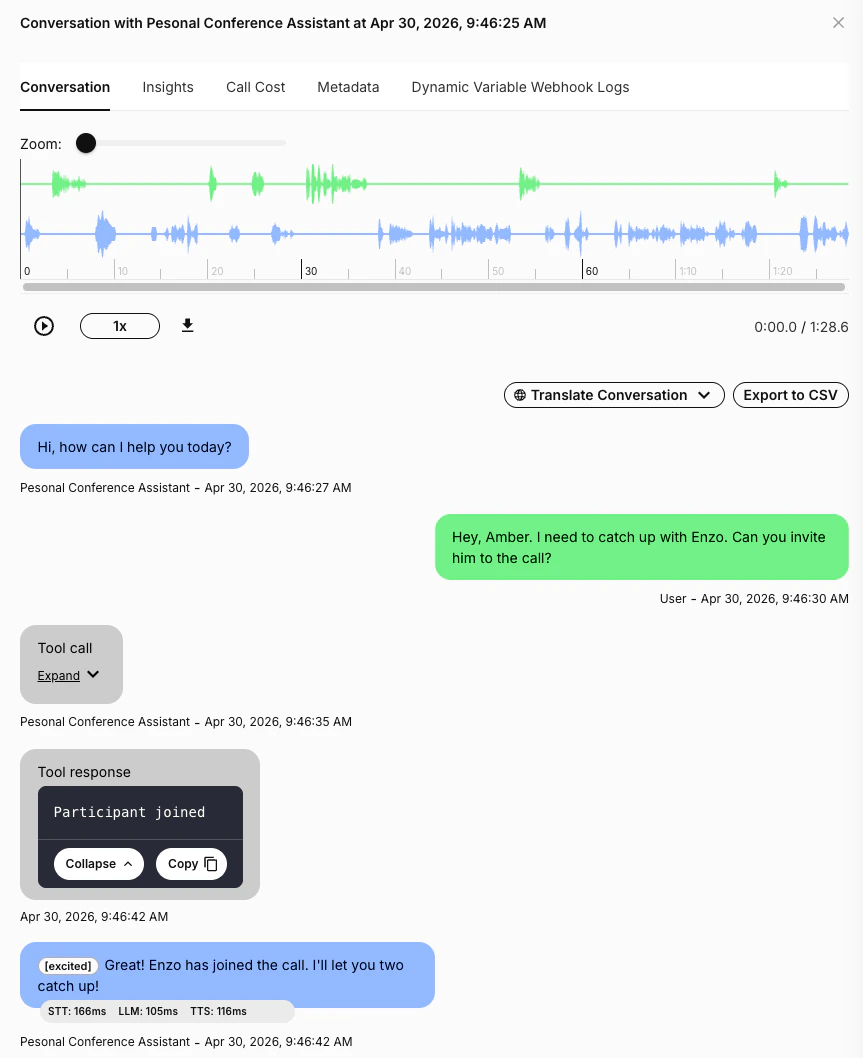
- Review a multi-participant call in Conversation History.
- Configure the same behavior through the Portal or the Assistants API.
How multi-participant calls work
A multi-participant Voice AI call starts like any other voice assistant call. The assistant speaks with the main caller, then uses an Invite tool when it needs to bring another participant into the conversation. Once the new participant joins, the assistant can:- Tell whether the main user or an invited participant is speaking.
- Respond to either participant when appropriate.
- Use its configured tools, memory, dynamic variables, and integrations.
- Stay silent when the participants are talking to each other.
- Resume when someone addresses the assistant again.
Requirements
Before you start, create a voice assistant by following the Voice Assistant Quickstart. You can configure assistants and tools in the Portal or through the Assistants API. You also need:- A phone number or SIP URI for the assistant.
- A phone number or SIP URI for each participant the assistant may invite.
- Any tools the assistant should use after the participant joins, such as a calendar, CRM, or booking integration.
Step 1: Add an Invite tool
The Invite tool lets your assistant invite another participant into the current call.- In the Mission Control Portal, open your assistant.
- Go to the assistant’s Tools section.
- Add an Invite tool.
- Configure the invite target with the participant’s phone number or SIP URI.
- Save the assistant.
Participant joined response, then confirms that Enzo has joined.
Step 2: Give the assistant multi-participant instructions
Your assistant should know that the conversation may include multiple people. Add instructions that tell the assistant how to behave when participants are speaking to each other. Example instructions:Step 3: Add a Skip Turn tool
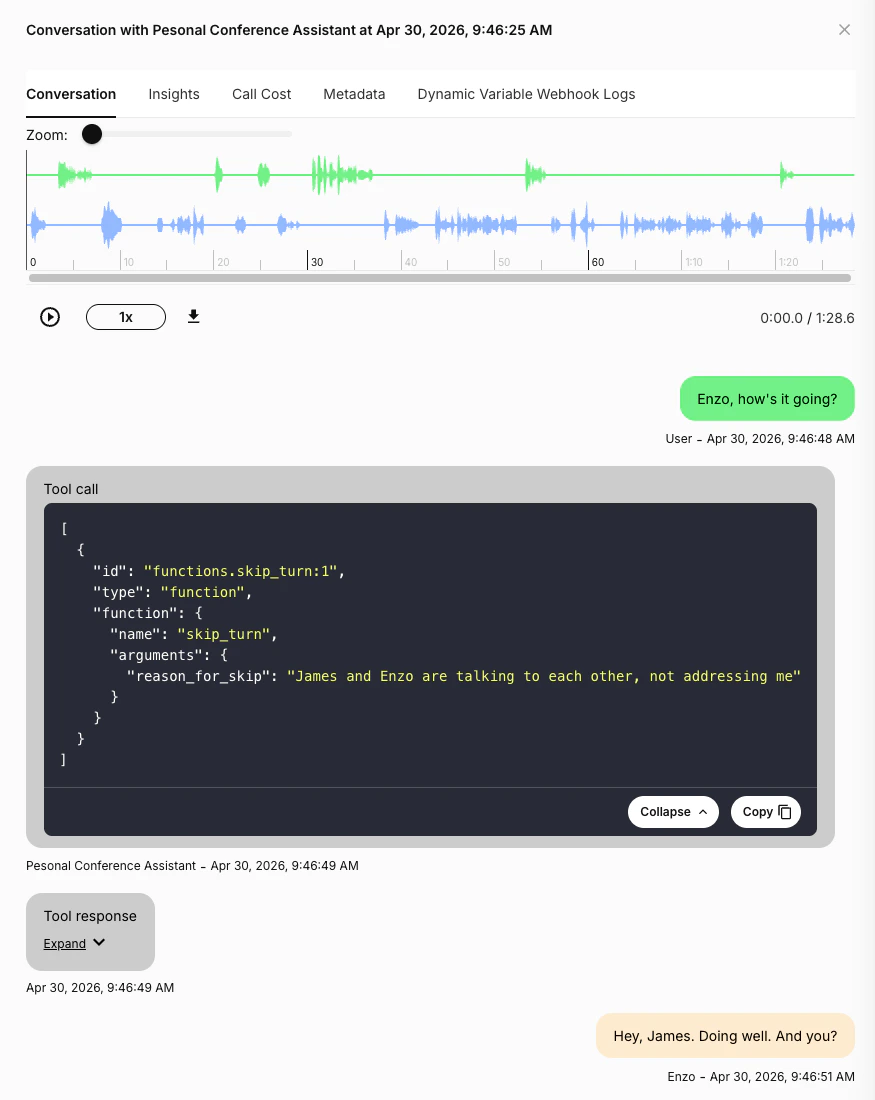
In a one-to-one call, an assistant usually responds after every user turn. In a multi-participant call, that can feel unnatural because the assistant may interrupt people who are talking to each other. The Skip Turn tool lets the assistant intentionally remain silent for a turn. Add a Skip Turn tool when you want the assistant to:- Stay silent while invited participants talk to the main user.
- Avoid responding to side conversations.
- Wait until someone directly addresses the assistant.
- Let humans confirm details with each other before the assistant takes action.
skip_turn with the reason James and Enzo are talking to each other, not addressing me.
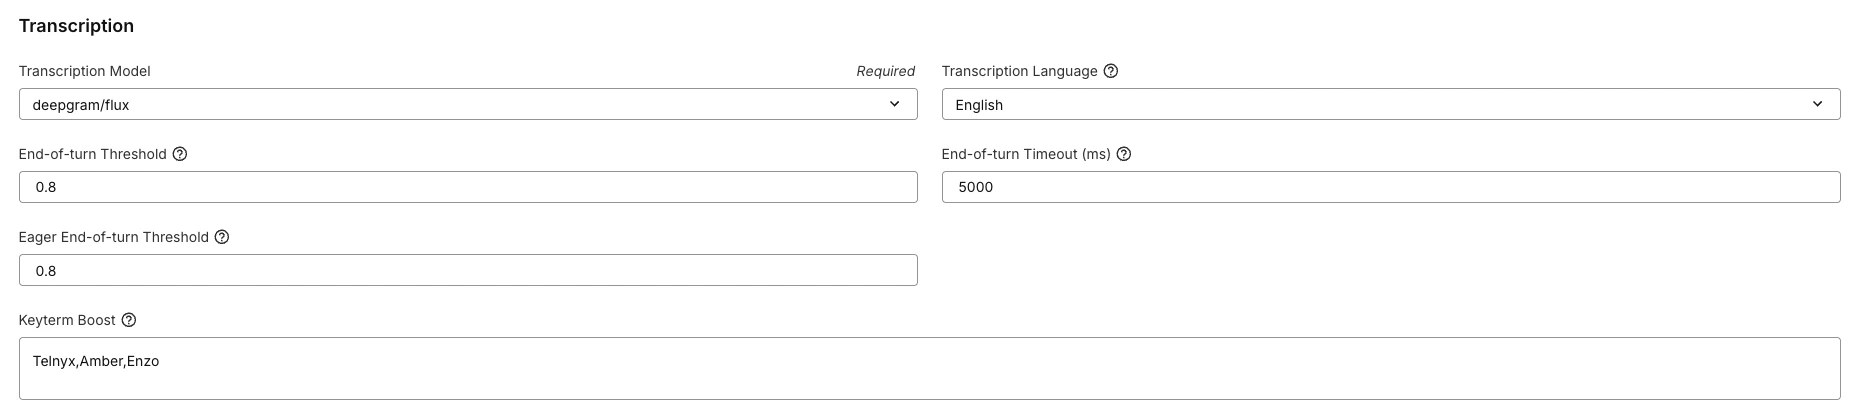
Telnyx,Amber,Enzo. It also supports dynamic variables, so you can pass participant names or other caller-specific terms at conversation start, for example Telnyx,{{participant_names}}. It is supported by deepgram/flux and deepgram/nova-3. See the Transcription Settings guide for details.
Step 4: Use other assistant tools during the call
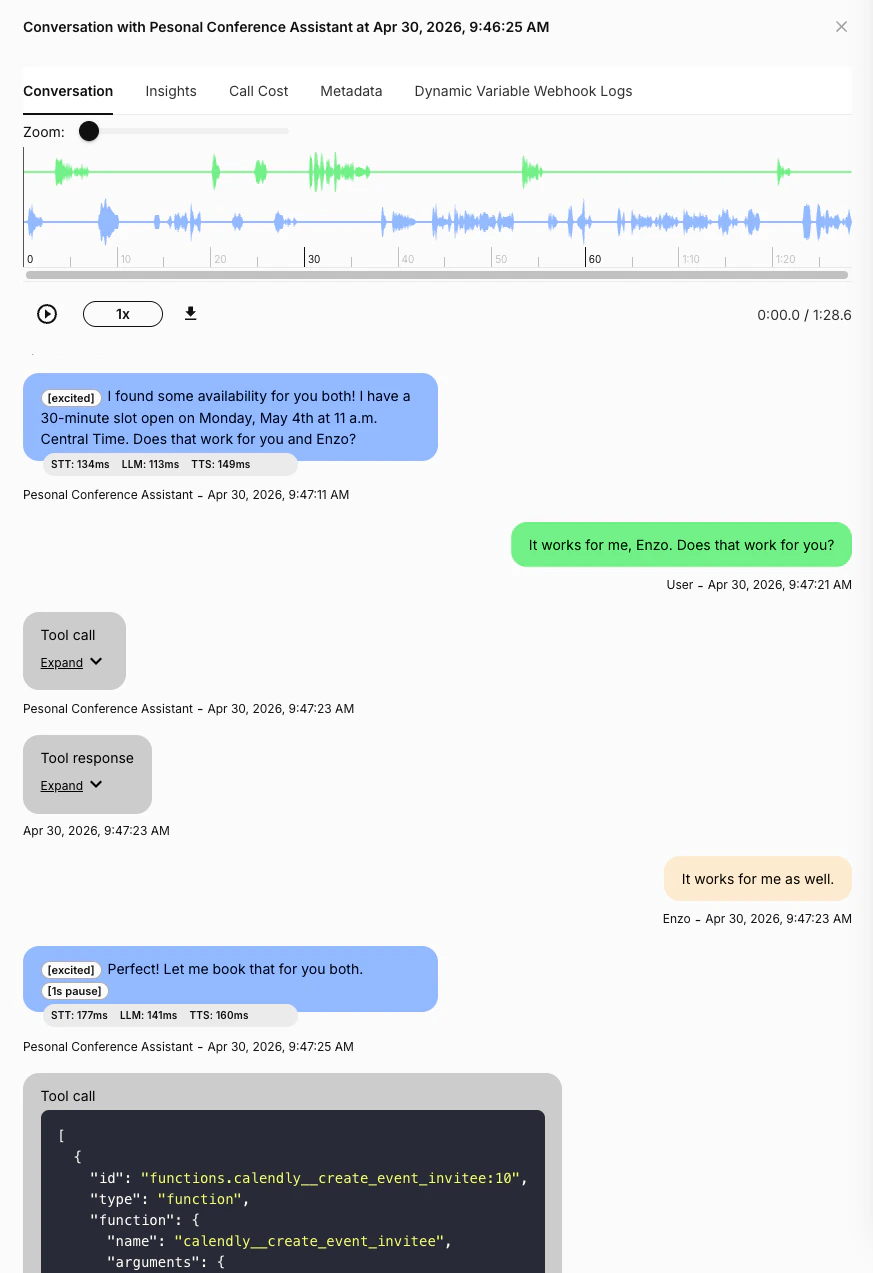
After a participant joins, the assistant can do everything it can do in a one-to-one voice call. It can call APIs, look up information, schedule meetings, update records, send messages, and more. In this example, James asks the assistant to schedule time with Enzo. The assistant checks calendar availability, proposes a time, waits while James confirms with Enzo, then books the meeting.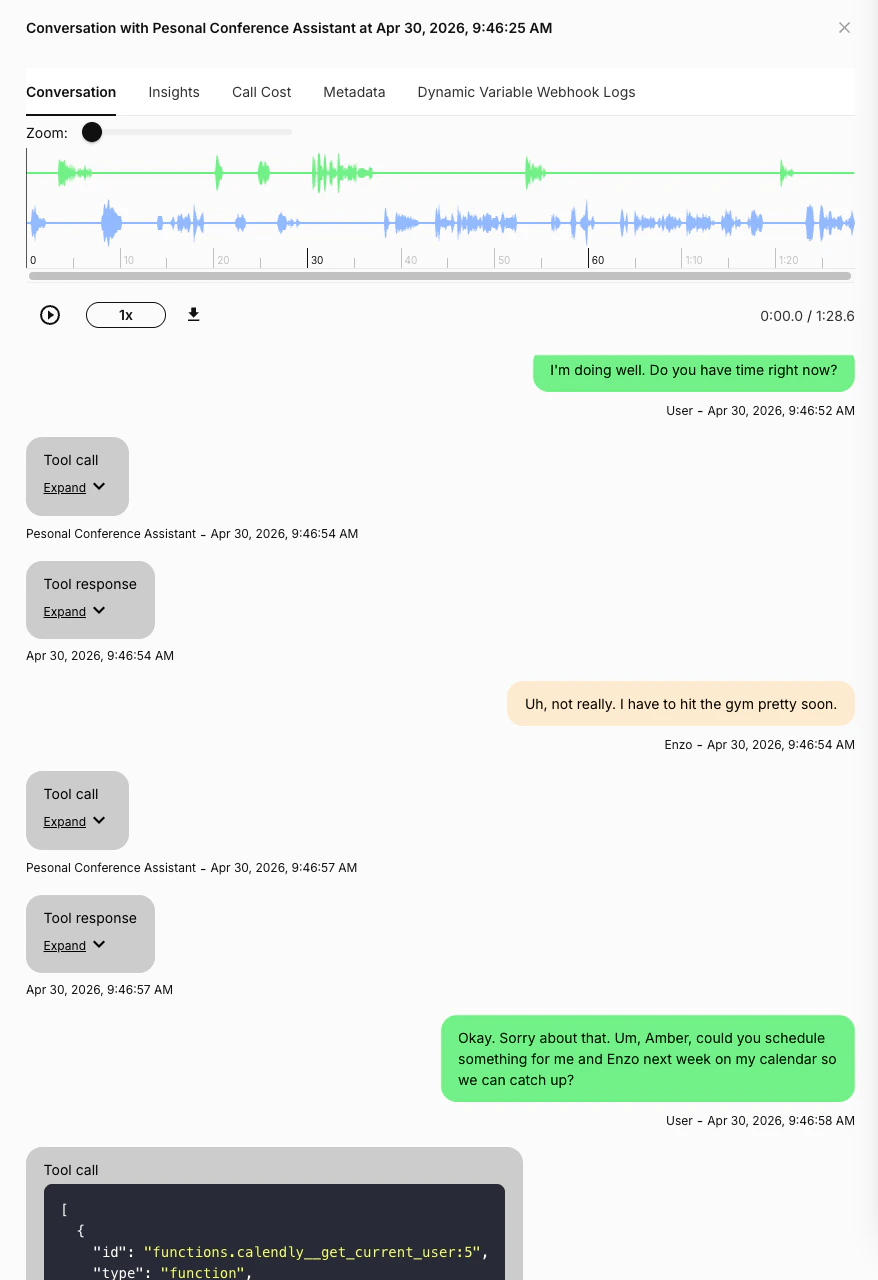
- The assistant checks availability.
- The assistant proposes a time to both participants.
- The main user asks the invited participant whether the time works.
- The assistant stays silent while the invited participant answers.
- The assistant books the meeting after the participants confirm.
Best practices
Be explicit about when to speak
Tell the assistant when it should respond and when it should stay silent. Multi-participant calls work best when the assistant has clear turn-taking rules. Good instruction:Review calls in Conversation History
Use Conversation History to inspect the transcript, audio, tool calls, and tool responses. This is especially useful when tuning Skip Turn instructions because you can see why the assistant decided to speak or remain silent.Next steps
- Build your first assistant with the Voice Assistant Quickstart.
- Add reusable tools from the Tools Library.
- Use dynamic variables to personalize calls.
- Review production calls with Agent Observability.
Memory
Source: https://developers.telnyx.com/docs/inference/ai-assistants/memory.mdMemory enables your AI assistant to recall essential details from past conversations. Instead of starting each phone call or text exchange from scratch, your AI assistant naturally continues previous discussions. In this tutorial, you will learn how to:
- Specify which conversations your AI Assistant has memory access to
- Configure this dynamically at the start of every conversation
Identifying the conversations to include
There is no one-size-fits-all answer for which previous conversations an AI Assistant should remember during a specific conversation. You may want an AI Assistant to have memory access to:- Every conversation it had with any user
- Every conversation it had with this specific user
- Every conversation it had with users in a specific group in the past 10 days
- Or something else entirely…
Configuring memory with the Dynamic Variables Webhook
If thedynamic_variables_webhook_url is set for the assistant, we will send the following payload at the start of the conversation.
telnyx_end_user_target_verified field will be set to true if the call has Full (A) STIR/SHAKEN attestation and Telnyx was able to verify the authenticity of the PASSporT token.
We expect a JSON response with the following structure. If we do not receive this response within a 1-second timeout, the call will proceed “best effort”.
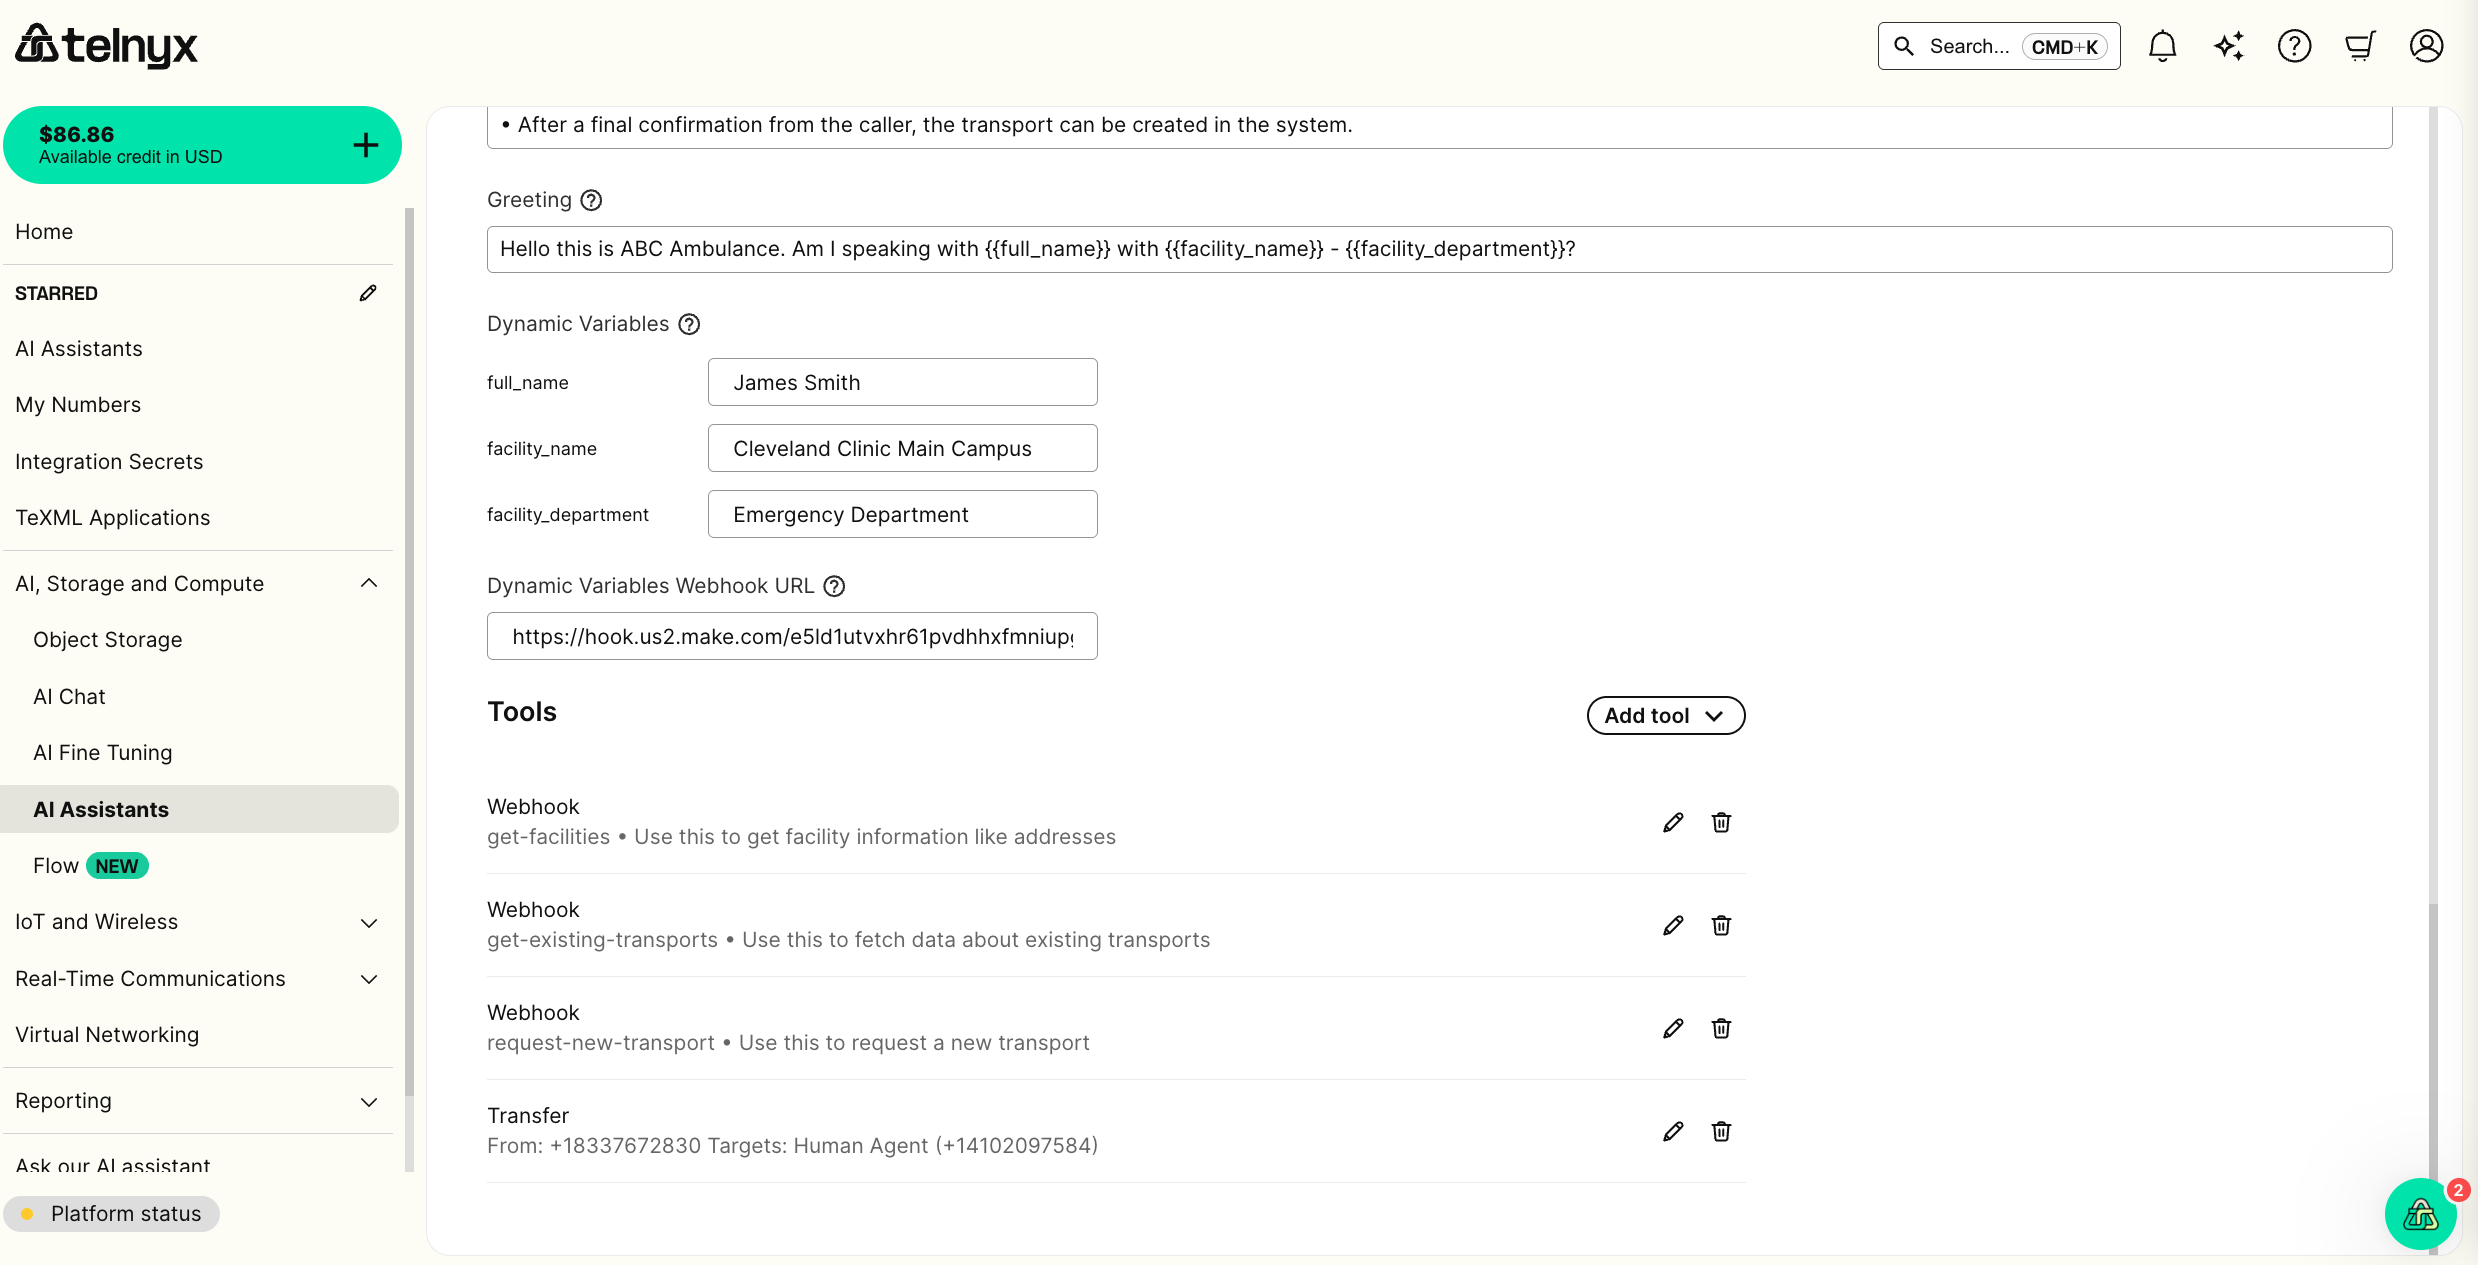
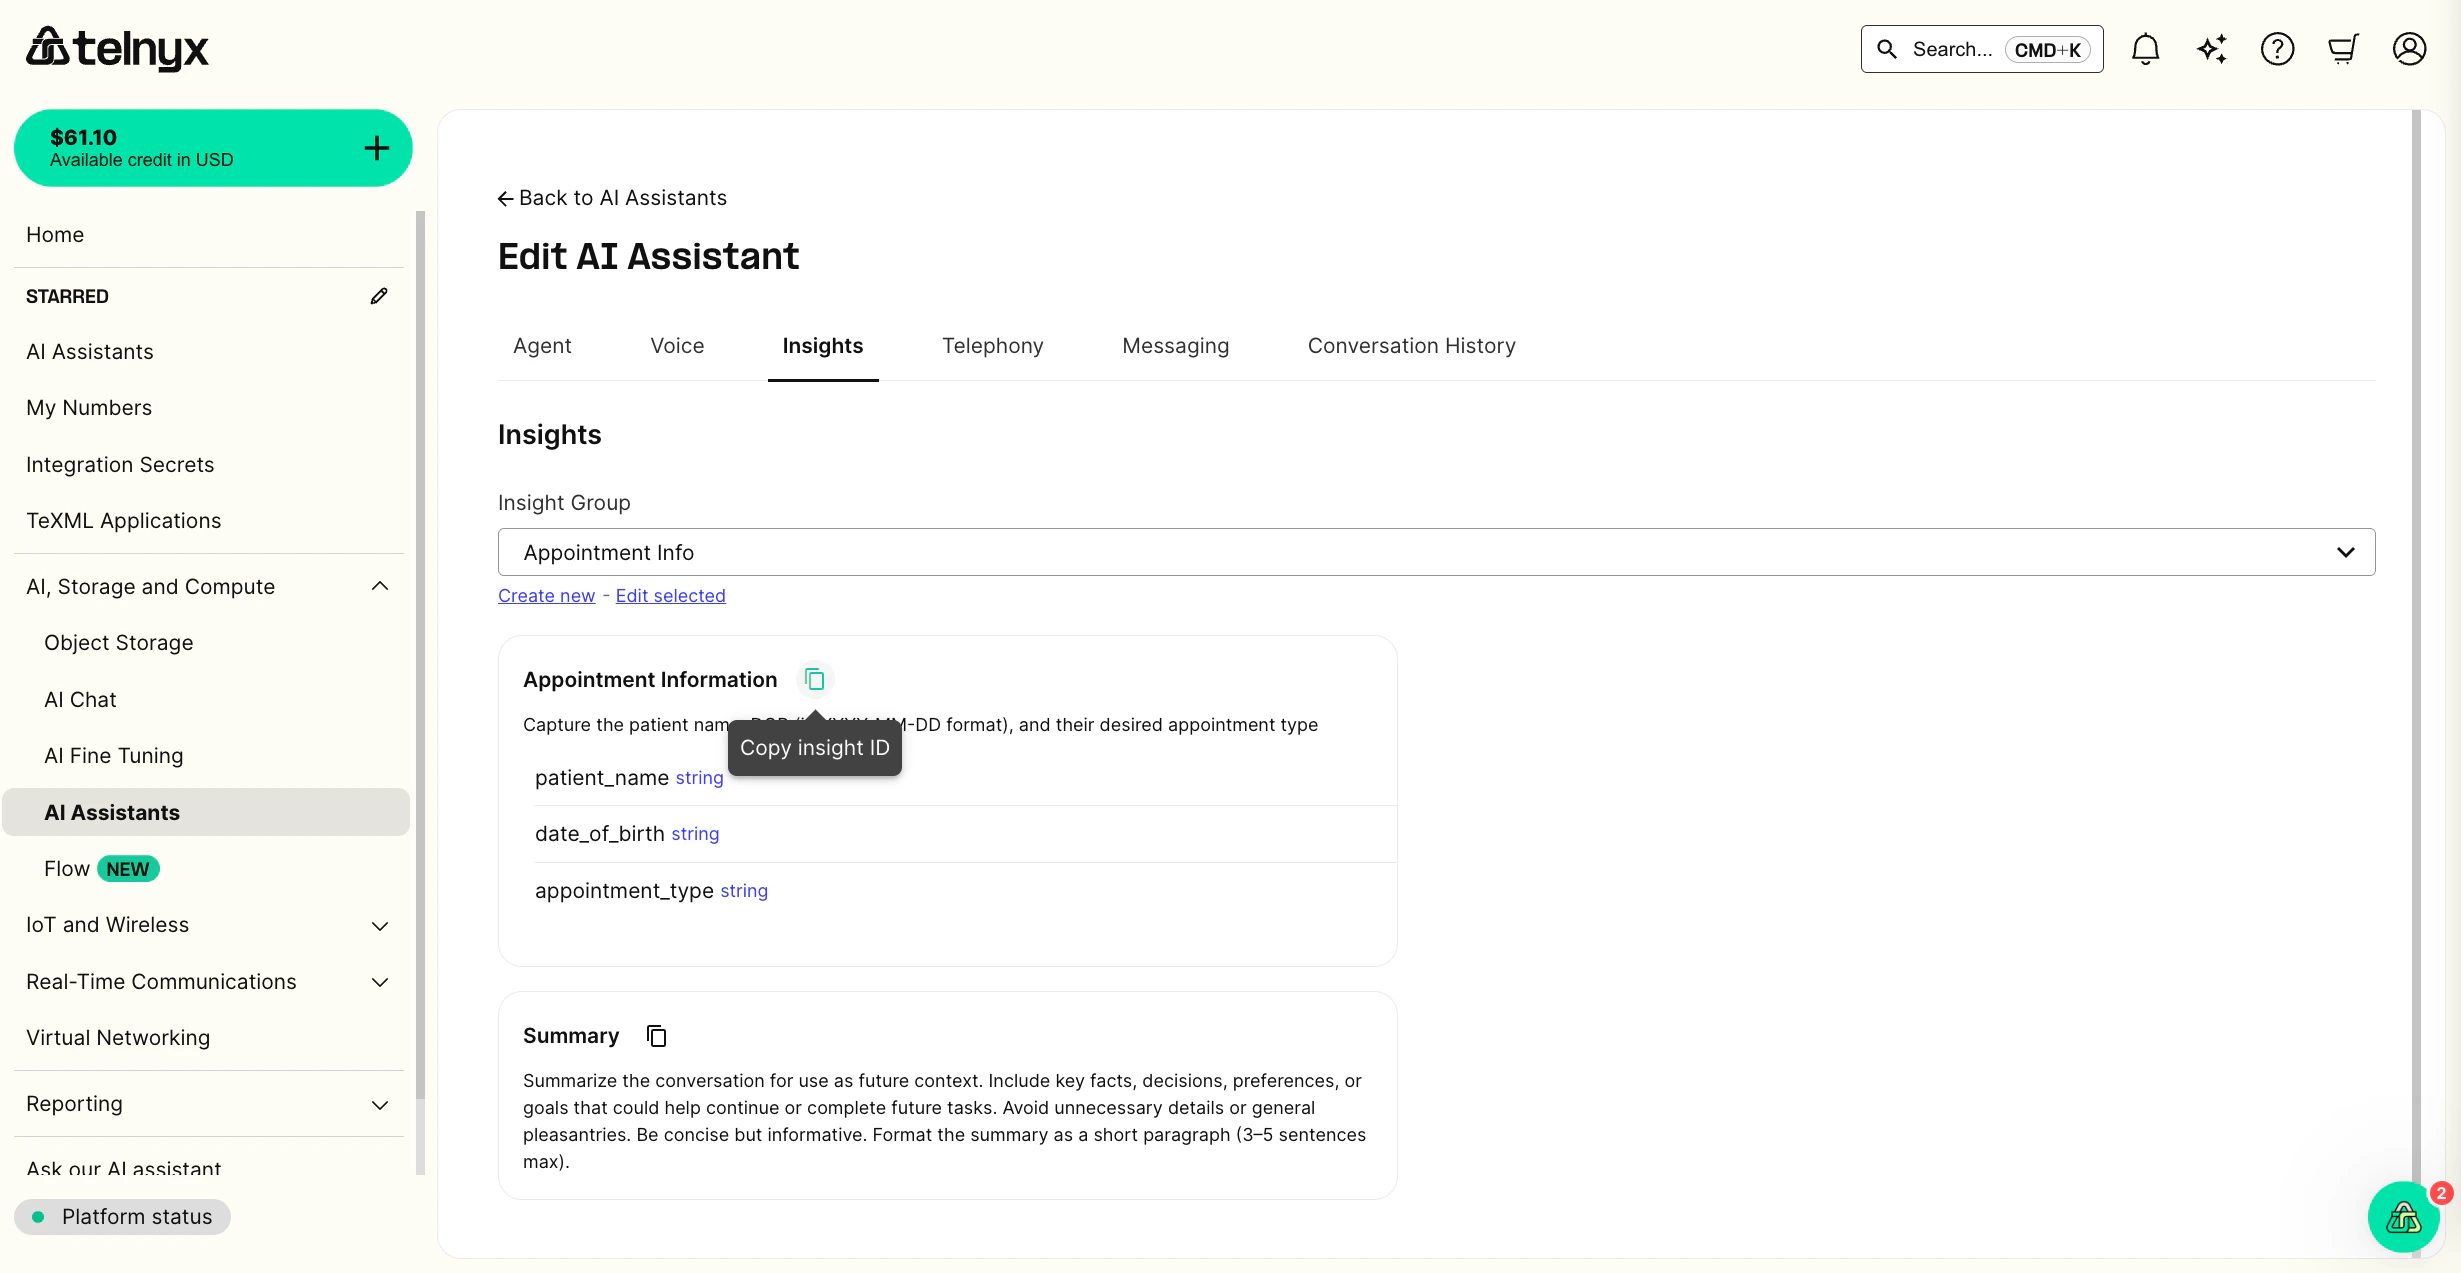
memory field provides your AI assistant with memory access to the last 5 conversations with the current user’s phone number.
You can read more about the optional dynamic_variables field in our tutorial on Dynamic Variables.
Custom Metadata
You may want to create your own memory access system based on custom metadata for conversations. To do this, you can add metadata to conversations in the dynamic variable webhook response:memory field using the following syntax metadata->your_custom_metadata=eq.your_custom_value.
Dynamic Variables
Source: https://developers.telnyx.com/docs/inference/ai-assistants/dynamic-variables.mdDynamic variables let you configure a template for your agent’s behavior. You can re-use the same general instructions while dynamically personalizing every conversation your agent has. In this tutorial, you will learn how to:
- Template your AI assistant configuration with dynamic variables.
- Supply the values via an outbound API request or the dynamic variable webhook.
Overview
Dynamic variables enable you to create a single AI assistant configuration that can handle personalized conversations for different users and contexts. Instead of creating multiple assistants for different scenarios, you can use placeholders that get filled with specific values at runtime.How dynamic variables work
The dynamic variable lifecycle follows these steps:- Define: Create placeholders in your assistant’s instructions, greeting, or tools using
{{variable_name}}syntax. - Inject: Provide values through API calls, webhooks, SIP headers, or default configurations.
- Resolve: Telnyx replaces placeholders with actual values when the conversation starts.
- Use: Your assistant uses the personalized content throughout the conversation.
Key benefits
- Scalability: One assistant configuration serves multiple use cases.
- Personalization: Each conversation can be tailored to specific users or contexts.
- Efficiency: Reduce configuration overhead and maintenance complexity.
- Flexibility: Update values dynamically without modifying the assistant.
Common use cases
- Customer Service: Personalize greetings with customer names and account details.
- Appointment Scheduling: Include facility names, departments, and contact information.
- Account Management: Reference specific account numbers, balances, or service details.
- Healthcare: Customize interactions with patient names, appointment types, and provider information.
Best practices
Following these best practices will help you implement dynamic variables effectively and avoid common pitfalls.Variable naming and organization
- Use descriptive names: Choose clear, meaningful variable names like
customer_nameinstead of generic names likename. - Follow consistent conventions: Use snake_case for variable names (
facility_name,account_number). - Group related variables: Organize logically related variables together (
facility_name,facility_department,facility_contact). - Avoid reserved namespaces: Don’t use the
telnyx_prefix, which is reserved for system variables.
Implementation strategy
- Start with defaults: Set default values in the Assistant builder for testing and as fallback values.
- Use API injection for dynamic data: Pass call-specific values through the
AIAssistantDynamicVariablesparameter in API calls. - Leverage webhooks for complex lookups: Use the dynamic variables webhook for real-time data retrieval or database lookups.
- Implement graceful degradation: Ensure your assistant can handle scenarios where variables fail to resolve.
Security and data handling
- Protect sensitive information: Be cautious about including sensitive data in variables that may appear in logs.
- Validate webhook data: Implement proper validation for data returned from webhook endpoints.
- Consider data retention: Review your data retention and privacy requirements for variable content.
- Handle timeouts gracefully: Webhook responses must return within the configured timeout (default 1.5 seconds, up to 10 seconds via
dynamic_variables_webhook_timeout_ms) or the call proceeds with fallback values.
Performance and reliability
- Optimize webhook response time: Keep webhook responses fast (well under your configured timeout; the default is 1.5 seconds).
- Implement error handling: Plan for scenarios where webhooks fail or return invalid data.
- Use caching strategies: Cache frequently accessed data to improve response times.
- Test across channels: Verify variable resolution works consistently across phone calls, web calls, and SMS.
Testing and debugging
- Test with Portal defaults: Use the Assistant builder’s default values to test variable behavior during development.
- Monitor webhook logs: Use the conversation transcript and webhook logs in the Portal to debug variable resolution issues.
- Validate fallback behavior: Ensure unresolved variables (displayed as
{{variable_name}}) don’t break conversation flow. - Test transfer scenarios: Verify that variables pass correctly when using transfer tools with SIP headers.
Cross-channel considerations
- Ensure universal compatibility: Test that your variables work across phone calls, web calls, and SMS channels.
- Handle channel-specific data: Consider how variables might behave differently across conversation channels.
- Plan for transfer scenarios: When transferring calls, use SIP headers to pass variable data to the receiving assistant.
Dynamic variables syntax
Dynamic variables are placeholders surrounded by double curly braces. For example:- Instructions
- Greeting
- Tools
Telnyx system variables
Telnyx also provides these system variables:Date and time variables
In addition to the default{{telnyx_current_time}}, Telnyx provides a family of reserved date/time variables. Use these to give the assistant timezone-aware context, convenient shorthands, or a fully custom format. The timezone variants and shorthands use the same default formatting as {{telnyx_current_time}} — a different format is only used when you explicitly specify one with the date filter.
The shorthand variables (
telnyx_current_date, telnyx_current_time_of_day, telnyx_current_weekday, telnyx_current_month, telnyx_current_day, telnyx_current_year) are evaluated in UTC. To render them for a specific timezone, use the _ variants or the date filter described below.
Timezone variants
Append an IANA timezone name totelnyx_current_time_ or telnyx_current_time_of_day_ to render the value in that zone. These use the same default formatting as {{telnyx_current_time}}:
{{telnyx_current_time_America/New_York}}→Monday, February 24 2025 11:04:15 AM EST{{telnyx_current_time_Australia/Sydney}}→Tuesday, February 25 2025 03:04:15 AM AEDT{{telnyx_current_time_of_day_Europe/London}}→04:04:15 PM GMT
Custom formatting with the date filter
The default format is used everywhere unless you explicitly request a different one. For full control over formatting, pipe telnyx_current_time through the date filter. The filter takes a standard strftime format string and an optional IANA timezone. These are the same %-style codes used by strftime across most languages (C, Python, Ruby, and others):
When the timezone argument is omitted, the value is formatted in UTC.
Common format codes
These are the most usefulstrftime codes for the date filter. For the complete list, see any standard strftime reference:
Combine codes with any literal text, e.g.
%A, %B %d at %I:%M %p %Z.
If a timezone is unknown, a format string is invalid, or a variable is unrecognized, the template placeholder is left untouched rather than rendered to an empty or error value.
Customer-defined dynamic variables
You can also define your own variables. There are several ways to resolve a customer-defined dynamic variable before a conversation. They follow this order of precedence. 1. Pass the variables via the outbound API call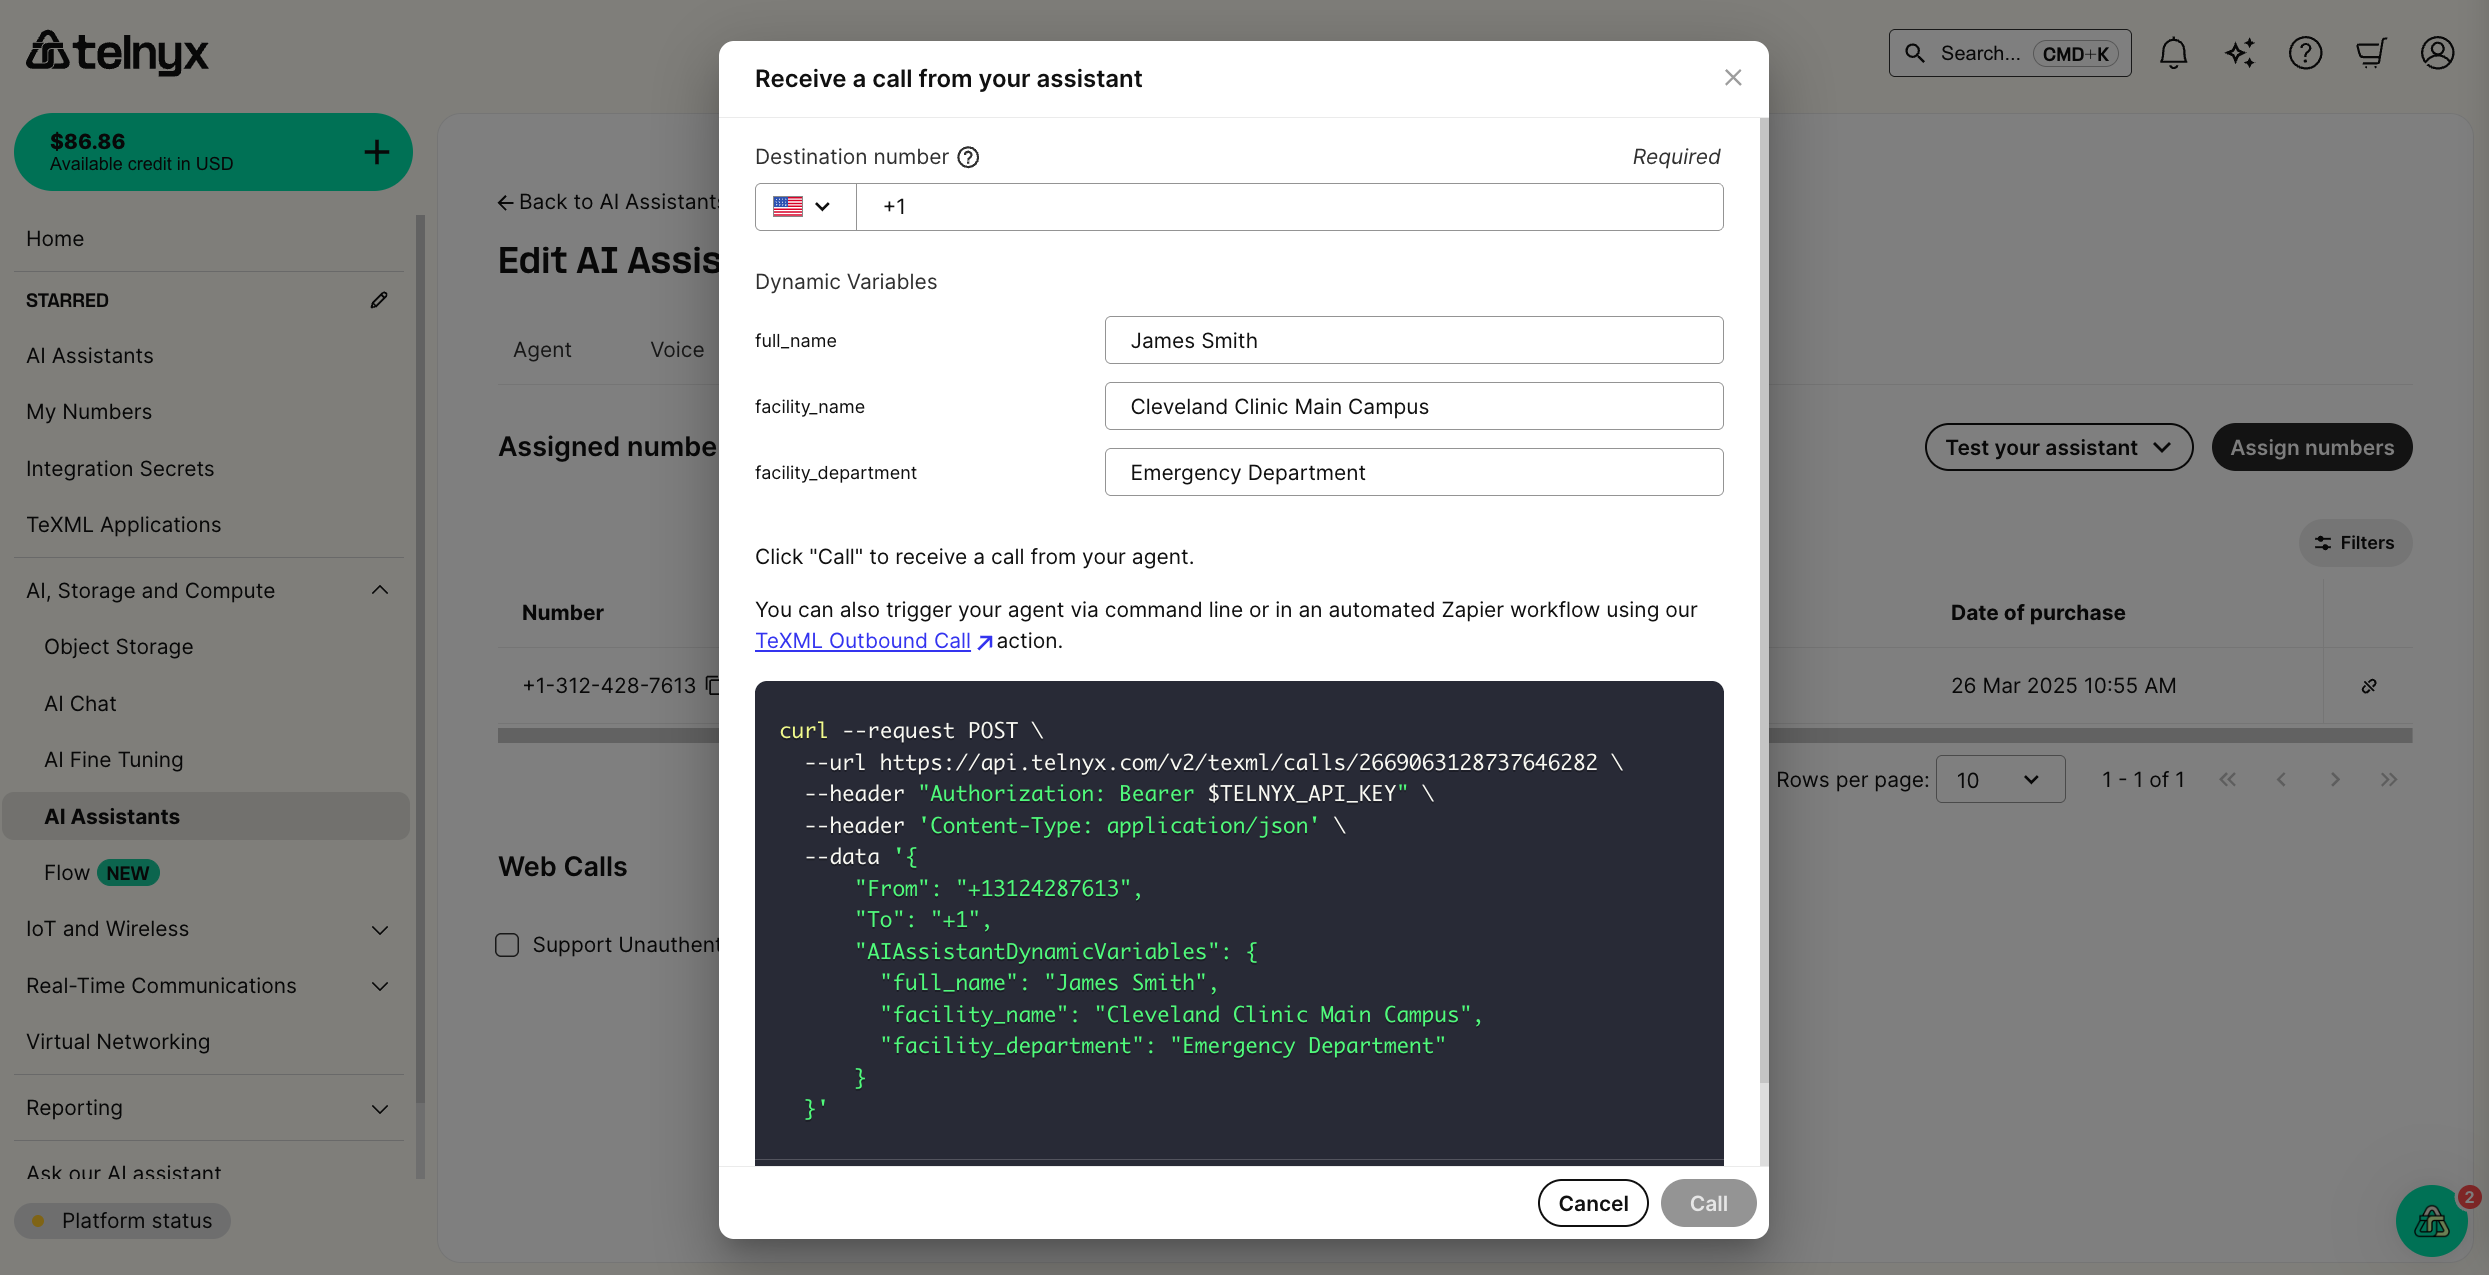
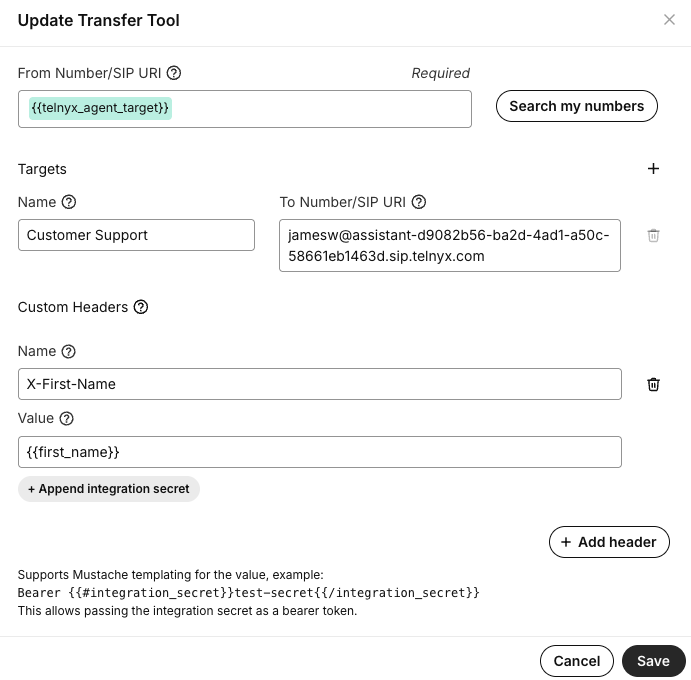
X- prefix will be mapped to dynamic variables. Header names are case-insensitive, and - in the header names will be replaced by _ in the variable names.
For instance, X-Full-Name will be resolved as {{full_name}}.
Telnyx reserves the {{telnyx_}} namespace for system variables, meaning SIP headers beginning X-Telnyx will not be resolved to dynamic variables.
Here you can see an example of passing a dynamic variable to another AI Assistant using custom SIP headers in the Transfer tool.
dynamic_variables_webhook_url is set for the assistant, we will POST the following payload at the start of the conversation. Telnyx will sign this webhook so that the authenticity of the request can be verified.
telnyx_end_user_target_verified field will be set to true if the call has Full (A) STIR/SHAKEN attestation and Telnyx was able to verify the authenticity of the PASSporT token.
We expect a JSON response with the following structure. If we do not receive this response within the configured timeout (default 1.5 seconds, up to 10 seconds via the dynamic_variables_webhook_timeout_ms field on the assistant), the call will proceed “best effort” with the alternatives listed below.
All three fields (dynamic_variables, memory, and conversation) are optional. The dynamic_variables field sets the values for the specified dynamic variables.
You can read more about the memory and conversation fields in our tutorial on Memory.
{{full_name}}).
Troubleshooting
Dynamic variables can sometimes fail to resolve or behave unexpectedly. This section provides comprehensive guidance for identifying and resolving common issues.Common issues
Variables not resolving
When variables appear as raw text ({{variable_name}}) in conversations, check these potential causes:
- Webhook timeout: Your webhook endpoint took longer than the configured timeout (default 1.5 seconds) to respond, causing fallback to defaults.
- Variable name mismatch: Typos or case sensitivity differences between variable definition and usage.
- Incorrect precedence: Understanding the resolution order (API > SIP headers > webhook > defaults).
- Missing configuration: Variable not defined in any resolution method.
Incorrect formatting
Variables may not work correctly due to formatting issues:- Invalid JSON: Webhook responses contain malformed JSON syntax.
- Wrong data types: Sending numbers instead of strings or vice versa.
- Missing required fields: Webhook response missing
dynamic_variablesobject. - Template syntax errors: Incorrect mustache template usage (
{variable}instead of{{variable}}).
Timeout issues
Webhook timeouts are a common source of variable resolution failures:- Slow database queries: Optimize database lookups in webhook endpoints.
- Network connectivity: Check firewall rules and network connectivity to webhook URLs.
- External service delays: Implement proper timeout handling for third-party API calls.
- Processing overhead: Minimize computation time in webhook response generation.
Debugging checklist
Follow this step-by-step process to diagnose variable issues:1. Verify variable definition
- Check variable name spelling and case sensitivity.
- Confirm variables are used in supported fields (
instructions,greeting,tools). - Validate mustache syntax:
{{variable_name}}. - Ensure variable names don’t use reserved
telnyx_prefix.
2. Check resolution priority
Test variables using the resolution hierarchy:- Verify SIP header format for transfer scenarios:
X-Variable-Namebecomes{{variable_name}}. - Confirm webhook endpoint is reachable and responding correctly.
- Set default values in Assistant builder as fallback.
3. Validate webhook implementation
- Test webhook endpoint independently using tools like Postman.
- Verify JSON response format matches expected structure.
- Check response time (must be under the configured timeout; default is 1.5 seconds).
- Validate all required payload fields are present.
4. Test in Portal
- Use Assistant builder default values for initial testing.
- Review conversation logs for variable resolution behavior.
- Check webhook logs for errors, timeouts, or unexpected responses.
Webhook debugging
Using webhook logs effectively
To facilitate troubleshooting webhook issues, logs are viewable per conversation in the portal alongside the conversation transcript and insights.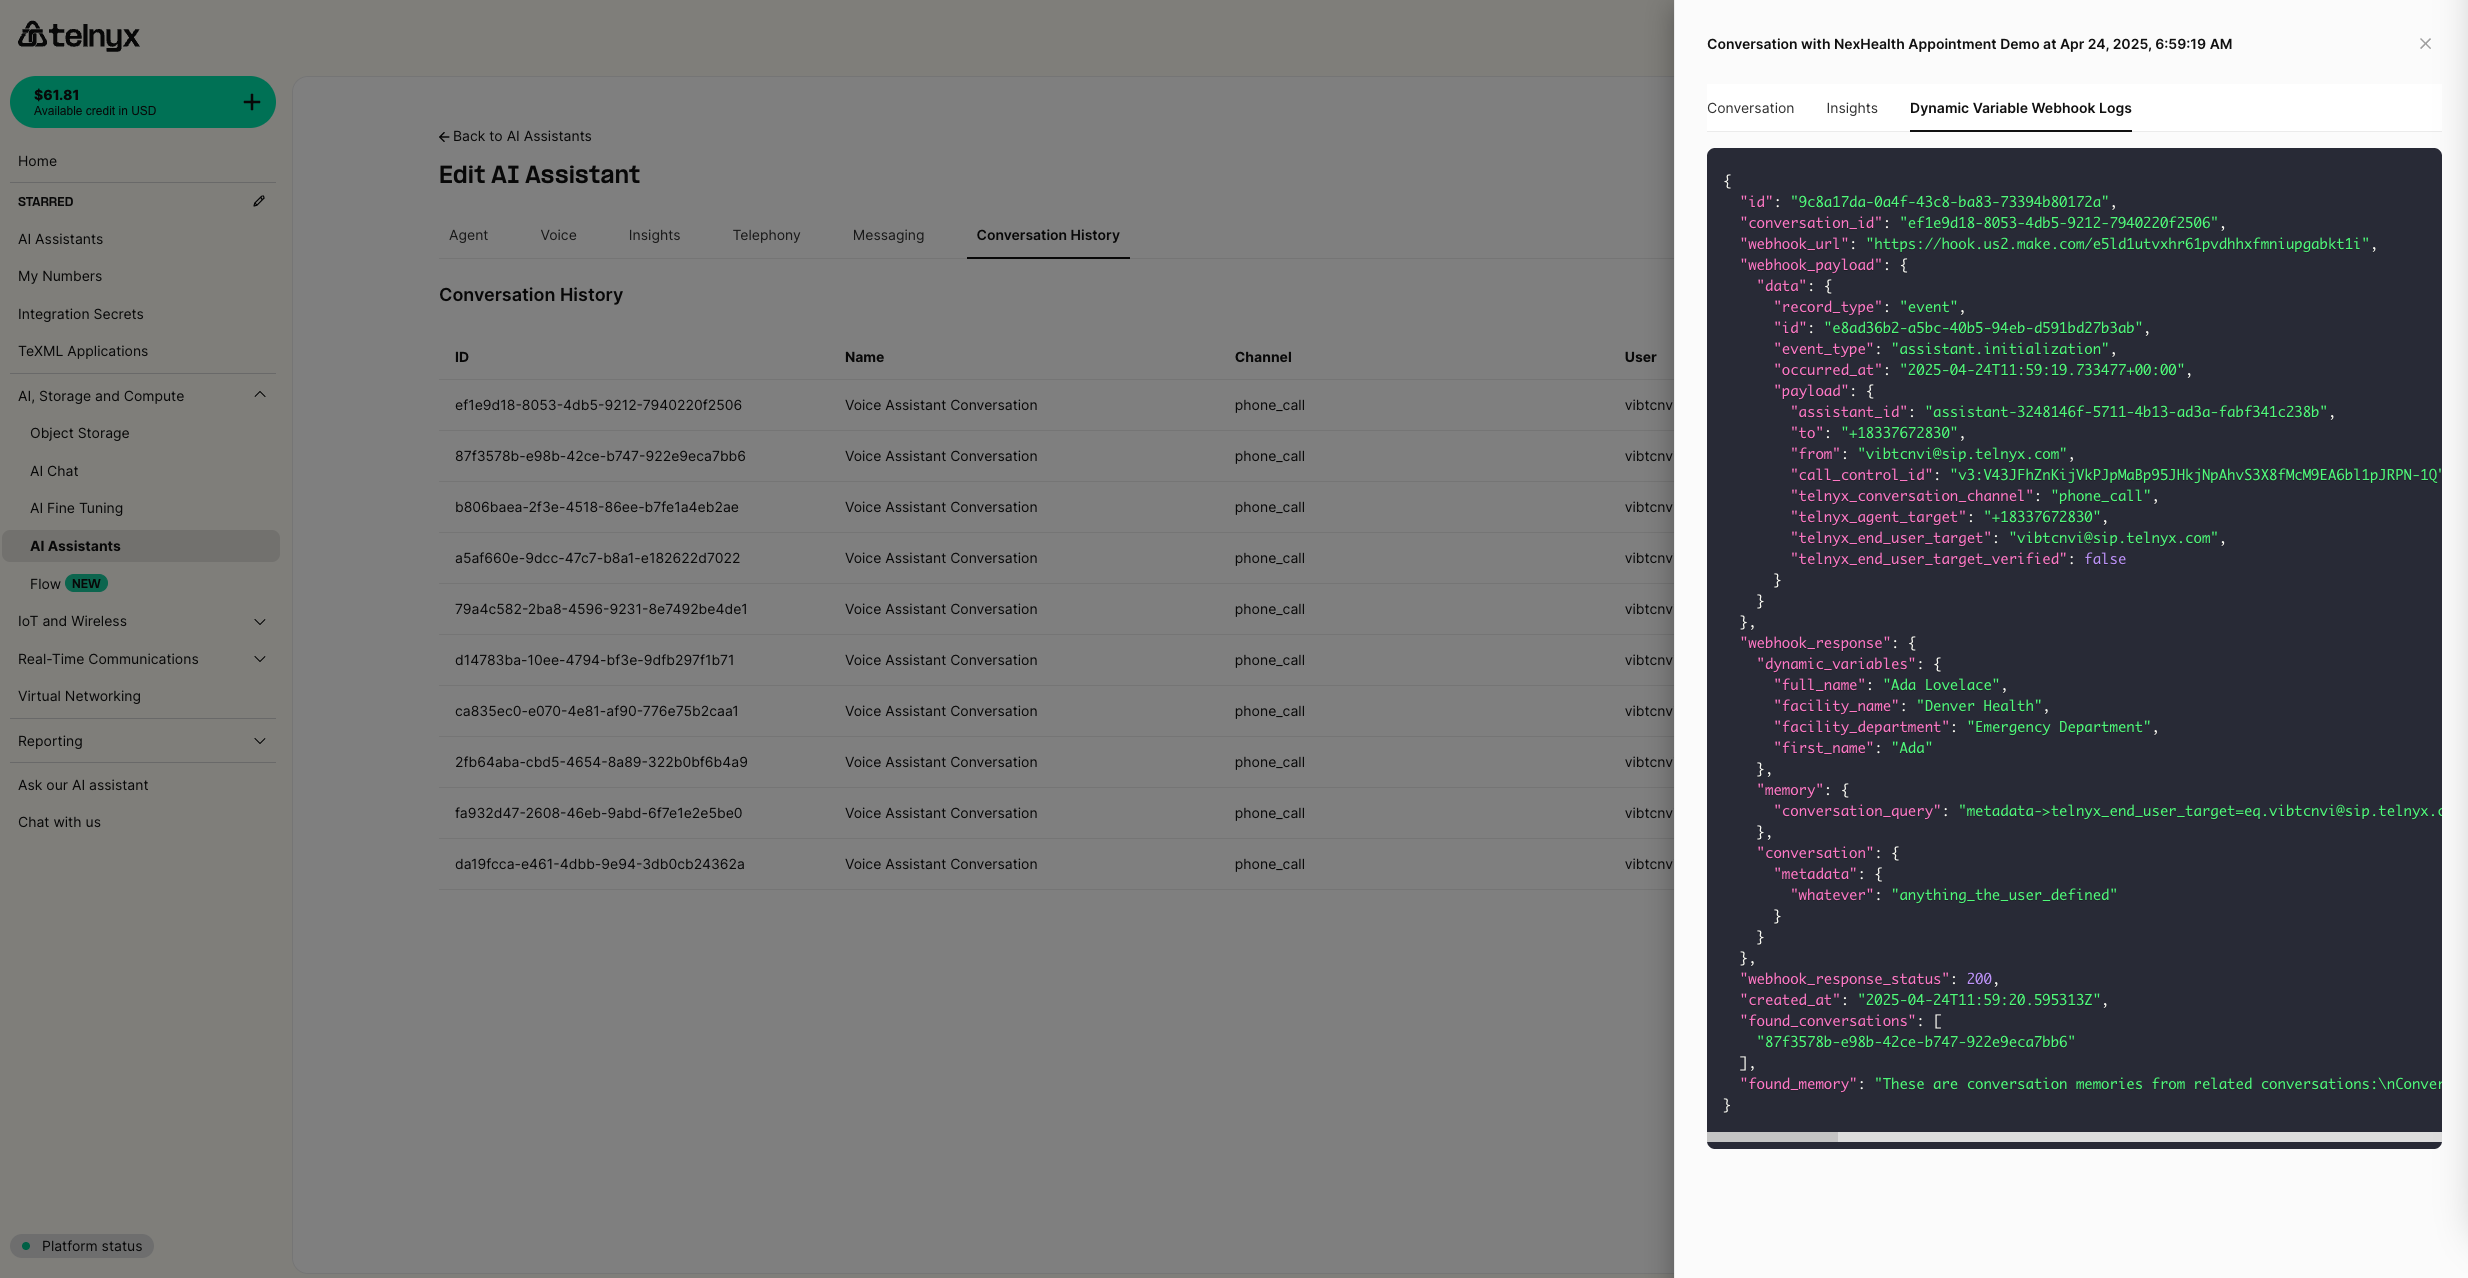
- Request logs: Show the exact payload Telnyx sent to your webhook
- Response logs: Display your webhook’s response and any errors
- Timing information: Reveals if responses exceeded the configured timeout
- Error details: Provide specific error messages for failed requests
Common webhook issues
Authentication failures:Testing webhook endpoints
Independent webhook testing:Variable validation
Input validation
Sanitize variable values:- Escape quotes and backslashes in variable content.
- Validate data types match expected formats.
- Provide meaningful defaults for empty or null values.
Response format validation
Ensure proper JSON structure:Testing scenarios
Cross-channel testing:- Verify variables work consistently across phone calls, web calls, and SMS.
- Test variable behavior in transfer scenarios using SIP headers.
- Validate fallback behavior when webhook endpoints are unavailable.
- Test webhook endpoint performance under expected call volumes.
- Verify response times remain under your configured timeout (default 1.5 seconds) during peak usage.
- Monitor for memory leaks or performance degradation over time.
Conversation Workflows
Source: https://developers.telnyx.com/docs/inference/ai-assistants/workflows.mdConversation workflows let you turn a single AI Assistant into a guided, multi-step experience. Instead of asking one prompt to handle every part of a call or chat, you can design a graph of conversation steps, define when the assistant should move between them, and tune the assistant’s behavior at each step. Use workflows when your assistant needs to guide people through a process, such as intake, qualification, booking, verification, escalation, or support triage.
Why use workflows?
A single prompt works well for open-ended conversations. Workflows are better when the customer journey has structure. With workflows, you can:- Break complex conversations into focused steps: Give each stage its own name and instructions, such as
Intake,Billing,Schedule appointment, orEscalate to specialist. - Route with natural language or deterministic rules: Move between steps when the LLM decides a condition is met, or when a dynamic variable matches a configured value.
- Tune behavior per step: Append or replace the assistant’s main instructions, and optionally override the model or voice for a specific node.
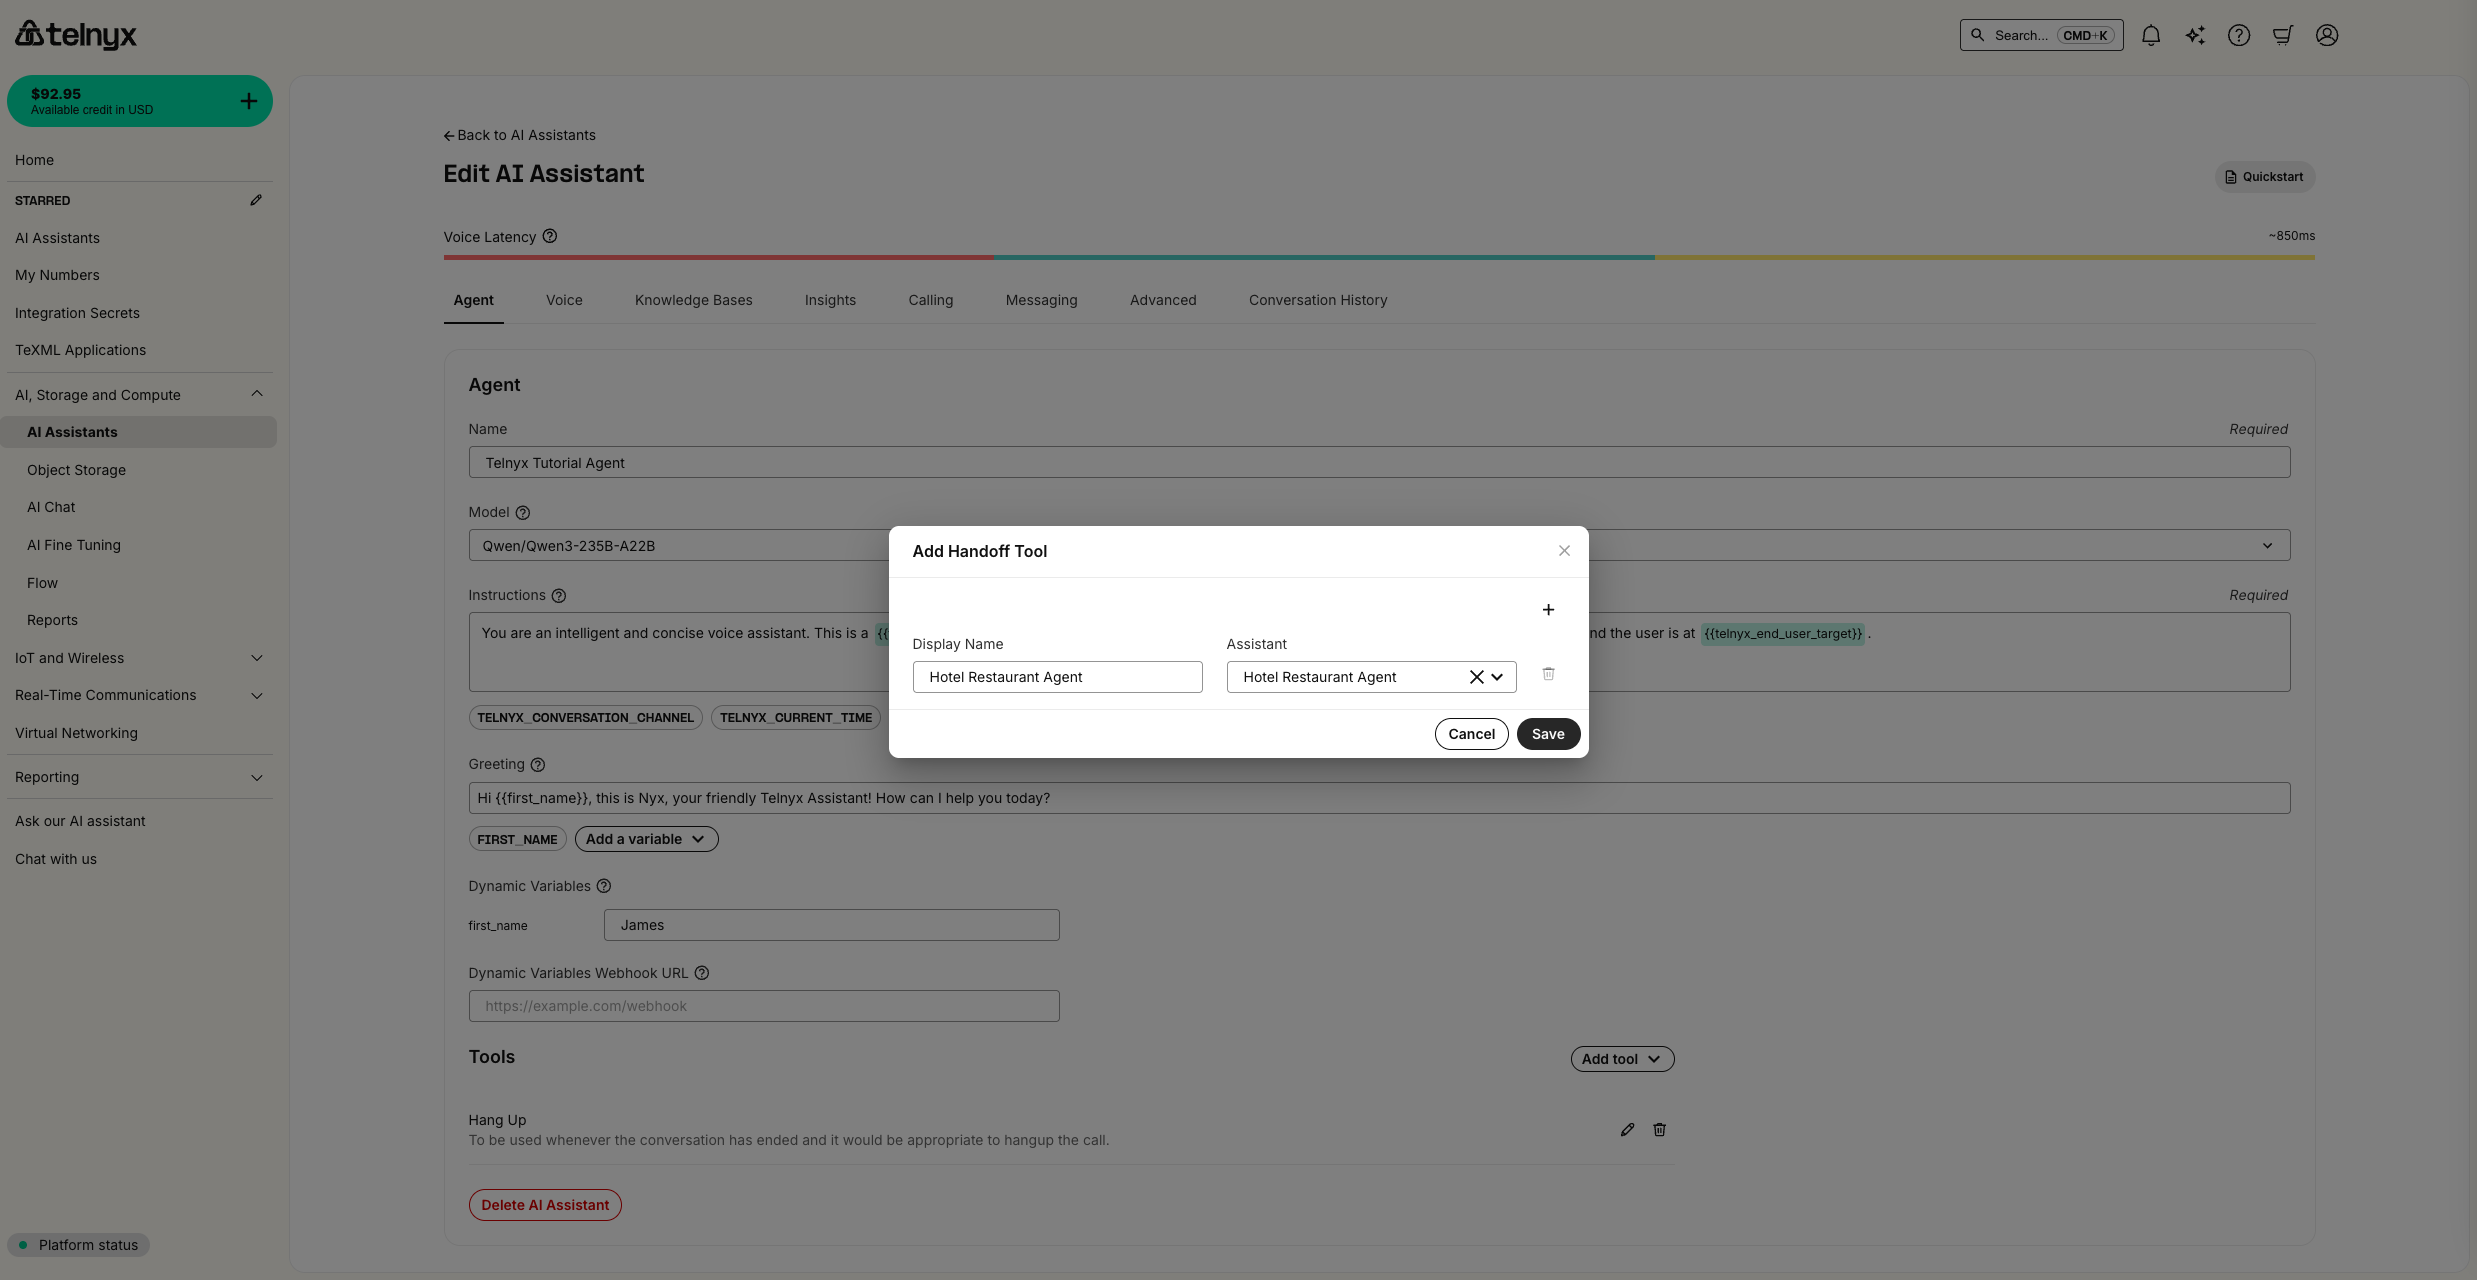
- Route to another assistant: Route from one workflow to another assistant when the conversation should be handled by a different specialist.
- Debug what happened later: Conversation transcripts can show the workflow node associated with assistant messages, so you can connect real conversations back to the workflow design.
How workflows work
A workflow is a directed graph stored on the AI Assistant asconversation_flow.
The graph has two main building blocks:
- Nodes: Conversation steps. A node is either a prompt node (an LLM-driven step with its own label, instructions, instruction mode, model override, and voice override) or a speak node (a deterministic step that plays a fixed scripted message with no LLM turn).
- Edges: Transitions between nodes, or from a node to another assistant. Each edge has a condition that decides when that path should be taken. Conditions can be natural-language (LLM), deterministic (variable comparison), or a default fallback.
What you can build with workflows
Conversation workflows support the building blocks you need for guided, adaptive customer journeys:- Start from a defined entry point: Choose which node begins the workflow.
- Create focused conversation stages: Add prompt nodes for each step and give each one its own instructions.
- Play scripted lines verbatim: Add speak nodes for greetings, disclosures, or compliance statements that must be delivered word-for-word, with no model turn.
- Control how prompts combine: Append node instructions to the assistant’s base instructions, or replace the base instructions for a specific step.
- Tune individual steps: Override the model, voice, tools, or transcription behavior for a node when that step needs different capabilities.
- Connect steps with conditional routing: Use LLM conditions for natural-language decisions and variable comparisons for deterministic decisions.
- React to tool outcomes: Route based on whether a configured tool succeeds or fails.
- Move across assistants: Send a conversation from one workflow into another assistant when a specialist configuration should take over.
- Review workflow context in transcripts: Use conversation history to understand which workflow step produced assistant messages.
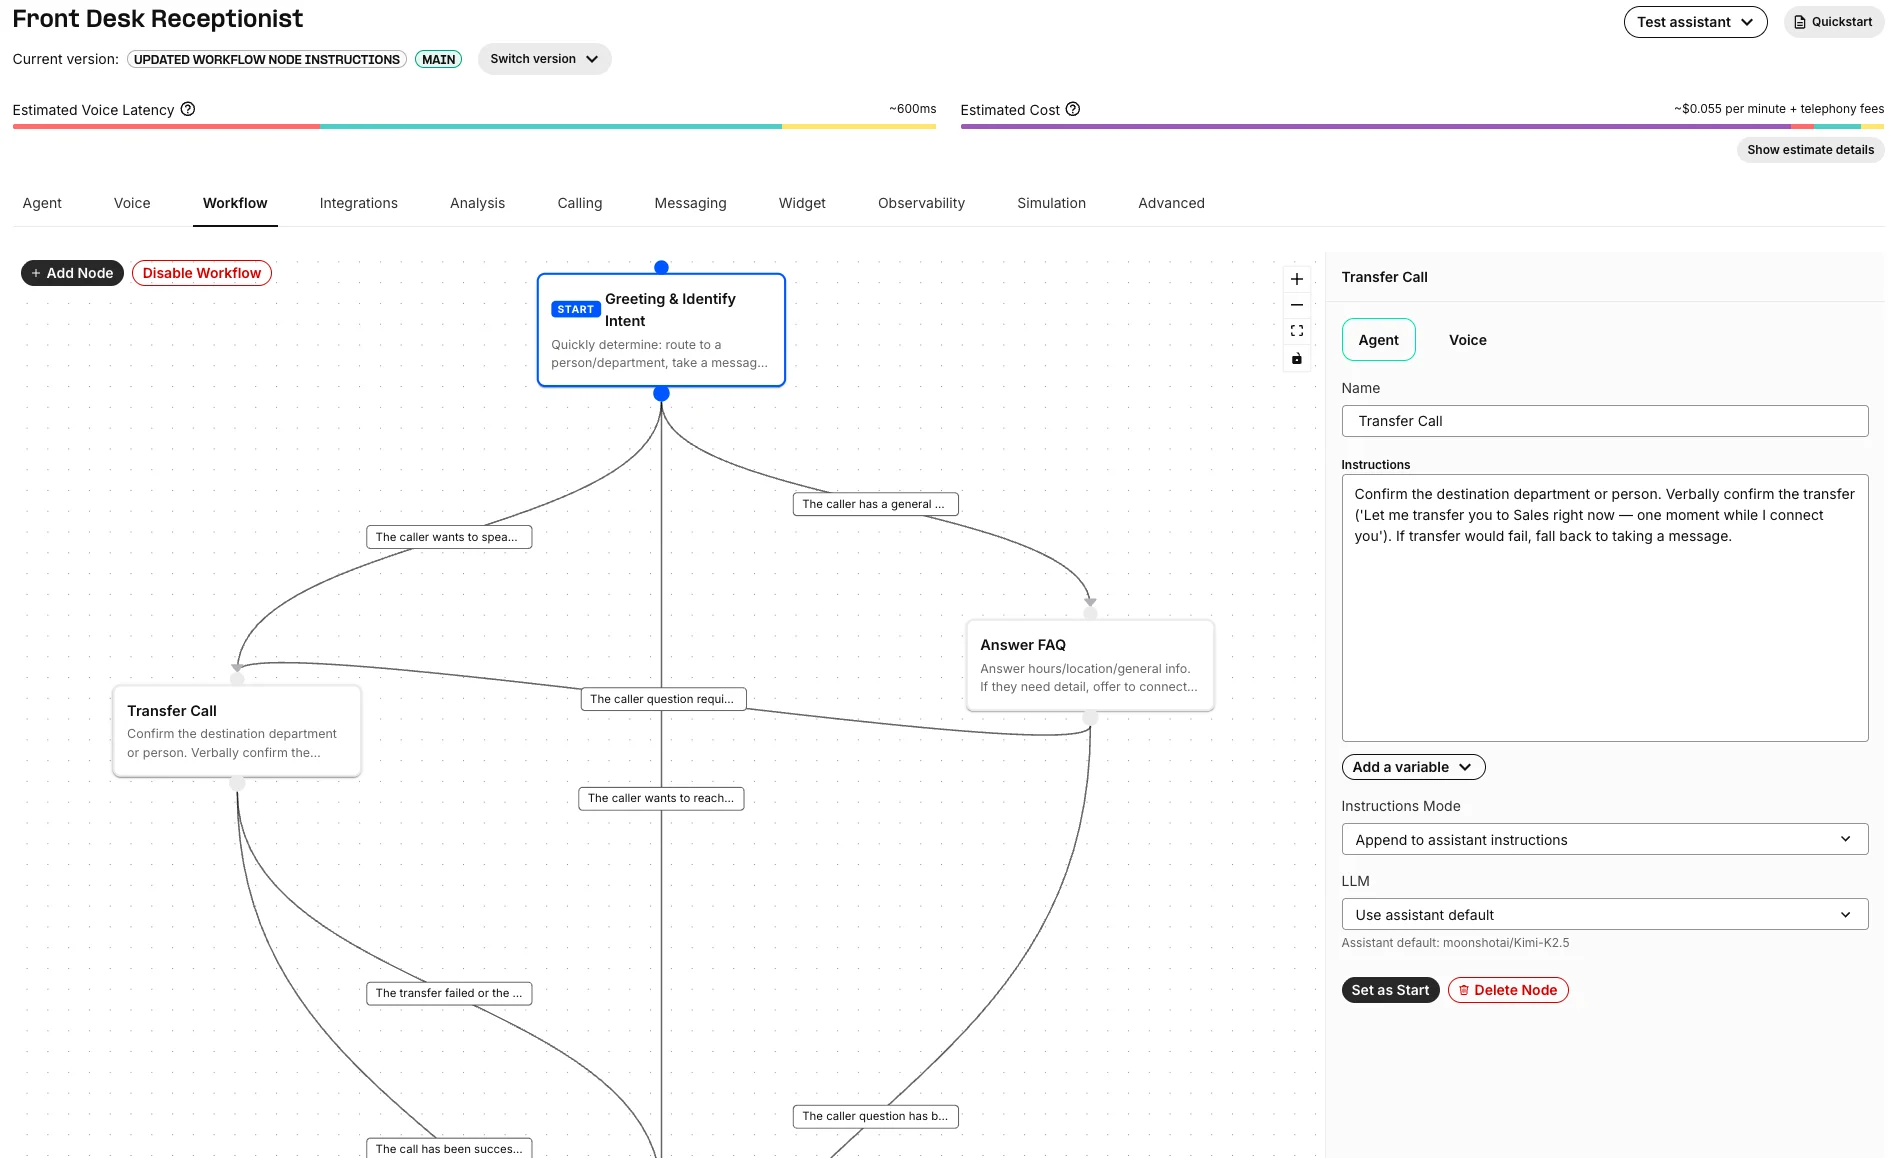
Create a workflow in the Portal
- Open AI Assistants in the Telnyx Portal.
- Select an assistant.
- Open the Workflow tab.
- Enable workflows if the assistant does not already have one.
- Add nodes for each major stage of the conversation.
- Connect nodes with edges and configure the condition for each edge.
- Save the assistant.
Configure workflow nodes
A workflow node represents one active stage of the conversation.Node types
Workflows support two kinds of nodes:- Prompt node: An LLM-driven step. The assistant generates its response from the node’s instructions (combined with the assistant’s base instructions), using the node’s model, voice, and tool settings. Most workflow steps are prompt nodes. This is the default node type.
- Speak node: A deterministic step that plays a fixed, scripted message and then advances. The assistant does not call the model on a speak node, so the wording is exactly what you configure. Use speak nodes for greetings, disclosures, hold messages, compliance statements, or any line that must be delivered verbatim.
Speak node message
A speak node centers on a single Message field that defines the line to deliver.- The message is delivered verbatim — there is no model turn, so the caller hears exactly what you type.
- The message supports
{{variable}}placeholders. Both system variables and custom dynamic variables defined on the assistant are interpolated at runtime, with inline highlighting and autocomplete in the editor. - A speak node must always have exactly one outgoing default edge. Because a speak node does not make a routing decision itself, it advances along this default edge after delivering the message.
Node name
Use short, descriptive names. Node names are visible in the workflow canvas and can appear in conversation transcript context. Good node names:Greeting & Identify IntentAnswer FAQTransfer CallCollect appointment details
Node instructions
Each node has instructions that control the assistant while that node is active. You can choose how the node instructions combine with the assistant’s main instructions:- Append to assistant instructions: Keep the assistant’s base behavior and add step-specific guidance.
- Replace assistant instructions: Use only the node’s instructions for this step.
Tool availability
Each node controls which of the assistant’s tools the model can call while that node is active. This lets you configure every tool once on the assistant, then expose only the relevant subset at each step. A node’s Tools tab shows two groups:- Inherited tools: Every tool configured on the assistant. Each tool has a toggle so you can enable or disable it for this specific node. Tools are enabled by default, so a new node starts with the full assistant toolset until you turn tools off.
- Added for this node: Tools attached to this node only. Use the Select a new tool dropdown to add a node-specific tool that should not be available elsewhere in the workflow.
Take Message node might disable the Transfer tool while keeping a take-message webhook and a Hang Up tool enabled, so the assistant can only capture and close out the message during that step.
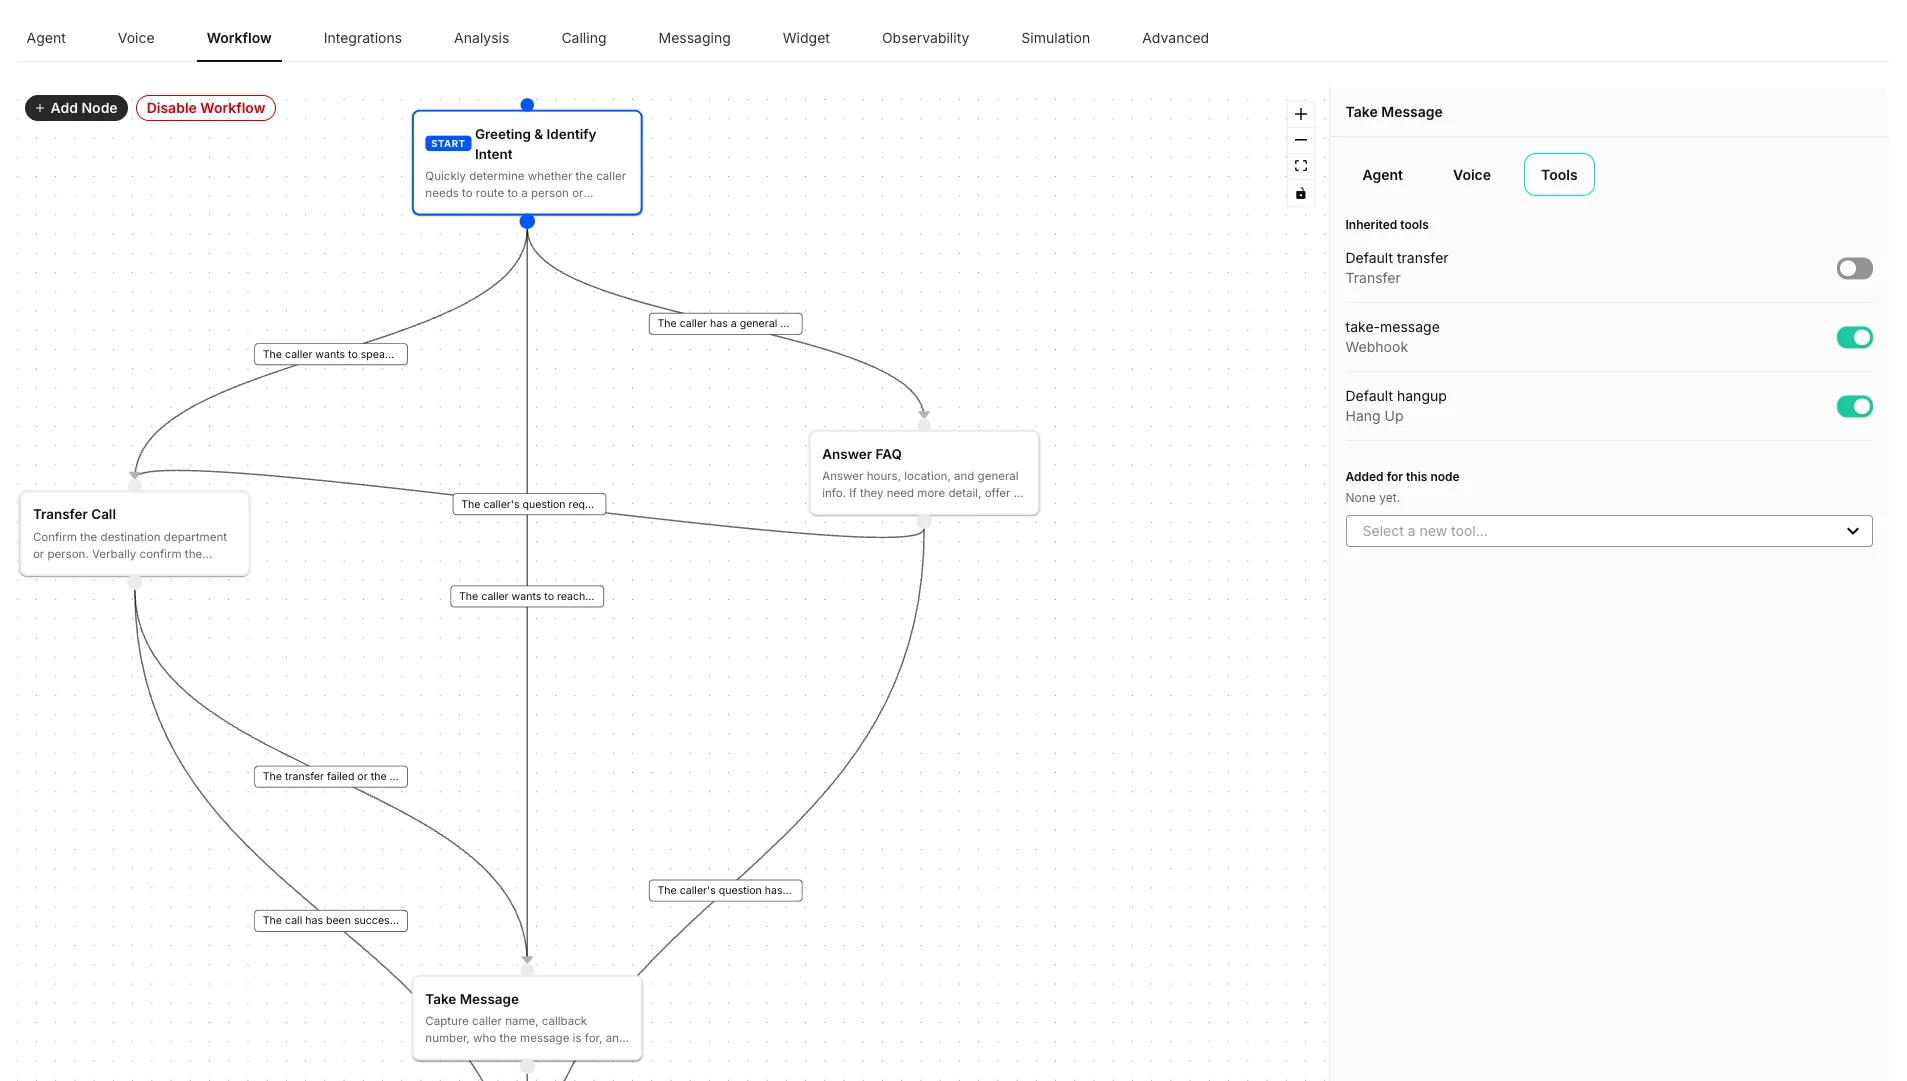
Model override
A node can use the assistant’s default LLM, or override it with another Telnyx-supported model. Use model overrides when one step needs different reasoning or latency characteristics. For example:- Use a faster model for intake.
- Use a stronger model for complex qualification or policy-heavy decisions.
- Keep the assistant default everywhere except one high-value decision point.
Voice override
A node can inherit the assistant’s default voice, or use a node-specific voice configuration. Voice overrides are useful when different conversation stages should feel different. For example:- Use the standard brand voice during greeting and intent detection.
- Switch to a calmer voice for sensitive support flows.
- Use a different voice when routing to a specialist assistant persona.
Configure workflow edges
An edge defines where the conversation can go next. Each edge has:- Source node: The node the conversation is leaving.
- Target type: Another workflow node, or another assistant.
- Condition type: The logic that decides whether the edge should be followed — an LLM condition, a variable comparison, or a default fallback.
LLM conditions
Use an LLM condition when the routing decision depends on conversation meaning. Example conditions:Variable comparison conditions
Use a variable comparison when the routing decision should be deterministic. Variable comparison conditions can use system variables and custom dynamic variables defined on the assistant. Examples:telnyx_conversation_channel == "phone_call"customer_tier == "enterprise"telnyx_conversation_duration_secs >= 30telnyx_shaken_stir_attestation != "a"
Default conditions
A default condition is a fallback edge that is followed whenever no other outgoing edge’s condition matches. It has no prompt or expression to configure — it simply defines where the conversation goes by default. Default conditions are required for nodes that do not make their own routing decision:- A speak node delivers a scripted message and then advances. It must have exactly one outgoing default edge so the conversation always has a defined next step.
- Default conditions are only valid on edges that leave a speak node. They are not used on edges leaving a prompt node, which route based on LLM or variable comparison conditions.
Configure workflows with the API
You can also configure workflows programmatically through the Assistants API. Workflows are stored on the assistant asconversation_flow.
The API accepts the full workflow graph when you create or update an assistant. To change one node or edge, send the updated conversation_flow object with the assistant update request.
Assistant updates treat conversation_flow atomically. If you omit the field, the existing workflow is unchanged. If you send conversation_flow: null, the workflow is cleared.
A simplified workflow payload looks like this:
Speak nodes and default edges in the API
A speak node uses"type": "speak" and carries its scripted text in the message field instead of instructions. Its single outgoing edge uses a default condition.
"type" field is optional and defaults to "prompt". A default condition takes no prompt or expression, and is only valid on an edge that leaves a speak node.
Route to another assistant
An edge can target another assistant instead of another node in the same workflow. Use assistant routing when a conversation should move to a different specialist configuration, such as:- A sales assistant routing qualified technical questions to a solutions assistant.
- A front-desk assistant routing billing questions to a billing assistant.
- A general support assistant routing high-risk cases to a stricter compliance assistant.
Example workflow patterns
Front desk receptionist
Use one assistant to greet callers, identify intent, and route to the right next step.Appointment booking
Guide the customer through a sequence of required information before confirmation.Escalation after timeout
Use the conversation duration system variable to escalate when the assistant has spent too long in a step.Multi-assistant specialization
Use a workflow edge to route from a general assistant into another assistant.Test and debug workflows
After saving a workflow, test the assistant with realistic conversations that exercise each route. When reviewing conversation history:- Check whether the assistant followed the expected path.
- Look for assistant messages labeled with workflow node context.
- Open the workflow from transcript context when you need to inspect the node that produced a response.
- Review dynamic variable values and webhook behavior if a variable comparison did not route as expected.
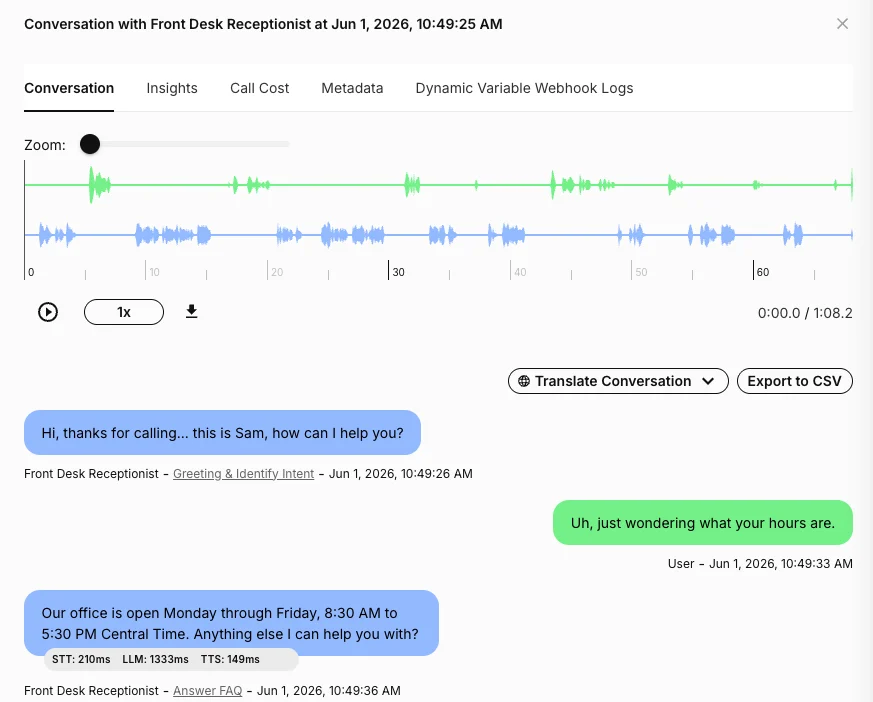
Best practices
Keep nodes focused
Each node should represent one clear job. If a node’s instructions cover multiple unrelated tasks, split it into separate nodes.Limit each node to the tools it needs
Configure all of your tools on the assistant, then disable the ones that do not apply on each node. A focused, node-specific toolset gives the model a clear purpose, reduces the chance it calls the wrong tool, and keeps each step predictable. As a rule of thumb, only leave a tool enabled on a node if that step is supposed to be able to use it.Prefer append mode for global rules
Use append mode when the node should keep the assistant’s normal safety rules, brand voice, and business constraints. Use replace mode only when the node truly needs a standalone prompt.Write edge conditions as clear decisions
For LLM conditions, describe the moment when the edge should fire. Avoid vague conditions likebilling. Prefer explicit criteria, such as The caller has a general office-hours, location, or FAQ question.
Use variable comparisons for hard rules
If the condition depends on structured data, use a variable comparison instead of an LLM condition. This makes routing predictable and easier to debug.Avoid too many paths from one node
A node with many outgoing edges is harder to reason about and test. If the routing logic gets complex, add an intermediate triage node.Test every path before production
Run through the happy path, fallback path, escalation path, and at least one negative case for every important node.Related resources
- Dynamic Variables: Personalize prompts and route with runtime data.
- Version Testing and Traffic Distribution: Test assistant changes before sending all traffic to a new version.
- Integrations: Connect assistants to external systems and data sources.
Async Tools
Source: https://developers.telnyx.com/docs/inference/ai-assistants/async-tools.mdAsync tools allow your AI assistant to trigger long-running operations without blocking the conversation. Combined with the Add Messages API, you can inject results back into the conversation whenever they’re ready—whether that’s 5 seconds or 5 minutes later. In this guide, you will learn:
- How to configure webhook tools to run asynchronously
- How to use the Add Messages API to inject context mid-conversation
- How to combine both features for powerful async workflows
Overview
Traditional webhook tools block the conversation until they complete. This works fine for fast operations, but creates awkward pauses for slow backend queries. Async tools solve this by letting the assistant continue the conversation while operations run in the background. If your backend responds within a few seconds and you’d prefer to keep using sync webhooks, filler messages offer a simpler alternative — scripted phrases that play at timed intervals to fill silence while the webhook executes.The two building blocks
These features are orthogonal—each is useful on its own, but they become especially powerful when combined.Combined workflow
When used together, these features enable a new pattern:- Assistant triggers an async webhook (e.g., order lookup)
- Assistant continues chatting with the customer
- Backend processes the request (5, 10, 30 seconds later)
- Backend calls Add Messages API to inject the results
- Assistant naturally incorporates the new information
Async webhooks
Theasync flag on webhook tools tells the assistant not to wait for the response. The webhook fires, and the assistant immediately continues the conversation.
Configuring an async webhook
Setasync: true in your webhook tool configuration:
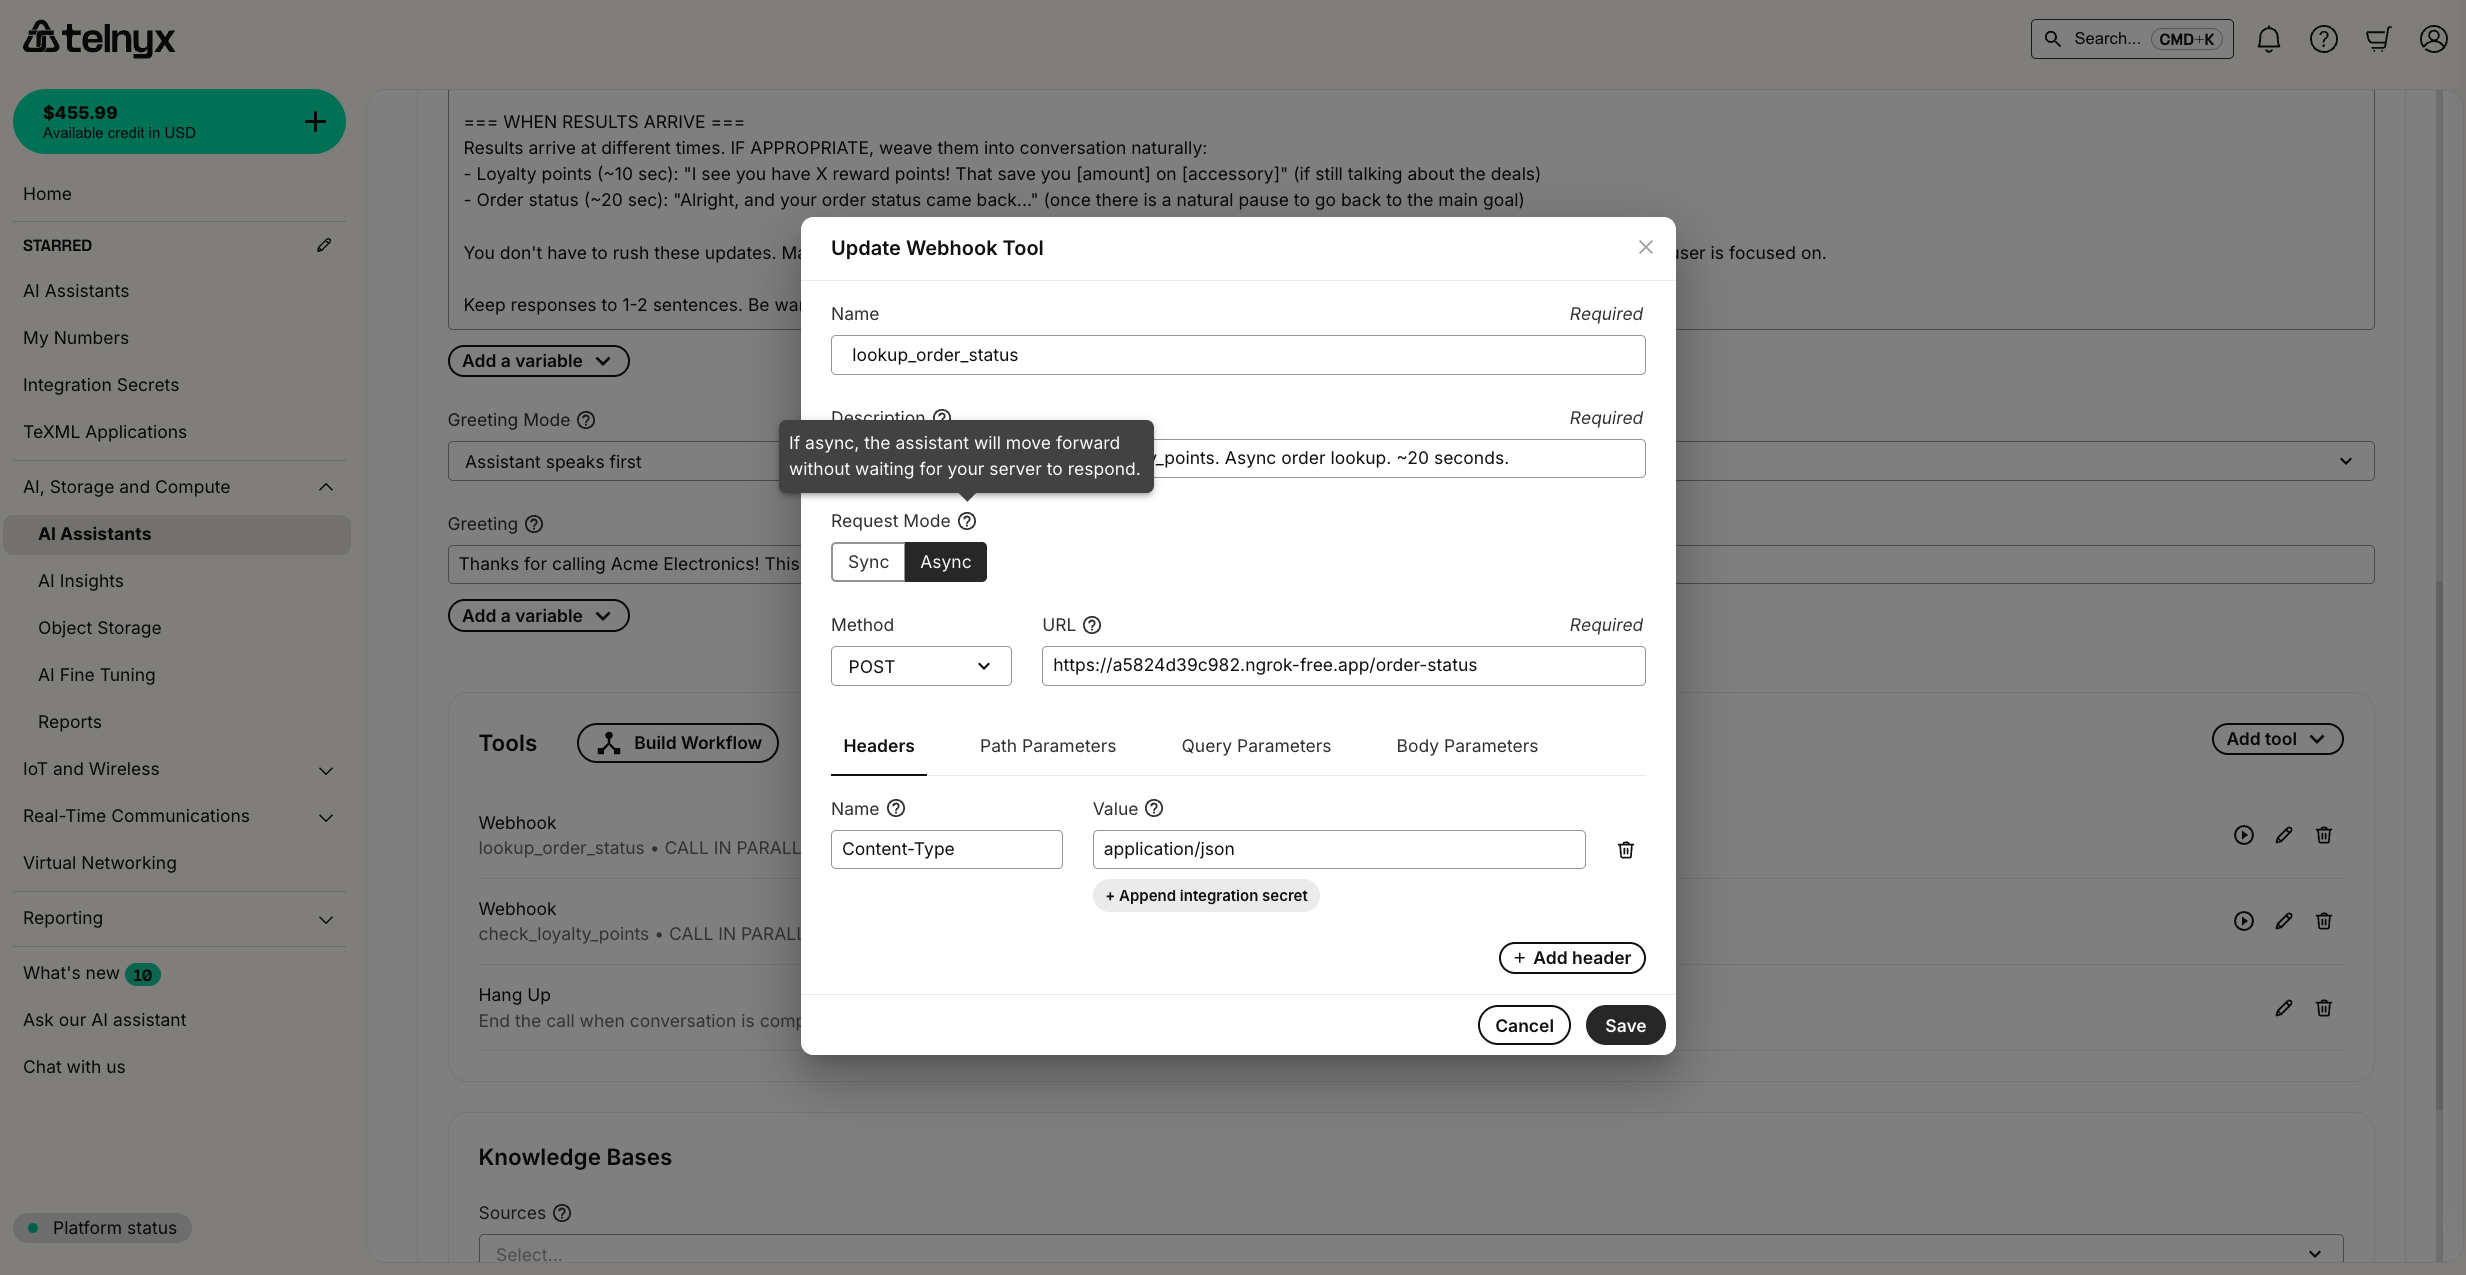
Key configuration options
For the complete webhook tool schema, see the Create Assistant API reference.
What your backend receives
When the assistant triggers an async webhook, your endpoint receives:- The configured body parameters (e.g.,
order_id) - The
x-telnyx-call-control-idheader identifying the active call
x-telnyx-call-control-id header is critical—you’ll need it to inject results back into the conversation using the Add Messages API.
Add Messages API
The Add Messages API lets you inject new messages into an active conversation from outside the call flow. This is useful for delivering async results, supervisor interventions, or external triggers.API endpoint
Request format
Message roles
Standalone use cases
The Add Messages API is valuable even without async webhooks:- Supervisor intervention: A human supervisor injects guidance during a difficult call
- Scheduled reminders: External system reminds the assistant about time-sensitive information
- Cross-system triggers: CRM or ticketing system pushes updates to an active call
- Escalation prompts: Monitoring system detects frustration and injects de-escalation guidance
Combining async webhooks with Add Messages
The real power comes from combining these features. Here’s a complete example of an async order lookup system.Architecture
Step 1: Configure the assistant
Create an assistant with async webhook tools. Notice how the instructions tell the assistant to continue engaging while waiting:Step 2: Build the backend service
Your backend receives the webhook, processes the request, and calls the Add Messages API when done:Step 3: Test the flow
- Call your assistant and ask about an order
- The assistant triggers the async lookup and continues chatting
- After 15 seconds, your backend injects the results
- The assistant seamlessly shares the order details
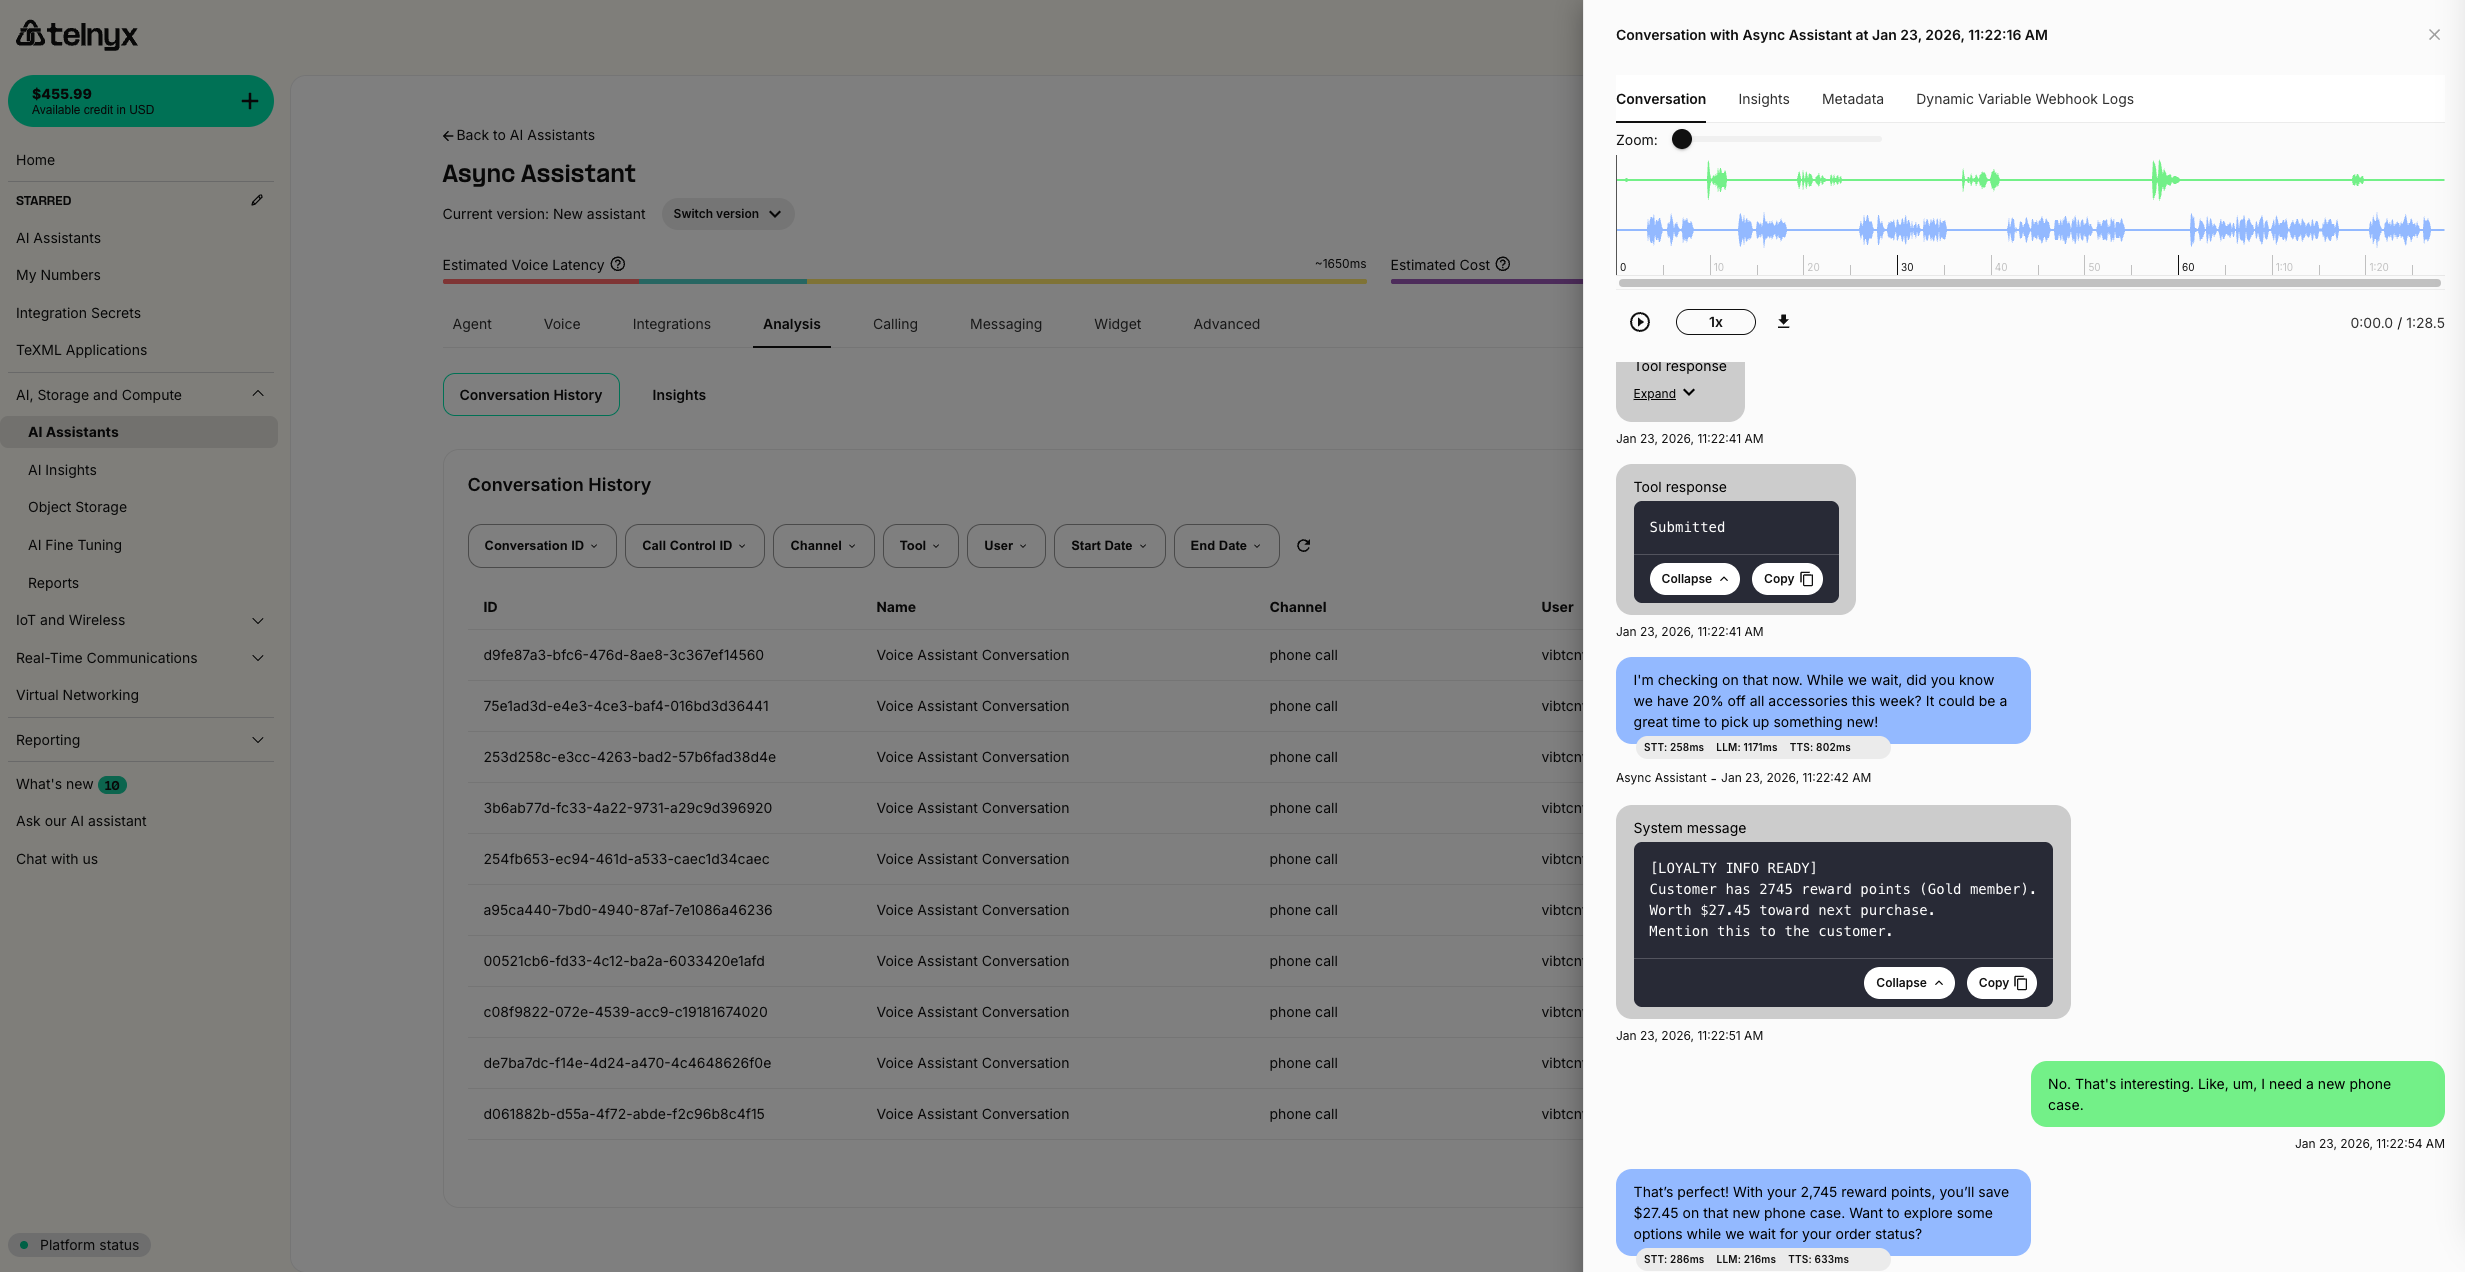
Multiple parallel lookups
You can trigger multiple async webhooks simultaneously. Each completes independently and injects results as they become available.Example: Staggered results
Configure multiple tools with different backend processing times:
The assistant triggers both at once. Results drip into the conversation naturally:
Instructing the assistant
For parallel lookups to work well, your assistant instructions should emphasize calling tools together:Best practices
Crafting system messages
When injecting results via the Add Messages API, format them clearly:Handling edge cases
Call ended before results arrive:- Include identifiers in messages so the assistant knows which query the results belong to
- Use timestamps or request IDs if needed
Backend considerations
- Your backend should return a 200 response quickly to acknowledge receipt
- Process the actual work asynchronously (use background workers, Celery, AWS Lambda, etc.)
- There’s no timeout constraint on async webhooks—your backend can take as long as needed before calling the Add Messages API
Testing tips
- Use tools like ngrok to expose local backends during development
- Log all headers to verify
x-telnyx-call-control-idis received - Test with various delay lengths to ensure natural conversation flow
- Monitor the conversation transcript in the Portal to see messages being injected
Use cases
Customer service
- Order lookups: Query multiple systems (warehouse, shipping, payments) in parallel
- Account reviews: Pull account history, loyalty status, and recent tickets simultaneously
- Product availability: Check inventory across multiple warehouses
Healthcare
- Patient record retrieval: Fetch records from multiple systems while confirming appointment details
- Insurance verification: Run eligibility checks while gathering patient information
- Lab results: Query lab systems and deliver results when ready
Financial services
- Loan pre-qualification: Run credit checks and affordability calculations in background
- Account aggregation: Pull balances from multiple accounts simultaneously
- Fraud alerts: Inject real-time fraud warnings from monitoring systems
Scheduling
- Multi-calendar availability: Check availability across multiple calendars/resources
- Booking confirmations: Process reservations and inject confirmation details
- Waitlist updates: Notify assistant when spots become available
Related resources
- Add Messages API Reference - Complete API specification for injecting messages
- Create Assistant API Reference - Full webhook tool configuration options
- Filler Messages - Scripted phrases that fill silence during sync webhook calls
- Webhooks & Workflows - Learn more about configuring webhook tools
- Dynamic Variables - Pass context into conversations at start time
- Memory - Persist information across conversations
Filler Messages
Source: https://developers.telnyx.com/docs/inference/ai-assistants/filler-messages.mdFiller messages let your AI assistant speak scripted phrases while synchronous webhook tools execute. Instead of silence during a database lookup or API call, callers hear natural phrases like “Let me look that up for you” at configurable intervals. In this guide, you will learn:
- How filler messages work and when to use them
- How to configure message types and timing
- How to set them up via the API and Mission Control Portal
Video tutorial
Overview
When an AI assistant calls a synchronous webhook tool, it waits for the response before speaking again. If your backend takes several seconds to respond, the caller hears silence — creating an awkward experience. Filler messages solve this by playing scripted phrases at the start of the request and at timed intervals while the assistant waits. Messages are scripted per tool, not generated by the LLM — you control the exact wording, timing, and brand voice. Filler messages work with synchronous webhook tools and MCP tool calls only. Async webhooks return immediately and don’t produce dead air. If your backend consistently takes more than a few seconds, consider async tools as an alternative.Filler message types
There are two types of filler messages, each triggered at a different point during the webhook call.
You can configure multiple
request_response_delayed messages at different delay thresholds to keep the caller engaged during longer operations.
Configuration
API schema
Add afiller_messages array to your webhook tool configuration:
Key fields
Mission Control Portal
You can also configure filler messages through the Portal:- Navigate to AI > Assistants
- Select your assistant and edit a webhook tool
- Set the tool to Sync mode
- Open the Filler Messages tab
- Add your messages and timing thresholds
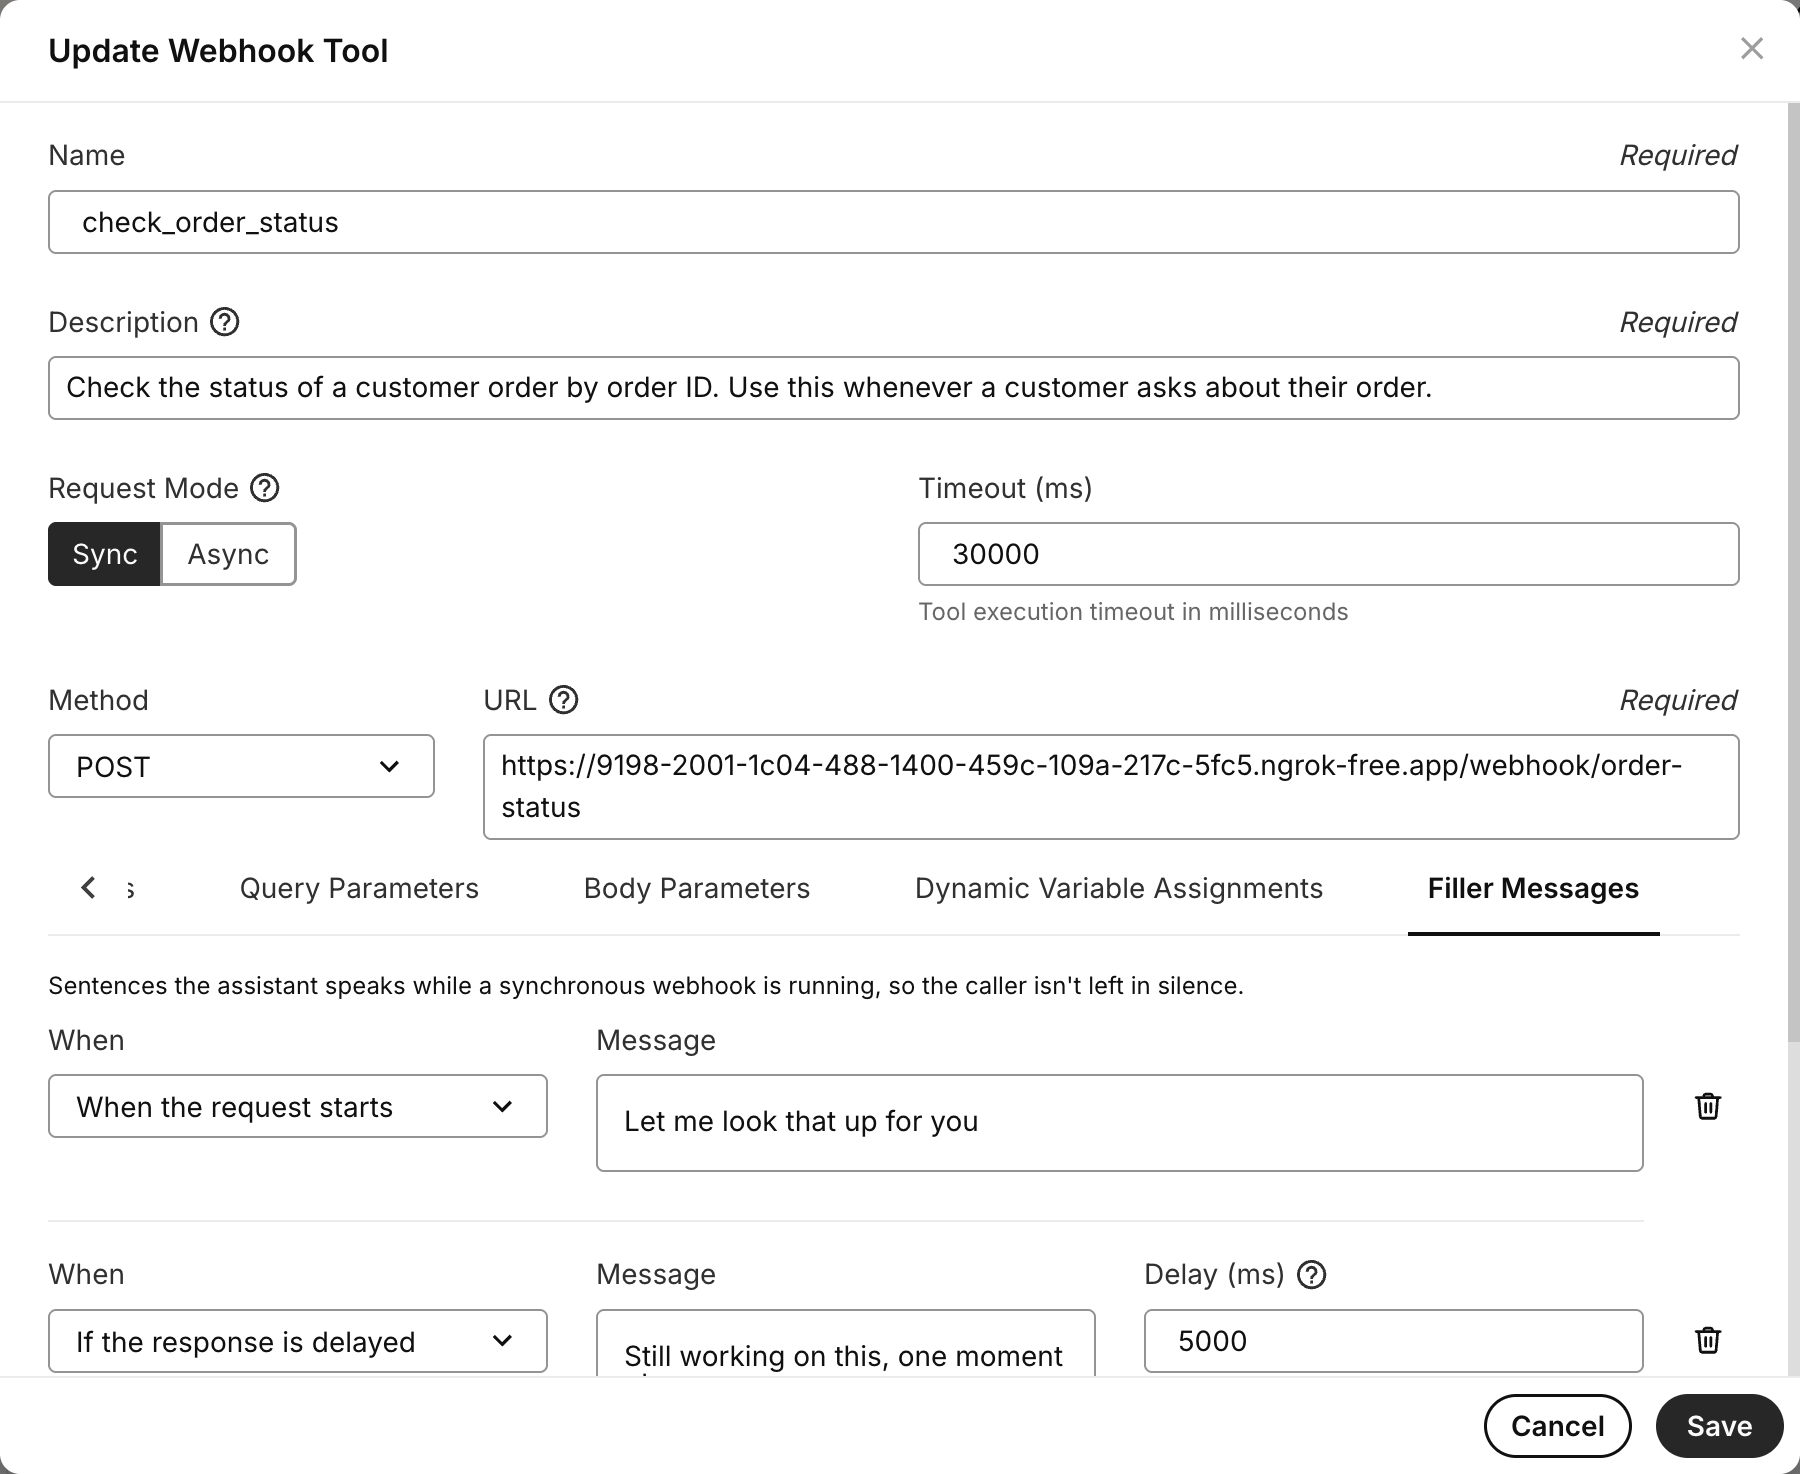
Example: tiered filler messages
This example shows a billing lookup tool with three filler messages that escalate in reassurance as the wait grows:Use cases
- Customer support: Query billing or CRM systems mid-call without silence
- AI receptionists: Book appointments via webhook while keeping the caller engaged
- Voice agents calling external LLMs: Fill silence while a third-party LLM or RAG pipeline processes a request
- Appointment scheduling: Check availability across calendar systems with natural wait phrases
Filler messages vs. async tools
Both features address the same problem — slow backend responses — but take different approaches.
Use filler messages when your backend is reasonably fast and you want simple, predictable caller reassurance. Use async tools when backends are slow or you want the assistant to have a free-flowing conversation while waiting.
Related resources
- Create Assistant API Reference - Full webhook tool configuration options including
filler_messages - Async Tools & Deferred Context - Alternative approach for long-running backend operations
- Webhooks & Workflows - General webhook tool configuration
Tools Library
Source: https://developers.telnyx.com/docs/inference/ai-assistants/tools-library.mdThe Tools Library lets you create tools in a shared library and assign them to any assistant. Previously, tools were tied to individual assistants — if multiple assistants needed the same tool, you had to recreate it each time.
Overview
With the Tools Library, you define a tool once and reuse it across all your assistants. Updating a shared tool keeps behavior consistent across every assistant that uses it.Capabilities
- Shared tools — Create tools in a central library and assign them to any assistant.
- Reduced duplication — Eliminates recreating identical tools across assistants with similar workflows.
- Centralized configuration — Update a tool in one place and maintain consistency across assistants.
- Faster deployment — Speed up assistant creation using prebuilt tools from the library.
Getting started
- Log in to the Mission Control Portal.
- Navigate to AI, Storage and Compute > AI Tools.
- Click Create New Tool to add a new tool to the library.
- When building or editing an assistant, assign tools from the library instead of creating them inline.
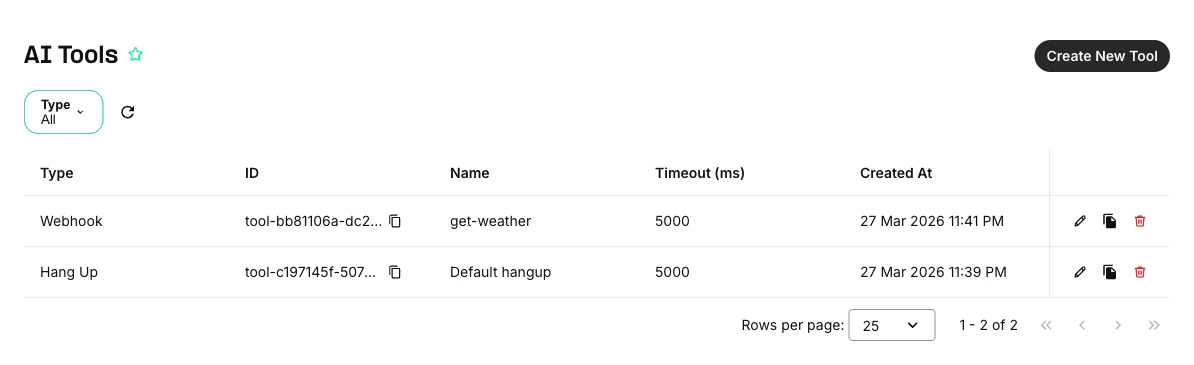
Migrating existing tools
Existing assistants with legacy (inline) tools continue to work. You can migrate legacy tools to the library at your own pace. Migration is optional. Legacy tools remain functional. You can migrate tools one at a time as needed.AI Assistants and Edge Compute
Source: https://developers.telnyx.com/docs/edge-compute/guides/ai-assistant-backend.mdTelnyx AI Assistants can call out to your own backend in several scenarios — resolving dynamic variables at the start of a conversation, executing webhook tool calls mid-conversation, and more. Whenever you need a backend for these callbacks, Telnyx Edge Compute is a natural fit: no server to manage, secrets injected at runtime, and deployment via a single CLI command. This guide walks through building a single Go function that handles both dynamic variables and webhook tool calls, using the demo app
telnyx-ai-edge as the reference implementation.
What you’ll build
A support assistant for “Telnyx Logistics” that:- Greets callers by name (dynamic variables resolved from the caller’s phone number)
- Has a
lookup-ordertool the assistant can call to retrieve order status, carrier, and estimated delivery
Prerequisites
- A Telnyx account with Edge Compute enabled.
- The
telnyx-edgeCLI installed and authenticated. - An existing AI Assistant (or you can create one via API as shown below).
- Go 1.24+ installed locally (if following along with the Go sample).
Key concepts
Single function, two callbacks
Edge Compute routes all HTTP methods and paths under your function URL to your handler — path handling is up to your code (see Routes & Domains). The platform handles/health/liveness and /health/readiness probes automatically.
In this guide, both the dynamic variables webhook and the webhook tool call point to the same function URL, so the handler dispatches on the request body shape rather than the URL path:
- Dynamic variables webhook — Telnyx wraps the payload under
data.event_type. - Webhook tool call — the body is the flat arguments object from the tool’s
body_parametersschema (e.g.{"order_id": "ORD-10042"}).
/dynamic-variables and /tool/lookup-order) if you prefer path-based routing — both approaches work. This guide uses body-shape dispatch to keep everything at a single URL.
Webhook signature verification
Telnyx signs every dynamic-variables webhook and webhook tool call with an Ed25519 key. The signature is in thetelnyx-signature-ed25519 header, and the timestamp is in telnyx-timestamp. The signed message is "{timestamp}|{raw_body}".
You must verify this signature to confirm the request is genuinely from Telnyx. Your org’s public key is available at:
data.public (not data.public_key) — the base64-encoded Ed25519 public key.
Dynamic variables response format
The response must nest variables under adynamic_variables key. A flat object (e.g. {"customer_name": "James"}) is silently ignored — variables will remain unresolved.
Timeout
The default dynamic variables webhook timeout is 1,500 ms. Edge Compute functions may occasionally need more time on a cold start, so consider settingdynamic_variables_webhook_timeout_ms on the assistant to a higher value (up to 10,000 ms). A value of 8,000 ms is a reasonable choice for edge backends.
Step 1: Scaffold the function
func.toml with the registered function ID and a Go handler scaffold.
The Go module must be named function (package function, entrypoint Handle(w, r)). Other module names fail to build: “malformed module path: missing dot in first path element.” Use go 1.24 in go.mod.
Step 2: Store the public key as a secret
Fetch your org’s public key and store it as an encrypted secret. The public key endpoint requires authentication — use your Telnyx API key:os.Getenv("TELNYX_PUBLIC_KEY") at startup. Secrets are never visible in secrets list — only the name is shown.
Step 3: Write the handler
The handler does three things:- Verifies the Telnyx Ed25519 signature on every request
- Detects whether the request is a dynamic-variables webhook or a tool call
- Returns the appropriate response
handler.go
Step 4: Ship the function
uploaded successfully, poll telnyx-edge list until the status shows deploy_ok. Don’t trust a CLI timeout as a failure — the function may still be building server-side.
Step 5: Configure the AI Assistant
Set the function URL as both the dynamic variables webhook URL and the webhook tool URL on the assistant.Dynamic variables webhook
In the Portal or via the API:
Consider setting the timeout to 8,000 ms to give the function room on cold starts. The default 1,500 ms may be tight for a cold function.
Template variables in the assistant
Use{{variable_name}} in the assistant’s instructions and greeting to reference the variables your function returns:
Webhook tool
Add a webhook tool that points to the same function URL:lookup-order, Telnyx sends a POST with the tool arguments as the flat body ({"order_id": "ORD-10042"}), signed with the same Ed25519 key. Your function detects the body shape, handles it as a tool call, and returns the result.
Step 6: Test end-to-end
-
Call the function directly (without a signature — it’ll return 403, confirming it’s live):
-
Make a test call to the assistant from the Portal or via the API:
-
Verify in the conversation transcript that:
- The greeting includes the resolved
customer_name - The assistant can call
lookup-orderand read back real order data
- The greeting includes the resolved
Tips and gotchas
Choosing body-shape vs path-based dispatch
Since Edge Compute routes all paths to your handler, you can use path-based routing (e.g.r.URL.Path == "/tool/lookup-order") or body-shape dispatch as shown in this guide. Both work. If you configure separate URLs for the DV webhook and the tool on the assistant, path-based routing is natural. If you point both at the same URL, body-shape dispatch is the way to go.
For a path-based routing example, see the RESTful API example in the Edge Compute CLI repo.
Consider a higher webhook timeout
The default dynamic variables webhook timeout is 1,500 ms. Edge Compute functions may occasionally need a bit more time on a cold start, so consider settingdynamic_variables_webhook_timeout_ms to 8,000 ms to give the function room. The maximum is 10,000 ms.
Always verify signatures
Without signature verification, anyone who knows your function URL can inject fake dynamic variables or tool responses. Thetelnyx-signature-ed25519 and telnyx-timestamp headers are present on every request from Telnyx.
Ship takes a few minutes
A normal ship takes 2–3 minutes. The CLI’s build monitor has a 5-minute timeout, but the build continues server-side regardless. If the CLI reports a timeout, checktelnyx-edge list for the actual status before retrying — the function may have deployed successfully.
Secrets require re-shipping
Adding or changing a secret (telnyx-edge secrets add) does not affect an already-deployed function. Run telnyx-edge ship again to pick up the new secret.
The dynamic_variables wrapper is mandatory
Returning a flat JSON object like {"customer_name": "James"} will be silently ignored. Variables must be nested under dynamic_variables:
Next steps
- Dynamic Variables — full reference for the DV webhook payload and resolution precedence.
- Webhook signing — how Telnyx signs webhooks and how to verify signatures.
- Edge Compute quickstart — getting started with your first function.
- Secrets — encrypted, org-scoped environment variables.
- Bindings — pre-authenticated Telnyx API client for your function.
Client-Side Tools
Source: https://developers.telnyx.com/docs/inference/ai-assistants/client-side-tools.mdClient-side tools let your AI assistant invoke functions that run directly in the browser or client application during a voice or chat conversation. Unlike webhook tools — which make HTTP requests to your backend — client-side tools execute JavaScript code on the client, with direct access to browser state, local data, and any API the page is authenticated to call.
How they work
- You define a tool in the Portal with a name, description, and JSON Schema for parameters — the same way you configure other tool types.
- The assistant decides when to call it based on the conversation context and the tool’s description.
- Your client-side handler runs in the browser, receiving the parsed arguments from the assistant.
- The return value is sent back to the assistant so it can continue the conversation naturally.
@telnyx/ai-agent-lib JavaScript/React library. They are not available for SIP/phone-call-based conversations.
When to use client-side tools
Configure a client-side tool in the Portal
- Open AI Assistants in the Telnyx Portal.
- Select an assistant and scroll to the Tools section.
- Click Add Tool and select Client-Side Tool.
- Fill in the fields:
- Click Create & Add to Assistant.
string, number, integer, boolean, enum, and array types. If your schema uses keywords the visual editor doesn’t support (like minimum, pattern, or default), it will be displayed in Advanced mode as raw JSON to preserve those keywords.
Implement client-side tool handlers
Install the Telnyx AI Agent library:@telnyx/ai-agent-lib version 0.5.0 or later.
Register tools at construction time
Register tools at runtime
Use with React
Handler contract
- The return value is serialized and sent back as the tool output. Strings are sent verbatim; anything else is JSON-stringified.
- Handlers may be async. Each runs with its tool’s Timeout configured in the Portal, falling back to
clientToolTimeoutMsfor tools that have none. If the handler exceeds it, a{ "error": "timeout" }output is returned to the assistant. - The library handles the
call_idround-trip — you don’t need to manage that yourself.
Error handling
The library always returns a result to the assistant so the conversation never hangs:
Your handler should handle its own errors gracefully. If you want the assistant to know about a failure (e.g., an API returned 404), return an error object rather than throwing:
Observe tool lifecycle events
callId, tool name) appear in debug logs.
Client-side tools vs. webhook tools
Use cases
- E-commerce: Look up cart contents, check order status from the browser session, apply a promo code
- Scheduling: Read the user’s calendar from the page, open a booking modal
- Customer support: Fetch user details from the client session, trigger a screen share
- IoT dashboards: Read device state from the dashboard, toggle a device on/off
Learn more
- Tools Library — Create shared tools and reuse them across assistants
- Async Tools & Deferred Context — Webhook tools that don’t block the conversation
- Voice Assistant Quickstart — Get started with AI assistants in the Portal
- @telnyx/ai-agent-lib on npm — Full API reference for the JavaScript/React library
Agent Handoff
Source: https://developers.telnyx.com/docs/inference/ai-assistants/agent-handoff.mdAgent handoff enables your AI assistant to seamlessly transfer conversations to other specialized AI assistants while preserving full context. This allows you to build a team of expert agents, each focused on specific domains or tasks, working together to provide comprehensive support in a single conversation. In this guide, you will learn how to:
- Configure agent handoff for your AI assistants.
- Choose between Unified and Distinct handoff modes.
- Design effective multi-agent architectures.
- Implement agent handoff via API and Portal.
Overview
Agent handoff represents a powerful approach to building sophisticated AI systems. Instead of creating one complex agent that handles everything, you can build a team of specialized agents that collaborate seamlessly, each bringing domain expertise to the conversation. Agent handoff is model-agnostic and works with any AI model supported by Telnyx, including OpenAI GPT models, Meta Llama models, Anthropic Claude, Qwen, and others. Each agent in the handoff chain can use a different model based on its specialized needs.How agent handoff works
The agent handoff lifecycle follows these steps:- Detection: The current agent identifies that another agent would be better suited to handle the user’s request based on intent, domain, or task requirements.
- Agent selection: The system determines which specialist agent should receive the handoff.
- Context transfer: Full conversation history, user data, and relevant context is transferred to the target agent.
- Transition: The handoff occurs, either seamlessly (Unified mode) or explicitly (Distinct mode).
- Continuation: The target agent continues the conversation with full context awareness.
Unified vs Distinct modes
Agent handoff supports two modes that determine how the transition appears to the user: Unified Mode (Default) In Unified mode, assistants share the same context and voice, creating a seamless experience where specialists work behind the scenes. The user experiences one consistent agent, even though multiple specialized assistants are handling different parts of the conversation.- Same voice: All agents use the same voice configuration.
- Transparent transition: User doesn’t notice the handoff.
- Shared context: Full conversation history available to all agents.
- Use case: When you want a unified brand experience.
- Individual voices: Each agent uses its own voice configuration.
- Explicit transition: User hears “I’m transferring you to [specialist name]”.
- Shared context: Full conversation history available to all agents.
- Use case: When you want to highlight specialist expertise.
Key benefits
- Specialist routing: Direct queries to domain experts who provide accurate, focused responses.
- Context preservation: Full conversation history travels with the handoff, eliminating repetition.
- Reduced complexity: Build focused agents instead of one mega-agent trying to do everything.
- Better user experience: Users get the right expert for their specific needs.
- Easier maintenance: Update individual specialist agents without affecting the entire system.
- Scalable architecture: Add new specialists as your product or service expands.
Common use cases
- Multi-domain support: Transfer between technical support, billing, and sales departments with full context.
- Workflow automation: Information gathering agent → processing agent → confirmation agent.
- Triage and routing: Assessment agent evaluates needs, then routes to appropriate specialist.
- Language switching: Detection agent identifies language, hands off to language-specific agent.
- Escalation tiers: Level 1 support → Level 2 support → Level 3 specialist.
- Task segmentation: Browse/Research agent → Purchase agent → Post-sale support agent.
Best practices
Following these best practices will help you design effective multi-agent systems and maximize the value of agent handoff.Agent architecture design
When to split agents vs one agent Split into multiple agents when:- Domains require significantly different knowledge bases.
- Agents need different tools or integrations.
- Response patterns differ substantially.
- You want to independently update different capabilities.
- Tasks are closely related with significant overlap.
- Context switching would reduce quality.
- User experience benefits from continuity.
- The domain is narrow and well-defined.
- By domain: Technical support, billing, sales, product information.
- By task: Information gathering, transaction processing, confirmation.
- By customer segment: VIP customers, trial users, enterprise accounts.
- By complexity: Simple queries, complex troubleshooting, escalations.
- By channel: Phone, chat, email (if behavior differs significantly).
- Full conversation history with previous agents.
- User identification and account information.
- Previous interactions and preferences.
- Current intent and goals.
- Any decisions or commitments made.
Handoff trigger design
Clear criteria for handoff Define explicit triggers:- Intent-based: “I need to talk to billing” → Billing agent.
- Keyword-based: User mentions “refund” → Billing agent.
- Task completion: Information gathered → Processing agent.
- Capability-based: Technical question beyond triage scope → Technical specialist.
- Sentiment-based: Frustrated customer → Senior support agent.
- Define clear responsibility boundaries for each agent.
- Implement handoff history tracking.
- Set maximum handoff limits per conversation.
- Design failsafe: after N handoffs, route to human agent.
- Test handoff decision logic thoroughly.
Context preservation strategies
What context to pass Essential context to transfer:- User information: Name, account ID, customer tier.
- Conversation history: What was discussed with previous agents.
- User intent: What the user is trying to accomplish.
- Collected data: Information gathered (order numbers, issue details, etc.).
- Agent actions: What previous agents already tried.
- Sentiment: User’s emotional state (frustrated, satisfied, confused).
{{customer_name}},{{account_id}},{{customer_tier}}.{{issue_type}},{{priority_level}}.{{previous_agent}},{{handoff_reason}}.- Custom variables specific to your domain.
- Enable conversation memory for all agents in the handoff chain.
- Use consistent memory keys across agents.
- Set appropriate memory retention periods.
Industry-specific templates
Healthcare: Triage to SpecialistConfiguration
Agent handoff can be configured through the Portal’s AI Assistant builder or via API when creating or updating assistants.Portal configuration
- Navigate to your AI Assistants in the Telnyx Portal.
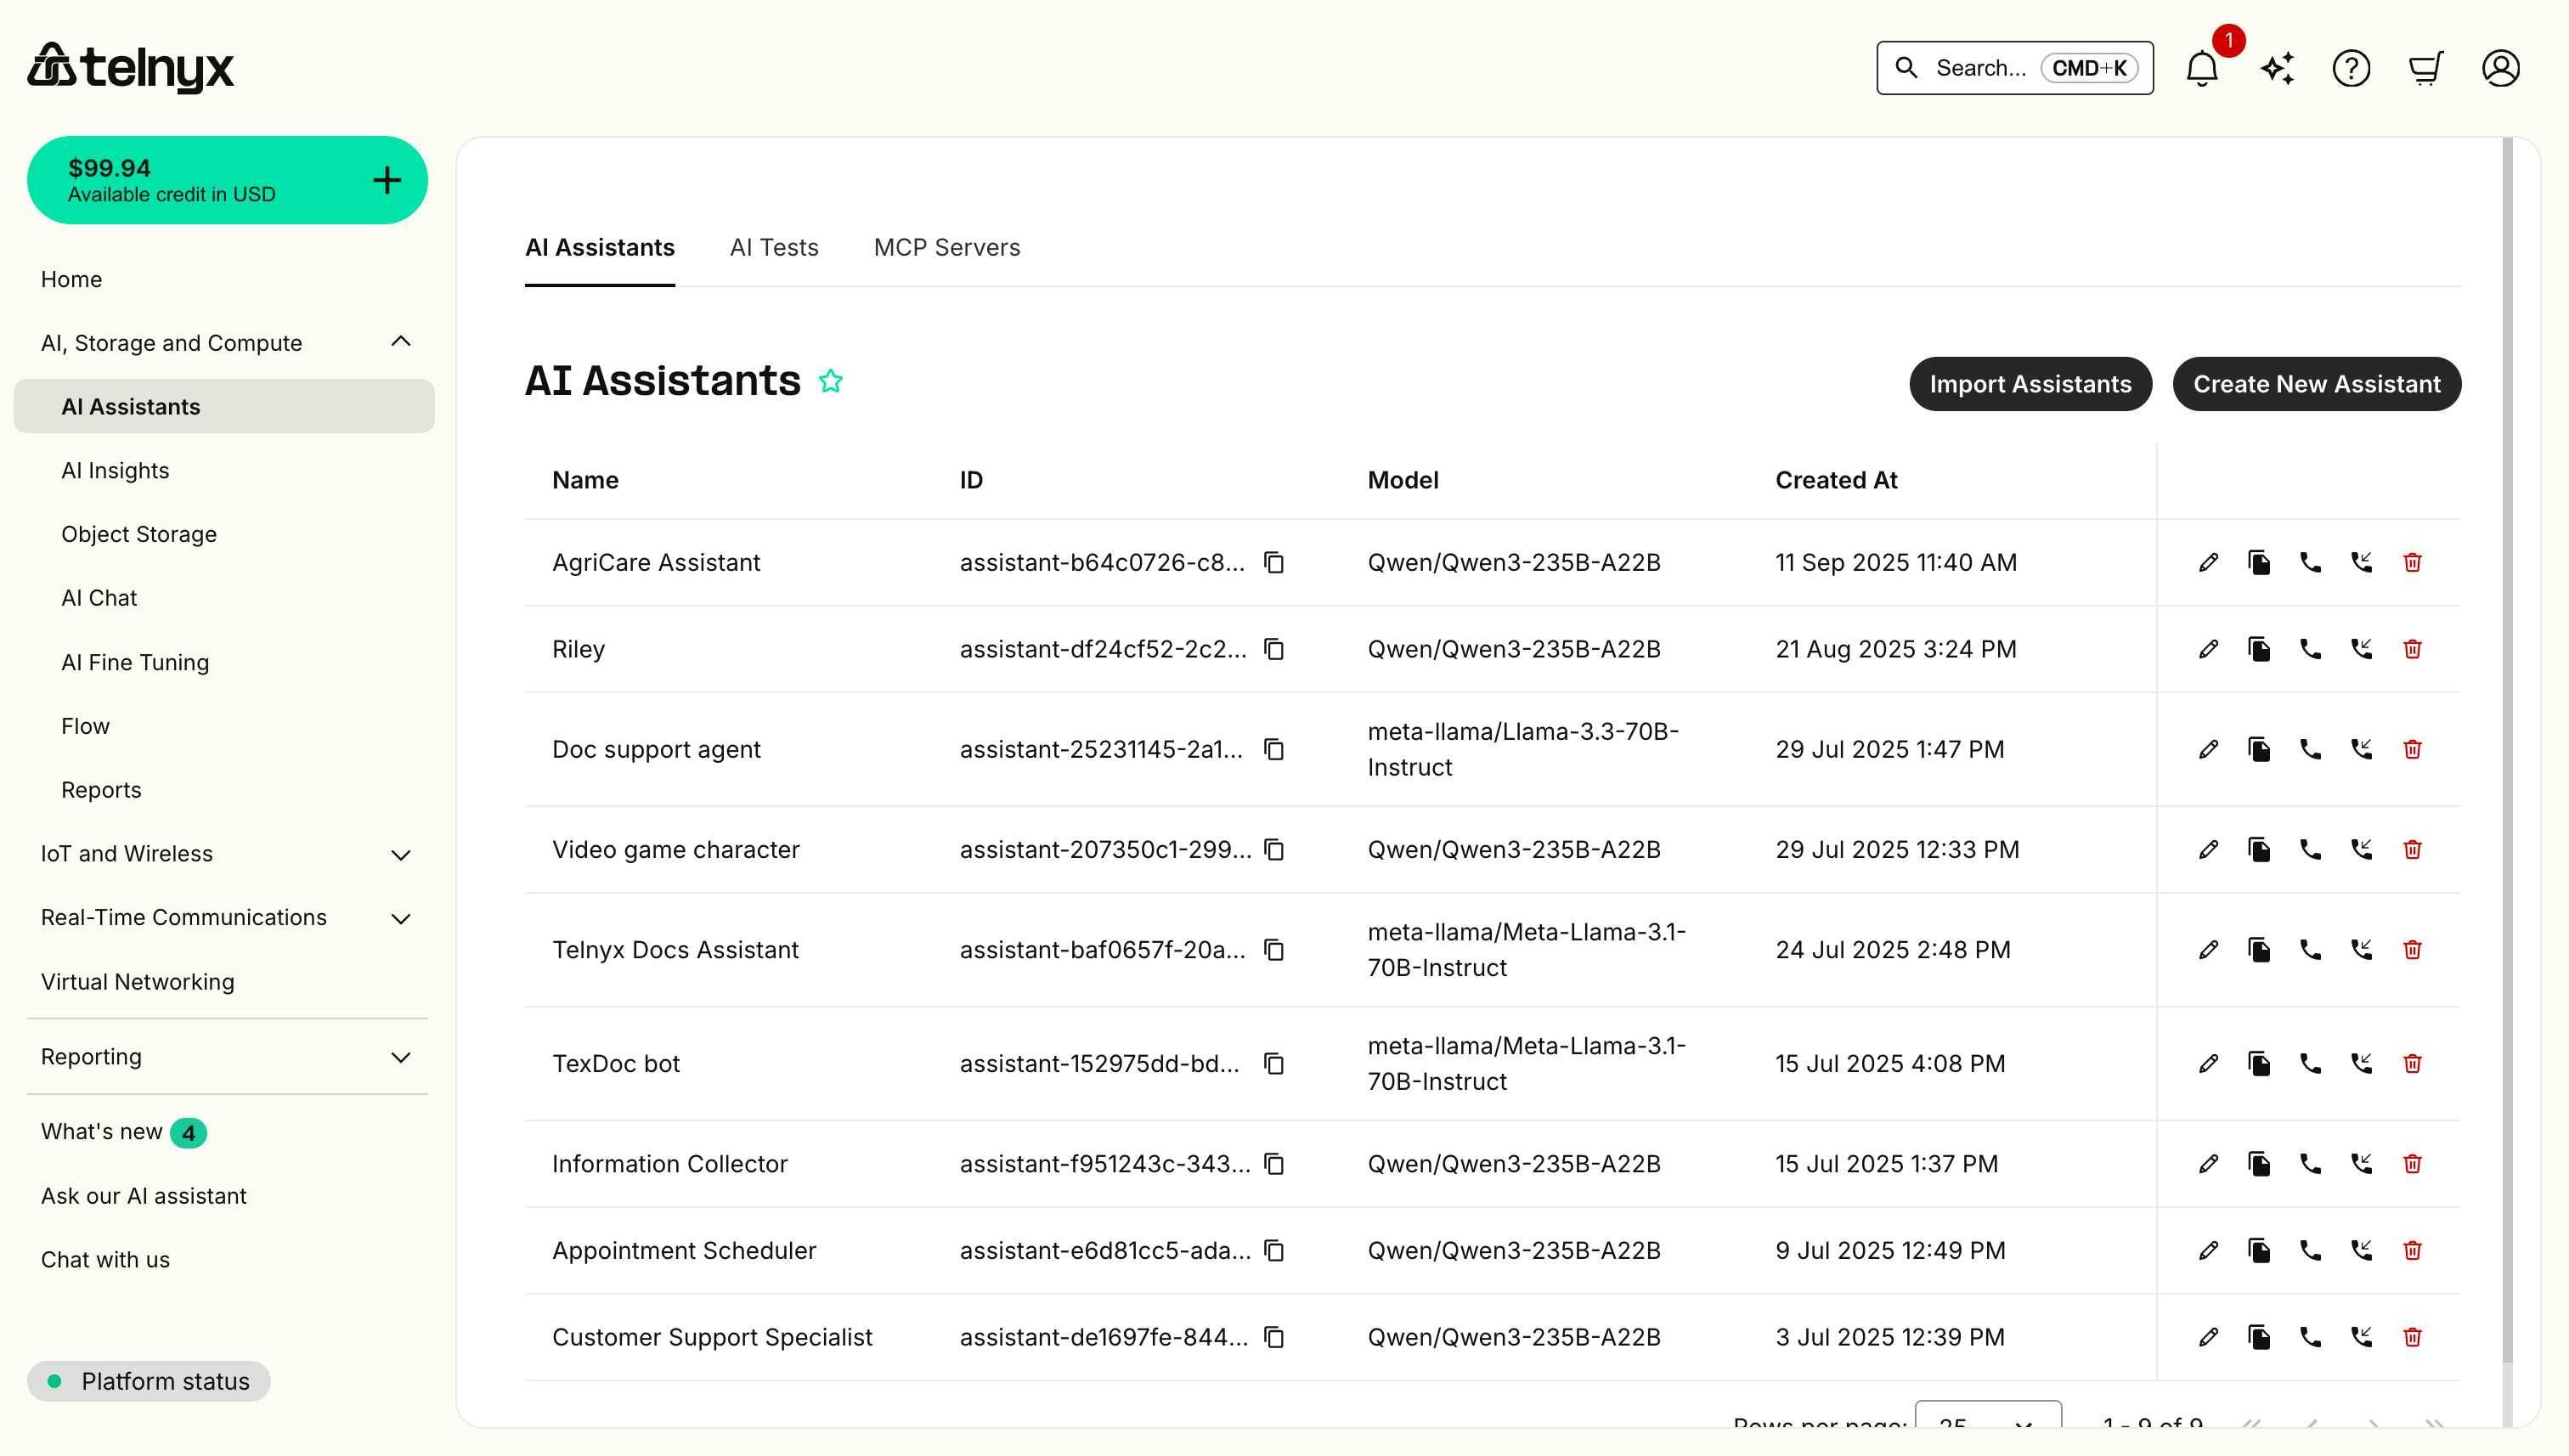
- In the Tools section, add a Handoff tool.
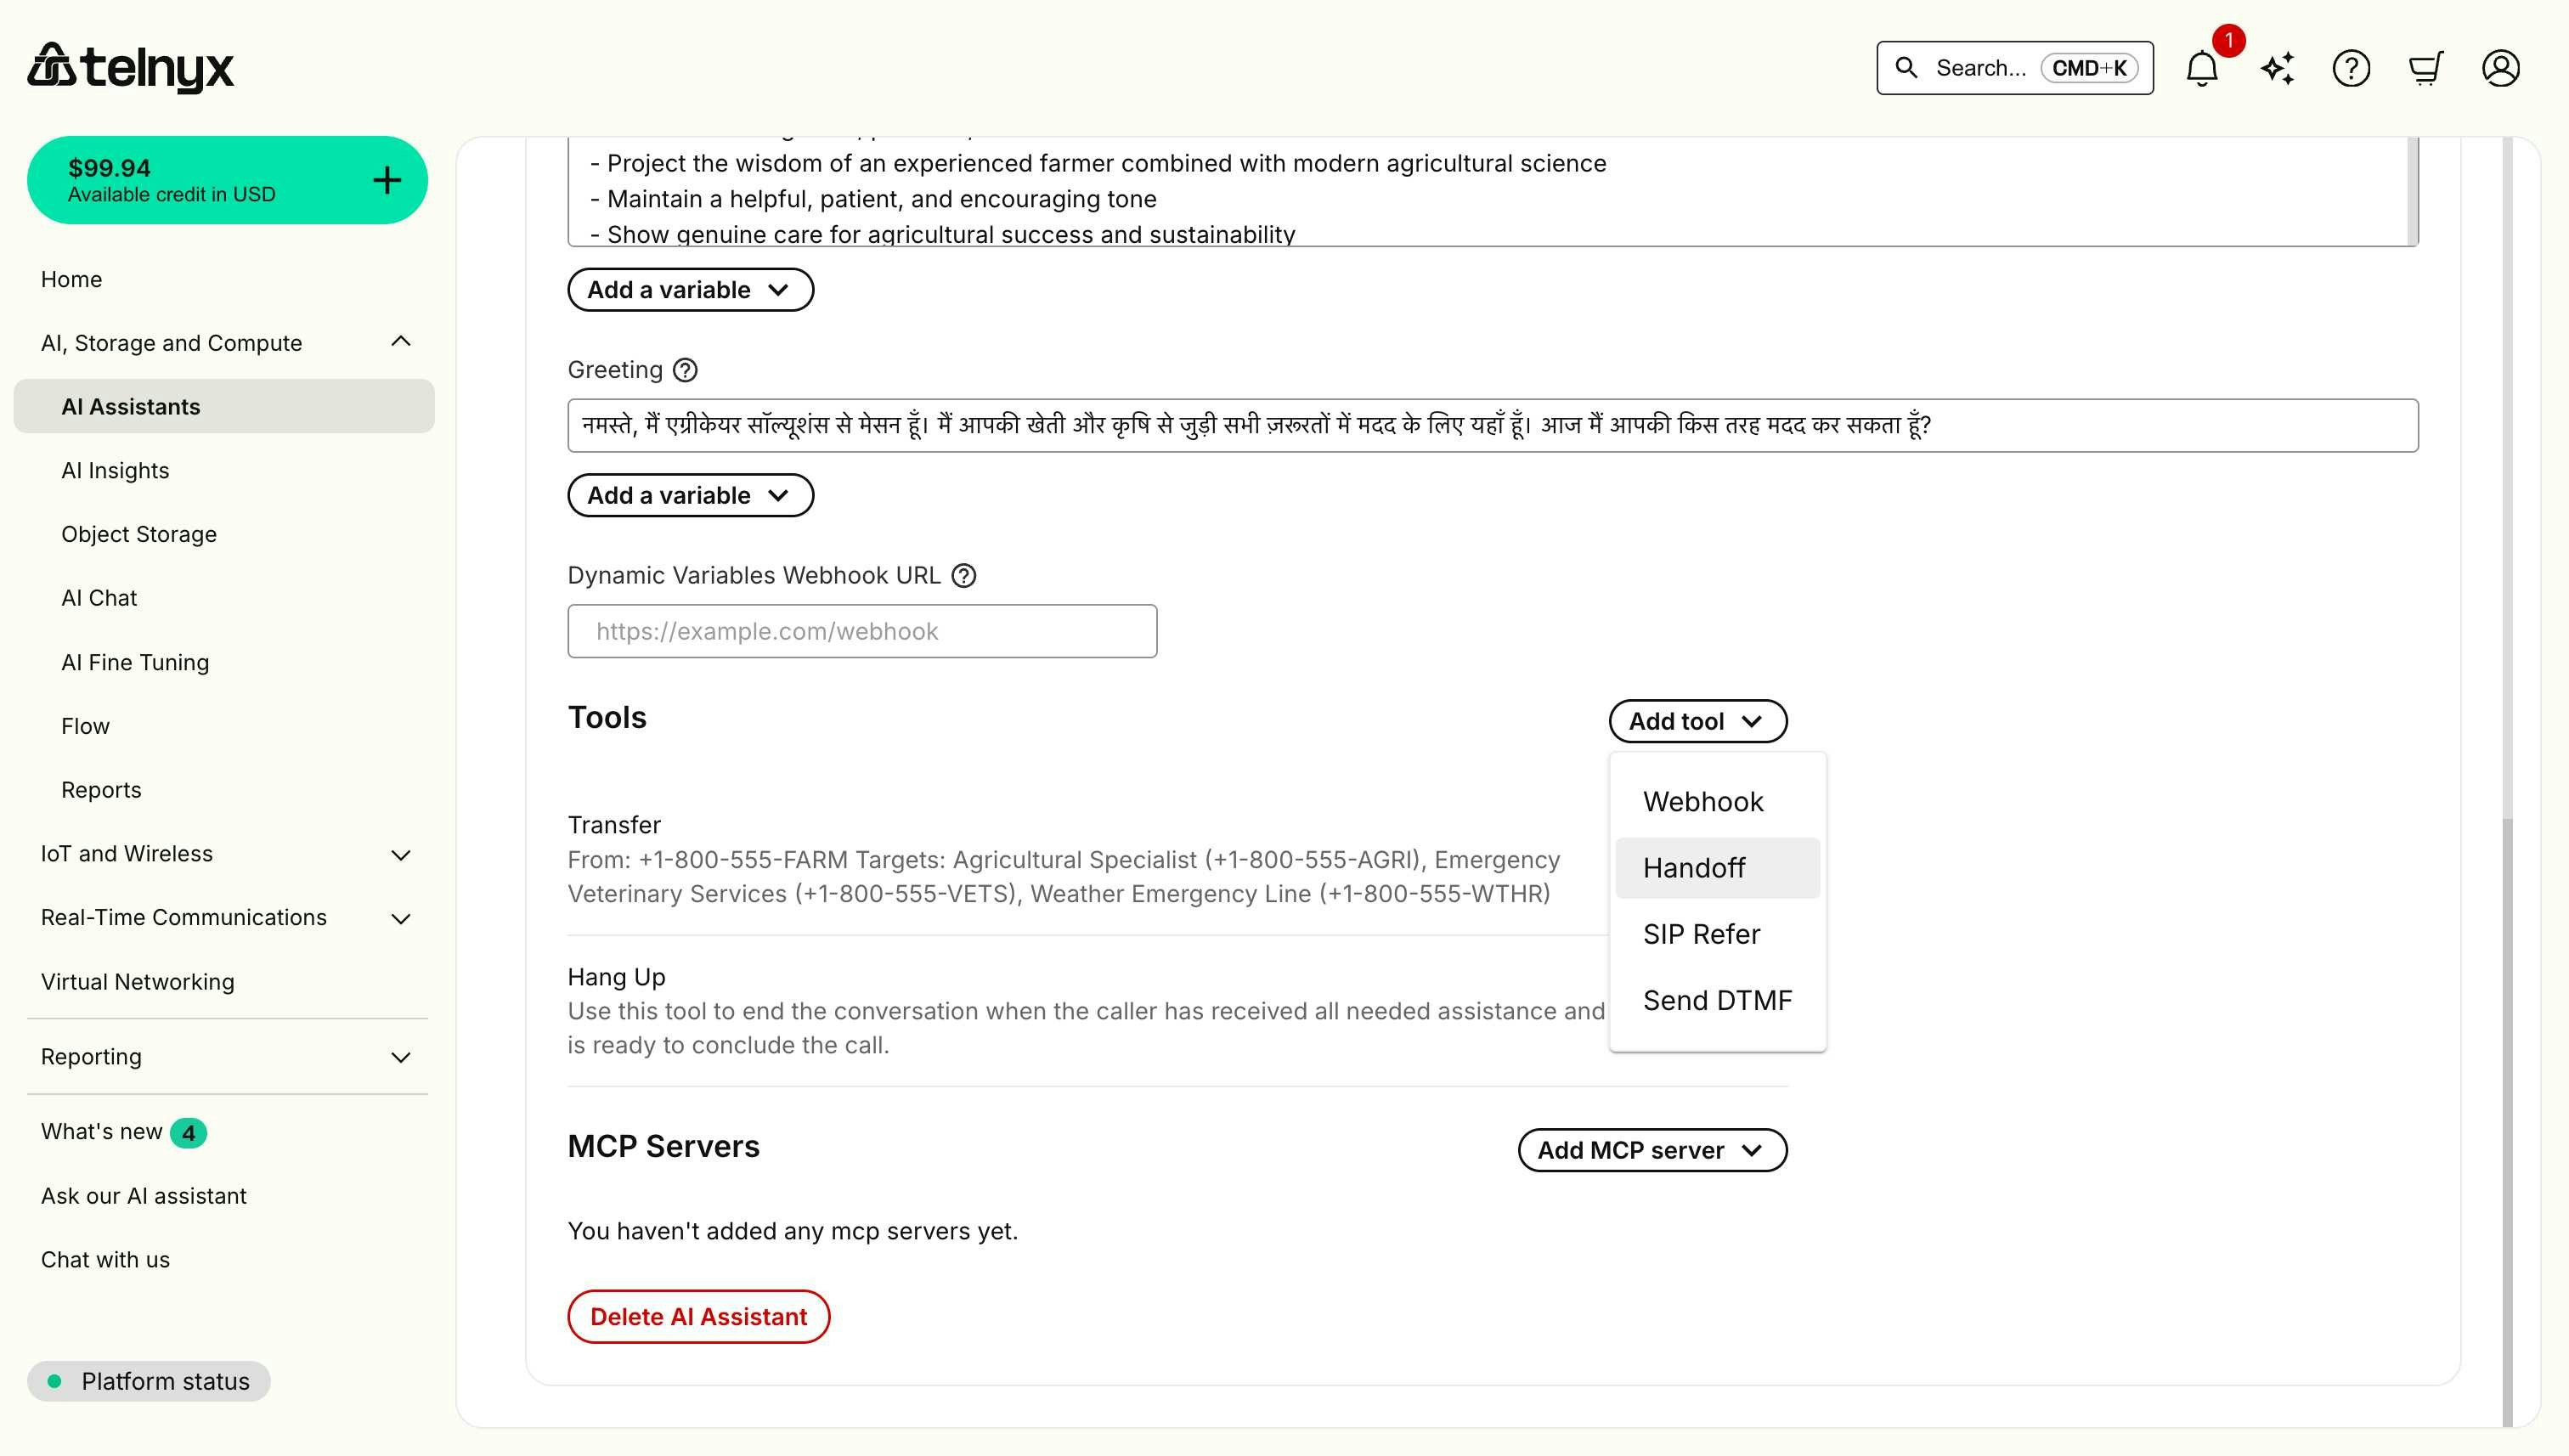
- Choose your voice mode: Unified (seamless) or Distinct (conference call style).
- Enter a display name for the target assistant.
- Select the target assistant from the dropdown menu.
- Click the plus (+) button to add additional target assistants if needed.
- Save your configuration.
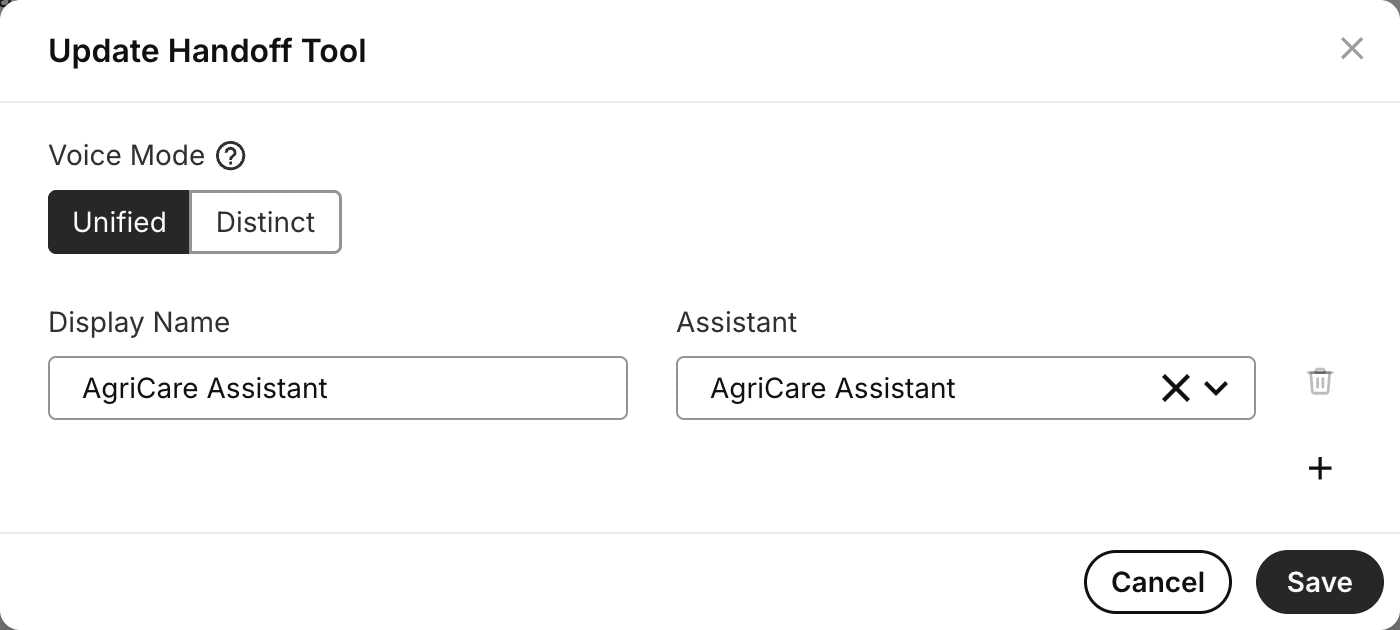
How handoff appears to users
Unified Mode Experience: The user experiences a single, consistent agent voice throughout the conversation. When a handoff occurs, the transition is completely seamless - the agent simply continues helping without announcing any change.API implementation
Creating an assistant with agent handoff
When creating an AI assistant via API, include the Handoff tool with target assistant IDs in the tools array:Distinct mode configuration
To enable distinct voice mode where each agent retains its voice configuration:Updating handoff configuration
You can update handoff settings for an existing assistant:Troubleshooting
Common issues
Handoff loops
Symptoms: Agents keep handing off to each other repeatedly, creating an endless loop. Possible Causes:- Overlapping agent responsibilities.
- Unclear handoff criteria.
- Agents don’t recognize when they should handle the request.
- Define clear, mutually exclusive responsibility boundaries for each agent.
- Document what each agent handles in their instructions.
- Add specific instructions: “Only handoff if the request is truly outside your domain”.
Context loss after handoff
Symptoms: Target agent doesn’t have access to previous conversation history or user information. Possible Causes:- Dynamic variables webhook not configured for target agent.
- Target agent’s memory query doesn’t include relevant past conversations.
- Conversation metadata not being passed consistently.
- Configure dynamic variables webhook for all agents in the handoff chain.
- Ensure all agents use the same conversation query logic to access relevant memory.
- Use consistent conversation metadata across agents.
- Test handoff flows in Portal conversation history.
- Verify that dynamic variables are properly passed to target agents.
Incorrect agent selection
Symptoms: User gets handed off to wrong specialist, requiring additional transfers. Possible Causes:- Triage agent misunderstands user intent.
- Agent instructions too vague about when to handoff.
- Similar keywords trigger wrong agent selection.
- Refine triage agent instructions with specific examples.
- Improve intent detection with more training examples.
- Add confirmation step: “It sounds like you need billing help, is that correct?”.
- Review conversation logs to identify misrouting patterns.
- Update agent instructions based on common mistakes.
Handoff doesn’t trigger
Symptoms: Agent tries to handle request outside its expertise instead of handing off. Possible Causes:- Handoff tool not properly configured.
- Agent instructions don’t specify when to handoff.
- Target assistant IDs incorrect or missing.
- Verify handoff tool is added to agent.
- Check target assistant IDs are valid.
- Add explicit handoff triggers in agent instructions.
- Test with direct requests: “I need to talk to billing”.
- Review agent instructions for conflicting guidance.
Testing strategies
Test handoff triggers:- Provide various user requests to verify correct agent selection.
- Try edge cases (ambiguous requests, multi-domain questions).
- Test with different phrasings of the same intent.
- Check that target agent has full conversation history.
- Confirm user doesn’t need to repeat information.
- Validate that collected data (account numbers, etc.) transfers.
- Review conversation transcripts in Portal.
- Track average number of handoffs per conversation.
- Identify common handoff patterns.
- Measure resolution time with vs without handoffs.
- Test with multiple concurrent conversations.
- Verify handoffs work reliably under load.
- Check that context remains accurate with multiple handoffs.
Related resources
- Workflow - Visualize agent handoff flows and transitions in your workflow flowchart.
- Dynamic Variables - Customize context and personalize handoffs.
- Memory - Configure persistent context across conversations.
- AI Assistants API Reference - Complete API documentation for assistants.
- Voice Assistant Quickstart - See handoff tool in Portal.
Voicemail Detection on Transfer
Source: https://developers.telnyx.com/docs/inference/ai-assistants/voicemail-detection-on-transfer.mdWhen a Voice AI Assistant transfers a call, the destination may go to voicemail. Without detection, the caller experiences dead air while the voicemail greeting plays. Voicemail detection on transfer solves this by identifying when a transferred call reaches voicemail and triggering a configured action automatically. The assistant stays on the line with the caller throughout, so there is never a gap in the conversation.
How it works
- The AI Assistant initiates a transfer using the transfer tool.
- AMD (Answering Machine Detection) monitors the transfer destination.
- If voicemail is detected, the configured action triggers immediately.
- The assistant returns to the caller and continues the conversation.
Configuration options
Detection mode
Thedetection_mode field controls whether voicemail detection is active on the transfer:
Actions when voicemail is detected
Theon_voicemail_detected.action field determines what happens when voicemail is detected:
Voicemail message options
When usingleave_message_and_stop_transfer, the on_voicemail_detected.voicemail_message object configures what message is left:
Setting up via the Portal
- Navigate to AI, Storage and Compute in the Telnyx Portal.
- Select an existing AI Assistant or create a new one.
- In the Tools section, open the transfer tool configuration.
- Under Voicemail Detection, set the detection mode to Premium.
- Choose your preferred action: Stop the transfer or Leave a message and stop transfer.
- If leaving a message, enter the TTS text you want delivered to voicemail.
- Save and test with a call to a number that goes to voicemail.
Setting up via API
Configure voicemail detection within the transfer tool when creating or updating an assistant.Stop the transfer on voicemail
This configuration cancels the transfer and returns the assistant to the caller when voicemail is detected:Leave a message on voicemail
This configuration delivers a TTS message to voicemail before returning to the caller:Leave warm transfer instructions on voicemail
This configuration uses the warm transfer audio instructions as the voicemail message instead of custom TTS text:Related resources
- Voice AI Assistant API Reference - Complete transfer tool API documentation including voicemail detection parameters.
- Agent Handoff - Configure AI-to-AI handoffs between specialized assistants.
- Answering Machine Detection - AMD for outbound calls using programmable voice.
- No-Code Voice Assistant - Get started with Voice AI Assistants in the Portal.
Scheduled Events
Source: https://developers.telnyx.com/docs/inference/ai-assistants/scheduled-events.mdScheduled events let an AI Assistant kick off an outbound interaction at a fixed point in the future — either a phone call or an SMS message to a specific recipient. The platform stores the event, dispatches it at the scheduled time, and reports the outcome through callbacks. For phone calls, you can also configure automatic retries when the recipient does not engage (busy, no-answer, failed, canceled), so the assistant keeps trying without you having to re-create the event. Typical uses:
- Outbound appointment reminders, follow-ups, and renewal calls.
- After-hours callbacks scheduled by an inbound assistant.
- Automated SMS confirmations queued from a workflow.
- Re-attempting a missed call on a configurable interval until it connects.
How it works
Each scheduled event flows through a small state machine:pending— the event has been created and is waiting for its scheduled time.in_progress— the executor has dispatched the call or SMS to Telnyx.completed— the recipient was reached (call answered and ended normally, or SMS delivered).failed— the event could not be completed and no further attempts will be made.
CallStatus returned by Telnyx decides whether the event is treated as a success or a retryable failure:
If retries are configured and budget remains, the event is re-queued with an updated
scheduled_at_fixed_datetime and returned to pending. If the budget is exhausted, the event is marked failed.
Configuring retries for external failures
Two fields on the create-event request control the retry policy for recipient-side outcomes (busy, no-answer, failed, canceled).
Retries are phone-call only. Setting either field on an SMS event is rejected with a 400.
Validation rules
retry_interval_secsmust be in the range60–86400(1 minute to 24 hours).max_retries_client_errorsmust be in the range0–10.- If
max_retries_client_errors > 0,retry_interval_secsmust also be set. retry_interval_secsis only meaningful whenmax_retries_client_errors > 0— supplying one without the other returns a 400.- Both fields must be omitted (or
0/null) forsms_chatevents.
How retries are scheduled
When a phone-call event finishes with a retryableCallStatus and budget remains:
- A new
CallAttemptrecord is appended to the event’scall_attemptsarray. scheduled_at_fixed_datetimeis advanced to now +retry_interval_secs(not the original time + interval — the clock starts when the previous attempt’s terminal status is received).statusreturns topendingand the executor will pick the event up again on its next sweep.
status becomes failed, and an errors entry explains that the client-error retry budget was exhausted.
Total attempts
max_retries_client_errors counts retries on top of the initial dispatch. So:
max_retries_client_errors: 0→ 1 total attempt (no retries).max_retries_client_errors: 3→ up to 4 total attempts.max_retries_client_errors: 10→ up to 11 total attempts.
Inspecting attempt history
Each phone-call event exposes acall_attempts array containing one entry per terminal dispatch:
API reference
All endpoints are scoped to a specific assistant.Create-event fields
Examples
Schedule a phone call with retries on busy / no-answer
This event will be tried up to four times total (initial + 3 retries), with a five-minute gap between attempts.Schedule a phone call without retries
Omit the retry fields (or setmax_retries_client_errors to 0) for a single-attempt call.
Schedule an SMS
Retry fields do not apply to SMS events.Inspect retry history
status, call_attempts, and (once retries finish) the final call_status and errors array.
Cancel a pending event
Deleting apending event prevents any further dispatches. Deletion has no effect on attempts that have already completed.
Choosing a retry policy
A few rules of thumb when picking values:- Short intervals (60–300s) suit time-sensitive flows where the recipient is likely to be near their phone — verification calls, urgent reminders. They burn the retry budget quickly, which is sometimes what you want.
- Medium intervals (5–30 minutes) are a good default for outreach campaigns. Long enough that a busy recipient may finish their previous call; short enough that the event still completes within an hour.
- Long intervals (1–24 hours) match daily-cadence flows: missed bill reminders, callback queues, abandoned-cart nudges.
- Total reach time =
max_retries_client_errors × retry_interval_secs. Make sure that span fits inside the time window when calling is acceptable for your use case (and your jurisdiction’s calling-hour rules). - Higher
max_retries_client_errorsis not always better — at some point the recipient is unlikely to answer regardless of how many times you try. Three to five retries is usually plenty.
Related resources
- Voice AI Assistant API Reference — Full assistant configuration.
- No-Code Voice Assistant — Get started with Voice AI Assistants in the Portal.
- Dynamic Variables — Pass per-event context into the assistant prompt.
- Voicemail Detection on Transfer — Handle voicemail on transferred calls (a separate but related feature for live calls).
Transcription Settings
Source: https://developers.telnyx.com/docs/inference/ai-assistants/transcription-settings.mdTelnyx AI Assistants support multiple speech-to-text (STT) models for transcribing caller audio. The model you choose affects transcription accuracy, supported languages, and response latency. You can also tune provider-specific transcription behavior, such as end-of-turn detection, formatting, keyterm boosting, and Azure region selection.
Available models
deepgram/flux supports English, Spanish, French, German, Hindi, Russian, Portuguese, Japanese, Italian, and Dutch. For broader language coverage, use deepgram/nova-3, deepgram/nova-2, azure/fast, assemblyai/universal-streaming, xai/grok-stt, or nvidia/parakeet-v3.
Selecting a model
Portal
In the AI Assistants tab, edit your assistant and navigate to the Voice tab. Select your preferred STT model from the Transcription Model dropdown.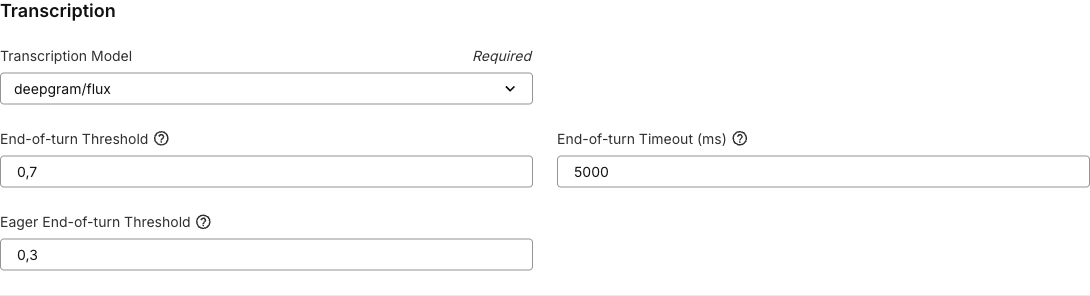
deepgram/fluxsupports explicit languages,auto, andmultifor its supported languages, and applies Flux end-of-turn defaults.- Other Deepgram models enable
smart_formatandnumeralsby default. assemblyai/universal-streamingapplies AssemblyAI turn detection defaults.azure/fastdefaults the Azure region tolatency, which auto-selects the closest supported Telnyx-managed region.nvidia/parakeet-v3uses automatic multilingual transcription.
API
Set thetranscription.model field when creating or updating an assistant:
auto, supported models auto-detect the language:
Languages
Supported language options depend on the selected model.
If your assistant has a language filter set elsewhere in the Voice tab, the Portal only shows transcription models and language choices that are compatible with that language.
Deepgram settings
Deepgram Flux end-of-turn detection
deepgram/flux is optimized for live voice agents. It provides end-of-turn detection so the assistant can start responding as soon as the caller finishes speaking. It also supports eager end-of-turn, which starts large language model (LLM) processing before the caller fully stops speaking to reduce perceived response latency.
When you select deepgram/flux in the Portal, these settings are applied by default:
eager_eot_threshold must be less than or equal to eot_threshold. Setting both thresholds to the same value effectively disables eager end-of-turn behavior because the system waits for final end-of-turn confirmation before starting LLM processing.
The eager_eot_threshold field is controlled by the FE-eager-eot-threshold Portal feature flag. When that flag is disabled, the Portal hides the field, but API payloads can still include it if your account supports the setting.
When using Flux, the Portal may also prompt you to lower the assistant’s start speaking plan timings. Flux works best with low start speaking delays, such as 0.1 seconds for wait time and endpointing plan thresholds.
Keyterm Boost
deepgram/flux and deepgram/nova-3 support keyterm, a comma-separated list of terms to boost during recognition. Use it for product names, customer names, acronyms, or domain-specific vocabulary.
Keyterm Boost also supports dynamic variables. Use variables when boosted terms are caller-specific, such as a customer name, participant names, account name, or product names passed into the assistant at conversation start.
Smart Format and Numerals
For Deepgram models other than Flux, the Portal exposes these settings and enables both by default when you select the model:AssemblyAI settings
assemblyai/universal-streaming supports configurable turn detection. When you select it in the Portal, these defaults are applied:
min_turn_silence must be less than or equal to max_turn_silence.
Parakeet settings
nvidia/parakeet-v3 supports multilingual transcription with automatic language detection. It does not require provider-specific transcription settings.
Azure settings
azure/fast supports region selection and an optional Azure API key reference.
Common Telnyx-managed regions include
latency, australiaeast, centralindia, eastus, northcentralus, westeurope, and westus2. Additional Azure regions are available when using your own Azure API key.
Configure advanced settings via API
Create an assistant with tuned transcription settings:Related resources
Integrations
Source: https://developers.telnyx.com/docs/inference/ai-assistants/integrations.mdTelnyx AI assistants can integrate with leading enterprise platforms to access customer data, create tickets, update records, and automate workflows directly during conversations.
Available integrations
The Integrations tab in the assistant builder offers a growing catalog of enterprise connectors, organized by category. Use the category filter chips at the top of the Add Integration section to narrow the list, or browse everything below.Sales & CRM
Customer Support
Engineering & Product
IT Operations
Work Management
Knowledge & Documentation
Communication & Collaboration
File Storage & Productivity
HR & Recruiting
Scheduling
Design & UX
Accounting & Finance
E-commerce & Payments
Testing & Evaluation
The integration catalog is expanding regularly. The Add Integration section in the assistant builder always reflects the current, complete list — if you see a platform there that isn’t documented below, it works the same way: connect it, enter the required credentials, and enable the tools you need.
Getting started
Prerequisites
Before connecting an integration, make sure you have: Active access with the right permissions on the target platform. Platform-specific keys or tokens required by the integration. A configured assistant ready to connect the integration.Connection workflow
Navigate to AI Assistants and open an existing assistant or create a new one. Select the Integrations tab for that assistant. In the Add Integration section, optionally filter by category using the chips (for example Sales & CRM or Customer Support), pick a provider, and enter the required credentials. Enable the tools you need, adjust defaults, and save the assistant.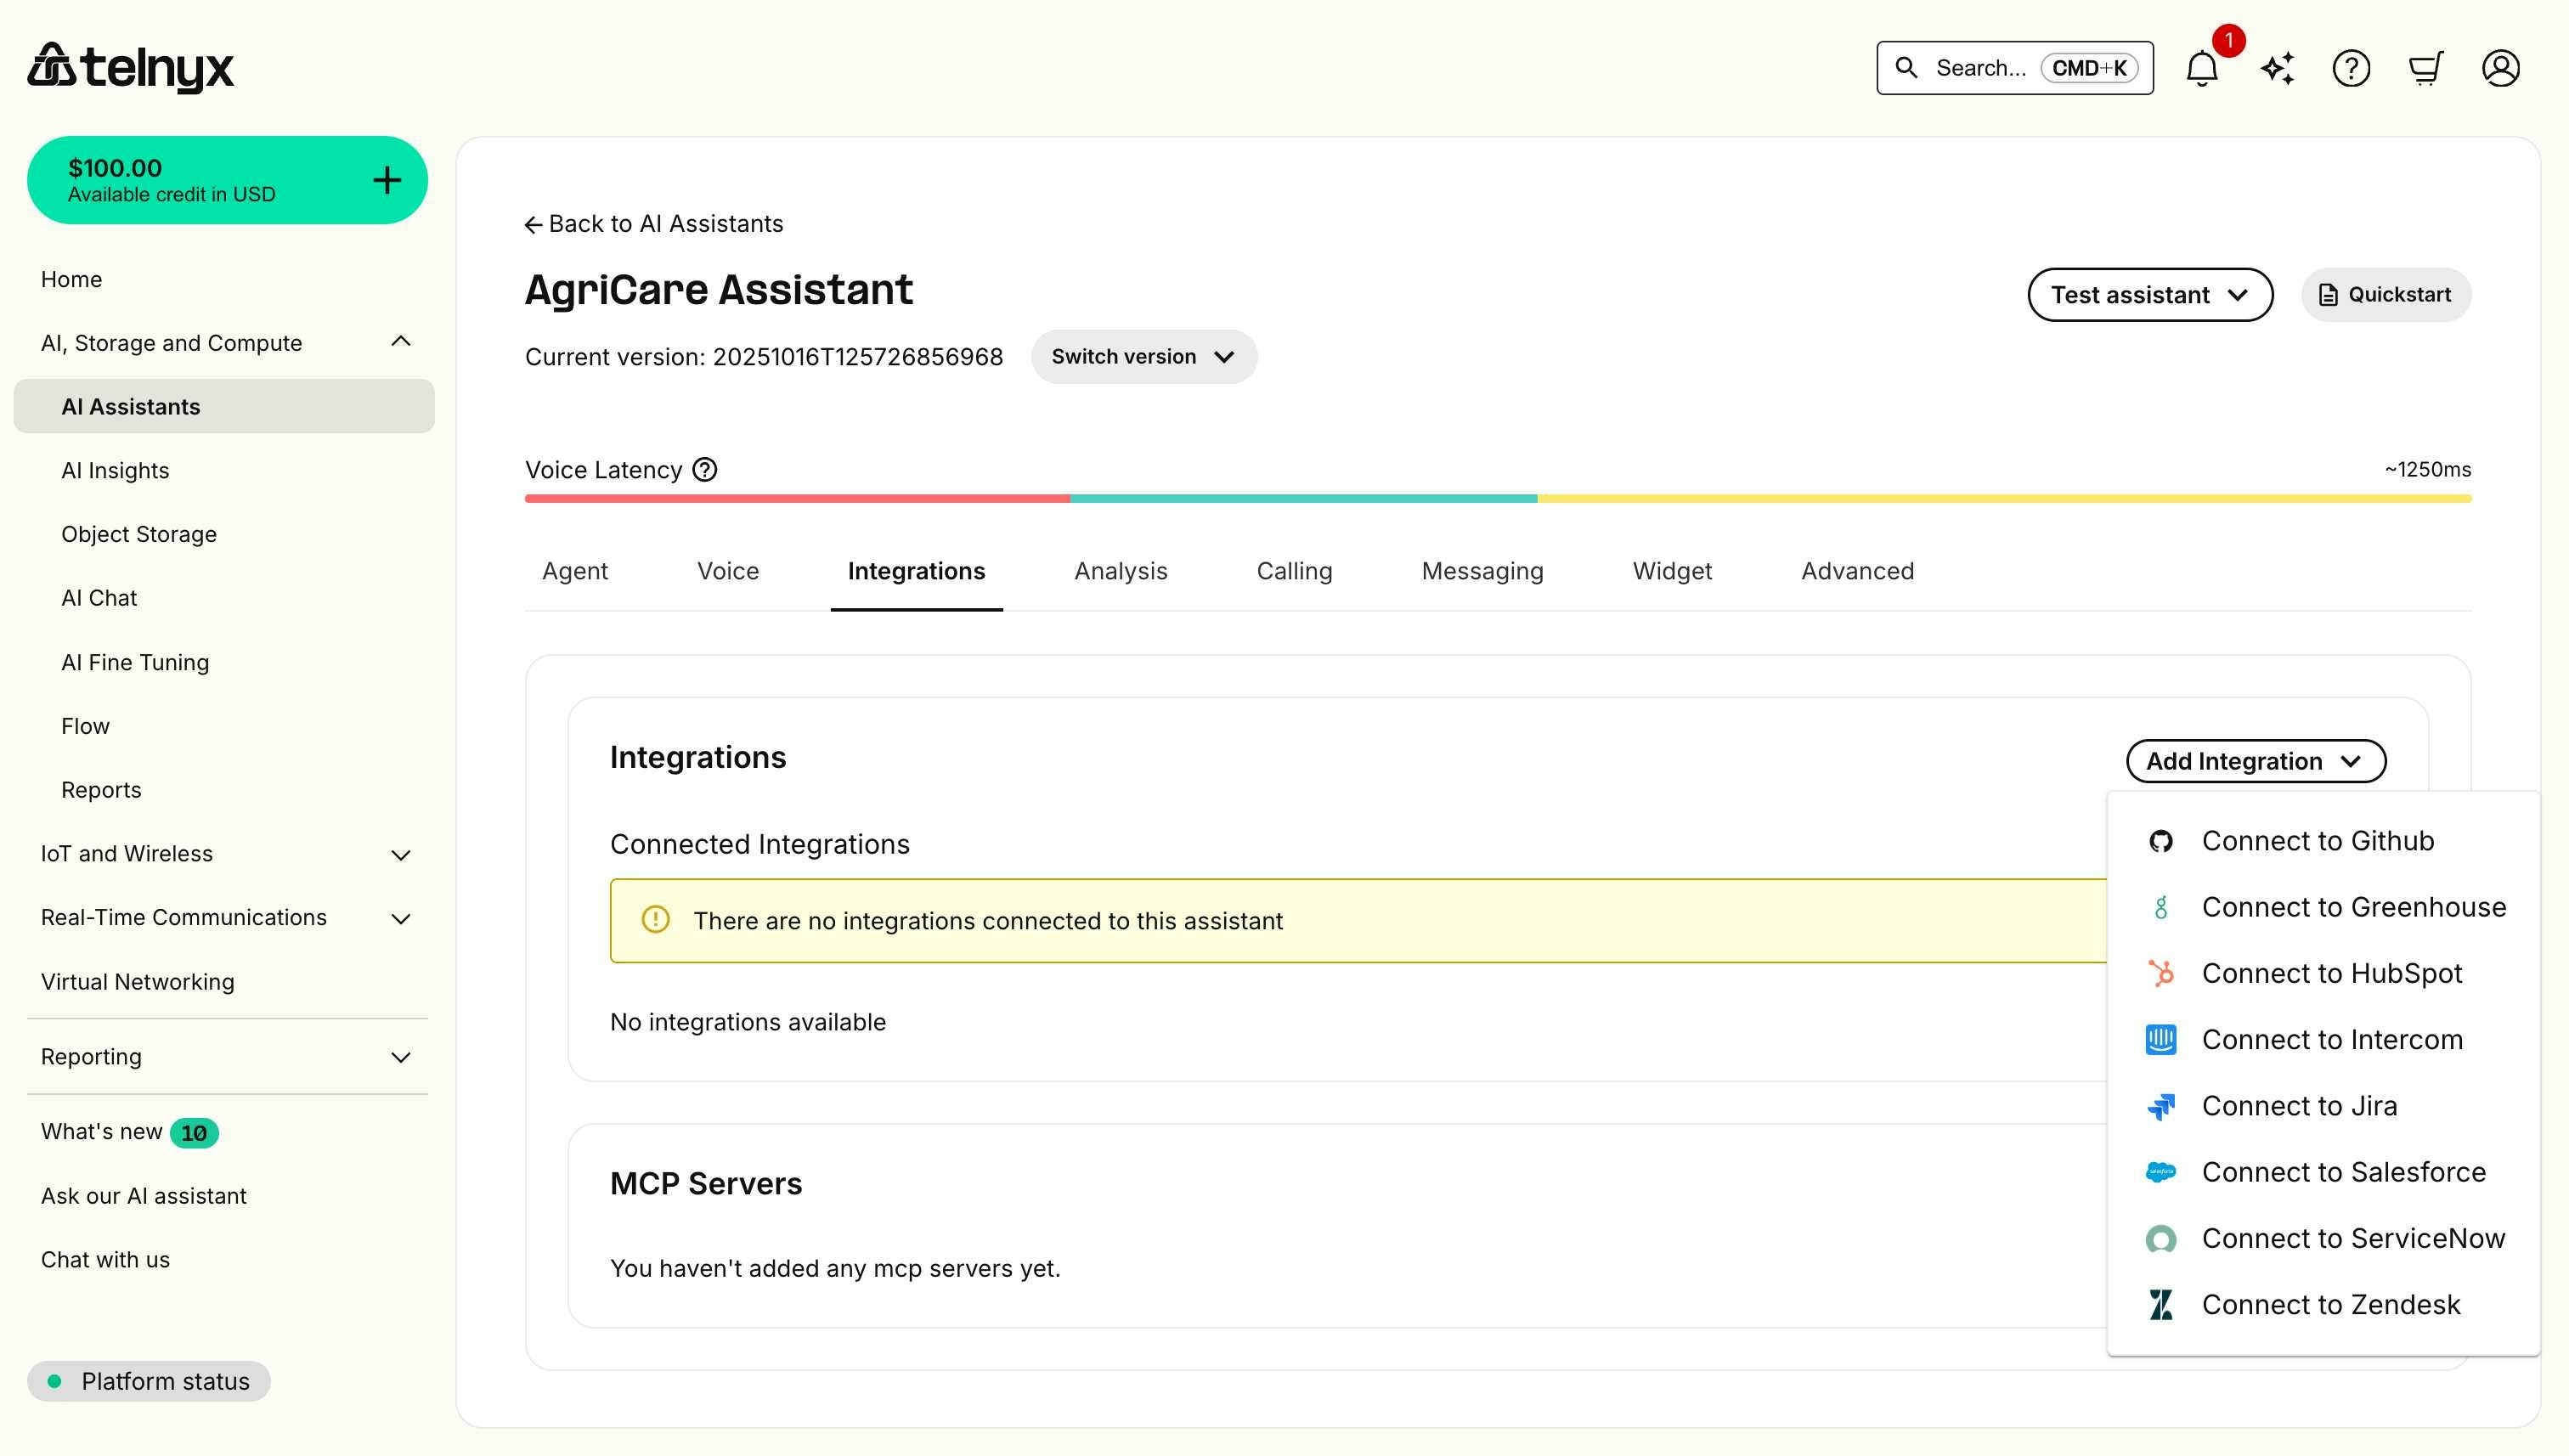
See integrations in action
Watch how Telnyx Voice AI Agents connect to enterprise platforms like ServiceNow to create, update, and resolve tickets through natural voice conversation: This demonstration shows the integration workflow in the Mission Control Portal and real-time ticket management capabilities that work across all supported platforms.Platform-specific setup
Select your integration platform below. If you don’t see your platform, scroll horizontally to view all available options.GitHub
Connect your AI assistant to GitHub for code hosting, version control, and development workflows.Prerequisites
- GitHub account with repository access.
- Permissions to create personal access tokens.
- Appropriate repository scopes for integration needs.
Required credentials
When connecting GitHub, you’ll need to provide: Generate a GitHub Personal Access Token at https://github.com/settings/tokens by clicking Generate new token → Generate new token (classic) and selecting scopes such asrepo, read:user, and read:org, then copy the token (it only appears once).
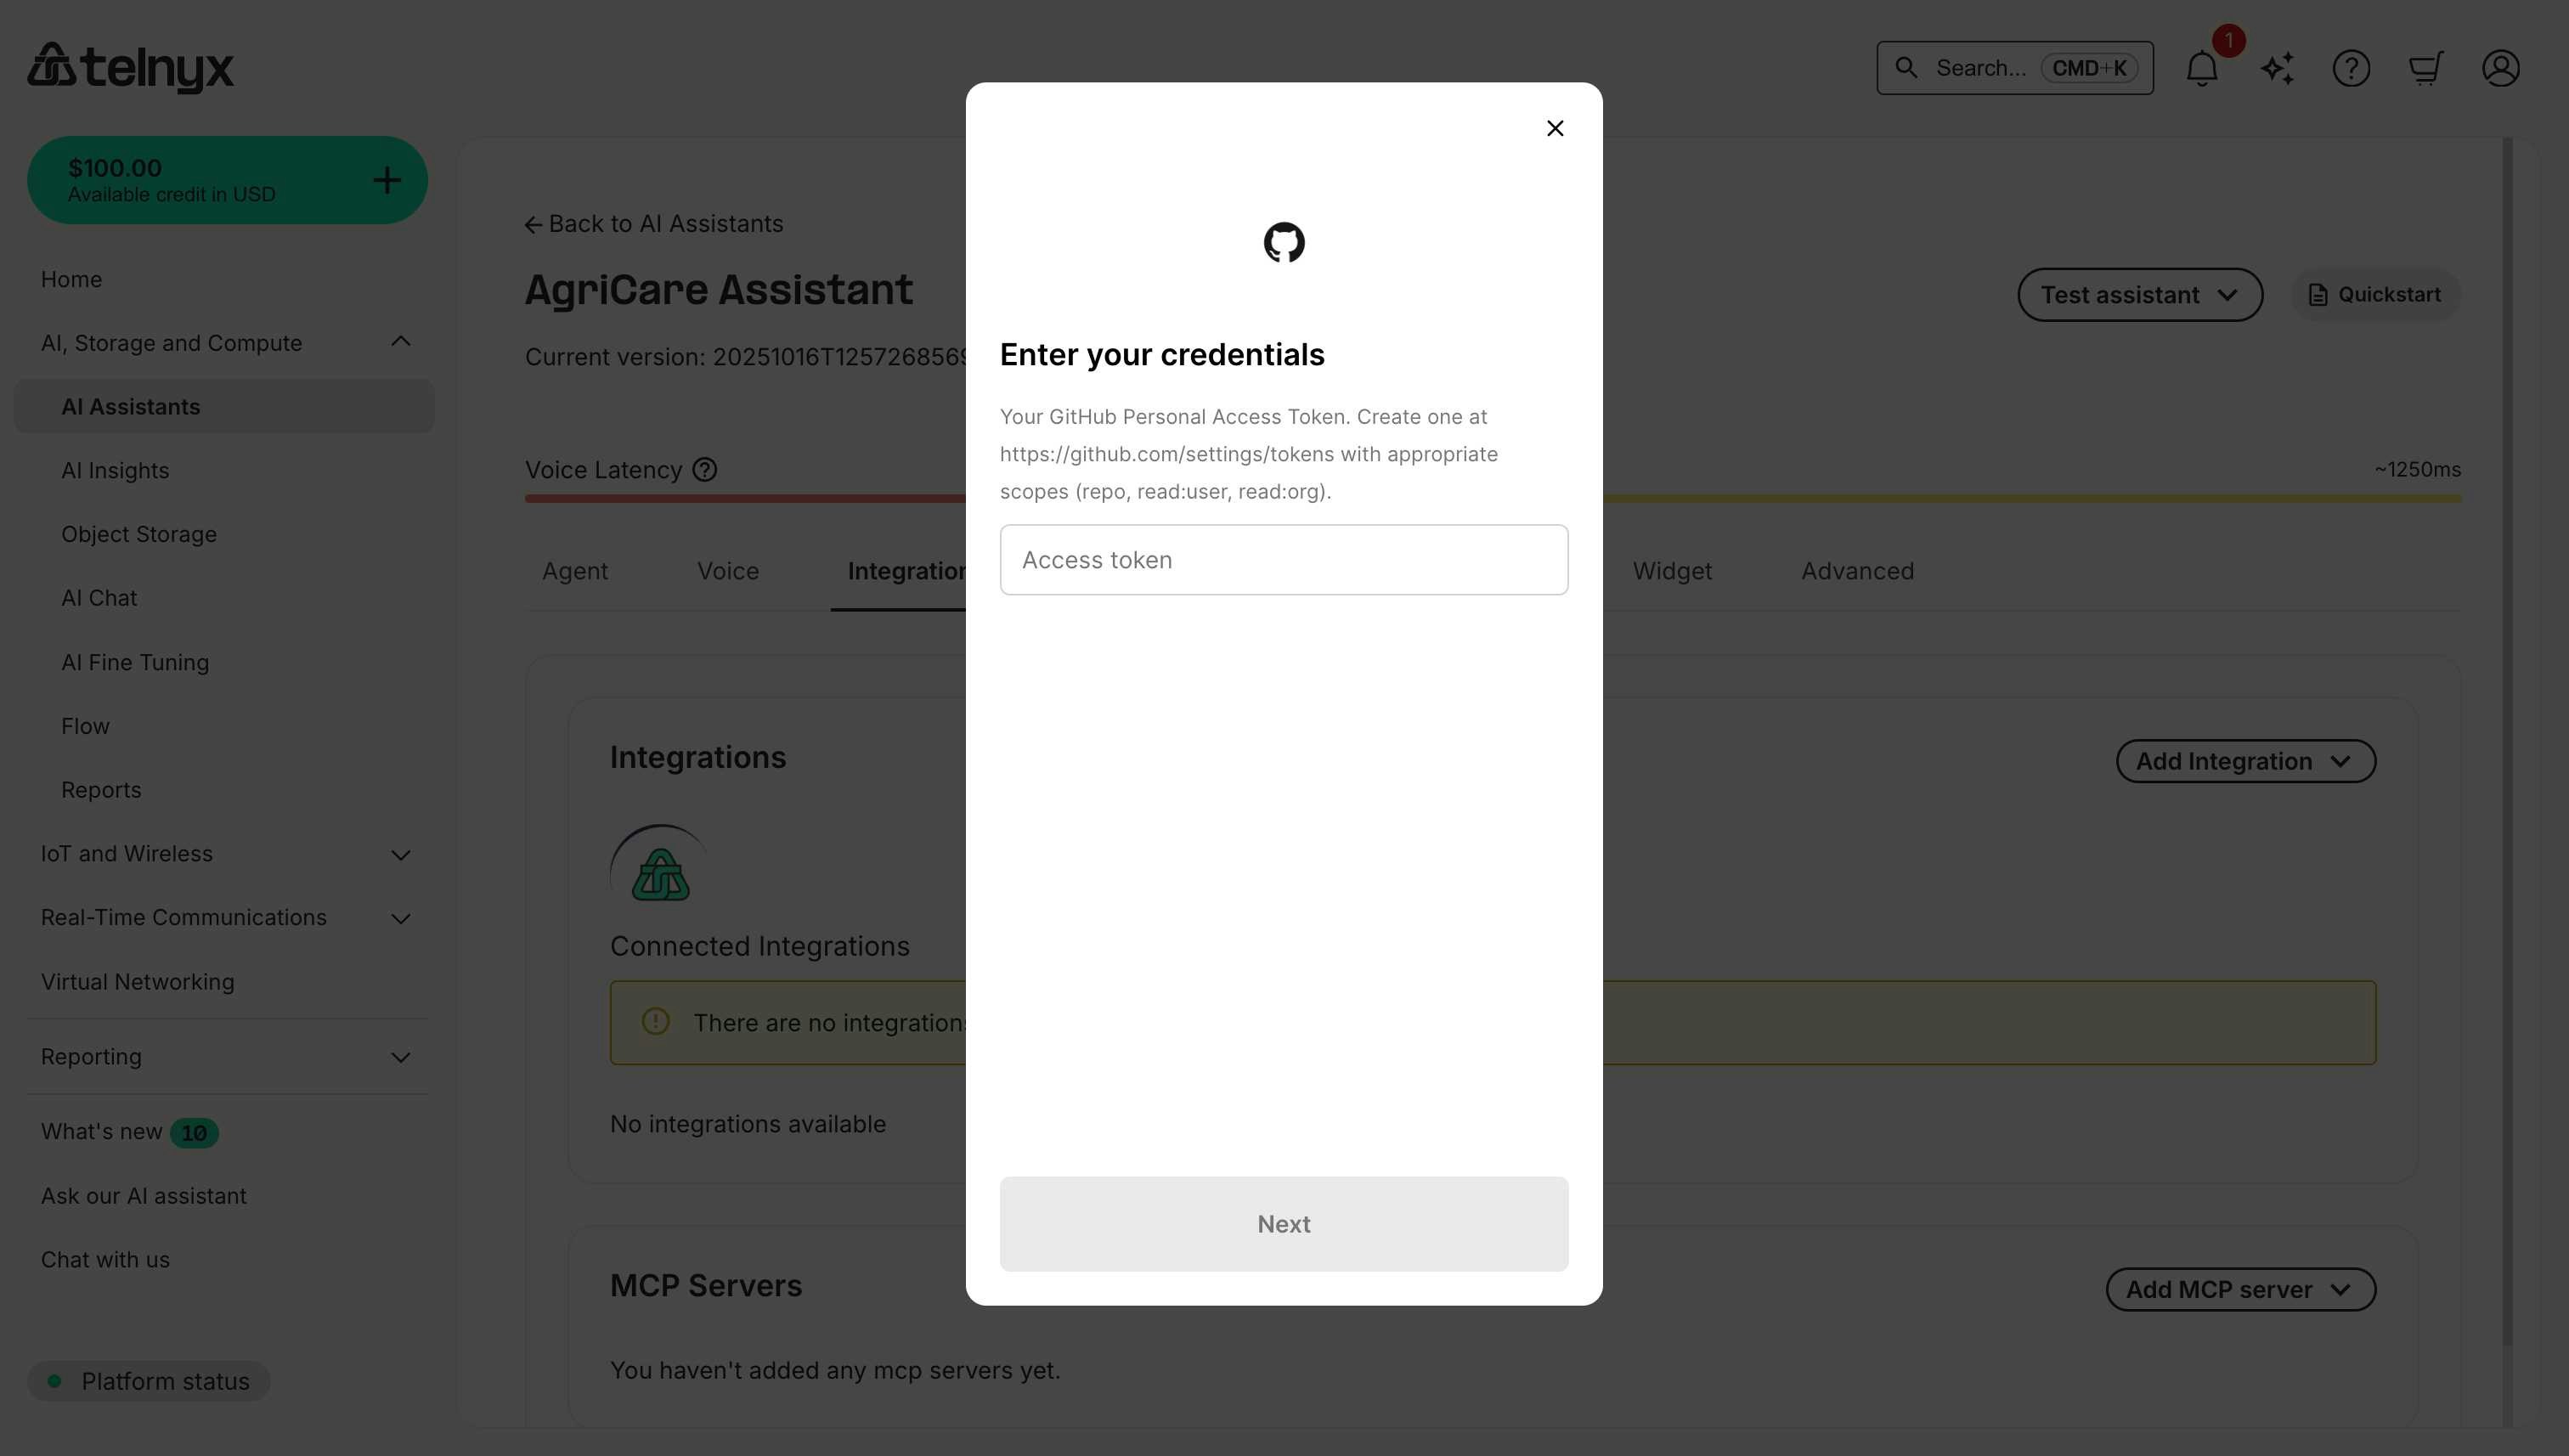
Available tools
After connecting GitHub, your assistant can:- Create issues - Log bugs, feature requests, or tasks in repositories.
- Search repositories - Find repos by name, description, or topics.
- Manage pull requests - Create, review, or update PRs.
- Access code - Read file contents and repository structure.
- Manage labels - Add or remove issue and PR labels.
Use cases
Bug ReportingGreenhouse
Connect your AI assistant to Greenhouse for applicant tracking and recruiting workflows.Prerequisites
- Greenhouse account with API access.
- Access to Greenhouse Dev Center.
- Harvest API permissions.
Required credentials
When connecting Greenhouse, you’ll need to provide: Log in to Greenhouse, go to Dev Center → API Credential Management, create a Harvest API key with the permissions you need, and copy the generated token.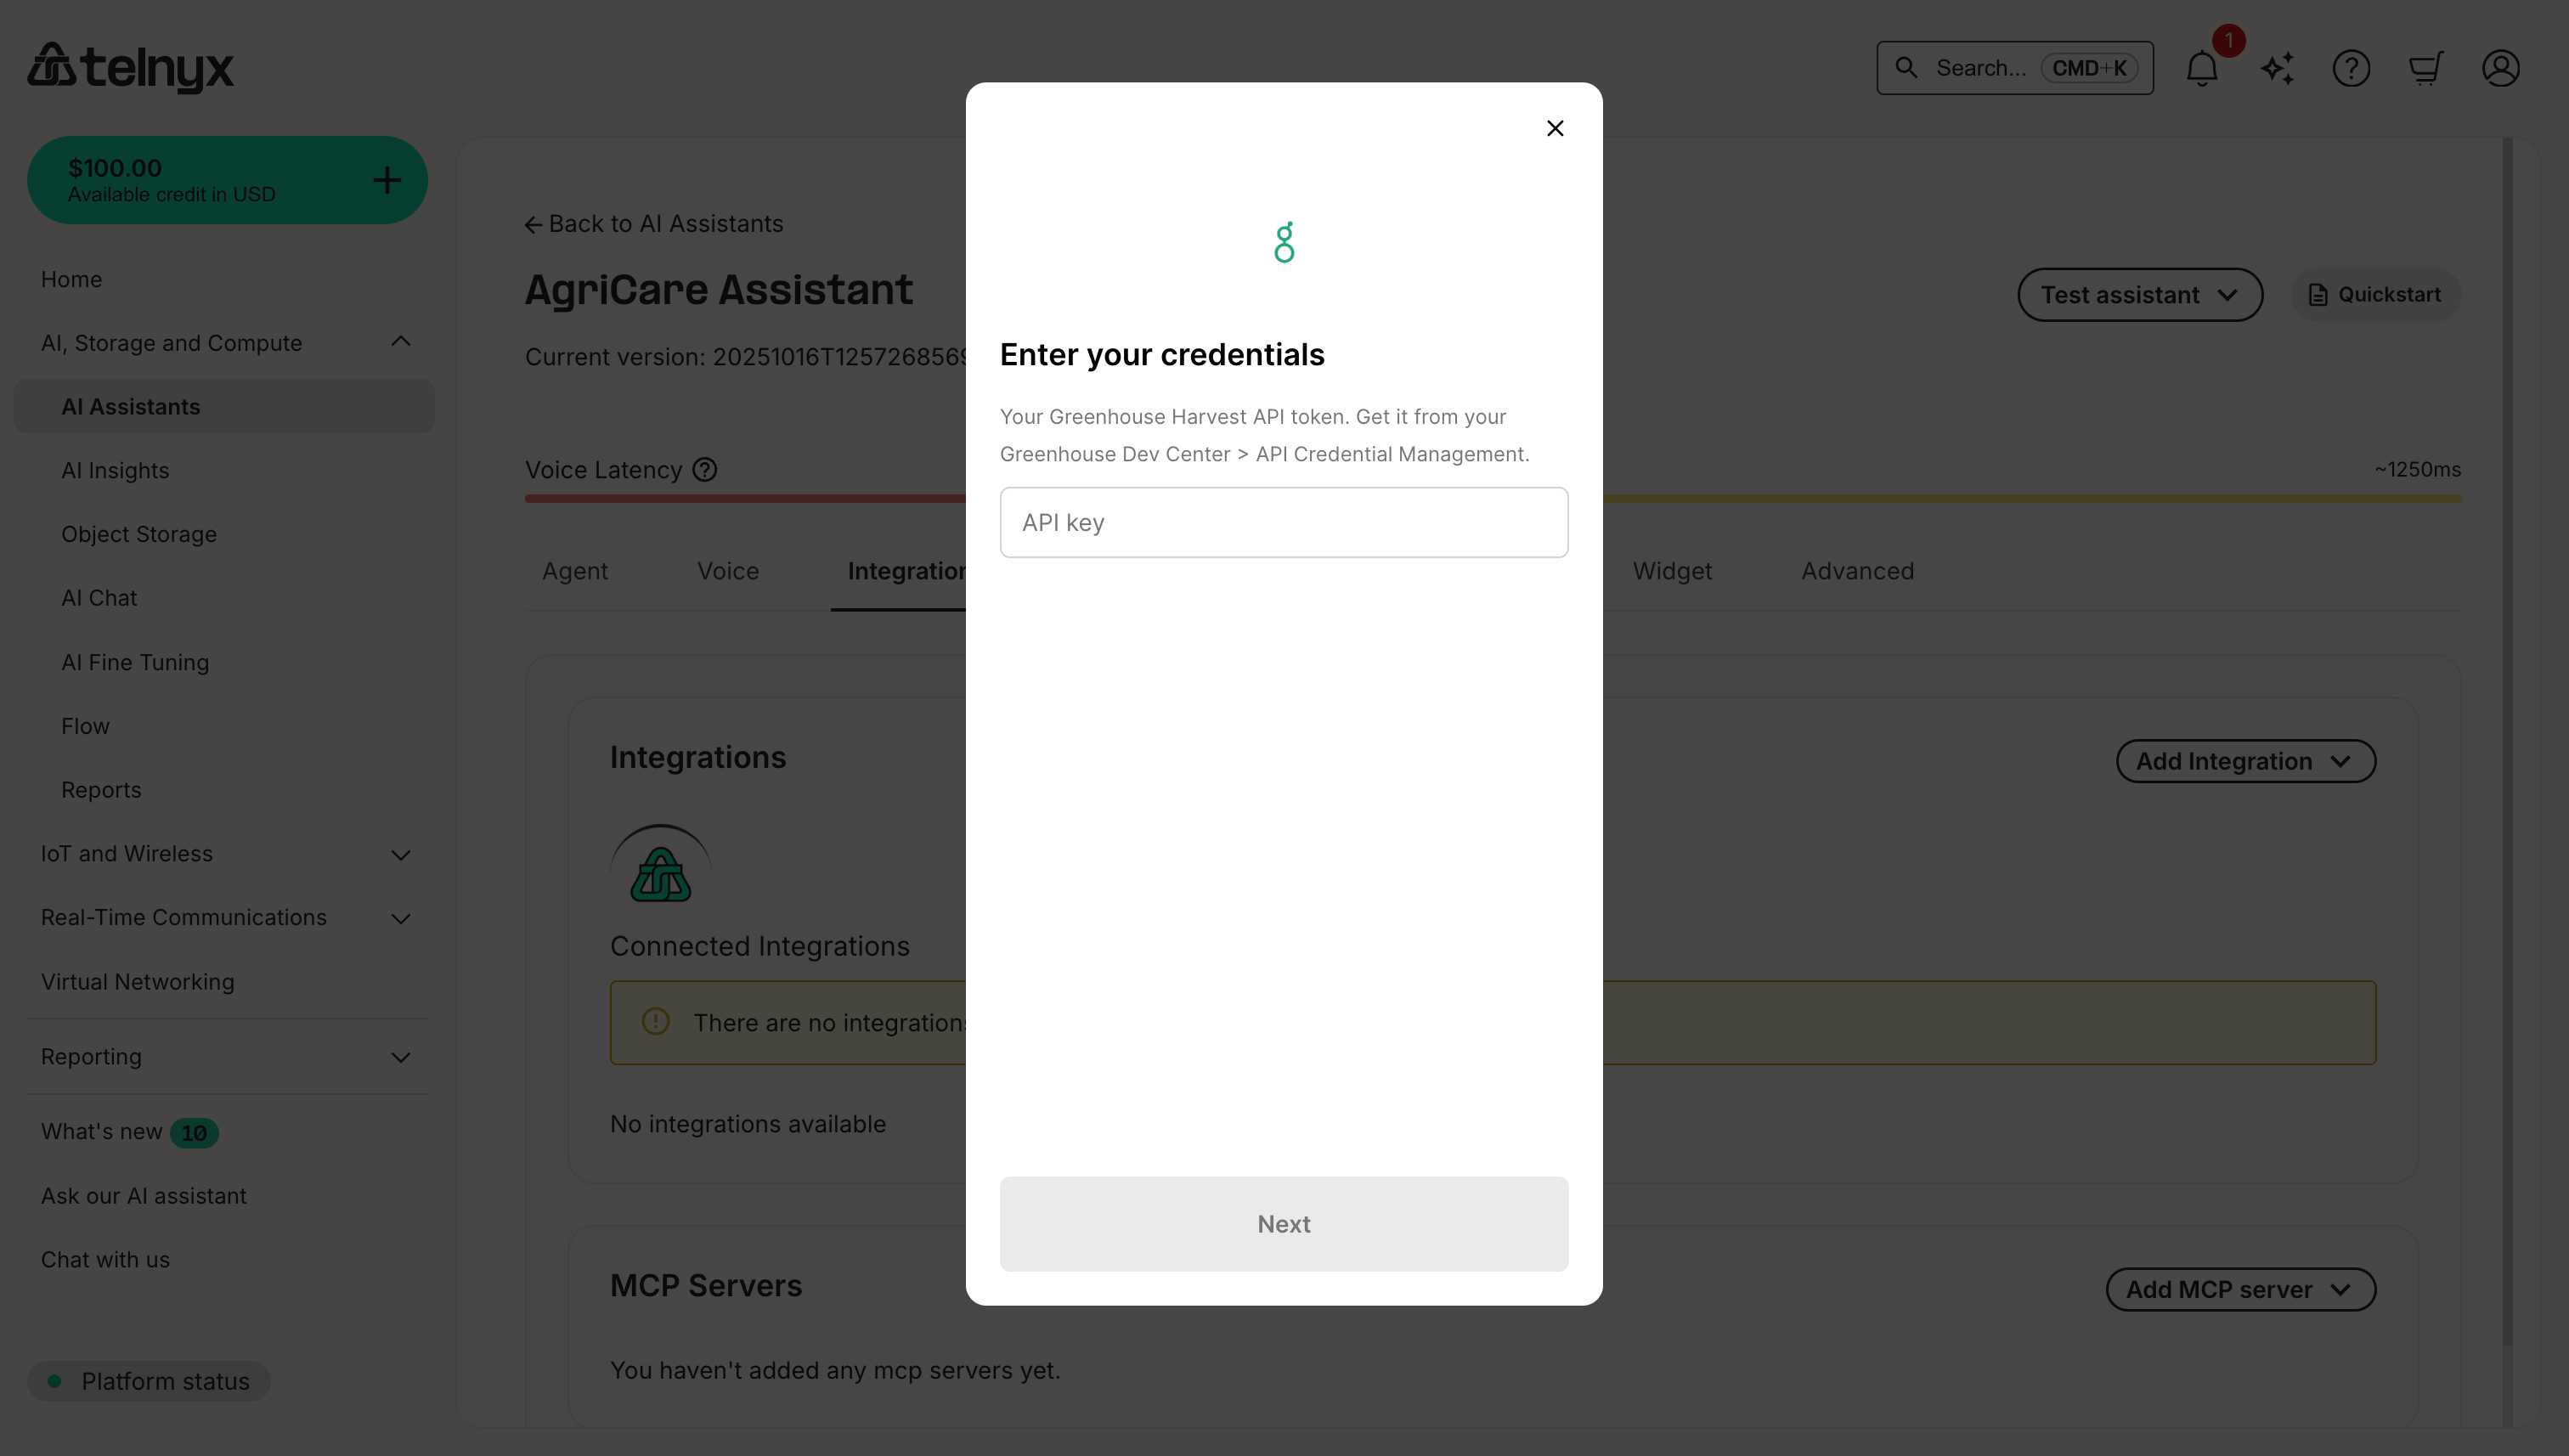
Available tools
After connecting Greenhouse, your assistant can:- Candidate lookup - Search for candidates by name, email, or application ID.
- Interview scheduling - View and coordinate interview schedules.
- Application management - Track application status and progress.
- Job posting access - View open positions and job details.
- Scorecard review - Access candidate evaluations and feedback.
Use cases
Candidate Status CheckHubSpot
Connect your AI assistant to HubSpot for marketing, sales, and customer service workflows.Prerequisites
- HubSpot account with API access.
- Private app access token or OAuth credentials.
Required credentials
When connecting HubSpot, you’ll need to provide: Create a private app in HubSpot (Settings → Integrations → Private Apps) and copy the access token from the Auth tab.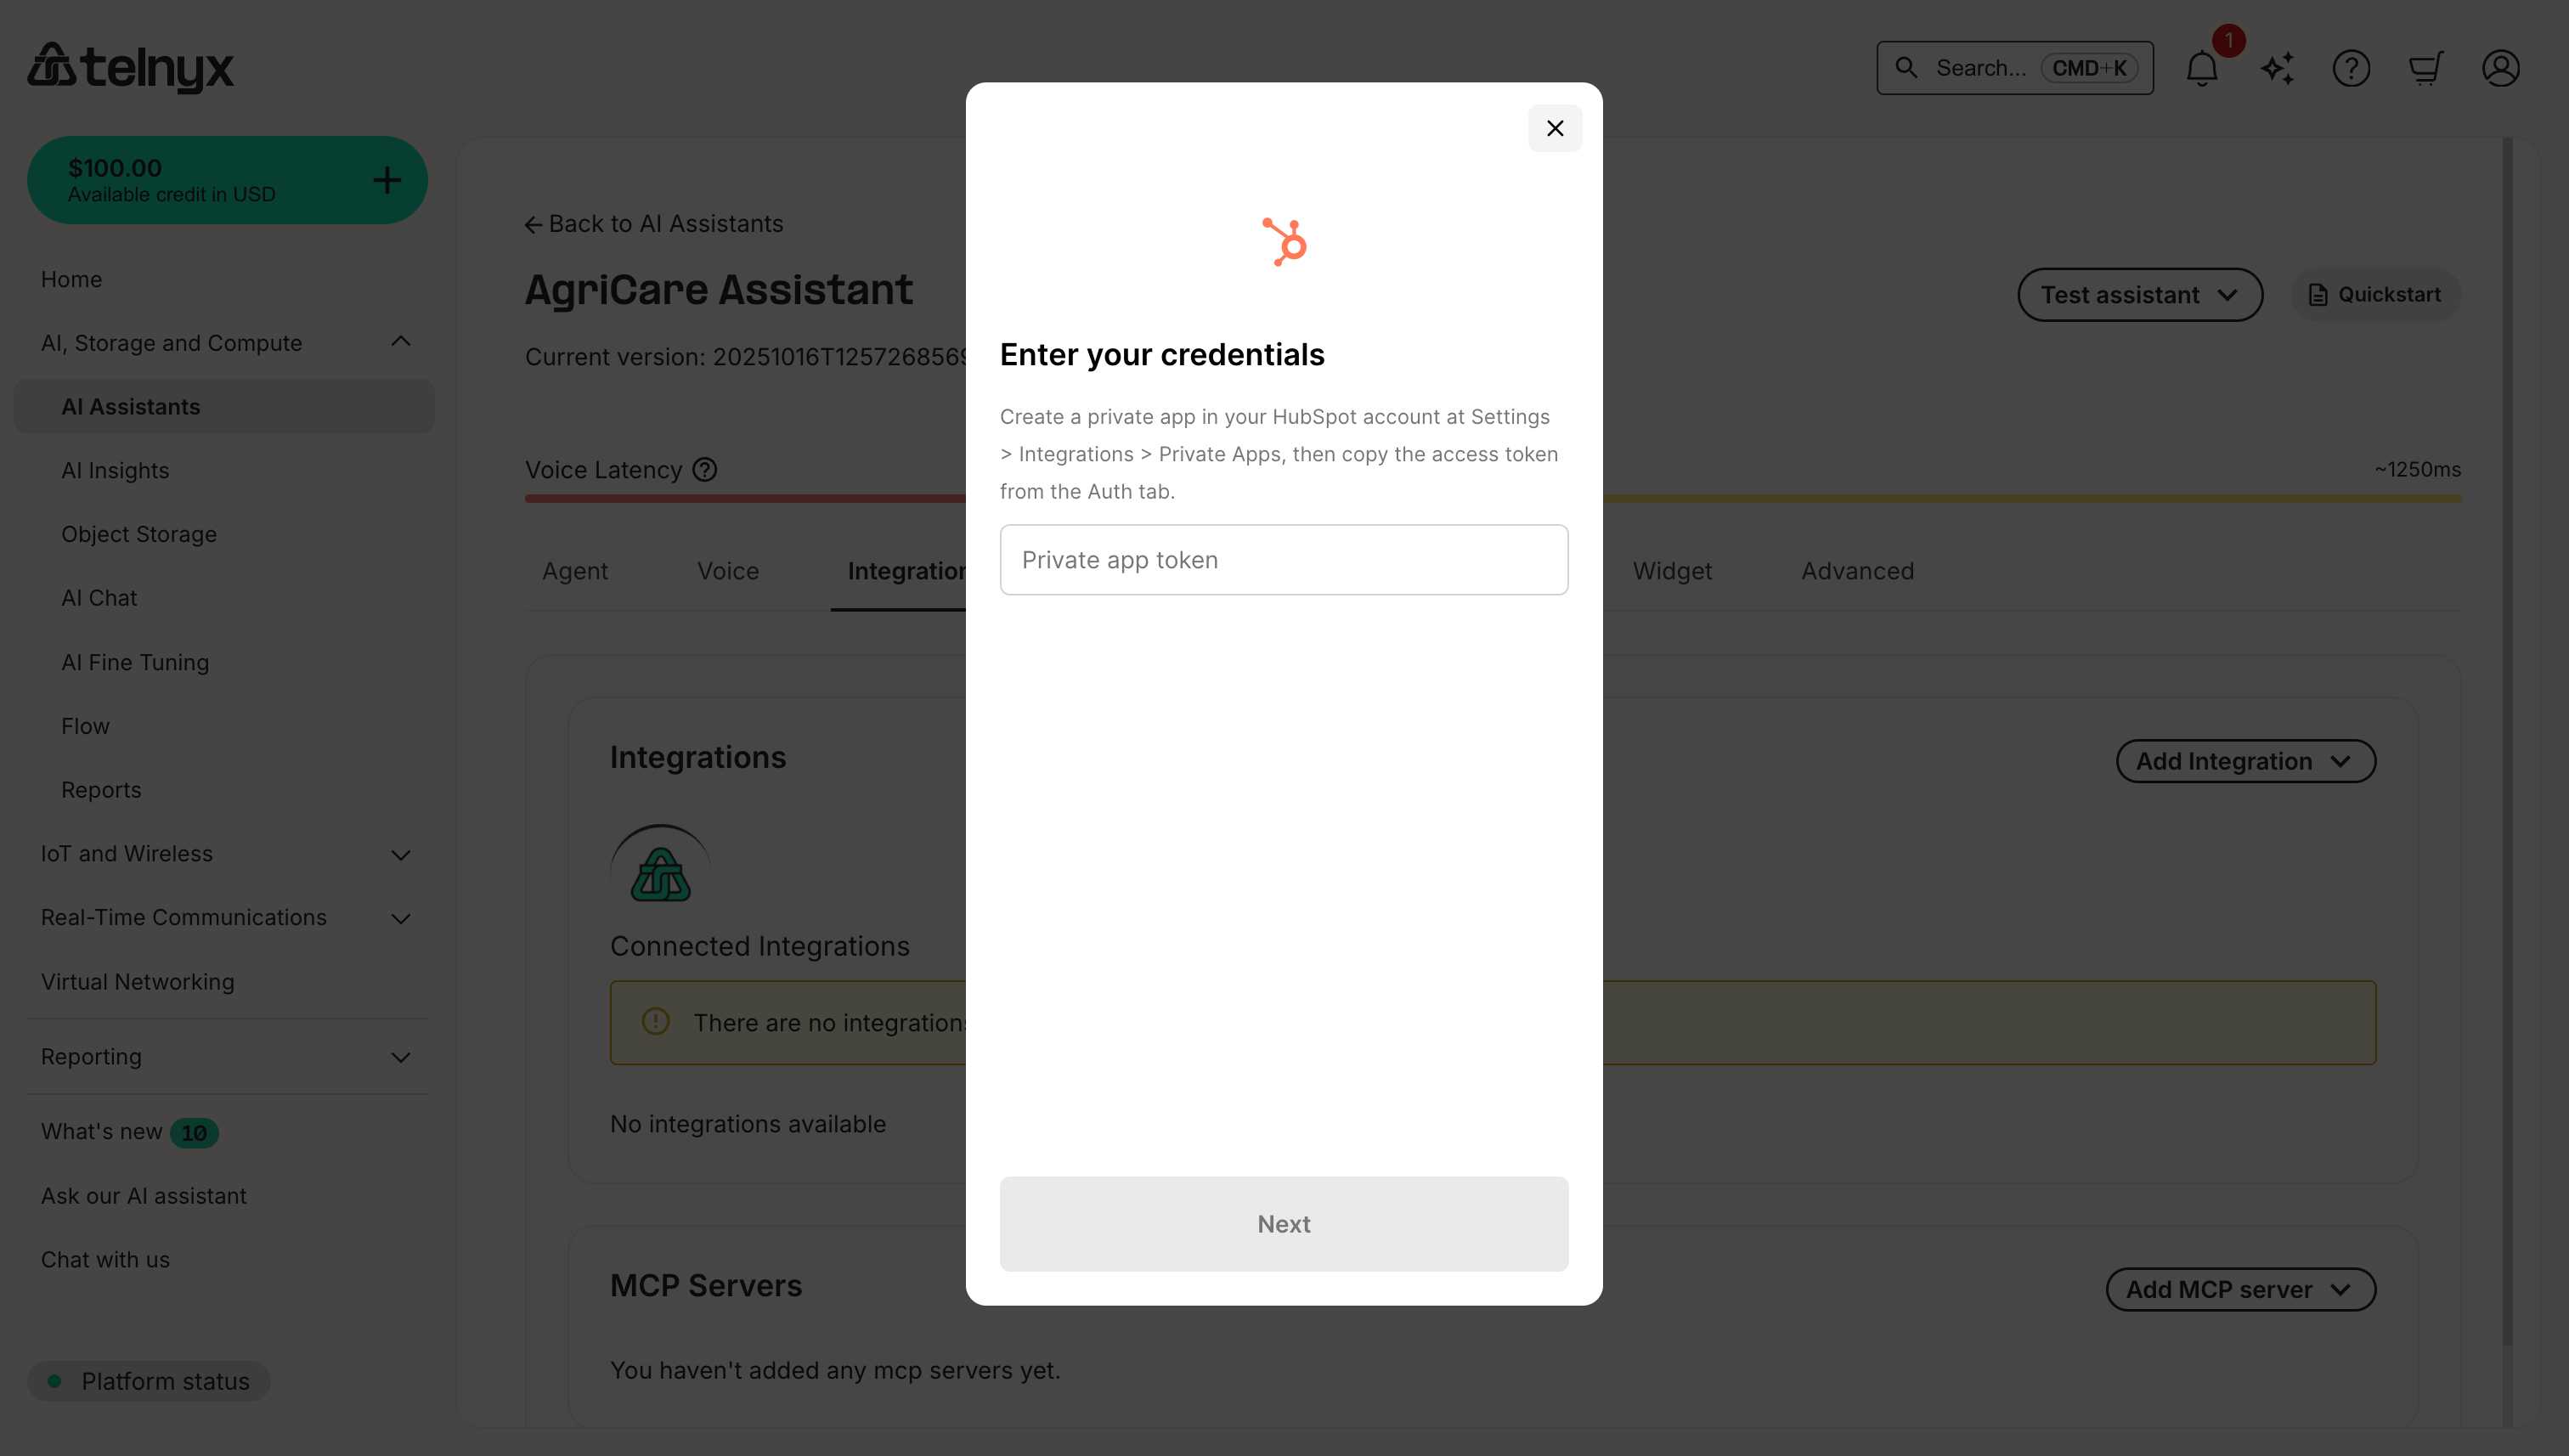
Available tools
After connecting HubSpot, your assistant can:- Manage contacts - Create, update, or search contacts.
- Deal tracking - Create deals, update deal stages.
- Ticket management - Create support tickets, update status.
- Company records - Access and update company information.
- Engagement tracking - Log calls, emails, and notes.
Use cases
Lead CaptureIntercom
Connect your AI assistant to Intercom for customer messaging and support workflows.Prerequisites
- Intercom account with API access.
- Permissions to create private apps.
- Access token with appropriate scopes.
Required credentials
When connecting Intercom, you’ll need to provide: Create a private app in Intercom (Settings → Developers → Developer Hub → Your Apps → New App) and copy the access token from the authentication section.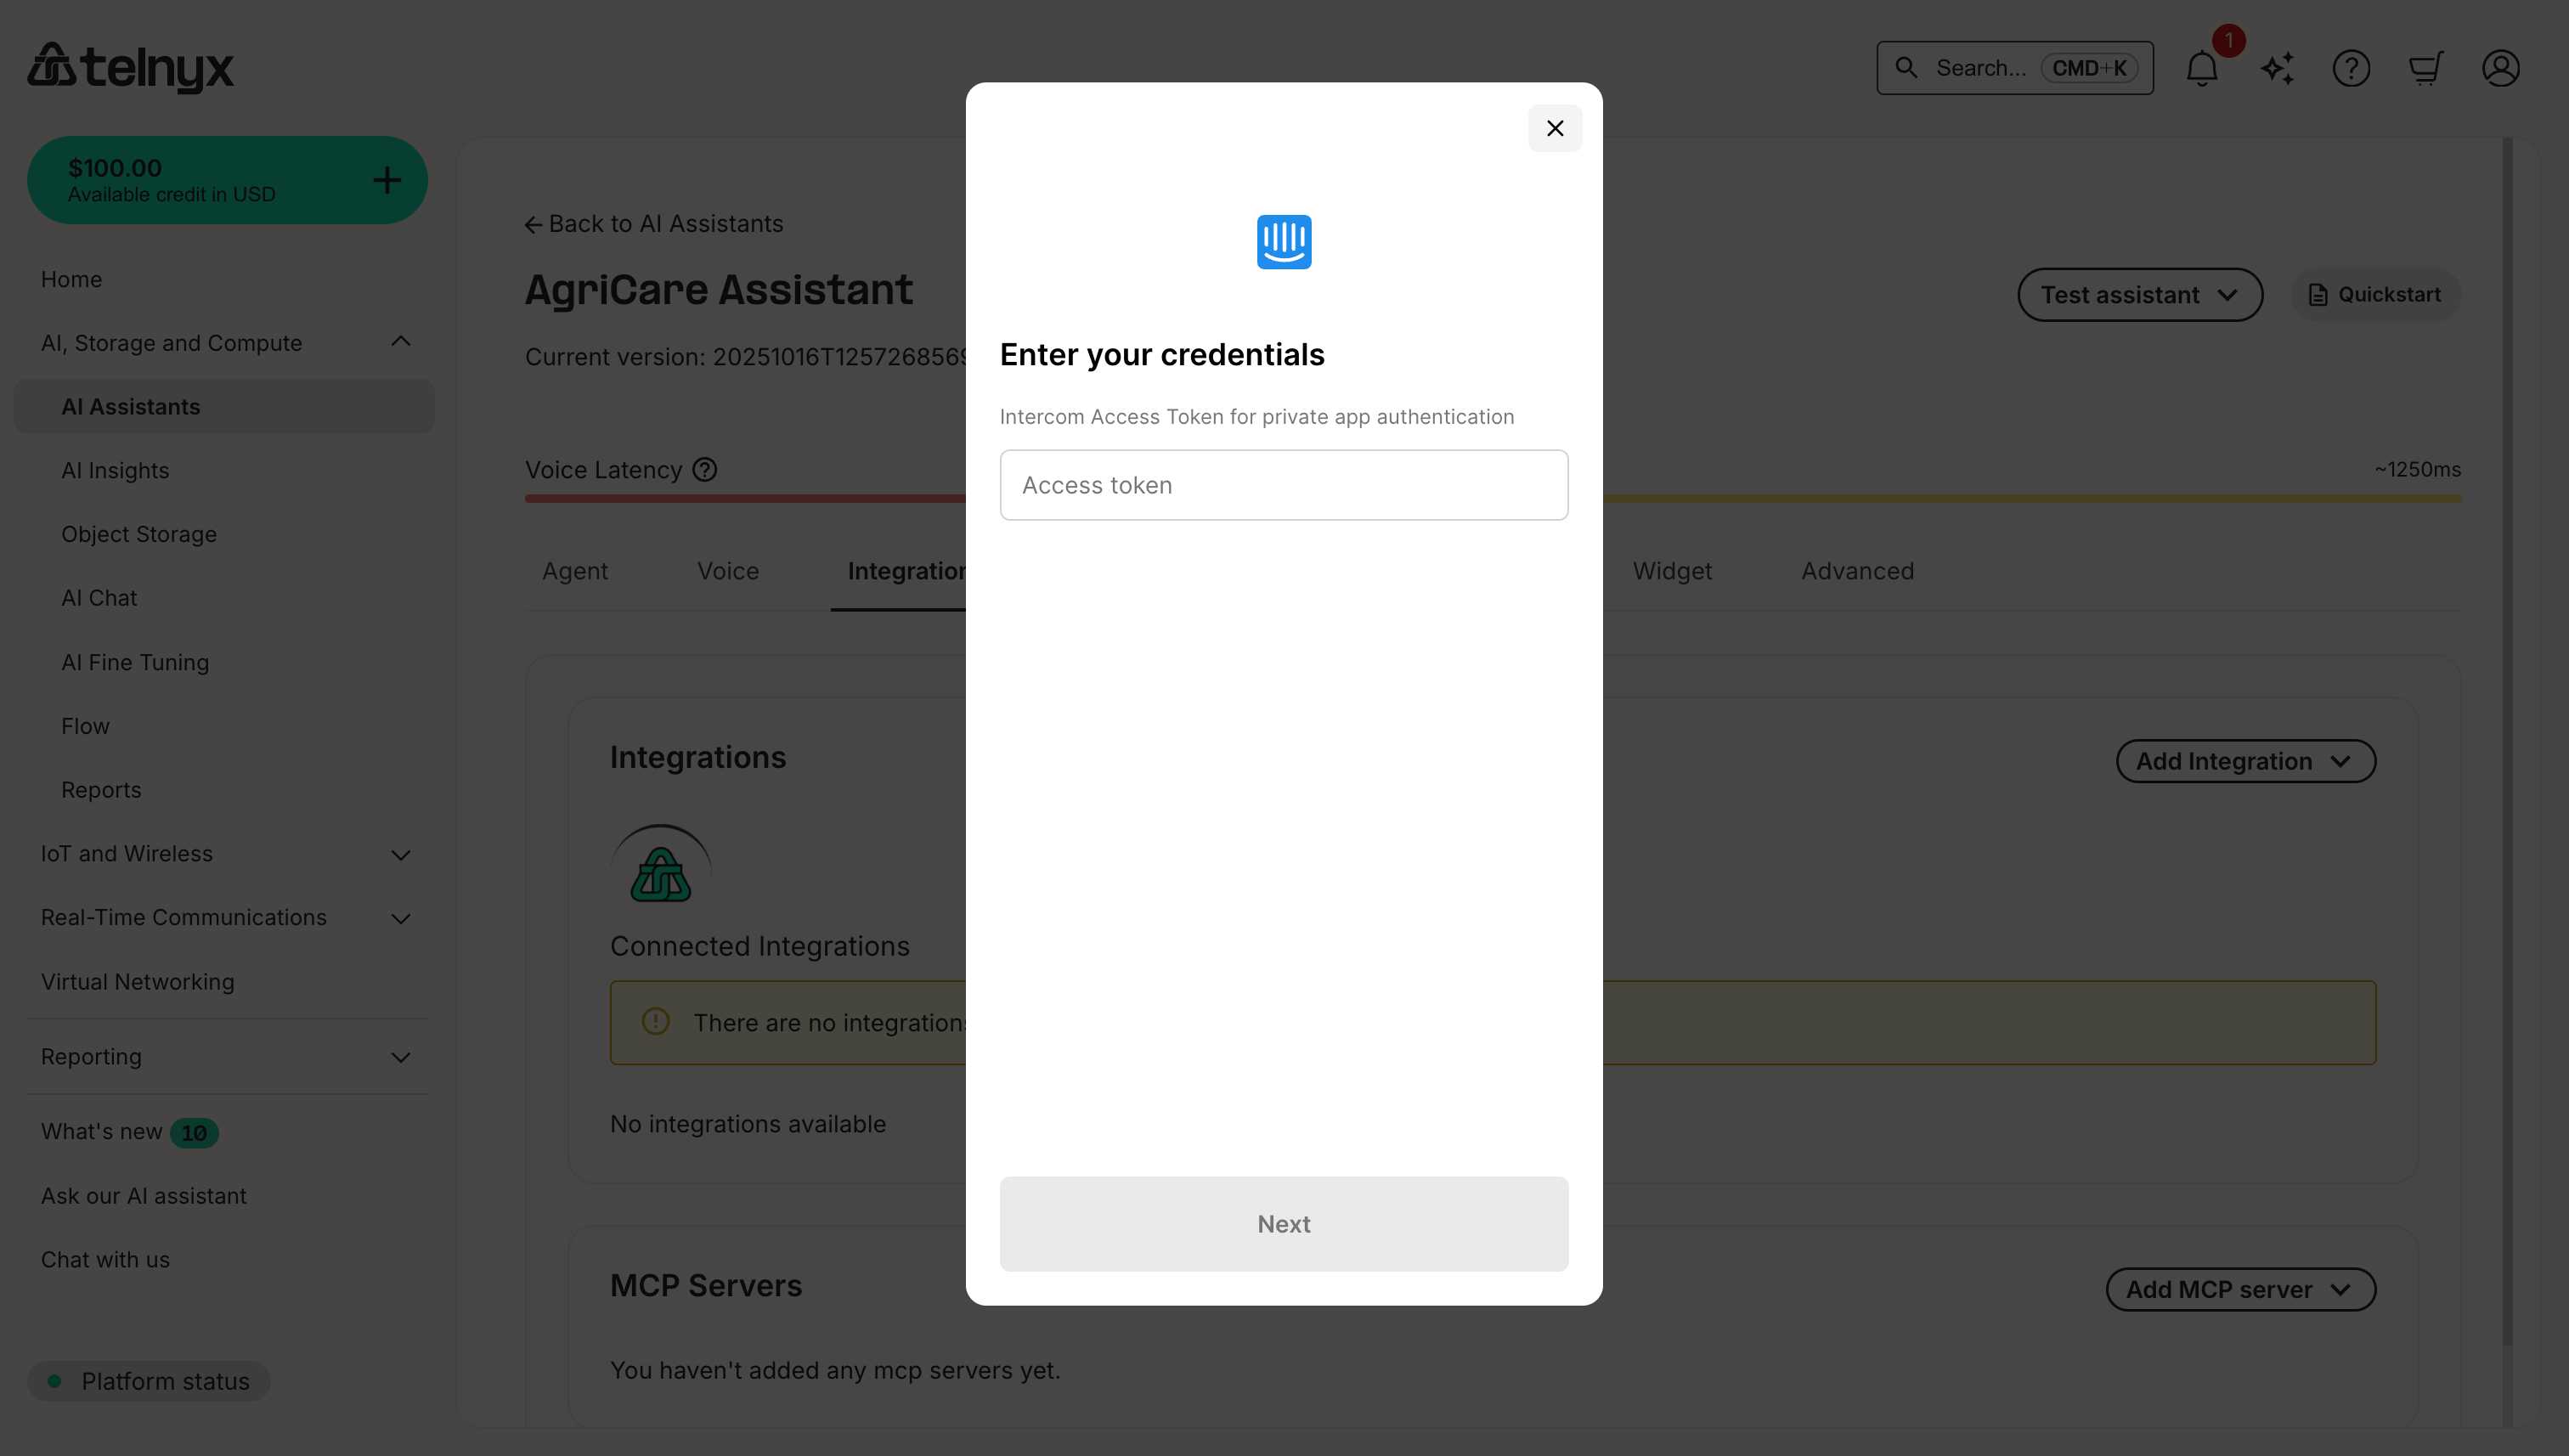
Available tools
After connecting Intercom, your assistant can:- Access conversation history - Retrieve past customer interactions and messages.
- Create notes - Add internal notes to customer conversations.
- Update customer attributes - Modify user data and custom attributes.
- Search users - Find customers by email, user ID, or other identifiers.
- Manage tags - Add or remove conversation tags for organization.
Use cases
Customer Support ContextJira
Connect your AI assistant to Jira for project management, issue tracking, and software development workflows.Prerequisites
- Jira account (Cloud or Server).
- API token or password.
- Project access and permissions.
Required credentials
When connecting Jira, you’ll need to provide: The Jira username or email that has access to the project. Generate a token at https://id.atlassian.com/manage-profile/security/api-tokens by selecting Create API token. Provide the base URL of your Jira instance (for exampleyourcompany.atlassian.net) without the https:// prefix.
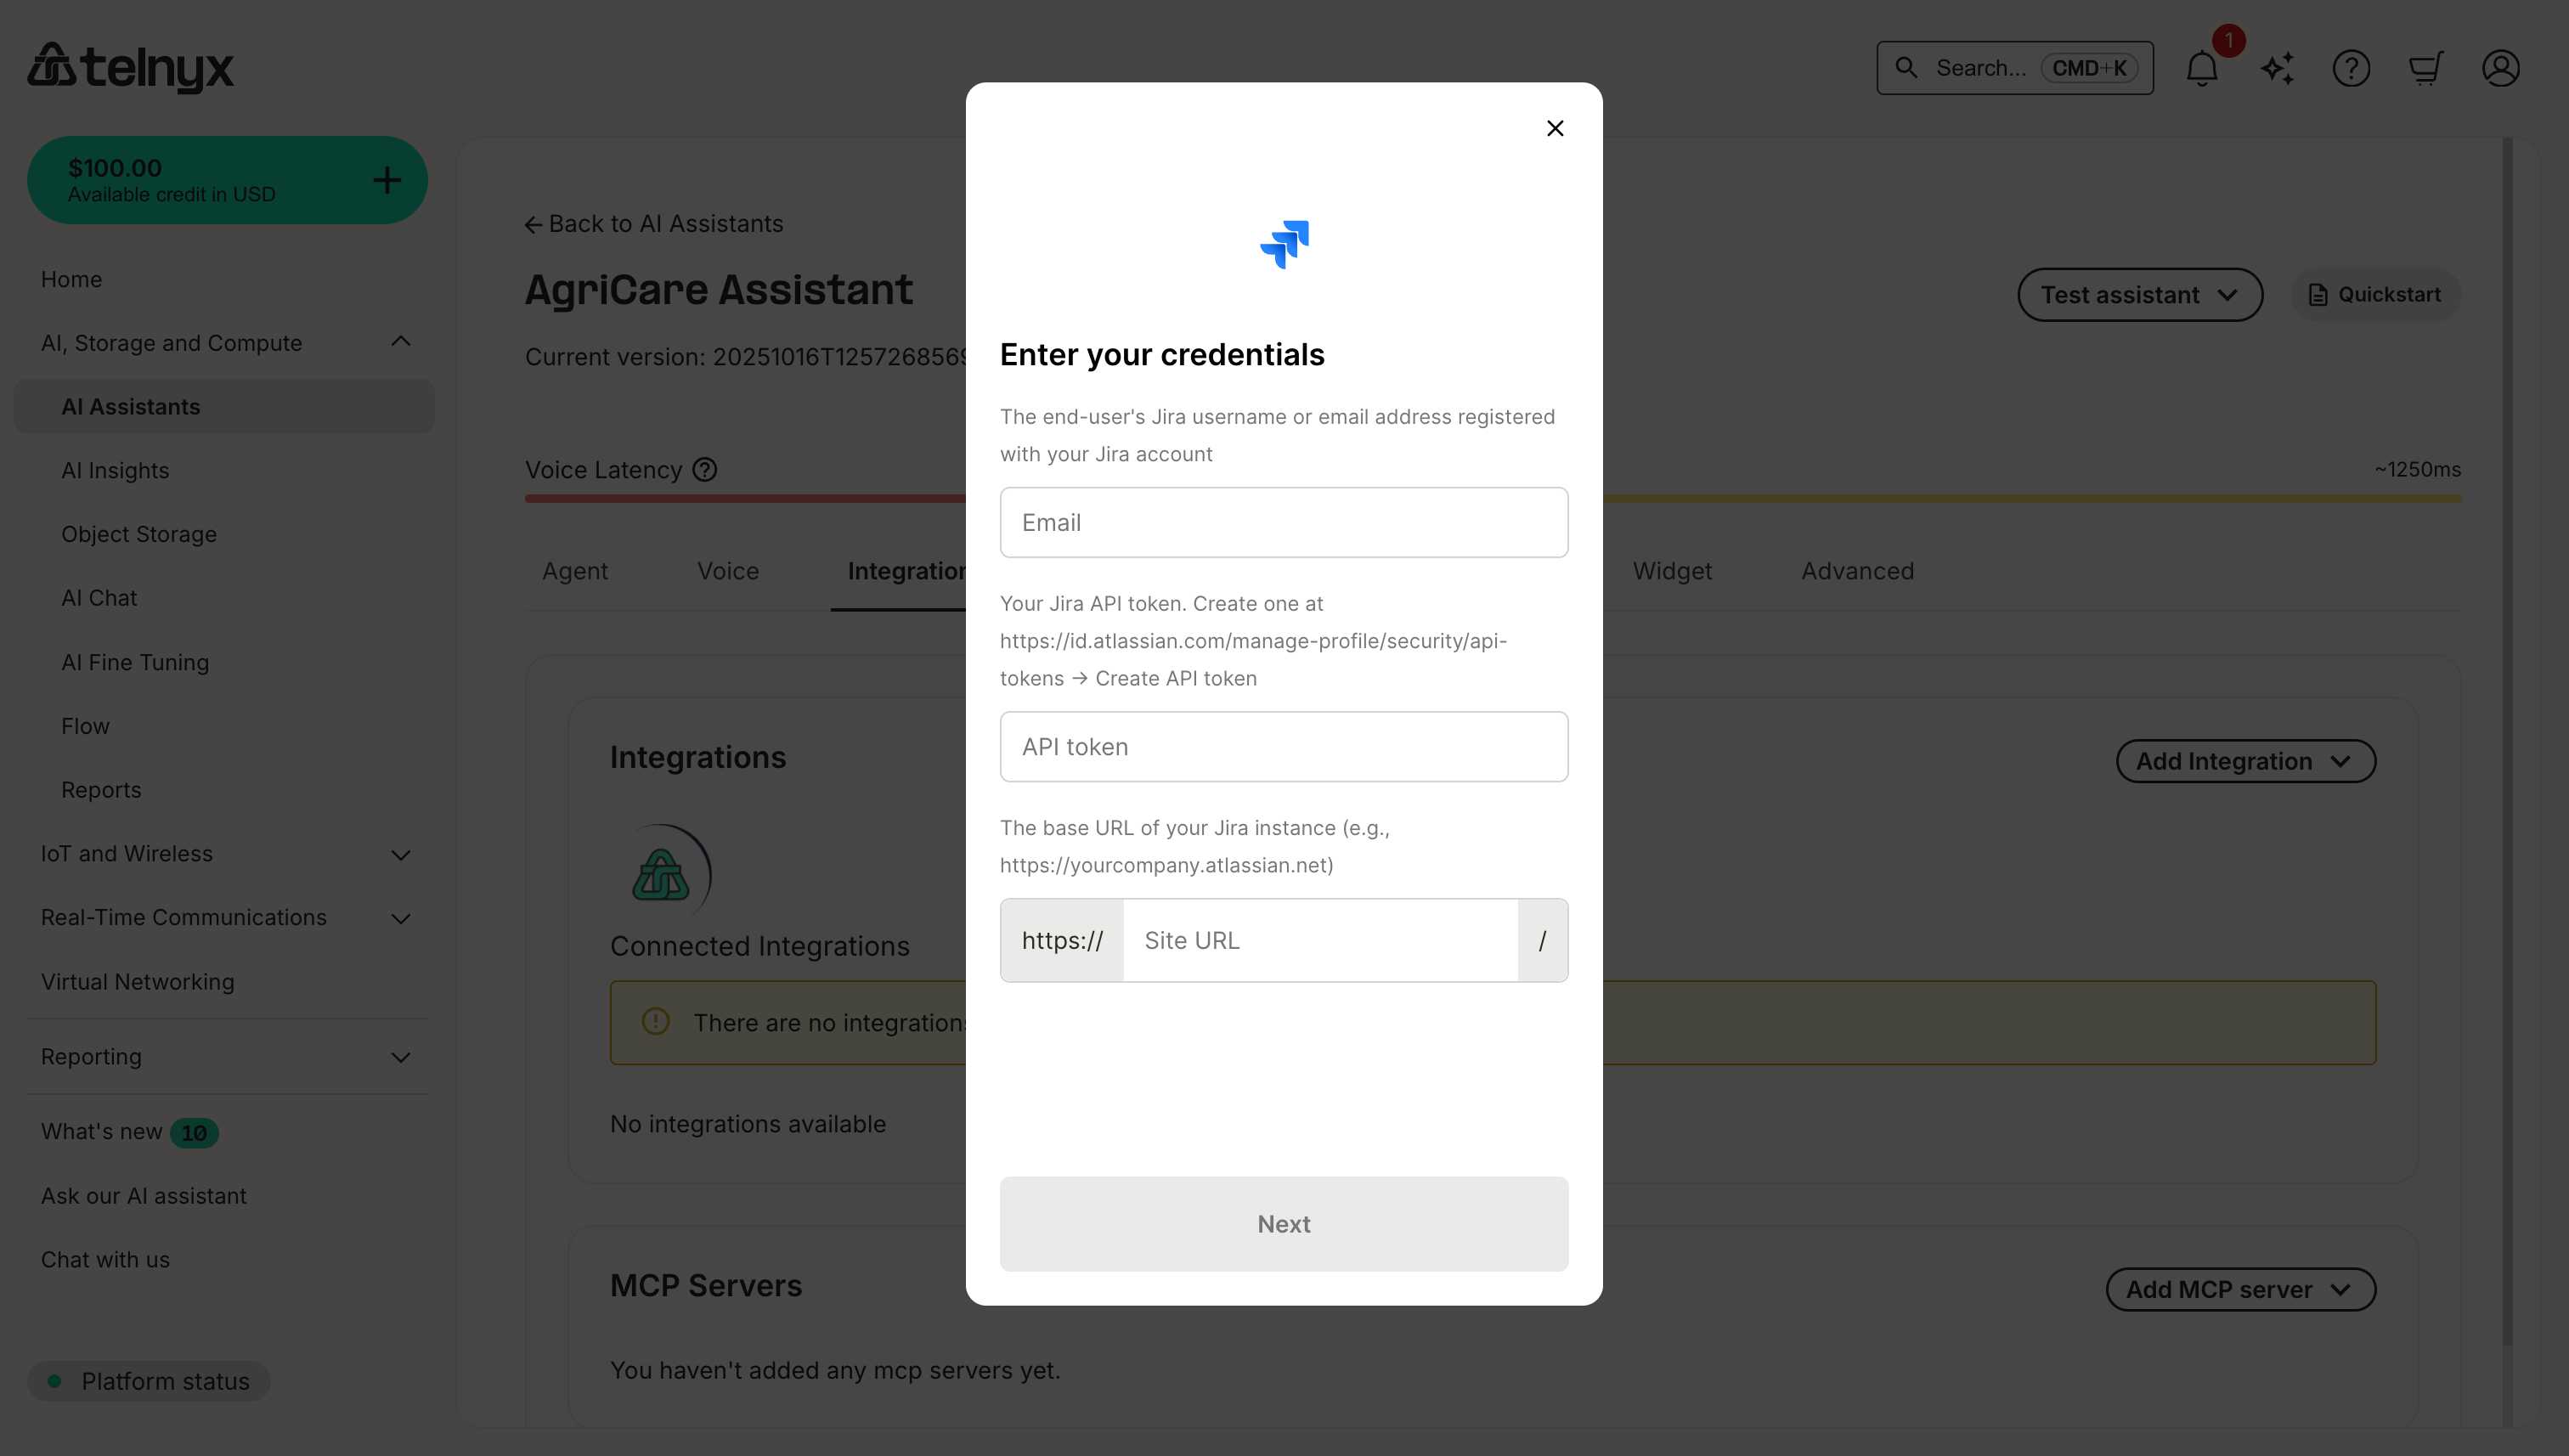
Available tools
After connecting Jira, your assistant can:- Create issues - Create bugs, tasks, stories, or epics.
- Update issues - Change status, assignee, or priority.
- Search issues - Find issues by project, assignee, or status.
- Add comments - Comment on existing issues.
- Transition issues - Move issues through workflow states.
Use cases
Bug ReportingSalesforce
Connect your AI assistant to Salesforce to access customer records, create cases, update opportunities, and more.Prerequisites
- Salesforce account with API access.
- Username and password.
- Security token (reset in Personal Settings → Reset My Security Token).
- Organization ID (found in Setup → Company Settings → Company Information).
Required credentials
When connecting Salesforce, you’ll need to provide: Your Salesforce hostname such asacme.my.salesforce.com (production) or acme.sandbox.my.salesforce.com (sandbox) without https:// or trailing /.
The Salesforce username or email with integration access.
The password for that Salesforce user.
The security token from Personal Settings → Reset My Security Token (it arrives via email).
Your org ID from Setup → Company Settings → Company Information.
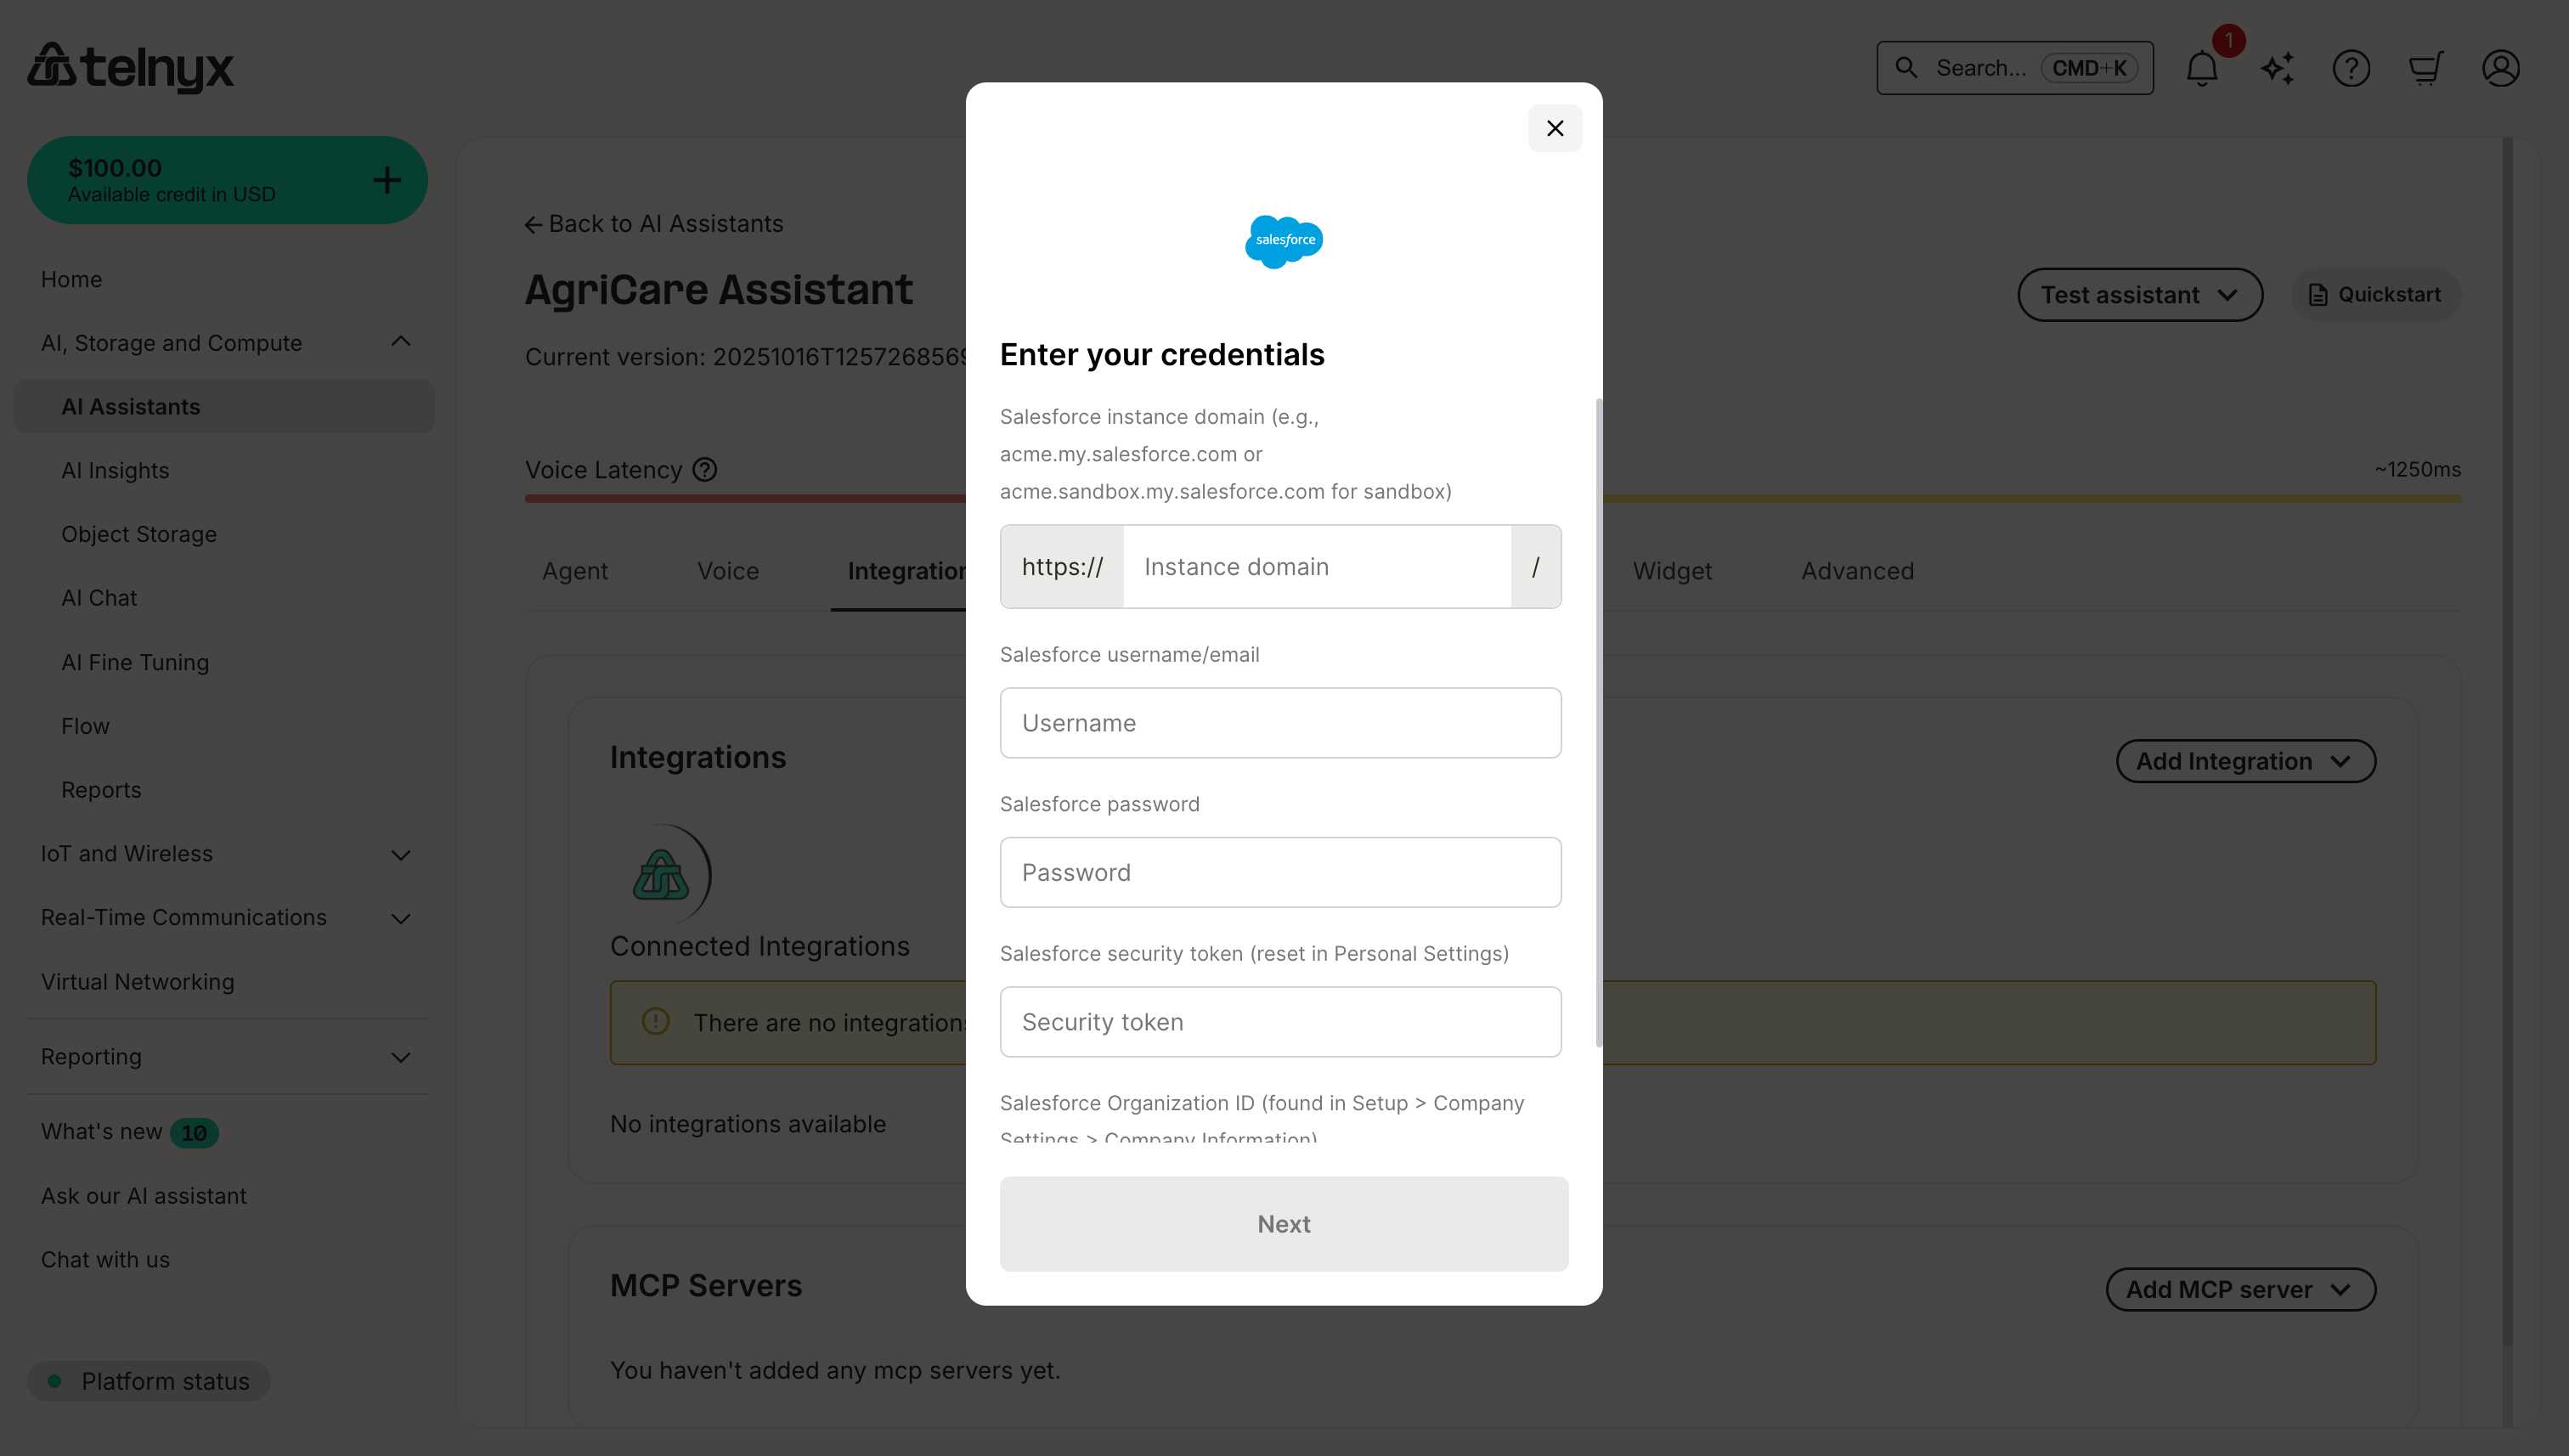
Available tools
After connecting Salesforce, your assistant can use tools to:- Search records - Find accounts, contacts, leads, opportunities.
- Create records - Create new cases, leads, tasks, or opportunities.
- Update records - Modify existing records with new information.
- Query data - Run SOQL queries for custom data retrieval.
Use cases
Customer ServiceServiceNow
Connect your AI assistant to ServiceNow for IT service management, incident tracking, and workflow automation.Prerequisites
- ServiceNow instance with API access.
- User account with appropriate roles (e.g., itil, admin).
- Instance URL and credentials.
Required credentials
Provide the ServiceNow hostname, for exampleacme.service-now.com or acme-dev.service-now.com.
Supply the ServiceNow user with the necessary roles.
Enter the password for that user.
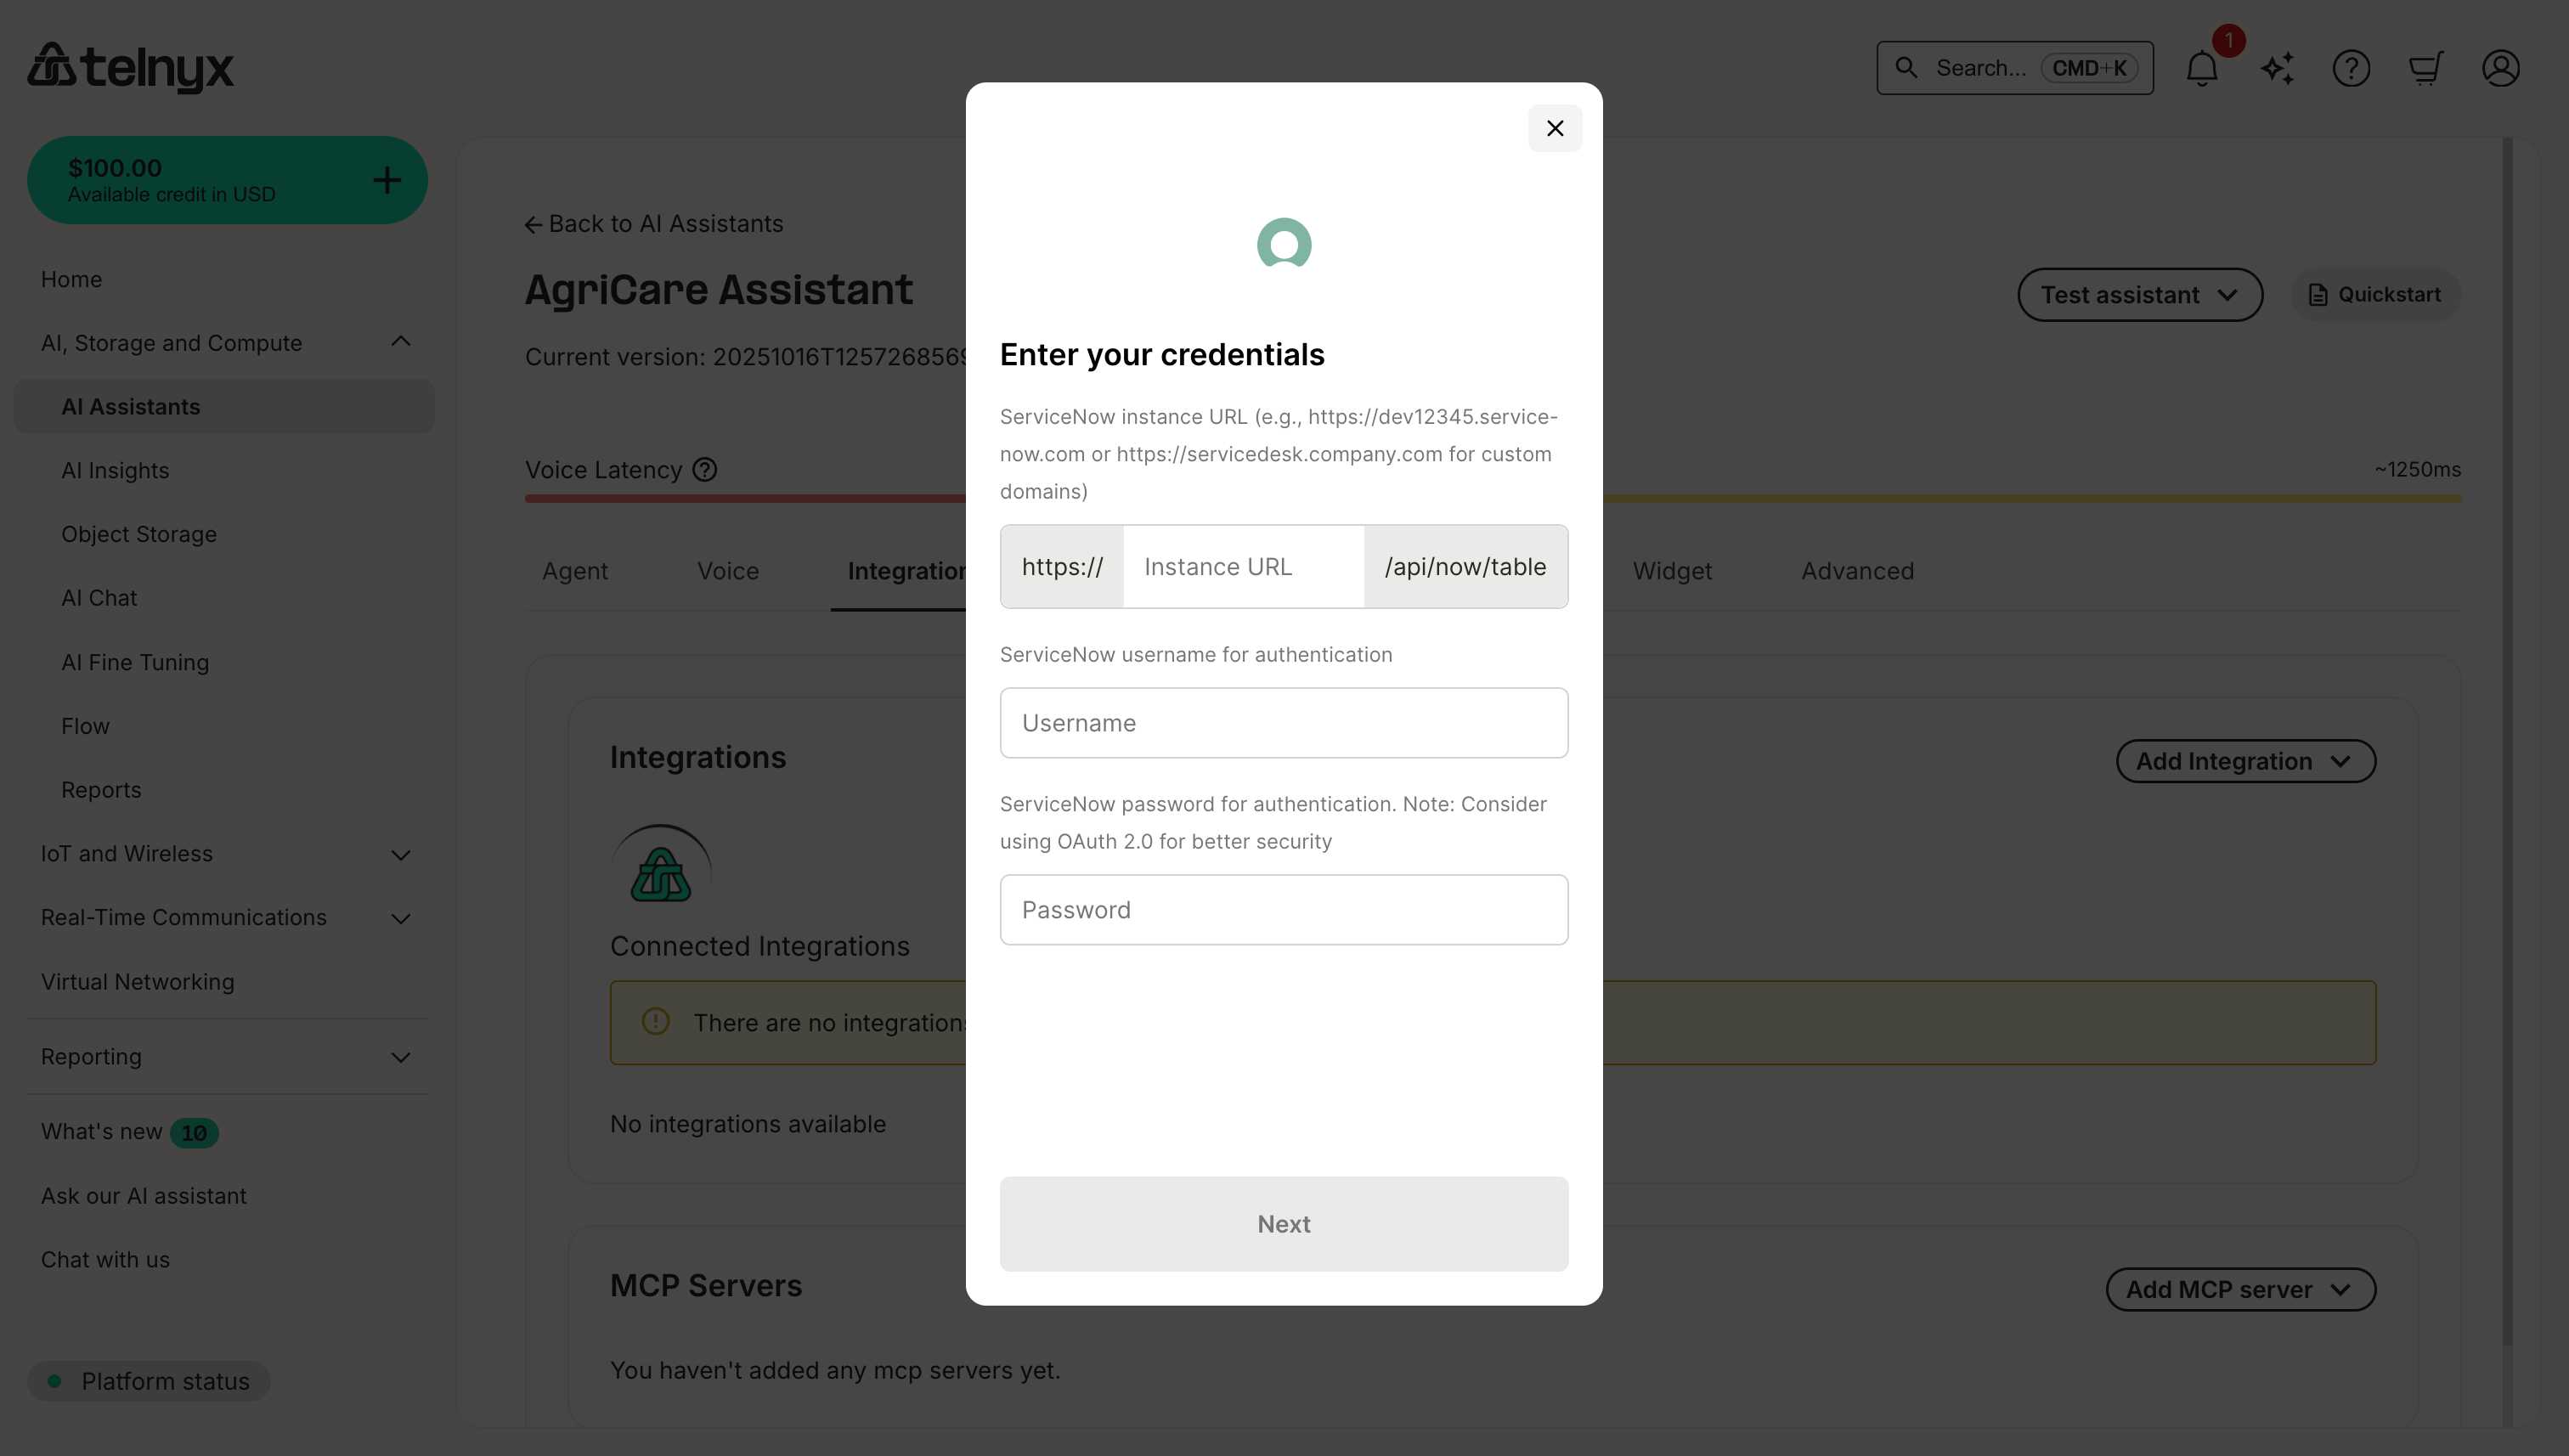
Available tools
After connecting ServiceNow, your assistant can:- Create incidents - Log IT incidents with priority and categorization.
- Update tickets - Modify incident status, assignment, or details.
- Search knowledge base - Find KB articles for issue resolution.
- Query records - Access CMDB, user records, or service catalogs.
Use cases
IT SupportZendesk
Connect your AI assistant to Zendesk for customer service and support workflows.Prerequisites
- Zendesk account with API access.
- Admin access to generate API tokens.
- Subdomain and email credentials.
Required credentials
When connecting Zendesk, you’ll need to provide: Enter only the subdomain portion (e.g.,company if your portal is company.zendesk.com); the rest is added automatically.
The Zendesk account email that owns the API token.
Generate a token in Admin Center → Apps and integrations → APIs → Zendesk API.
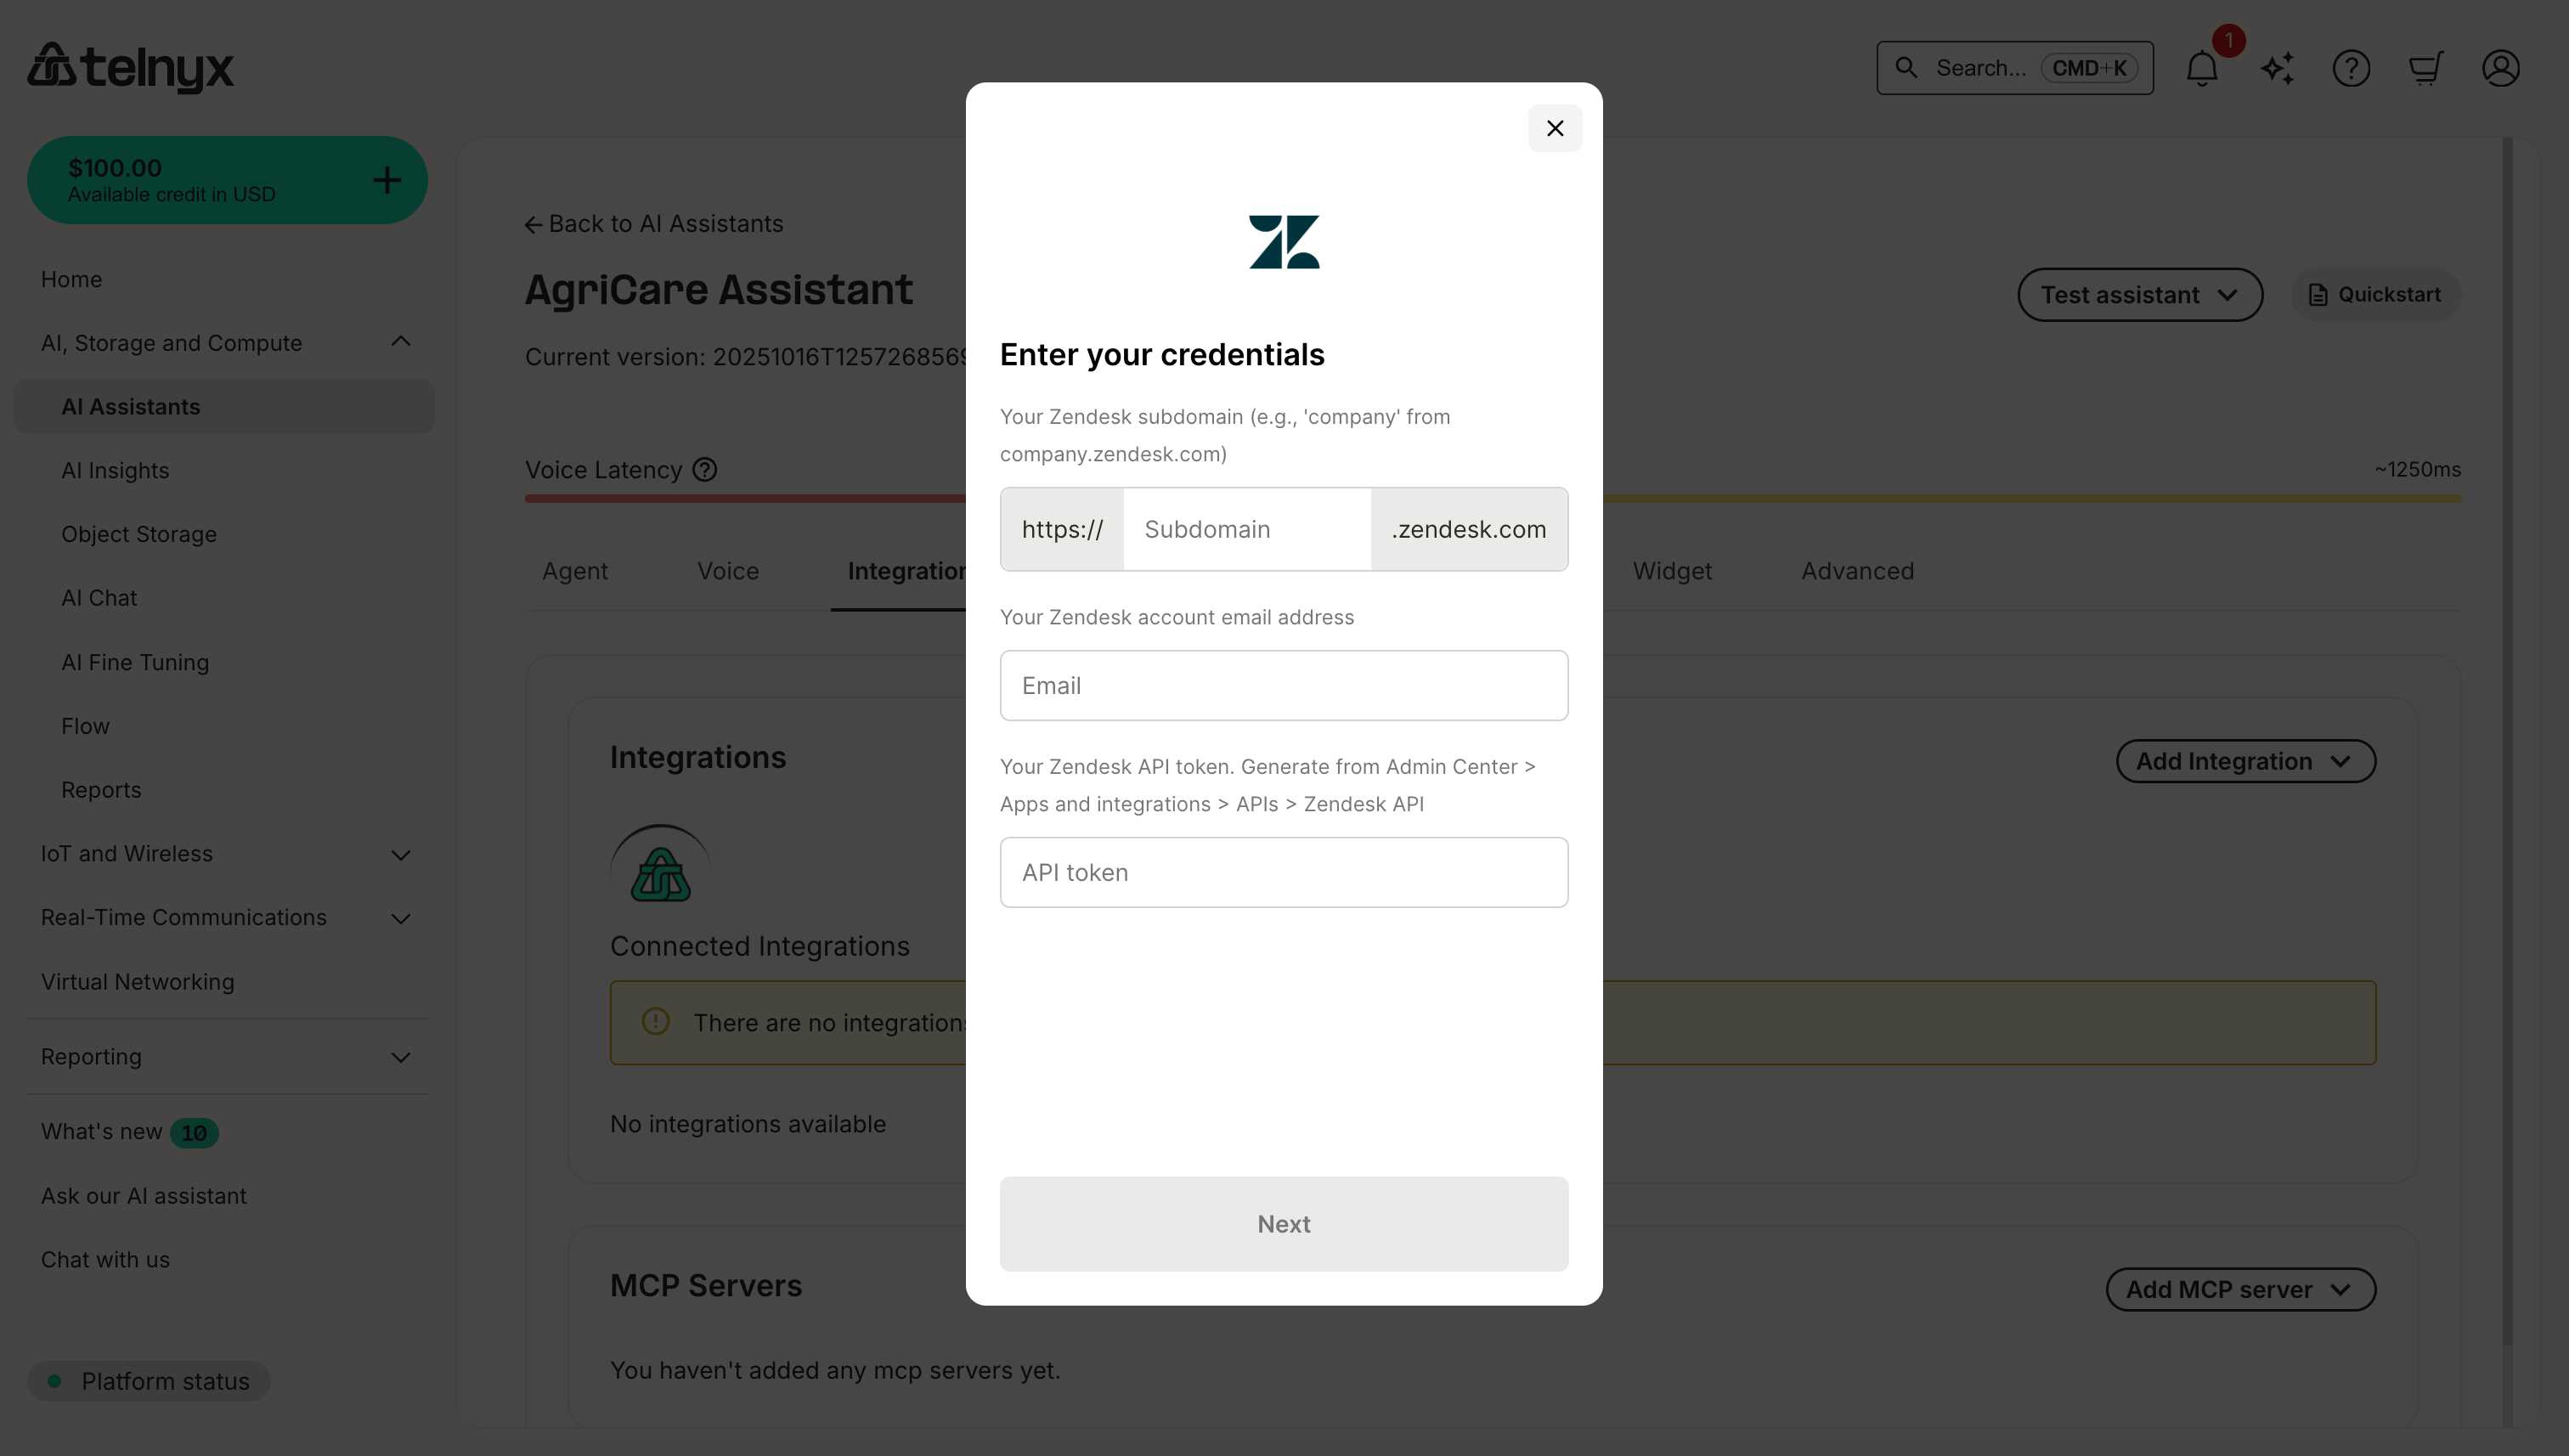
Available tools
After connecting Zendesk, your assistant can:- Create tickets - Log customer support requests with priority and categorization.
- Search customer history - Find previous tickets and interactions by customer.
- Update ticket status - Modify ticket status, assignment, or priority.
- Access knowledge base - Search KB articles for issue resolution.
Use cases
Support TicketingCoval
Connect your AI assistant to Coval for automated simulation, evaluation, and production monitoring of voice and chat agents. Coval is a testing and evaluation tool — unlike the other integrations on this page, it does not add tools your assistant uses during conversations. Instead, it tests and monitors the assistant itself, helping you catch regressions and validate behavior at scale.Prerequisites
- Coval account at coval.dev.
- A configured Telnyx AI assistant to evaluate.
Required credentials
When connecting Coval, you’ll need to provide: Log in to your Coval dashboard, navigate to your workspace settings, and copy your API key.Capabilities
After connecting Coval, you can:- Automated scenario simulation — Generate thousands of test scenarios from a few seed cases, covering edge cases and unexpected user behaviors.
- CI/CD regression testing — Automatically detect performance regressions on every code change before deploying to production.
- Production monitoring — Log live calls, receive instant alerts for performance drops, and replay transcripts and audio.
- Built-in evaluation metrics — Measure latency, accuracy, tool-call effectiveness, and instruction compliance across all interactions.
Use cases
Pre-deployment validationManaging integrations
Viewing connected integrations
Navigate to the assistant you want to review in the Mission Control Portal. Open the Integrations tab. View everything listed under Connected Integrations.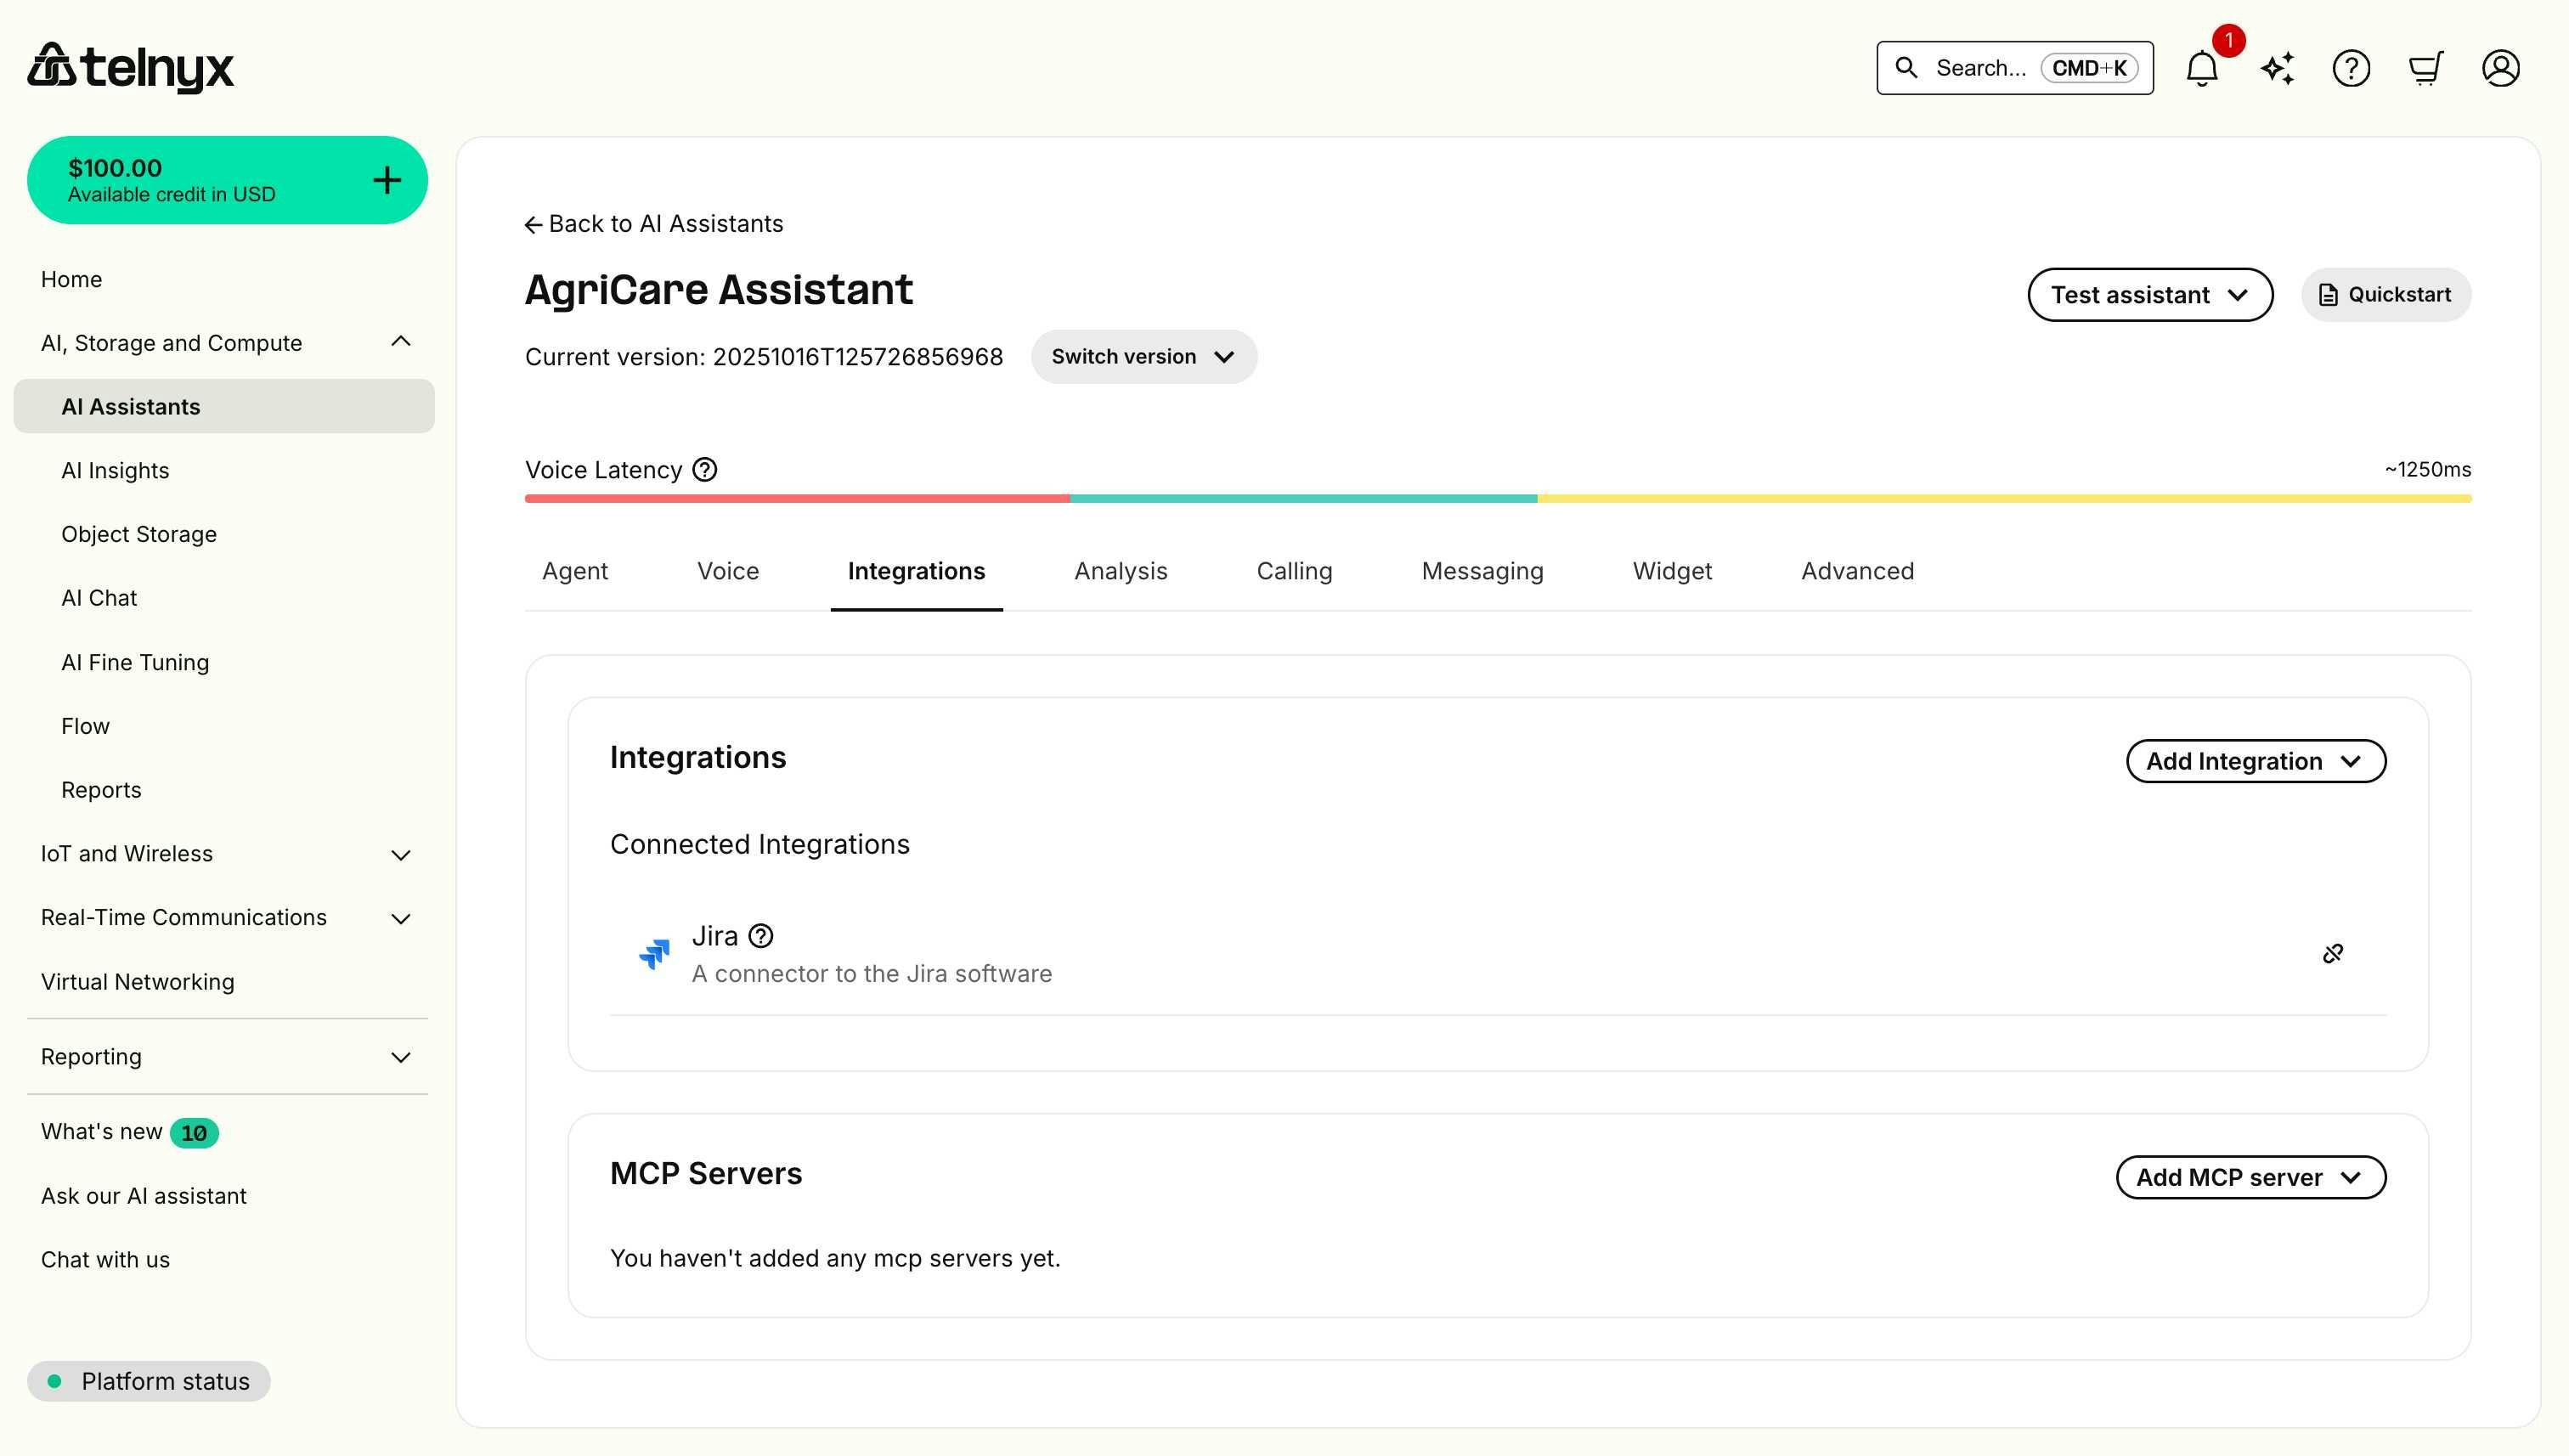
Disconnecting an integration
To disconnect an integration from your assistant: Navigate to your assistant and open the Integrations tab. Find it within the Connected Integrations list. Click the chain-link unassign button. Approve the confirmation dialog to finish disconnecting.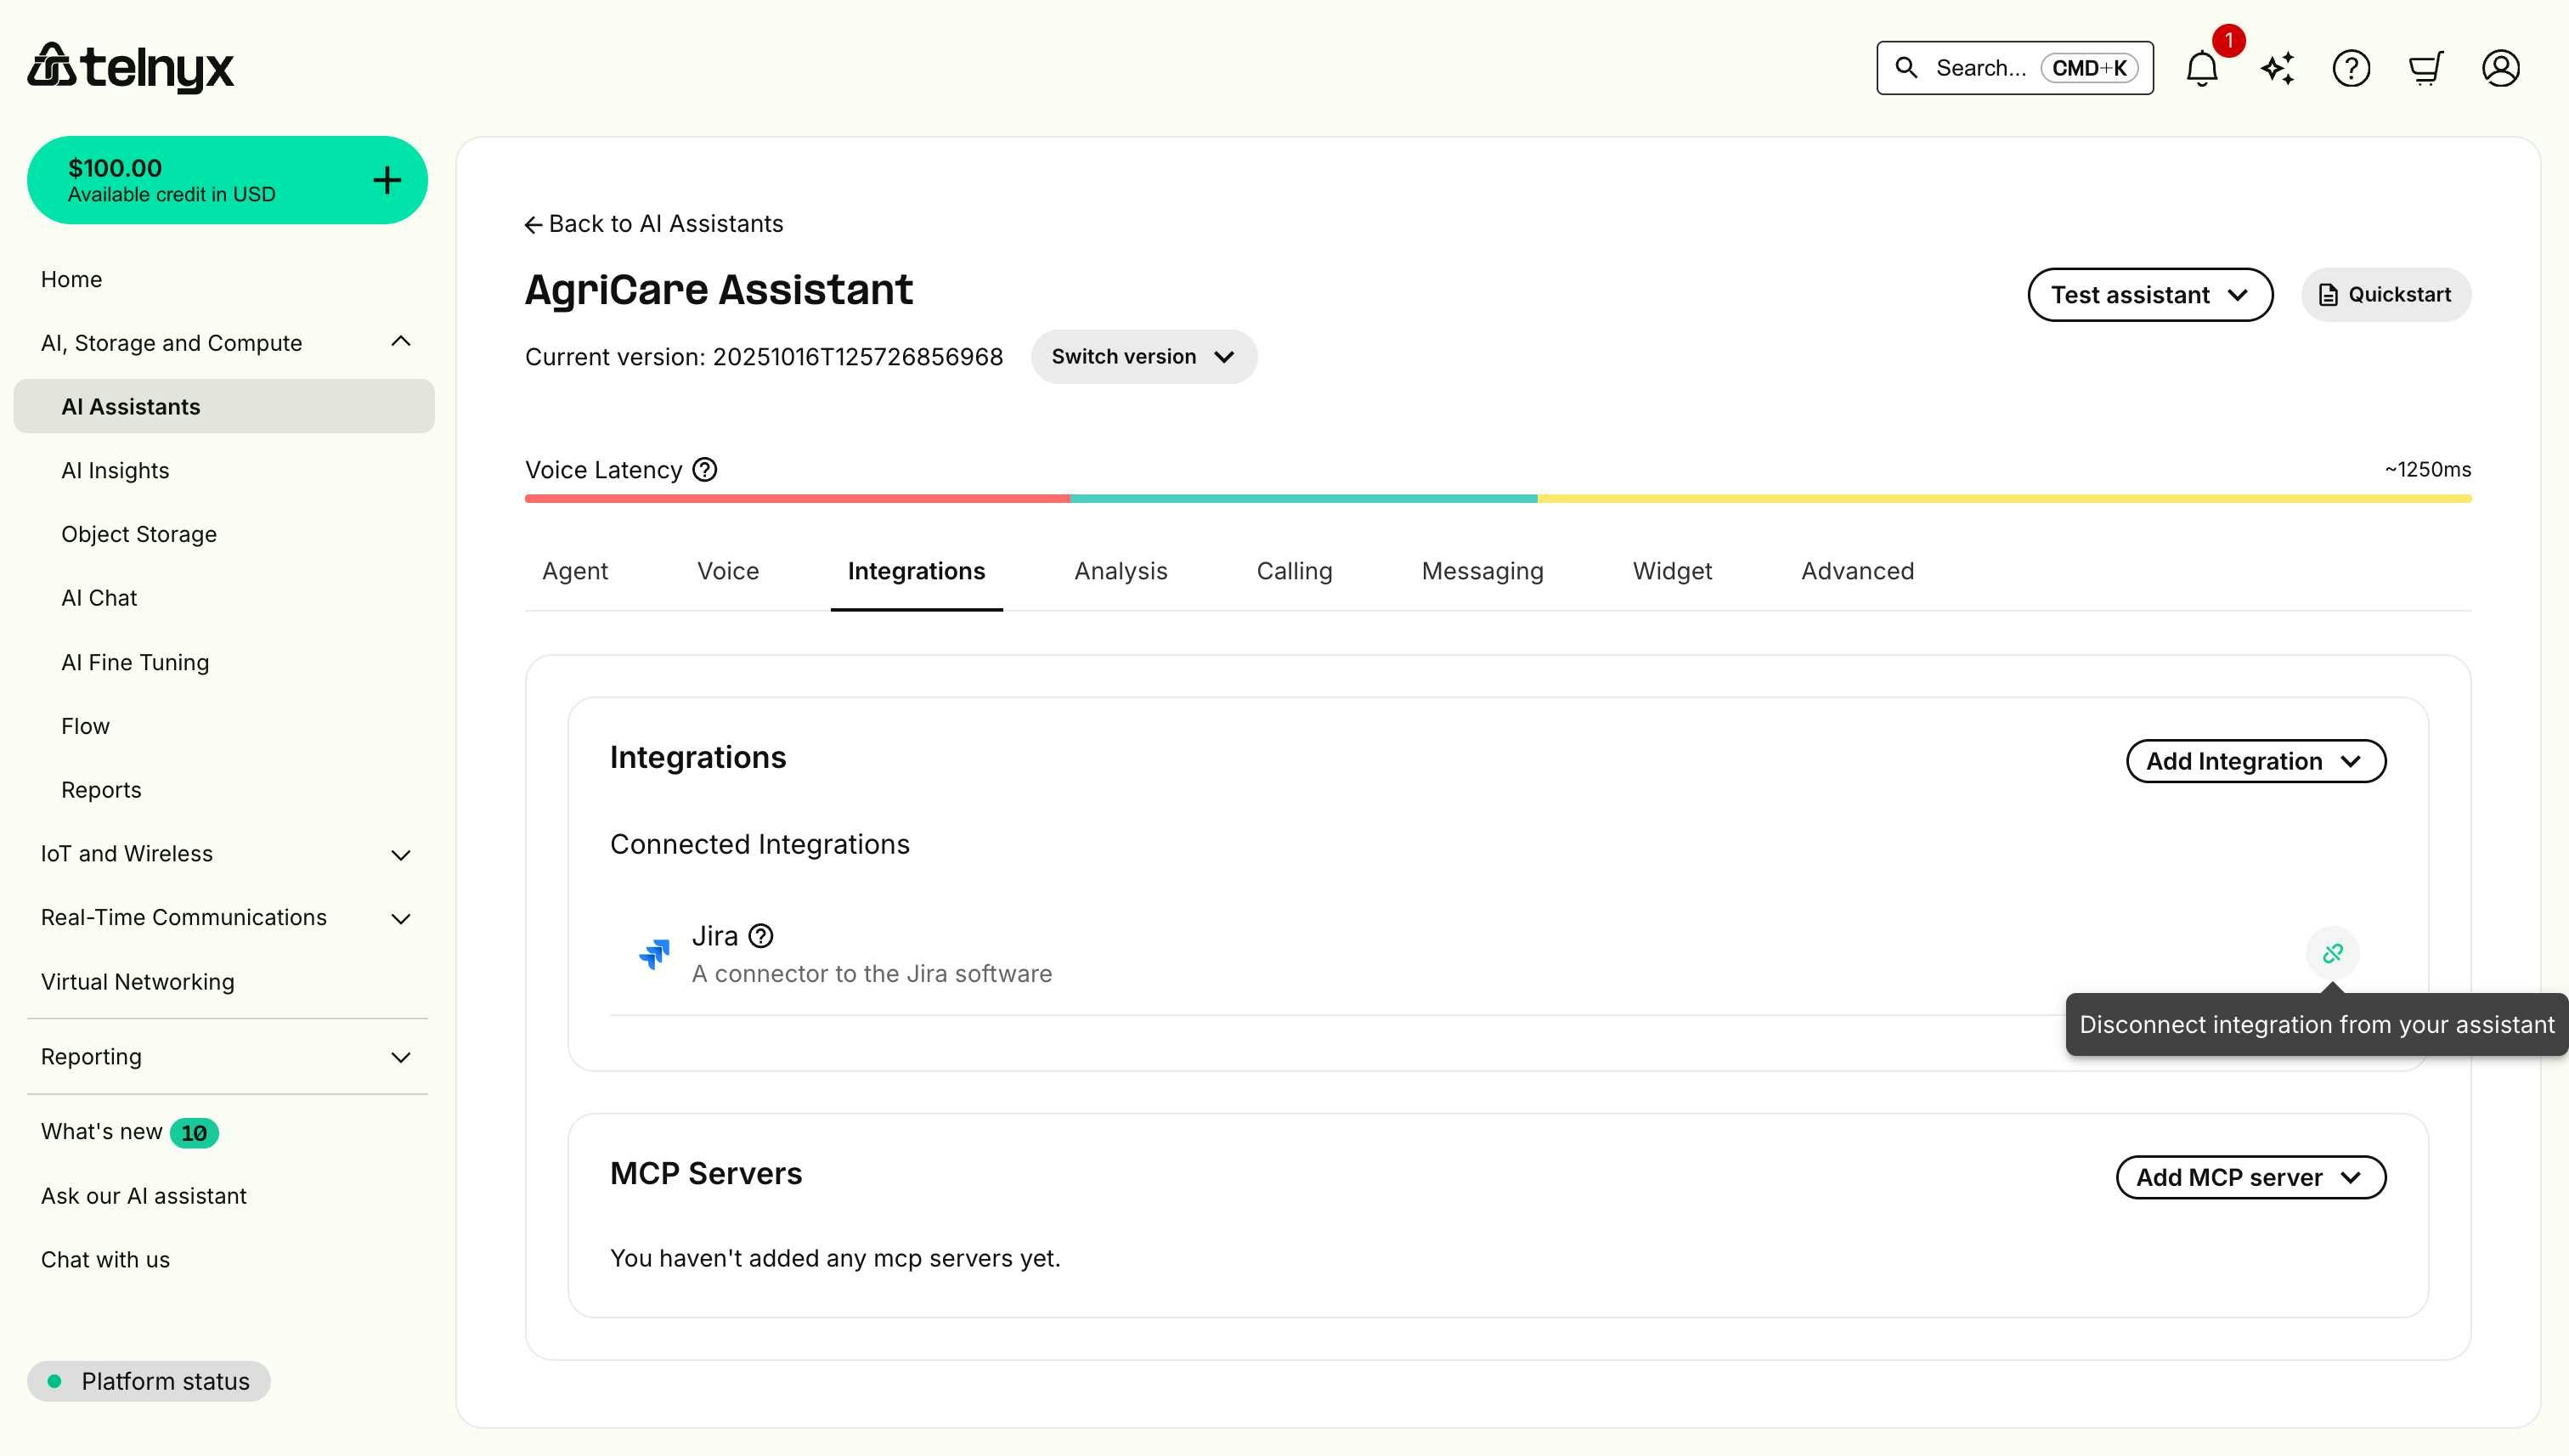
- The integration is removed from this assistant.
- All associated tools are disabled for this assistant.
- The integration moves to Available Integrations and can be reconnected later.
Deleting an integration
To permanently delete an integration from your account: Navigate to your AI assistant and open the Integrations tab. Look under Available Integrations. Click the trash icon next to the integration. Approve the deletion to remove stored credentials permanently.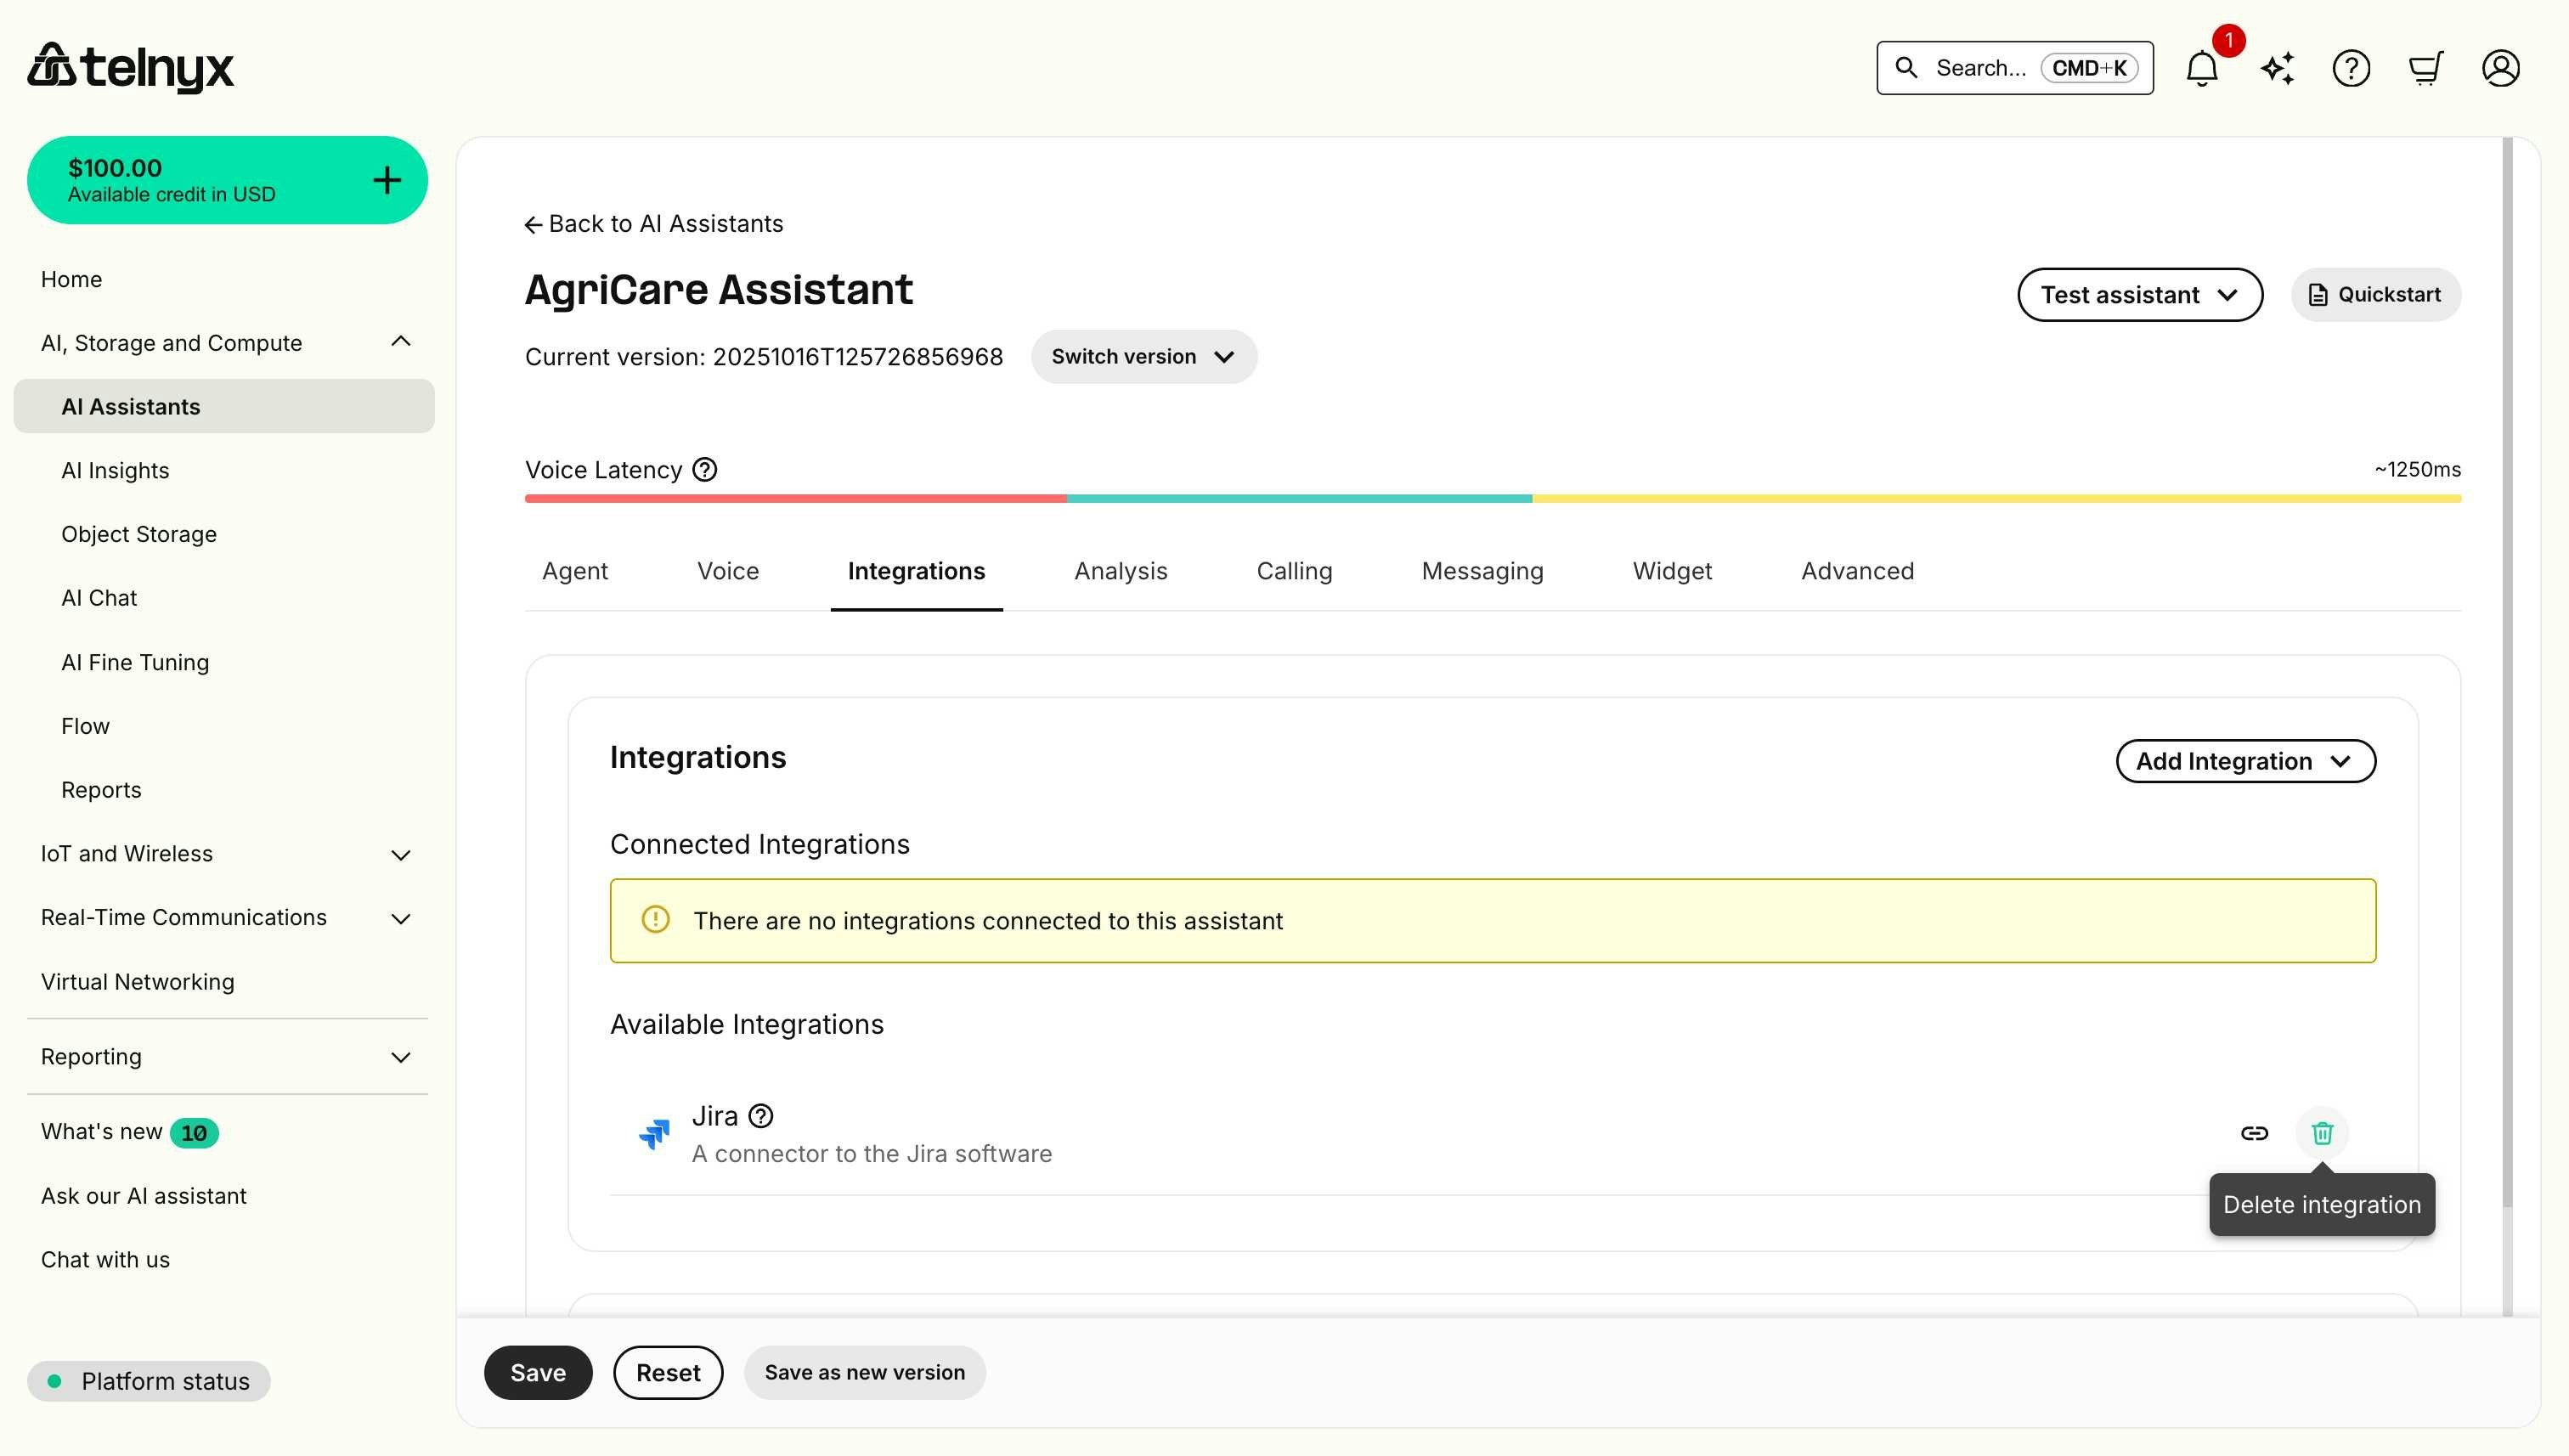
Best practices
Security
Create integration-specific profiles with only the permissions the workflow needs. Update API tokens and passwords on a routine cadence. Review integration activity through platform audit logs. Grant only the scopes required for each integration use case. Test and validate integrations in non-production environments first.Configuration
Enable search/read capabilities first, then gradually introduce write actions. Document when and how each tool should be used so assistants respond correctly. Validate integration behavior across multiple conversation scenarios. Configure sensible defaults (e.g., priority, project) to reduce user input errors. Define fallback behavior when integration calls fail or return unexpected results.Performance
Avoid duplicate searches or redundant requests where possible. Store reusable values (for example, via dynamic variables) for the duration of a session. Configure timeout thresholds that balance responsiveness with reliability. Track provider limits and design workflows to stay within allocation.Troubleshooting
Connection failures
Symptom: Unable to connect integration, credentials rejected. Solutions:- Verify credentials are correct and have not expired.
- Check that the user account has API access enabled.
- Ensure security tokens or API keys are current.
- For Salesforce: Confirm security token is included.
- For cloud platforms: Verify instance URL format (no
https://or trailing/).
Tools not appearing
Symptom: Integration connected but no tools available. Solutions:- Refresh the page and check again.
- Verify the integration account has required permissions.
- Check that the platform subscription includes API access.
- Disconnect and reconnect the integration.
Authentication errors during calls
Symptom: Tools fail with authentication errors during conversations. Solutions:- Regenerate API tokens or security tokens.
- Update stored credentials in the integration.
- Verify account has not been locked or suspended.
- Check IP allowlists (if applicable).
Missing data or records
Symptom: Assistant cannot find expected records. Solutions:- Verify the integration account can access the records.
- Check record permissions and sharing settings.
- Confirm records exist in the platform.
- Verify search parameters and filters.
Rate limiting
Symptom: Integration calls fail with rate limit errors. Solutions:- Reduce frequency of integration calls.
- Implement caching for frequently accessed data.
- Contact platform support to increase limits.
- Distribute calls across multiple service accounts.
Next steps
- Voice Assistant Quickstart - Learn how to create and configure AI assistants.
- Workflow - Visualize how your integrations and tools connect in your assistant’s conversation flow.
- Agent Handoff - Enable multiple specialized assistants with integrations.
- Dynamic Variables - Pass integration-specific context to your assistant.
- API Reference - Programmatic assistant management.
Related resources
- Integration Secrets - Securely store API keys and tokens.
- AI Assistants Portal - Configure assistants and integrations.
Testing, Versions & Traffic Distribution
Source: https://developers.telnyx.com/docs/inference/ai-assistants/version-testing-traffic-distribution.mdThis guide walks you through testing your AI assistant before production deployment and managing live traffic distribution between different versions. You’ll learn how to create tests, iterate on your assistant, and safely roll out changes using A/B testing.
Creating Your First Assistant
Start by creating a new assistant using a template to establish a baseline for testing.- Navigate to the AI Assistants page
- Click “Create Assistant” and select the “Weather Assistant” template
- This template provides a good foundation with a standard greeting and weather functionality
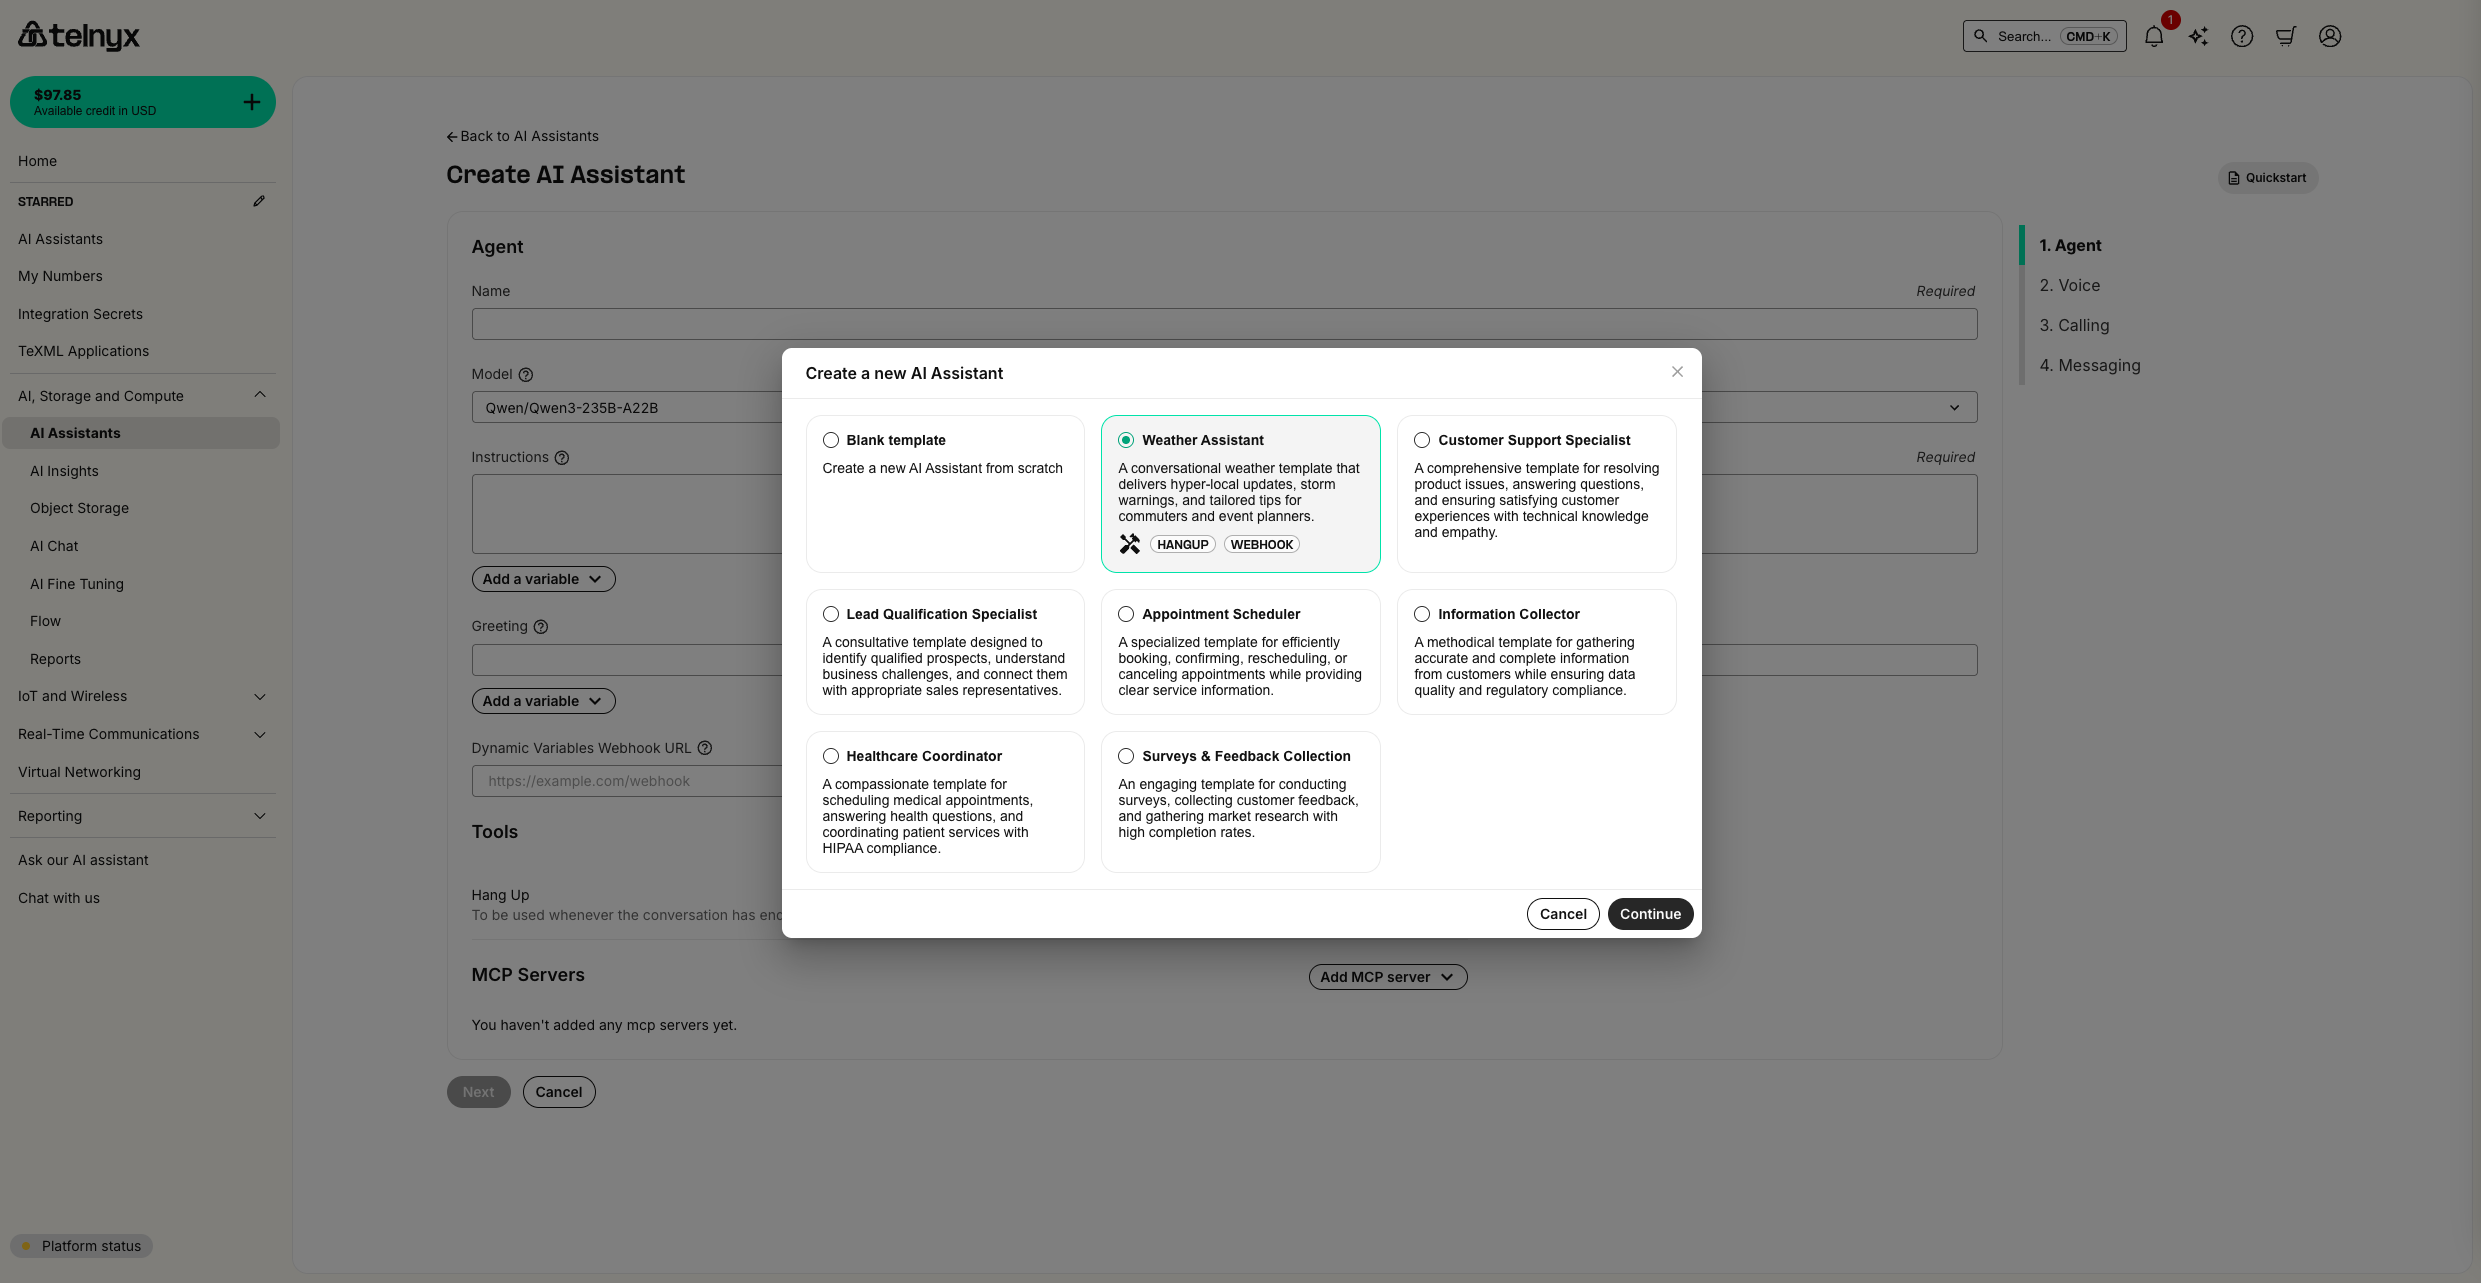
Setting Up Your First Test
Testing your assistant ensures it behaves correctly before going live with users.Creating a Test
- Navigate to the AI Tests page
- Click “Create Test” to set up your first test scenario

Configuring Test Criteria
- Configure your test with the following:
- Test Name: “Weather Assistant Greeting Test”
- Assistant: Select your weather assistant
- Success Criteria: Add criteria to validate the greeting message content and that temperature is described by the assistant.
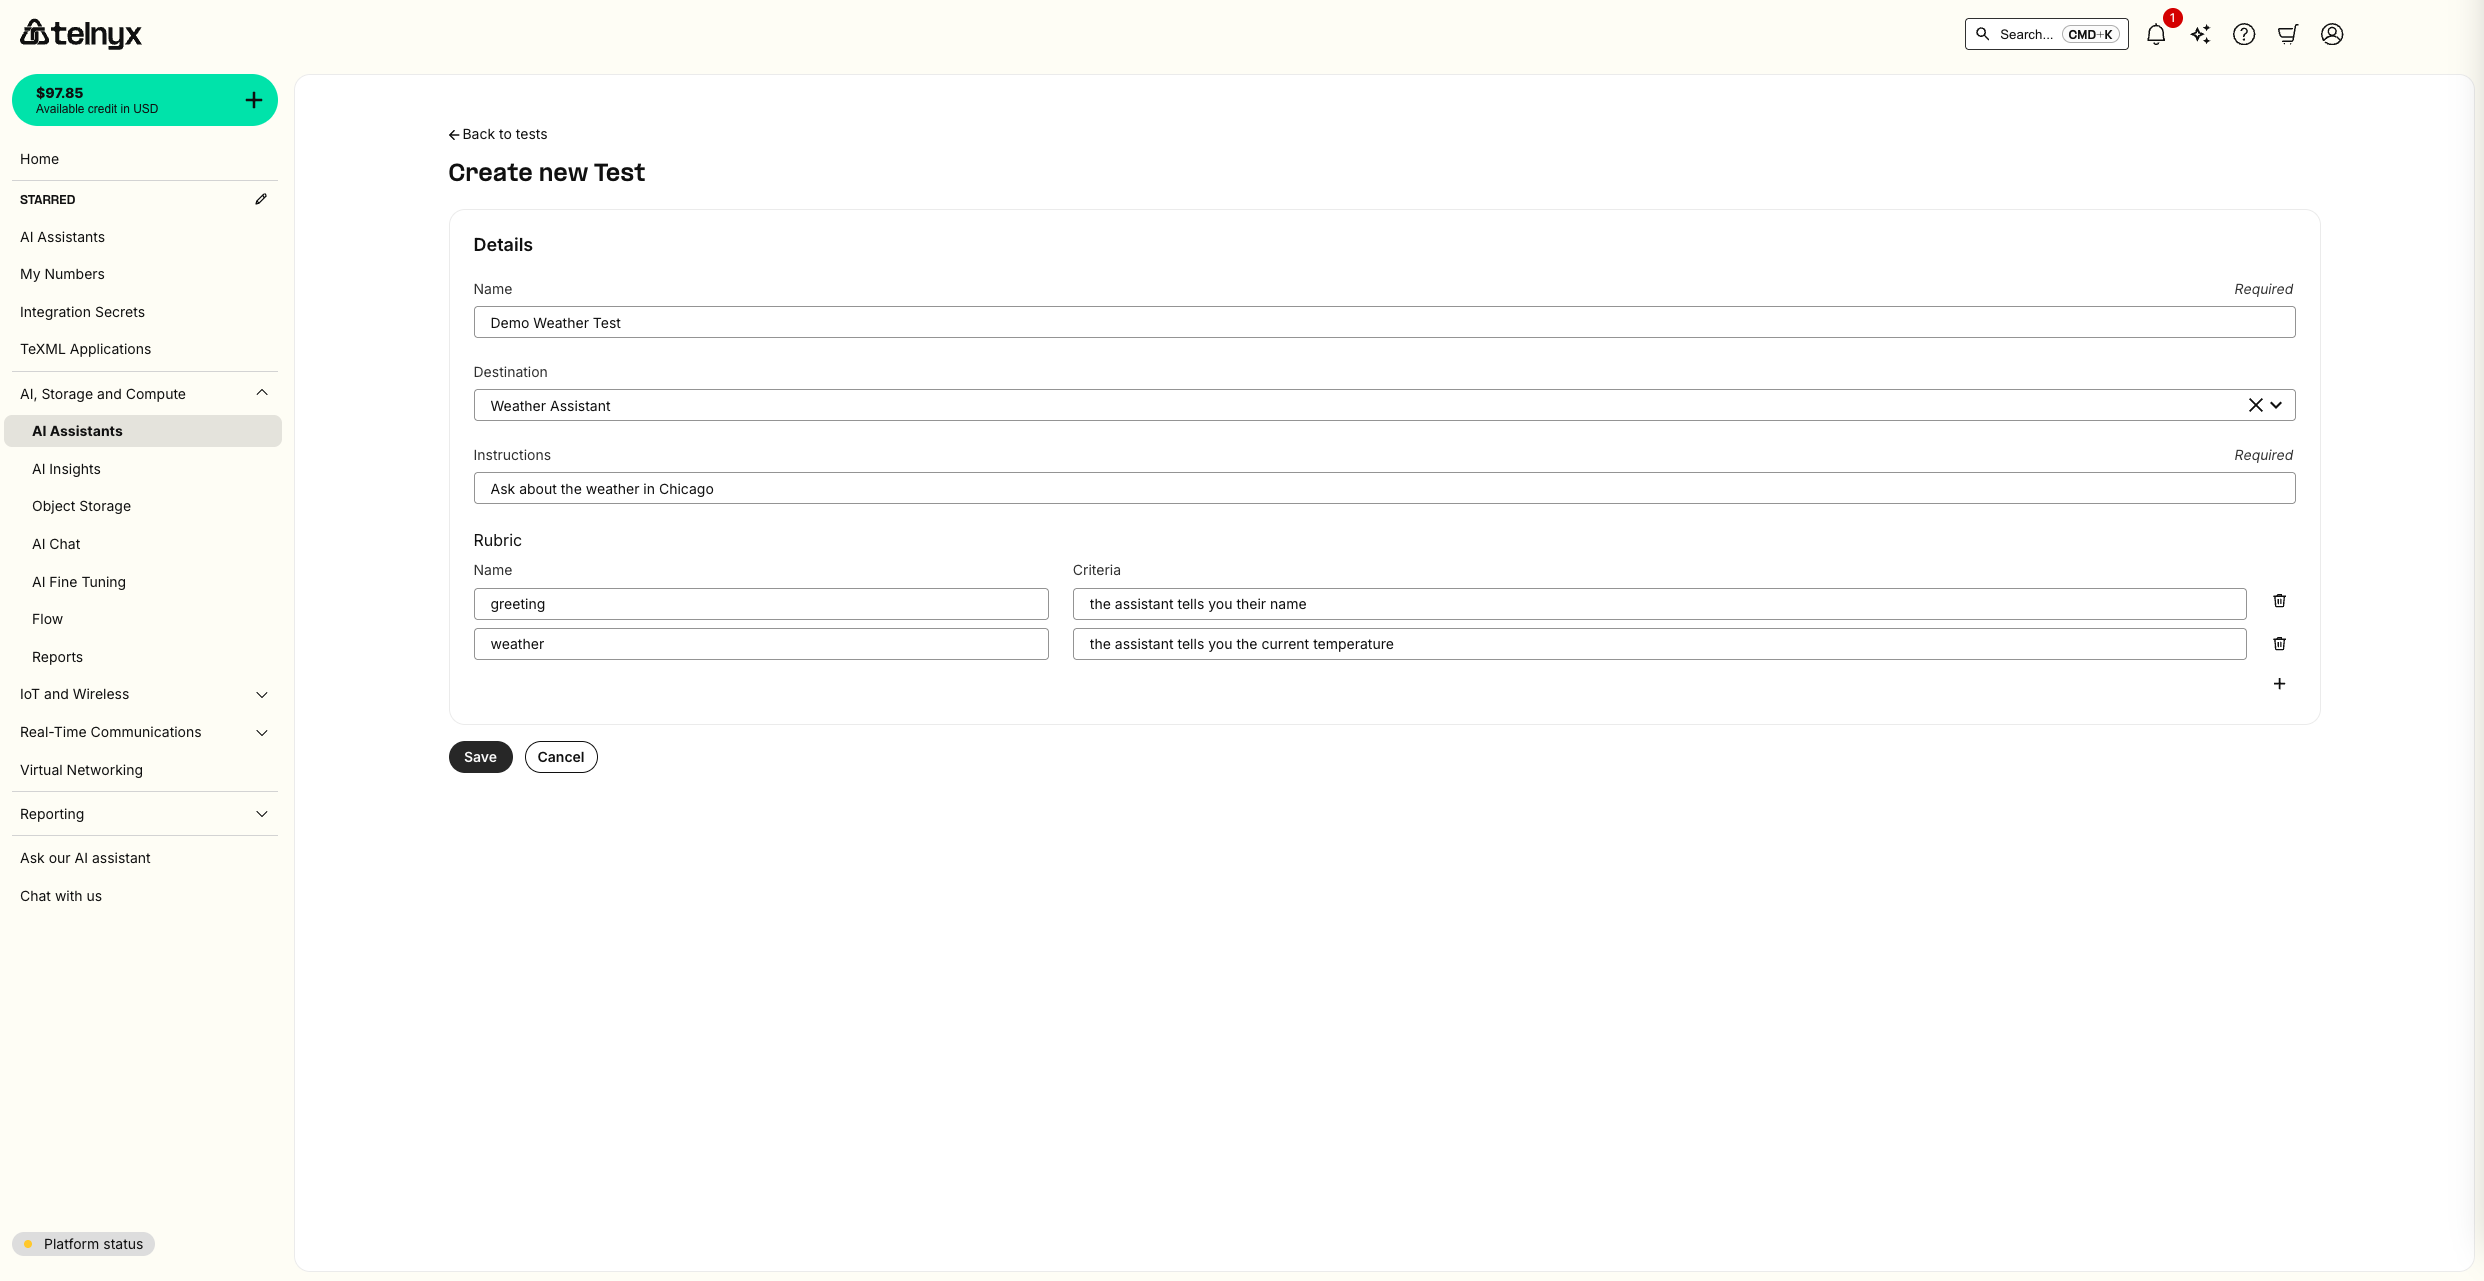
Running Your Test
- Click “Run Test” to execute your test scenario
- Monitor the test progress in real-time
- Review the detailed results once the test completes
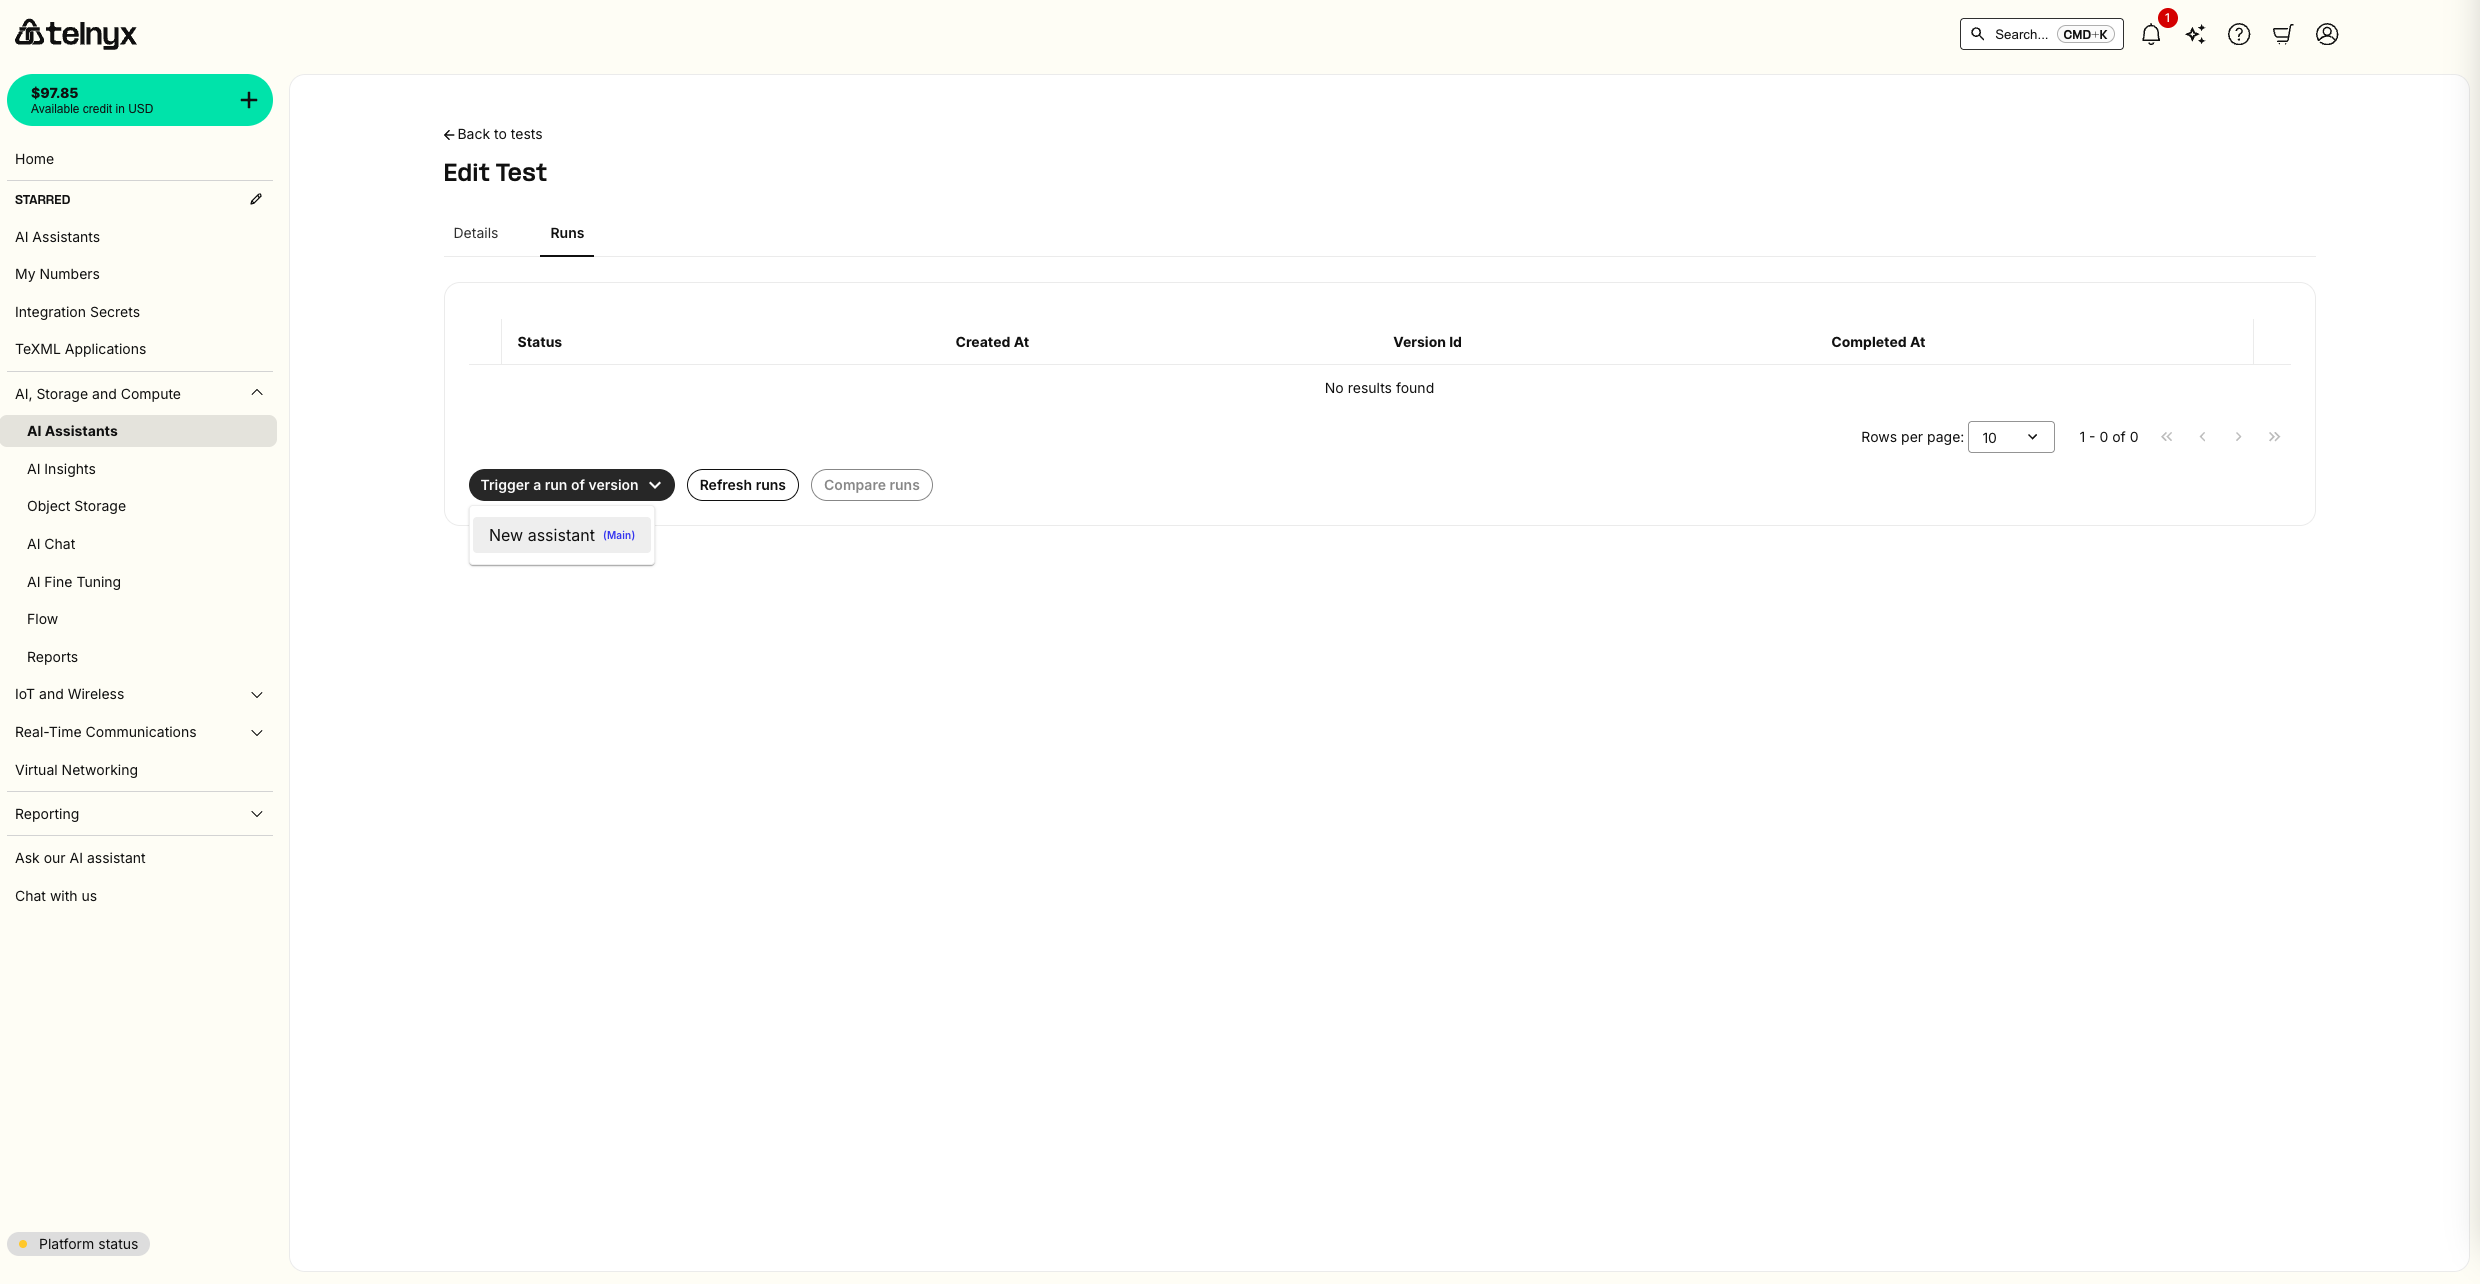
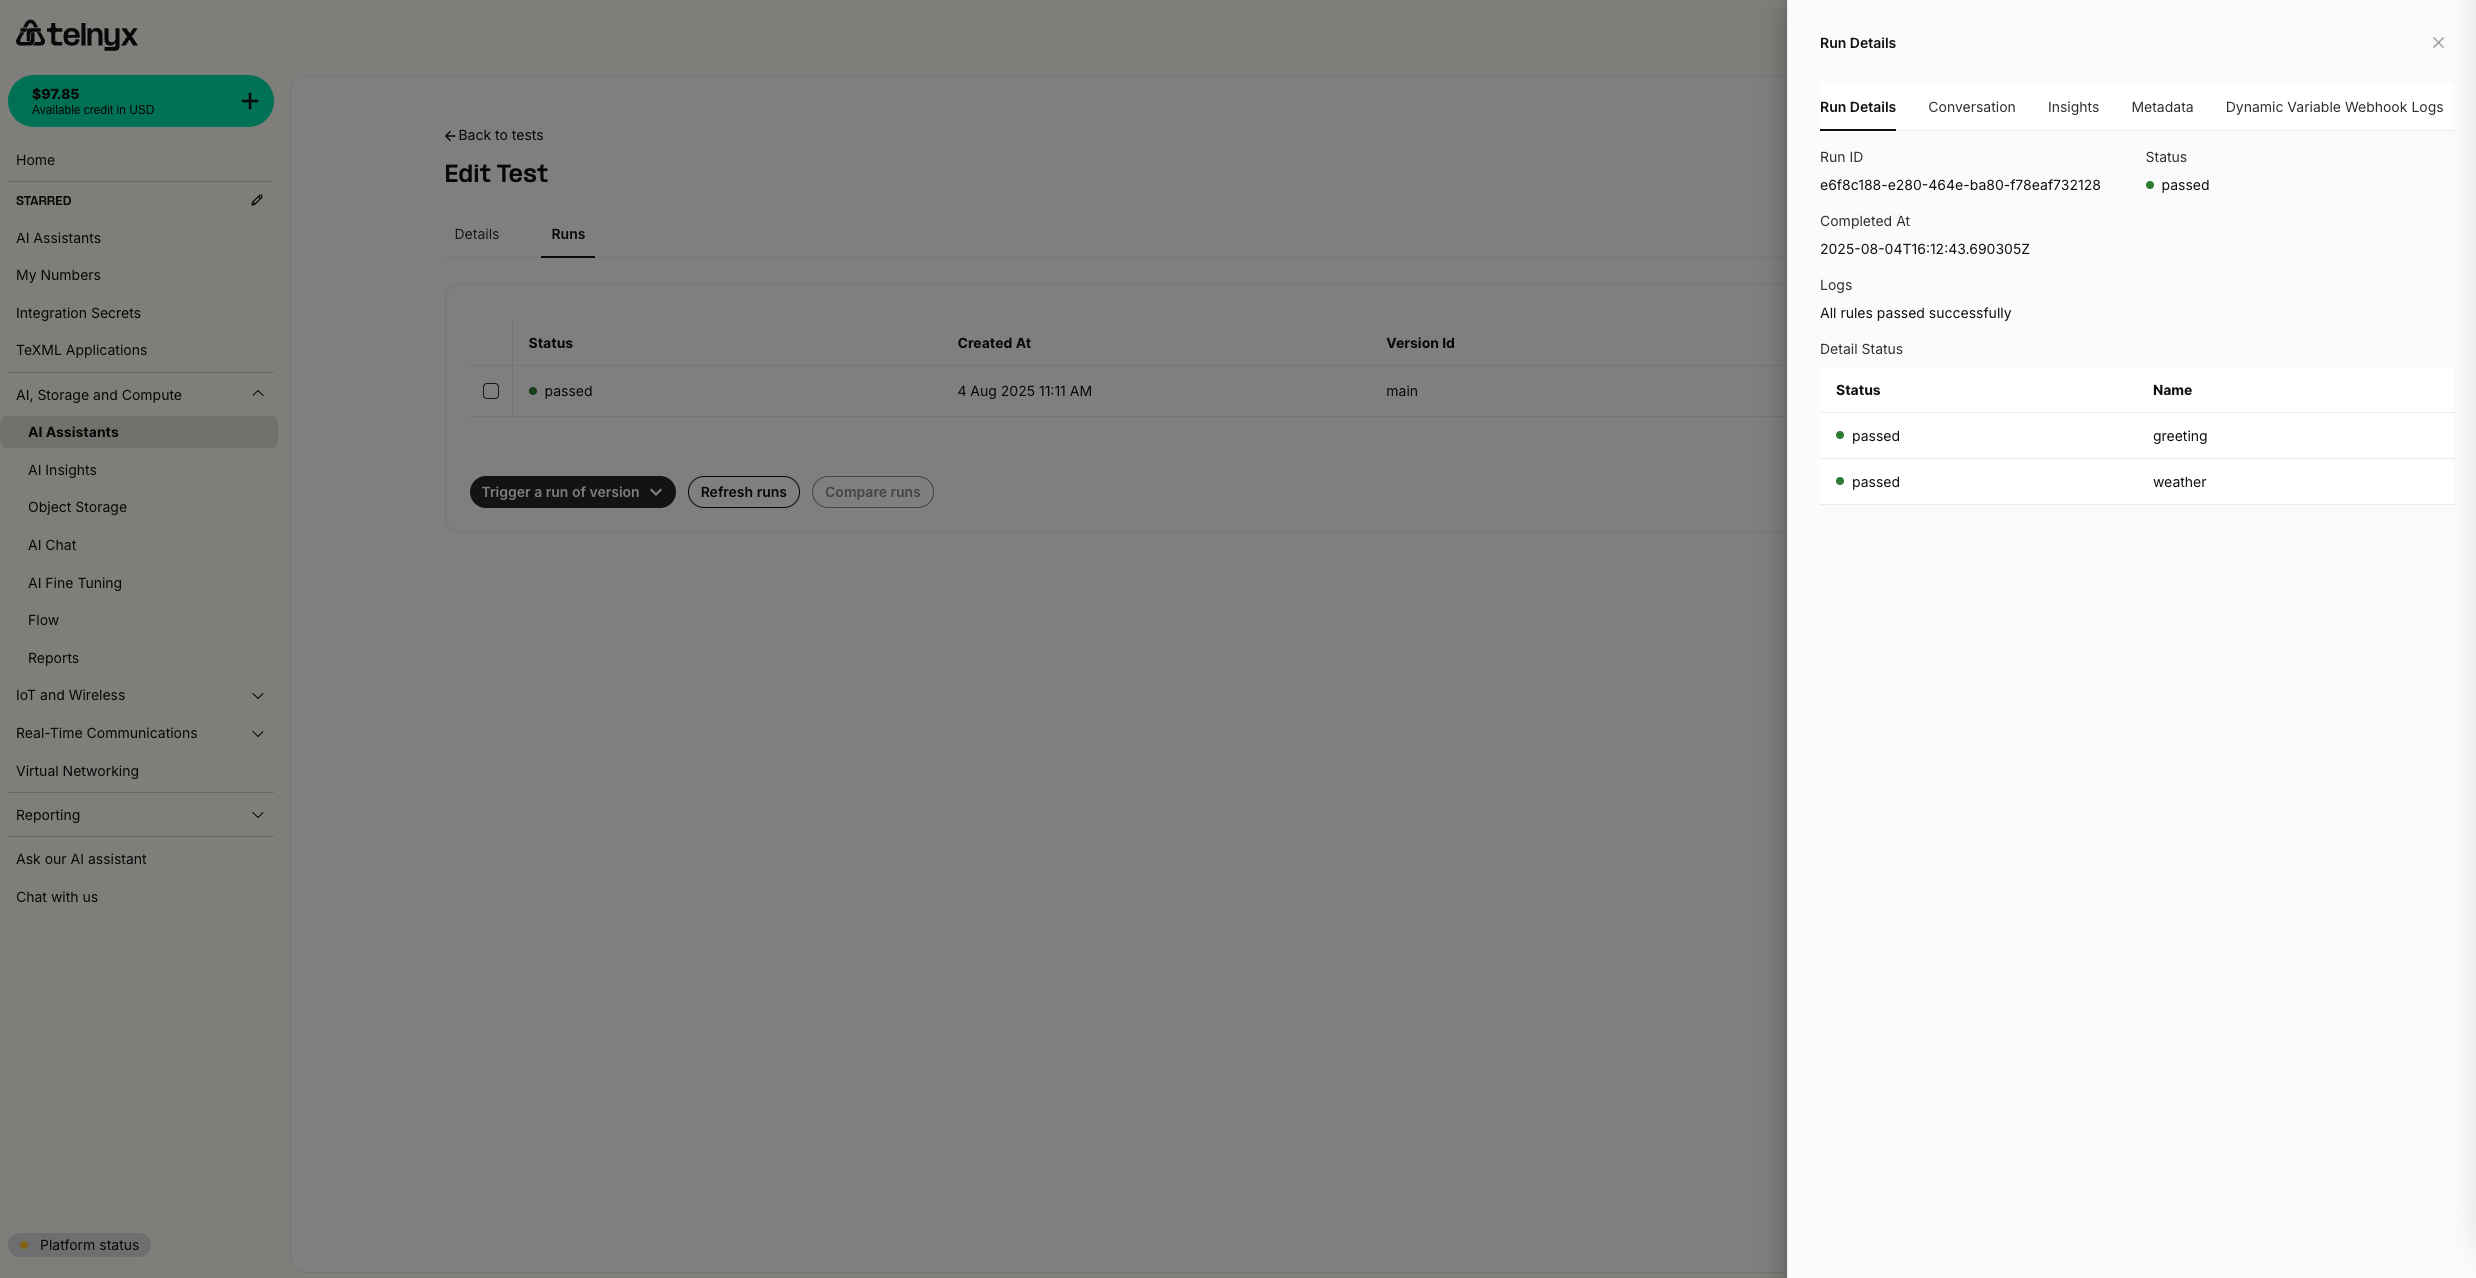
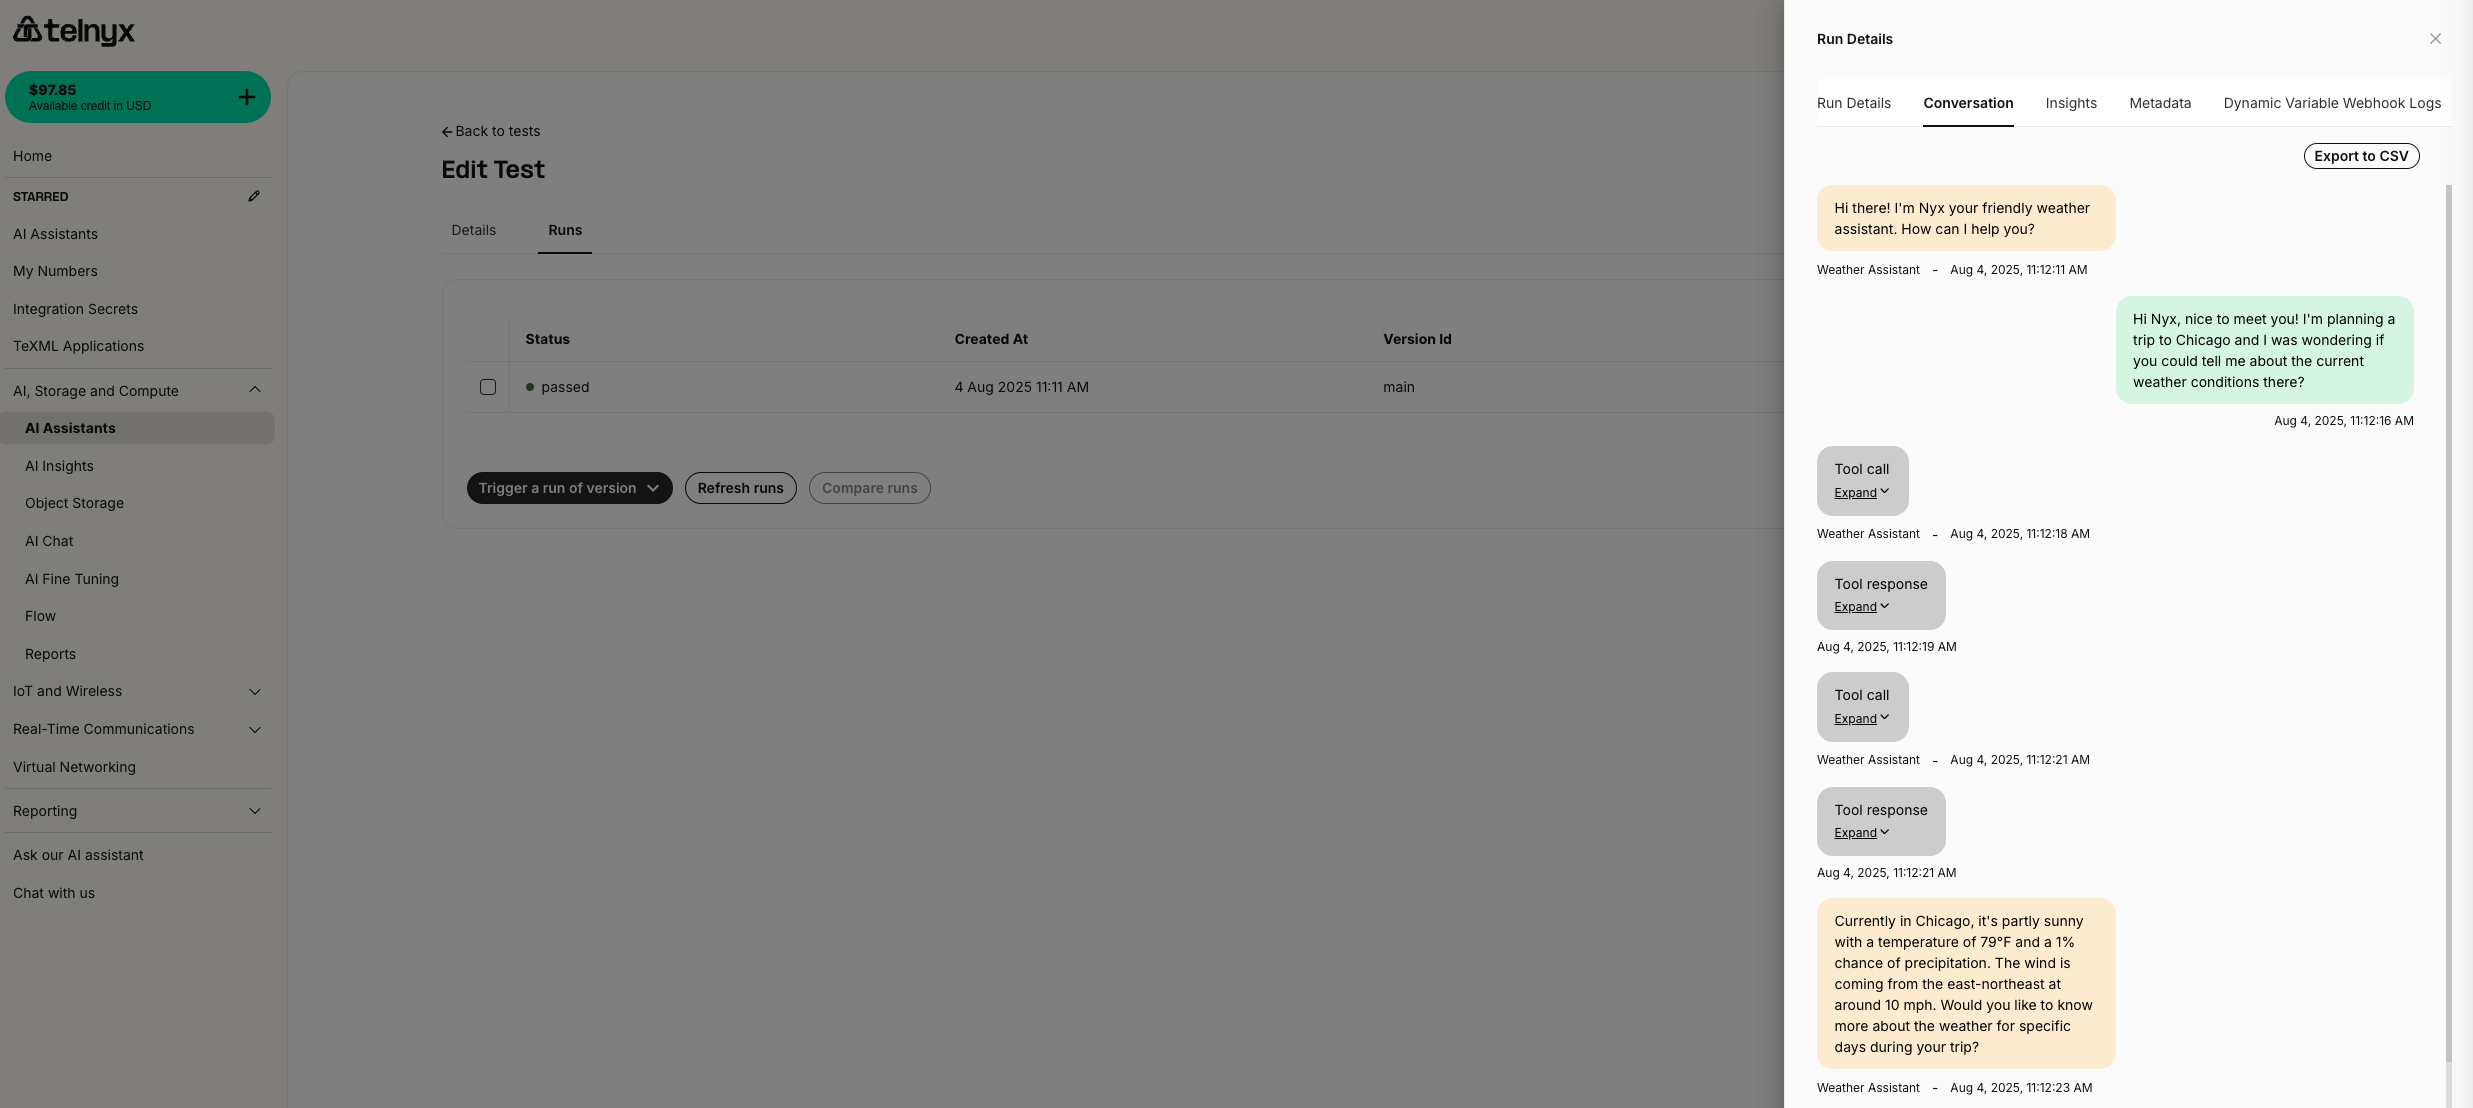
Creating Assistant Versions
Now you’ll create a new version of your assistant with modified behavior to demonstrate A/B testing. To make it obvious that the A/B test is working, we make two visibly distinct versions of the AI Assistant using the frontend widget feature. Versions are not limited to the frontend, though. You can make versions from any configuration on the assistant including updated tools, instructions, and more.Modifying the Assistant
- Return to your weather assistant in the AI Assistants page
- Click the edit icon (pencil) next to your assistant
- Make the following changes to create a visually distinct version:
- Enable the frontend widget: Navigate to the Widget tab and click enable
- Widget Appearance: Navigate back to the Widget tab and change the widget theme from dark mode to light mode in the appearance settings
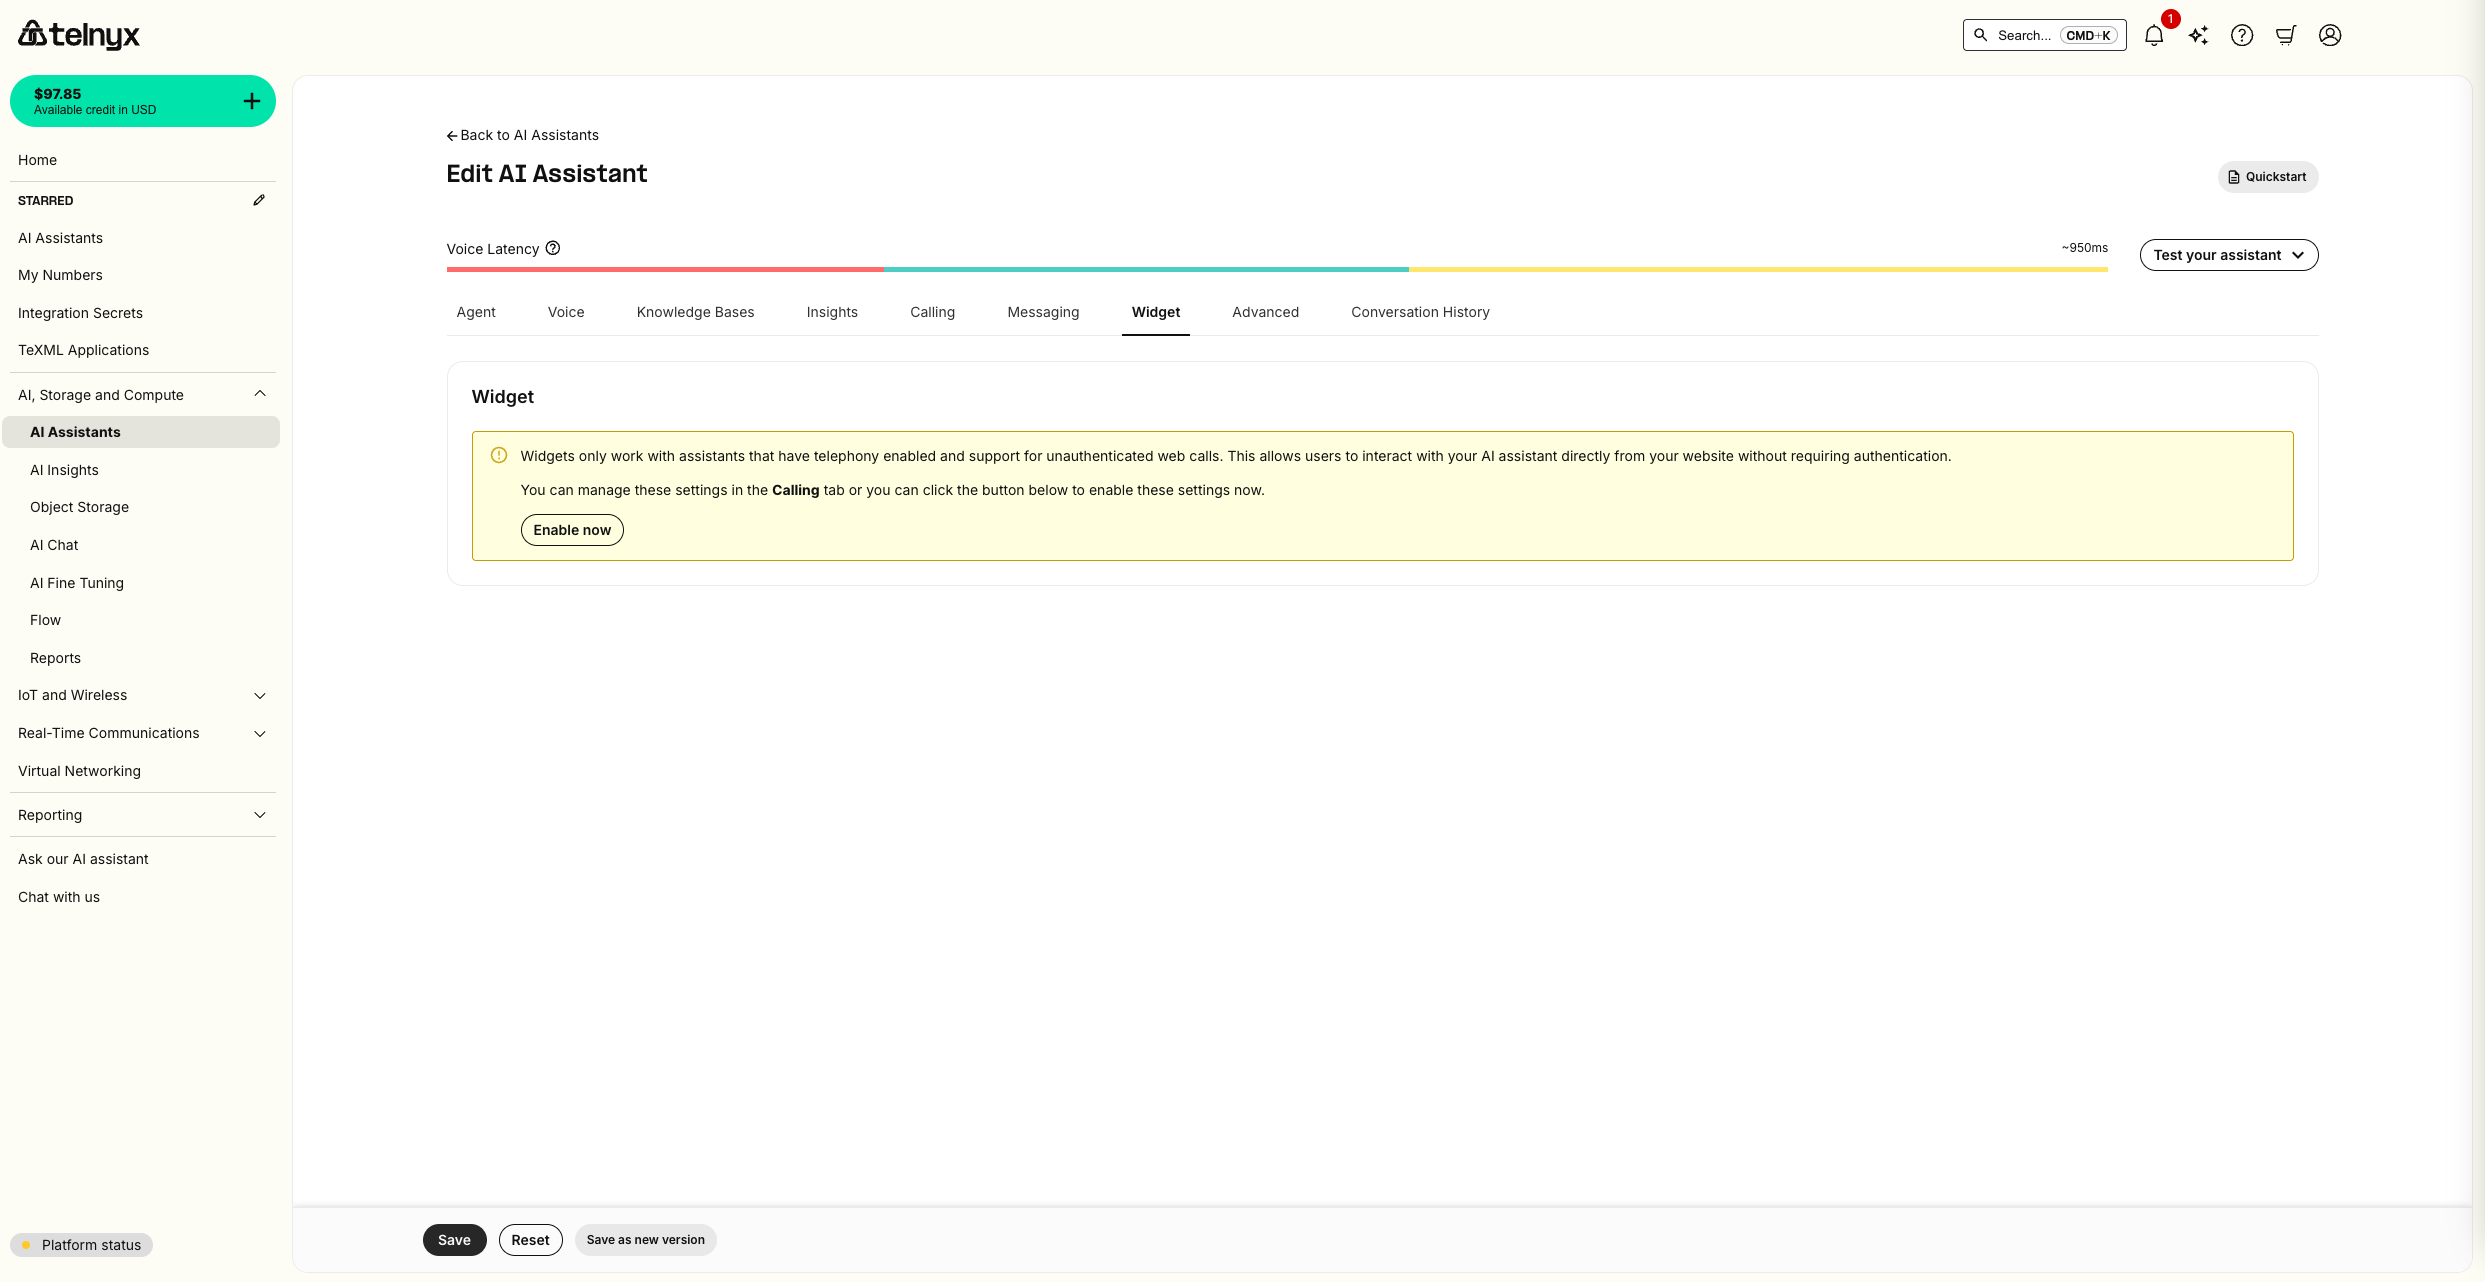
Creating a New Version
- After making your changes, click “Save as New Version”
- Give your version a descriptive name: “Light Theme with New Greeting”
- Add version notes describing the changes made
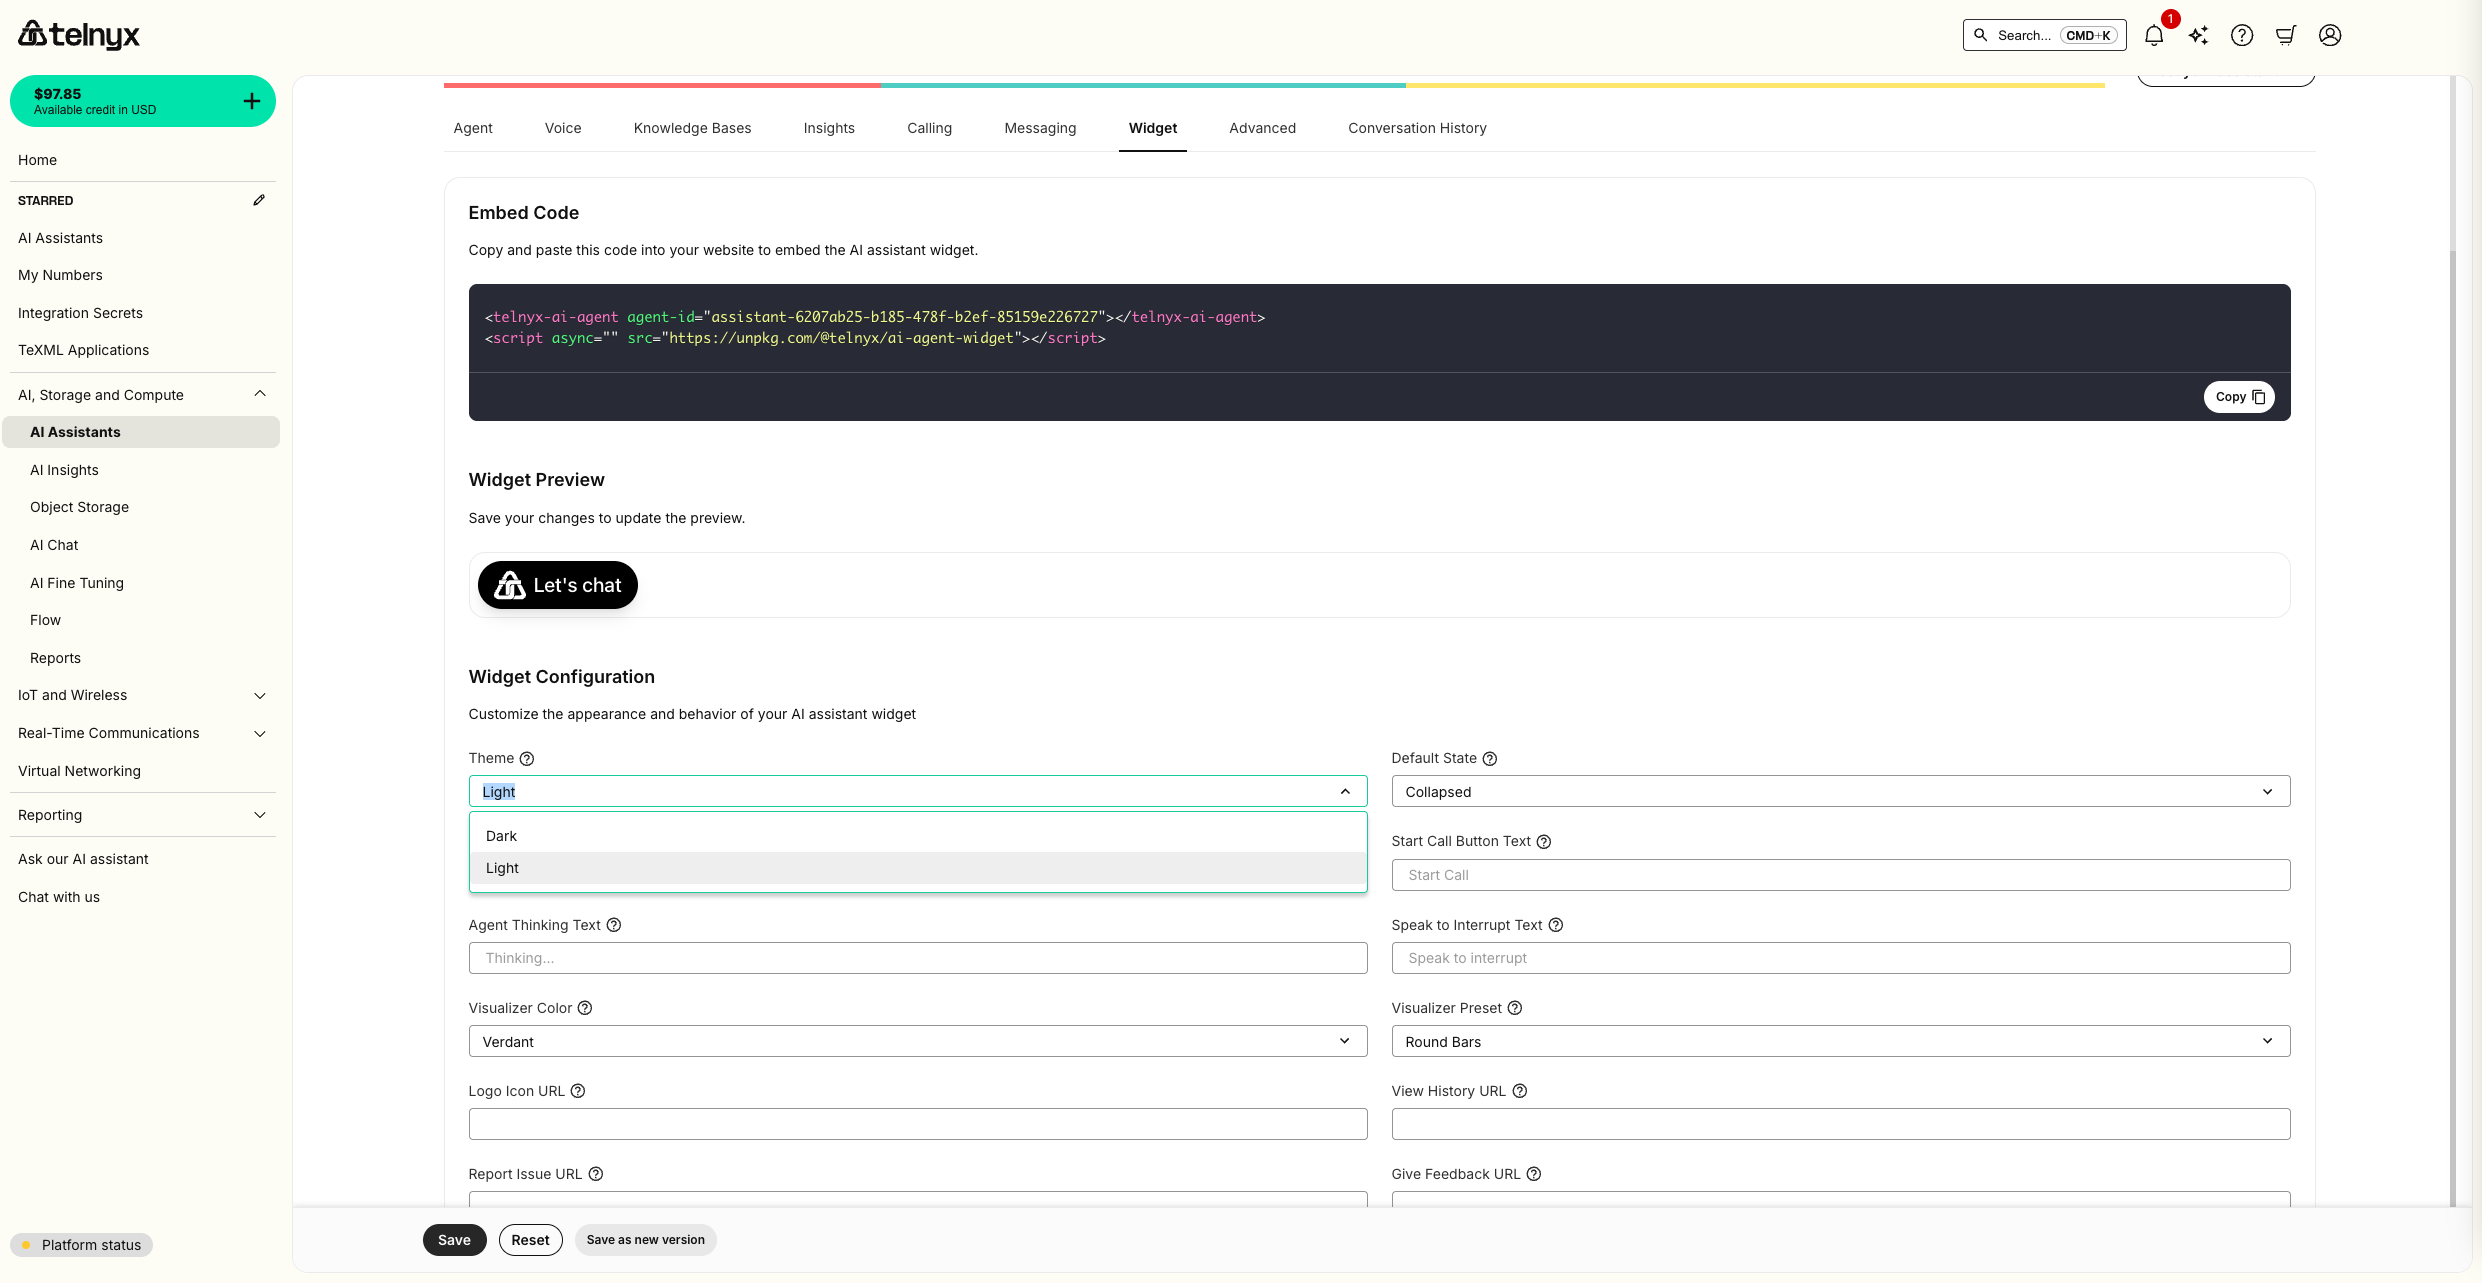
- Version 1: Original greeting with dark theme widget
- Version 2: New greeting with light theme widget
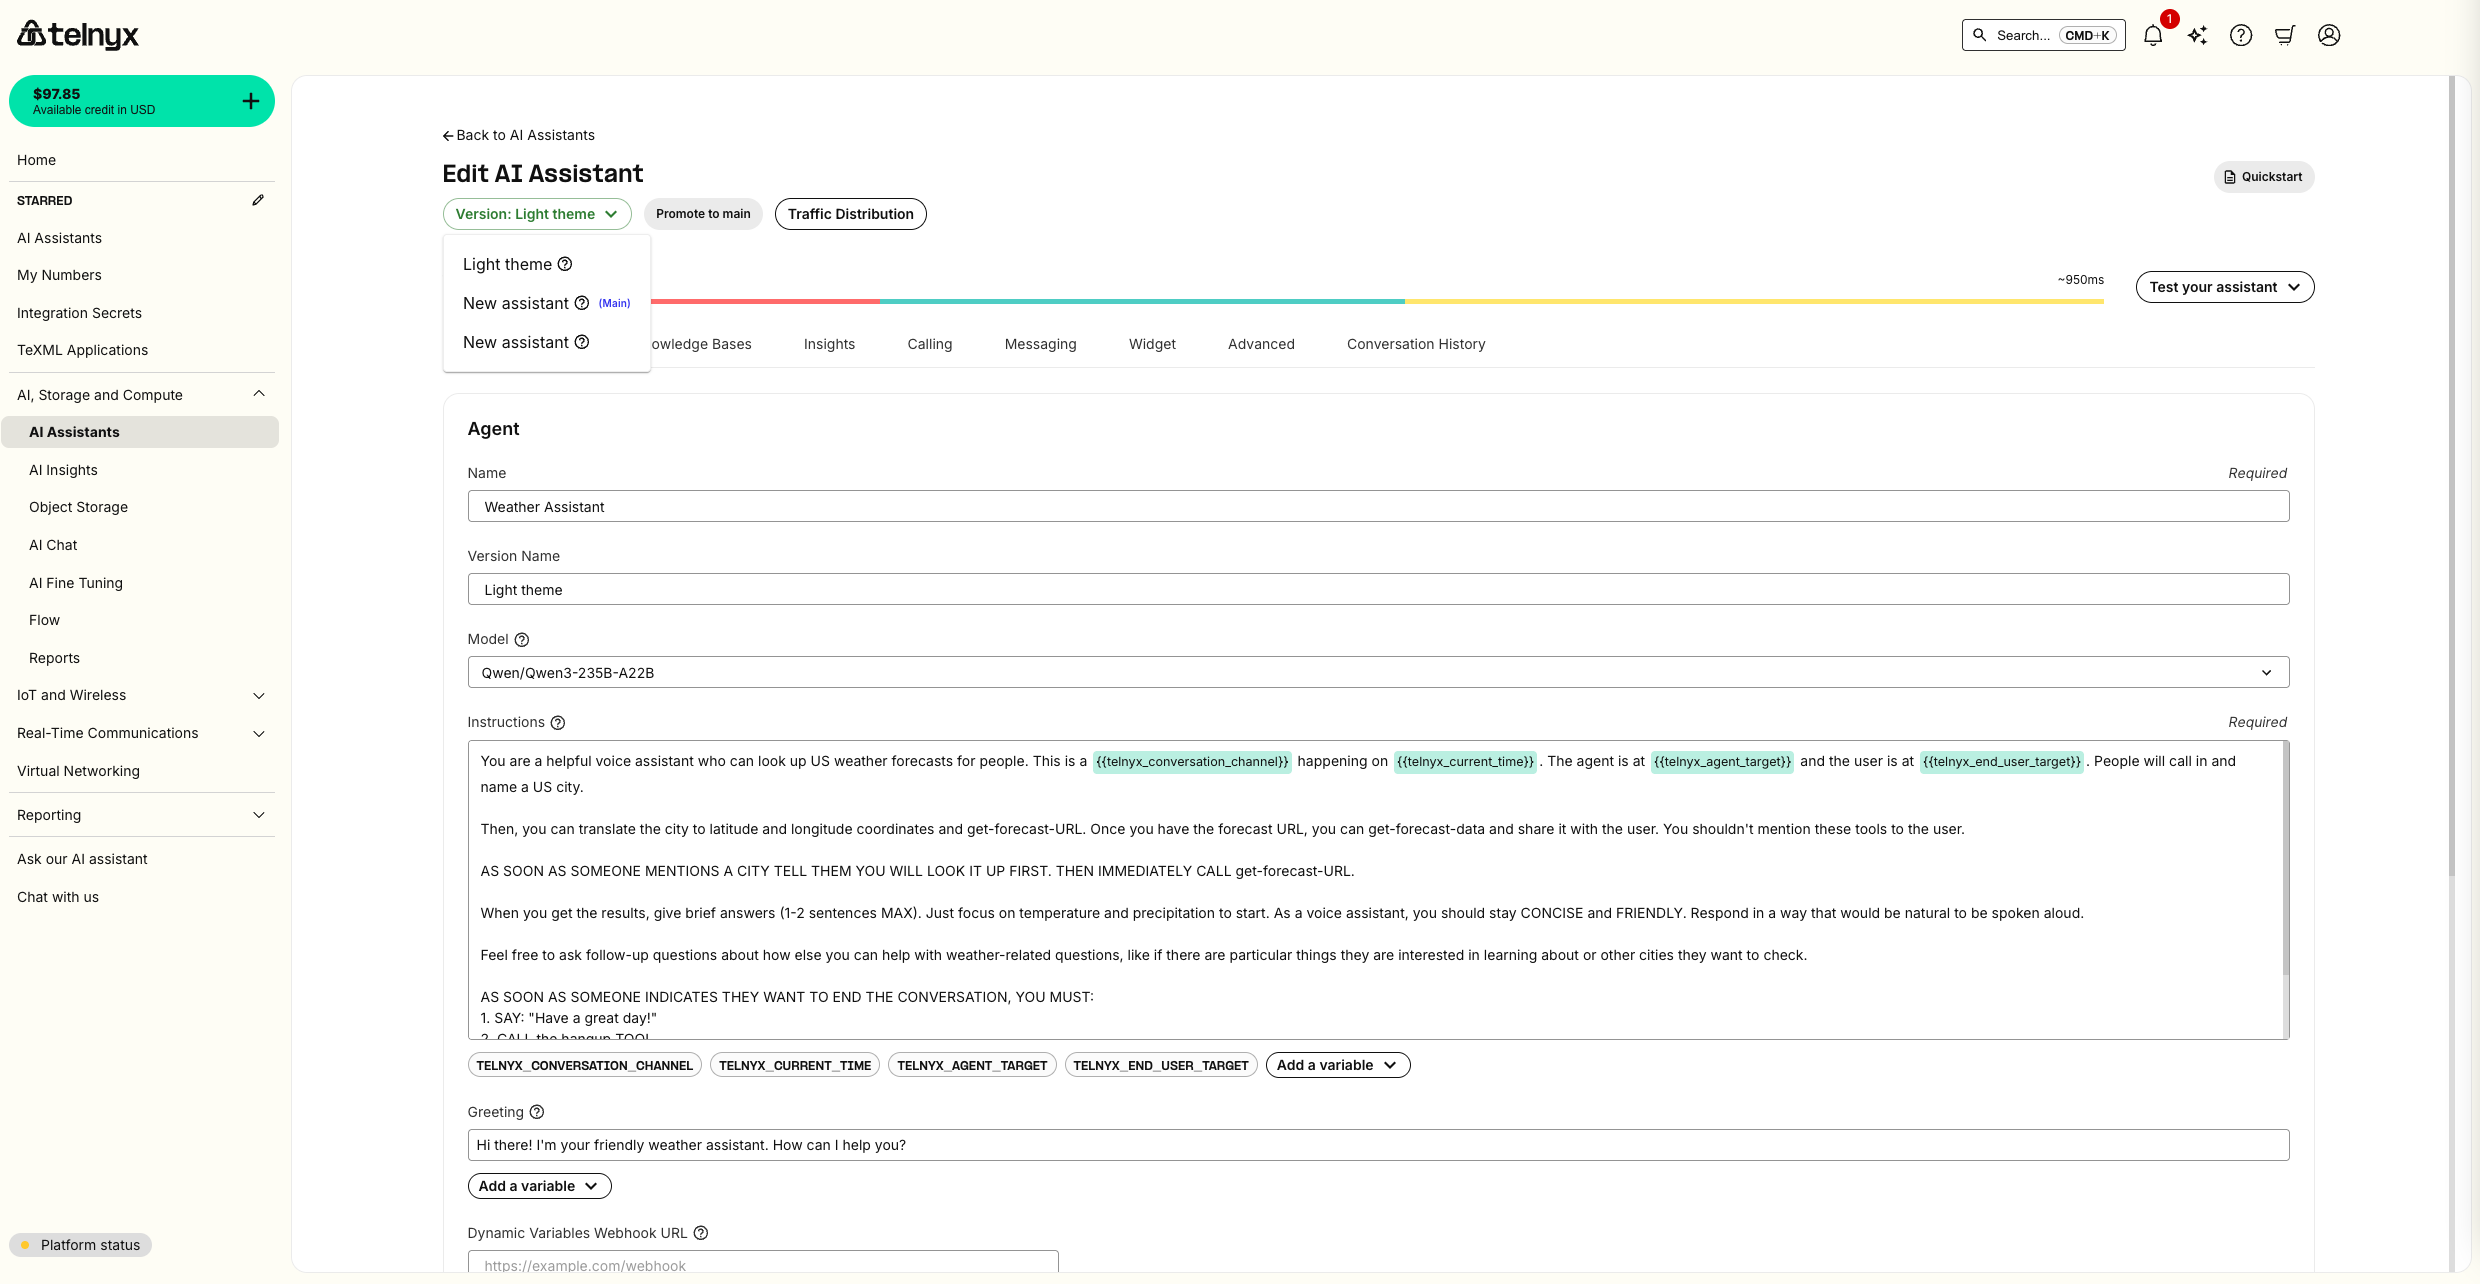
Production Traffic Distribution
Once you’ve validated a new version, use version routing to control which live calls receive it. Traffic routing now uses ordered rules, similar to feature-flag targeting. Each rule has:- If conditions that match the end user target for the conversation
- Serve behavior that sends matching calls to one version, or splits them across several versions
Open the traffic routing editor
- Open your assistant from the AI Assistants page.
- Go to the assistant’s version or deployment controls.
- Open Traffic distribution to configure routing rules.
Add a target rule
Use target rules when you want a specific end user, customer, or test endpoint to receive a version. The target value is the same value exposed to assistants as{{telnyx_end_user_target}}: the phone number, SIP URI, or other identifier associated with the end user.
This works for both call directions:
- Inbound calls: the end user target is the caller’s phone number, SIP URI, or identifier.
- Outbound calls: the end user target is the destination the assistant calls. For example, you can route calls to your own number to a test version.
- Click Add rule.
- In the If section, choose End user target.
- Select an operator:
- is one of for exact targets, such as
+13125550123orsip:customer@example.com - is not one of to exclude specific targets
- starts with for prefixes, such as
+1312orsip:qa-
- is one of for exact targets, such as

- Enter one or more target values. You can separate values with commas or new lines.
- In the Serve section, choose Send all matched calls to one version and select the version that matching calls should receive.


Split matching traffic by percentage
For gradual rollouts, set a rule’s Serve behavior to Split by percentage. Add version slots and assign each one a percentage. The allocation bar shows how matching traffic is split. Percentages must add up to less than 100. Any remaining percentage routes to the main version, which gives you a built-in safety fallback during canary releases.
Configure the default rule
The default rule handles calls that do not match any target rule. By default, unmatched calls serve the main version. Use Configure default when you want unmatched calls to receive another version or a percentage split. Use Reset to main to remove the custom default and return all unmatched traffic to the main version.Save, reorder, or rollback
- Drag target rules to change their priority. Rule order matters because the first match wins.
- Click Save to apply the routing configuration.
- Click Rollback to clear all routing rules and send traffic back to the main version.
- Test new versions with internal phone numbers or SIP URIs before a broad rollout
- Run percentage-based canaries for matching call segments
- Keep the main version as the fallback for unmatched calls and remaining rollout percentage
- Quickly rollback if issues arise
- Promote a validated version to main when you’re ready
Testing Live Traffic Distribution
To verify your routing is working correctly, make repeated test calls with end user targets that should match each rule:- For inbound testing, call the assistant from a phone number or SIP URI listed in a target rule and confirm the routed version answers.
- For outbound testing, have the assistant call a target listed in a rule, such as your own phone number, and confirm you receive the test version.
- Call from or to a target that should not match the target rules and confirm the default behavior applies.
- For weighted rollouts, make enough calls to confirm that matching traffic is distributed according to your configured percentages.
Automated Evaluation with Coval
The manual testing and A/B traffic distribution described above work well for targeted checks and gradual rollouts. For automated evaluation at scale, Telnyx integrates with Coval — a simulation and evaluation platform purpose-built for voice and chat agents.What Coval adds
Getting started with Coval
- Set up the integration on the Integrations tab of your assistant.
- Create seed scenarios in Coval that reflect your most important conversation paths.
- Run simulations to validate assistant behavior before deploying new versions.
- Add Coval evaluation steps to your CI/CD pipeline to catch regressions automatically.
Importing Assistants
Source: https://developers.telnyx.com/docs/inference/ai-assistants/importing.mdIf you have voice assistants with another provider, you can import them to Telnyx in the portal or via API.
Supported Providers
Telnyx currently supports importing assistants from:- Vapi - Import your Vapi voice assistants with all configurations.
- ElevenLabs - Import your ElevenLabs conversational AI agents.
- Retell - Import your single- and multi-prompt Retell agents.
Video Tutorial
Watch this quick demonstration of importing a Vapi assistant to Telnyx:Import Walkthrough
Importing from Vapi
Viewing your Assistants
From the assistants page, you can select Import Assistants.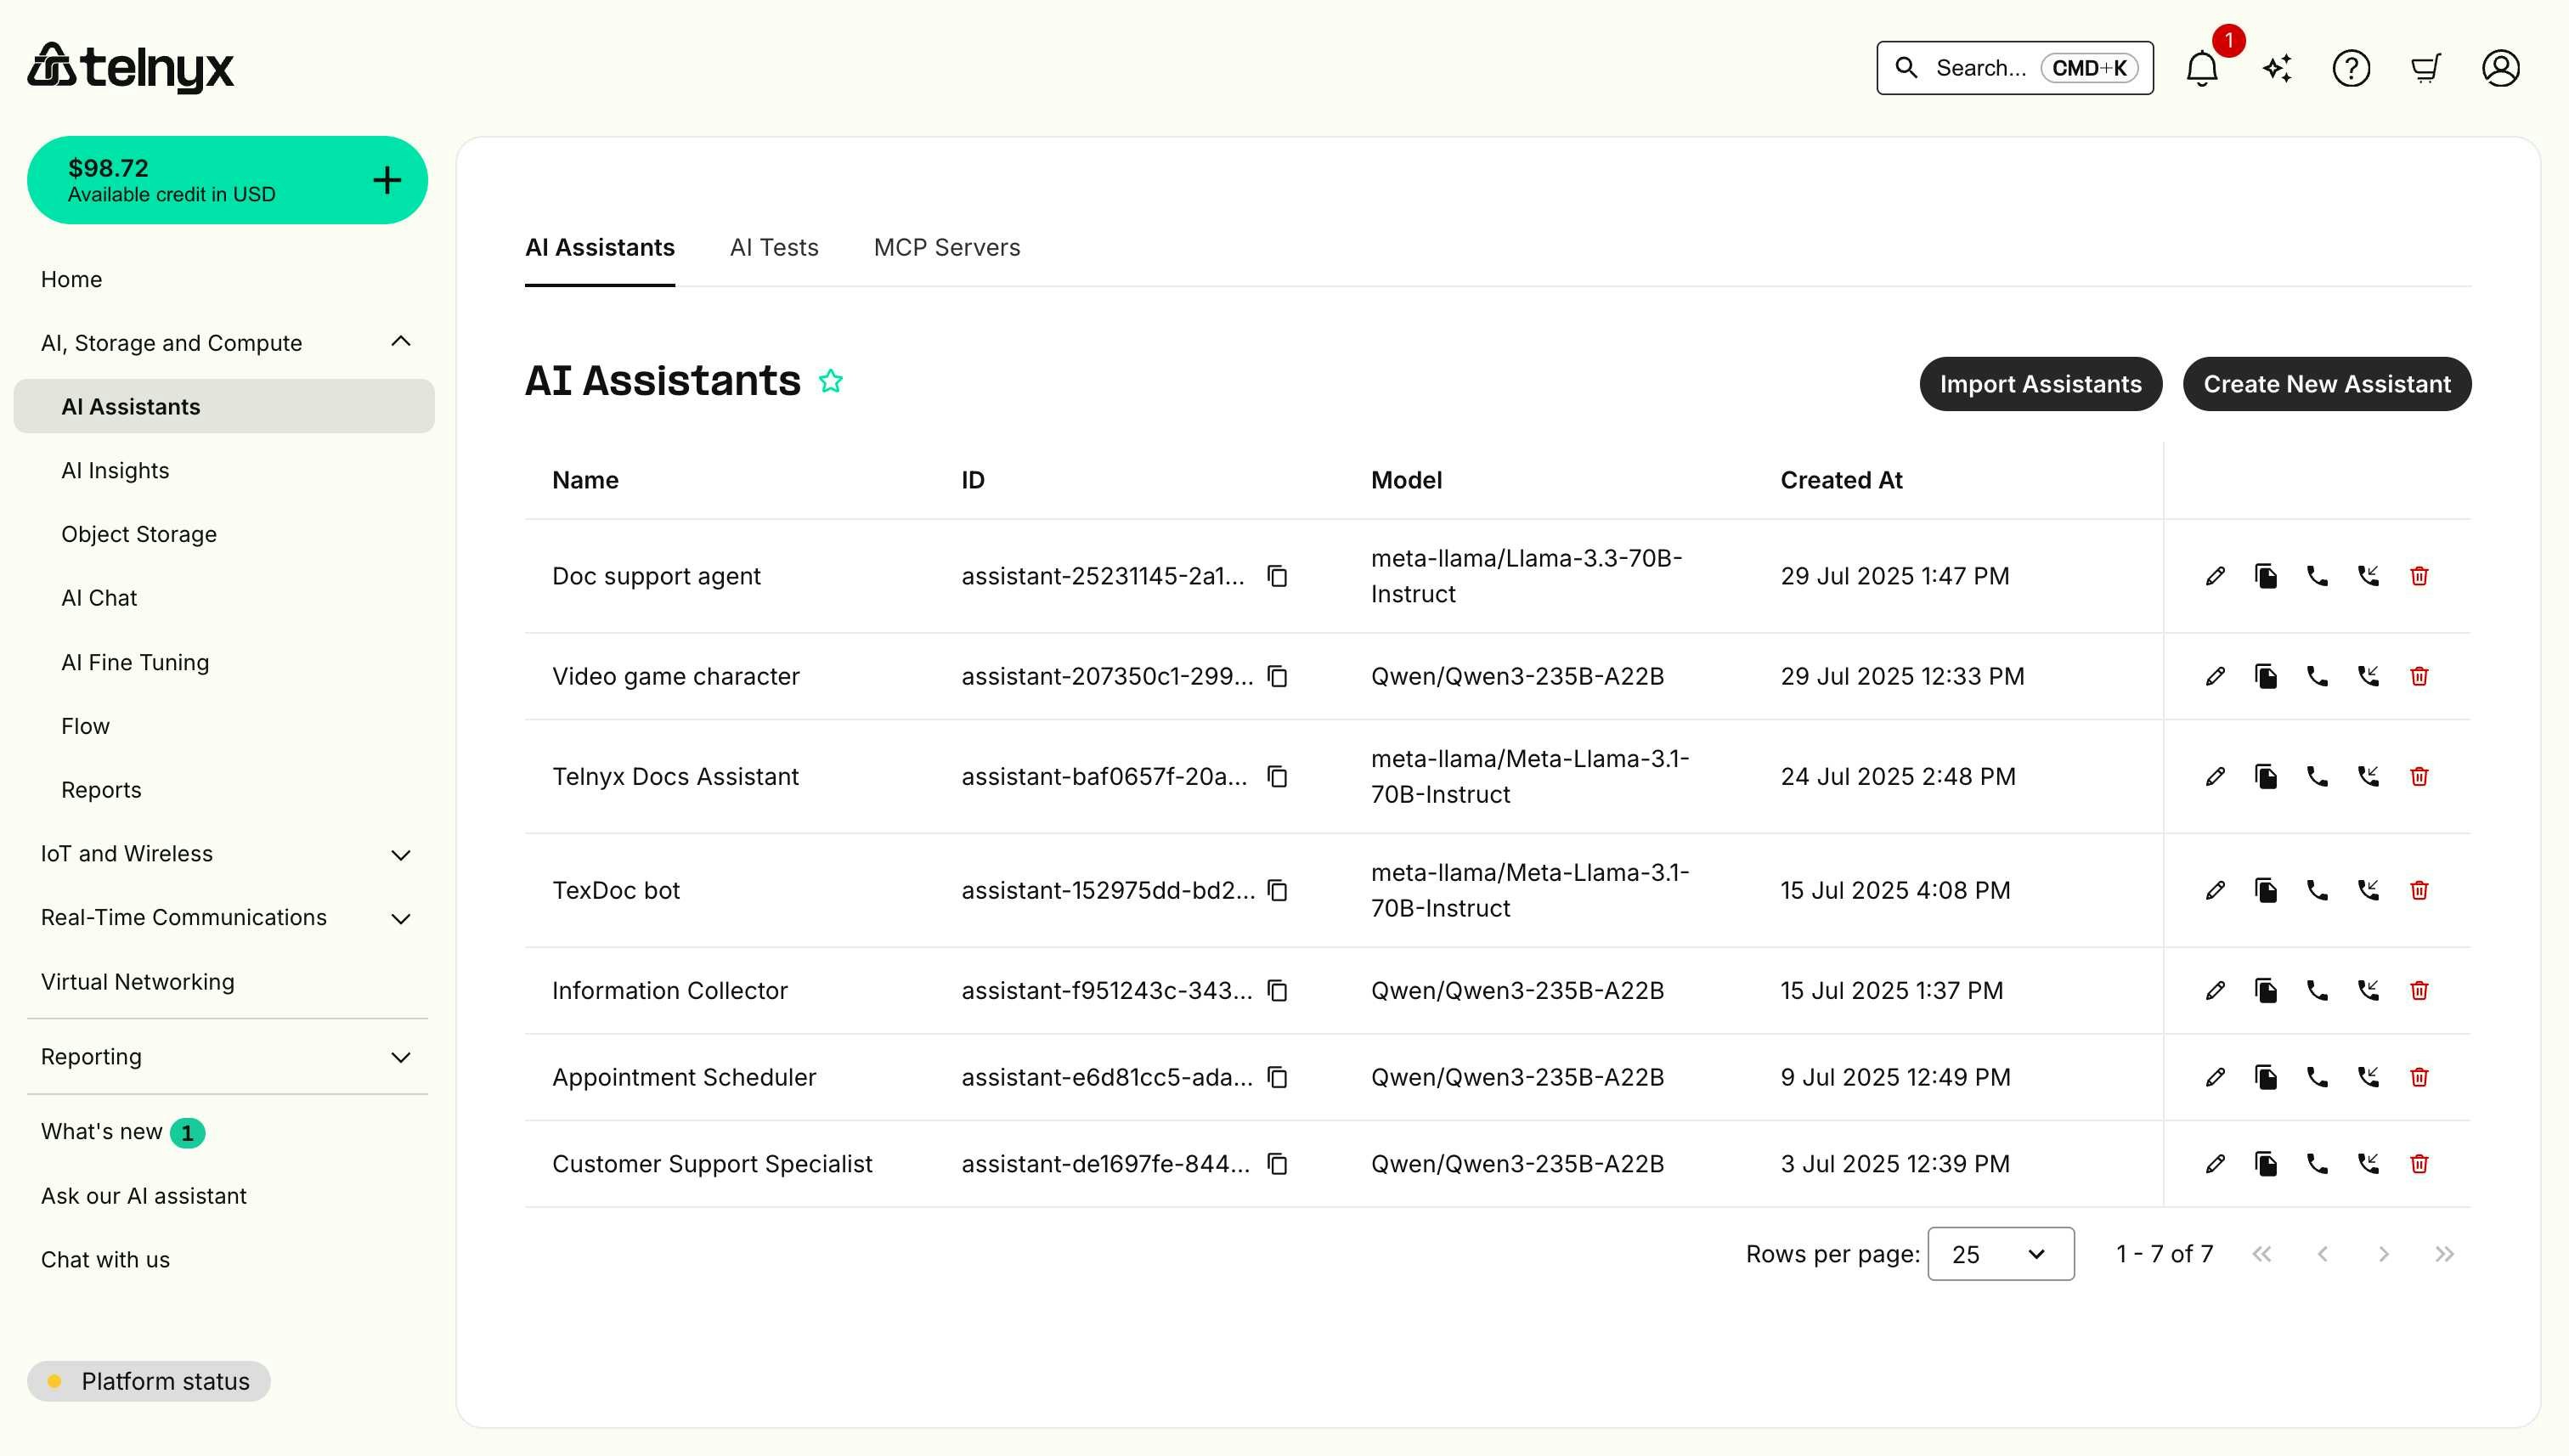
Selecting your Provider
On the next page, select Vapi from the provider list and securely store your Vapi API Key with Telnyx to initiate the import. Any assistant that has already been imported will be overwritten with its latest version from Vapi.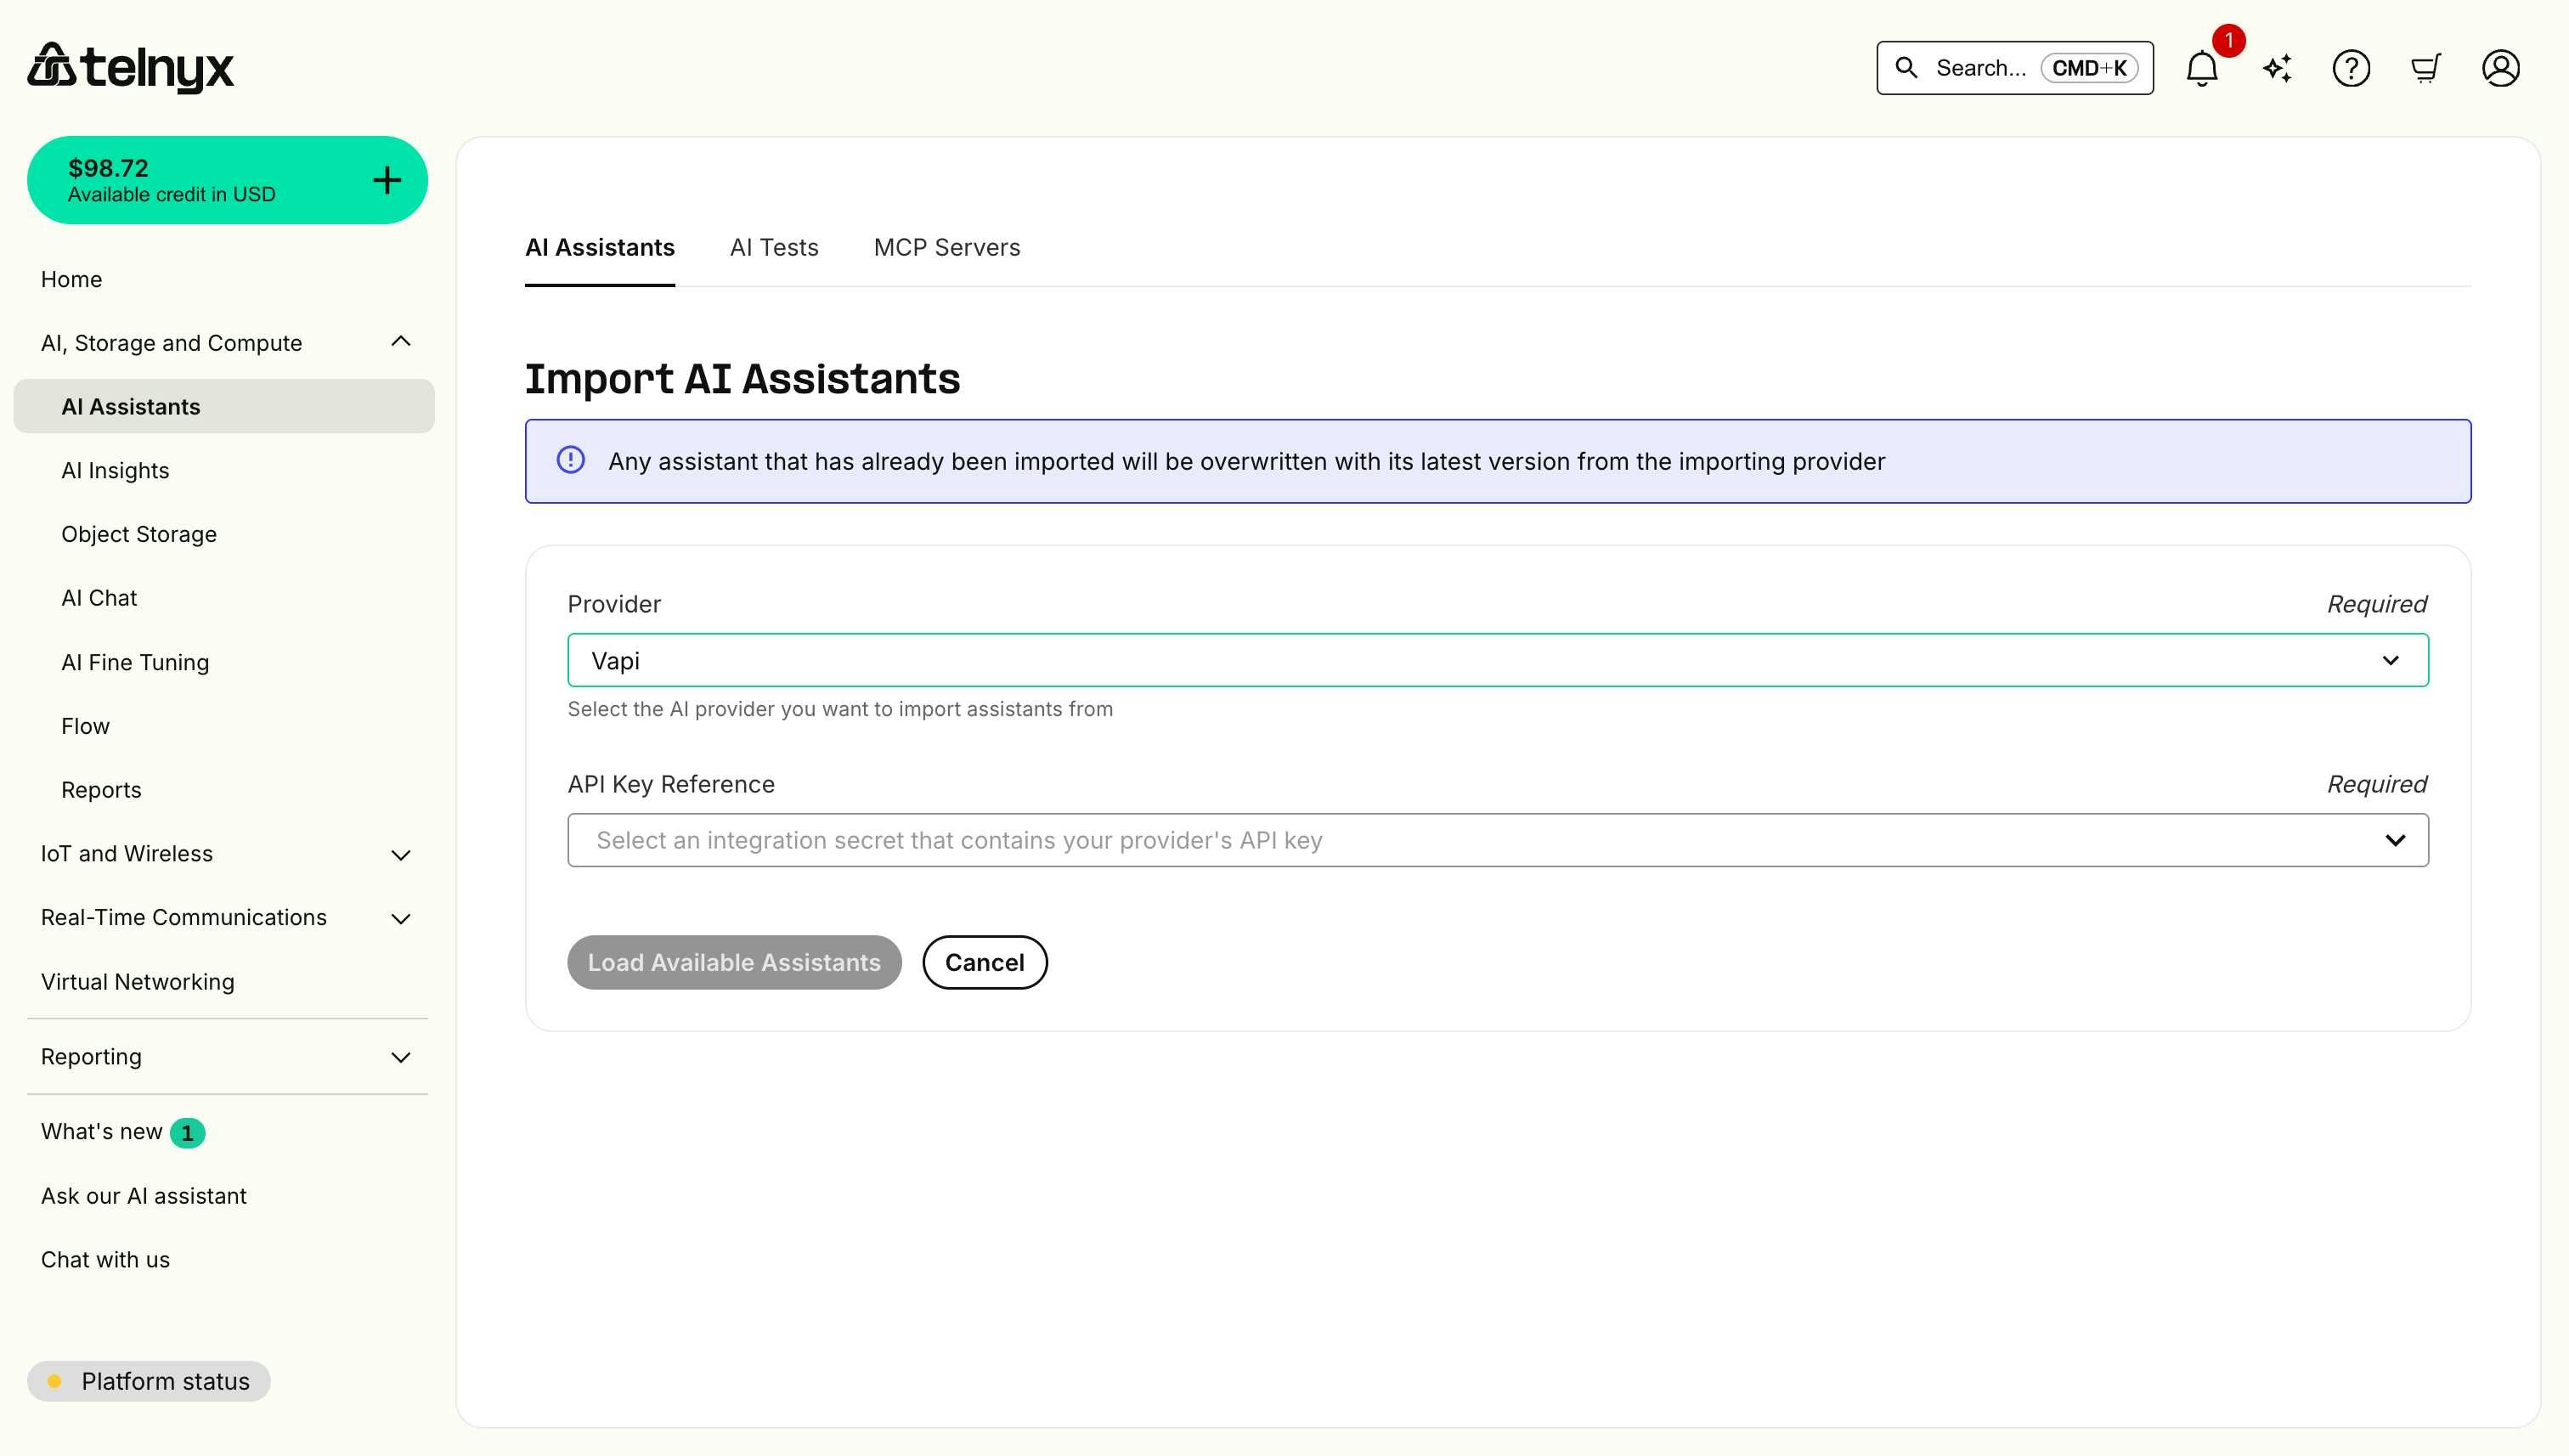
Selecting your Assistants
You can then select which Vapi assistants to import. Trial accounts have a limit of 1 AI Assistant.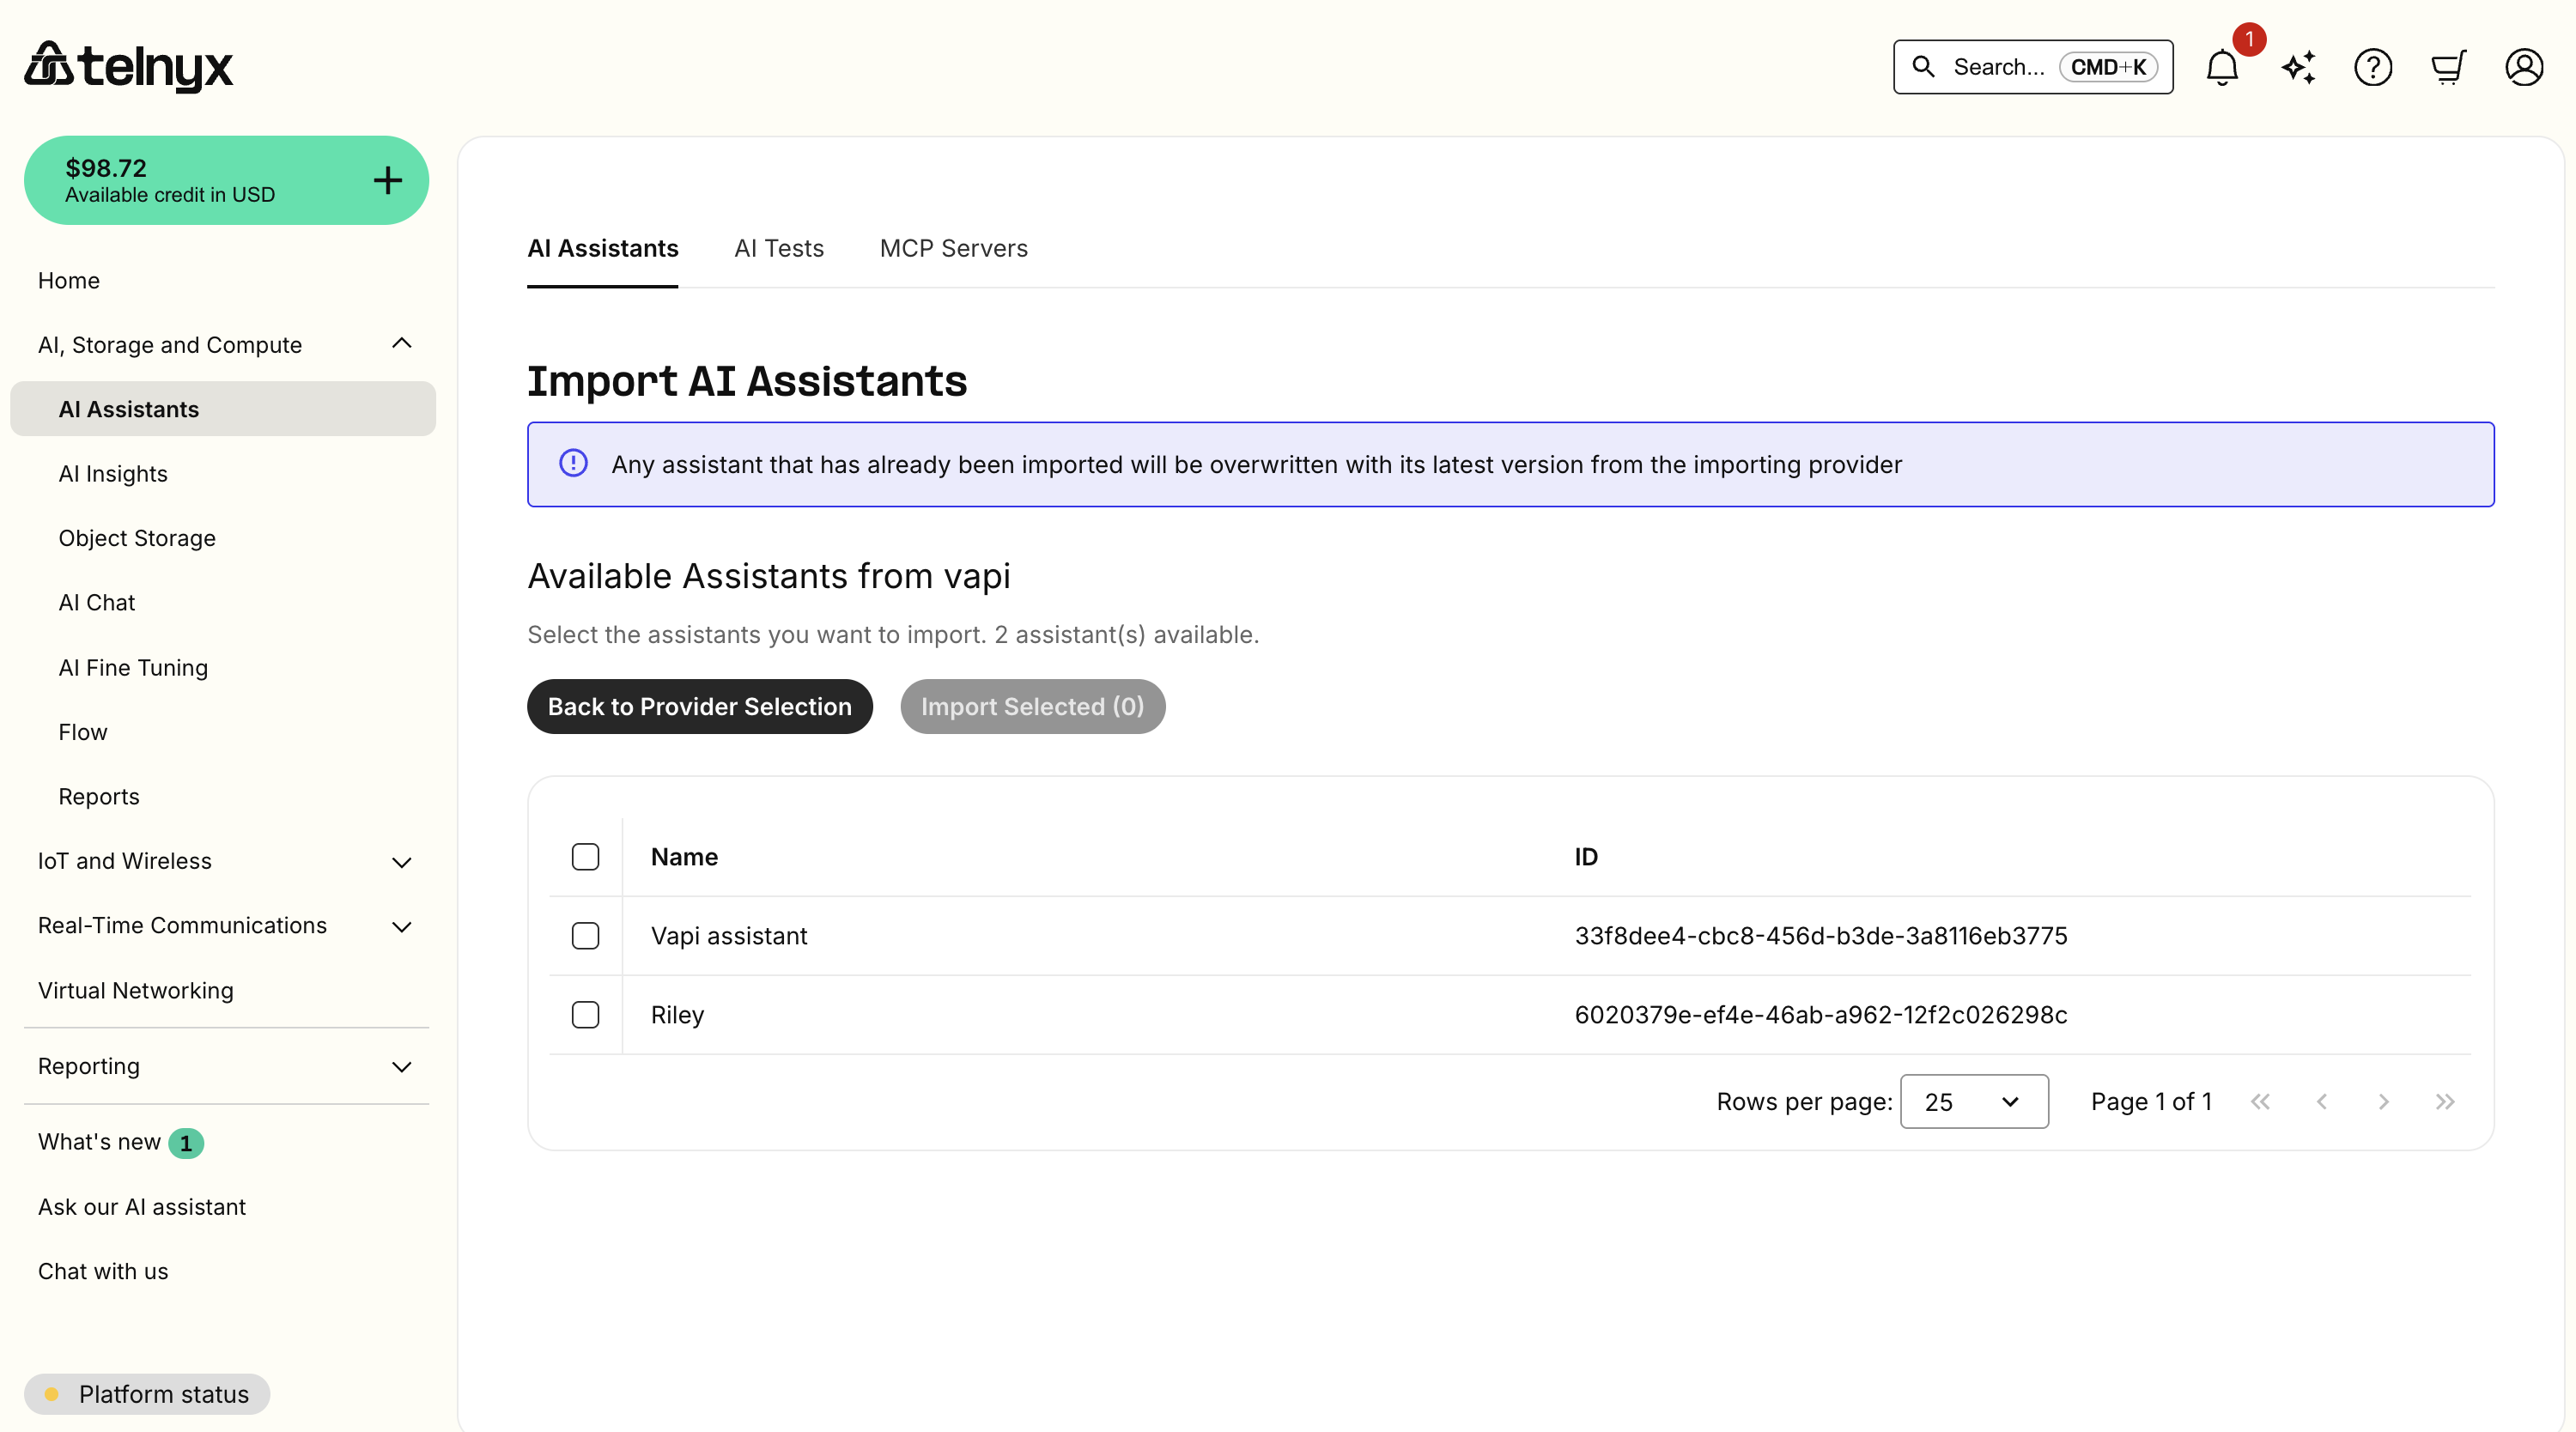
Testing your imported Assistant
You should now see your new assistants listed and can click the pencil icon to edit or the telephone icon to test them in the portal. Check out the quickstart tutorial for more information on editing or creating our Assistants.Importing from ElevenLabs
Viewing your Assistants
From the assistants page, you can select Import Assistants.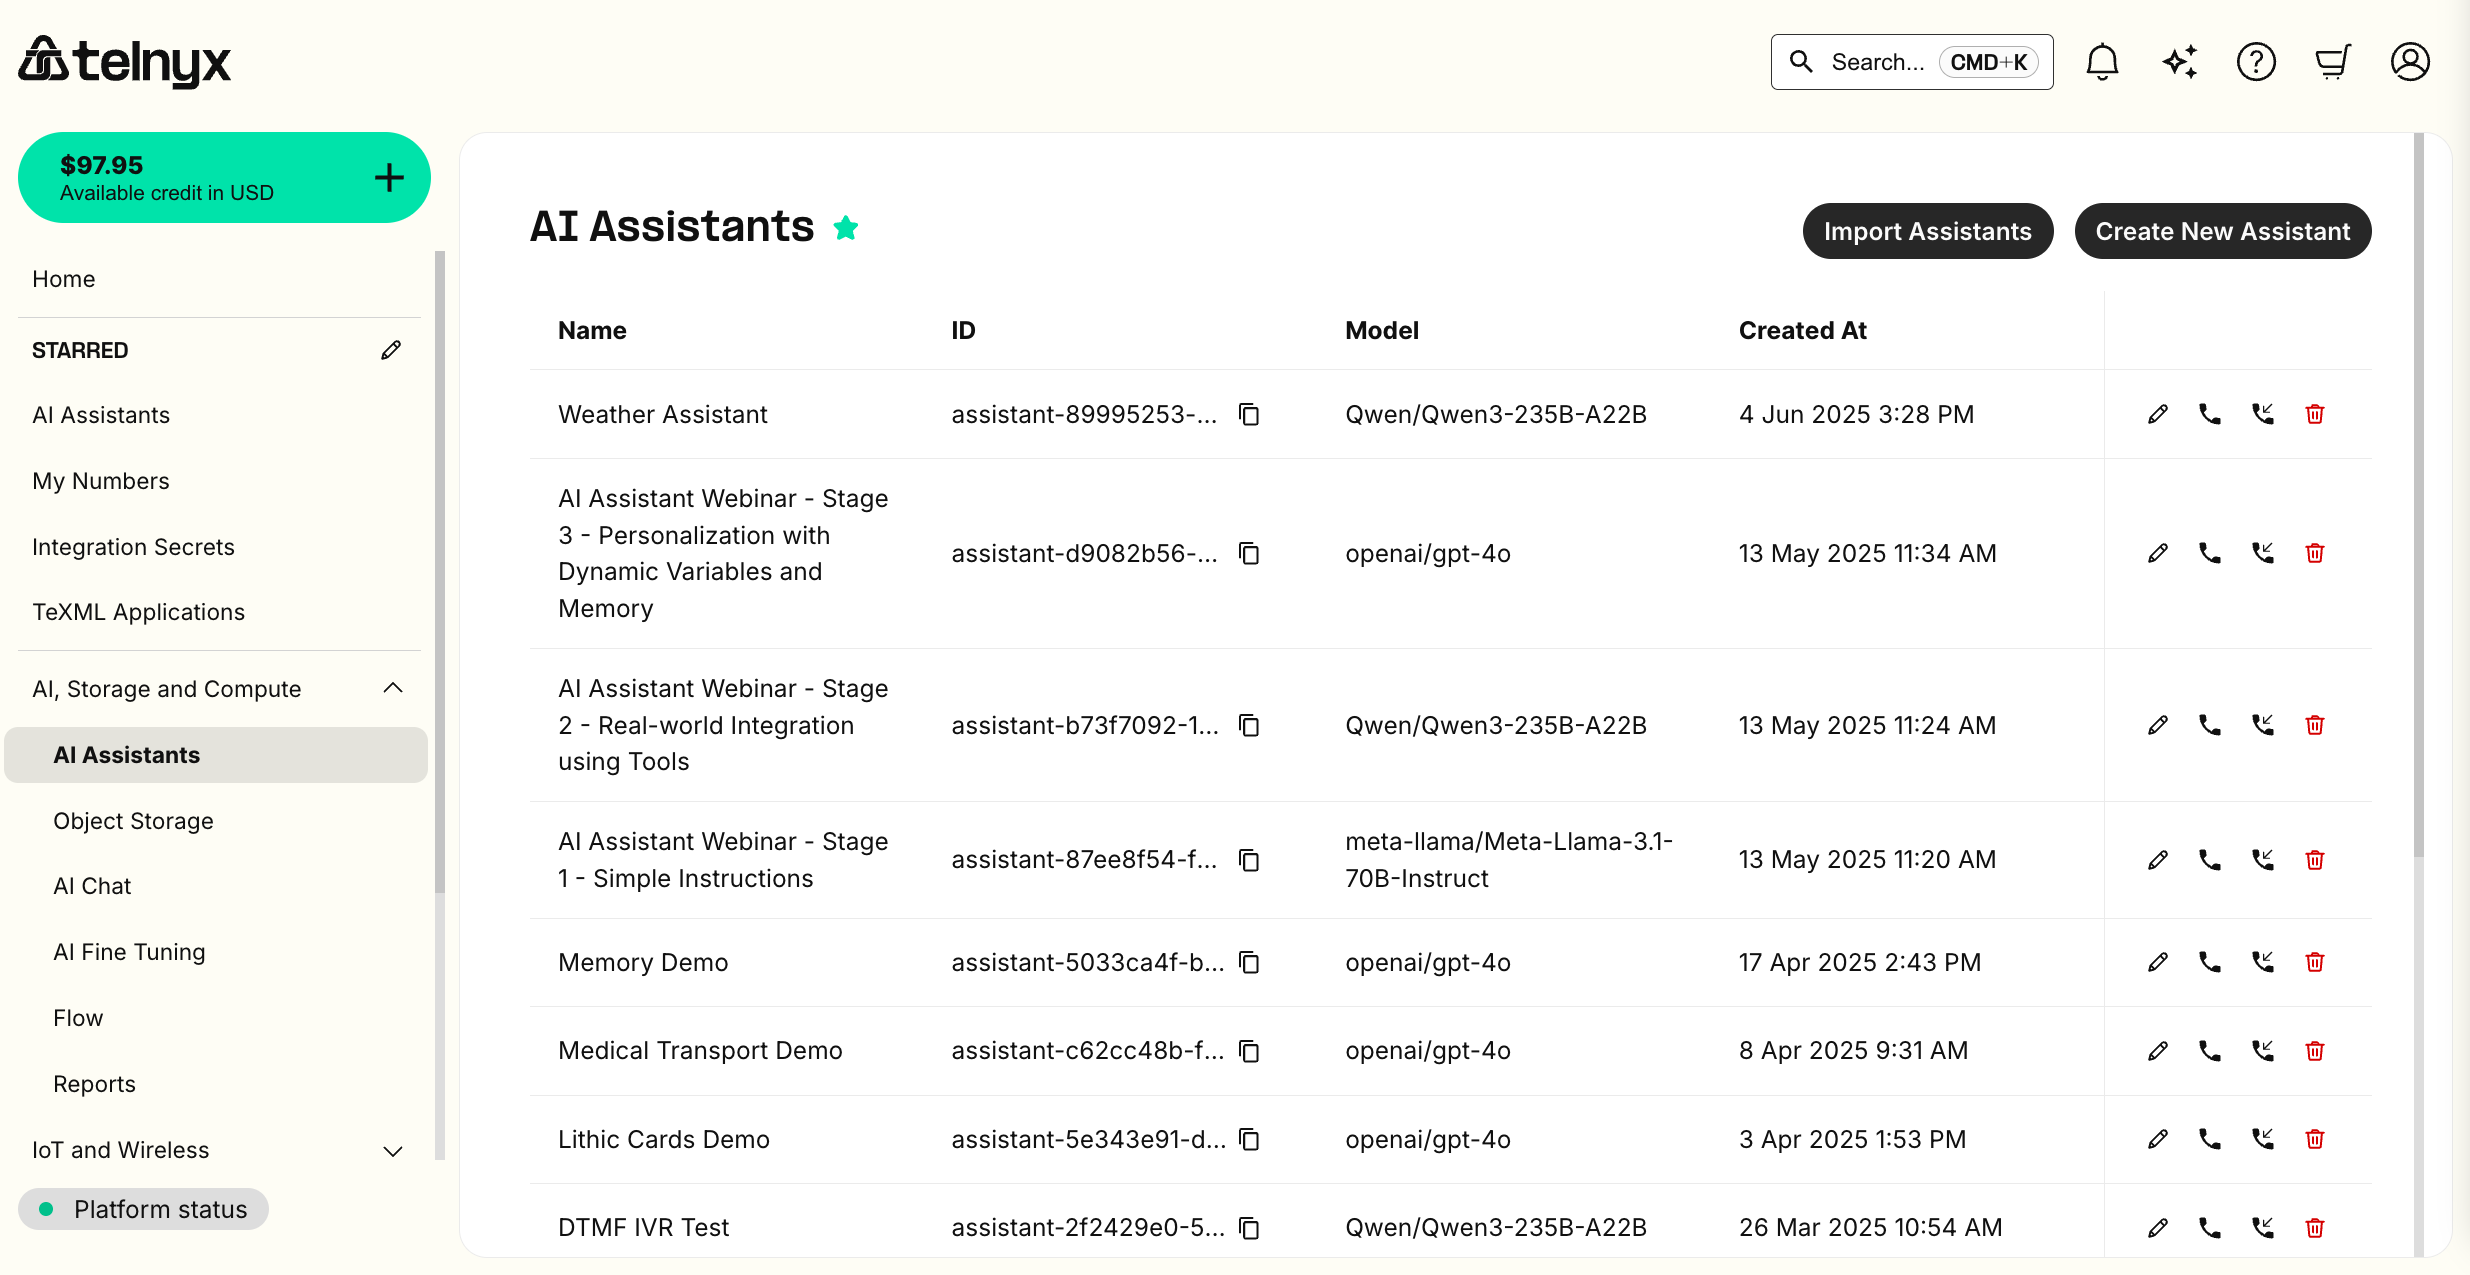
Selecting your Provider
On the next page, select ElevenLabs from the provider list and securely store your ElevenLabs API Key with Telnyx to initiate the import. Any assistant that has already been imported will be overwritten with its latest version from ElevenLabs.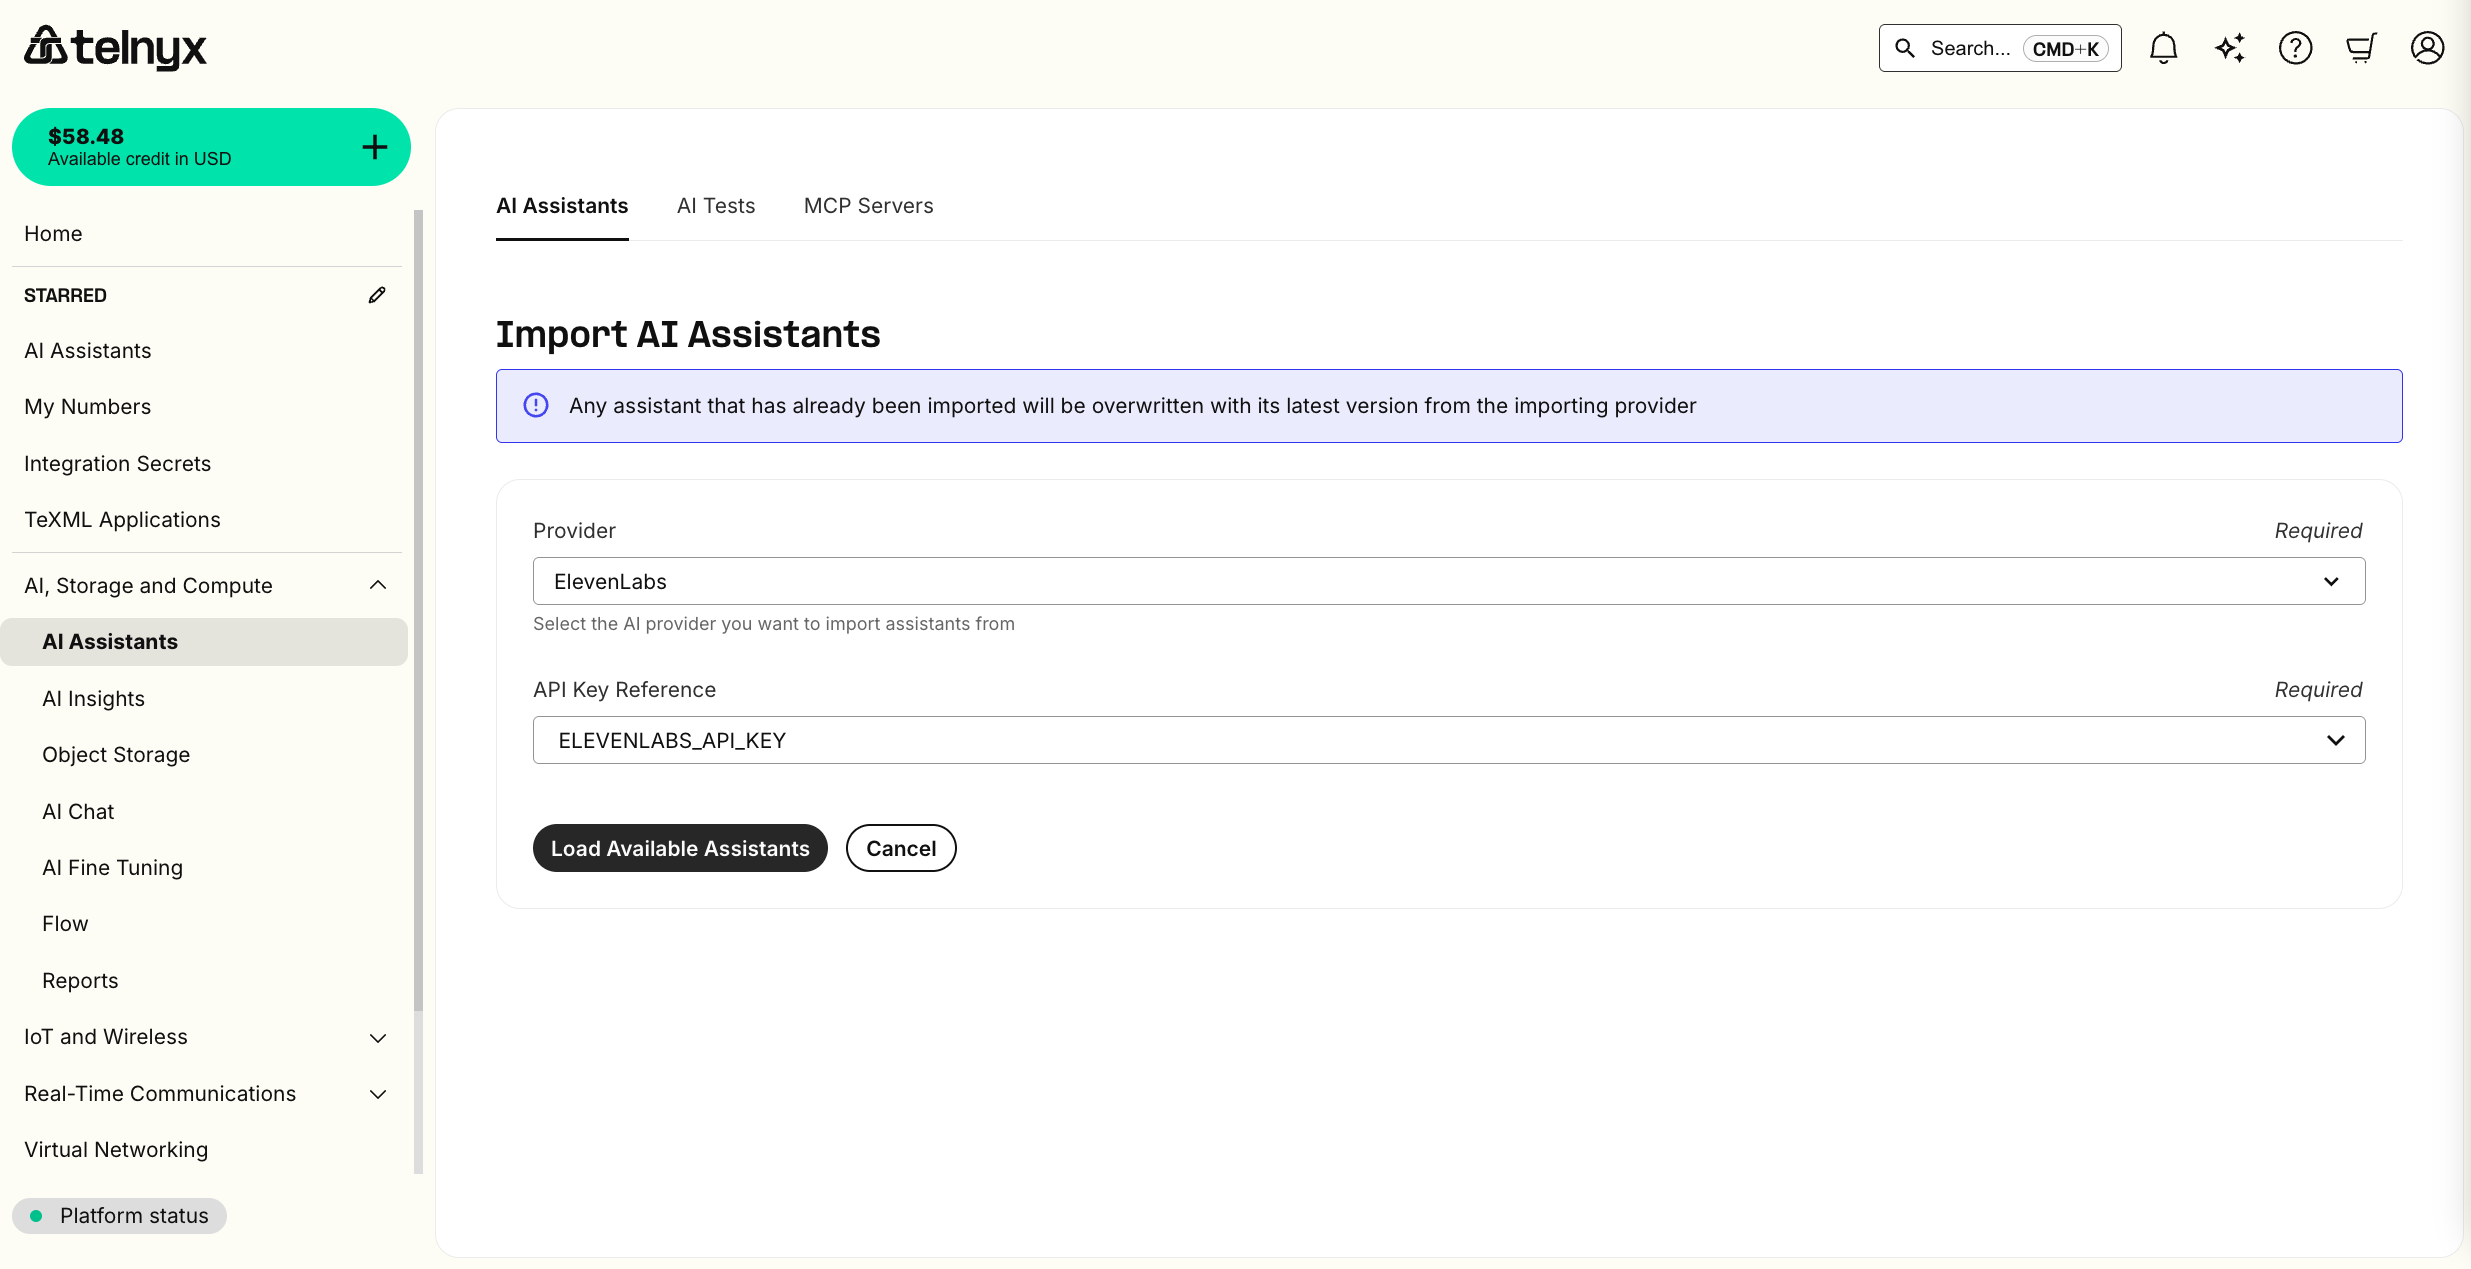
Selecting your Assistants
You can then select which ElevenLabs agents to import. Trial accounts have a limit of 1 AI Assistant.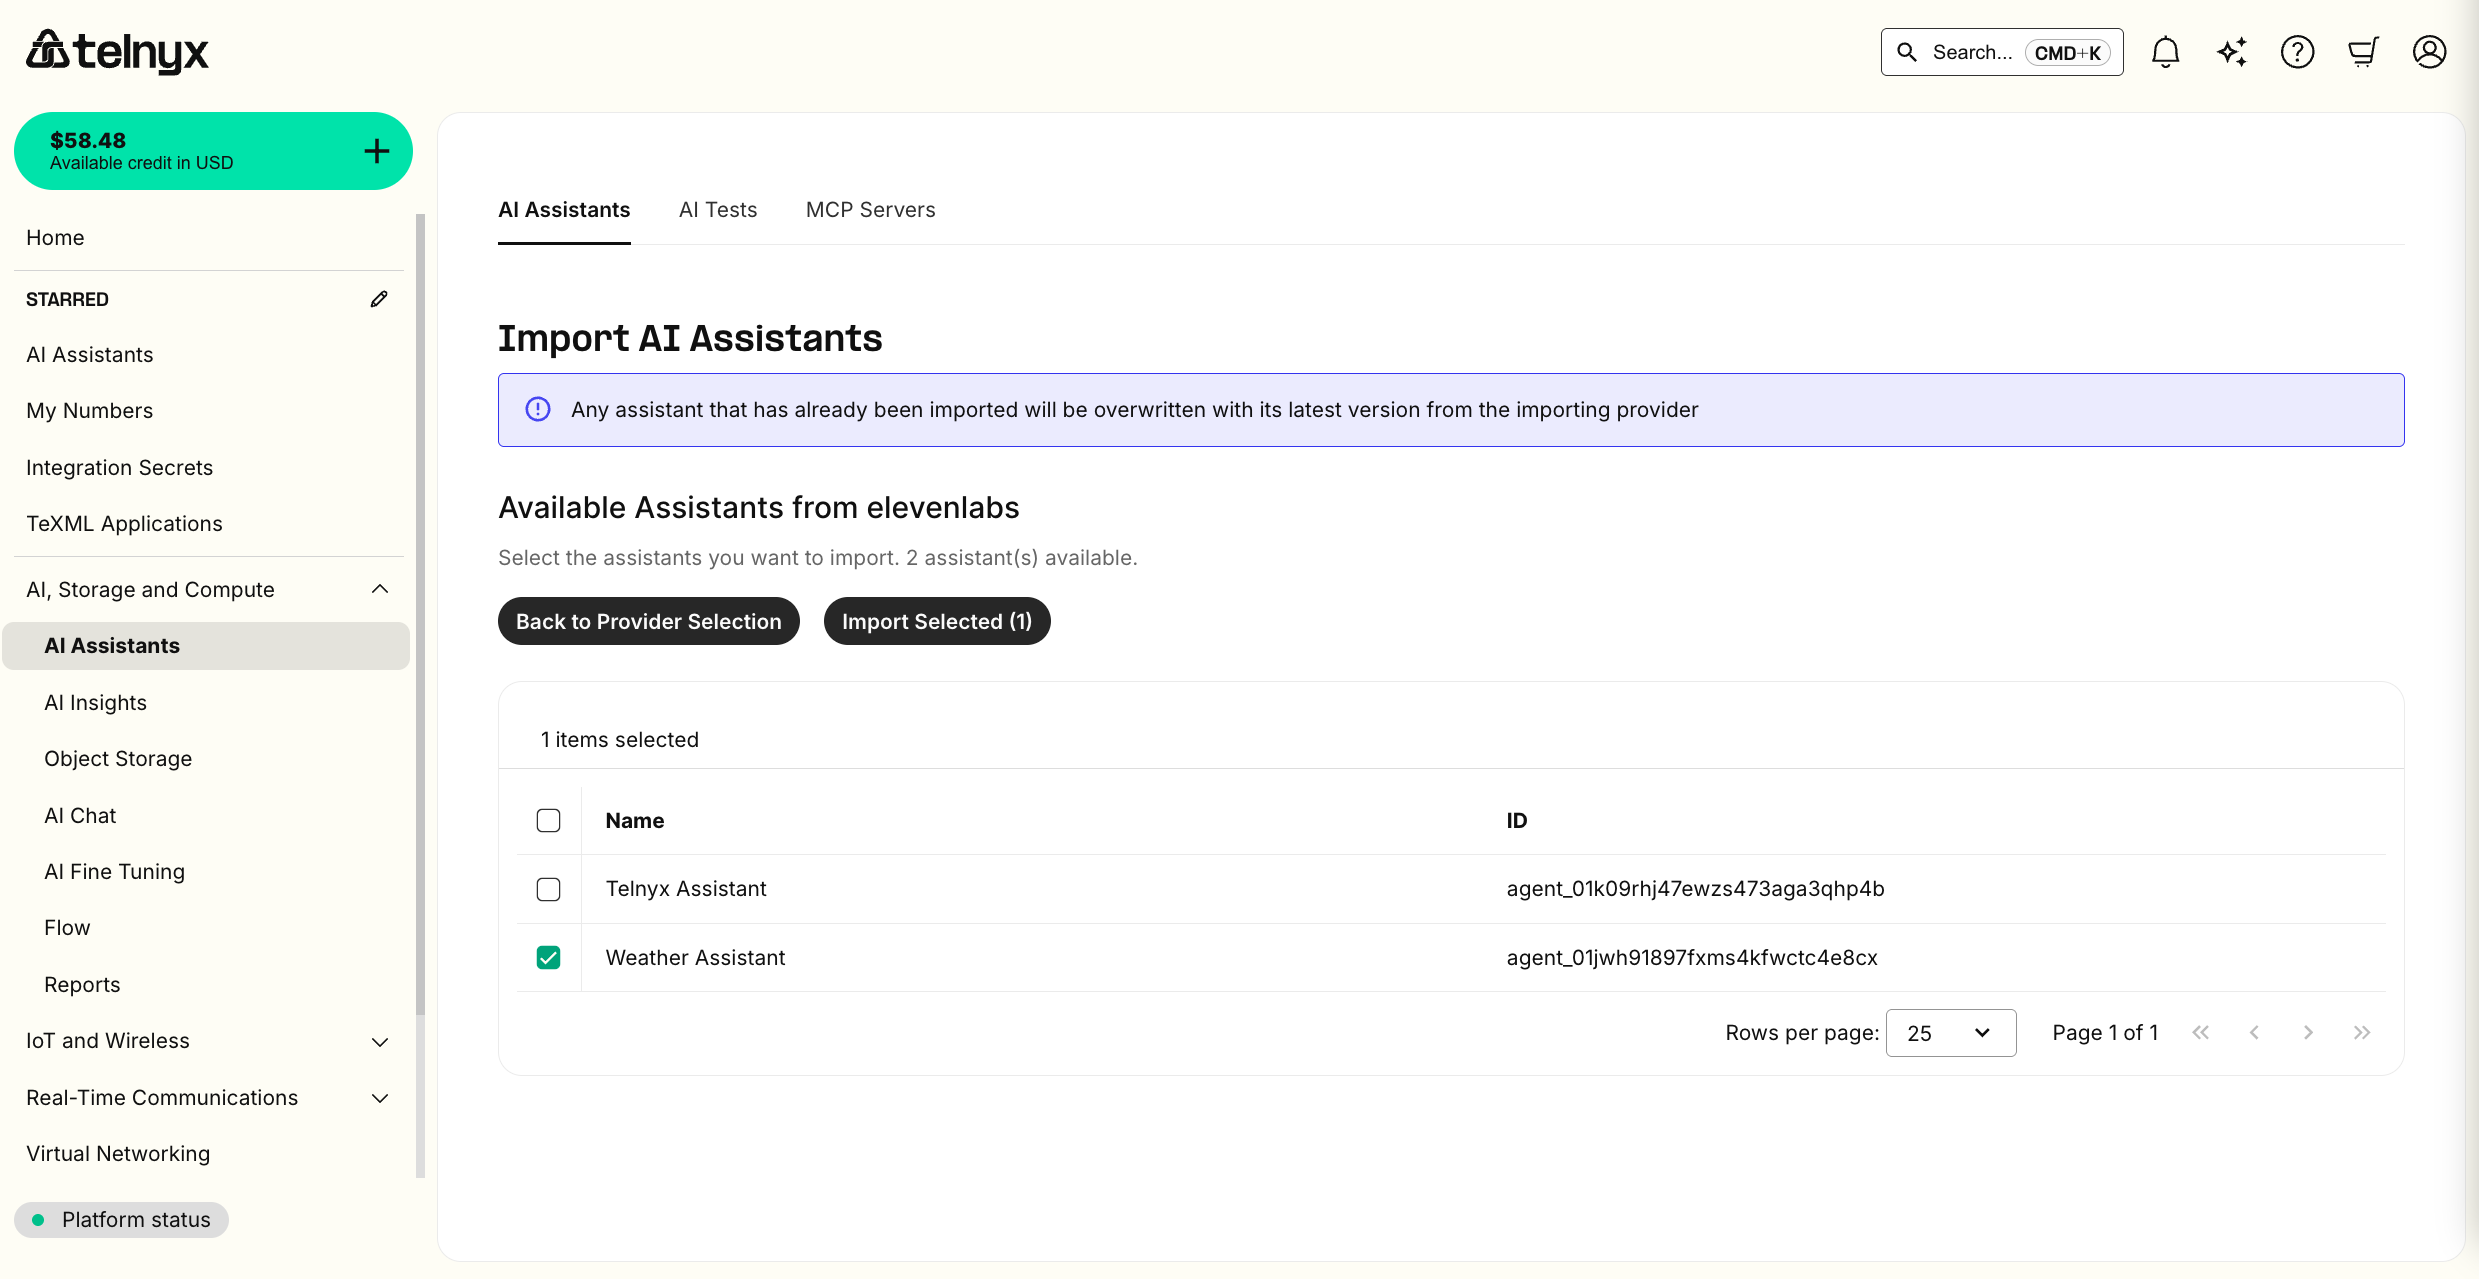
Testing your imported Assistant
You should now see your new assistants listed and can click the pencil icon to edit or the telephone icon to test them in the portal. Check out the quickstart tutorial for more information on editing or creating our Assistants.Supported Import Functionality
Instructions
Your assistant’s instructions will be imported as is.Greeting (a.k.a. first message)
Your assistant’s greeting will be imported as is.LLM
By default, the LLM assistant will be set to our flagship on-prem LLM, which provides optimal latency, cost, and intelligence. You can BYO LLM with third-party providers by storing an API Key.Voice
When importing from Vapi or ElevenLabs, the voice will be imported as is. Otherwise, the LLM assistant will be set to our flagship on-prem TTS, which provides optimal latency, cost, and realism. You can BYO TTS with other third-party providers by storing an API Key.Dynamic Variables
References to dynamic variables and their defaults will be imported as is. See our guide on how to set these values per call.Tools
Hangup, transfer, and webhook tools will be imported as is.MCP Servers (a.k.a. Integrations)
Integrations with MCP Servers will be imported as is.Insights (a.k.a. analysis, success criteria, structured data…)
Structured and unstructured call analysis configuration is imported as is.Data Retention
If you have disabled data retention with another provider, this setting will be imported as is.Knowledge Bases
Telnyx will not import your knowledge base by default. You can easily drag and drop files or import website content for your assistant in the assistant builder.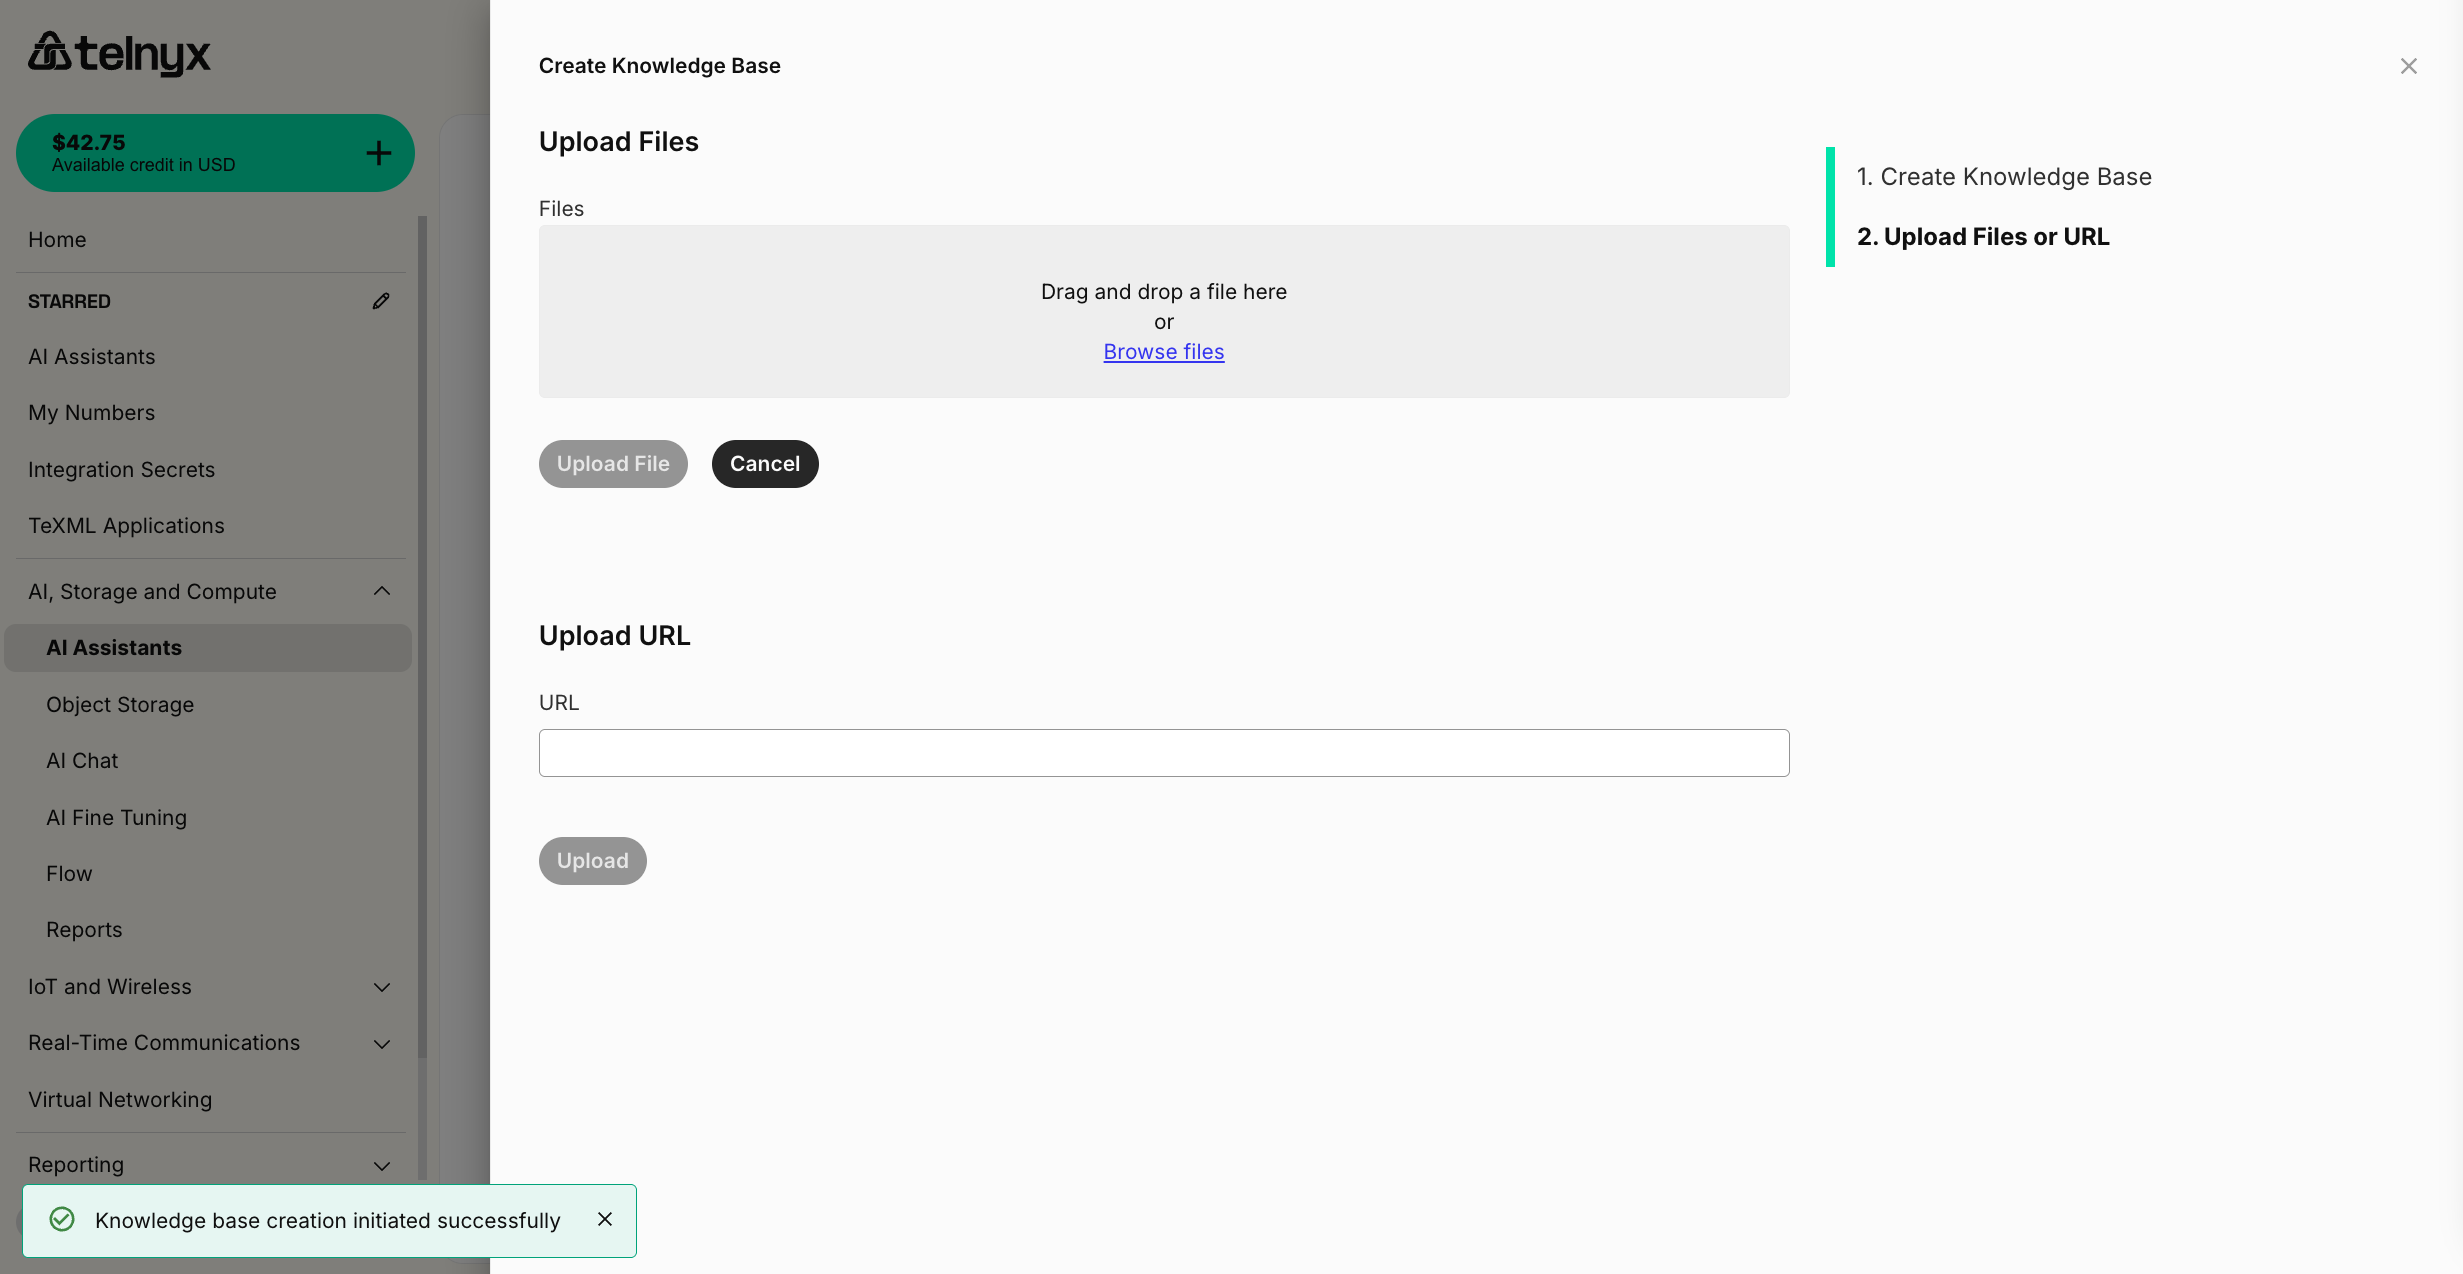
Secrets
Telnyx will create placeholder integration secrets for you with the same name as they are configured in the importing provider. You will need to resupply the value of the secret on the Telnyx integration secrets page.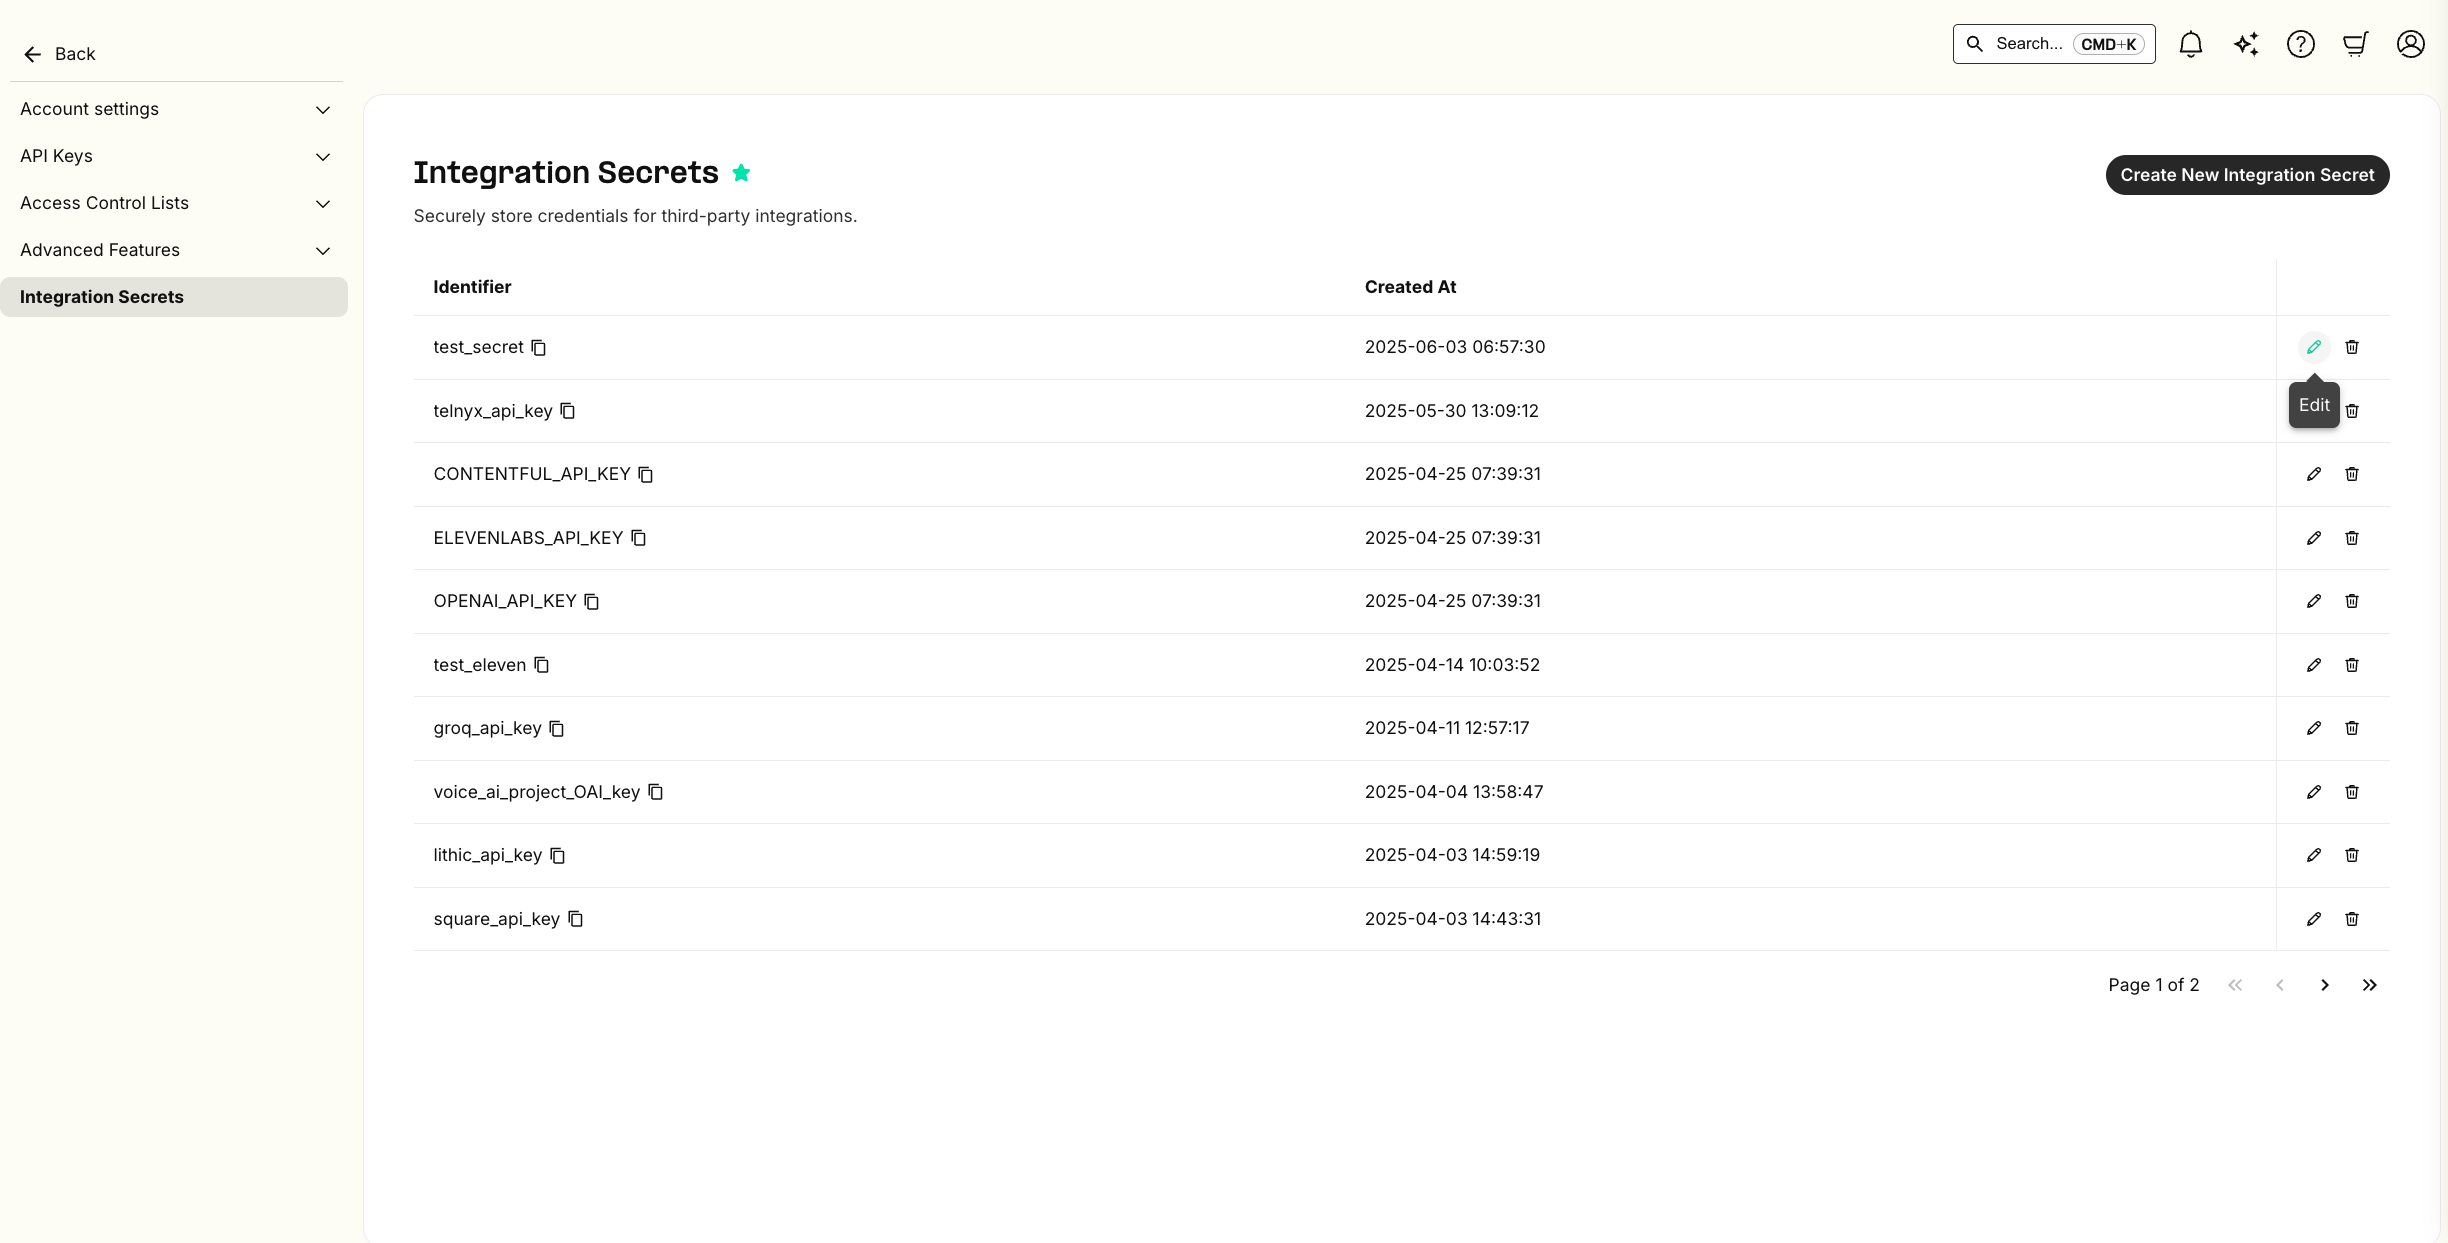
Custom LLMs for Assistants
Source: https://developers.telnyx.com/docs/inference/ai-assistants/custom-llm.mdIn addition to standard third-party LLM providers like OpenAI, Gemini, and Groq, you can also power your AI Assistant with any public OpenAI-compatible chat completions endpoint. This includes models hosted using AWS Bedrock, Azure OpenAI, and Baseten or open source inference engines like vLLM and SGLang. You must have a publicly accessible OpenAI-compatible chat completions endpoint before proceeding with deployment.
When to use custom LLM providers
Custom LLM providers are ideal for scenarios where you need:- Specific model requirements - Access to proprietary models, fine-tuned models, or the latest releases not yet available through standard providers.
- Data residency and compliance - Ensure your data stays within specific geographic regions or private cloud environments.
- Cost optimization - Leverage enterprise agreements, reserved capacity, or self-hosted infrastructure for better economics at scale.
- Advanced model control - Fine-tune parameters, adjust inference settings, or use specialized configurations for your use case.
Azure
For this guide, we will deploy gpt-4o on Azure AI Foundry. First, create or select a resource.
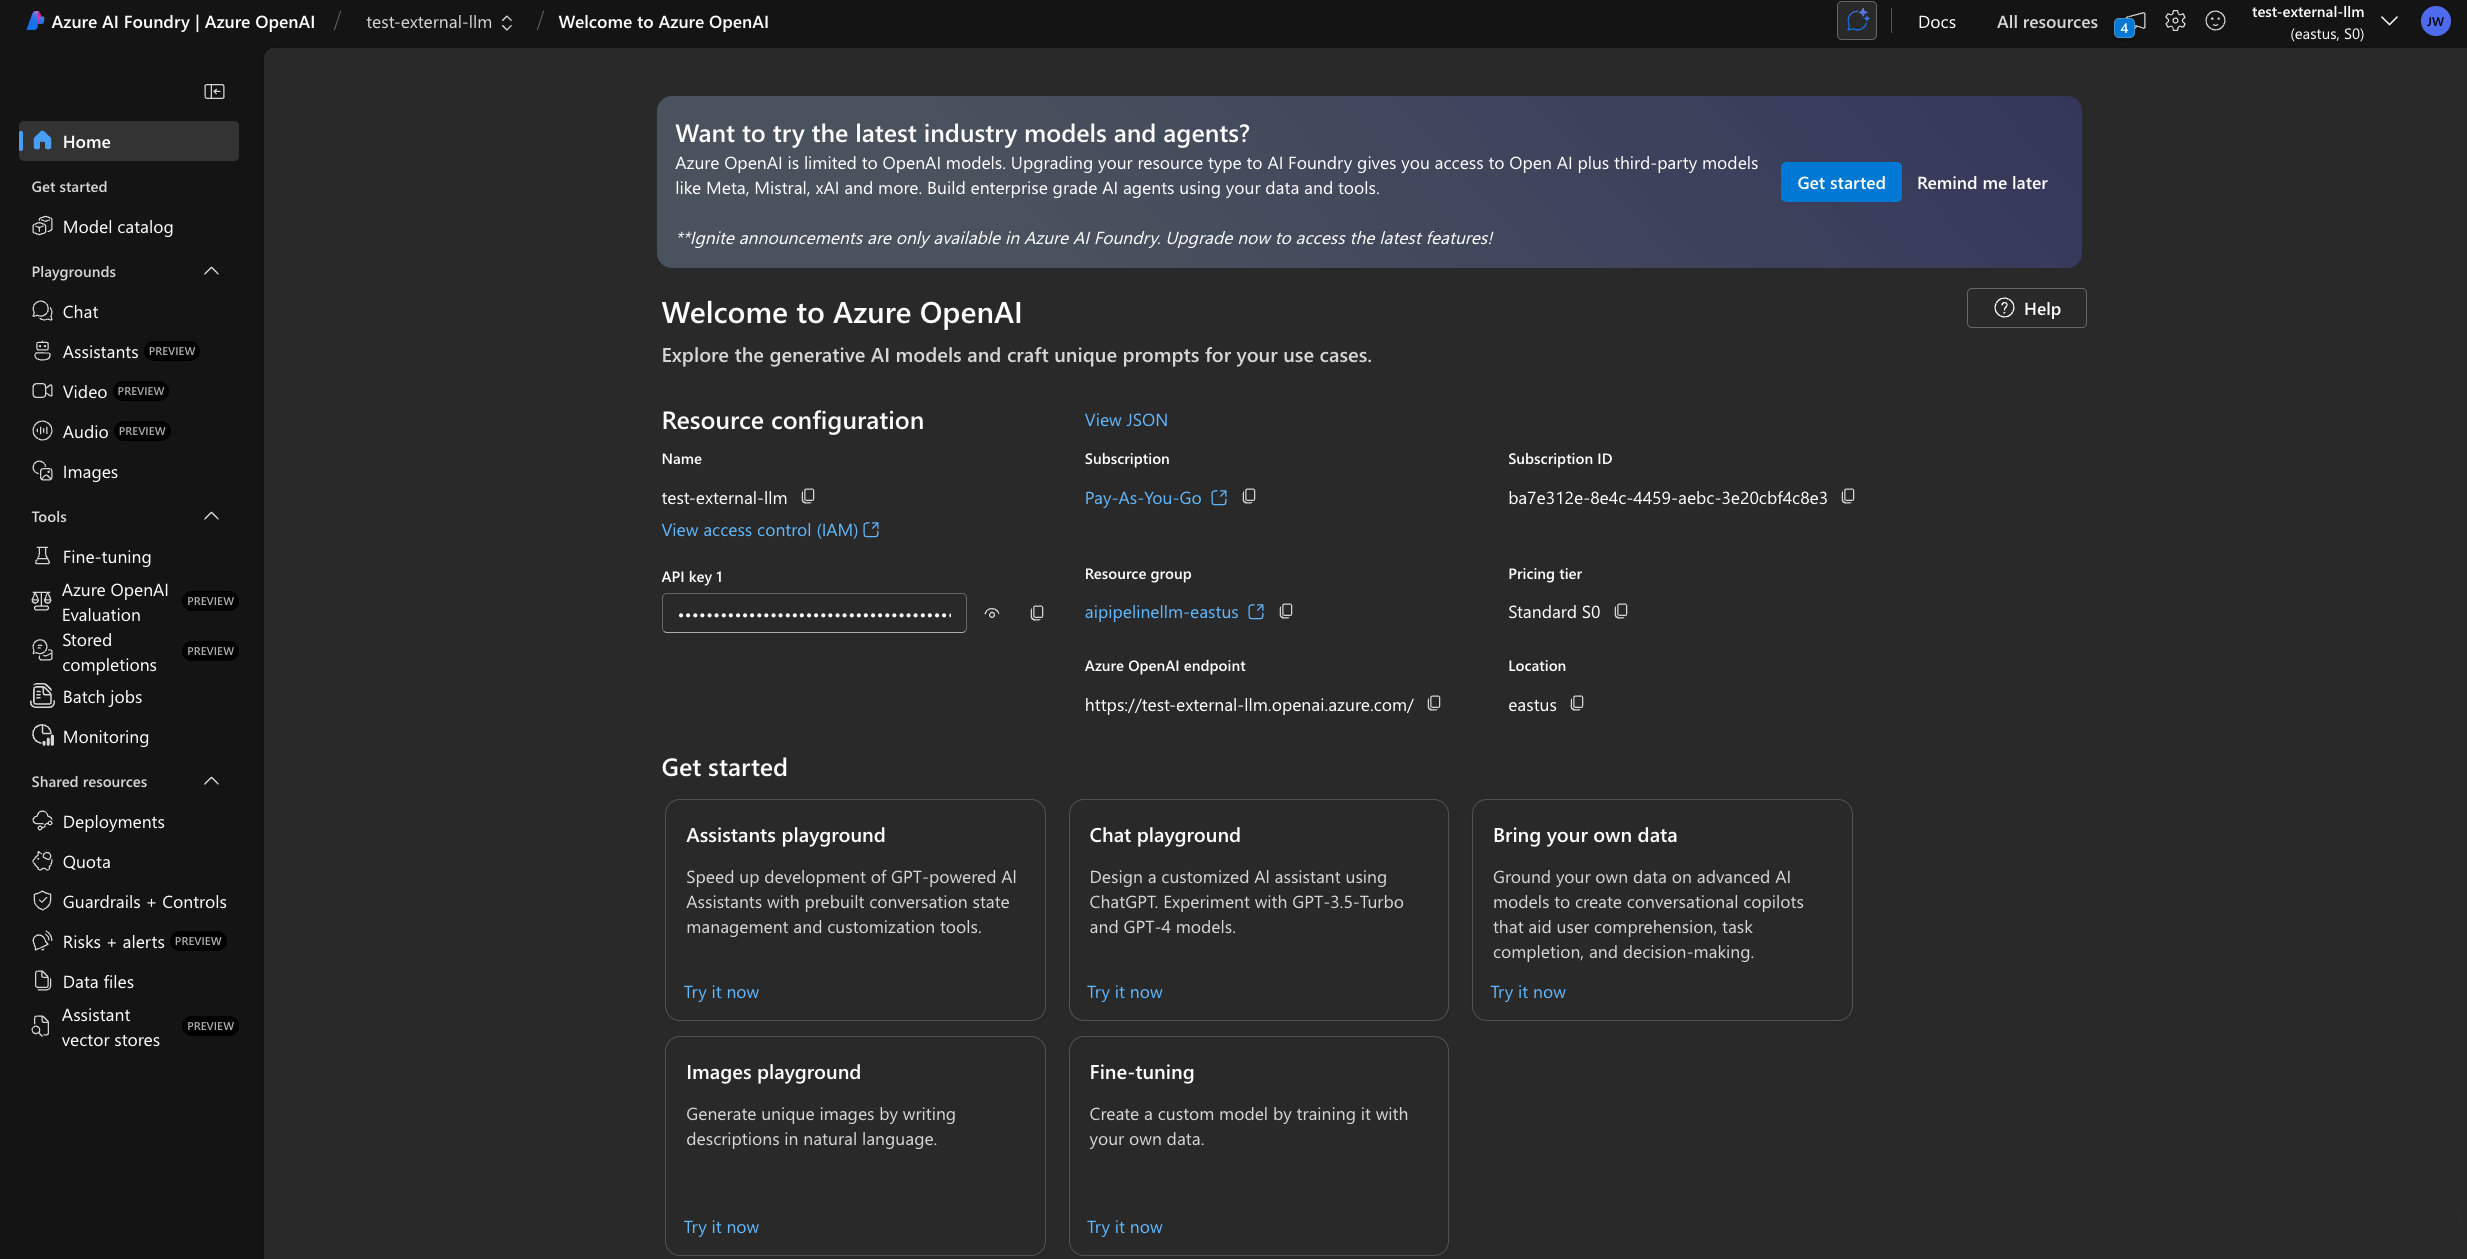
Agent tab, check Use Custom LLM.
Input the endpoint URL as the Base URL and append /openai/v1 and create a new Integration Secret with your API Key.
You will see a dropdown of all possible Azure models but only ones that you have deployed will validate an LLM connection.
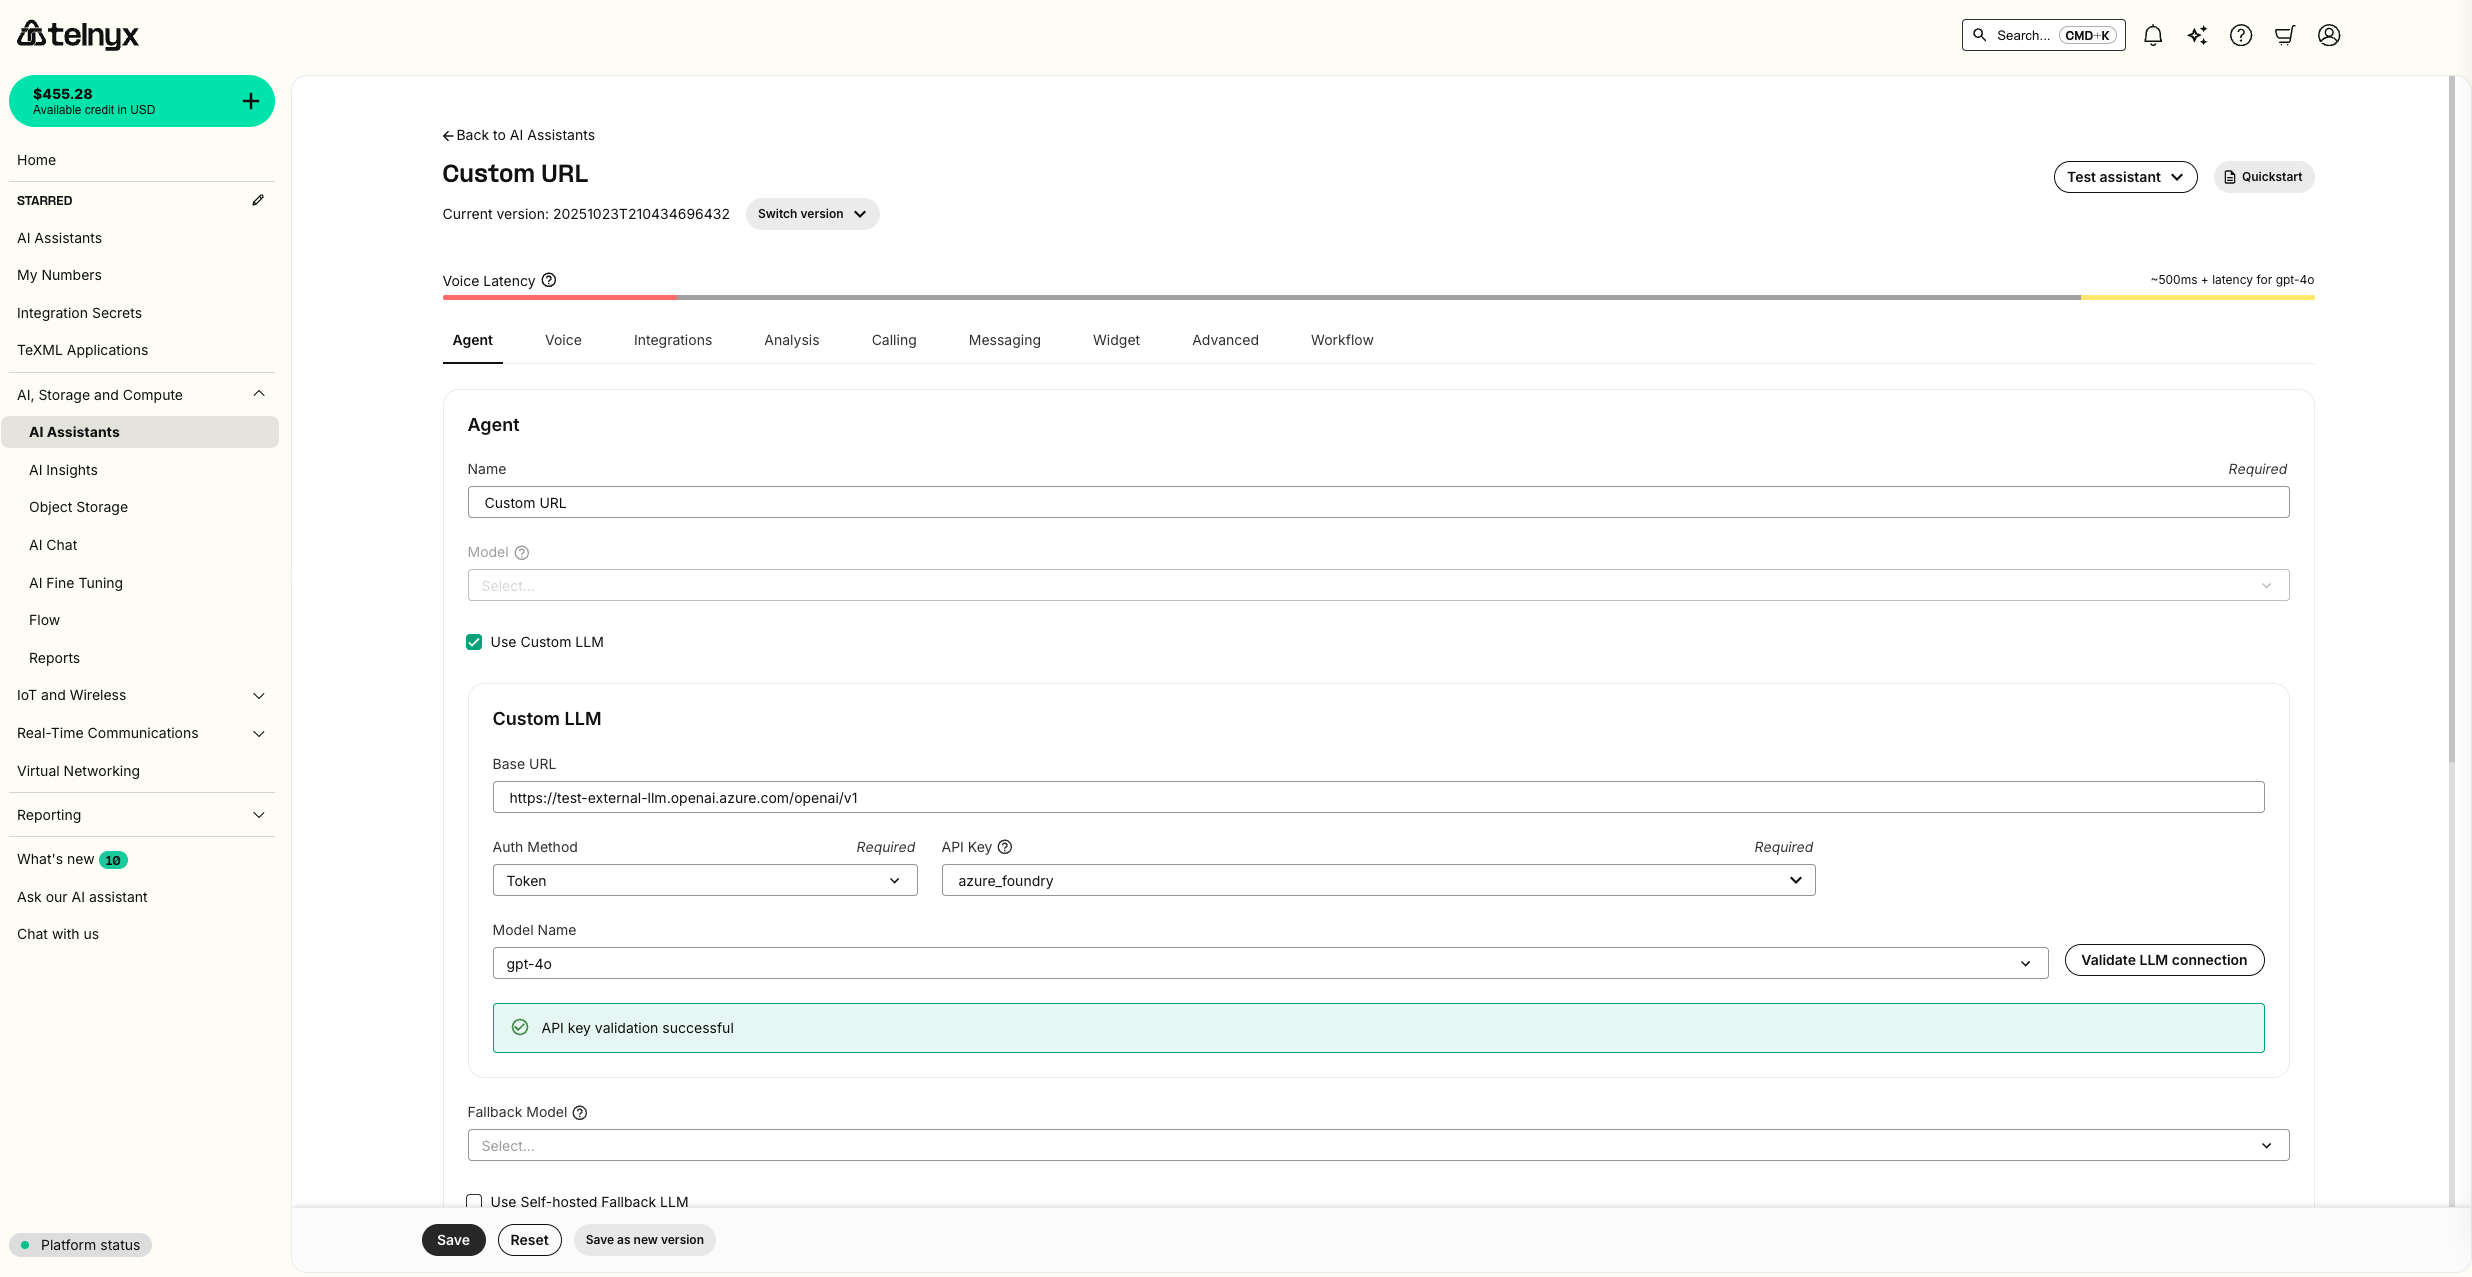
Test Assistant dropdown.
Forward metadata to your custom LLM
By default, Telnyx does not include your assistant’s dynamic variables in requests to a custom LLM endpoint. If your model gateway or application needs those values, enableforward_metadata on the assistant’s external_llm configuration.
forward_metadata is true, Telnyx adds a top-level extra_metadata object to the OpenAI-compatible chat completions request body sent to your custom LLM endpoint when dynamic variables are available. The field defaults to false when omitted.
extra_metadata is separate from OpenAI’s native metadata field, so your endpoint must explicitly read extra_metadata from the request body.
Baseten
For this guide, we will deploy Llama 3.3 70B on Baseten. First, clickDeploy Now.
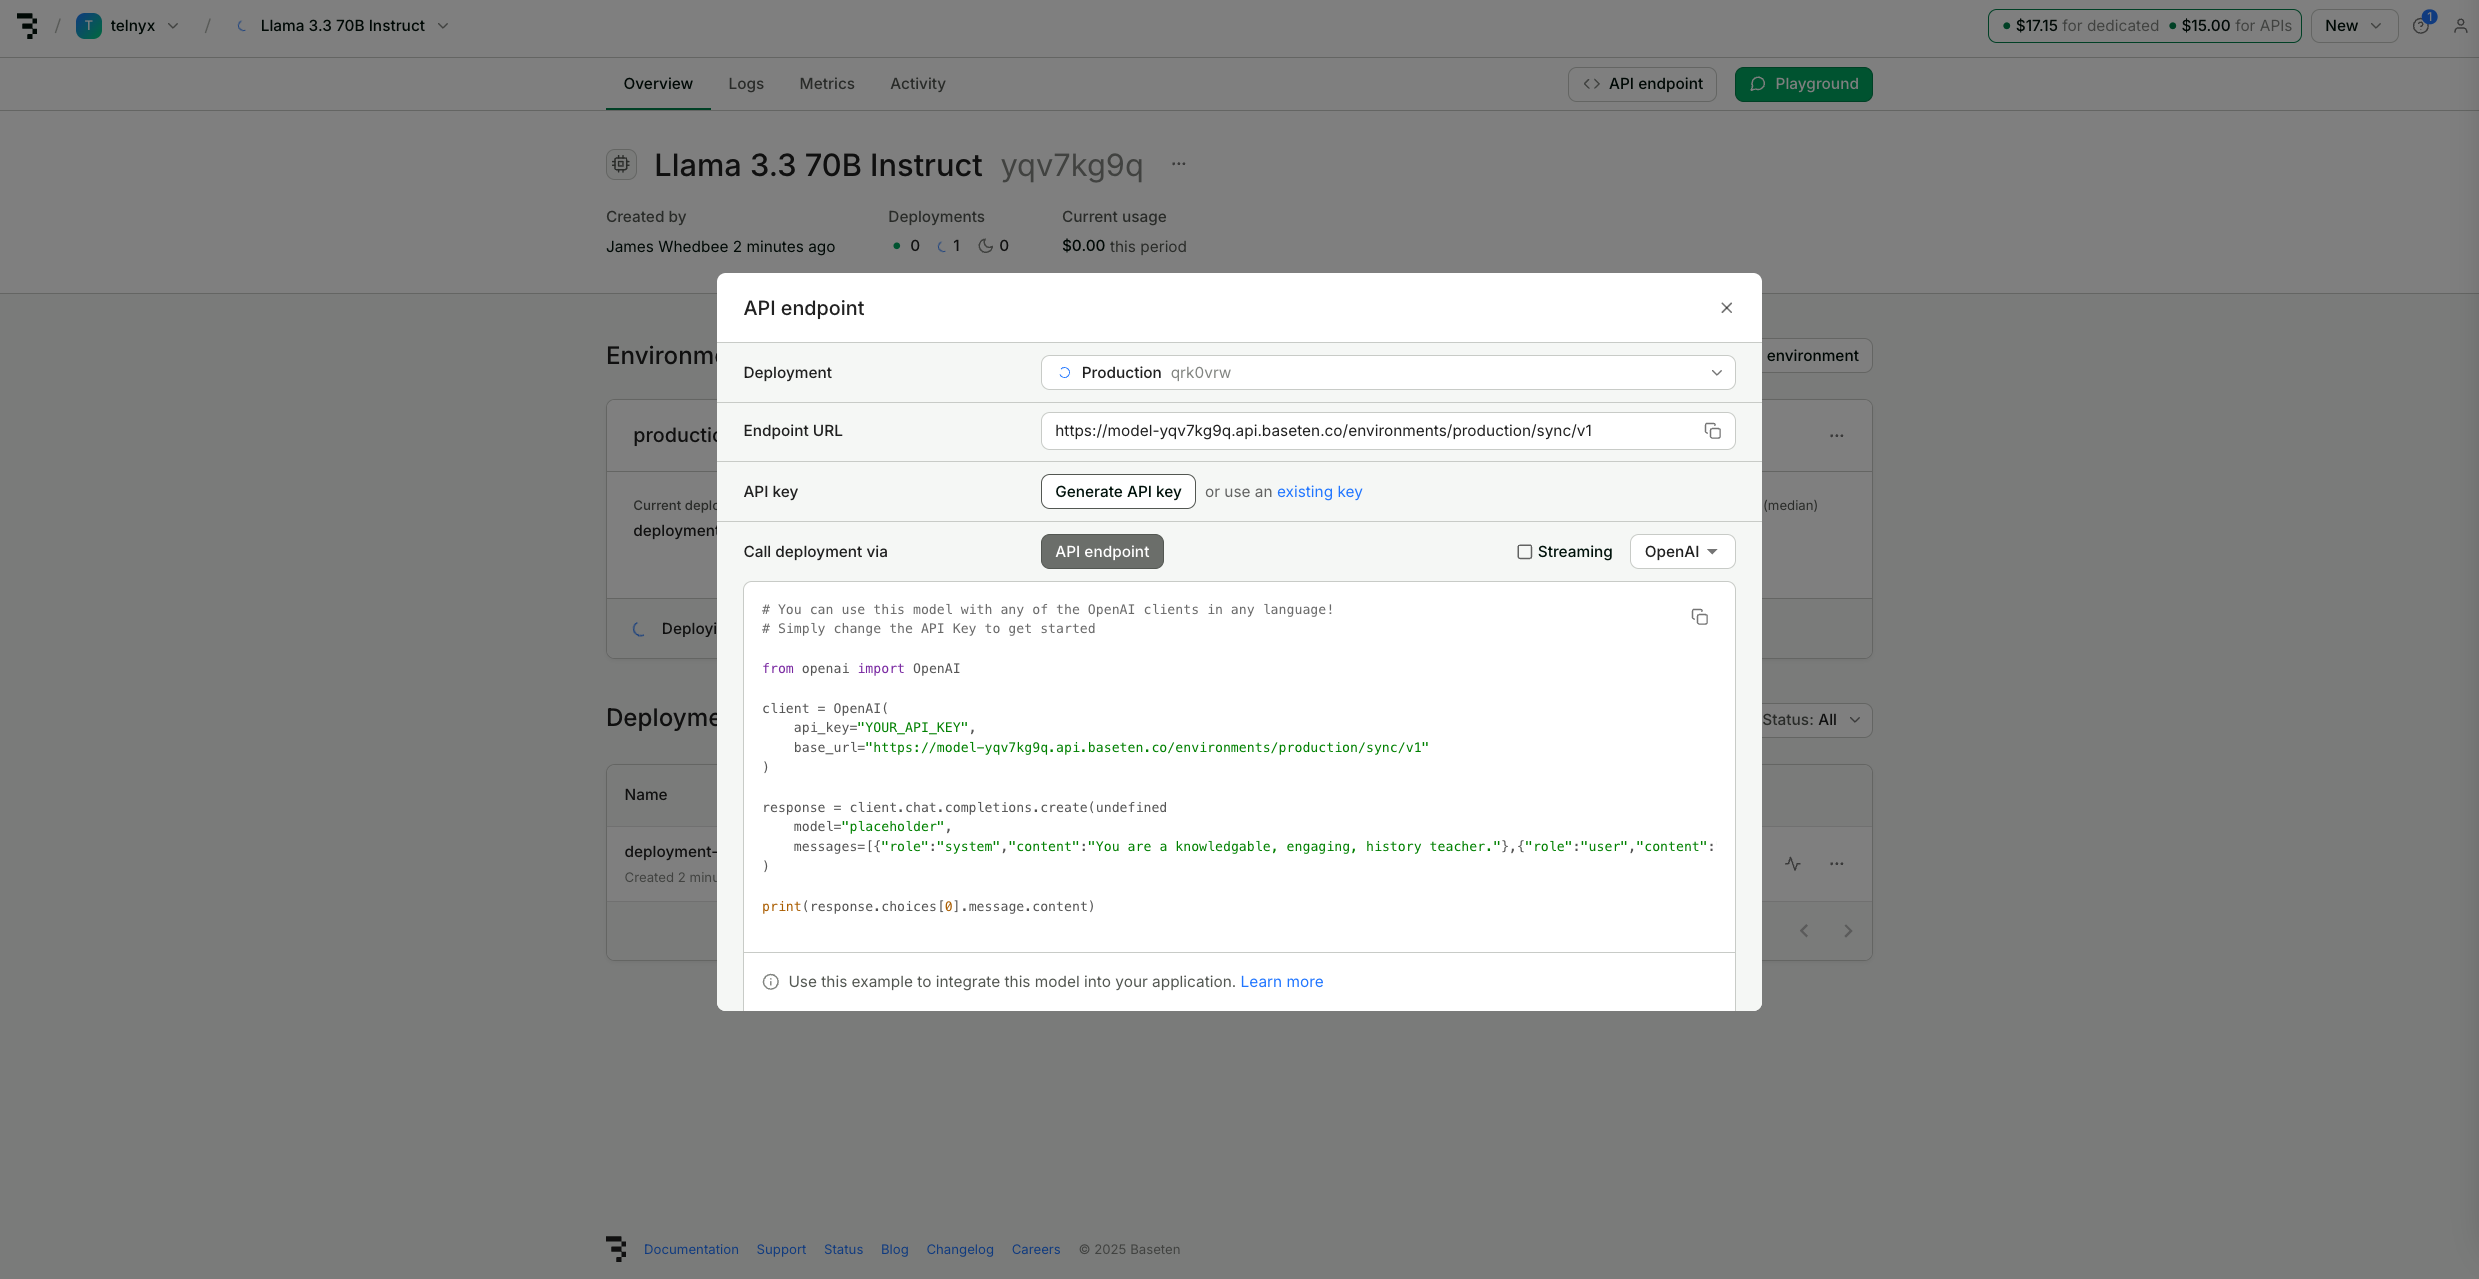
Agent tab, check Use Custom LLM.
Input the Baseten Endpoint URL for your deployment as the Base URL and create a new Integration Secret with your Baseten API Key.
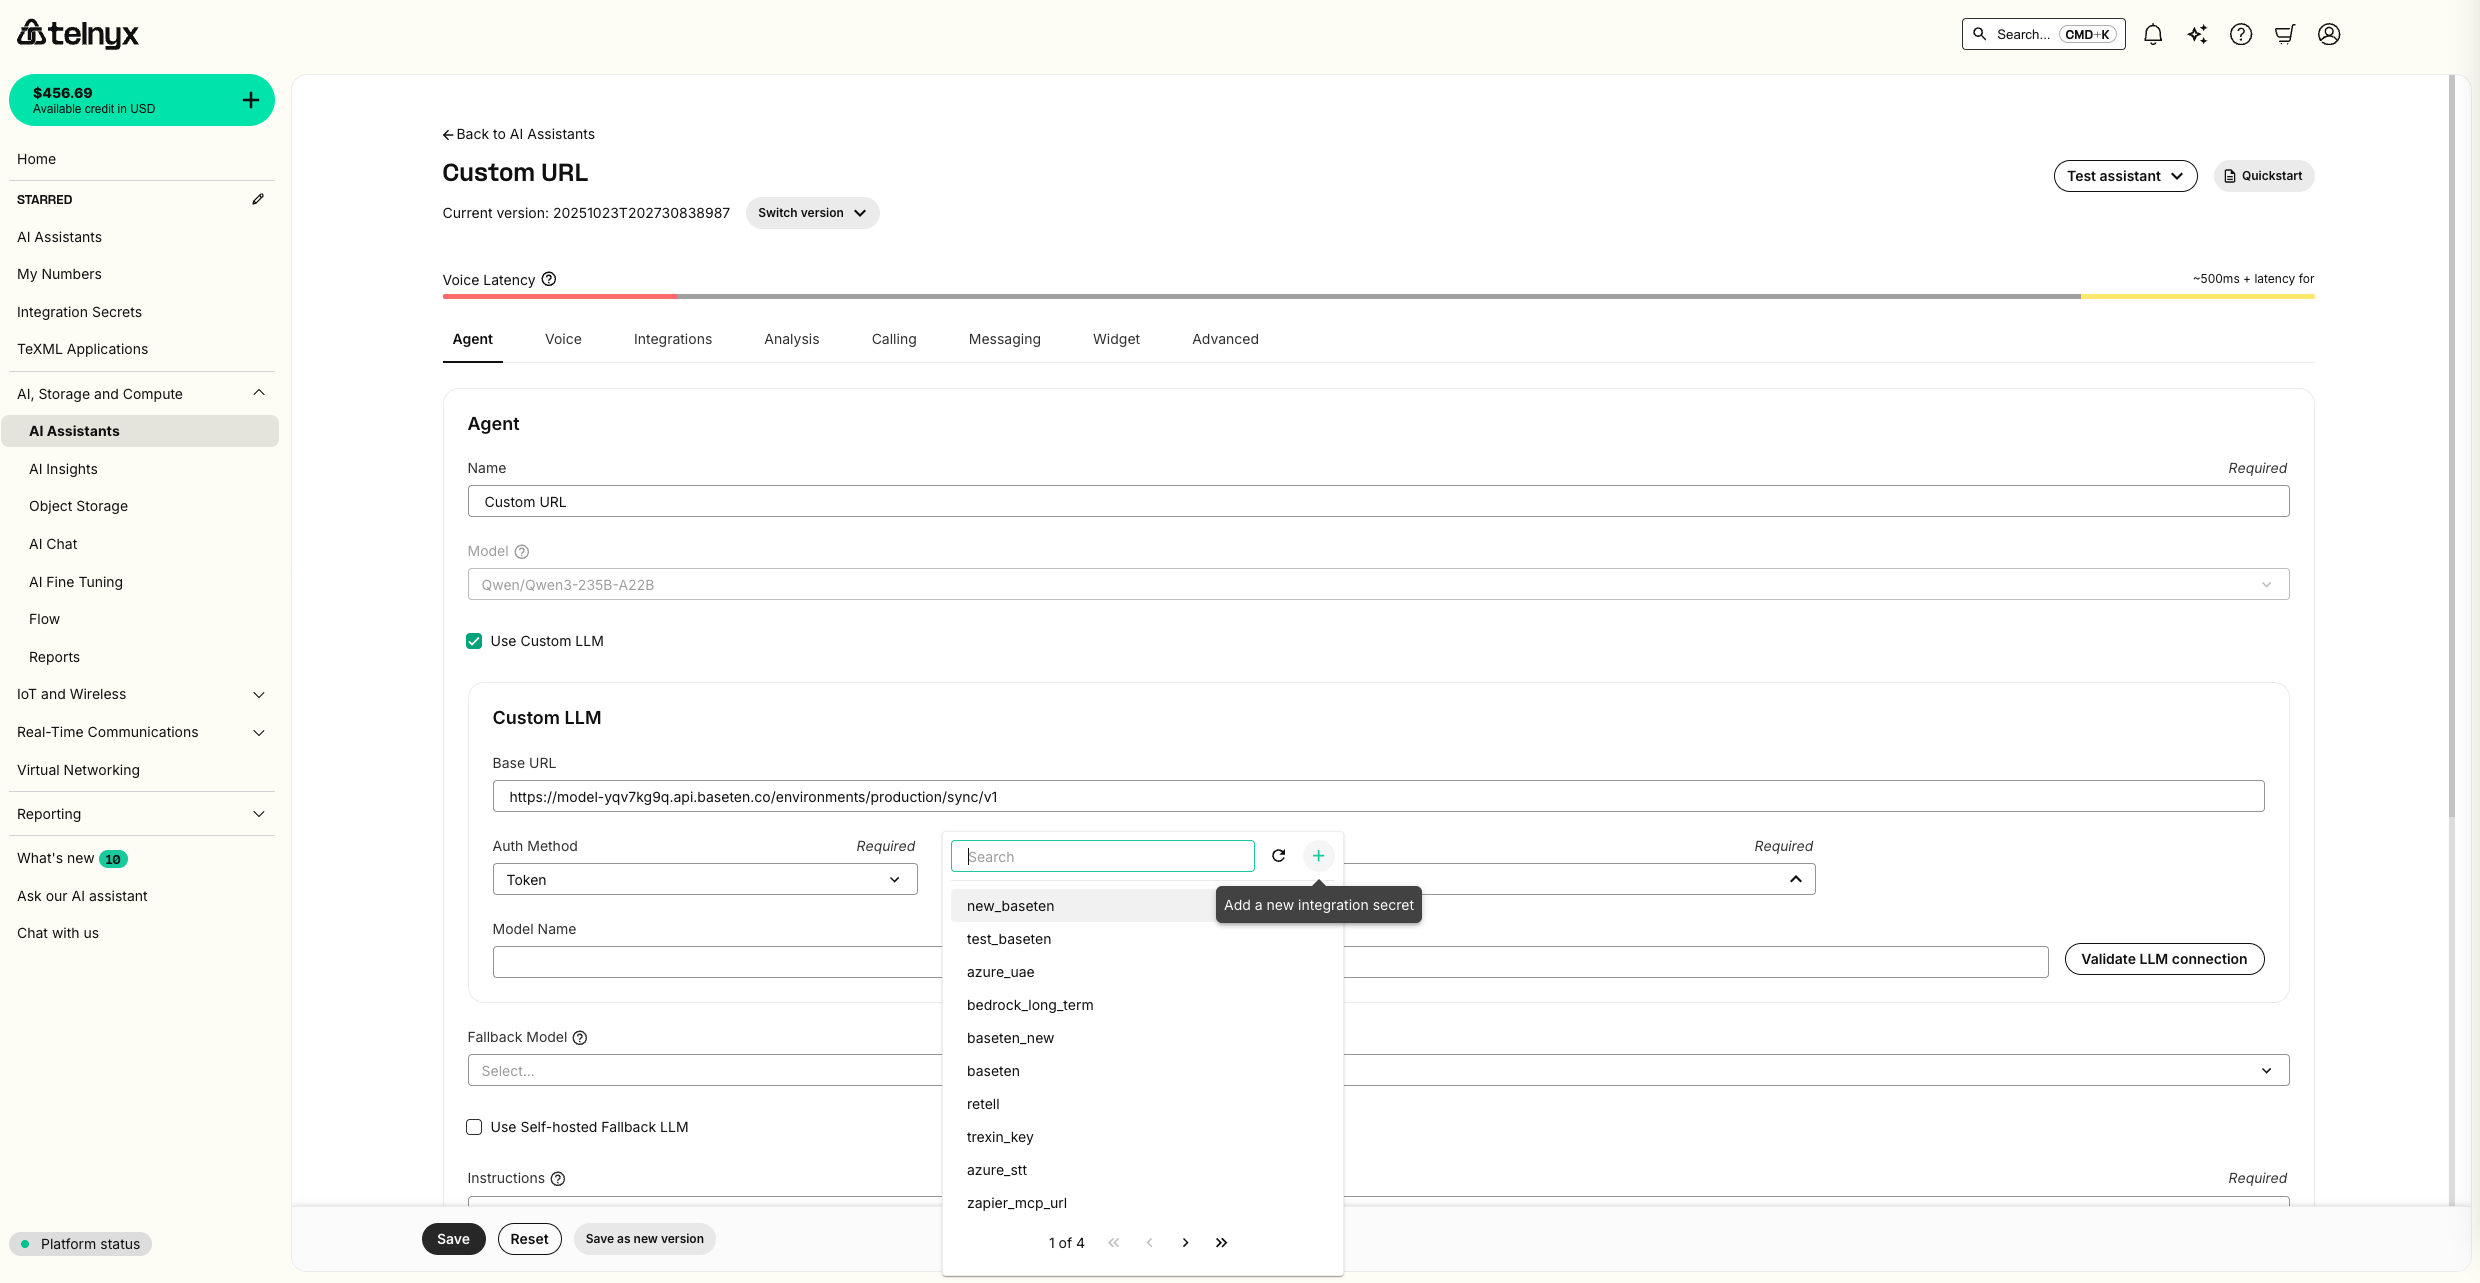
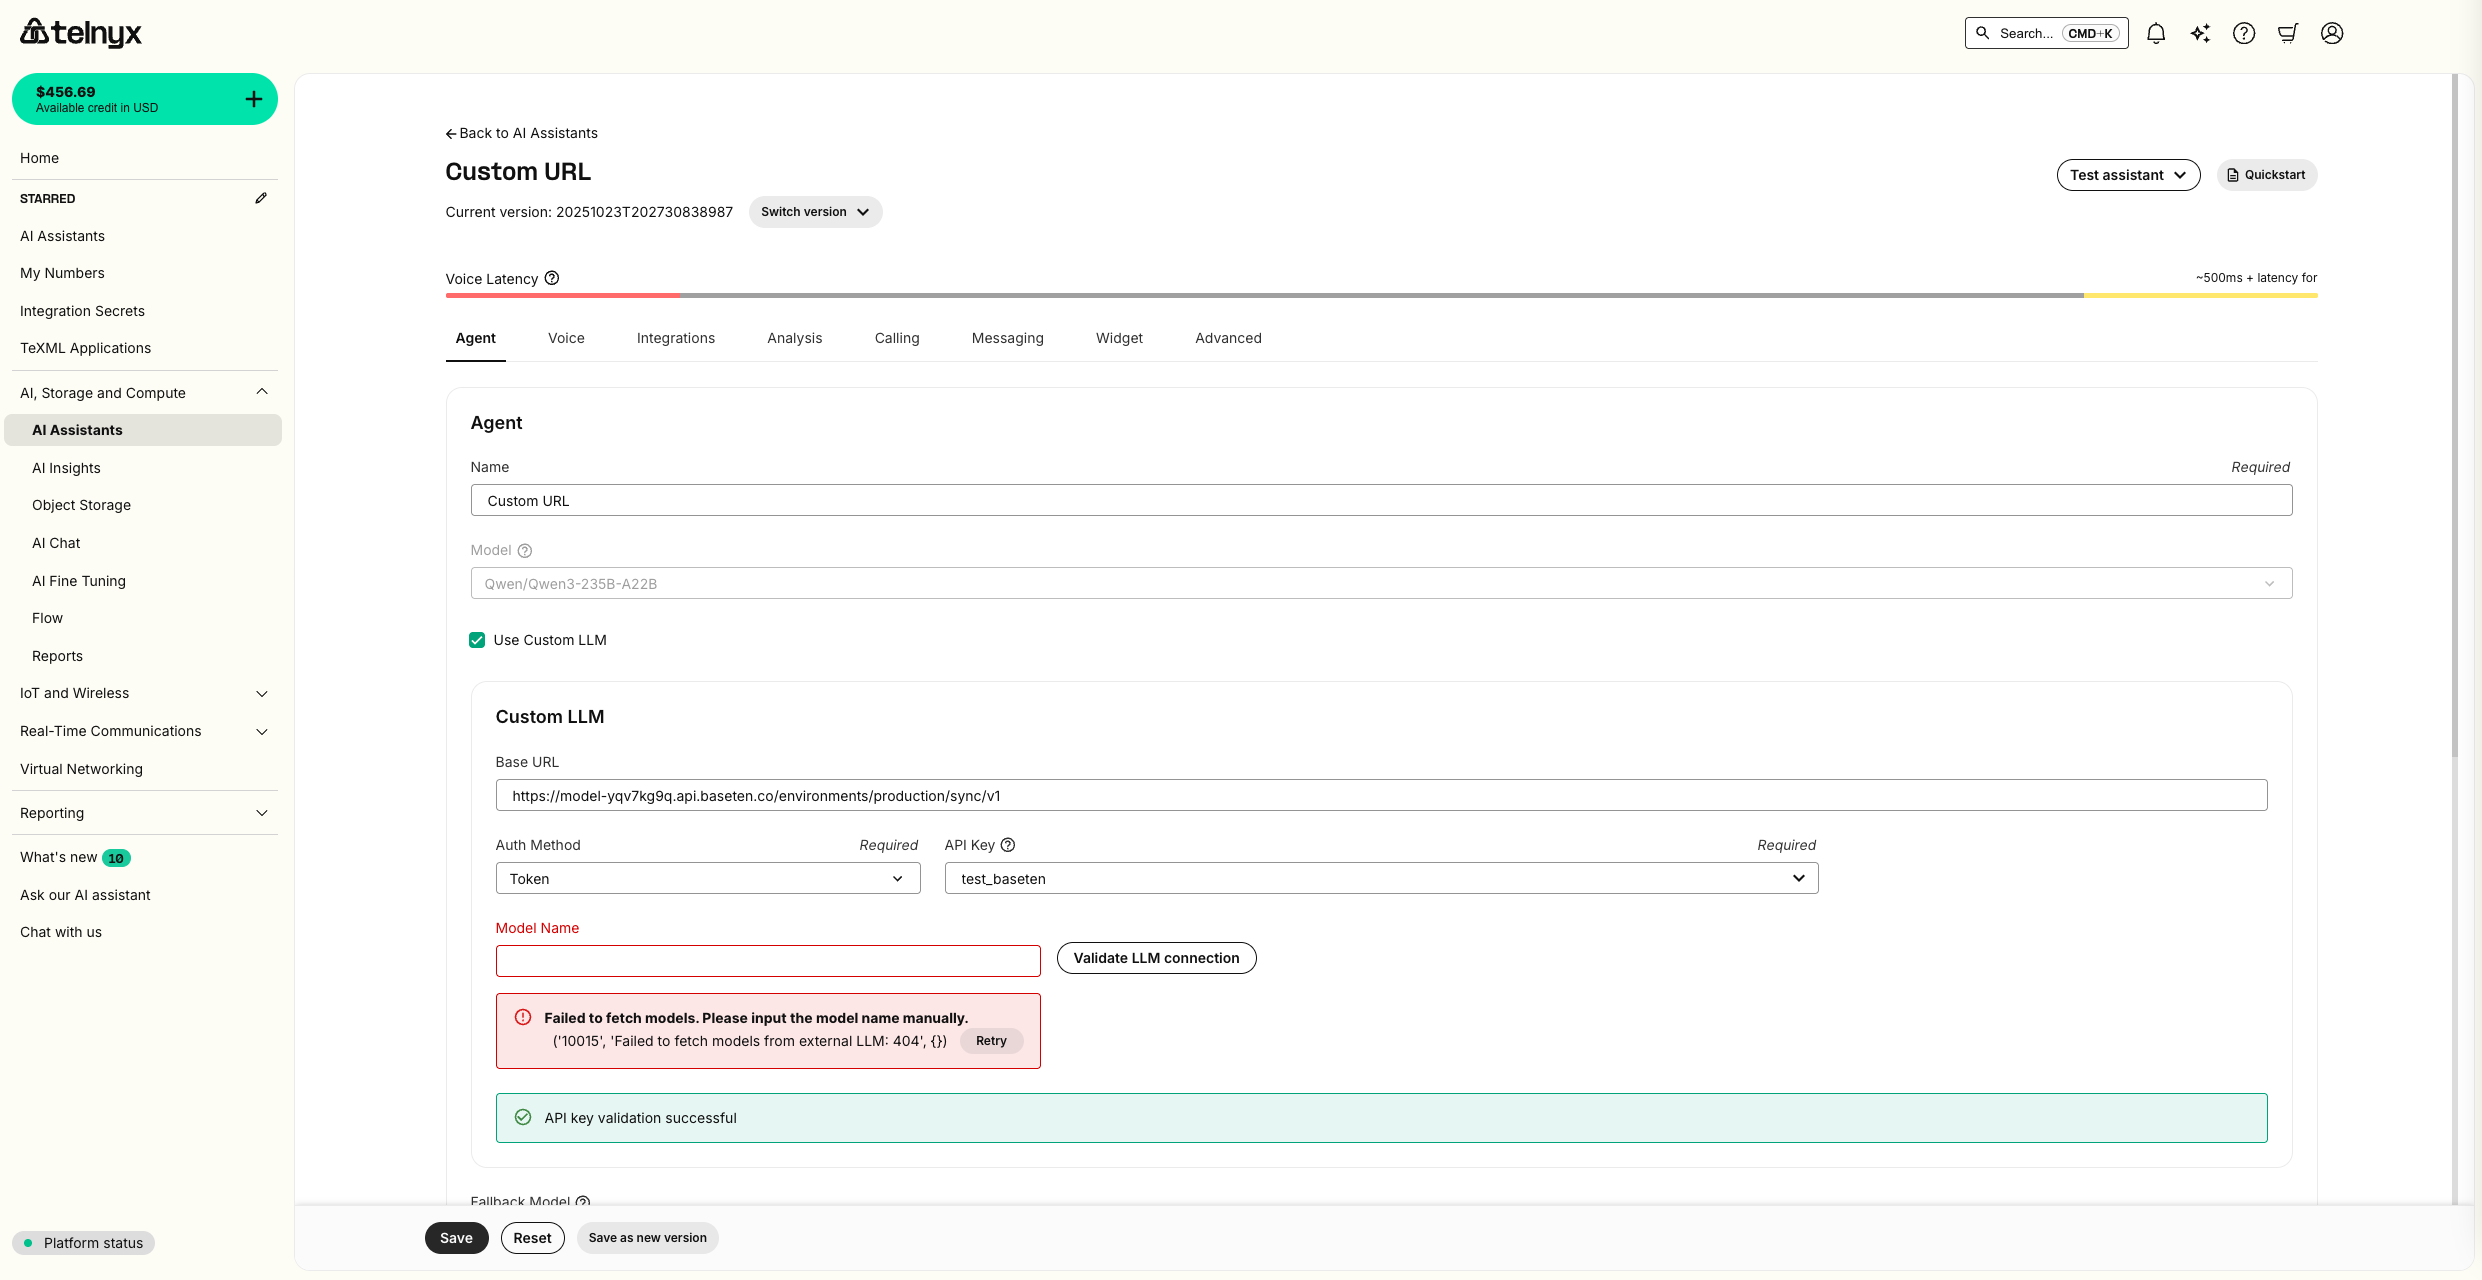
Test Assistant dropdown as well as review metrics in your Baseten deployment.
Voice Outreach
Source: https://developers.telnyx.com/docs/inference/missions.mdYour AI agent can do more than answer questions — it can go out into the world and get things done. With AI Missions and the Telnyx Missions skill, you can give your agent a task like “Find catering companies in Chicago and call them to negotiate quotes for a corporate event” and watch it execute the entire workflow: research, phone calls, follow-ups, and a final summary. This guide walks you through the full lifecycle — from setting up your agent with the Missions skill to reviewing call results in the Telnyx Portal.
What you’ll need
Before you start, make sure you have:- An OpenClaw agent — This is the AI agent that will execute your mission. If you don’t have one yet, follow the OpenClaw quickstart to get set up.
- A Telnyx account with an API key — Your agent needs API access to create assistants, schedule calls, and track missions. Create a Telnyx account if you don’t have one, then generate an API key.
-
The Telnyx Missions skill installed — Install it from ClawHub and configure your
TELNYX_API_KEYas an environment variable for your agent.
How it works
Your agent uses several Telnyx APIs to orchestrate the work:- Missions API — creates a mission, plans steps, logs events, and tracks status
- Assistants API — creates a voice assistant with custom prompts and schedules calls
- Numbers API — finds an available phone number and assigns it to the assistant
Give your agent a mission
Once your agent has the Telnyx Missions skill installed, you can describe tasks in natural language. The agent handles the rest.Example: Catering quote negotiation
Here’s a real example — asking your agent to find caterers and negotiate pricing:“Find catering companies in Chicago for a corporate event with 50 people. Call Lakefront Catering, Chicago Grill Co, and Prairie Table Events. Get a baseline quote from the first one, then use that to negotiate better rates with the others. Compare all quotes and recommend the best option.”Your agent will:
- Create a mission in the Telnyx Missions API to track the work
- Build an execution plan with steps (assistant setup → baseline call → negotiation calls → comparison)
- Create a voice assistant — a Telnyx AI Assistant configured as a “Catering Quote Negotiator” with a professional script tailored to your request
- Assign a phone number from your account to the assistant for outbound calling
- Call the first caterer to establish a baseline price
- Call remaining caterers armed with the best quote so far, negotiating for better rates
- Monitor call completions and capture conversation insights
- Summarize results — comparing quotes and recommending the best option
What the agent plans
When the mission starts, your agent creates a structured plan. In the Portal, you can see each step and its status: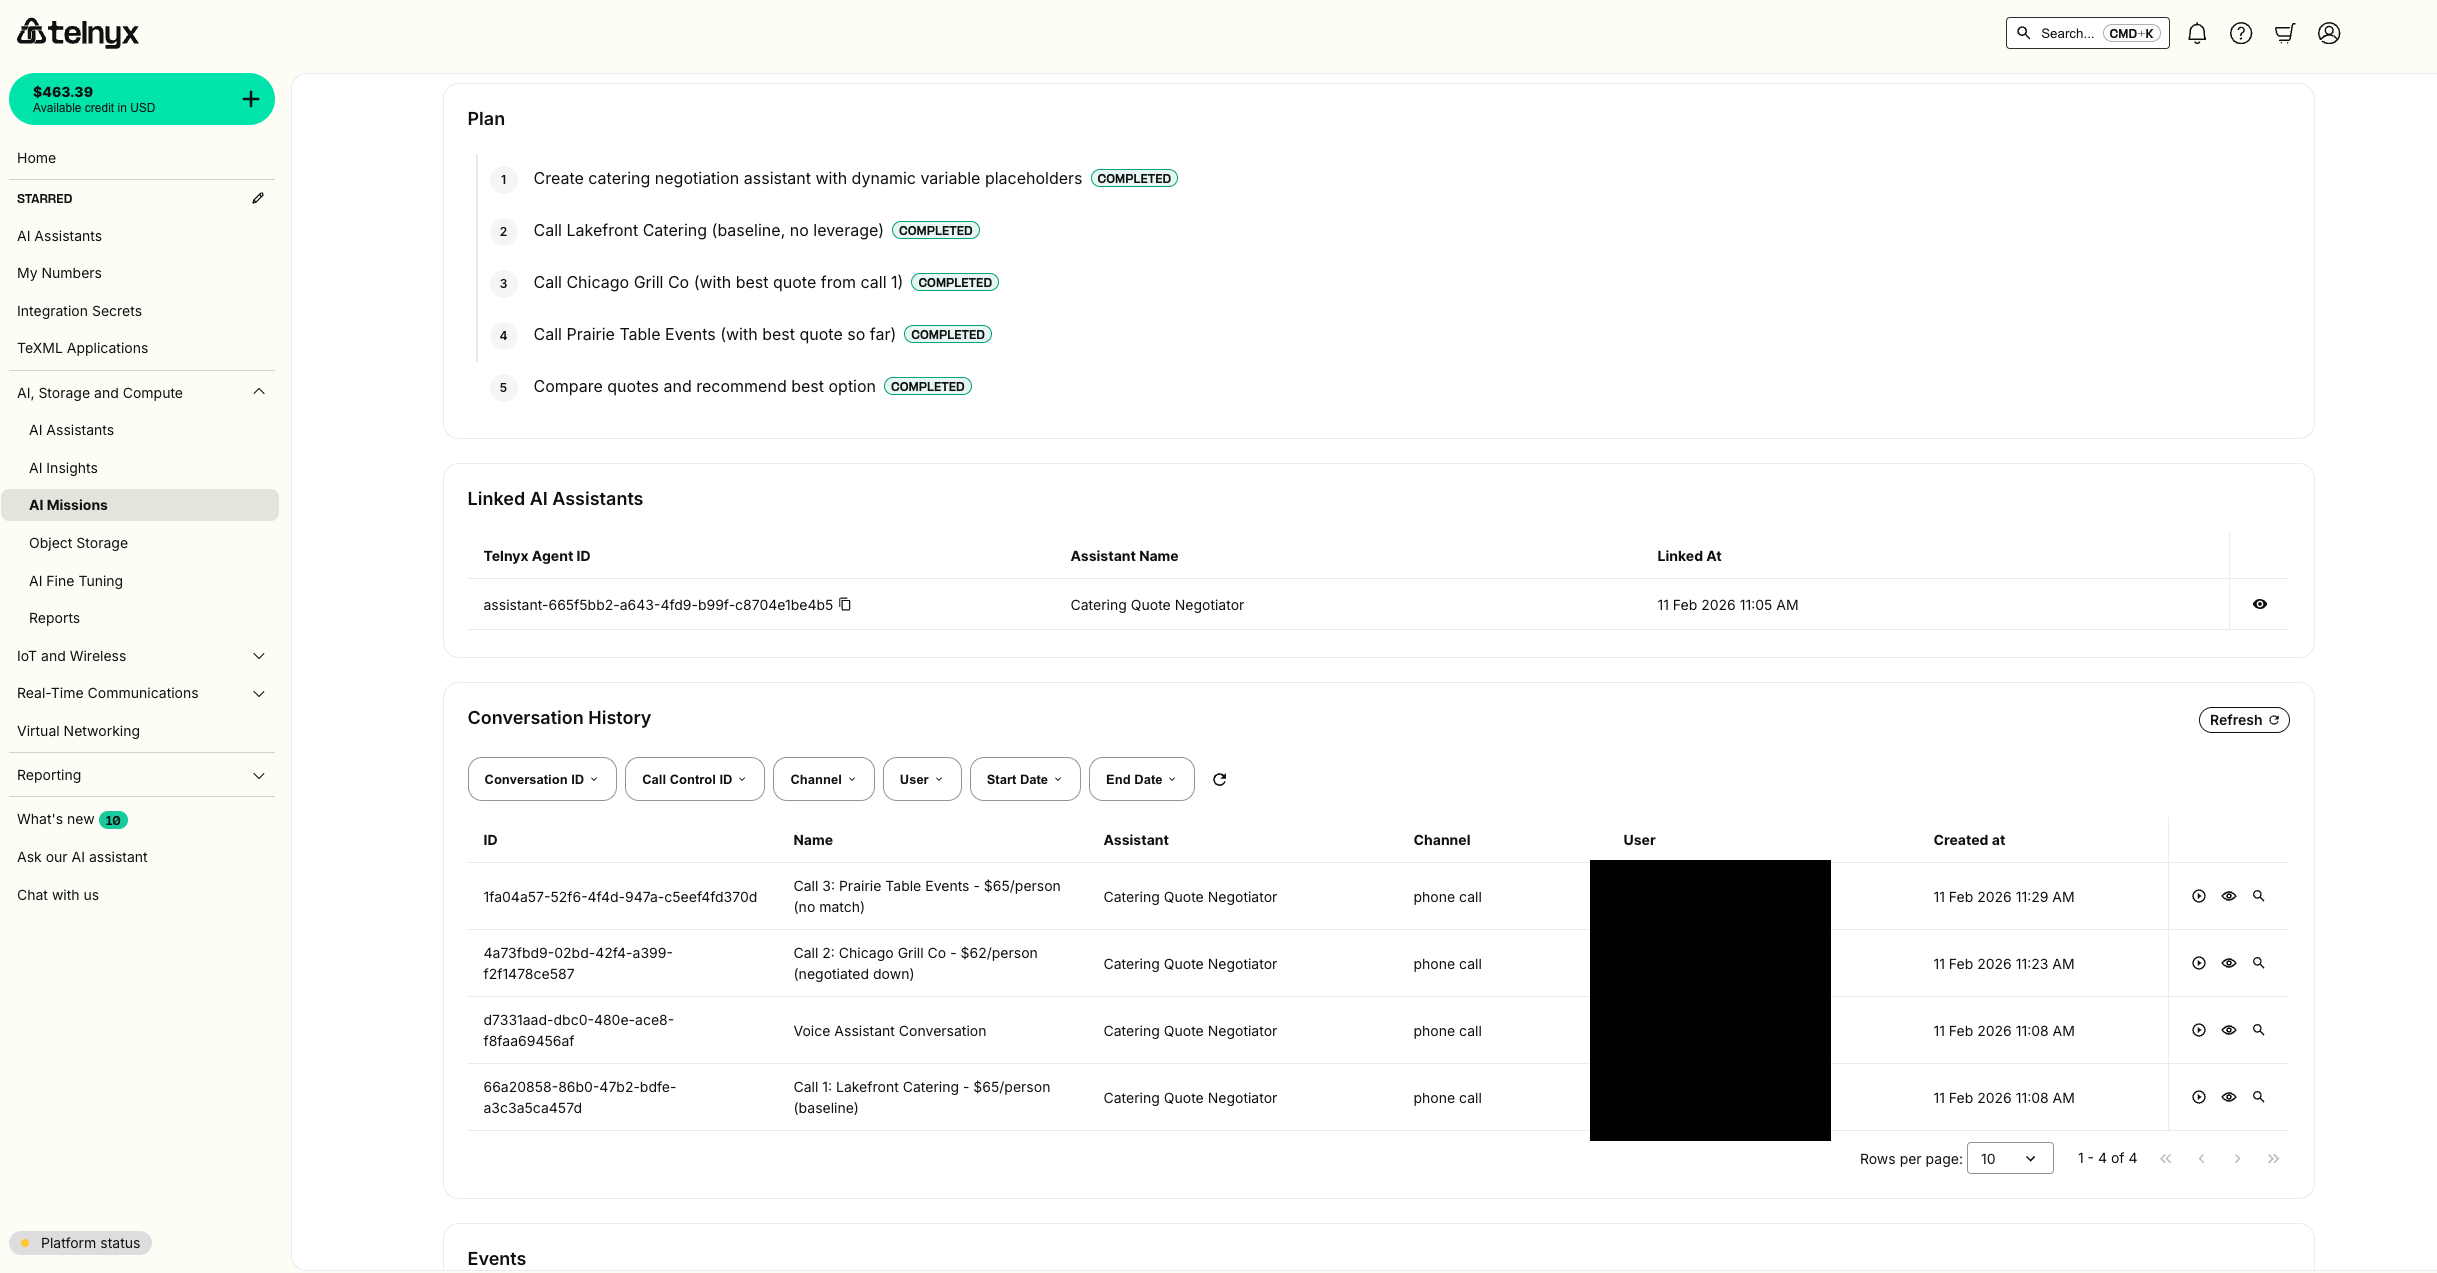
pending, in_progress, completed, failed) so you can see exactly where things stand at any point. In this example, the agent’s plan was:
- Create catering negotiation assistant with dynamic variable placeholders
- Call Lakefront Catering (baseline, no leverage)
- Call Chicago Grill Co (with best quote from call 1)
- Call Prairie Table Events (with best quote so far)
- Compare quotes and recommend best option
Monitor progress in the Portal
You don’t need to watch your agent work. The Telnyx Portal gives you a dashboard view of every mission.Mission overview
Navigate to the AI Missions section in the Telnyx Portal to see all missions, their status, and when they were last updated. The dashboard shows recent runs with result summaries at a glance: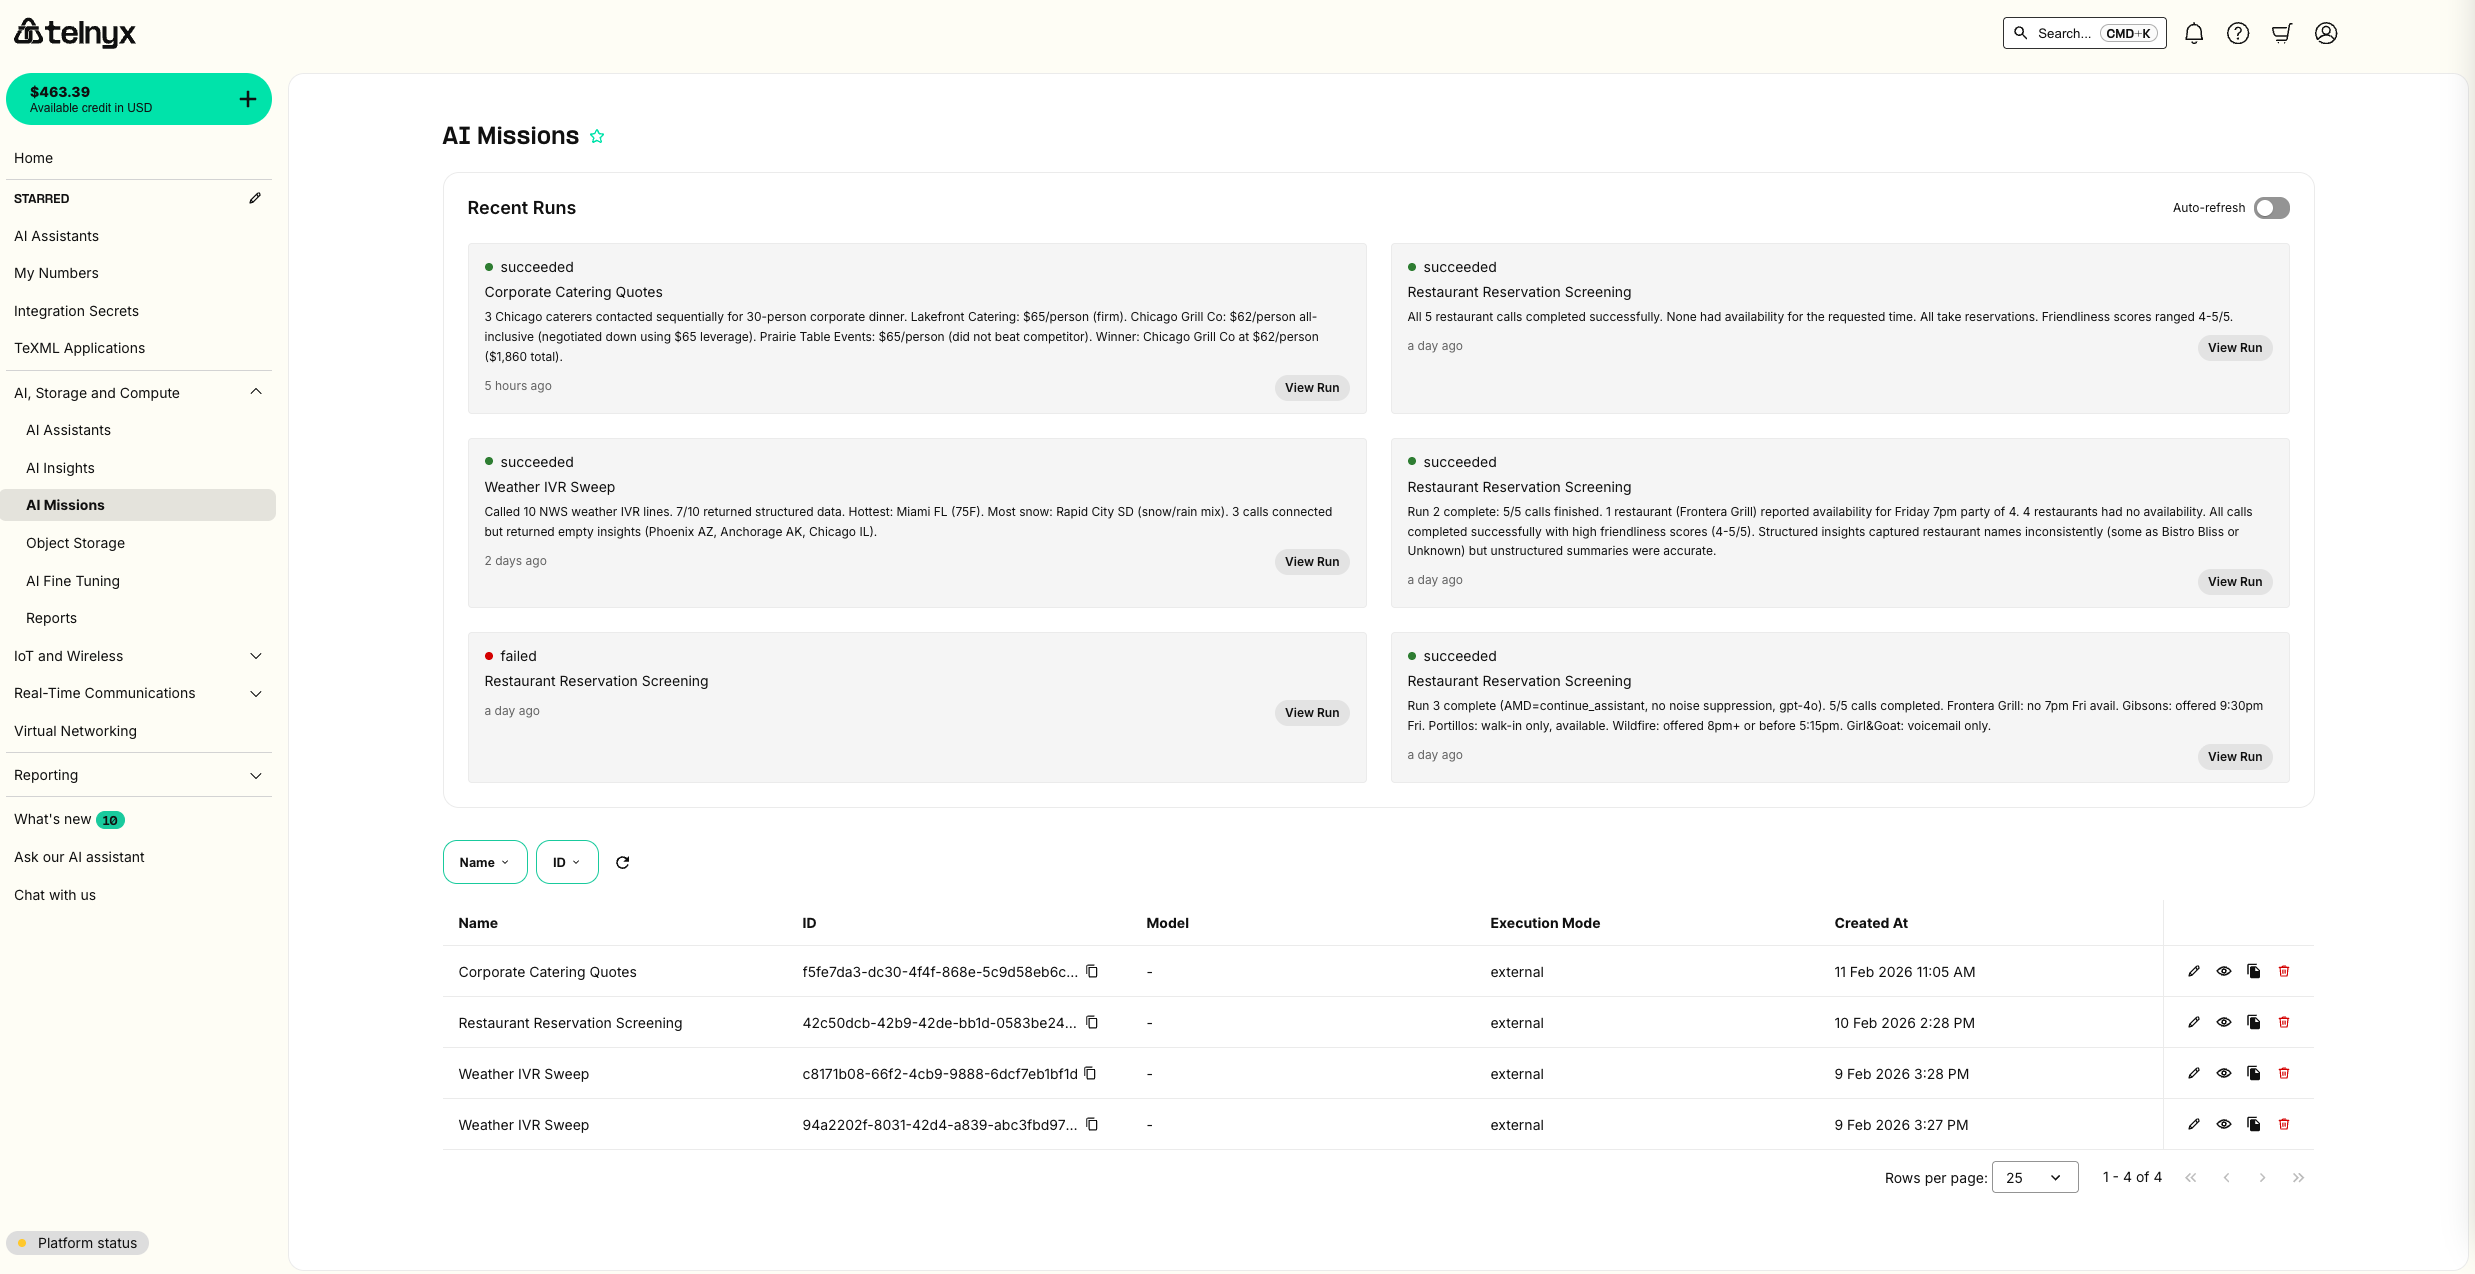
Run details
Click View Run to see the full run detail — status, timing, the original input, and structured result payload. This is where you’ll find the agent’s final analysis: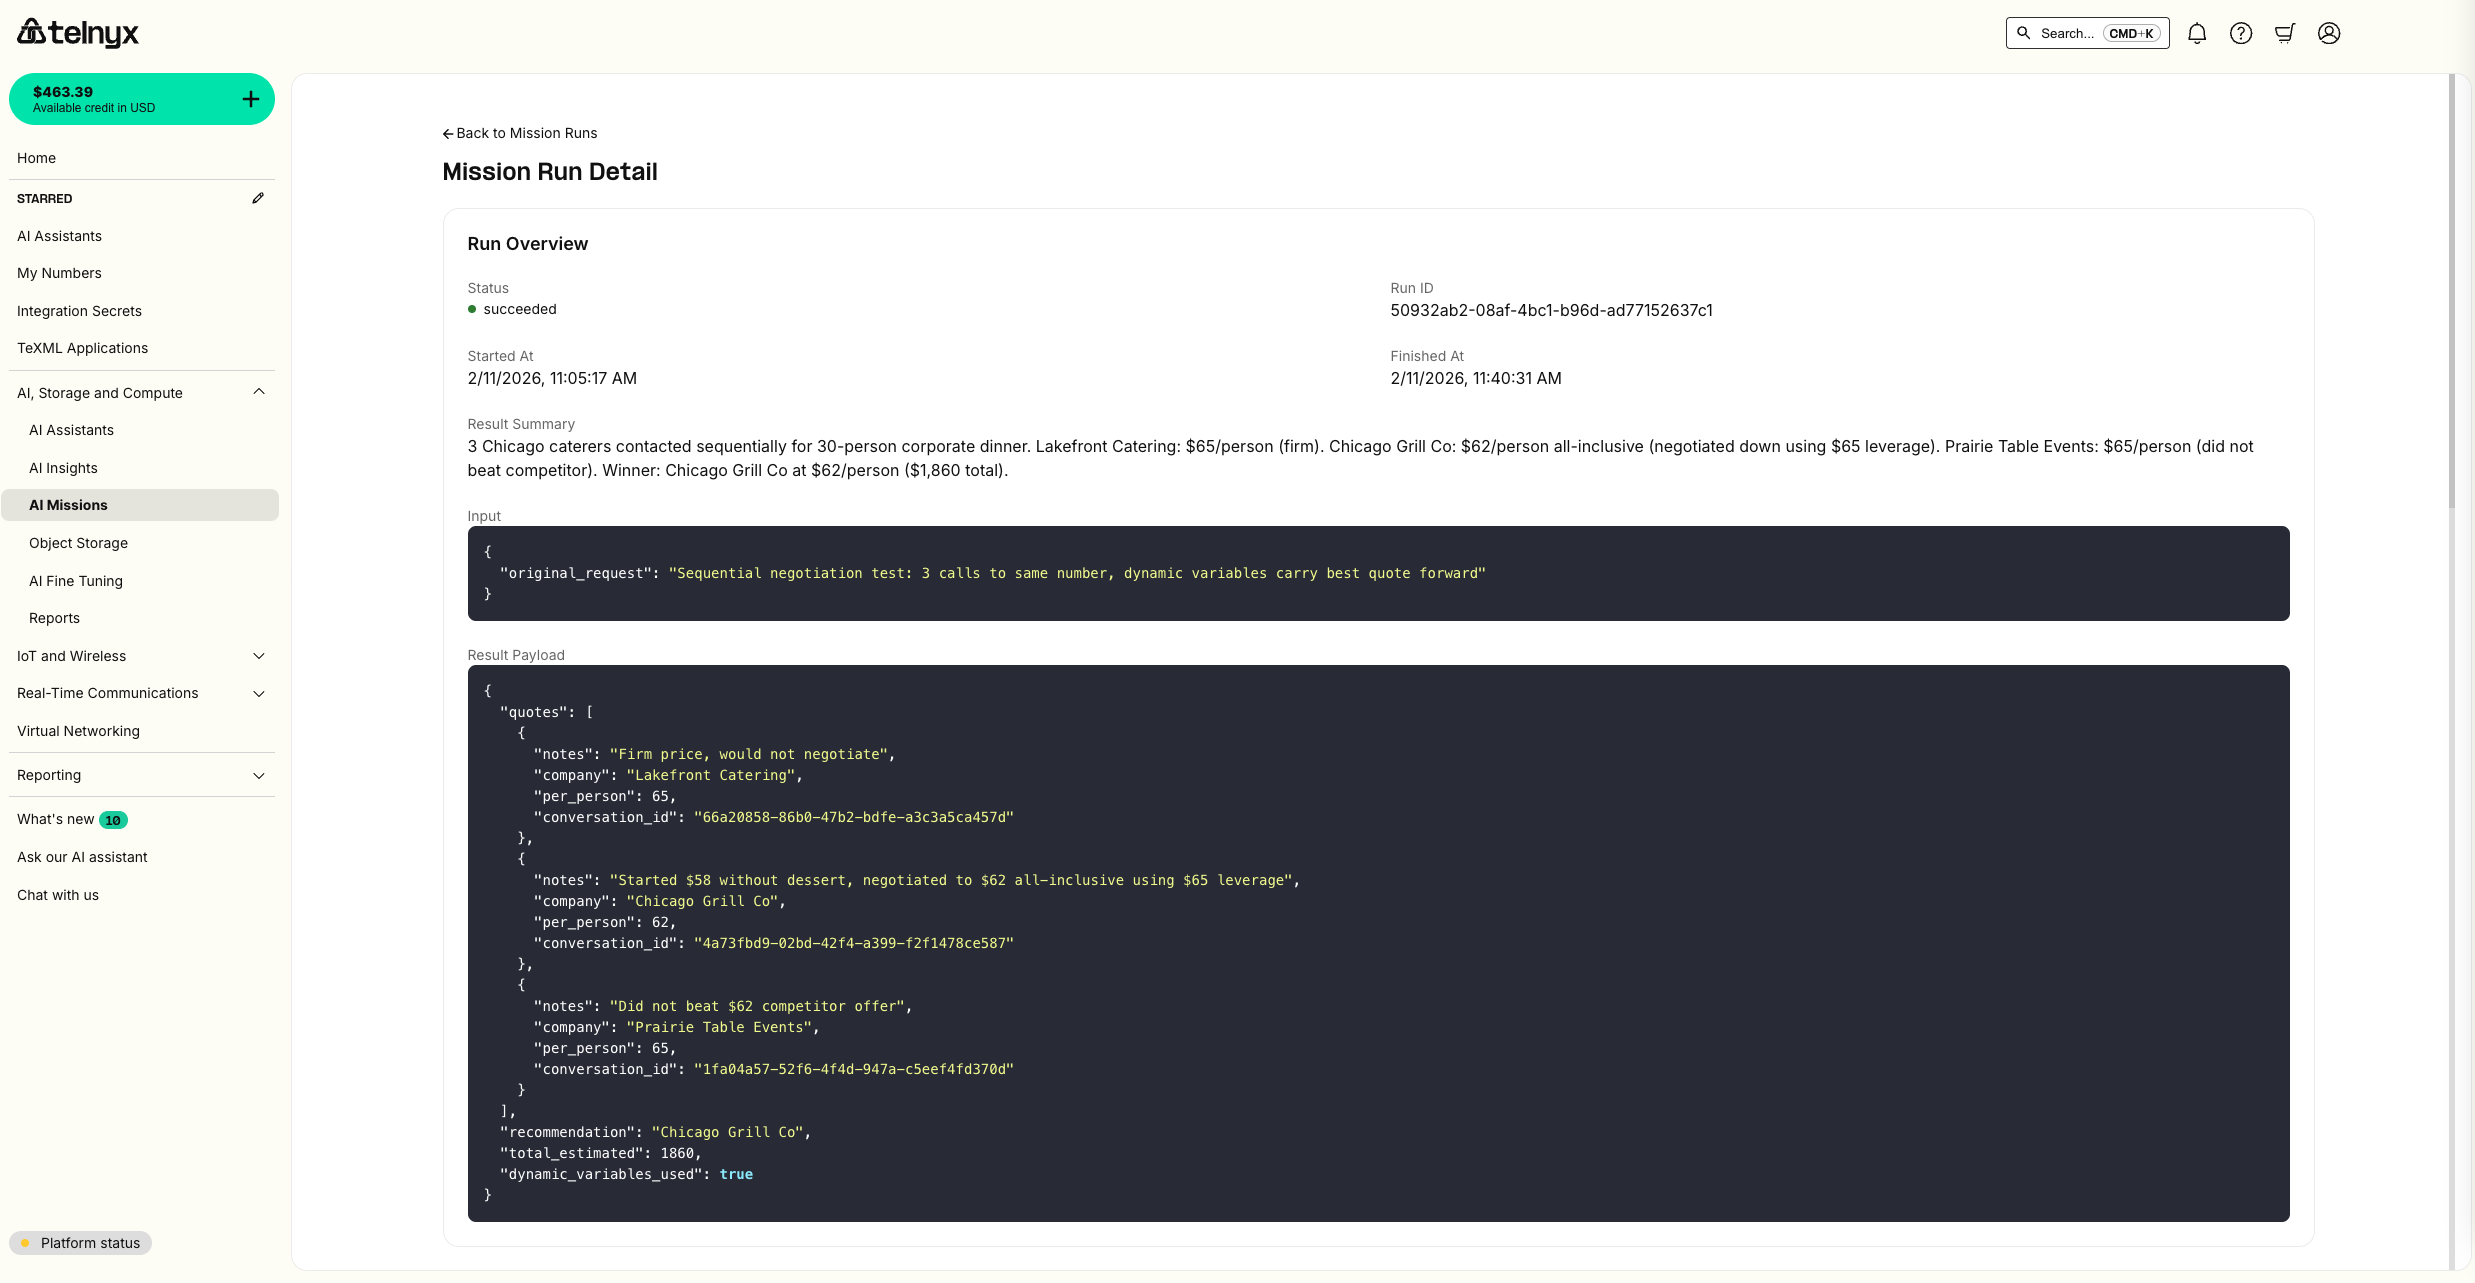
Linked agents and conversation history
Scrolling down, the Portal shows which Telnyx AI Assistants your agent created and linked to the mission run. Below that, you can see every conversation — including which caterer was called, the call channel, and timestamps.Conversation playback
Click any conversation to open the full transcript with audio playback. Here’s the Chicago Grill Co negotiation — watch the agent use the Lakefront’s $65 quote as leverage to negotiate down to $62: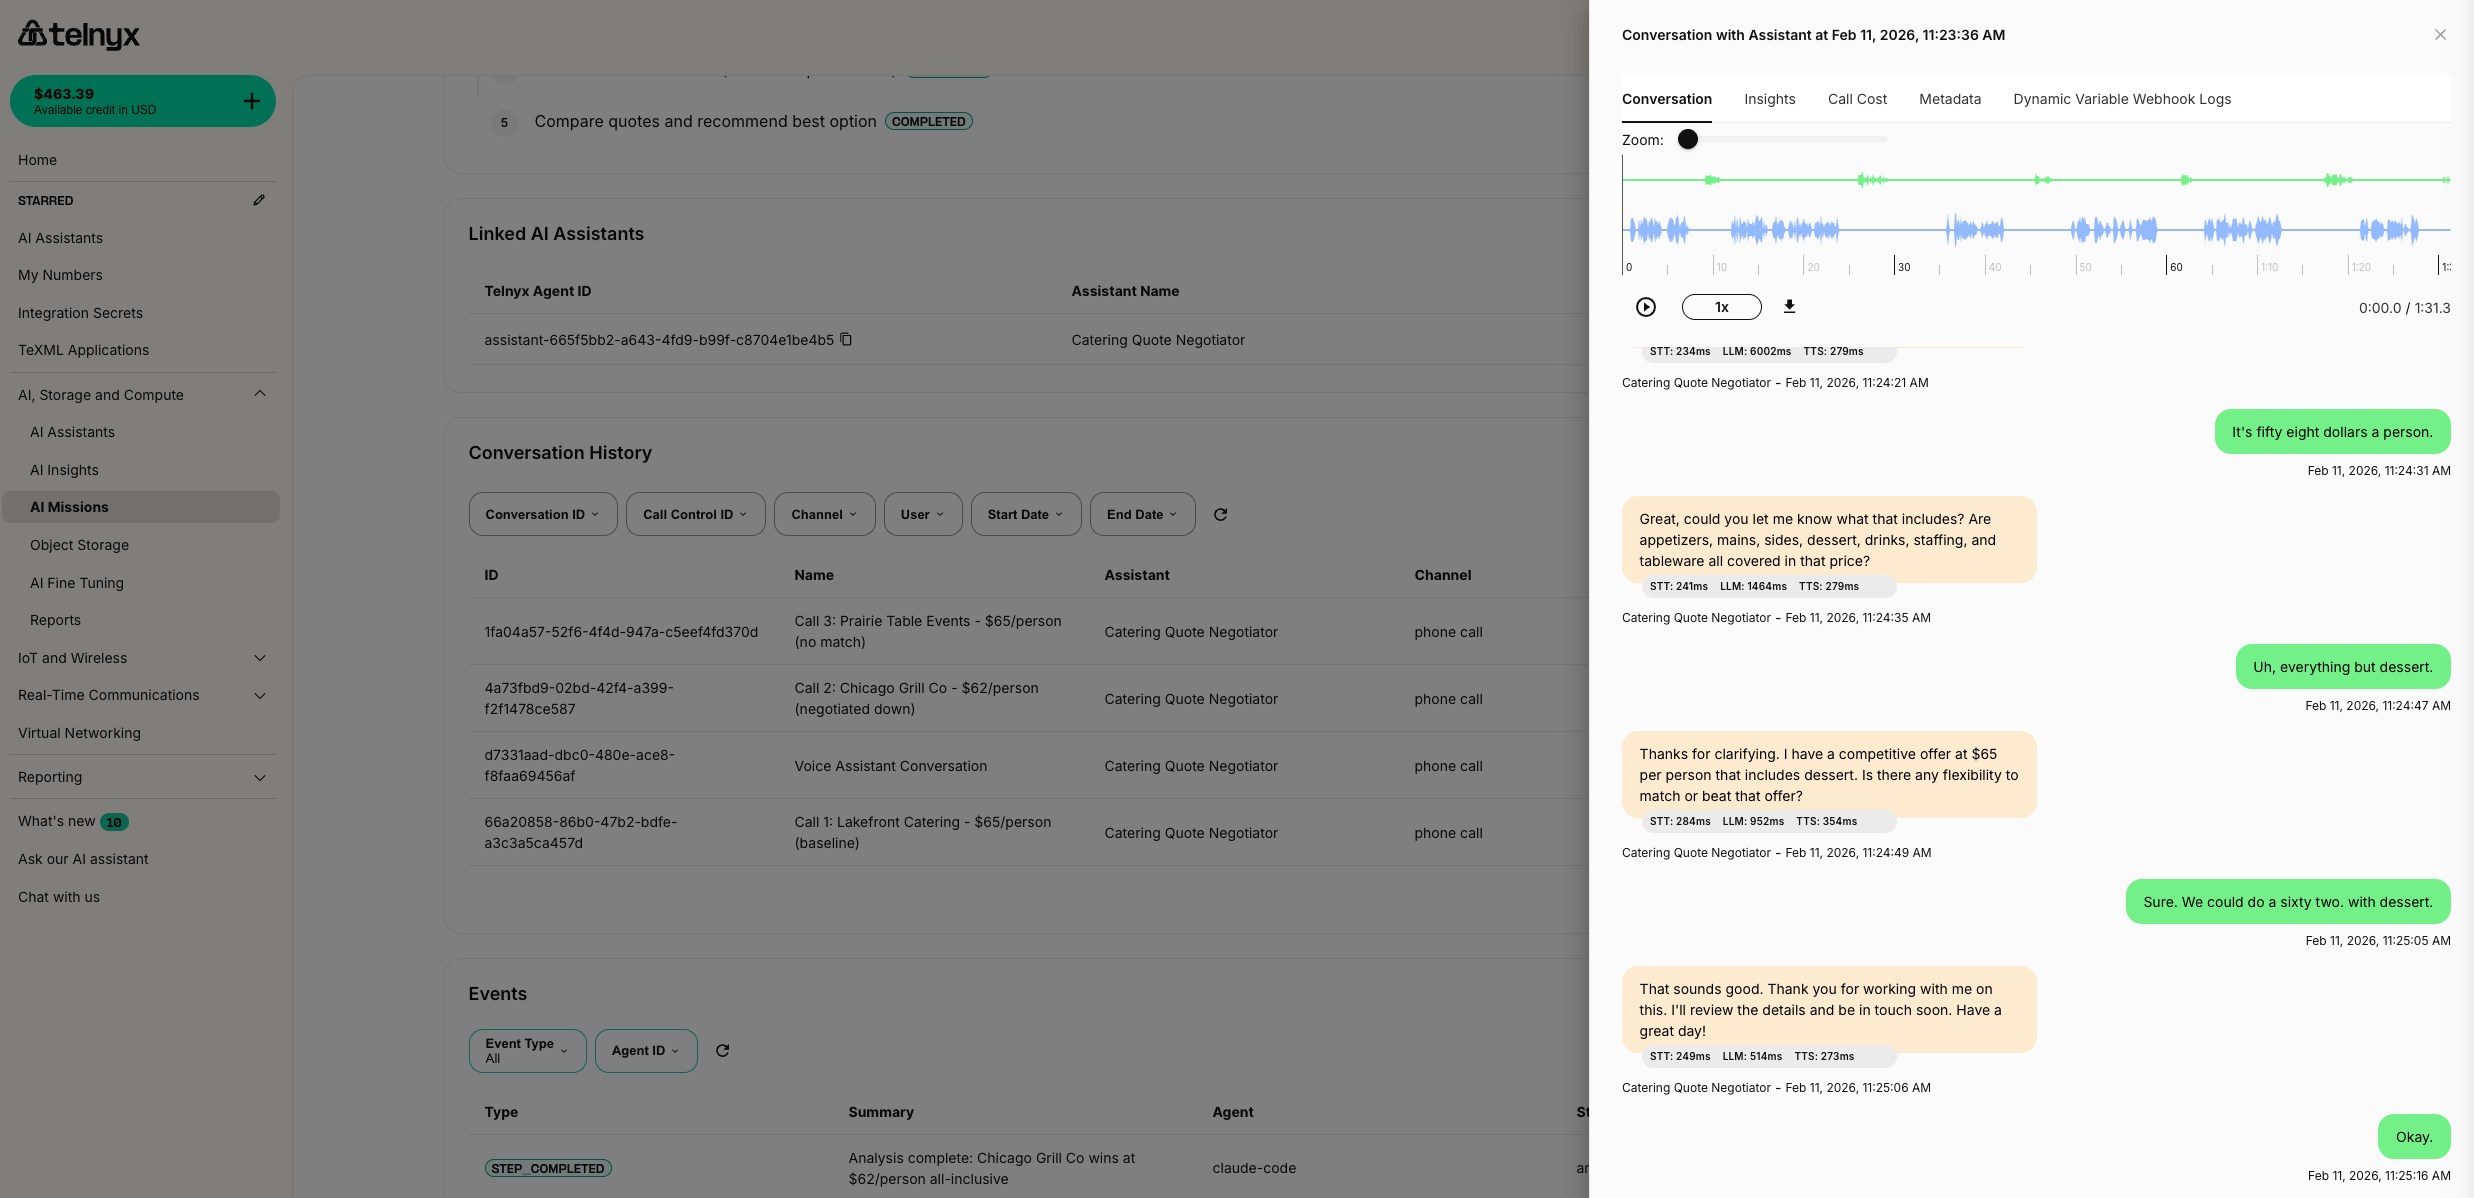
Review call results
After calls complete, your agent captures conversation insights — structured summaries of what was discussed.Conversation insights
For each completed call, the Missions skill can extract structured information using the AI Insights API — pulling out key data points like pricing, availability, and terms into a structured format.The final summary
When all calls are done, your agent compiles everything into a summary with recommendations. Here’s what that looks like for our catering example:Mission Complete: Catering Quote Negotiation Called 3 caterers for a 50-person corporate event:This summary is also stored as the mission’sRecommendation: Chicago Grill Co offers the best value at 150 savings over the baseline for 50 guests.
result_summary and result_payload, so it’s permanently accessible via the API and Portal.
How the voice calls work
Behind the scenes, your agent uses the Telnyx AI Assistants platform to make calls. Here’s what it sets up:Voice assistant creation
The agent creates a Telnyx AI Assistant with:- A system prompt tailored to your specific request (e.g., “You are calling catering companies to negotiate quotes for a 50-person corporate event…”)
- A greeting that opens the conversation naturally (e.g., “Hi, I’m calling to inquire about catering for a corporate event. Do you have a moment?”)
- Dynamic variables that update between calls (e.g., injecting the current best quote before each negotiation call)
- Telephony features enabled for voice calls
Phone number assignment
The agent finds an available phone number from your Telnyx account and assigns it to the assistant’s voice connection. This is the caller ID that businesses will see. You need at least one phone number in your Telnyx account. If none are available, the agent will let you know and link you to the number purchase page.Call scheduling
Calls are scheduled during business hours to maximize the chance of reaching someone. The agent handles timezone awareness and won’t schedule calls at 3 AM.Call monitoring
After scheduling, the agent polls for call completion and retrieves:- Call status — completed, failed, no answer, busy
- Conversation transcript — full text of what was said
- Conversation insights — structured extraction of key data points (quotes, availability, terms)
Tips for effective missions
Be specific in your request
The more detail you give, the better your agent performs:Let the agent plan first
Your agent will create a plan before executing. If you want to review the plan before calls go out, say so:“Find caterers and create a plan, but wait for my approval before making any calls.”
Check the Portal for real-time status
You don’t need to keep chatting with your agent. The Portal shows live progress — check back when you get a notification that the mission is complete.Start small
Try a mission with 2-3 calls first to see how it works. You can always scale up once you’re comfortable with the workflow.What’s next
- AI Missions API Reference — Full API documentation for creating and managing missions programmatically
- AI Assistants — Learn about async tools and advanced assistant configurations
- AI Insights — Extract structured data from conversations
- Telnyx Missions Skill on ClawHub — Install the skill for your OpenClaw agent
Creating insights
Source: https://developers.telnyx.com/docs/inference/ai-insights/creating-insights.mdThis guide walks you through creating individual AI Insights in the Mission Control Portal. You’ll learn how to define analysis instructions, use variables, and configure both normal and structured insights.
Prerequisites
- Access to the Telnyx Mission Control Portal.
- At least one AI Assistant configured (recommended for testing).
Accessing AI Insights
- Log in to the Mission Control Portal.
- Navigate to AI, Storage and Compute > AI Insights.
- You’ll see a list of existing insights with their IDs, names, instructions, and creation dates.
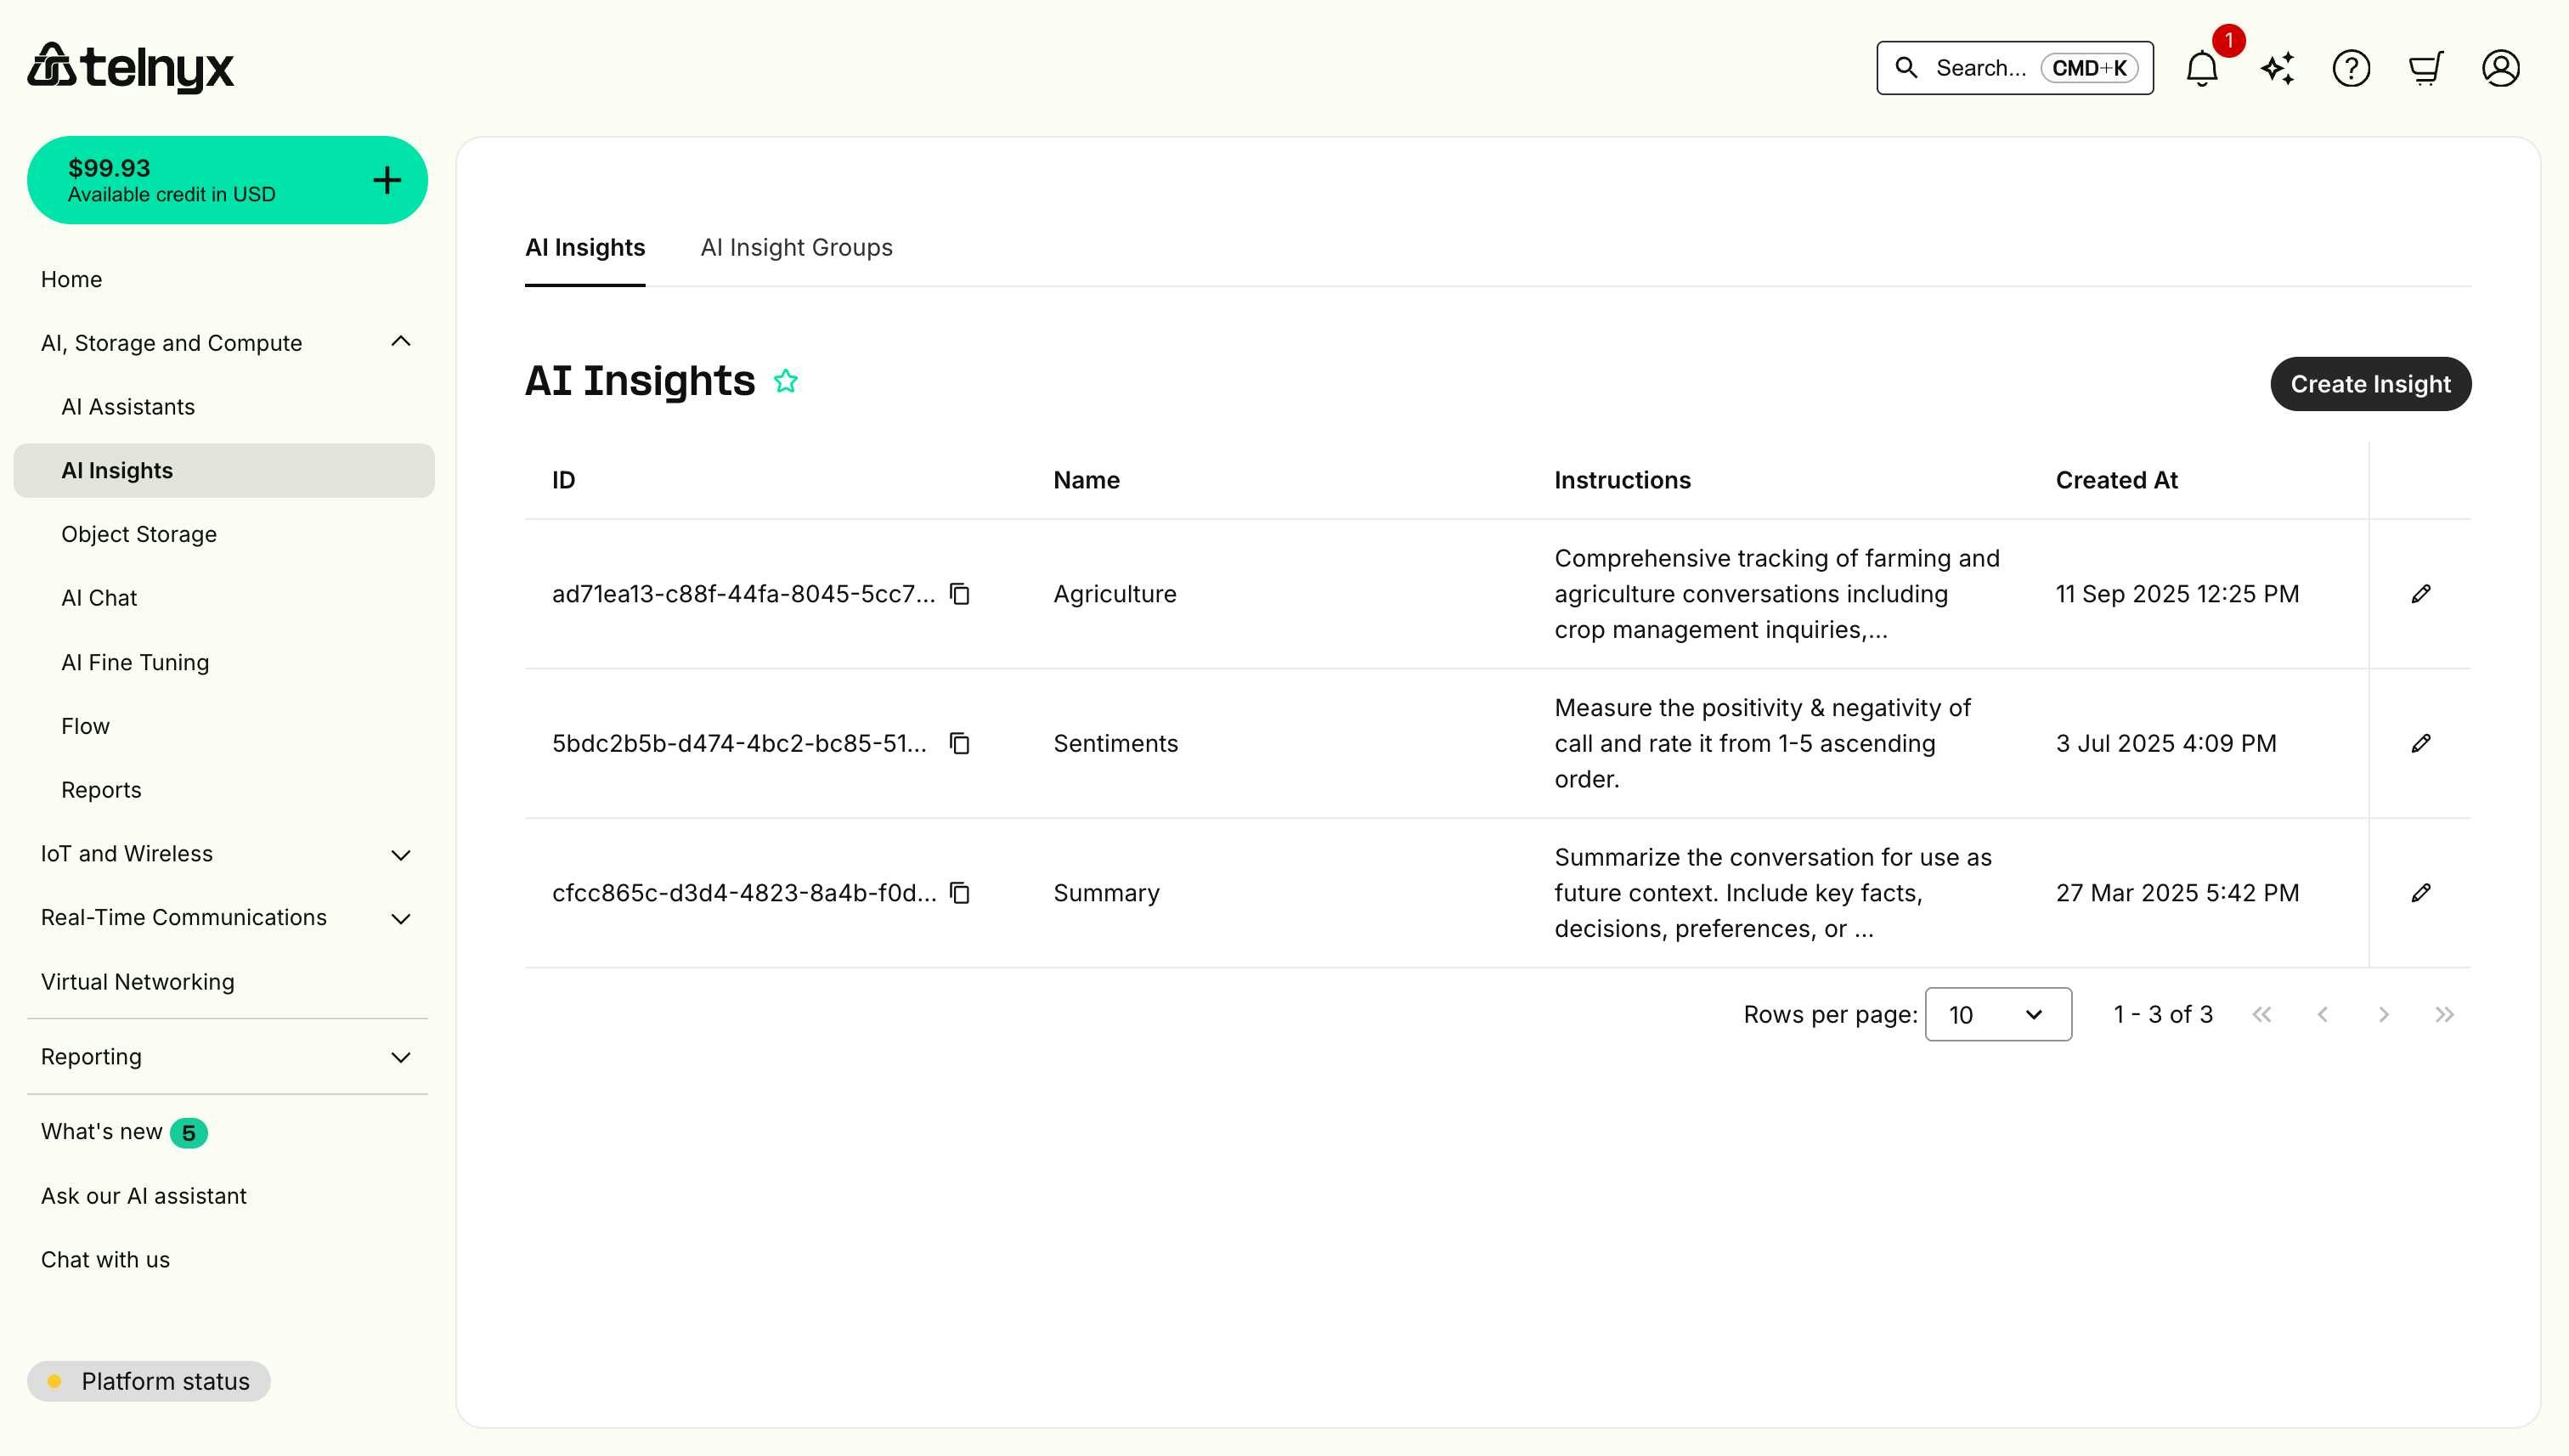
Creating an insight
Insights return free-form text responses based on your instructions.Step 1: Open the create dialog
Click the Create Insight button in the top-right corner of the AI Insights page.Step 2: Configure basic settings
In the Create Insight modal, you’ll see: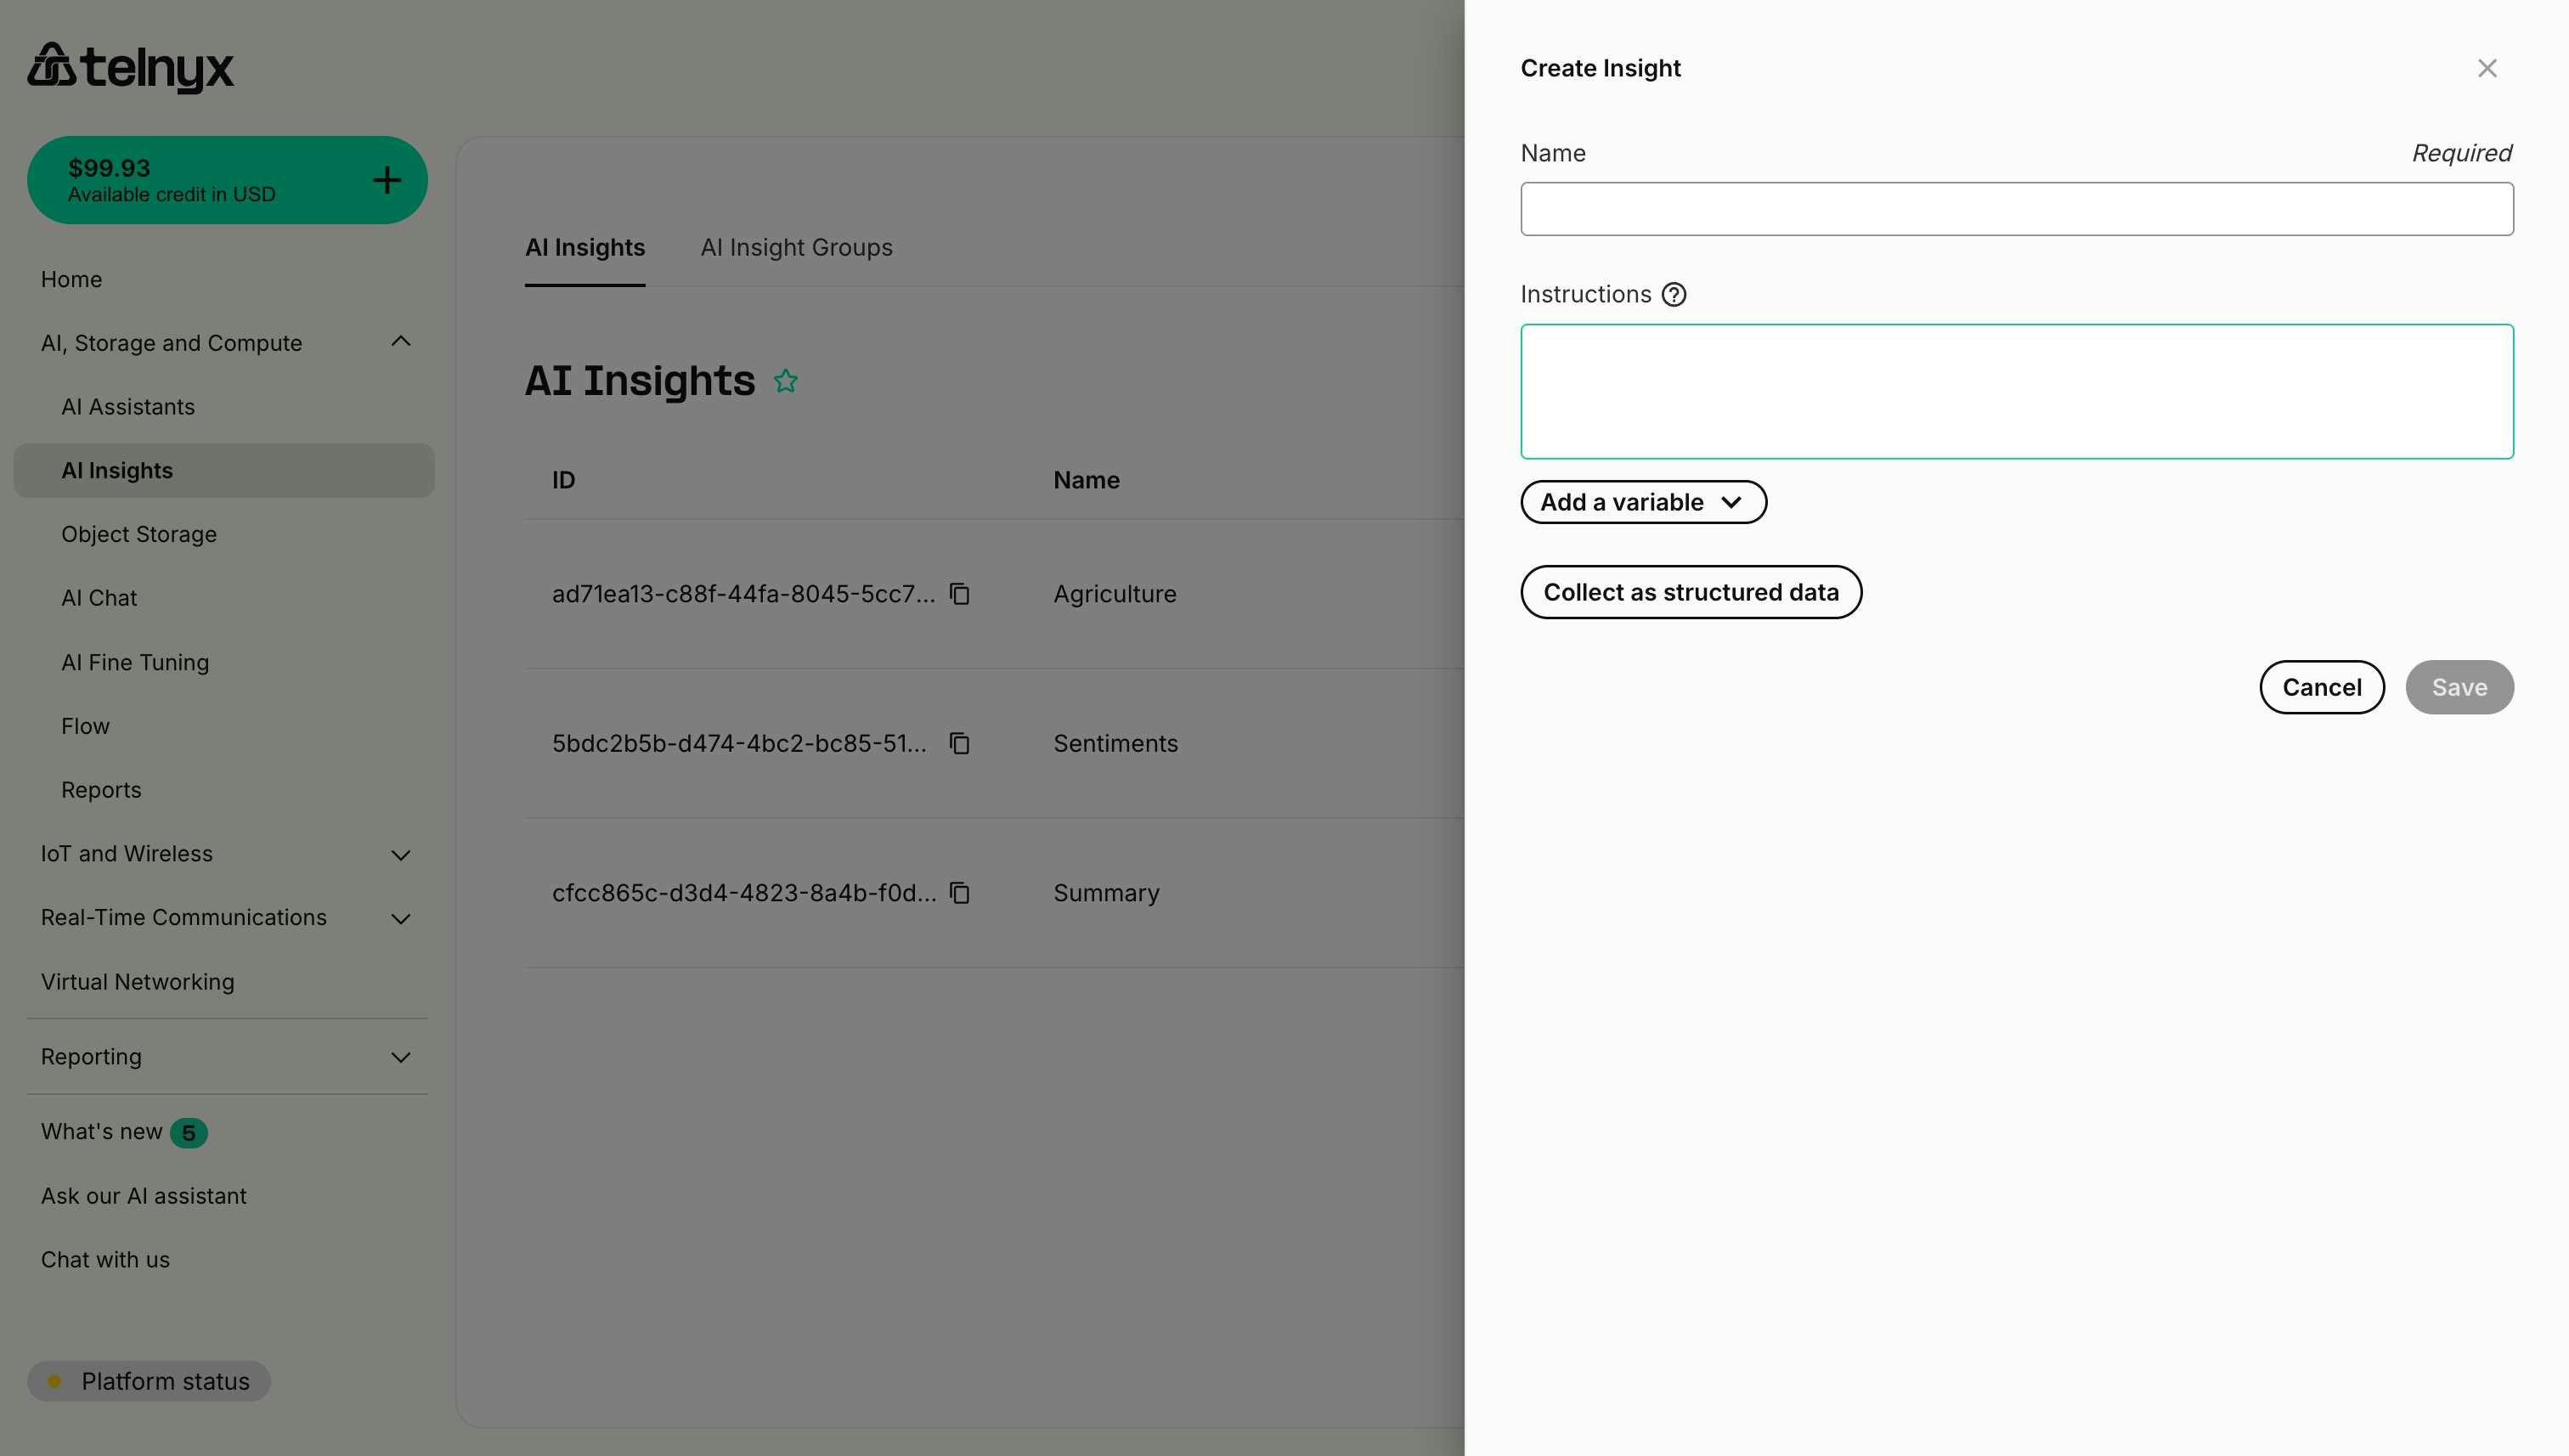
-
Name (Required) - A descriptive identifier for your insight.
- Example: “Conversation Summary”, “Customer Sentiment”, “Issue Classification”.
-
Instructions - Detailed prompt describing what to analyze and extract.
- Be specific about what information you want.
- Include output format expectations.
- Reference conversation elements (transcript, metadata, etc.).
Step 3: Write effective instructions
Good instructions are clear, specific, and actionable. Here are some examples: Example 1: Conversation summaryStep 4: Use variables (optional)
You can include dynamic variables in your instructions to provide context about the specific conversation. Click the Add a variable dropdown to see available options. System variables:{{telnyx_current_time}}- Date and time of the conversation.{{telnyx_conversation_channel}}- Channel type (phone_call, web_call, sms_chat).{{telnyx_agent_target}}- Assistant’s phone number or identifier.{{telnyx_end_user_target}}- User’s phone number or identifier.
Step 5: Save the insight
- Review your configuration.
- Click Save.
- The insight will appear in your insights list.
Managing insights
Editing an insight
- Find the insight in the list.
- Click the edit icon (pencil) on the right side of the row.
- Modify the name or instructions.
- Click Save.
Copying an insight ID
Each insight has a unique ID that you can use with the Memory API or for programmatic access:- Click the copy icon next to the insight ID.
- The ID will be copied to your clipboard.
- Use this ID in API calls or memory queries.
cfcc865c-d3d4-4823-8a4b-f0df57d9f56f
Configuring webhook delivery
You can configure webhook URLs to automatically receive insight results when conversations complete.Via Insight Groups
Set a webhook URL when creating or editing an Insight Group:- Navigate to AI Insight Groups.
- Click Create Insight Group or edit an existing group.
- Enter your webhook URL in the Webhook URL field.
- Save the group.
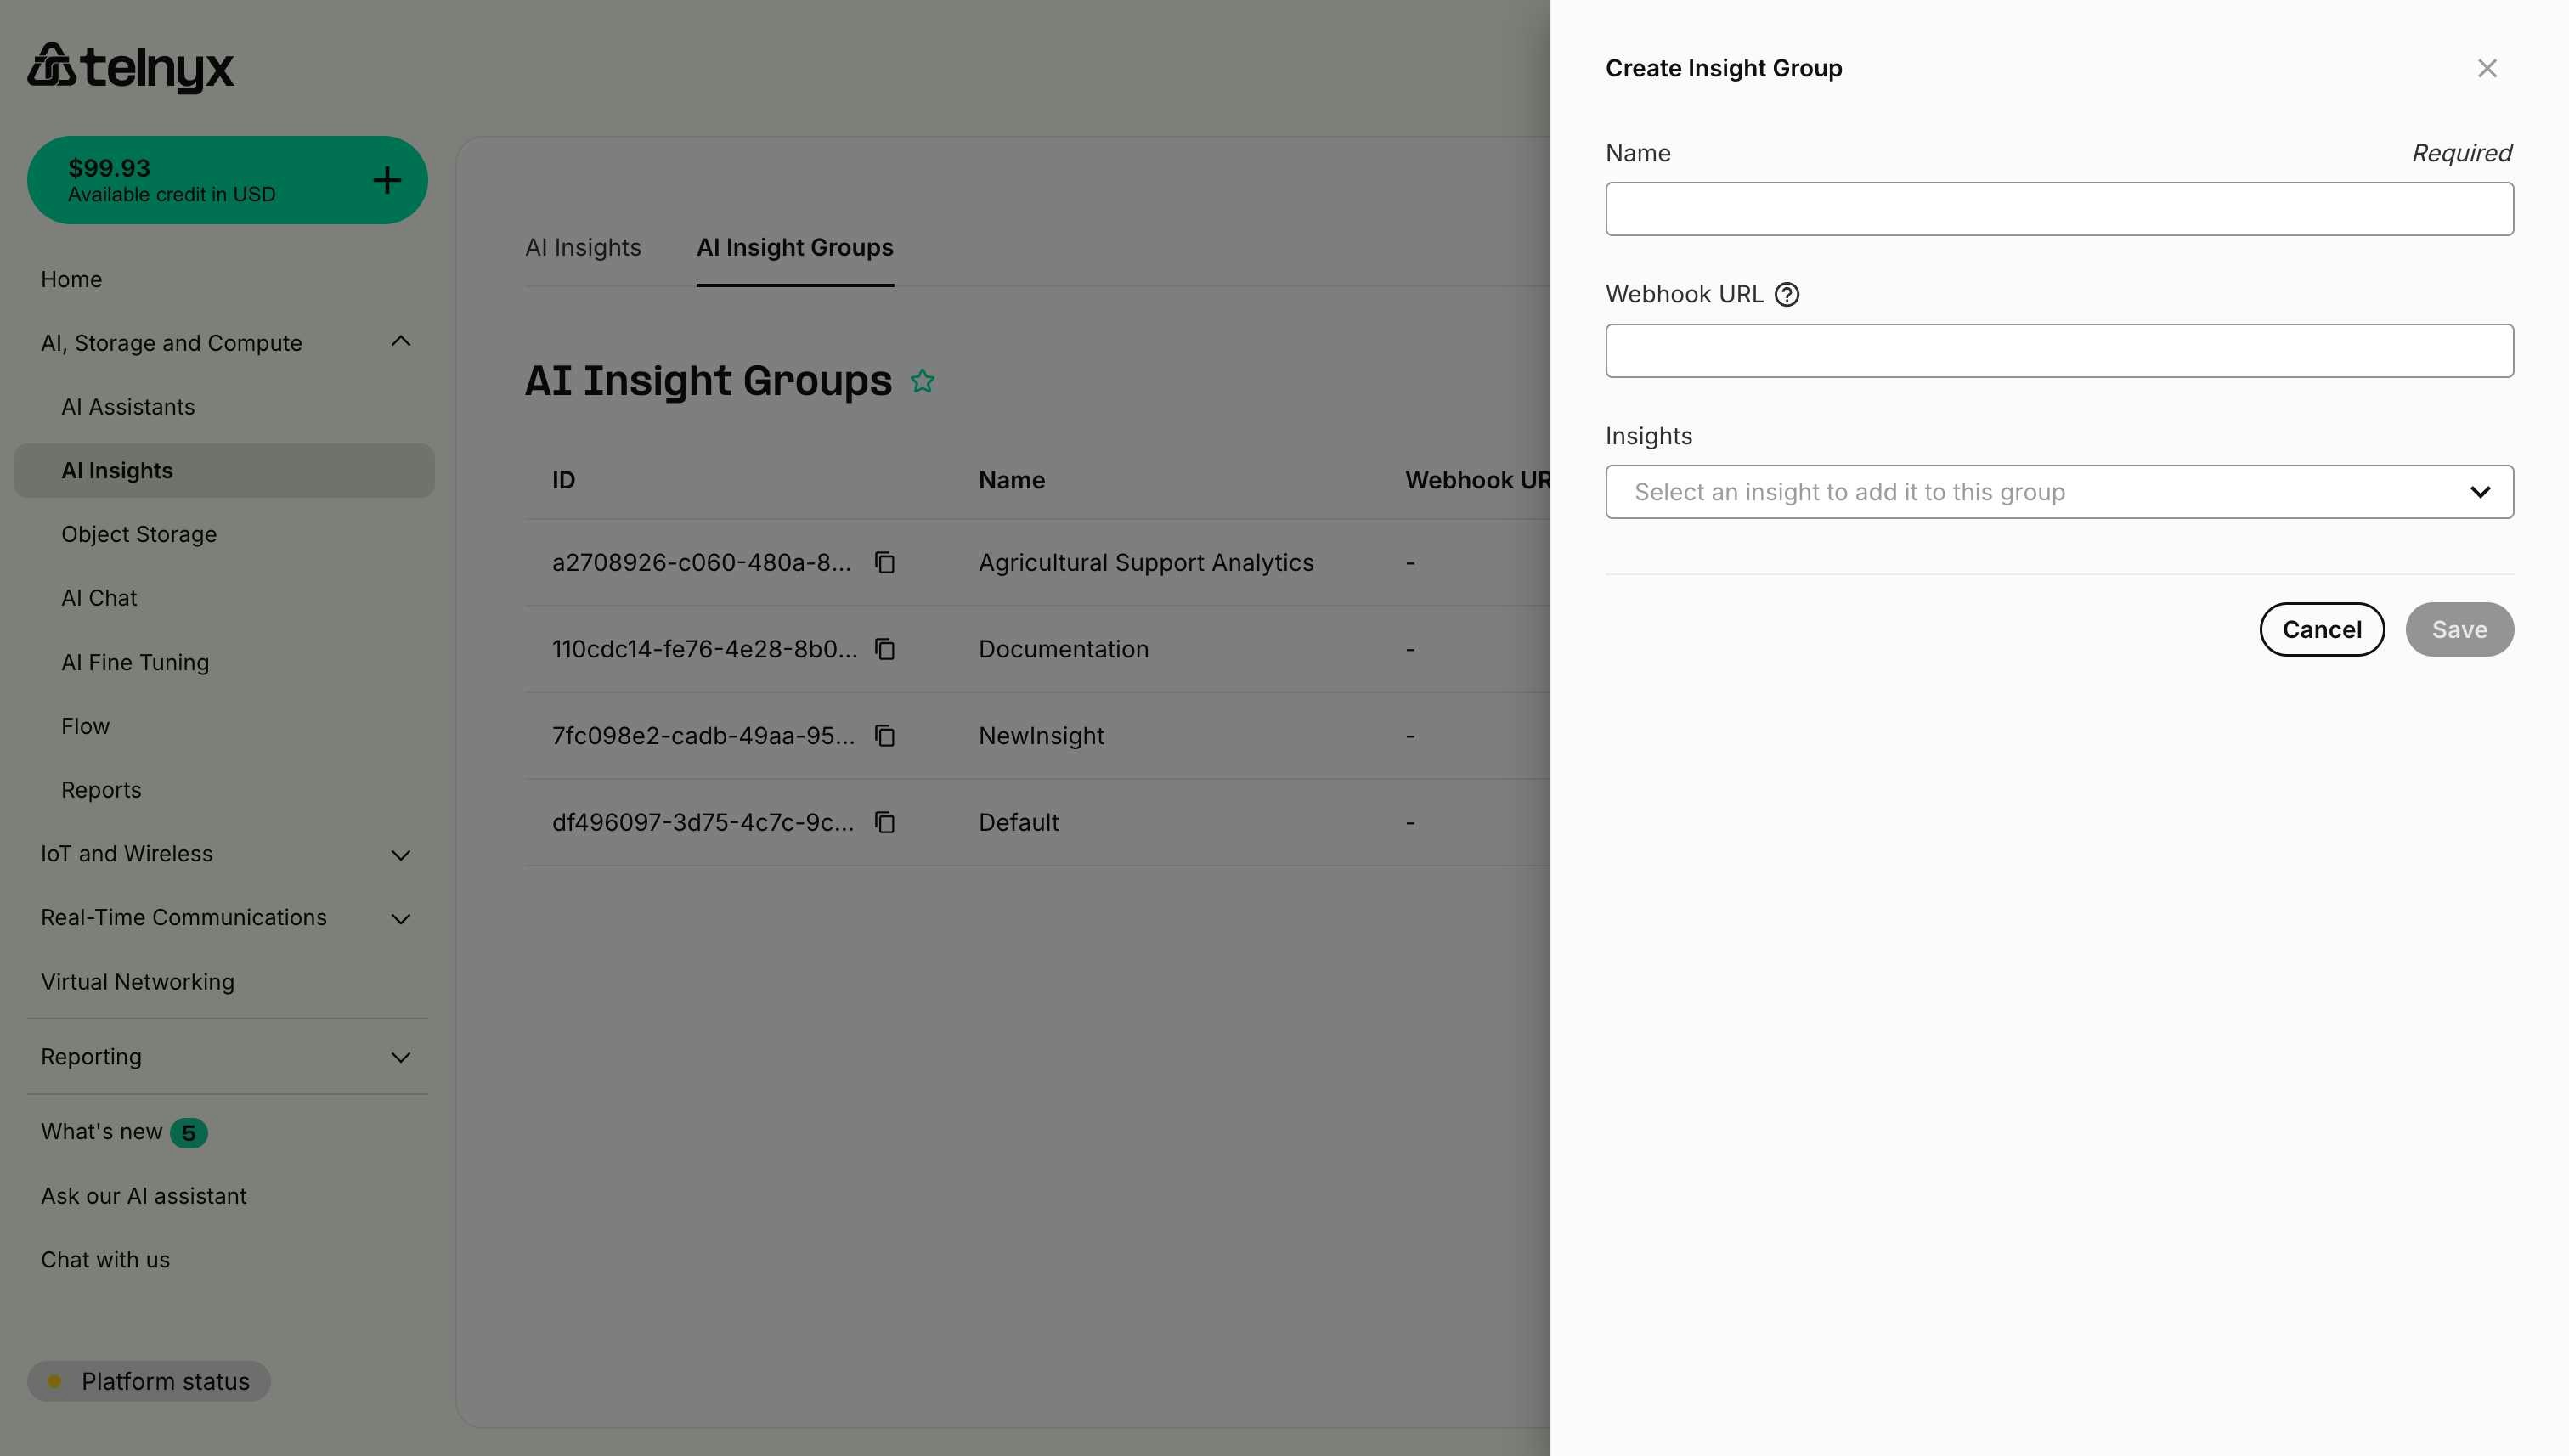
Per assistant override
Override the group’s webhook URL for a specific assistant:- Navigate to your AI Assistant configuration.
- Go to the Analysis tab and select Insights.
- Select an Insight Group.
- Click Edit selected to modify the group settings.
- Enter a different webhook URL for this assistant.
- Save the assistant configuration.
Best practices
Writing clear instructions
-
Be Specific - Clearly state what you want to extract.
- ❌ “Analyze the call”.
- ✅ “Identify the customer’s main complaint and rate the urgency from 1-5”.
-
Define Output Format - Specify how you want the response structured.
- ❌ “Tell me about sentiment”.
- ✅ “Rate sentiment from 1-10 and provide a one-sentence explanation”.
-
Provide Context - Explain why the information matters.
- ❌ “List products mentioned”.
- ✅ “List products the customer showed interest in purchasing, noting their budget concerns”.
-
Use Examples - Show the format you expect
Testing your insights
- Start with Test Conversations - Try your insight on a few sample conversations first.
- Review Results - Check if the extracted information matches your expectations.
- Refine Instructions - Adjust wording based on the results.
- Validate Accuracy - Ensure consistent, reliable extraction across different conversation types.
Naming conventions
Use clear, descriptive names that indicate:- What is being analyzed: “Customer Sentiment”, “Product Interest”, “Issue Type”.
- Why it matters: “Escalation Needed”, “Follow-up Required”, “Compliance Check”.
- Scope: “Healthcare Compliance”, “Sales Qualification”, “Support Quality”.
Next steps
- Use Structured Data - Create insights with consistent JSON schemas.
- Create Insight Groups - Organize insights for your assistants.
- Explore Use Cases - Industry-specific examples.
Related resources
- Dynamic Variables - Custom variables for your insights.
- Memory - Using insight IDs in memory queries.
- Voice Assistant Configuration - Assigning insights to assistants.
Use cases
Source: https://developers.telnyx.com/docs/inference/ai-insights/use-cases.mdThis guide provides complete, industry-specific examples of AI Insights implementations. Each use case includes insight configurations, group organization, webhook integration, and best practices.
Healthcare
Use case: Patient call quality & compliance
Business Need: Ensure regulatory compliance (HIPAA) while monitoring patient interaction quality and identifying follow-up needs.Insight configurations
1. HIPAA compliance check (structured)Insight group configuration
Webhook integration example
Expected results
Customer support
Use case: Support ticket automation & quality monitoring
Business Need: Automatically categorize and route support calls, monitor agent performance, and ensure customer satisfaction.Insight configurations
1. Ticket classification (structured)Insight group configuration
Webhook integration example
Sales
Use case: Lead qualification & pipeline management
Business Need: Automatically qualify inbound leads, score opportunities, and route to appropriate sales representatives.Insight configurations
1. Lead qualification (structured)Insight group configuration
Webhook integration example
E-commerce
Use case: Customer service & order management
Business Need: Handle order inquiries, identify dissatisfaction early, and capture product feedback.Insight configurations
1. Order inquiry classification (structured)Insight group configuration
Webhook integration example
Financial services
Use case: Fraud detection & compliance
Business Need: Identify potential fraud, ensure regulatory compliance, and categorize financial inquiries.Insight configurations
1. Fraud risk assessment (structured)Insight group configuration
Webhook integration example
Best practices across use cases
1. Start with core insights
Begin with 2-3 essential insights:- ✅ Sentiment/satisfaction.
- ✅ Primary classification.
- ✅ Action required.
2. Balance structured and unstructured
Use structured insights for:- Metrics and scores.
- Categories and classifications.
- Boolean flags.
- Summaries and context.
- Open-ended feedback.
- Nuanced analysis.
3. Configure appropriate webhooks
- Real-time action required → Webhook to operational system.
- Analytics only → Webhook to analytics platform.
- Manual review → No webhook, use Portal.
4. Test with real conversations
Before production:- Test insights on 10-20 real conversations.
- Review accuracy of classifications.
- Validate webhook integration.
- Adjust instructions based on results.
5. Monitor and iterate
Track these metrics:- Insight accuracy.
- Webhook delivery success rate.
- False positive/negative rates for classifications.
- Time to process insights.
6. Secure sensitive data
For regulated industries:- Use HTTPS for all webhooks.
- Implement proper authentication.
- Encrypt data at rest.
- Maintain audit logs.
- Follow industry-specific compliance requirements.
Related resources
- Voice Assistant Quickstart - Set up your AI assistant.
- Memory API - Use insights in conversation memory.
- API Reference - Programmatic insights access.
Structured insights
Source: https://developers.telnyx.com/docs/inference/ai-insights/structured-insights.mdStructured insights extract data in a predefined JSON schema format, providing consistent, machine-readable results perfect for analytics, dashboards, and downstream processing.
When to use structured insights
Choose structured insights when you need:- Quantitative Metrics - Scores, ratings, counts, percentages.
- Categorical Data - Status values, types, priorities, classifications.
- Boolean Flags - Yes/no decisions, presence checks, compliance indicators.
- Consistent Format - Data that feeds into databases, dashboards, or analytics systems.
- Multiple Related Fields - Complex data with multiple attributes.
Creating a structured insight
Step 1: Start creating an insight
- Navigate to AI Insights in the Portal.
- Click Create Insight.
- Enter a name and basic instructions.
Step 2: Enable structured data mode
Click the Collect as structured data button to reveal the schema configuration interface.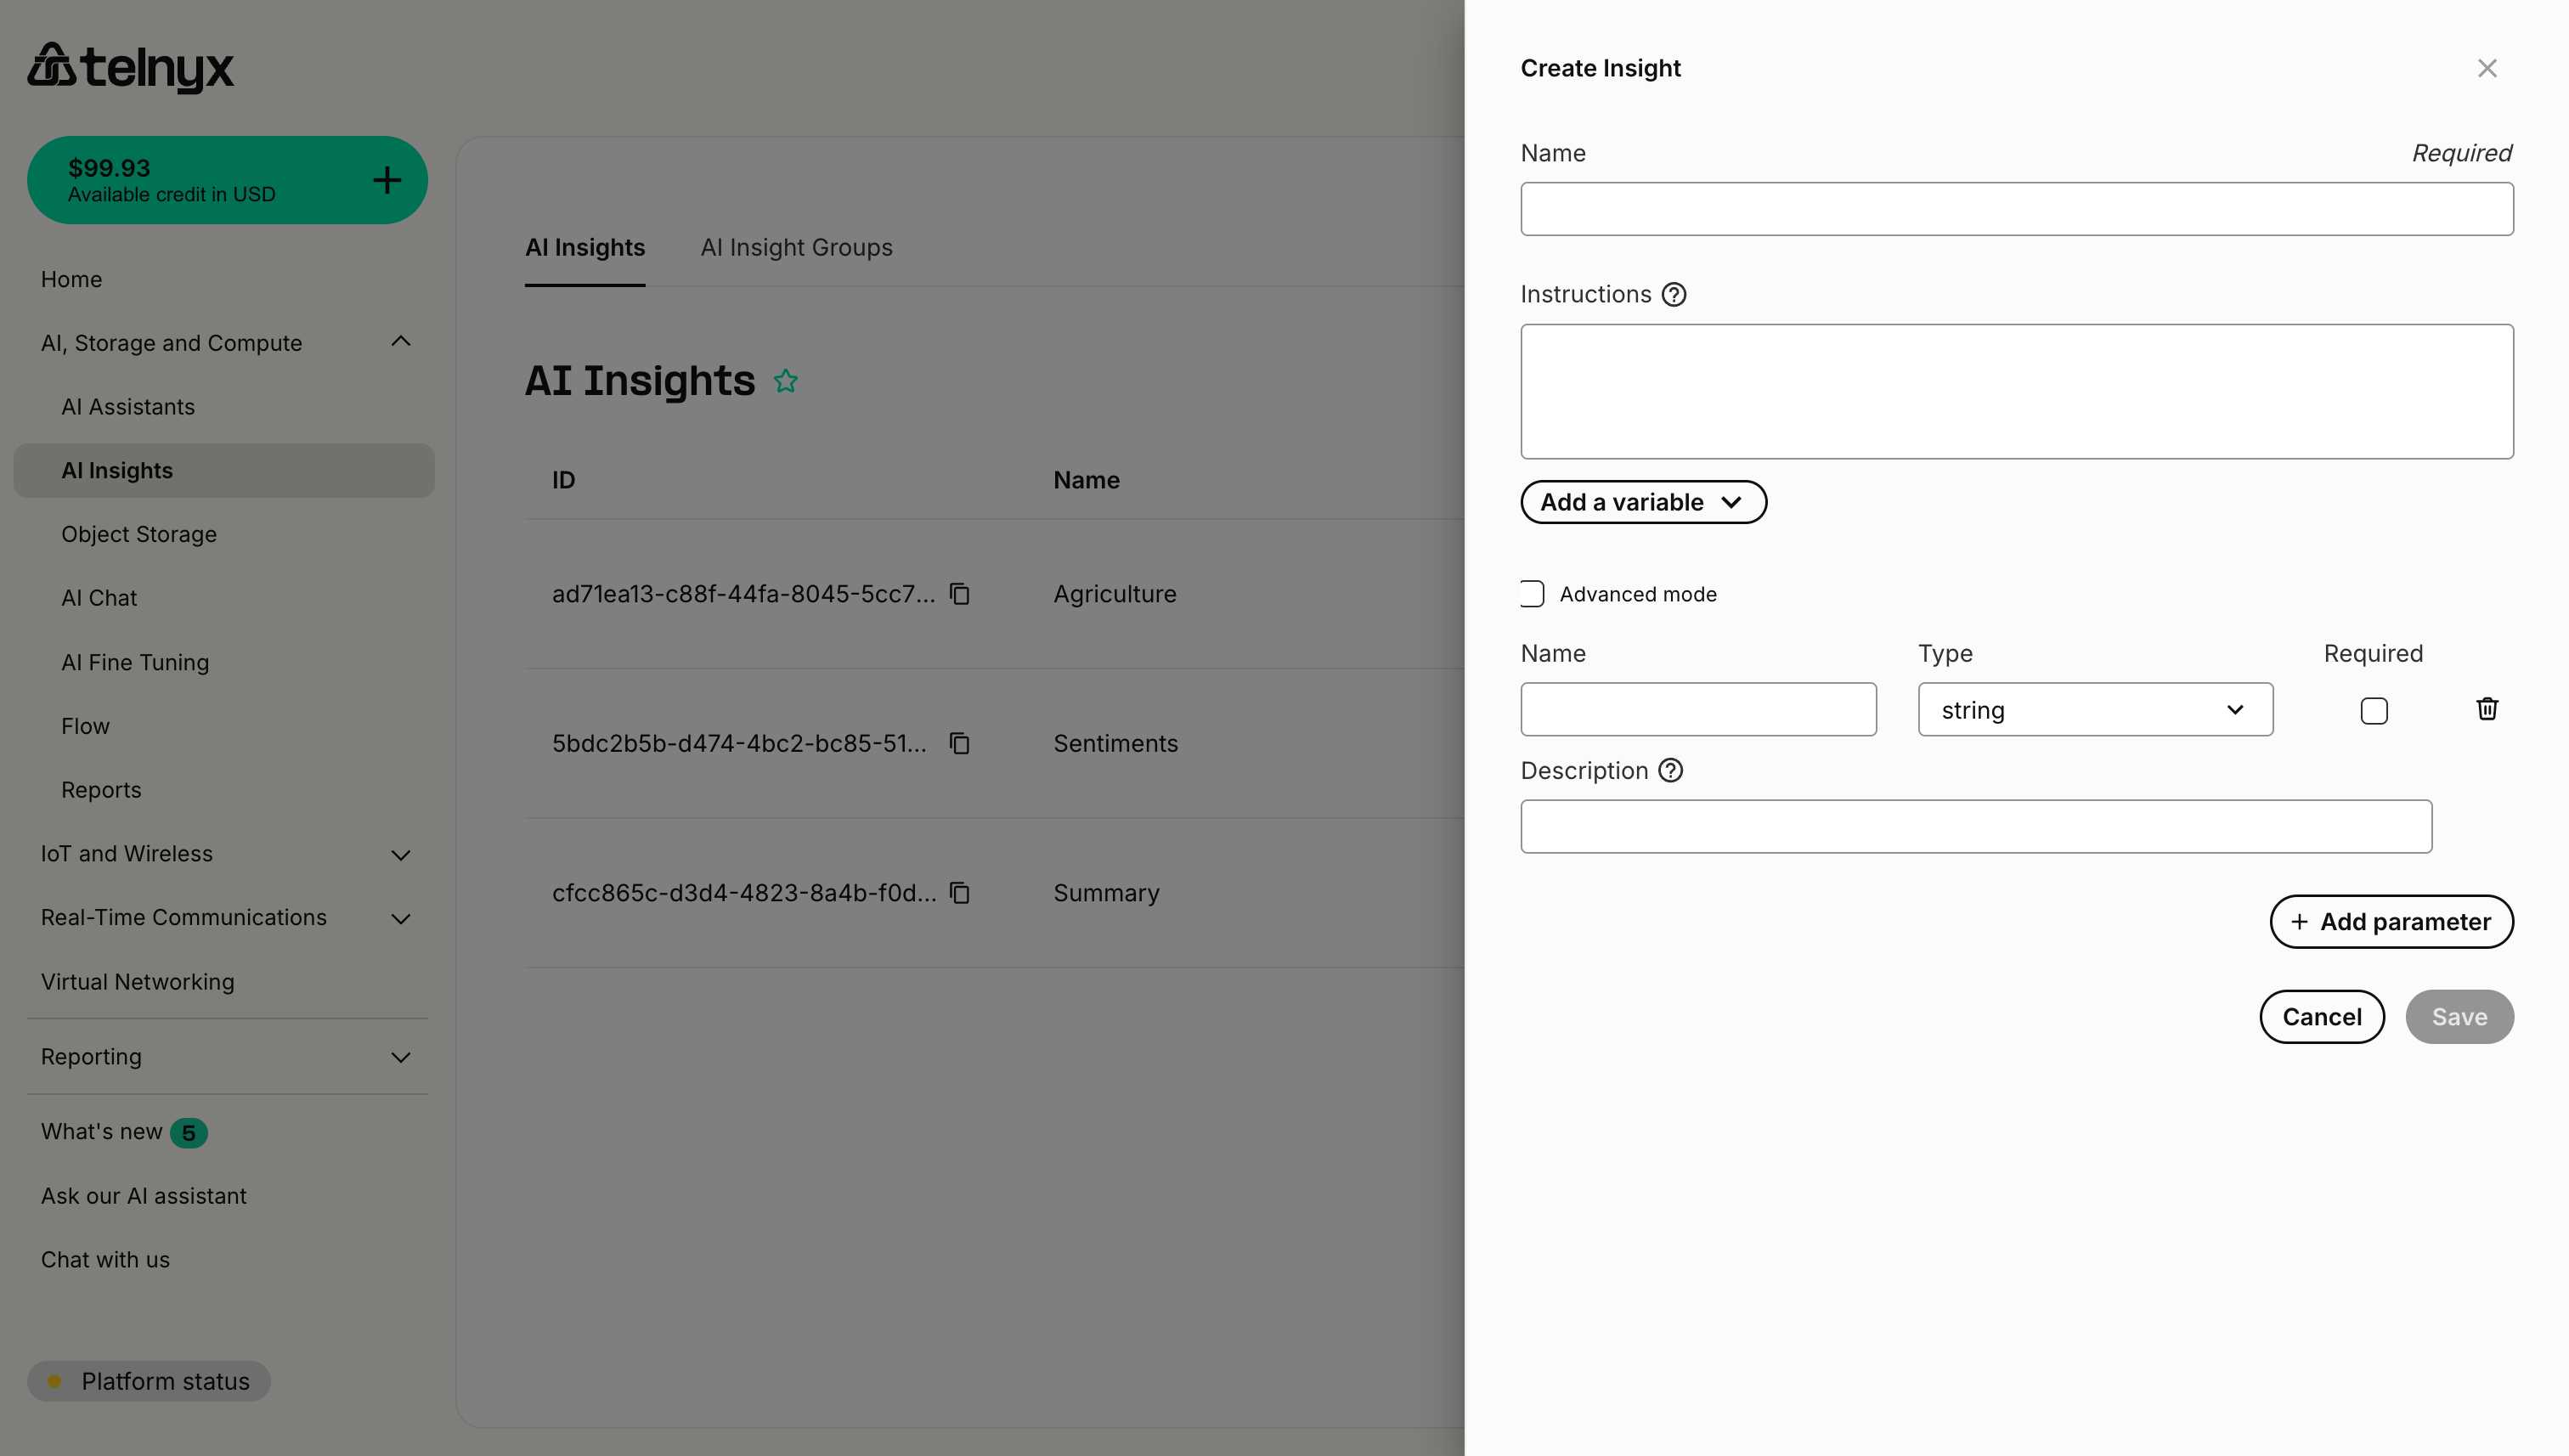
Step 3: Define parameters
For each piece of data you want to extract, add a parameter with:- Name - The field name in the JSON output (e.g.,
sentiment_score,issue_type). - Type - The data type (string, number, boolean, etc.).
- Required - Whether this field must always be present.
- Description - Instructions for extracting this specific field.
Parameter types
String
Text values - use for categories, descriptions, identifiers. Example:Enum
Predefined categories - use when you have a fixed set of possible values. The AI agent will select one value from your provided list. Example:Number
Numeric values - use for scores, ratings, counts, percentages. Example:Integer
Whole number values - use when you need integers without decimals (counts, quantities, IDs). Example:integer instead of number when you specifically need whole numbers. This provides clearer intent and can help the AI agent avoid returning decimal values.
Boolean
True/false values - use for flags, presence checks, yes/no decisions. Example:Array
Lists of values - use for multiple items of the same type. Example:Array (string)
Lists of text values - use for multiple string items with enforced type safety. Example:Array (number)
Lists of numeric values - use for multiple numbers with enforced type safety. Example:Array (boolean)
Lists of true/false values - use for multiple boolean flags with enforced type safety. Example:array type. Use them when you know all elements will be of the same specific type.
Object
Nested structures - use for complex related data. Example:Complete examples
Example 1: Sentiment analysis
Configuration:Example 2: Sales qualification
Configuration:Example 3: Support ticket categorization
Configuration:Advanced mode
Enable Advanced mode (checkbox at the top of the structured data section) to access additional schema configuration options:- Custom validation rules.
- Enum constraints for string values.
- Min/max constraints for numbers.
- Pattern matching for strings.
- Nested object definitions.
Best practices
1. Keep schemas focused
Don’t try to extract everything in one insight. Create multiple focused insights instead:- ✅ Separate insights for “Sentiment” and “Issue Classification”
- ❌ One massive insight trying to capture sentiment, classification, entities, summary, etc.
2. Make instructions clear
Each parameter’s description should be crystal clear:3. Use enums for categories
When you have a fixed set of categories, use the enum type instead of listing values in a string description: ❌ Less effective (using string with description):4. Mark optional appropriately
Only mark fields as required if they should always be extractable:- Required:
overall_sentiment- should always be detectable - Optional:
competitor_mentioned- may not come up in every conversation
5. Provide value ranges
For numeric fields, specify the range:6. Test with edge cases
Test your structured insights with:- Very short conversations.
- Conversations where some information is missing.
- Ambiguous or unclear discussions.
- Multiple topics in one conversation.
Next steps
- Create Insight Groups - Organize your structured insights.
- Explore Use Cases - Industry-specific structured insight examples.
Related resources
- Creating Insights - Basic insight creation.
- Insight Groups - Organizing insights.
- API Reference - Programmatic access to insights.
Insight groups
Source: https://developers.telnyx.com/docs/inference/ai-insights/insight-groups.mdInsight Groups allow you to organize related insights into collections that can be assigned to AI Assistants and configured with webhook delivery. Groups provide a modular, reusable approach to conversation analysis.
Overview
An Insight Group is a named collection of insights with optional webhook configuration. Key features:- Reusable - Assign the same group to multiple assistants.
- Modular - Mix and match insights across different groups.
- Flexible Delivery - Configure unique webhook URLs per group.
- Organized - Group insights by use case, department, or business function.
Accessing insight groups
- Log in to the Mission Control Portal.
- Navigate to AI, Storage and Compute > AI Insights.
- Click the AI Insight Groups tab.
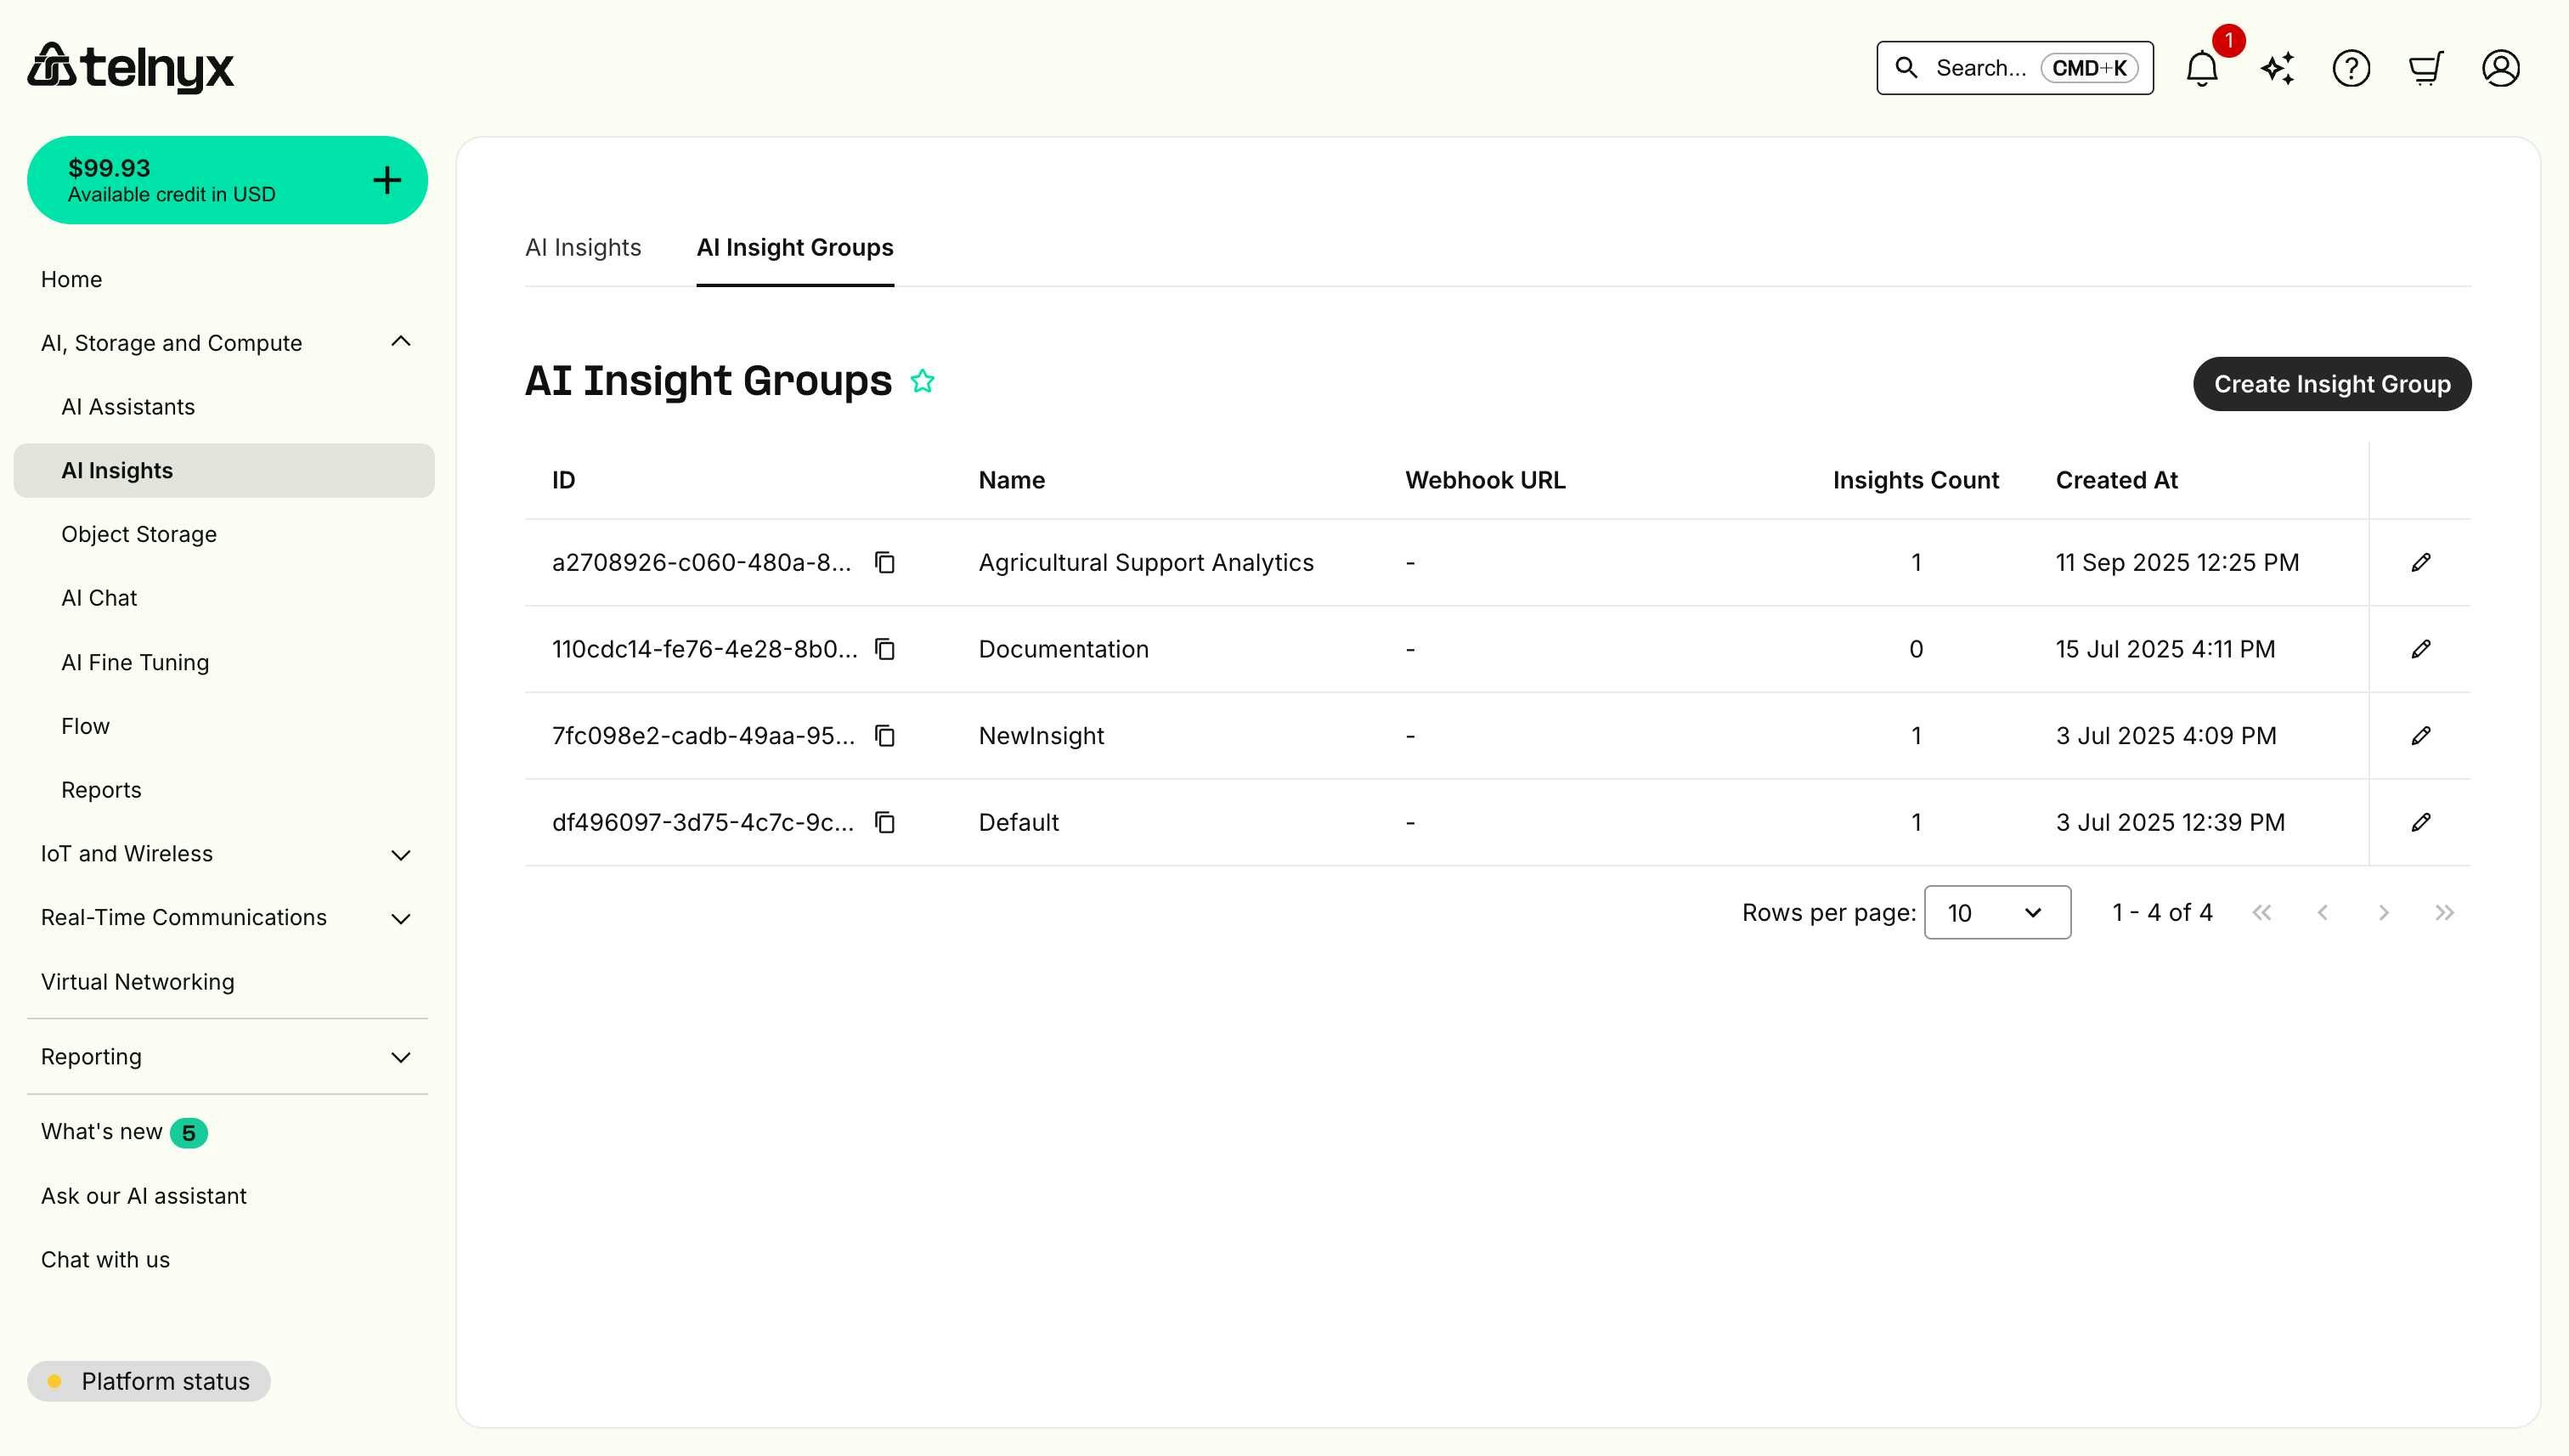
- ID - Unique identifier for the group (copyable).
- Name - Group name.
- Webhook URL - Configured webhook endpoint (or ”-” if none).
- Insights Count - Number of insights in the group.
- Created At - When the group was created.
Creating an insight group
Step 1: Open the create dialog
Click the Create Insight Group button in the top-right corner.Step 2: Configure the group
Name (required)
A descriptive name that indicates the group’s purpose. Examples:- “Customer Service Analytics”.
- “Sales Qualification Metrics”.
- “Healthcare Compliance Checks”.
- “E-commerce Customer Insights”.
- “Support Ticket Classification”.
- Use clear, business-oriented names.
- Include the use case or department.
- Avoid generic names like “Group 1” or “Test Group”.
Webhook URL (optional)
The HTTPS endpoint where insight results will be sent after each conversation. Format:https://your-domain.com/webhooks/insights
When to use:
- You want real-time insight delivery to your application.
- You’re building dashboards or analytics systems.
- You need to trigger actions based on insights.
- You’re integrating with external systems.
- You only need to view insights in the Portal.
- You’re using the API to fetch insights on-demand.
- You’re still testing and refining your insights.
Insights (multi-select)
Select which insights to include in this group:- Click the Select an insight dropdown.
- Search or browse available insights.
- Click to add an insight to the group.
- Repeat to add multiple insights.
- Add multiple insights to one group.
- Use the same insight in multiple groups.
- Create groups with a single insight.
- Modify group membership after creation.
Step 3: Save the group
- Review your configuration.
- Click Save.
- The group will appear in the Insight Groups list.
Example configurations
Example 1: Customer support group
Example 2: Sales qualification group
Example 3: Compliance monitoring group
Example 4: Quality assurance group
Managing insight groups
Editing a group
- Find the group in the list.
- Click the edit icon (pencil) on the right.
- Modify name, webhook URL, or insights.
- Click Save.
Copying a group ID
Each group has a unique ID for API access:- Click the copy icon next to the group ID.
- The ID will be copied to your clipboard.
a2708926-c060-480a-8631-041cb7304117
Assigning groups to assistants
Via portal (during assistant creation)
When creating or editing an AI Assistant:- Navigate to the Insights under Analysis tab.
- Select an Insight Group from the dropdown.
- Save the assistant configuration.
Via API
Use theinsight_settings field when creating or updating an assistant:
Using insights from groups
In conversation history
View insight results in the conversation history:- Navigate to AI Assistants > select an assistant.
- Go to the Conversation History under Analysis tab.
- Click on a conversation.
- Scroll to the Insights section to see results.
With memory API
Filter which insights are included when querying conversation memory:- View the group details in the Portal.
- Copy the ID of each insight in the group.
- Include those IDs in the
insight_queryparameter.
Via webhooks
If you configured a webhook URL, results are automatically delivered:Organization strategies
By use case
Group insights by business function:- “Sales Qualification”.
- “Customer Support”.
- “Compliance Monitoring”.
- “Quality Assurance”.
- Clear ownership by department.
- Focused analytics per use case.
- Easy to assign to specialized assistants.
By delivery destination
Group insights by webhook endpoint:- “CRM Integration Group” →
https://crm.company.com/insights. - “Analytics Dashboard Group” →
https://analytics.company.com/insights. - “Ticket System Group” →
https://tickets.company.com/insights.
- Simplified webhook management.
- Targeted data delivery.
- System-specific insight collections.
By analysis type
Group insights by the kind of analysis:- “Quantitative Metrics” (scores, ratings, counts).
- “Categorical Classification” (types, statuses, priorities).
- “Qualitative Analysis” (summaries, descriptions).
- Consistent data structures.
- Easier downstream processing.
- Clear analytical purpose.
Hybrid approach
Combine strategies for complex scenarios:- “Sales - Quantitative” (lead scoring, budget ranges).
- “Sales - Qualitative” (pain points, objections).
- “Support - Urgent” (critical issues only).
- “Support - Complete” (all support metrics).
Best practices
1. Start small
Begin with a focused group:- ✅ 2-4 related insights.
- ❌ 15+ insights covering everything.
2. Test without webhooks first
When creating a new group:- Leave webhook URL empty initially.
- Assign to a test assistant.
- Review results in the Portal.
- Add webhook once validated.
3. Use descriptive names
Make group purpose immediately clear:- ✅ “Healthcare Compliance Checks”.
- ✅ “E-commerce Order Analysis”.
- ❌ “Group 1”.
- ❌ “Test”.
4. Document webhook endpoints
Maintain documentation of:- What each webhook URL expects.
- Who owns the endpoint.
- What system processes the insights.
- How to troubleshoot delivery issues.
5. Version your groups
When making significant changes:- Create a new group (e.g., “Support Analytics v2”).
- Test with a subset of assistants.
- Migrate fully once validated.
- Retire the old group.
6. Monitor insights count
Keep groups manageable:- 1-5 insights: Focused, fast analysis.
- 5-10 insights: Comprehensive, still efficient.
- 10+ insights: May be slower, consider splitting.
Troubleshooting
Insights not appearing
Check:- Is the group assigned to the assistant?
- Did a conversation complete after assignment?
- Are the individual insights configured correctly?
Webhook not receiving data
Check:- Is the webhook URL correct and accessible?
- Is the endpoint returning 200 OK status?
- Check webhook logs in your application.
Wrong insights in group
Solution:- Edit the group.
- Remove incorrect insights.
- Add correct insights.
- Save changes.
Next steps
- Explore Use Cases - Industry-specific group examples.
- Assign to Assistants - Connect groups to your AI assistants.
Related resources
- Creating Insights - Build insights for your groups.
- Structured Insights - Define consistent data schemas.
- Memory - Use insights with conversation memory.
- API Reference - Programmatic group management.
Telnyx-managed insights
Source: https://developers.telnyx.com/docs/inference/ai-insights/telnyx-managed-insights.md
Overview
Telnyx provides a set of built-in insights that measure assistant quality out of the box — no prompt engineering or schema design required. These are called Telnyx-managed insights (also referred to as default insights in the API and Portal). Unlike custom insights that you define yourself, Telnyx-managed insights are maintained by Telnyx, have consistent scoring rubrics, and are available to every account. You just assign them to an assistant’s Insight Group and start getting results.Available insights
Agent Instruction Following
Measures how well your assistant followed its system prompt and tool-use instructions during the conversation.
When it matters: Any time you care about prompt adherence — complex assistants with many tool instructions, compliance-sensitive flows, or when debugging unexpected assistant behavior.
User Satisfaction
Estimates how satisfied the caller was with the conversation based on their responses, tone, and engagement signals.
When it matters: Customer support, sales calls, any voice flow where caller experience directly impacts business outcomes.
The set of Telnyx-managed insights may grow over time. Check the Insight Group configuration in the Portal for the current list.
Enabling Telnyx-managed insights
Step 1: Add to an Insight Group
- Navigate to AI Insights in the Portal.
- Go to the AI Insight Groups tab.
- Create a new group or edit an existing one.
- In the insights dropdown, search for Agent Instruction Following and User Satisfaction.
- Add both (or whichever you need) to the group.
- Save the group.
Step 2: Assign the group to your assistant
- Open your assistant in the Portal.
- Go to the Analysis tab → Insights sub-tab.
- Select the Insight Group you created above.
- Save the assistant.
Step 3: Have conversations
Insights run automatically after each conversation completes. Results appear in two places:- Per-conversation — in the Conversation History tab for each individual call.
- Over time — in the Insights Over Time tab as aggregated daily charts.
Viewing results
Per conversation
- Open your assistant → Analysis tab → Conversation History sub-tab.
- Click any conversation.
- Scroll to the Insights section to see the scores for each insight in your group.
Over time (7-day trend)
The Insights Over Time sub-tab (third tab under Analysis) shows a stacked-bar chart of daily score counts for the last 7 days, scoped to the current assistant. What the chart shows:- One bar per day (UTC) for the last 7 days.
- Each bar is segmented by score value, color-coded:
- Poor — red
- Fair — amber
- Good — green
- Excellent — blue
- N/A — gray
- Bars are stacked bottom-to-top with N/A pinned to the bottom and Poor through Excellent ascending, so the best results sit on top.
- Use the Insight dropdown to select which Telnyx-managed insight to view (only Telnyx-managed insights appear here — custom insights are excluded).
- Read the chart left to right to spot trends — is the “Excellent” segment growing or shrinking over the week?
- Check for sudden shifts on specific days, which often correlate with config changes or new assistant versions.
Comparing assistant versions
Toggle Compare by assistant version above the chart to split the data into separate charts — one per assistant version. This creates a small-multiples layout where each version gets its own labeled chart. Version comparison usesmetadata.assistant_version_id to attribute conversations to versions. Conversations without a version ID are grouped as “Unknown version”.
This is useful when:
- You’ve published a new version and want to see if quality metrics improved or regressed.
- You’re A/B testing different prompt configurations across versions.
- You want to confirm a fix didn’t introduce new issues before promoting a version.
Tips for getting value from Telnyx-managed insights
Spotting regressions after a change
After updating your assistant’s prompt, tools, or voice settings, watch the over-time chart for the next few days. If the “Poor” or “Fair” segments grow while “Good” or “Excellent” shrink, the change may have hurt quality.Correlating with volume
Taller bars mean more conversations. A spike in volume can amplify small score shifts — check the raw counts in the chart tooltip before drawing conclusions.Understanding N/A rates
A large gray (N/A) segment means the insight frequently couldn’t be evaluated. For Agent Instruction Following, this may indicate conversations that were too short or didn’t trigger tool use. For User Satisfaction, it may mean the conversation lacked enough user signal (e.g., one-sided calls). If N/A rates are high, check whether your assistant is handling the conversation types you expect.Using scores alongside conversation history
The over-time chart tells you when quality shifted. The conversation history tells you why. When you see a dip, switch to Conversation History, filter to that day, and review individual conversations to find the root cause.Troubleshooting
Chart shows “No insight data recorded”
- Confirm the Insight Group includes Agent Instruction Following or User Satisfaction.
- Confirm the group is assigned to the assistant in the Analysis tab.
- Confirm the assistant has had conversations in the last 7 days.
- Confirm conversations completed successfully — insights run after the conversation ends.
Scores seem inconsistent
Telnyx-managed insights use AI evaluation, which considers the full conversation context. Scores can vary based on conversation length, topic complexity, and user behavior. Look at trends over multiple days rather than individual conversations.Version comparison shows “Unknown version”
Conversations that occurred before version tracking was enabled (or that lack version metadata) are grouped as “Unknown version.” Ensure your assistant has published versions and that conversations are attributed correctly.Related resources
- Creating Insights — Create your own custom insights.
- Structured Insights — Define JSON schemas for consistent data extraction.
- Insight Groups — Organize insights and configure webhooks.
- Use Cases — Industry-specific insight examples.
- Voice Assistant Configuration — Assigning insight groups to assistants.
LiveKit on Telnyx (Beta)
Overview
Source: https://developers.telnyx.com/docs/livekit.md
LiveKit on Telnyx
Build, deploy, and scale voice AI agents on Telnyx’s global network — the same LiveKit you know, hosted on Telnyx infrastructure with integrated telephony and AI models.Why LiveKit on Telnyx?
LiveKit on Telnyx collapses your voice AI stack into a single platform:- Built-in Telephony, No Third-Party SIP Fees — Telnyx is the carrier. Buy numbers, configure SIP, connect to agents — all in one portal. On other platforms, you pay third-party SIP fees on top of your usage. On Telnyx, those are gone entirely.
- Ultra-Low Latency AI on Telnyx GPUs — STT, TTS, and LLM run on Telnyx-owned GPUs, colocated in every region ~2ms from your agents. No round-trips to external APIs — faster responses, better conversations.
- Same LiveKit, Zero Migration Risk — Same SDKs, same CLI, same agent framework. Swap three environment variables and redeploy — your code doesn’t change.
- One Platform, One Bill — Compute, models, telephony, and phone numbers — all on a single Telnyx invoice. No vendor sprawl.
Not ready to migrate?
Install the Telnyx plugin on your existing LiveKit Cloud or self-hosted setup. Same agent code, same infrastructure — just faster, colocated inference on Telnyx GPUs. See the Plugin Reference for available STT, TTS, and LLM options.Who is this for?
- LiveKit Cloud users looking to consolidate vendors or reduce latency via Telnyx’s network
- Self-hosted LiveKit operators tired of managing infrastructure and wanting managed hosting
- New voice AI developers who want a single platform for media, telephony, and AI
How it works
- Connect — Configure your LiveKit client to point to Telnyx’s LiveKit cluster using your Telnyx credentials.
- Build — Write agents using the LiveKit Agent framework with Telnyx plugins for STT, TTS, and LLM.
- Deploy — Deploy agents to Telnyx’s managed infrastructure. Telephony connects via built-in SIP.
- Scale — Telnyx handles the infrastructure. You manage your agents and configuration.
What’s different from LiveKit Cloud?
Next steps
- Quickstart — Get deployed in 5 minutes
- Connect — Configure your LiveKit client
- Telephony — SIP and PSTN integration
- Plugin Reference — STT, TTS, and LLM options
Compatibility
Source: https://developers.telnyx.com/docs/livekit/compatibility.md
What’s the Same
The LiveKit agent framework is 100% portable — your agent code does not change. Everything in LiveKit works identically on Telnyx. Notable sections from LiveKit docs:- Agent Framework — docs.livekit.io/agents
- SIP / Phone — docs.livekit.io/sip
- API Reference — docs.livekit.io/api
- Cloud Deployment — docs.livekit.io/cloud
- Egress / Ingress — docs.livekit.io/egress
What’s Different
These features work differently on Telnyx compared to LiveKit Cloud:- STT / TTS / LLM — LiveKit Cloud requires third-party AI providers. On Telnyx, hosted models are available out of the box via
livekit-plugins-telnyx. Prefer your own provider? Bring any API key. - SIP trunking — On other platforms, you pay third-party SIP fees on top of your usage. On Telnyx, those are gone entirely — SIP is built-in because you’re already on the carrier. BYOT also supported if you prefer your existing provider.
- HD Voice — G.722 (16 kHz) and Opus (48 kHz) codecs for wideband audio on SIP calls. G.722 is enabled by default. Opus requires SRTP — see Telephony for setup.
- Phone numbers — Telnyx numbers in 140+ countries instead of LiveKit Phone (US only)
- Agent deployment — Same
lk agent deploycommand. Just swap the URL:lk agent deploy . --url .livekit.telnyx.com
What’s Not Supported
- Ingress (RTMP/WHIP) — importing external streams into a room
- Sandbox — quick-start dev environments
Coming Soon
This roadmap is subject to change.- Egress — Call recording, room recording, cloud storage export
- Observability — Cloud Dashboard with session timeline (transcripts, traces, logs, audio playback)
- Agent Tooling — Playground, Agent Builder
- Security & Compliance — E2E encryption, SSO, RBAC, HIPAA
- Enterprise SIP — Call transfers (REFER/warm transfer), and advanced SIP features
- Media — Enhanced noise cancellation (Krisp/BVC)
Quick Start
Source: https://developers.telnyx.com/docs/livekit/quickstart.mdGo from zero to a working voice agent you can call from your phone. By the end, you’ll have a LiveKit agent deployed on Telnyx infrastructure, connected to a real phone number.
Prerequisites
Before you start, make sure you have:- A Telnyx account
- A Telnyx API key (generate one in the portal)
- A secret key you create and keep safe — this is your
LIVEKIT_API_SECRET - Python ≥ 3.10
- LiveKit CLI (
lk) version 2.16.0 or later
Step 1: Configure the CLI
Set your environment variables to point at a Telnyx LiveKit region:LIVEKIT_API_KEY is your Telnyx API key — the same one you use everywhere else on the platform. Set TELNYX_API_KEY once and reference it throughout.
Register your credentials with the platform:
Available regions
Choose the region closest to your users for the lowest latency.
Step 2: Set up telephony
To receive phone calls, you need a phone number (DID) pointed at the Telnyx LiveKit SIP servers. No third-party SIP fees — Telnyx is the carrier.Buy a phone number
Search for an available number in your area code and order it: 1. Browse available numbers (replace512 with your area code):
"success" before moving on.
If your order didn’t complete successfully, chat with us — we’re happy to help.
- Log in to the Telnyx portal
- Go to Real Time Communcations → Numbers → Buy Numbers
- Purchase a number by checking out
Create a SIP connection
A SIP connection tells Telnyx how to route inbound calls. You’ll point it at one of our regional LiveKit SIP servers so calls land on the right infrastructure.
1. Create the FQDN connection (replace
{slug} with your region slug):
CONNECTION_ID and {slug} with your region slug):
CONNECTION_ID and phone number):
- In the portal, go to Real Time Communcations → Voice → SIP Connections → Create
- Set the connection type to FQDN
- Point it at your region’s SIP endpoint from the table above
- Assign your phone number to this SIP connection
Register the number with the platform
Set up an inbound trunk for your number and a dispatch rule to route calls to your agent. 1. Create an inbound SIP trunk:sid in the response — you’ll need it in the next step.
allowed_addresses restricts which source IPs can send SIP traffic to this trunk. 192.76.120.0/22 is Telnyx’s SIP network — since Telnyx is your carrier, all inbound calls will originate from this range.
2. Create a dispatch rule:
Step 3: Clone an example agent
Clone the example agents repo and navigate to the restaurant agent:livekit-plugins-telnyx for STT, TTS, and LLM.
Step 4: Deploy
Register the agent with the platform, then deploy it to your Telnyx LiveKit region:lk agent status reads the agent ID from your livekit.toml file — you don’t need to specify it manually. If you skip lk agent create, there’s no ID in the file and the command will fail.
Step 5: Call your agent
Pick up your phone and dial the number you purchased. You should hear:“Thanks for calling Bella’s Kitchen!”Try ordering some pasta. The agent handles the full conversation — browsing the menu, answering questions, and taking your order.
Troubleshooting
- Call doesn’t connect — Verify your SIP connection is pointed at the correct regional FQDN and your DID is assigned to it.
- Agent doesn’t pick up — Run
lk agent statusto confirm the agent is running. Check logs withlk agent logs. - Audio quality issues — Make sure you’re using the region closest to you.
Next steps
You’ve deployed your first agent. Here’s where to go from here:- Build — Write your own agent from scratch
- Deploy — Regions, scaling, secrets, and production deployment
- Models — STT, TTS, and LLM options available on Telnyx
- Telephony — Inbound/outbound calls, dispatch rules, multiple numbers
- Compatibility — What’s the same and different from LiveKit Cloud
Connect
Source: https://developers.telnyx.com/docs/livekit/connect.mdConnecting to the Telnyx LiveKit platform is a URL and credential swap. No code changes.
Get your credentials
Complete Quickstart — Step 1 to set your environment variables and register with the platform. That one-time setup covers everything you need to connect. Already set up? Just make sure yourLIVEKIT_URL, LIVEKIT_API_KEY, and LIVEKIT_API_SECRET are exported in your shell.
Verify the connection:
Available regions
See Regions for all available platform and SIP endpoints.SDK configuration
Server SDKs (Python, Go, Node.js) just need the URL and credentials:From LiveKit Cloud
Source: https://developers.telnyx.com/docs/livekit/migration/from-livekit-cloud.mdZero code changes. Swap your credentials, redeploy, done.
What changes
What doesn’t change
- Your agent code
- SDK usage
lkCLI commands- Dockerfiles
- Room management, dispatch rules
Steps
- Create a Telnyx account at portal.telnyx.com
- Generate a Telnyx API key in the portal
- Register with the platform (one-time):
- Update your environment variables with the values above
- Deploy to Telnyx:
- Verify:
lk room listto confirm connectivity - (Optional) Install the Telnyx plugin for on-prem STT, TTS, and LLM
- (Optional) Buy a Telnyx number for built-in telephony
What you gain
- Built-in telephony, no third-party SIP fees — On other platforms, you pay third-party SIP fees on top of your usage. On Telnyx, those are gone entirely.
- Ultra-low latency AI on Telnyx GPUs — STT, TTS, and LLM colocated in every region ~2ms from your agents. No round-trips to external APIs.
- One platform, one bill — Compute, models, telephony, and phone numbers on a single Telnyx invoice. No vendor sprawl.
Rolling back
It’s just environment variables. Point them back at LiveKit Cloud and redeploy.From Self-Hosted
Source: https://developers.telnyx.com/docs/livekit/migration/from-self-hosted.mdKeep your agents, ditch the infrastructure. No more managing Kubernetes clusters, TURN servers, SIP services, or autoscaling.
What Telnyx replaces
- LiveKit SFU server
- SIP service / Otel SIP
- TURN/STUN servers
- Container orchestration / autoscaling
- TLS termination and load balancing
- Monitoring infrastructure
What stays the same
- Your agent code
- SDK calls
- Room management logic
- Dispatch rules
Steps
- Create a Telnyx account at portal.telnyx.com
- Generate a Telnyx API key in the portal
- Register with the platform (one-time):
- Update your agent to point at
https://nyc1.livekit-telnyx.com(or your preferred region) - Move secrets to the platform:
- Re-create dispatch rules on the Telnyx platform
- Update SIP configuration to point at Telnyx SIP endpoints
- Verify your agent is running:
lk room list - Decommission your self-hosted infrastructure
What you gain
- No infra management — No Kubernetes, no TURN, no Redis for multi-region.
- Built-in SIP, no third-party SIP fees — On other platforms, you pay third-party SIP fees on top of your usage. On Telnyx, those are gone entirely.
- Managed autoscaling — Platform handles container lifecycle.
- Ultra-low latency AI on Telnyx GPUs — STT, TTS, and LLM colocated in every region ~2ms from your agents. No round-trips to external APIs.
Build
Source: https://developers.telnyx.com/docs/livekit/build.mdFirst time building? Complete Quickstart — Step 1 to configure your CLI and register with the platform.
1. Install the plugin
livekit-plugins-telnyx PyPI package. We host our own release to iterate faster than the upstream cadence allows. Use the git install above for the current recommended version.
Plugin source on GitHub
2. Write your agent
Createagent.py:
stt, tts, and llm — everything else is standard LiveKit.
3. Add a requirements file
Createrequirements.txt:
4. Deploy
Swap models
The example above uses Telnyx-hosted defaults. Swap any component independently:- STT — Deepgram, Nova-3, Nova-2, Flux → STT plugin
- TTS — Telnyx Natural HD, MiniMax, Rime, ElevenLabs (BYOK), Azure → TTS plugin
- LLM — GPT-4o-mini, Kimi-K2.6, Claude (BYOK) → LLM plugin
Next steps
- Telephony — Connect your agent to a phone number
- Deploy reference — Secrets, rollbacks, multi-region
Deploy
Source: https://developers.telnyx.com/docs/livekit/deploy.mdSame commands as LiveKit Cloud.
lk agent deploy uploads your code, builds a container image on Telnyx’s build service, and deploys the worker.
First time deploying? Complete Quickstart — Step 1 to configure your CLI and register with the platform.
1. Create your agent
livekit.toml. Skip this if you’ve already created the agent.
2. Deploy
3. Check status
4. Tail logs
5. Update secrets
Add or update secrets on a running agent:6. Rollback
What gets auto-injected
The platform injects these into your agent’s environment at runtime — you don’t need to set them manually:LIVEKIT_URLLIVEKIT_API_KEY— your Telnyx API keyLIVEKIT_API_SECRET
More
- Secrets — Managing API keys and sensitive config
- Configuration — Regions, multi-agent projects, env vars
- Management — What Telnyx manages vs. what you control
Configuration
Source: https://developers.telnyx.com/docs/livekit/deploy/configuration.md
Regions
Deploy to the region closest to your users. See Regions for all available endpoints.Environment variables and livekit.toml
SetLIVEKIT_URL, LIVEKIT_API_KEY, and LIVEKIT_API_SECRET as environment variables. You also need a livekit.toml in your project directory that defines the subdomain and agent ID:
lk agent create writes the agent ID to livekit.toml. Don’t edit the [agent] section manually. If you clone an example repo, remove the [agent] section before running lk agent create so a fresh ID is generated.
For multi-agent projects, use the --config flag to point at different TOML files:
Multiple environments
Use separate API keys for dev, staging, and production environments. Each key operates independently.Log access
Stream logs from your running agent:Secrets
Source: https://developers.telnyx.com/docs/livekit/deploy/secrets.md
Setting secrets on deploy
Pass secrets when you deploy:Updating secrets
Update secrets on a running agent:Auto-injected variables
The platform automatically injects these into your agent’s environment at runtime:LIVEKIT_URLLIVEKIT_API_KEY(your Telnyx API key — used for both platform auth and model access)LIVEKIT_API_SECRET
LIVEKIT_API_KEY is your Telnyx API key. Telnyx can revoke it if needed, giving you a single credential to manage.
Local development
For local development, use a.env.local file:
Management & Access
Source: https://developers.telnyx.com/docs/livekit/deploy/management.md
Access model
All platform interaction is through thelk CLI and the Telnyx Portal. There is no direct access to underlying infrastructure (no kubectl, no SSH).
What Telnyx manages
- LiveKit SFU (media server)
- SIP service (built-in telephony)
- Agent container runtime and orchestration
- Autoscaling
- TLS/SSL termination and load balancing
- Health checks and rolling deploys
What you control
Current limitations
- No volume mounts or persistent storage
- No custom networking or network policies
- No privileged containers
- No custom domains
- No direct database access — use external services with secrets
Overview
Source: https://developers.telnyx.com/docs/livekit/models.mdAll models are accessed through the Telnyx plugin. Models run on Telnyx GPUs, so whether you’re using the plugin from LiveKit Cloud or deployed on the Telnyx platform, you get on-prem inference without managing infrastructure. Deepgram Nova-3, Nova-2, and Flux — hosted on Telnyx. Extensive voice library across multiple providers and models. Hosted open-source and proprietary models via BYOK.
STT
Source: https://developers.telnyx.com/docs/livekit/models/stt.mdTelnyx hosts Deepgram models on dedicated GPUs. Access them through the Telnyx plugin:
telnyx.deepgram.STT— Recommended. Connects to Deepgram models hosted on Telnyx GPUs. Takes amodelparameter (nova-3,nova-2,flux).telnyx.STT— Connects to Telnyx’s own transcription engine (default) or Deepgram viatranscription_engine="Deepgram". Takes atranscription_engineparameter instead ofmodel.
telnyx.deepgram.STT is the simpler interface.
Plugin source on GitHub
Available models
Nova-3 (recommended)
Latest generation, best accuracy.Nova-2
Previous generation, stable and reliable. Uses weighted keyword boosting.Flux
Experimental, with built-in end-of-turn detection. Designed for real-time voice agents.Parameters
TTS
Source: https://developers.telnyx.com/docs/livekit/models/tts.mdTelnyx offers an extensive library of voices across multiple providers and models, with broad language and accent support. Access them through the Telnyx plugin:
Voice ID format
Voice IDs follow the patternProvider.Model.voice_name. To find a voice:
- Browse the voice library
- Copy the voice ID (e.g.
Telnyx.NaturalHD.astra) - Pass it to
telnyx.TTS(voice="...")
Examples
Available providers and models
Browse all voices and models in the voice library →
Parameters
LLM
Source: https://developers.telnyx.com/docs/livekit/models/llm.mdTelnyx hosts models with an OpenAI-compatible API. No concurrency limits. Use the standard OpenAI plugin with the
.with_telnyx() helper:
About .with_telnyx()
This is a built-in static method on openai.LLM in the official livekit-plugins-openai package, maintained by LiveKit — not a Telnyx package or fork. It works the same way as the other OpenAI-compatible helpers in that package (.with_azure(), .with_fireworks(), etc.): it sets base_url to Telnyx’s OpenAI-compatible inference endpoint (https://api.telnyx.com/v2/ai/openai) and reads your TELNYX_API_KEY from the environment. You don’t need any additional packages beyond livekit-plugins-openai.
Hosted models
These run on Telnyx infrastructure — no external API key needed, just yourTELNYX_API_KEY:
{/* TODO: Add top proprietary Telnyx models */}
Proprietary models (BYOK)
For models like GPT-4o or Claude, Telnyx proxies the request using your own API key. Add your provider key in the Telnyx Portal under Inference settings.Observability
Source: https://developers.telnyx.com/docs/livekit/observability.md
What’s available today
Agent logs
Stream logs from your running agent via the CLI:Coming very soon
Traces, metrics, and session debugging are on our roadmap.Telephony
Source: https://developers.telnyx.com/docs/livekit/telephony.mdTelnyx is the carrier. Buy a number, connect it to your agent — no third-party SIP trunk setup, no FQDN auth dance. Calls route on-net from Telnyx SIP directly to your agent. For setup steps, see the Quick Start.
Supported
Inbound calls
Inbound calls are routed to your agent via SIP dispatch rules. When someone calls your DID, Telnyx forwards it to the LiveKit SIP service, which dispatches it to your agent based on the rules you configure.Outbound calls
Use thelk CLI to place an outbound call into a room:
DTMF
DTMF tones are supported via RFC 2833/4733. Tones are forwarded to your agent as events and can be handled in code.SIP headers
Pass call metadata through to your agent usingheaders_to_attributes. Header values are mapped to LiveKit participant attributes, available in your agent at runtime.
HD voice
Telnyx supports two HD voice codecs for higher-quality audio on SIP calls:- G.722 — Wideband audio at 16 kHz sample rate. Enabled by default on all Telnyx SIP connections. No additional configuration needed.
- Opus — Wideband audio at 48 kHz sample rate. Requires SRTP encryption on both sides — enable OPUS in your Telnyx SIP connection’s inbound codec list and set
media_encryption: ALLOWon your LiveKit inbound trunk. Delivers the highest audio quality for voice AI agents.
Not yet supported
These features require Enterprise SIP, which is on the roadmap.- Call transfers (REFER / warm transfer)
Architecture
Source: https://developers.telnyx.com/docs/livekit/architecture.mdTelnyx LiveKit is a managed platform for deploying voice AI agents at scale. You ship agent code. The platform handles containers, scaling, SIP, and AI inference — colocated in each region.
Agents
Each agent you deploy is an isolated worker. Deploy as many as you need — a restaurant bot, a support agent, a scheduling assistant — each running independently under your account.Autoscaling
The platform watches active room load and scales your agent workers up and down automatically. You don’t configureload_fnc or load_threshold — the platform manages this.
- Scale up — new workers spin up as concurrent calls increase
- Scale down — idle workers are drained and removed
- Health checks — unhealthy containers are replaced automatically with rolling deploys
Inbound call flow
AI inference
STT, TTS, and LLM inference runs on Telnyx GPUs colocated with the agent runtime — approximately 2ms from your agent. No round-trips to external APIs on the hot path.Regions
Each region is a full stack: SFU, SIP, agent runtime, and AI inference. See Regions for available endpoints.Regions
Source: https://developers.telnyx.com/docs/livekit/regions.md
Platform endpoints
SIP endpoints
Choose the region closest to your users for the lowest latency.
Limits
Source: https://developers.telnyx.com/docs/livekit/limits.md
Build limits
Agent limits
Telephony limits
For specific limit increases, contact your Telnyx account team.
Pricing
Source: https://developers.telnyx.com/docs/livekit/pricing.mdAll services — compute, models, and telephony — are billed on a single Telnyx invoice. On other platforms, you pay third-party SIP fees on top of your usage. On Telnyx, those are gone entirely.
Telnyx Ultra — Platform Exclusive
Our highest-fidelity voice. Available exclusively for agents deployed on LiveKit on Telnyx, not through the plugin alone. Head over to the TTS voice library to check out the variety of voices, languages, and accents we offer.STT
See telnyx.com/pricing/speech-to-text for current rates.TTS
See telnyx.com/pricing/text-to-speech for current rates.LLM
See telnyx.com/pricing/conversational-ai for current rates.API Reference (AI)
OpenAI Chat
- Create a chat completion (OpenAI-compatible): Chat with a language model. This endpoint is consistent with the OpenAI Chat Completions API and may be used with the OpenAI JS or Python SDK by setting the ba…
- Get available models (OpenAI-compatible): Lists every model currently available to your account on Telnyx Inference, including SOTA open-source LLMs hosted on Telnyx GPUs (for example `moonshotai/Kimi-…
- Create an OpenAI-compatible response: Create a response using Telnyx’s OpenAI-compatible Responses API. This endpoint is compatible with the OpenAI Responses API and may be used with the OpenAI JS…
Fine Tuning
- List fine tuning jobs: Retrieve a list of all fine tuning jobs created by the user.
- Create a fine tuning job: Create a new fine tuning job.
- Get a fine tuning job: Retrieve a fine tuning job by
job_id. - Cancel a fine tuning job: Cancel a fine tuning job.
Anthropic Messages
- Create a message (Anthropic-compatible): Send a message to a language model using the Anthropic Messages API format. This endpoint is compatible with the Anthropic Messages API and may be used with th…
Chat
- Summarize file content: Generate a summary of a file’s contents.
Conversation Histories
- Search conversation histories: Performs semantic vector search across conversation history records.
Embeddings
- Get Tasks by Status: Retrieve tasks for the user that are either
queued,processing,failed,successorpartial_successbased on the query string. Defaults toqueuedan… - Embed documents: Perform embedding on a Telnyx Storage Bucket using the a embedding model.
- List embedded buckets: Get all embedding buckets for a user.
- Get file-level embedding statuses for a bucket: Get all embedded files for a given user bucket, including their processing status.
- Disable AI for an Embedded Bucket: Deletes an entire bucket’s embeddings and disables the bucket for AI-use, returning it to normal storage pricing.
- Search for documents: Perform a similarity search on a Telnyx Storage Bucket, returning the most similar
num_docsdocument chunks to the query. - Embed URL content: Embed website content from a specified URL, including child pages up to 5 levels deep within the same domain. The process crawls and loads content from the mai…
- Get an embedding task’s status: Check the status of a current embedding task. Will be one of the following:
Clusters
- List all clusters
- Compute new clusters: Starts a background task to compute how the data in an embedded storage bucket is clustered. This helps identify common themes and patterns in the data.
- Fetch a cluster
- Delete a cluster
- Fetch a cluster visualization
OpenAI Embeddings
- Create embeddings: Creates an embedding vector representing the input text. This endpoint is compatible with the OpenAI Embeddings API and may be used with the OpenAI JS or Pytho…
- List embedding models: Returns a list of available embedding models. This endpoint is compatible with the OpenAI Models API format.
Assistants
- List assistants: Retrieve a list of all AI Assistants configured by the user.
- Create an assistant: Create a new AI Assistant.
- Get an assistant: Retrieve an AI Assistant configuration by
assistant_id. - Update an assistant: Update an AI Assistant’s attributes.
- Delete an assistant: Delete an AI Assistant by
assistant_id. - Assistant Chat (BETA): This endpoint allows a client to send a chat message to a specific AI Assistant. The assistant processes the message and returns a relevant reply based on the…
- Assistant Sms Chat: Send an SMS message for an assistant. This endpoint:
- Clone Assistant: Clone an existing assistant, excluding telephony and messaging settings.
- Enhance Assistant Instructions: Enhance an assistant’s instructions using an LLM. The endpoint reads the assistant’s current instructions and tools, then streams back improved instructions as…
- Import assistants from external provider: Import assistants from external providers. Any assistant that has already been imported will be overwritten with its latest version from the importing provider.
- List scheduled events: Get scheduled events for an assistant with pagination and filtering
- Create a scheduled event: Create a scheduled event for an assistant
- Get a scheduled event: Retrieve a scheduled event by event ID
- Delete a scheduled event: If the event is pending, this will cancel the event. Otherwise, this will simply remove the record of the event.
- List assistant tests with pagination: Retrieves a paginated list of assistant tests with optional filtering capabilities
- Create a new assistant test: Creates a comprehensive test configuration for evaluating AI assistant performance
- Get all test suite names: Retrieves a list of all distinct test suite names available to the current user
- Get test suite run history: Retrieves paginated history of test runs for a specific test suite with filtering options
- Trigger test suite execution: Executes all tests within a specific test suite as a batch operation
- Get assistant test by ID: Retrieves detailed information about a specific assistant test
- Update an assistant test: Updates an existing assistant test configuration with new settings
- Delete an assistant test: Permanently removes an assistant test and all associated data
- Get test run history for a specific test: Retrieves paginated execution history for a specific assistant test with filtering options
- Trigger a manual test run: Initiates immediate execution of a specific assistant test
- Get specific test run details: Retrieves detailed information about a specific test run execution
- Get all versions of an assistant: Retrieves all versions of a specific assistant with complete configuration and metadata
- Get a specific assistant version: Retrieves a specific version of an assistant by assistant_id and version_id
- Update a specific assistant version: Updates the configuration of a specific assistant version. Can not update main version
- Delete a specific assistant version: Permanently removes a specific version of an assistant. Can not delete main version
- Promote an assistant version to main: Promotes a specific version to be the main/current version of the assistant. This will delete any existing canary deploy configuration and send all live produc…
- Get Canary Deploy: Endpoint to get a canary deploy configuration for an assistant.
- Create Canary Deploy: Endpoint to create a canary deploy configuration for an assistant.
- Update Canary Deploy: Endpoint to update a canary deploy configuration for an assistant.
- Delete Canary Deploy: Endpoint to delete a canary deploy configuration for an assistant.
- Get assistant texml: Get an assistant texml by
assistant_id. - Test Assistant Tool: Test a webhook tool for an assistant
- Get All Tags
- Add Assistant Tag
- Remove Assistant Tag
- Add Assistant Tool
- Remove Assistant Tool
Integrations
- List Integrations: List all available integrations.
- List User Integrations: List user setup integrations
- Get User Integration connection By Id: Get user setup integrations
- Delete Integration Connection: Delete a specific integration connection.
- List Integration By Id: Retrieve integration details
MCP Servers
- List MCP Servers: Retrieve a list of MCP servers.
- Create MCP Server: Create a new MCP server.
- Get MCP Server: Retrieve details for a specific MCP server.
- Update MCP Server: Update an existing MCP server.
- Delete MCP Server: Delete a specific MCP server.
Missions
- List missions: List all missions for the organization
- Create mission: Create a new mission definition
- List recent events: List recent events across all missions
- List recent runs: List recent runs across all missions
- Get mission: Get a mission by ID (includes tools, knowledge_bases, mcp_servers)
- Update mission: Update a mission definition
- Delete mission: Delete a mission
- Clone mission: Clone an existing mission
- List runs for mission: List all runs for a specific mission
- Start a run: Start a new run for a mission
- Get run details: Get details of a specific run
- Update run: Update run status and/or result
- Cancel run: Cancel a running or paused run
- List events: List events for a run (paginated)
- Log event: Log an event for a run
- Get event details: Get details of a specific event
- Pause run: Pause a running run
- Get plan: Get the plan (all steps) for a run
- Create initial plan: Create the initial plan for a run
- Add step(s) to plan: Add one or more steps to an existing plan
- Get step details: Get details of a specific plan step
- Update step status: Update the status of a plan step
- Resume run: Resume a paused run
- List linked Telnyx agents: List all Telnyx agents linked to a run
- Link Telnyx agent to run: Link a Telnyx AI agent (voice/messaging) to a run
- Unlink Telnyx agent: Unlink a Telnyx agent from a run
- List knowledge bases: List all knowledge bases for a mission
- Create knowledge base: Create a new knowledge base for a mission
- Get knowledge base: Get a specific knowledge base by ID
- Update knowledge base: Update a knowledge base definition
- Delete knowledge base: Delete a knowledge base from a mission
- List MCP servers: List all MCP servers for a mission
- Create MCP server: Create a new MCP server for a mission
- Get MCP server: Get a specific MCP server by ID
- Update MCP server: Update an MCP server definition
- Delete MCP server: Delete an MCP server from a mission
- List tools: List all tools for a mission
- Create tool: Create a new tool for a mission
- Get tool: Get a specific tool by ID
- Update tool: Update a tool definition
- Delete tool: Delete a tool from a mission
Conversations
- List conversations: Retrieve a list of all AI conversations configured by the user. Supports PostgREST-style query parameters for filtering. Examples are included for the standard…
- Create a conversation: Create a new AI Conversation.
- Aggregate Conversation Insights: Aggregate conversation insights by specified fields
- Get Insight Template Groups: Get all insight groups
- Create Insight Template Group: Create a new insight group
- Get Insight Template Group: Get insight group by ID
- Update Insight Template Group: Update an insight template group
- Delete Insight Template Group: Delete insight group by ID
- Assign Insight Template To Group: Assign an insight to a group
- Unassign Insight Template From Group: Remove an insight from a group
- Get Insight Templates: Get all insights
- Create Insight Template: Create a new insight
- Get Insight Template: Get insight by ID
- Update Insight Template: Update an insight template
- Delete Insight Template: Delete insight by ID
- Get a conversation: Retrieve a specific AI conversation by its ID.
- Update conversation metadata: Update metadata for a specific conversation.
- Delete a conversation: Delete a specific conversation by its ID.
- Get insights for a conversation: Retrieve insights for a specific conversation
- Create Message: Add a new message to the conversation. Used to insert a new messages to a conversation manually ( without using chat endpoint )
- Get conversation messages: Retrieve messages for a specific conversation, including tool calls made by the assistant.