

Telnyx Messaging — Full Documentation
SMS, MMS, RCS, WhatsApp, short codes, 10DLC compliance, and messaging profiles. Complete page content for the Messaging section of the Telnyx developer docs (https://developers.telnyx.com). Root index: https://developers.telnyx.com/llms.txt · Lightweight index for this section: https://developers.telnyx.com/development/llms/messaging-llms-txt.md
SMS & MMS
Send Your First Message
Source: https://developers.telnyx.com/docs/messaging/messages/send-message.mdSend your first SMS using the Telnyx Messaging API. This guide takes you from zero to sending a message in about 5 minutes by testing between two Telnyx numbers—no carrier registration required.
Prerequisites
- A Telnyx account (free to create)
1. Get two phone numbers
Purchase two Telnyx numbers so you can test messaging between them without registration requirements. Navigate to Numbers > Search & Buy in the portal. Enter your preferred area code or region, check SMS under features, and click Search. Click Add to Cart on two numbers, then Place Order. Having two numbers lets you test on-net (Telnyx-to-Telnyx) messaging immediately, and also test receiving inbound messages.2. Create a Messaging Profile
Navigate to Messaging in the portal. Click Add new profile, give it a name (e.g., “My App”), and click Save. Go to My Numbers, and for each number, click the Messaging Profile dropdown, select your profile, and save.3. Get your API key
Go to API Keys and copy your API key (or create one if needed).4. Send a message
curl
Node
Python
Ruby
Go
Java
.NET
PHP
curl
Node
Python
Ruby
Go
Java
.NET
PHP
YOUR_API_KEY: Your API key from step 3from: Your first Telnyx number (the sender)to: Your second Telnyx number (the recipient)
+ prefix, country code, and full number with no spaces or punctuation.
Common mistakes:
- ❌
15551234567(missing+) - ❌
+1 (555) 123-4567(contains spaces and punctuation) - ❌
+1-555-123-4567(contains dashes) - ✅
+15551234567
Response
A successful response looks like this:status: "queued" means your message is on its way. Save the id to track delivery status.
Error handling
API errors return structured JSON responses with an error code, title, and detail message. Handle these in your application to provide clear feedback and enable automatic recovery.Error response format
SDK error handling examples
Node
Python
Ruby
Go
.NET
PHP
HTTP error codes
Messaging-specific error codes
These codes appear in theerrors[].code field and provide more specific detail than HTTP status codes alone:
For a complete error code reference including delivery failure codes, see the Messaging Error Codes guide.
Rate limiting
The Telnyx Messaging API enforces rate limits to ensure platform stability. When you exceed the limit, the API returns429 Too Many Requests with a retry-after header.
Rate limit headers:
Best practices for high-volume sending:
- Implement exponential backoff: wait
2^attemptseconds between retries (1s, 2s, 4s, 8s…) - Add jitter to prevent thundering herd:
wait = base_wait * (0.5 + random()) - Set a maximum retry count (3–5 attempts) to avoid infinite loops
- Use a message queue (Redis, RabbitMQ, SQS) to buffer outbound messages and control throughput
- Monitor
x-ratelimit-remainingand slow down before hitting the limit
Troubleshooting checklist
If your message fails to send, work through this checklist: Confirm your API key is active at API Keys. Revoked or expired keys return401.
Verify your from number is assigned to a messaging profile at My Numbers. Unassigned numbers return 403.
Both from and to must be in E.164 format: +15551234567. No spaces, dashes, or parentheses.
Sending to US carriers off-net requires registration. Check your registration status:
- 10DLC: 10DLC Registration
- Toll-free: Toll-Free Verification
- Short code: Short Codes
Insufficient balance returns
402. Check and top up at Billing. - SMS body must not exceed 1,600 characters
- MMS media URLs must be publicly accessible HTTPS URLs
- Content must comply with carrier guidelines (no SHAFT content without proper registration)
If the API returns
200but the message doesn’t arrive, checkmessage.finalizedwebhook events for delivery failure details. See Webhooks and delivery tracking.
Webhooks and delivery tracking
After sending a message, Telnyx delivers real-time status updates via webhooks. Configure a webhook URL on your Messaging Profile to receive these events automatically.Message lifecycle events
Messages progress through these statuses:
Not all carriers return delivery receipts. Some messages may remain in
sent status without a finalized event. US carriers generally support delivery receipts for SMS; international coverage varies.
Webhook payload example
Processing webhooks
Set up an endpoint to receive webhookPOST requests and return a 200 response. Telnyx retries failed deliveries with exponential backoff.
Node
Python
Ruby
Go
Java
.NET
PHP
Retrieve message status via API
You can also check a message’s current status by its ID:curl
Node
Python
Delivery failure error codes
When a message fails delivery, theerrors array in the webhook payload contains error codes:
For a complete error code reference, see the Messaging Error Codes guide.
Webhook security
Validate incoming webhooks to ensure they’re from Telnyx:- IP allowlisting — Telnyx sends webhooks from
192.76.120.192/27 - HTTPS endpoints — Always use HTTPS for your webhook URL
- Respond quickly — Return
200within 5 seconds to prevent retries
Next steps
Set up webhooks to receive incoming SMS Learn about long codes, toll-free, and short codes Register your brand for US messaging compliance Explore all messaging parametersReceive Messages
Source: https://developers.telnyx.com/docs/messaging/messages/receive-message.mdReceive inbound SMS and MMS messages via webhooks. When someone texts your Telnyx number, Telnyx sends an HTTP
POST request with the message details to your configured webhook URL.
Prerequisites
- A Telnyx phone number assigned to a messaging profile
- A webhook URL configured on your messaging profile
- ngrok or similar tool for local development
Quick Start
Build a web server that acceptsPOST requests from Telnyx:
Node
Python
Ruby
Go
Java
.NET
PHP
https://abc123.ngrok.io).
Set the webhook URL on your messaging profile via the Portal or API:
2xx response within 2 seconds (API v2) or 5 seconds (API v1). If delivery fails, Telnyx retries up to 2 times per URL. With a failover URL configured, that’s up to 4 total attempts.
Auto-Reply to Incoming Messages
A common pattern is sending an automatic reply when a message arrives. Combine your webhook handler with the Send Message API:Node
Python
Ruby
Go
Webhook Payload Reference
Inbound SMS
Inbound MMS
MMS messages include amedia array with downloadable attachments:
Webhook Payload Schema
Supported MMS media types:
- Images:
image/jpeg,image/png,image/gif,image/bmp,image/webp - Video:
video/mp4,video/3gpp - Audio:
audio/mpeg,audio/ogg,audio/amr - Files:
application/pdf,text/vcard,text/calendar
Downloading MMS Media
Download media attachments from inbound MMS messages using the URLs in themedia array. Authenticate with your API key:
Node
Python
Go
Ruby
Java
.NET
PHP
curl
Verifying Webhook Signatures
In production, verify webhook signatures to confirm requests are from Telnyx. All webhooks are signed using ED25519 public key cryptography. Each webhook includes two headers:telnyx-signature-ed25519— Base64-encoded signaturetelnyx-timestamp— Unix timestamp when the webhook was sent
Node
Python
Ruby
.NET
PHP
Handling Failed Webhooks
When webhook delivery fails, Telnyx retries automatically. Build resilience into your architecture:Node
Python
Troubleshooting
Check your webhook URL is configured:- Webhook URL not set on the messaging profile
- Phone number not assigned to the messaging profile
- Server not publicly accessible (use ngrok for local dev)
- Firewall blocking Telnyx IPs
2xx within the timeout (2 seconds for API v2). Telnyx retries up to 2 times.
Fix: Return 200 immediately, then process the message asynchronously. Use the payload.id field to deduplicate.
-
Return
200immediately, process in background - Use a message queue (Redis, SQS, RabbitMQ) for heavy processing
- Set up a failover URL as a backup
-
Check the
typefield isMMS(SMS messages have an emptymediaarray) -
Media URLs require authentication — include your API key in the
Authorizationheader - Media URLs expire after 30 days
- Verify your number is MMS-enabled in the Portal
Webhook URL Hierarchy
Telnyx checks for webhook URLs in this order:- Request body — URLs provided when sending a message (outbound delivery receipts only)
- Messaging profile — URLs configured on the profile
- No URL — Webhook delivery is skipped
Related Webhook Events
Your webhook URL receives more than justmessage.received. For delivery status tracking and other events, see Receiving Webhooks.
Next Steps
Send outbound SMS and MMS messages All webhook event types and payload details Understand GSM-7, UCS-2, and message segmentation Handle STOP/HELP keywords automaticallyWebhooks
Source: https://developers.telnyx.com/docs/messaging/messages/receiving-webhooks.mdTelnyx sends webhooks to notify your application about messaging events in real time — inbound messages, delivery status updates, and errors. This guide covers every event type, payload structure, signature verification, and best practices for production webhook handling.
Prerequisites
- A Telnyx account with a phone number assigned to a messaging profile
- A publicly accessible HTTPS endpoint (or ngrok for local development)
- Your API key and public key (for signature verification)
How webhook delivery works
A message is received by your number, or a sent message changes status (queued → sent → delivered). An HTTPPOST with a JSON payload is sent to your configured webhook URL.
Return a 2xx status code within 2 seconds to acknowledge receipt.
If your server doesn’t respond in time, Telnyx retries (up to 3 attempts per URL) and then tries your failover URL if configured.
Webhook URL hierarchy
Telnyx determines where to send webhooks using this priority order:- Per-message URLs —
webhook_urlandwebhook_failover_urlin the send message request body - Messaging profile URLs — Configured on the messaging profile
- No webhook — If neither is set, no webhook is delivered (events are still available in Message Detail Records)
Webhook event types
Telnyx messaging produces the following webhook events:Payload structure
All messaging webhooks share this top-level structure:Event examples
Inbound message (message.received)
Triggered when your Telnyx number receives an SMS or MMS:
media array with URLs, content types, and file sizes:
Message sent (message.sent)
Triggered when an outbound message has been accepted by the downstream carrier:
Delivery receipt (message.finalized)
Triggered when a message reaches a terminal delivery state:
Delivery statuses
Theto[].status field in message.finalized events indicates the final delivery outcome:
When a message fails, the
errors array in the payload contains details:
For a complete list, see the Error Codes reference.
Webhook signature verification
Telnyx signs every webhook using Ed25519 public key cryptography so you can verify that requests genuinely come from Telnyx. This is strongly recommended for production deployments. Each webhook request includes two headers:
The signature is computed over the string
{timestamp}|{json_payload}.
Get your public key
Find your public key in the Mission Control Portal under Keys & Credentials → Public Key.Verification examples
Node
Python
Ruby
Go
Java
.NET
PHP
telnyx-timestamp is more than 5 minutes old.
Handling webhooks in your application
Basic webhook handler
Node
Python
Ruby
Go
Java
.NET
PHP
Retry behavior and error handling
Retry policy
Best practices for reliability
- Respond immediately — Return
200before processing the event. Offload heavy logic to a background queue. - Handle duplicates — Webhooks may be delivered more than once. Use the
data.idfield as an idempotency key. - Handle out-of-order delivery — Events may arrive in a different order than they occurred. Use
data.occurred_attimestamps to sequence events. - Use HTTPS — Always use TLS-encrypted endpoints in production.
- Verify signatures — Validate
telnyx-signature-ed25519headers to prevent spoofing.
Webhook IP allowlist
If your server uses a firewall or ACL, allowlist the following Telnyx subnet:Troubleshooting
- Check your messaging profile — Confirm a webhook URL is configured in the Portal or via the API.
- Test your endpoint — Send a test POST request with
curlto ensure your server is accessible: - Check ngrok — If using ngrok, verify the tunnel is running and the URL matches your profile configuration.
- Check firewall — Ensure
192.76.120.192/27is allowlisted. - Check Message Detail Records — Events are logged regardless of webhook delivery. Check MDRs in the portal.
data.id) and skip duplicates:
message.finalized may arrive before message.sent. Use the data.occurred_at timestamp to determine event sequence, and design your logic to handle any arrival order.
- Ensure you’re reading the raw body — Parse the signature against the raw request body, not a re-serialized JSON object.
- Check your public key — Verify you’re using the correct public key from the Portal.
- Check timestamp tolerance — If you’re rejecting stale timestamps, ensure your server clock is synchronized (NTP).
- Return
200immediately - Process the event asynchronously (use a message queue like Redis, RabbitMQ, or SQS)
Next steps
Step-by-step guide to building a webhook server Send SMS and MMS with the Messaging API Platform-wide webhook concepts, signing, and retry behavior Query historical message data and delivery statusesChoosing a Sender Type
Source: https://developers.telnyx.com/docs/messaging/getting-started/choosing-your-sender-type.md
Interactive Product Selector
Answer a few quick questions to get a personalized recommendation: This is a high-level recommendation. Contact Telnyx Sales for detailed guidance on complex use cases.Use Case Decision Tree
Not sure which sender type fits? Start with your primary use case: Best options:- Toll-free — Fast provisioning (2–3 days), high throughput, handset-level delivery receipts. Ideal for US/CA transactional messaging.
- 10DLC long code — Good alternative if you want a local presence. Requires brand + campaign registration (2–3 business days).
- Short code — Best for very high volume (200+ MPS). Longer provisioning (2–6 weeks) and higher cost.
- 10DLC long code — Required for A2P marketing in the US. Register your brand and campaign through 10DLC registration.
- Toll-free — Good for mixed marketing + transactional. Requires toll-free verification.
- Short code — Premium option for brand recognition and highest throughput.
- RCS — Rich media cards, carousels, and suggested actions for supported devices.
- 10DLC long code — Local number feel, supports voice + SMS on the same number.
- Toll-free — Works well for two-way if local presence isn’t important.
- RCS — Rich interactive experience with read receipts, typing indicators, and suggested replies.
- Alphanumeric sender ID — Supported in 100+ countries. No number procurement needed. Great for brand recognition internationally.
- Local long codes — Required in some countries. Use the coverage checker below for availability.
- RCS — Full rich media support: images, video, carousels, suggested actions, branded sender profiles.
- MMS via long code/toll-free — Image and video support for US/CA only.
Sender Comparison
Capabilities at a Glance
* Throughput varies based on TCR Trust Score. ** T-Mobile daily limits based on TCR brand score; can be increased upon request.
Registration & Cost Comparison
Understanding the time and cost investment for each sender type helps you plan your launch:
Register your brand and campaign for US A2P messaging.
Verify your toll-free number for higher throughput.
Apply for a dedicated short code.
Set up RCS business messaging with rich media.
Send branded one-way messages internationally.
Bring your existing numbers to Telnyx messaging.
Check Coverage by Country
Sender type availability varies by country. Use the tool below to check which options are available for your destination:Key Regional Considerations
- 10DLC is required for A2P messaging to US mobile numbers (enforced by carriers since 2023)
- Toll-free numbers work for both US and CA
- Short codes are country-specific (US short codes don’t work in CA and vice versa)
- MMS is supported on long code, toll-free, and short code
- RCS is available for Android users
- Alphanumeric sender IDs are widely supported and commonly used
- Some countries require pre-registration of alphanumeric IDs (e.g., UK, France)
- Local long codes may be required for two-way messaging
- Short codes are available in select markets
- GDPR compliance required for all messaging
- Alphanumeric sender IDs supported in most countries
- Local long codes recommended for better deliverability
- Some carriers require pre-approved sender IDs or templates
- WhatsApp is dominant — consider RCS as an alternative rich channel
- Regulations vary significantly by country
- India requires DLT registration and approved templates
- Australia supports alphanumeric IDs and local numbers
- Some countries require local entity for number procurement
- Check coverage tool above for specific country details
Quick Start: Send Your First Message
Once you’ve chosen your sender type, sending a message uses the same API regardless of sender:cURL
Python
Node.js
Ruby
Java
.NET
PHP
Go
from field determines your sender type automatically:
- Phone number (
+15551234567) → Long code or toll-free - Short code (
12345) → Short code - Alphanumeric (
"MyBrand") → Alphanumeric sender ID
Next Steps
Complete guide to sending your first SMS/MMS. Configure number pools, webhooks, and features. Understand throughput tiers and daily caps.Message Encoding
Source: https://developers.telnyx.com/docs/messaging/messages/message-encoding.mdSMS messages are encoded into segments of 140 bytes each. You are billed per segment, so understanding encoding is key to controlling costs. The encoding determines how many characters fit in each segment:
A single non-GSM-7 character (like an emoji or curly quote) switches the entire message to UTF-16, cutting capacity from 160 to 70 characters per segment. This can more than double your costs.
Segment calculator
Use this interactive tool to check how your message will be encoded and segmented:How segments work
Every SMS message is transmitted in units of 140 bytes. When a message exceeds one segment, a 6-byte header (User Data Header, or UDH) is added to each segment for reassembly, reducing the usable space.Segment calculation formula
To calculate the number of segments for a message:Cost impact example
Consider a 200-character message:
Enable smart encoding to automatically replace common Unicode characters (like curly quotes and em dashes) with GSM-7 equivalents, reducing segment counts.
Encoding by sender type
If your message contains characters outside the default encoding’s character set, the fallback encoding is used automatically for the entire message.
MMS and RCS messages use UTF-8 encoding by default and are not affected by these limits.
GSM 7-bit character set
Telnyx uses a GSM 7-bit encoding optimized for maximum carrier compatibility. Only characters in this set will keep your message in the efficient GSM-7 encoding. Letters:
These characters require an escape sequence and count as 2 characters in segment calculations:
Extended characters are easy to overlook when estimating segment counts. A message with 155 standard characters and 3 pipe characters (
|) uses 155 + (3 × 2) = 161 character slots, requiring 2 segments instead of 1.
Detecting encoding in your application
Before sending, you can check if a message will use GSM-7 or UTF-16 encoding to estimate costs. Here are helper functions for each language:Python
Node
Ruby
Go
Java
.NET
PHP
Common encoding issues
Symptom: Your message uses more segments than expected. Cause: A non-GSM-7 character is present, forcing the entire message to UTF-16. Common culprits:
Fix:
- Enable smart encoding to auto-replace these characters
- Or manually replace them with GSM-7 equivalents before sending
[, ], {, }, |, \, ^, ~, and € are in the GSM-7 extended set and count as 2 characters each.
Example:
- Enable smart encoding — this handles the most common substitutions automatically
- Sanitize text before sending by replacing known problem characters
- Use the
encodingparameter set togsm7to get a400error if non-GSM-7 characters are present (fail-fast approach)
- Keep messages under 3-4 segments for maximum compatibility
- Telnyx supports up to 10 segments, but recipient device support varies
- Consider using MMS for longer content
- This is expected behavior — plan for higher segment counts when messaging in non-Latin scripts
- Keep messages concise
- Consider MMS for longer non-Latin content
Best practices
Turn on smart encoding on your messaging profile to automatically handle Unicode-to-GSM-7 substitutions. This is the single biggest cost-saving measure. Use the encoding detection helpers above to check segment counts before sending. Alert your application when messages will be unexpectedly expensive. If you accept user-generated content, sanitize it before sending. Strip or replace invisible Unicode characters, curly quotes, and other common problem characters. Stay under 160 characters (GSM-7) or 70 characters (UTF-16) to avoid multi-part message overhead. Each additional segment adds 7 characters of UDH overhead. For messages that need emojis, rich formatting, or non-Latin scripts, consider MMS or RCS instead of SMS.Related resources
Automatically replace Unicode characters with GSM-7 equivalents to reduce costs. Get started with the Telnyx Messaging API. API reference for sending messages with encoding options. Configure smart encoding and other profile settings.Rate Limiting
Source: https://developers.telnyx.com/docs/messaging/messages/rate-limiting.mdThis guide covers message delivery throughput. For API request limits, see API Rate Limiting.
Rate Limits
The following are the default rate limits applied by Telnyx for each message type and sender type.Account
Sender
The default Long Code rate limit applies to non-US destinations. For US destinations, throughput is determined at the campaign level based on your 10DLC registration. See 10DLC for carrier-specific limits.
If you need an increased rate limit, contact Telnyx sales to discuss your options.
10DLC
When using US long codes for A2P messaging, throughput is determined by mobile network operators (MNOs) based on your registered 10DLC campaign. Each carrier has different throughput systems. AT&T assigns throughput per campaign based on “Message Class,” determined by use case type and vetting score.
TPM = Throughput Per Minute. For standard use cases, the vetting score from your 10DLC brand registration determines which message class (and throughput) your campaign receives. Special use cases have fixed throughput regardless of vetting score.
T-Mobile assigns daily message caps at the brand level, shared across all campaigns under that brand.
Unvetted brands default to Low tier unless listed on the Russell 3000. Sole Proprietor campaigns have a 1,000 daily cap.
Verizon has not published specific throughput limits but uses content filtering for 10DLC traffic.
Queuing
When you send messages faster than your rate limit allows, excess messages are automatically queued for delivery.How Queuing Works
- Message submitted — Request validated against your Messaging Profile
- Rate limit check — Under limit: sent immediately. Over limit: queued
- Queue processing — Messages held up to 4 hours, released in FIFO order
- Delivery — Sent to carrier, webhook fired, visible in MDR search
Calculating Queue Size
Each sender type and message type combination has its own queue. The maximum queue length is:
Messages are delivered at 20 MPS, but 30 MPS (50 - 20) accumulates in the queue. After 4 hours of sustained sending, the queue reaches its 288,000 segment limit. Any additional messages return error
40318 (queue full).
Acme Corp sends SMS from 5 Toll-Free numbers simultaneously, each at 20 MPS.
Combined sender capacity is 100 MPS (5 × 20), but the account limit is 50 MPS. Messages exceeding the account limit queue at the account level. Once the account queue (720,000) fills, additional messages return error
40318.
Acme Corp sends SMS from 10 Long Code numbers simultaneously, each at 0.1 MPS.
Here, the sender limit (1 MPS combined) is well below the account limit (50 MPS). The sender queues will fill first. Each Long Code queue holds 1,440 segments — once full, messages to that specific number return error
40318, even though the account has capacity.
When a queue is full, additional messages return error code 40318. See API Errors for details.
Monitoring Queued Messages
Queued messages return aqueued status and won’t appear in MDR search until delivered.
Monitor queue depth via the Mission Control Portal.
To avoid queue buildup, implement client-side rate limiting to match your throughput limits. See Client-Side Rate Limiting below.
Client-Side Rate Limiting
Implementing rate limiting in your application prevents queue buildup, avoids40318 errors, and gives you control over message pacing. The examples below show a token bucket rate limiter that works for any sender type.
Python
Node
Ruby
Go
Java
.NET
PHP
Adapting for your sender type
Change therate parameter to match your sender type:
For Number Pool configurations, the effective rate is the per-number limit multiplied by the number of numbers in the pool. For example, 10 Long Codes at 0.1 MPS each gives an effective 1 MPS pool rate.
Handling Rate Limit Errors
When your sending rate exceeds limits, the API returns specific error codes. Handle them gracefully with retry logic:Python
Node
Related Resources
HTTP API request rate limits (separate from message throughput). Carrier-specific throughput for 10DLC campaigns. Distribute messages across multiple numbers for higher throughput. Monitor delivery status and diagnose throughput issues.Error Codes
Source: https://developers.telnyx.com/docs/messaging/messages/error-codes.mdComplete reference for errors returned by the Telnyx Messaging API. Errors fall into three categories: API request errors (returned immediately), delivery errors (reported via webhooks), and configuration errors (number/profile issues). For general Telnyx API errors (authentication, rate limiting, etc.), see the API Error Codes reference.
Delivery errors (40xxx)
These errors occur after the message is accepted by the API but fails during delivery. They appear in message detail records andmessage.finalized webhooks.
Carrier rejections
10DLC-specific errors
Toll-free errors
API request errors (403xx)
These errors are returned immediately in the API response when the message request is invalid.Sender/recipient errors
Content errors
Profile/configuration errors
Number provisioning errors (401xx)
Handle errors in code
Python
Node
Ruby
Go
curl
Handle delivery errors via webhooks
Delivery errors arrive asynchronously inmessage.finalized webhooks:
Python
Retriable vs permanent errors
Most delivery errors require you to change something before retrying — blindly retrying the same message with the same configuration will not resolve the issue and may result in further blocking.Related resources
Understand and handle API and carrier rate limits. Query delivery status and error details for sent messages. Diagnose 10DLC registration and delivery issues. Configure and manage messaging profile spend limits.Smart Encoding
Source: https://developers.telnyx.com/docs/messaging/messages/smart-encoding.mdSmart encoding automatically replaces Unicode characters with visually similar GSM-7 characters. This keeps your messages in the more efficient GSM-7 encoding, reducing segment counts and costs. Smart encoding applies to SMS only. MMS and RCS messages use UTF-8 encoding by default and are not affected.
Why use smart encoding
SMS messages using GSM-7 encoding fit 160 characters per segment. When a message contains even one Unicode character outside GSM-7, the entire message switches to UTF-16 encoding, which only fits 70 characters per segment. A single smart quote (") or em dash (—) can more than double your messaging costs.
Example:
Smart encoding is especially valuable when your message text originates from word processors, CMS platforms, or mobile keyboards that silently insert Unicode characters like curly quotes, em dashes, or non-breaking spaces.
How it works
When smart encoding is enabled:- Your message text is scanned for Unicode characters that have GSM-7 equivalents.
- Matching characters are automatically replaced (e.g.,
"→",—→-,…→...). - The final encoding (GSM-7 or UTF-16) is determined after all substitutions.
- The segment count is recalculated based on the transformed text.
- The API response includes metadata about the transformation.
text field in delivery webhooks contains your original message, not the smart-encoded version. This ensures your application’s message tracking stays consistent.
Enable smart encoding
You can enable smart encoding at two levels: on a messaging profile (applies to all messages) or on a per-request basis.On a messaging profile
Enable smart encoding as a default for all messages sent through a profile.curl
Node
Python
Ruby
Go
Java
.NET
PHP
Per-request control
Override the profile setting on individual messages using theencoding parameter:
The request-level
encoding parameter takes precedence over the messaging profile’s smart_encoding setting.
curl
Node
Python
Ruby
Go
Java
.NET
PHP
Response metadata
When smart encoding is applied, the API response includes detailed metadata:
The
parts field in the top-level response reflects the segment count after smart encoding, so you always see the actual billing impact.
Checking the response
curl
Node
Python
Ruby
Go
Java
.NET
PHP
Precedence rules
Smart encoding behavior is determined by a combination of your messaging profile setting and the per-requestencoding parameter:
The request-level
encoding parameter always takes precedence over the messaging profile setting.
Character substitutions
Smart encoding replaces 200+ Unicode characters with GSM-7 equivalents. The tables below show all supported substitutions grouped by category.
Fullwidth uppercase (U+FF21–U+FF3A) → A–Z
Fullwidth lowercase (U+FF41–U+FF5A) → a–z
Small capital letters:
Greek capital letters that visually resemble Latin letters are substituted:
These characters are replaced with a standard space or removed:
These control characters are removed or transformed:
Tab characters (U+0009) are converted to 7 spaces, which can significantly increase message length and affect segment count.
Edge cases
Some substitutions increase message length. For example:- Horizontal ellipsis (
…) becomes three periods (...) — adds 2 characters - Tab (U+0009) becomes 7 spaces — adds 6 characters
- Vulgar fractions like
½become1/2— adds 2 characters
~, ^, |, \, {, }, [, ] are part of the GSM-7 extended set and count as 2 characters each when calculating segment length. Smart encoding accounts for this when determining the final segment count.
Zero-width characters (like U+200B zero-width space) are removed entirely. If your message consists entirely of zero-width or control characters that all get removed, the API returns a 400 error — messages cannot be empty after transformation.
If you set encoding=gsm7 on a request but the message contains characters that cannot be represented in GSM-7 (e.g., emoji), the API returns a 400 error rather than silently dropping characters.
Limitations
- SMS only — MMS and RCS use UTF-8 encoding by default and are not affected by smart encoding.
- Not all characters convert — Emojis and non-Latin scripts (e.g., Chinese, Arabic, Cyrillic) have no GSM-7 equivalents and will still trigger UTF-16 encoding.
- Visual differences — Substitutions may slightly alter the appearance of your message. Review the character tables above to understand what changes will occur.
- Length may increase — Some substitutions produce longer output (e.g.,
…→...). Always check the response metadata for the actual segment count.
Related resources
Learn about GSM-7, UTF-16, and segment calculations. Get started with the Telnyx Messaging API. API reference for updating messaging profile settings. API reference for sending messages with encoding options.Group Messaging
Source: https://developers.telnyx.com/docs/messaging/messages/group-messaging.mdSend group MMS messages to multiple recipients in a single API call. Group messaging uses the MMS protocol to create multi-party conversations where all participants can see and reply to each other — just like a group text on your phone.
Prerequisites
- A Telnyx account
- A Messaging Profile with an MMS-enabled phone number
- An API key
How group messaging works
Group messaging builds on the MMS protocol to enable multi-party conversations:- You send a message to the
/v2/messages/group_mmsendpoint with multipletonumbers - Telnyx delivers the message to all recipients as a group MMS conversation
- When any recipient replies, all participants (including your Telnyx number) receive the reply
- You receive inbound group messages via webhooks with a
ccfield listing all participants
- Maximum of 8 recipients per conversation (plus the sender)
- MMS protocol only — all messages are billed at MMS rates
- US and Canada destinations only
- Requires a v2 webhook version on your messaging profile for inbound messages
- Charged per recipient — standard MMS rates plus carrier passthrough fees apply
Send a group message
Export your API key as an environment variable:curl
Python
Node
Ruby
Go
Java
.NET
PHP
curl
Python
Node
Ruby
Go
Java
.NET
PHP
Response
A successful response includes per-recipient status:id to correlate delivery webhooks with your group message.
Receive group messages
When someone replies to the group conversation, you receive amessage.received webhook. The cc field lists all other participants in the conversation:
Webhooks and delivery tracking
Group messages generate individual webhook events and detail records for each recipient:- Per-recipient webhooks: You receive a separate
message.finalizedevent for each recipient with their individual delivery status group_message_id: A unique identifier returned in the API response, webhooks, and detail records that lets you correlate all individual records back to the original group message- Non-Telnyx recipient status: Handset delivery confirmation is not available for non-Telnyx recipients — their status will show as
unknown
Comparison with other providers
Troubleshooting
-
Verify all
tonumbers are valid US or Canadian wireless numbers - Group MMS requires MMS-capable handsets — landlines and some VoIP numbers won’t receive them
- Check that you haven’t exceeded the 8-recipient limit
- Ensure your messaging profile uses v2 webhook version — go to Messaging, edit your profile, and confirm the webhook version
-
Verify your webhook URL is accessible and returning
200 OK
Next steps
New to Telnyx messaging? Start here Handle delivery confirmations and inbound messages Learn about long codes, toll-free, and short codes Full messaging API documentationAlphanumeric Sender ID
Source: https://developers.telnyx.com/docs/messaging/messages/alphanumeric-sender-id.mdAlphanumeric Sender IDs allow you to send SMS messages using a custom text identifier (like your brand name) instead of a phone number. This makes messages instantly recognizable to recipients—they see “TELNYX” instead of a random number. Alphanumeric Sender IDs are one-way only. Recipients cannot reply to messages sent from alphanumeric senders.
Format requirements
Your alphanumeric sender ID must follow these rules:
Country restrictions: Alphanumeric senders cannot send to the United States, Canada, or Puerto Rico. Use a long code or toll-free number for these destinations.
Before you begin
To use alphanumeric sender IDs, you need:- A Telnyx account with Level 2 verification
- A Messaging Profile configured with your alphanumeric sender ID
- An API key
Send a message
Use the send message endpoint with your alphanumeric sender ID in thefrom field.
curl
Python
Node
Ruby
PHP
Java
.NET
YOUR_API_KEYwith your API keyYourBrandwith your alphanumeric sender ID (1–11 characters)YOUR_MESSAGING_PROFILE_IDwith your messaging profile ID
US and Canada fallback
If you need to reach US or Canadian recipients, configure a fallback long code on your messaging profile. Telnyx will automatically use this number instead of the alphanumeric sender for restricted destinations. Configure this in the Messaging Portal or via the Messaging Profiles API.Limitations
Rate limits
Need higher throughput? Contact sales@telnyx.com.
Failover behavior
Telnyx attempts to deliver your message whenever possible. If alphanumeric delivery fails for a destination:- If a US fallback long code is configured, Telnyx uses that number
- Otherwise, Telnyx may use a generic alphanumeric sender ID to complete delivery
Common errors
Next steps
Create and configure messaging profiles via API Complete messaging quickstart guide Compare alphanumeric, long code, toll-free, and short codes Full send message API documentationInternational Compliance
Source: https://developers.telnyx.com/docs/messaging/messages/international-sms-compliance.mdSending SMS internationally requires compliance with country-specific regulations for sender IDs, opt-in consent, content restrictions, and registration requirements. This guide covers the top 10 international messaging destinations and their specific rules. Quick links: Country-by-country reference · Sender ID types · Opt-in requirements · Content restrictions · Pre-registration Regulations change frequently. This guide reflects requirements as of early 2026. Always verify current requirements with Telnyx support before launching messaging in a new country.
Sender ID types by country
Not every sender type works in every country. Here’s what’s supported in the top international destinations:
US/Canada note: Alphanumeric sender IDs are not supported for US and Canadian destinations. Use 10DLC, toll-free, or short codes.
Countries requiring pre-registration
Several countries require sender ID or entity registration before you can send messages. Failing to register results in blocked traffic or filtered messages.Mandatory registration
India requires Distributed Ledger Technology (DLT) registration for all A2P SMS. This is the most complex international registration requirement. What you need:- Entity registration on a DLT platform (JioConnect, Vodafone DLT, Airtel DLT, or BSNL DLT)
- Header (sender ID) registration — your alphanumeric sender ID must be approved
- Template registration — every message template must be pre-approved
- Content category — transactional, promotional, or service
- Register as a business entity on one of the DLT platforms
- Submit your sender ID (called “header”) for approval
- Create and submit message templates
- Provide Telnyx with your DLT Entity ID, registered headers, and template IDs
Promotional messages to users on the Do Not Disturb (DND) registry will be blocked. Transactional and service messages are exempt from DND filtering.
Template format:
{#var#} and the template must match exactly at delivery time.
France requires registration through the Off-net Application-to-Person (OACP) framework for commercial SMS.
Requirements:
- Sender ID must be registered with French carriers
- Opt-out must include “STOP” at no cost to the recipient
- Commercial messages restricted to 8 AM – 8 PM local time
- No commercial SMS on Sundays or public holidays
- CNIL (French data authority) consent rules apply
- Submit sender ID registration through Telnyx support
- Provide business documentation (SIRET number for French businesses)
- Allow 5–10 business days for approval
- Alphanumeric sender IDs must be registered with carriers
- Messages must include opt-out instructions
- Commercial messages must comply with the Spam Act 2003
- Sender must have consent (express or inferred)
- Submit sender ID through Telnyx support
- Provide Australian Business Number (ABN) or equivalent
- Typical approval: 3–5 business days
- Mandatory SSIR registration since January 2023
- Unregistered alphanumeric sender IDs display as “Likely-SCAM”
- Registration through SGNIC (Singapore Network Information Centre)
- Register on the SSIR portal (sgnic.sg)
- Submit sender ID with business documentation
- Link registered sender ID to Telnyx account via support
Recommended (not mandatory) registration
Opt-in requirements by region
Europe (GDPR + ePrivacy)
The EU’s GDPR and ePrivacy Directive set the baseline for all EU/EEA countries: Recipients must actively opt in to receive messages. Pre-checked boxes are not valid consent under GDPR. Consent must specify what types of messages the user will receive. “We may contact you” is too vague. Users must be able to opt out at any time, and the process must be as easy as opting in. Maintain records of when and how consent was obtained. You must be able to prove consent if challenged. GDPR-compliant consent example:- Germany: Requires “double opt-in” (confirmation SMS after initial signup) as best practice
- France: CNIL requires explicit, separate consent for marketing SMS
- Spain: AEPD allows “soft opt-in” for existing customers (similar products/services only)
- Italy: Garante requires clear separation between service and marketing consent
North America
Asia-Pacific
Latin America
Content restrictions
Universally restricted content
These content types are restricted or prohibited in most countries:Country-specific restrictions
- Financial promotions: Must be approved by an FCA-authorized firm
- Age-gated content: Must use age verification for alcohol, gambling
- Charity messaging: Regulated by the Fundraising Regulator
- Marketing hours: No legal restriction, but industry best practice is 8 AM – 9 PM
- UWG (Competition Law): Strict consent requirements for all commercial messages
- Heilmittelwerbegesetz: Restricts pharmaceutical advertising
- Glücksspielstaatsvertrag: Strict gambling advertising rules
- Double opt-in: Expected best practice for marketing consent
- Loi Hamon: Right to opt out of all commercial solicitation
- Time restrictions: No commercial SMS 8 PM – 8 AM, Sundays, or public holidays
- CNIL enforcement: Active enforcement with significant fines
- Language: Commercial messages should be in French
- Promotional hours: 9 AM – 9 PM IST only (mandatory, not best practice)
- DND registry: Promotional messages blocked to DND-registered numbers
- Template approval: Every message must match a pre-approved template
- Scrubbing: Numbers are checked against DND registry before delivery
- LGPD compliance: Explicit consent with specific purpose
- Quiet hours: 9 PM – 9 AM (industry standard)
- Consumer code: Price/offer messages must include full terms
- Language: Messages should be in Portuguese
Country-by-country reference
🇬🇧 United Kingdom
Send with alphanumeric sender ID:
curl
Python
Node
Ruby
Java
.NET
PHP
Go
🇮🇳 India
India requires both sender ID registration and message template approval before any messages can be sent. Contact Telnyx support to initiate India DLT registration.
🇩🇪 Germany
🇫🇷 France
🇦🇺 Australia
🇧🇷 Brazil
🇲🇽 Mexico
Best practices for international messaging
Review this guide and contact Telnyx support for any country not listed. Requirements vary significantly and change frequently. Alphanumeric sender IDs are preferred in most international markets (except US/Canada). They build brand recognition and improve open rates. Send messages in the recipient’s language. Many countries require or strongly recommend this for commercial messaging. Even where not legally required, sending during business hours dramatically reduces complaints and opt-outs. Universal best practice. Use language appropriate to the country (e.g., “STOP” in English-speaking countries, “ARRÊT” in France). Store when and how each recipient consented. GDPR requires you to prove consent if challenged. Keep records for at least 4 years. Use Message Detail Records to track delivery rates per country. Sudden drops may indicate registration issues or content filtering.Handling multi-country messaging
For platforms sending to multiple countries, implement country-aware routing:Python
Node
Next steps
Set up branded sender IDs for international messaging. Handle character encoding for international scripts (Arabic, Chinese, etc.). Understand delivery errors including country-specific rejections. US-specific registration for A2P messaging.MMS Converter
Source: https://developers.telnyx.com/docs/messaging/messages/mms-converter.mdWhile your message’s source number may support sending MMS, the destination number might not support receiving it. Normally, this will prevent you from sending MMS to this destination. When MMS converter is enabled on your messaging profile, however, your MMS will be converted to an SMS message by Telnyx and then sent to the destination. Messages sent as SMS are unaffected by this feature and will be sent as usual. The resultant webhooks for messages sent with this feature enabled will indicate the protocol that was used to send the message. For example: when an MMS message is sent and fallback happens, the webhook will indicate that an SMS message was sent, and when an MMS message is sent and fallback doesn’t happen, the webhook will indicate that an MMS message was sent. If fallback happens, the destination will receive an SMS formatted to contain the media URLs specified in the request. Each media URL will appear on its own line, immediately after the message body, if any.
Examples
Note how the media URL(s) appear on the destination exactly as provided in the request. No shortlinking or other transformations are applied on your behalf.Message body and one media URL
If your request includes:"text": "message body that\nis potentially spread across multiple lines""media_urls": ["https://example.com/image.png"]
Message body and two media URLs
If your request includes:"text": "message body""media_urls": ["https://example.com/one.png", "https://example.com/two.png"]
Only one media URL
If your request doesn’t settext and includes:
"media_urls": ["https://example.com/image.png"]
Enable MMS converter
This behavior is not enabled by default; if you want to make use of this feature then you must enable it first. This is controlled at the messaging profile level by an optional boolean field calledmms_fall_back_to_sms, which you can either
set at creation time or update later if you’d like to change
an existing messaging profile.
MMS Media & Transcoding
Source: https://developers.telnyx.com/docs/messaging/messages/mms-transcoding.mdMMS messages let you send images, videos, and other media files alongside text. This guide covers supported media types, carrier size limits, and how to use Telnyx’s automatic transcoding to ensure delivery. MMS is supported on Long Code, Toll-Free, and Short Code numbers in the US and Canada. International MMS support varies by carrier.
Send an MMS message
Include one or moremedia_urls in your message request to send an MMS:
curl
Python
Node
Ruby
Go
Java
.NET
PHP
Supported media types
Animated GIFs are not supported for transcoding. If you send animated GIFs, ensure they are under the carrier size limit — they will not be resized.
Carrier size limits
Each US carrier imposes different maximum MMS message sizes based on the sender type. Messages exceeding these limits will be rejected by the carrier.
The safe maximum across all carriers and sender types is 600 KB. To guarantee delivery to all recipients regardless of carrier, keep your total media under this limit — or enable transcoding.
Automatic transcoding
Telnyx can automatically resize media to comply with carrier size limits. When enabled, oversized images and videos are resized before delivery.How transcoding works
- You send an MMS with media that exceeds the destination carrier’s size limit
- Telnyx detects the destination carrier and its size restriction
- Media is resized to fit within the limit:
- Images → converted to JPEG
- Videos → converted to H.264 MP4
- The resized media is delivered to the recipient
Enable transcoding
Enablemms_transcoding on your messaging profile to apply it to all MMS sent through that profile.
curl
Python
Node
Ruby
Go
Java
.NET
PHP
Best practices
Pre-optimize your media for the best balance of quality and deliverability:- Images: Resize to 640×480 or smaller, use JPEG at 80% quality
- Videos: Compress to H.264, keep under 30 seconds, target 480p
- Target size: Stay under 600 KB for universal carrier compatibility
- URLs don’t require authentication
- URLs respond quickly (timeouts cause delivery failures)
- URLs return the correct
Content-Typeheader - URLs use HTTPS for security
- Cheaper — MMS messages cost more than SMS
- Faster — No media download/processing overhead
- More reliable — Fewer points of failure
Related resources
Full tutorial for building an MMS application with media storage. Customize the layout of your MMS media with SMIL templates. Get started with the Telnyx Messaging API. API reference for sending messages with media.Schedule Messages
Source: https://developers.telnyx.com/docs/messaging/messages/schedule-message.mdSchedule SMS and MMS messages to send at a specific time in the future. Use scheduled messaging for appointment reminders, marketing campaigns, time-zone-aware notifications, and any scenario where precise delivery timing matters.
Prerequisites
- A Telnyx account
- A Messaging Profile with an assigned phone number
- An API key
How scheduled messaging works
When you schedule a message, Telnyx stores it and delivers it at the specified time. Here’s how it works:- You send a request with a
send_attimestamp set in the future - Telnyx validates the request and returns a message resource with
status: "scheduled" - At the scheduled time (accurate to the minute), Telnyx sends the message
- Standard webhooks fire as the message is processed and delivered
send_atmust be at least 5 minutes in the futuresend_atmust be no more than 5 days in the future- Scheduling accuracy is up to 1 minute
- Maximum of 1 million scheduled messages at any given time
Schedule a message
You can schedule messages using either endpoint:POST /v2/messages— The standard send endpoint, with thesend_atparameter addedPOST /v2/messages/schedule— A dedicated scheduling endpoint with the same parameters
/v2/messages with send_at.
Export your API key as an environment variable:
send_at field requires an ISO 8601 formatted datetime string in UTC. For example:
2026-02-15T14:30:00Z— February 15, 2026 at 2:30 PM UTC2026-02-14T09:00:00-08:00— February 14, 2026 at 9:00 AM PST
curl
Python
Node
Ruby
Go
Java
.NET
PHP
curl
Python
Node
Ruby
Go
Java
.NET
PHP
Response
A successful response returns the message withstatus: "scheduled":
id — you’ll need it to retrieve or cancel the scheduled message.
Retrieve a scheduled message
Check the status of a scheduled message withGET /v2/messages/{id}:
curl
Python
Node
Cancel a scheduled message
Cancel a message that hasn’t been sent yet withDELETE /v2/messages/{id}:
curl
Python
Node
- The message must have
status: "scheduled" - The
send_attime must be more than 1 minute in the future - Once a message begins sending, it cannot be cancelled
Webhooks
Scheduled messages trigger the same messaging webhooks as immediate messages. The webhook sequence is:message.sent— Fires when the message is sent at the scheduled timemessage.finalized— Fires when delivery is confirmed or fails
Use cases
Schedule reminders 24 hours before an appointment:Python
Python
Limits and rate limiting
- Scheduling window: 5 minutes to 5 days in the future
- Maximum scheduled messages: 1 million at any given time
- Accuracy: Messages are sent within 1 minute of the scheduled time
- Rate limits: The same rate limits apply to scheduled messages as to immediate messages — both when creating the scheduled message and when it’s sent
Comparison with other providers
Next steps
New to Telnyx messaging? Start here Handle delivery confirmations and inbound messages Understand messaging throughput limits Full API parameter documentationSpecifying SMIL Template
Source: https://developers.telnyx.com/docs/messaging/messages/smil-template.mdSMIL specifies how MMS media files are laid out in MMS. Telnyx generates SMIL automatically based on
media_urls and text fields. Advanced users can add a smil_template parameter to the MMS message request. This template will then be used to generate a customized SMIL.
Example of SMIL template:
{{ }}. During the construction of SMIL these parameters will be automatically replaced with locations of text and media contents. In case of media, {{ 0 }} will be replaced with the location of the first URL in the media_urls list, {{ 1 }} will be replaced with the location of the second URL in the media_urls list, and so on. {{ text }} will be replaced with the location of the text content.
The SMIL template must be set in smil_template parameter of the MMS request. It must be properly JSON-escaped:
Two-Factor Authentication (2FA)
Source: https://developers.telnyx.com/docs/messaging/messages/2fa.mdImplement SMS-based two-factor authentication (2FA) using the Telnyx Messaging API. This guide covers generating, sending, and verifying one-time passwords (OTPs) with security best practices. Consider the Verify API first. Telnyx offers a dedicated Verify API that handles OTP generation, delivery, and verification for you — including retry logic, rate limiting, and multi-channel support (SMS, voice, WhatsApp). Use this guide only if you need full control over the 2FA flow.
How SMS 2FA works
Generate and send an OTP
Generate a cryptographically secure OTP and send it via SMS:Python
Node
Ruby
Go
Java
.NET
PHP
Security best practices
Never useMath.random(), rand(), or similar non-cryptographic functions for OTP generation. Use:
OTPs should expire after a short window (3-5 minutes is typical). Never allow OTPs to be valid indefinitely.
- Store the expiry timestamp alongside the OTP
- Check expiry before validating
- Delete expired OTPs proactively
Prevent abuse by limiting how frequently a user can request new OTPs:
- Per phone number: Maximum 1 OTP request per 60 seconds
- Per IP address: Maximum 10 OTP requests per hour
- Per account: Maximum 5 OTP requests per hour
847291) rather than alphanumeric codes. They are:
- Easier for users to type on mobile
- Compatible with SMS autofill on iOS and Android
- Sufficient security when combined with attempt limits and expiry
When to use the Verify API instead
The Telnyx Verify API is a better choice when:
Use this guide’s DIY approach only when you need full control over the OTP flow, custom message templates, or integration with existing verification systems.
Related resources
Managed OTP verification with built-in rate limiting and multi-channel support. Get started with the Verify API in minutes. Understand message throughput limits for OTP delivery. Get started with the Telnyx Messaging API.Appointment Reminders
Source: https://developers.telnyx.com/docs/messaging/messages/appointment-reminder.mdReduce no-shows by sending automated SMS appointment reminders with the Telnyx Messaging API. This guide covers scheduling strategies, message templates, opt-out handling, and timing best practices.
How it works
Send an appointment reminder
Python
Node
Ruby
Go
Java
.NET
PHP
Scheduling strategies
Choose a scheduling approach based on your application’s requirements: The simplest approach — use the Telnyx API’s built-in scheduled messaging feature. No external scheduler needed.Python
Python
Python
Handle replies (confirm / cancel)
Set up a webhook to receive replies and update appointment status:Python
Node
Opt-out handling
You must honor opt-out requests. Telnyx automatically handles STOP/UNSTOP keywords for 10DLC and Toll-Free numbers, but you should also track opt-outs in your application. Telnyx automatically handles standard opt-out keywords (STOP, UNSUBSCRIBE, CANCEL, END, QUIT) for US long codes and toll-free numbers. When a user texts STOP:
- Telnyx sends an automatic reply confirming the opt-out
- Future messages to that number are blocked at the carrier level
- You receive a
message.receivedwebhook with the STOP keyword
Timing best practices
- 24 hours before: Primary reminder — enough time to cancel/reschedule
- 2-3 hours before: Final reminder for same-day appointments
- Avoid late night/early morning: Only send between 9 AM and 8 PM in the recipient’s local time zone For high-value appointments (medical, legal), send two reminders:
- 48 or 24 hours before — gives time to reschedule
- 2-3 hours before — final confirmation
- Patient name
- Date and time
- Location (short form)
- Reply instructions
Message templates
Healthcare:Related resources
Use the Telnyx API to schedule messages for future delivery. Customize opt-in/out behavior for your messaging profile. Receive inbound messages and delivery status updates. Understand throughput limits for bulk reminder sending.Send & Receive MMS
Source: https://developers.telnyx.com/docs/messaging/messages/send-receive-mms.mdSend multimedia messages (images, video, audio, vCards) via the Telnyx API and process inbound MMS attachments from webhooks.
Prerequisites
- A Telnyx account with API key
- A messaging profile with a phone number enabled for MMS
- A webhook endpoint to receive inbound messages (see ngrok setup)
Send an MMS
Includemedia_urls in your message request. You can send up to 10 media files per message.
Python
Node
Ruby
Java
.NET
PHP
Go
curl
Send multiple media files
Include multiple URLs inmedia_urls. Total payload must stay under carrier limits.
curl
Receive an MMS
Inbound MMS messages arrive as webhooks to your messaging profile’s webhook URL. Themedia array contains attachment details.
Webhook payload
Process inbound MMS
Python
Node
Ruby
Go
curl
Reply with media
Echo received media back to the sender, or reply with different media:Python
Node
Supported media types
Telnyx automatically transcodes oversized media when possible. For details on carrier-specific limits and transcoding behavior, see MMS Media & Transcoding.
Store media externally (optional)
For production use, store received media in your own cloud storage rather than relying on ephemeral Telnyx URLs.Python
Python
Troubleshooting
Cause: The media URL was unreachable, or the recipient’s carrier doesn’t support MMS. Fix:- Verify the media URL is publicly accessible (no auth required)
- Check message detail records for error details
- Confirm the recipient’s number supports MMS
- Compress images before sending (aim for < 600 KB each)
- Enable automatic transcoding (on by default)
- See carrier size limits
Next steps
Carrier limits, supported formats, and automatic transcoding. Set up and secure your webhook endpoint. SMS sending guide with all SDK examples. Send MMS to multiple recipients.Zapier Integration
Source: https://developers.telnyx.com/docs/messaging/messages/zapier-integration.mdConnect Telnyx SMS messaging to 7,000+ apps using Zapier — no code required. Build automated workflows that send messages, forward inbound SMS, and respond to triggers from other services. When to use Zapier vs. the API: Zapier is ideal for simple automations, prototyping, and connecting to third-party services without code. For high-volume messaging, complex logic, or production-critical workflows, use the Telnyx Messaging API directly.
Prerequisites
- A Telnyx account with a messaging-enabled phone number
- A Messaging Profile configured with a webhook URL
- A Zapier account (free tier available)
- Your Telnyx v2 API Key
Connect Telnyx to Zapier
Go to the Telnyx Zapier integration page and click Connect. Enter your Telnyx v2 API key when prompted. This gives Zapier permission to send and receive messages on your behalf. After authenticating, Zapier displays all phone numbers on your Telnyx account. Select the number you want to use for sending. Zapier does not support selecting a messaging profile directly — it lists individual numbers from your account. The number you choose must be assigned to a messaging profile with a webhook URL configured for inbound triggers to work.Available triggers and actions
Example workflows
Send SMS alerts from any app
Connect any Zapier trigger to Telnyx SMS to send notifications: Popular combinations:- Google Sheets → new row → send SMS (e.g., new lead notification)
- Shopify → new order → send SMS confirmation
- Google Calendar → event starting → send SMS reminder
- Stripe → payment received → send SMS receipt
- Typeform → new response → send SMS follow-up
- Create a new Zap and select your trigger app (e.g., Google Sheets)
- Configure the trigger event (e.g., “New Spreadsheet Row”)
- Add Telnyx as the action and select Send SMS
- Map fields from the trigger into the message:
- Source Number: Select a Telnyx number from the dropdown — this is a fixed number from your account, not a mapped field from the trigger
- Destination Number: Use a field from the trigger (e.g., a phone number column from Google Sheets) or enter a fixed number
- Message Content: Compose your message using trigger data
- Test and turn on the Zap
Forward inbound SMS to your phone
Route messages received on your Telnyx number to your personal phone — useful for monitoring business numbers. Setup:- Create a new Zap with Telnyx → Receive a Message as the trigger
- Add Telnyx → Send SMS as the action
- Configure the action:
- Source Number: Your Telnyx number
- Destination Number: Your personal number
- Message Content: Use trigger fields:
- Test and turn on the Zap
Automatically reply to inbound messages
Set up automatic replies for inbound messages — useful for business hours notices, keyword responses, or acknowledgments. Setup:- Create a new Zap with Telnyx → Receive a Message as the trigger
- (Optional) Add a Filter by Zapier step to only reply to certain messages — for example, filter where
{{Text}}contains “HOURS” or “INFO”. Note: filtering requires a Zapier paid plan (Professional or higher) - Add Telnyx → Send SMS as the action
- Configure the action:
- Source Number: Your Telnyx number
- Destination Number: Use
{{From Phone Number}}from the trigger (replies to sender) - Message Content: Your auto-reply message
- Test and turn on the Zap
Limitations
Zapier checks for new triggers on a schedule based on your plan:
This means inbound messages may not trigger actions immediately. For real-time processing, use the Telnyx Messaging API with webhooks directly.
The Telnyx Zapier integration supports SMS only. MMS media attachments are not included in the trigger data, and the Send SMS action does not support
media_urls.
For MMS, use the Messaging API directly.
Each Telnyx Send SMS action step uses a single sender number selected from your account. To send from different numbers in the same Zap, add multiple Telnyx action steps — each with a different sender number.
The Zapier integration does not provide delivery status (sent, delivered, failed). For delivery tracking, use the API with webhooks or Message Detail Records.
Standard Telnyx rate limits apply to messages sent via Zapier. If your Zap sends messages faster than your sender type allows, messages will be queued or rejected.
Troubleshooting
Ensure phone numbers include the country code with+ prefix:
- ✅
+15551234567 - ❌
5551234567 - ❌
(555) 123-4567
- Verify your Telnyx number is assigned to the correct messaging profile
- Check that the messaging profile has a webhook URL configured
- Ensure the Zap is turned on (not paused)
- Check Zapier’s task history for errors
- On free plans, polling may take up to 15 minutes
- Verify your API key is a v2 key from the Telnyx Portal
- Ensure the key has not been revoked or expired
- Try removing the Telnyx connection in Zapier and re-adding it
- 40333: Spend limit reached — increase your daily spend limit
- 40318: Queue full — you’re sending too fast for your sender type
- 40300: Invalid
fromnumber — ensure the source number is assigned to a messaging profile in the Telnyx Portal
- Adding a Zapier Filter step that checks if the sender is your own number
- Using a delay step to rate-limit responses
- Checking for duplicate messages within a time window
Related resources
Use the Telnyx API directly for full messaging control. Real-time message delivery via webhooks (no polling delay). Browse all Telnyx Zapier integrations and templates. Configure the messaging profile used by your Zapier integration.Vercel Chat SDK
Source: https://developers.telnyx.com/docs/messaging/messages/chat-sdk-adapter.md
@telnyx/chat-sdk-adapter is the official Telnyx adapter for the Vercel Chat SDK — Vercel’s TypeScript framework for building chatbots that work across Slack, Microsoft Teams, Discord, Telegram, WhatsApp, email, and now SMS/MMS through Telnyx. Write bot logic once and route messages through any supported channel.
The adapter is maintained by Telnyx at team-telnyx/telnyx-chat-sdk-adapter and listed as a vendor-official adapter on chat-sdk.dev/adapters.
When to use this adapter: building an AI- or rules-driven SMS bot inside a Next.js app and wanting the same handler API you already use for other chat platforms. For general-purpose, high-volume messaging outside a Chat SDK app, use the Telnyx Messaging API directly.
Prerequisites
- A Telnyx account with a messaging-enabled phone number (E.164 format)
- A Messaging Profile with a webhook URL configured
- Your Telnyx v2 API key
- The Ed25519 Public Key from the messaging profile (for webhook signature verification)
- Node.js
>=18
Install
@chat-adapter/state-memory for development, @chat-adapter/state-redis for production:
Quick start
chat.webhooks.telnyx:
https:///api/webhooks/telnyx.
Configuration
Environment variables
TelnyxAdapterConfig
Recommended: Dedicated messaging profile
Create a dedicated Messaging Profile for each bot and pass its ID asmessagingProfileId. We recommend prefixing the profile name with [Chat SDK] (for example, [Chat SDK] support-bot-prod) so it’s easy to find in Mission Control and in usage reports.
A dedicated profile gives you:
- Per-profile usage analytics, so bot traffic is separated from the rest of your account
- Per-profile spend limits, which cap bot spend without affecting other workloads
- An isolated webhook URL and failover URL
- An isolated Ed25519 public key — the one you pass as
publicKeybelongs to the profile, not the account
Webhook setup
In the Telnyx Mission Control portal, open the messaging profile you created for the bot. Under Inbound Settings, set the Webhook URL to your server’s endpoint (for example,https://bot.example.com/api/webhooks/telnyx). Set Webhook API version to 2.
Under Messaging → Security, copy the Public Key for the profile. Pass it as publicKey (or set TELNYX_PUBLIC_KEY). Telnyx shows this key in base64; the adapter accepts it as-is.
Assign one or more phone numbers to the profile. The number you set as TELNYX_FROM_NUMBER must belong to this profile.
Incoming webhooks are validated against the telnyx-signature-ed25519 and telnyx-timestamp headers. Requests with a timestamp older than 300 seconds, or with an invalid signature, are rejected with 401.
Capabilities
Thread model
A thread is a pair of E.164 phone numbers. The thread ID format istelnyx::, for example telnyx:+15551234567:+15559876543. openDM(phoneNumber) returns the thread ID for a given recipient so you can post proactively.
Attribution
Outbound messages carry two ecosystem-observability signals:User-Agentheader on every outbound API call:@telnyx/chat-sdk-adapter/ (vercel-chat-sdk).tagson every outbound message:["vercel-chat-sdk", "vercel-chat-sdk:"], merged with any user-supplied tags.
message.sent, message.finalized, message.received) in the data.payload.tags field. User-supplied extraTags are merged after the attribution tags. Set disableAttributionTags: true to opt out; extraTags is unaffected.
Pair with the Telnyx AI SDK provider
Use this adapter alongside@telnyx/ai-sdk-provider — the Telnyx provider for the Vercel AI SDK — to build a full AI-powered SMS agent on Telnyx inference. The Chat SDK handles message I/O; the AI SDK handles LLM, embeddings, and speech. One account, one API key, two packages.
Resources
@telnyx/chat-sdk-adapteron npm- Source on GitHub
- Vercel Chat SDK adapter directory
- Chat SDK docs
- Telnyx Messaging API reference
- Messaging profiles overview
Spend Limits
Source: https://developers.telnyx.com/docs/messaging/messages/configurable-spend-limits.mdMessaging profiles can be configured with a daily spending limit to prevent unexpected costs from bugs, traffic spikes, or human error. When the limit is reached, outbound messages are rejected until the limit resets at midnight UTC.
Set up spend limits
Enable thedaily_spend_limit_enabled flag and set a daily_spend_limit value (in USD) on your messaging profile:
curl
Python
Node
Ruby
Go
Java
.NET
PHP
daily_spend_limit value is a string representing USD (e.g., "0.50", "10.00", "100.00"). It applies per messaging profile — use separate profiles for different budgets.
When the limit is reached
Once spending exceeds the configured limit, Telnyx:- Rejects new messages with HTTP
429and error code40333 - Sends a webhook to your configured URL
- Sends an email notification to your account
Error response
Webhook payload
current_cost to slightly exceed configured_limit.
Handle the spend limit webhook
Process the webhook to alert your team and gracefully handle the blocked state:Python
Node
Track spending
Monitor your messaging spend to take action before hitting the limit:Python
Node
Reset and override
The running spend total resets automatically at midnight UTC each day. After reset, messages can be sent until the limit is exceeded again. Changing thedaily_spend_limit or daily_spend_limit_enabled values does not reset the running total. Only the midnight UTC reset clears accumulated spend.
If you’ve hit the limit but need to send urgent messages, temporarily disable the limit:
daily_spend_limit to allow more messages until the new limit is reached:
Best practices
Even if you don’t expect high spend, a limit prevents runaway costs from application bugs or compromised API keys. Create separate messaging profiles for transactional messages (OTP, alerts) and marketing messages, each with appropriate limits. Always handle themessaging-profile.spend-limit-reached webhook to alert your team immediately.
Your application should gracefully handle the 40333 error code — queue messages for later delivery or switch to a backup profile.
As your messaging volume grows, review and adjust limits to avoid unexpected blocks during peak periods.
Related resources
API reference for configuring messaging profile settings. Track message costs and delivery status. Understand message throughput limits. Configure webhooks to receive spend limit notifications.Message Detail Records
Source: https://developers.telnyx.com/docs/messaging/messages/message-detail-records.mdA Message Detail Record (MDR) describes a specific message request—including its current status, cost, and metadata. Telnyx creates an MDR when a message is submitted and updates it as the message progresses through delivery.
When to Use MDRs
Check if a message was delivered, failed, or is still in progress. Investigate delivery issues by examining message status and error codes. Confirm message costs after delivery for billing reconciliation. Retrieve message history for compliance and record-keeping.Retrieve an MDR
Fetch a message record using its UUID. The UUID is returned when you send a message and is also included in webhook events.curl
Node
Python
Ruby
Go
Java
.NET
PHP
Example Response
MDR Schema
Cost may be null: When retrieved immediately after sending,
cost may be null because pricing is calculated asynchronously. The final cost appears in the message.finalized webhook event.
Message Status
Thestatus field in the to array indicates where the message is in its lifecycle.
Outbound Status Flow
Outbound Statuses
Track delivery with webhooks: Rather than polling for status, configure a webhook URL to receive real-time status updates as
message.sent, message.delivered, or message.finalized events.
Inbound Statuses
Common Error Codes
When a message fails, theerrors array contains details:
See the Error Codes Reference for the complete list.
Best Practices
Polling the MDR endpoint is inefficient and can hit rate limits. Instead, configure webhooks on your Messaging Profile to receive real-time updates:message.sent— Message accepted by carriermessage.delivered— Confirmed deliverymessage.finalized— Final status with cost
id returned when you send a message. This UUID is required to retrieve the MDR later:
cost field is populated asynchronously. For accurate billing:
- Wait for the
message.finalizedwebhook, OR - Retrieve the MDR after a few seconds
Troubleshooting
Possible causes:- Invalid message ID format
- Message ID from a different account
- Message was never created (request was rejected at validation)
201 status. Rejected requests don’t create MDRs.
Possible causes:
- Message is rate-limited and waiting in queue
- Gateway connection issue
valid_until will fail.
Cause: Cost is calculated asynchronously after the message is sent.
Solution: Either wait for the message.finalized webhook, or retrieve the MDR again after 5-10 seconds.
Next Steps
Get real-time delivery updates Complete sending quickstart Full error code reference Complete Messages API docsOverview
Source: https://developers.telnyx.com/docs/messaging/messages/messaging-profiles-overview.mdA messaging profile is the central configuration object for your Telnyx messaging setup. It groups your phone numbers, defines webhook URLs, and controls features like number pooling, smart encoding, and spend limits. Every phone number you use for messaging must be assigned to a messaging profile.
What a messaging profile controls
Create a messaging profile
curl
Python
Node
Ruby
Go
Java
.NET
PHP
Configure profile features
Update an existing profile to enable features:curl
Python
Node
Profile features explained
Every messaging profile needs a webhook URL to receive:- Inbound messages — SMS/MMS received on your numbers
- Delivery status updates — sent, delivered, failed, etc.
- Spend limit notifications — when daily limits are reached
See Webhooks for implementation details.
When enabled, messages sent from the profile automatically distribute across all assigned numbers. This increases throughput and helps avoid carrier filtering.
Settings:
See Number Pool for details.
Automatically replaces Unicode characters (curly quotes, em dashes, etc.) with GSM-7 equivalents to keep messages in the more efficient encoding and reduce segment counts.
A single curly quote can switch an entire message from GSM-7 (160 chars/segment) to UTF-16 (70 chars/segment), more than doubling costs.
See Smart Encoding for the full character substitution reference.
Automatically resizes images and videos to meet carrier size limits before delivery. When enabled:
- Images are converted to JPEG
- Videos are converted to H.264 MP4
- Animated GIFs are not resized
- New messages are rejected with error
40333 - A webhook notification is sent
- An email alert is sent to your account
Assign phone numbers
After creating a profile, assign phone numbers to it:curl
Python
Node
Common configurations
Related resources
Distribute messages across multiple numbers for higher throughput. Reduce SMS costs by replacing Unicode with GSM-7 characters. Set daily spend caps to prevent unexpected costs. Receive inbound messages and delivery status updates.Number Pool
Source: https://developers.telnyx.com/docs/messaging/messages/number-pool.mdNumber Pool automatically distributes your outbound messages across multiple phone numbers, helping you scale messaging campaigns while maintaining deliverability. Instead of specifying a single “from” number, Telnyx selects the optimal sender from your pool based on availability, health, and configured weights.
When to Use Number Pool
Distribute traffic across numbers to avoid per-number rate limits and increase total throughput. Automatically skip unhealthy numbers and spread reputation across multiple senders. Balance between long codes and toll-free numbers with configurable weights. No need to track which number to use—Telnyx handles sender selection.How It Works
- Pool creation: All long code and toll-free numbers assigned to your Messaging Profile form the pool
- Sender selection: When you send a message, Telnyx picks an available number from the pool
- Weight distribution: Control the ratio of long code vs. toll-free usage with weights
- Health monitoring: Optionally skip numbers with poor delivery rates
Prerequisites
- A Messaging Profile with at least one phone number assigned
- Multiple numbers recommended for effective load distribution
Configure Number Pool
Enable Number Pool on your Messaging Profile by setting thenumber_pool_settings. The weights control which number types are preferred.
curl
Node
Python
Ruby
Go
Java
.NET
PHP
- Go to Messaging in the portal
- Click the edit icon next to your Messaging Profile
- Under Outbound, toggle on Number Pool
- Configure the weights for long codes and toll-free numbers
- Optionally enable Skip Unhealthy Numbers
- Click Save

Configuration Options
Weights are ratios, not percentages. With
long_code_weight: 5 and toll_free_weight: 1, approximately 5 out of every 6 messages use a long code.
Send Messages with Number Pool
When sending with Number Pool, omit thefrom field and specify your messaging_profile_id instead. Telnyx automatically selects the optimal sender.
curl
Node
Python
Ruby
Go
Java
.NET
PHP
from number that was selected:
Disable Number Pool
To disable Number Pool, setnumber_pool_settings to an empty object:
curl
Node
Python
Related Features
Number Pool works alongside these Messaging Profile features: Maintains consistency by using the same number for a recipient across messages. When enabled, if you’ve previously messaged a recipient, the same number is reused when available. Enable with:Troubleshooting
Cause: All numbers are flagged as unhealthy andskip_unhealthy is enabled.
Solutions:
- Temporarily disable
skip_unhealthyto allow sending - Add more numbers to your Messaging Profile
- Investigate delivery issues on your existing numbers
- Verify weights are non-zero for both types
- Ensure you have both long codes and toll-free numbers assigned to the profile
/v2/messages endpoint instead of /v2/messages/number_pool.
Solution: Use the Number Pool send endpoint which requires messaging_profile_id instead of from.
Next Steps
Maintain sender consistency for recipients Match sender to recipient geography Understand messaging throughput limits View full Number Pool API detailsSticky Sender
Source: https://developers.telnyx.com/docs/messaging/messages/sticky-sender.mdSticky Sender ensures the same phone number is used every time your application messages a particular recipient. This consistency builds familiarity—your customers see the same number each time, making your messages more recognizable and trustworthy. Sticky Sender is part of Number Pool settings. You must have Number Pool enabled to use Sticky Sender.
When to Use Sticky Sender
Maintain consistent sender identity throughout multi-message conversations. Appointment reminders, delivery updates, and alerts from a familiar number. Customers can save your number knowing future messages will come from the same sender. Build trust by ensuring customers recognize your number over time.How It Works
- First message: Telnyx selects a number from your pool (using weights, geomatch, or availability)
- Mapping created: The recipient-to-sender pairing is stored
- Future messages: The same sender is automatically used for that recipient
- Mapping expires: After 8 days of no messages, the mapping resets
Mapping Behavior
Compare with Twilio: Sticky Sender works similarly to Twilio’s Messaging Services sticky sender feature. If you’re migrating, the concept is the same—just configure it on your Messaging Profile instead.
Prerequisites
- A Messaging Profile with Number Pool enabled
- At least one phone number assigned to the profile
Configure Sticky Sender
Enable Sticky Sender by updating your Messaging Profile’snumber_pool_settings.
The PATCH endpoint merges with your existing configuration—only the fields you include are updated. Your current weights and other Number Pool settings are preserved.
curl
Node
Python
Ruby
Go
Java
.NET
PHP
- Go to Messaging in the portal
- Click the edit icon next to your Messaging Profile
- Under Outbound, toggle on Number Pool
- Check the Sticky Sender checkbox
- Click Save

Disable Sticky Sender
To disable Sticky Sender, set thesticky_sender field to false. This immediately clears all existing mappings.
curl
Node
Python
Combining with Other Features
Sticky Sender works alongside other Number Pool settings. The priority order for number selection is:- Sticky Sender (if enabled and mapping exists)
- Geomatch (if enabled and matching area code available)
- Weight distribution (long code vs. toll-free preference)
- Skip unhealthy (exclude poor-performing numbers)
- First message: Geomatch selects a number matching the recipient’s area code
- Future messages: Sticky Sender reuses that same geomatched number
- The mapping is preserved
- Messages still route through that number (skip_unhealthy doesn’t override sticky mappings)
Troubleshooting
Possible causes:- Sticky Sender not enabled on the Messaging Profile
- Previous mapping expired (8+ days since last message)
- A phone number was removed from the profile
- Verify Sticky Sender is enabled in your profile settings
- Send messages more frequently to prevent mapping expiration
- Check that all expected numbers are still assigned to the profile
Next Steps
Learn about number pool configuration and weights Match sender to recipient geography Send your first message with Number Pool View full Messaging Profile API detailsGeomatch
Source: https://developers.telnyx.com/docs/messaging/messages/geomatch.mdGeomatch automatically selects sender numbers that share the same area code as your recipients. When enabled, Telnyx matches your outbound messages with locally-recognized numbers—boosting trust and engagement with your customers. Geomatch is part of Number Pool settings. You must have Number Pool enabled to use Geomatch.
When to Use Geomatch
Appear local to recipients—messages from familiar area codes are more likely to be read and trusted. Local numbers typically see better response rates than out-of-area or toll-free numbers. Automatically match senders across different geographic areas without manual routing logic. Build rapport with customers who prefer communicating with local business numbers. NANP only: Geomatch currently supports only North American numbers (US, Canada, Caribbean). International numbers don’t participate in geomatching.How It Works
- Message sent: Your app sends a message without specifying a
fromnumber (using Number Pool) - Area code lookup: Telnyx identifies the recipient’s area code
- Pool search: Telnyx searches your number pool for a matching area code
- Selection: If found, that number is used; otherwise, a number with a different area code is selected
Prerequisites
- A Messaging Profile with Number Pool enabled
- Phone numbers from multiple area codes assigned to the profile (for effective geomatching)
Configure Geomatch
Enable Geomatch by updating your Messaging Profile’snumber_pool_settings.
curl
Node
Python
Ruby
Go
Java
.NET
PHP
long_code_weight to ensure Number Pool is active. If you already have Number Pool configured, you can omit weight fields—PATCH requests merge with existing settings.
- Go to Messaging in the portal
- Click the edit icon next to your Messaging Profile
- Under Outbound, toggle on Number Pool
- Check the Geomatch option
- Click Save
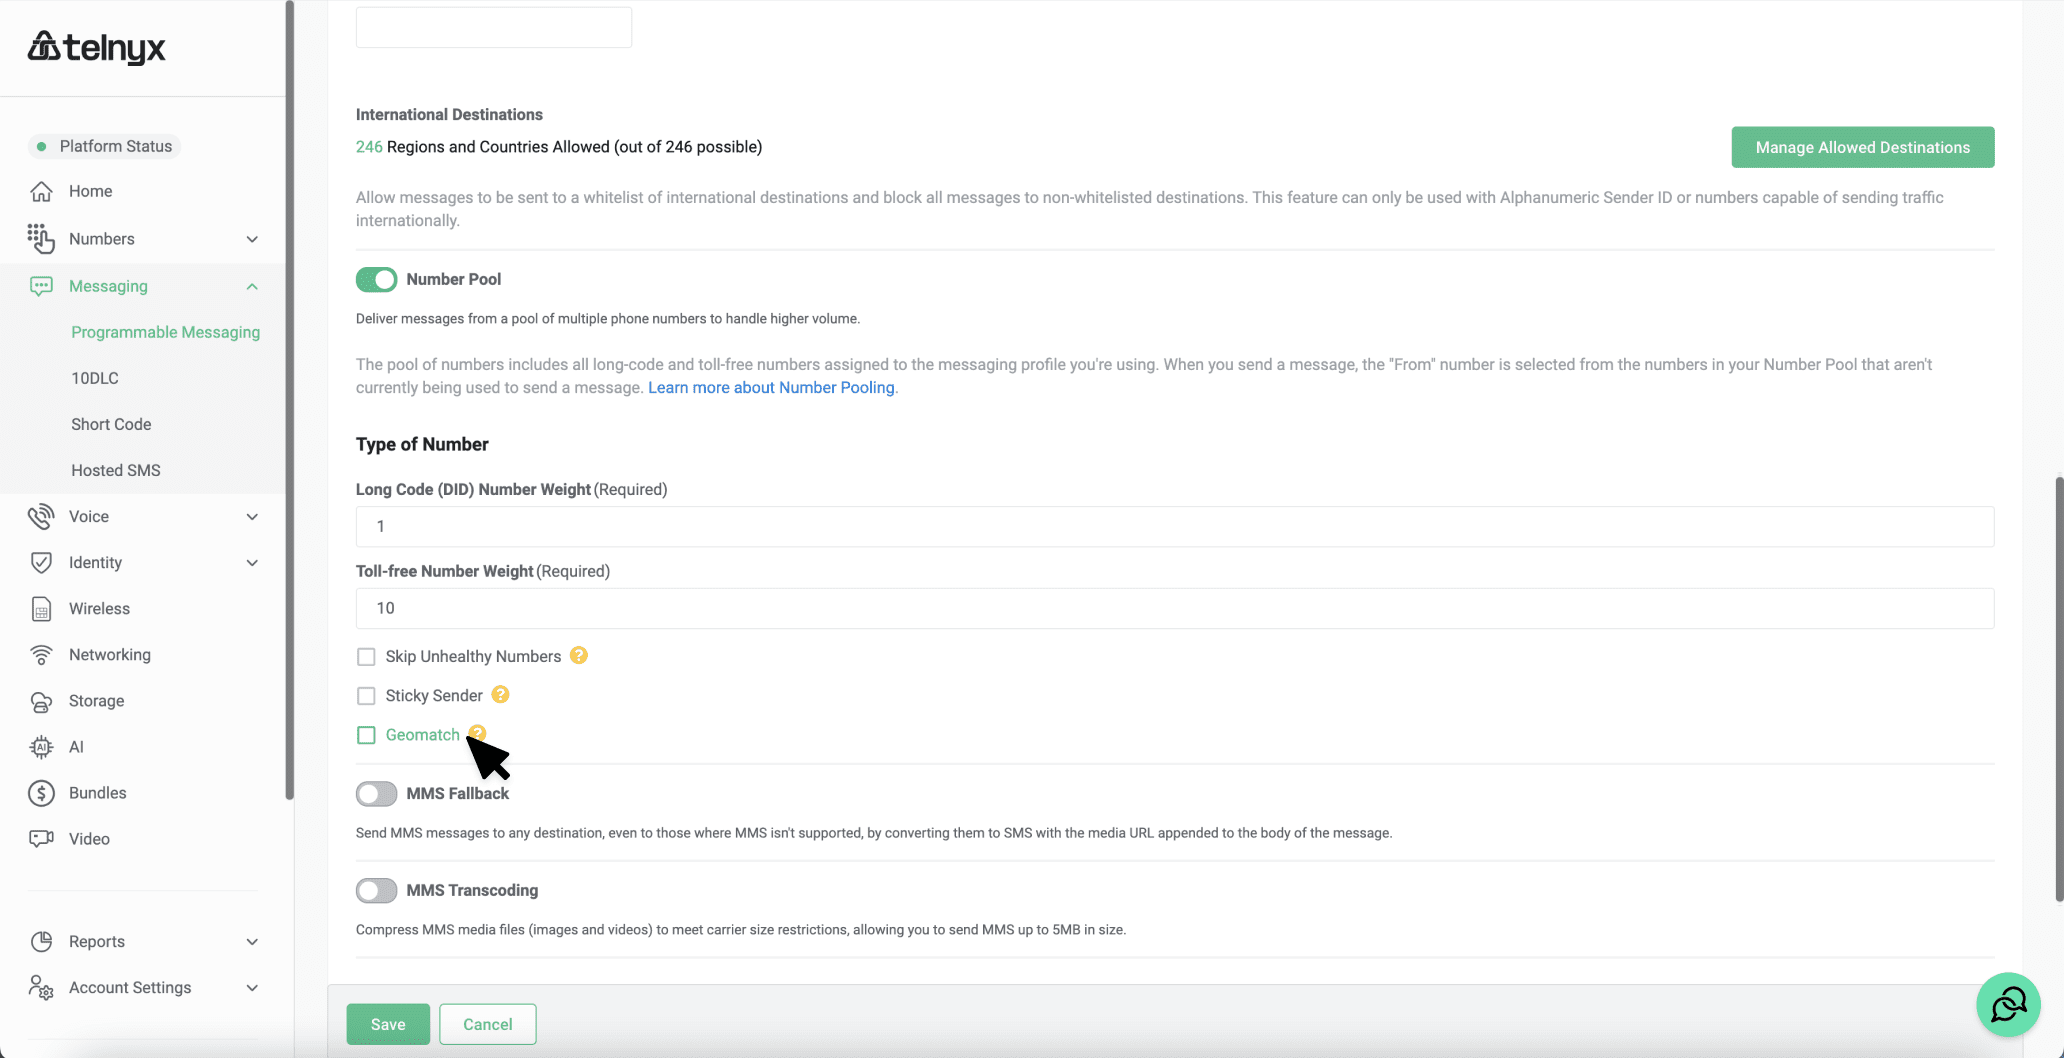
Selection Behavior
Understanding how Geomatch selects senders helps you optimize your number pool coverage.Selection Priority
When both Geomatch and Sticky Sender are enabled:
Sticky Sender takes precedence over Geomatch. Once a recipient is mapped to a sender, that sender is used regardless of area code matching.
Coverage Planning
For effective geomatching, ensure your number pool covers the area codes where your recipients are located:
Use the Phone Numbers API to audit your pool’s area code coverage. Search for numbers in missing area codes to improve geomatch rates.
Disable Geomatch
To disable Geomatch while keeping Number Pool active:curl
Node
Python
Related Features
Geomatch works best combined with other Number Pool features: Maintain the same sender for each recipient. When combined with Geomatch:- First message uses geomatch selection
- Subsequent messages use the “stuck” sender (even if area code no longer matches)
skip_unhealthy: trueis enabled- The number’s deliverability rate is below 25% OR spam ratio exceeds 75%
Troubleshooting
Possible causes:- Geomatch not enabled on the profile
- No numbers with matching area code in your pool
- Sticky Sender is enabled and recipient already has a mapping to a different number
- Matching number is unhealthy and
skip_unhealthyis enabled
from numbers or rely on weight-based Number Pool selection.
Possible causes:
- Number Pool is not enabled (Geomatch requires Number Pool)
- Only one number in the pool (nothing to match against)
- Sending with explicit
fromnumber (bypasses Number Pool entirely)
from when sending to use the pool.
Next Steps
Learn about multi-number distribution and weights Maintain consistent sender numbers per recipient Complete messaging quickstart Full Messaging Profiles API detailsShort Codes
Source: https://developers.telnyx.com/docs/messaging/messages/short-code.mdShort codes are 5- or 6-digit phone numbers designed for high-volume, application-to-person (A2P) messaging. They offer the highest throughput of any sender type — up to 1,000 messages per second — and are recognized by consumers as legitimate business numbers.
When to use short codes
- High-volume alerts: Time-sensitive notifications to large audiences
- Two-factor authentication: OTP delivery at scale with high deliverability
- Marketing campaigns: Promotional messages with keyword opt-in (e.g., “Text JOIN to 12345”)
- Voting and polling: Interactive SMS campaigns
- Emergency notifications: Critical alerts requiring maximum throughput | Need | Better option | |------|--------------| | Low volume (< 1,000 msgs/day) | 10DLC Long Code | | Quick setup (no 8-12 week wait) | Toll-Free | | Two-way conversations | Long Code with Sticky Sender | | International messaging | Alphanumeric Sender ID | | Budget-conscious | 10DLC (lower per-message cost) |
Short code vs. other sender types
Provisioning process
Navigate to Short Code in Mission Control and submit your request. Choose your type:
Vanity codes are subject to availability. Request early — popular combinations may already be taken.
Provide details about your messaging program:
- Company information — Legal name, address, contact
- Use case description — What messages you’ll send
- Message content samples — Representative examples
- Volume estimates — Expected daily/monthly message volume
- Opt-in flow — How users subscribe (web form, keyword, etc.)
- Opt-out handling — STOP keyword support
- Help response — HELP keyword response content Your application is submitted to each major US carrier for review and approval:
This is the longest step. Carrier certification typically takes 8-12 weeks. Each carrier reviews independently — you may get approved by some carriers before others. Plan your launch timeline accordingly.
Once approved by all target carriers, your short code appears under your messaging profile. Send messages using the same Messaging API as any other number type.
Sending messages from a short code
Once provisioned, send messages the same way as any other sender type:curl
Python
Node
Ruby
Go
Java
.NET
PHP
Automated responses
Short codes must handle standard keywords to pass carrier certification. Telnyx manages these automatically.Required keywords
Customizing responses
After carrier certification, you can customize the HELP and campaign keyword responses: Configure a custom help message that includes:- Your business name
- What messages the user is subscribed to
- How to get support (phone number or email)
- How to opt out
Use case examples
Keyword: N/A (API-triggered) Flow: User initiates login → your app sends OTP via short code → user enters codeCarrier certification requirements
Failing to meet these requirements will delay or prevent certification. Prepare these items before submitting your application.Related resources
Compare short codes, toll-free, long codes, and alphanumeric sender IDs. Short code throughput limits and queuing behavior. Customize opt-in and opt-out behavior. Understand ASCII 7-bit encoding used by short codes.Hosted SMS
Source: https://developers.telnyx.com/docs/messaging/messages/hosted-sms.mdHosted SMS lets you add messaging capabilities to phone numbers that stay with your current voice provider. Your existing voice service continues uninterrupted — Telnyx handles only the SMS and MMS routing. This is ideal for:
- Landline numbers that need texting capabilities
- Business numbers where you want to keep your voice provider but add programmable messaging
- Gradual migration — test Telnyx messaging before a full port
How it works
Step 1: Check number eligibility
Not all numbers can be hosted. Check eligibility before creating an order.curl
Python
Node
Ruby
Go
PHP
.NET
Eligibility statuses
Step 2: Create a hosted SMS order
curl
Python
Node
Ruby
pending status. They stay pending until you complete verification and document upload.
Go to Numbers → Hosted SMS in Mission Control.
Click Add New Order.
Enter the phone number(s) you want to host in E.164 format (e.g., +13125550001). The system automatically checks eligibility.
Choose the messaging profile for these numbers.
Click Create Order to proceed to document upload.
Step 3: Verify phone number ownership
Prove you own the numbers by receiving and entering SMS verification codes.3a. Request verification codes
curl
Python
Node
3b. Submit verification codes
curl
Python
Node
verified status. The number status then changes to ownership_successful.
Step 4: Upload authorization documents
After verification, upload two PDF documents:- Letter of Authorization (LOA) — signed authorization to host the number
- Recent bill — from your current voice provider showing the number
curl
Python
Node
Check order status
curl
Python
Order statuses
Webhook notifications
Hosted SMS orders trigger webhooks to your messaging profile’s configured webhook URL. Set up a handler to track order progress in real time.Python
Node
Webhook event types
Email and Portal notifications
You can also receive email notifications: Go to Advanced Features → Notifications and click New Profile. Click New Channel, select your profile, choose Email, and enter your address. Click New Settings, select Messaging Hosted SMS Activity, and link to your profile.Troubleshooting failed orders
Cause: The losing carrier (your current voice provider) rejected the hosting request. Common reasons:- Number is under contract with restrictions on SMS routing changes
- Provider doesn’t support hosted SMS arrangements
- Account information mismatch between LOA and provider records
- Contact your voice provider to understand the rejection
- Verify your LOA matches the account holder name exactly
- Some carriers require you to call and authorize the SMS routing change
- Consider porting the number fully to Telnyx instead
- Contact Telnyx support to check if the carrier has been added since your last attempt
- Check if this specific number has different account ownership
- Create a separate order for this number after resolving with your provider
- If you own both accounts, remove the hosting from the other account first
- If not, contact Telnyx support to resolve the conflict
- Create a new order for the same number
- If it fails again, contact Telnyx support — the carrier may need manual intervention
- Ensure the number can receive SMS (landlines may need the current provider to enable it)
- Check if the number has any SMS blocking enabled
- Request the code again — you can retry multiple times
- If the number truly cannot receive SMS, contact Telnyx support for alternative verification
- LOA not signed
- Name on LOA doesn’t match the voice provider account
- LOA template is outdated
- Download the latest LOA template from Telnyx support
- Ensure the authorized signer matches the account holder
- Upload a new LOA via the API or Portal
Failed order and number statuses reference
Order statuses
Number statuses
Next steps
Transfer hosted numbers between Telnyx accounts. Configure webhooks, opt-out settings, and number assignment. Start sending SMS and MMS once your hosted numbers are active. Compare hosted SMS with other number types (10DLC, toll-free, short code).Internal Transfer
Source: https://developers.telnyx.com/docs/messaging/messages/hosted-sms/internal-transfer.md
Overview
Internal Hosted SMS Transfer allows you to move messaging-enabled numbers between two Telnyx accounts without going through the standard carrier porting process. This is useful when:- You manage multiple Telnyx accounts (e.g., separate voice and messaging organizations)
- You need to consolidate numbers under a single account
- You’re migrating messaging services from one Telnyx organization to another
How it works
Internal transfers follow a modified version of the standard Hosted SMS flow with an additional approval step to protect the current number owner. The receiving account creates a standard hosted SMS order with the number(s) to transfer. The system automatically detects that the number belongs to another Telnyx account and flags the order as an internal transfer. The account that currently owns the number receives an email and portal notification with the transfer request details, including an approval link. The current owner has 72 hours to approve or reject the transfer. If no action is taken, the transfer is automatically approved after the window expires. After approval, the receiving account must complete phone number ownership verification — the same verification code process used in standard hosted SMS orders. Upload the Letter of Authorization (LOA) and the most recent bill, just like a standard hosted SMS order. Once approved, verified, and documents are submitted, the Telnyx team reviews and activates the transfer. The number’suser_id is updated to the new account, and any existing 10DLC campaign associations on the number are removed.
When a number is internally transferred, any 10DLC campaign registrations associated with that number are automatically deleted. The receiving account must re-register the number with a campaign after the transfer completes.
Create an internal transfer order
Create a hosted SMS order using the same endpoint as a standard order. The system automatically detects if the number belongs to another Telnyx account.cURL
Python
Node.js
Ruby
Java
.NET
PHP
Go
Example response
Approve or reject a transfer
The current number owner can approve or reject the transfer using the link in their notification email, or via the API.Approve
Reject
token parameter is included in the notification sent to the current owner. It is a one-time use token that expires after 72 hours. If the token expires without action, the transfer is automatically approved.
Complete the transfer
After the transfer is approved (either explicitly or via auto-approval), the receiving account must:- Verify ownership — Send and validate verification codes for the number(s), identical to the standard verification process.
- Upload documents — Submit the LOA and bill via the file upload endpoint.
- Wait for activation — The Telnyx team reviews and activates the transfer.
Webhook notifications
Internal transfers generate the same webhook events as standard hosted SMS orders (.created, .updated, .deleted), plus five lifecycle-specific events that let you track classification, approval, and auto-approval separately from generic order updates.
Lifecycle event reference
Detected (fires after .created)
Approval requested
Approved
Rejected
Auto-approved
Transfer activated
Once approved, activation emits the standard.updated event when numbers become successful:
Key differences from standard Hosted SMS
Troubleshooting
If the 72-hour window passed without action, the transfer is automatically approved. Contact Telnyx Support immediately — the transfer may be reversible if activation hasn’t completed. Ensure the number can receive SMS messages. For internal transfers, the verification code is sent to the number being transferred. If the number is a landline or doesn’t have SMS capabilities on the current account, contact Telnyx Support for assistance. Check the order status for specific error details. Common causes include:- The number was deleted or deactivated on the source account before activation
- The number is already hosted with another Telnyx subscriber
- Billing issues on the receiving account
Opt-In/Out Management
Source: https://developers.telnyx.com/docs/messaging/messages/advanced-opt-in-out.mdAdvanced Opt-In/Out lets you customize keyword triggers and auto-responses on your messaging profile. Configure country-specific responses, custom keywords, and track opt-out behavior via webhooks — all while maintaining CTIA & TCPA compliance.
Default behavior
Without custom configuration, Telnyx handles standard opt-in/out keywords automatically: These keywords create a block rule preventing further messages to the recipient:
Block rules operate at the messaging profile level. If a user opts out from one number on your profile, they’re opted out from all numbers on that profile.
When you attempt to message a blocked recipient, the API returns:
Create custom auto-responses
Configure custom keyword responses for opt-in, opt-out, and help messages:curl
Python
Node
Ruby
Go
PHP
Operation types
Country-specific auto-responses
Configure different responses per country using ISO 3166-1 alpha-2 codes. This enables localized language support:curl
country_code field determines which auto-response applies based on the sender’s number origin.
Track opt-out behavior via webhooks
When a user sends an opt-in, opt-out, or help keyword, the inbound message webhook includes anautoresponse_type field:
Handle opt-out webhooks
Python
Node
autoresponse_type field is also available in your SMS Logs via Detail Record Search reporting.
Limitations
START, STOP, and HELP are reserved keywords for their respective operations and cannot be reassigned to different operations. You can add additional keywords to each operation, but the defaults always remain active. Default operations (start, stop, help) require a minimum 20 characters for the auto-response message. This ensures compliance with carrier requirements. Each auto-response configuration supports a maximum of 20 trigger keywords. Toll-free numbers have a separate carrier-level opt-out system that Telnyx cannot customize or remove. When a user texts STOP to a toll-free number:- The carrier sends its own auto-reply:
NETWORK MSG: You replied with the word “stop” which blocks all texts sent from this number. Text back “unstop” to receive messages again.
- Your custom STOP response is also sent (if configured)
- The carrier block is applied independently of Telnyx’s block rule
NETWORK MSG: You have replied “unstop” and will begin receiving messages again from this number.You cannot prevent the carrier’s NETWORK MSG responses on toll-free numbers. Design your custom responses to complement (not contradict) these messages. Block rules apply at the messaging profile level, not the individual number level. If a user opts out from any number on your profile, they’re blocked from all numbers on that profile. To manage separate opt-out lists for different programs, use separate messaging profiles.
Related resources
Configure the messaging profile that manages your opt-in/out rules. Set up webhooks to receive opt-in/out events. Short code keyword handling and carrier certification. Toll-free number verification and compliance.Number Configuration
Source: https://developers.telnyx.com/docs/messaging/messages/phone-number-configuration.mdBefore a phone number can send or receive messages through Telnyx, it must be assigned to a messaging profile and have messaging enabled. This guide covers the complete workflow — from purchasing a number to configuring it for messaging, assigning it to profiles, and troubleshooting common issues.
Prerequisites
- A Telnyx account with API access
- Your API key
- At least one messaging profile created
Overview
Every phone number used for messaging needs:- A messaging profile — Controls webhook URLs, inbound settings, and features like number pool or sticky sender
- Messaging enabled — The number must have messaging capabilities activated
- Regulatory compliance — Depending on the number type, you may need 10DLC registration or toll-free verification
Step 1: List messaging-capable numbers
Find numbers on your account that support messaging:curl
Python
Node
Ruby
Go
PHP
.NET
Java
Step 2: Assign a number to a messaging profile
Link a phone number to a messaging profile to configure its webhook URLs and messaging behavior.curl
Python
Node
Ruby
Go
PHP
.NET
Java
Step 3: Retrieve number configuration
Check the current messaging configuration for a specific number:curl
Python
Node
Response fields
Step 4: Bulk assignment
Assign multiple numbers to a messaging profile at once using the messaging profile’s phone number assignment endpoint:curl
Python
Node
Messaging enablement by number type
Different number types have different requirements before they can send messages:
US long codes without 10DLC registration will experience carrier filtering and potential message blocking. Always complete 10DLC registration before sending A2P messages on US long codes.
Unassign a number from a profile
Remove a number’s messaging profile assignment:curl
Python
Node
Troubleshooting
Possible causes:- The number doesn’t have messaging capabilities. Check your number order — not all numbers support SMS/MMS.
- The number hasn’t finished provisioning yet. Wait a few minutes after purchase.
- The number is on a different Telnyx account.
GET /v2/phone_numbers/{id} and check for messaging in the features.
Cause: The from number in your send request isn’t assigned to a messaging profile.
Fix: Assign the number to a profile using the assignment API, or use the messaging profile’s number pool to automatically select a number.
Possible causes:
- The number isn’t assigned to a messaging profile
- The messaging profile doesn’t have a webhook URL configured
- Your webhook endpoint is returning errors (check MDR logs)
- The number is already assigned to a different product (voice connection, etc.) that conflicts
- The messaging profile ID is invalid
- The number belongs to a different organization
Next steps
Create and configure messaging profiles with webhooks and features. Send your first SMS/MMS using a configured number. Use multiple numbers in a pool for automatic sender selection. Register your brand and campaign for US long code messaging.Toll-Free Verification
Source: https://developers.telnyx.com/docs/messaging/toll-free-verification.mdTelnyx toll-free verification now supports Business Registration Number (BRN) fields to strengthen business verification and compliance. Starting February 17th, 2026, three BRN fields will be required for all new toll-free verification submissions. The following fields are required for all new toll-free verification requests:
businessRegistrationNumberbusinessRegistrationTypebusinessRegistrationCountry
Why This Matters
U.S. wireless carriers require toll-free numbers (800, 888, 877, 866, 855, 844, 833) used for SMS/MMS to complete verification. The new BRN fields provide carriers with verified business identity information, helping to:- Reduce verification processing time
- Improve approval rates
- Ensure compliance with carrier policies
- Prevent fraudulent messaging
New Business Registration Fields
Required Fields (February 17th, 2026)
businessRegistrationNumber
The official government-issued business registration identifier.
Examples by Country:
Where to Find:
- US: IRS EIN Lookup - Check your EIN confirmation letter or SS-4 form
- Canada: CRA Business Number from your registration documents
- UK: Companies House registration certificate
- Australia: ABN Lookup
- EU: VAT registration certificate from your national tax authority
businessRegistrationType
The type or classification of your business registration.
Common Values:
EIN- U.S. Employer Identification NumberCRA- Canadian Revenue Agency Business NumberCompanies House- UK company registrationABN- Australian Business NumberVAT- European Union VAT registrationSSN- For U.S. sole proprietors without EIN
businessRegistrationCountry
ISO 3166-1 alpha-2 country code of the authority that issued the registration.
Validation:
- Must be exactly 2 letters
- Only alphabetic characters (A-Z)
- Automatically converted to uppercase (
"us"→"US") - Returns HTTP 400 if invalid
US, CA, GB, AU, DE, FR, JP
See complete list: ISO 3166-1 country codes
Optional Fields
These fields are optional but recommended for faster verification processing.doingBusinessAs
DBA, trade name, or brand name if different from your legal business name.
Example: Legal name “Acme Corporation Inc.”, DBA “Acme Services”
entityType
Legal business entity classification.
Value Descriptions:
optInConfirmationResponse
Message sent to subscribers confirming their opt-in.
Example:
"You are now subscribed to Acme alerts. Reply STOP to unsubscribe. Msg&data rates may apply."
helpMessageResponse
Automated response when subscribers text HELP.
Example:
"Acme Support: Call 1-800-555-0123 or email help@acme.com. Reply STOP to unsubscribe."
privacyPolicyURL
URL to your business privacy policy.
Example:
"https://www.acme.com/privacy"
URL format validation is not enforced. Provide a publicly accessible URL.
termsAndConditionURL
URL to your business terms and conditions.
Example:
"https://www.acme.com/terms"
ageGatedContent
Indicates if messaging content requires age verification (18+ or 21+).
Set to
true for alcohol, tobacco, cannabis, or other age-restricted content.
optInKeywords
Keywords subscribers use to opt-in to your messaging program.
Example:
"START, YES, SUBSCRIBE, JOIN"
API Usage
Create Verification Request with BRN Fields
Endpoint:POST /public/api/v2/requests
Request with BRN Fields:
Retrieve Verification with BRN Fields
Endpoint:GET /public/api/v2/requests/{id}
Update BRN Fields
Endpoint:PATCH /public/api/v2/requests/{id}
Code Examples
Python
JavaScript/TypeScript
Error Handling
Validation Errors (HTTP 400)
Missing Required Fields (After February 2026)
Response:Invalid Country Code
Invalid Entity Type
Other Status Codes
Migration Guide
Timeline
Preparation Steps
1. Gather Business Registration Information Locate your:- Business registration number (EIN, VAT, ABN, etc.)
- Registration type identifier
- Issuing country code
- Submit test requests with BRN fields
- Verify fields are returned in responses
- Test validation error handling
- Confirm country code uppercase conversion
Backward Compatibility
Until February 17, 2026:- Requests without BRN fields continue to work
- No breaking changes to existing integrations
- BRN fields default to
nullif not provided
- Requests without 3 required BRN fields will be rejected (HTTP 400)
- Update your integration before this date
Frequently Asked Questions
When do BRN fields become mandatory?
February 17th, 2026. All new verification requests must includebusinessRegistrationNumber, businessRegistrationType, and businessRegistrationCountry.
Do I need to resubmit existing verifications?
No. Approved verifications before February 2026 remain valid.Where do I find my business registration number?
- US: IRS EIN confirmation letter or IRS.gov
- Canada: CRA Business Number registration documents
- UK: Companies House certificate
- Australia: ABN Lookup
- EU: VAT registration certificate
What if I’m a sole proprietor without an EIN?
U.S. sole proprietors can use their Social Security Number asbusinessRegistrationNumber with type SSN. Other countries may have similar individual tax identifiers.
Can I update BRN fields after submission?
Yes. UsePATCH /public/api/v2/requests/{id} to update BRN fields.
Why are country codes converted to uppercase?
For consistency. Sending"us" automatically becomes "US" in responses and storage.
Which entity type should I choose?
Choose the type matching your official business registration:SOLE_PROPRIETOR- Individual or sole proprietorshipPRIVATE_PROFIT- Private corporation (most common)PUBLIC_PROFIT- Publicly traded companyNON_PROFIT- 501(c) or charitable organizationGOVERNMENT- Government entity
How long does toll-free verification take?
Verification typically takes 1-2 weeks, depending on the carrier review queue and the completeness of your submission. Including accurate BRN fields can speed up the process.What happens if my verification is rejected?
You’ll receive a webhook notification with the rejection reason. Common causes:- Incomplete or inaccurate business information
- Message samples don’t match your declared use case
- Missing opt-out language in sample messages
- Business couldn’t be verified with the provided registration number
Can I send messages before verification is complete?
Unverified toll-free numbers have limited throughput and may experience carrier filtering. Complete verification to unlock full sending capabilities (up to 20 MPS).What’s the difference between toll-free verification and 10DLC registration?
Related resources
API reference for managing toll-free verification requests. Send messages from your verified toll-free numbers. Alternative registration path for local 10-digit numbers. Configure opt-in/out behavior including toll-free specific handling.Support
Need help with toll-free verification?- Support Portal: support.telnyx.com
- Email: support@telnyx.com
- Developer Community: Join discussions and get help from other developers
Troubleshooting
Source: https://developers.telnyx.com/docs/messaging/toll-free-verification/troubleshooting.mdThis guide covers common toll-free verification failures, rejection reasons, resubmission best practices, and messaging issues with toll-free numbers. Use it to diagnose problems and get your verification approved faster. Quick links: Rejection reasons · Resubmission guide · Delivery issues · Status tracking · Diagnostic checklist
Verification lifecycle
Understanding where your verification can fail helps target the right fix:Verification rejection reasons
Rejections come from carrier review. Each has specific causes and fixes.Business information issues
Rejection reason: Business name does not match public records. Root cause: ThebusinessName you submitted doesn’t match what’s on file with the Secretary of State, IRS, or similar authority for your registration number.
Fix:
- Look up your exact legal name on your state’s Secretary of State website
- Cross-reference with your EIN confirmation letter from the IRS
- Include suffixes exactly: “Inc.”, “LLC”, “Corp.” — these matter
- Resubmit with the corrected name
curl
- Using a DBA/trade name instead of the legal entity name
- Missing “LLC”, “Inc.”, etc.
- Using an old company name after a legal name change
- Verify your EIN at IRS.gov or on your SS-4 confirmation letter
- Ensure the
businessRegistrationTypematches the number format (e.g., “EIN” for US tax IDs) - Confirm
businessRegistrationCountryis correct (ISO alpha-2) - For sole proprietors using SSN, ensure the name matches exactly
curl
- Ensure the URL is accessible (no authentication required, no redirects to a different domain)
- The website must show the company name prominently
- Website content should relate to the messaging use case
- HTTPS is strongly preferred
- Under construction / parking pages will cause rejection
- Use a phone number that’s publicly associated with the business (Google listing, website, etc.)
- Use a business email domain (not gmail.com, yahoo.com for corporations)
- Ensure the contact person is authorized to represent the business
PRIVATE_PROFIT but the business is registered as a nonprofit, or vice versa.
Fix:
Choose the correct entity type based on your actual business registration:
Messaging use case issues
Rejection reason: Message samples are inconsistent with the stated use case. Root cause: YouruseCaseSummary says one thing (e.g., “appointment reminders”) but your sample messages show something different (e.g., marketing promotions).
Fix:
- Ensure every sample message directly relates to your declared use case
- Include realistic content — not placeholder text
- Show the full message including opt-out language
- If you have multiple use cases, describe all of them in
useCaseSummary
- Include “Reply STOP to unsubscribe” (or similar) in every sample
- The opt-out instruction should be natural, not buried
- STOP, CANCEL, UNSUBSCRIBE, QUIT, END should all work
- “Reply STOP to opt out.”
- “Text STOP to unsubscribe.”
- “Reply STOP to end messages. Msg & data rates may apply.”
- Be honest about expected volumes — carriers cross-reference similar businesses
- If volume is high, explain why (large customer base, time-sensitive notifications)
- Start conservative and increase as your messaging matures
messageFlow field:
- Where users sign up (website form, checkout flow, in-app)
- What consent language they see
- Whether it’s single or double opt-in
- How consent records are maintained
- Cannabis/CBD
- Adult content
- Gambling (without proper licensing documentation)
- High-risk financial services (payday loans, crypto trading signals)
- Third-party lead generation
- If your content is genuinely prohibited, toll-free may not be the right channel
- For regulated industries (gambling, financial services), include licensing documentation
- Remove any references to restricted content from samples
- Contact Telnyx support for guidance on restricted use cases
Resubmission process
After a rejection, you can fix the issues and resubmit. There’s no limit on resubmission attempts. Check your verification status via API or the Telnyx portal. The rejection reason tells you exactly what to fix.curl
Python
Node
curl
Python
Node
Ruby
Go
Java
.NET
PHP
Python
Resubmission tips
Delivery issues after verification
Even after successful verification, you may experience delivery problems.Throughput limitations
Sending above your throughput tier results in message queuing and eventual
40014 (Expired in queue) errors. If you need more than 20 MPS from toll-free numbers, consider using short codes or 10DLC with number pools.
Common delivery errors
Cause: Message content triggered carrier-level content filters, independent of verification status. Fix:- Review message content for spam trigger words (FREE, WINNER, ACT NOW)
- Avoid URL shorteners (bit.ly, tinyurl) — use full URLs or Telnyx URL shortening
- Don’t send identical messages to many recipients in rapid succession
- Check if recipient has previously opted out
- Review the error code reference for specific guidance
- Validate numbers before sending (use Number Lookup API)
- Remove landlines and VoIP numbers that don’t support SMS
- Check for typos in the recipient number
- Implement client-side rate limiting (see Rate Limiting guide)
- Spread traffic across multiple toll-free numbers if needed
- Use a messaging profile with number pooling for high-volume use cases
- Reduce sending rate to stay within throughput limits
- Check if a carrier outage is causing delivery backlog
- For time-sensitive messages, set a shorter validity period
- New verifications (carrier trust builds over time)
- Content that resembles spam patterns
- High complaint rates from recipients
- Start with lower volumes and ramp up gradually over 1–2 weeks
- Monitor delivery rates per carrier using MDRs
- Ensure opt-out is working properly (high complaint rates trigger filtering)
- Contact Telnyx support if specific carriers consistently filter your traffic
Checking verification status
Via API
curl
Python
Node
Via Portal
- Log in to the Telnyx Portal
- Navigate to Messaging → Toll-Free Verification
- View status, rejection reasons, and submission details for each verification
Status reference
Diagnostic checklist
Use this checklist when troubleshooting verification issues:Before submitting
- Business name matches exact legal name (including Inc./LLC/etc.)
- EIN/BRN is correct and matches the business name
- Website is live, accessible, and shows the business name
- Contact phone and email are valid and publicly associated with the business
- Entity type matches business registration
- Use case summary clearly describes messaging purpose
- Sample messages are realistic (not placeholder text)
- Every sample includes opt-out language (“Reply STOP to unsubscribe”)
- Message flow describes how users consent to receive messages
- Volume estimate is reasonable for the use case
After rejection
- Read the rejection reason completely
- Cross-reference with the rejection reasons above
- Fix only the specific issue cited
- Double-check all information against official business records
- Resubmit via PATCH (don’t create a new request)
- Set up webhooks to track the new review
After verification (delivery issues)
- Verify toll-free number is on an active messaging profile
- Check sending rate isn’t exceeding throughput tier
- Review message content for spam trigger words
- Confirm opt-out keywords are being processed
- Check MDRs for carrier-specific delivery rates
- Monitor error codes for patterns
Timeline expectations
Expedited review is not available for toll-free verification. The review timeline is set by carriers, not Telnyx. Ensure your first submission is complete and accurate to avoid resubmission delays.
Toll-free vs. 10DLC: when to use which
Many businesses use both: toll-free for customer service and support lines, 10DLC for marketing and transactional messages with local presence.
Next steps
Main verification guide with BRN fields and API reference. Understand delivery error codes and resolution steps. Similar troubleshooting guide for 10DLC registration issues. Implement client-side rate limiting to avoid throughput errors.Quickstart
Source: https://developers.telnyx.com/docs/messaging/10dlc/quickstart.md10DLC (10-Digit Long Code) is the industry standard for application-to-person (A2P) messaging on US long code numbers. Registering your brand and campaigns provides higher throughput, better deliverability, and reduced carrier filtering.
Registration overview
Vetting is critical. Your brand’s vetting score directly determines your throughput limits — especially on AT&T and T-Mobile. See 10DLC Rate Limits for details.
Step 1: Create a brand
A brand represents the business entity sending messages.curl
Python
Node
Ruby
Go
PHP
Step 2: Vet your brand
Brand vetting determines your trust score (0-100), which directly affects your messaging throughput. Higher scores unlock more messages per minute.curl
Step 3: Create a campaign
A campaign defines your messaging use case and is required for each distinct type of messaging you do.curl
Python
Node
Sample messages matter. Carriers review your sample messages during approval. Make them realistic and representative of your actual messaging. Include opt-out language (e.g., “Reply STOP to unsubscribe”).
Step 4: Assign phone numbers
Link your phone numbers to the campaign so they can send messages under that campaign’s registration.curl
Python
Node
Troubleshooting
Common causes:- EIN mismatch: The EIN must match the legal business name exactly as registered with the IRS
- Invalid address: Use the physical business address, not a P.O. box
- Missing website: A working website is strongly recommended for higher vetting scores
- Business age and size
- Online presence and reputation
- EIN verification
- Industry vertical
- Request Enhanced Vetting for a more thorough review (may improve score)
- Ensure your website is live, professional, and matches your brand information
- Check that your EIN and business name match IRS records exactly
- Vague or misleading sample messages
- Missing opt-out language in samples
- Use case doesn’t match message content
- Prohibited content (cannabis, gambling in some states, etc.)
- Content doesn’t match the registered campaign use case
- Messages look like spam (identical content to many recipients)
- Links are flagged by carrier content filters
- Volume exceeds your campaign’s throughput allocation
Next steps
Understand carrier-specific throughput based on your vetting score. Receive webhooks for brand vetting, campaign approval, and more. Special 10DLC registration for sole proprietors without an EIN. Start sending messages once your 10DLC setup is complete.Sole Proprietor
Source: https://developers.telnyx.com/docs/messaging/10dlc/sole-proprietor.mdSole Proprietor registration enables individuals and small businesses without a federal Tax ID (EIN) to register for 10DLC messaging. This guide covers the API workflow for creating Sole Proprietor brands, completing OTP verification, and managing campaigns programmatically.
Overview
Sole Proprietor brands have specific constraints compared to standard business brands:
Sole Proprietor registration requires identity verification via SMS OTP before campaigns can be created.
Prerequisites
- Telnyx account with API access
- At least one US 10DLC phone number
- Valid US/CA mobile phone number for OTP verification
- Personal information: name, address, date of birth
Registration Flow
Step 1: Create a Sole Proprietor Brand
Create a brand withentityType set to SOLE_PROPRIETOR:
Valid vertical values include: PROFESSIONAL, REAL_ESTATE, HEALTHCARE, RETAIL, ENTERTAINMENT, EDUCATION, NONPROFIT, GOVERNMENT, and others. See the Brand API Reference for the full list.
curl
Node
Python
Ruby
Go
Java
Response
PENDING identity status until OTP verification is completed. You cannot create campaigns until the brand is VERIFIED.
Step 2: Trigger OTP Verification
Send an OTP PIN to the mobile phone associated with the brand:curl
Node
Python
Ruby
Go
Java
Request Parameters
Response
@OTP_PIN@ placeholder in pinSms will be replaced with the actual 6-digit PIN when the SMS is sent.
Step 3: Check OTP Status
Poll the OTP status to confirm delivery:curl
Node
Python
Ruby
Go
Java
Response
Delivery Status Values
Step 4: Verify OTP PIN
After the user receives and provides the PIN, verify it:curl
Node
Python
Ruby
Go
Java
- The brand
identityStatuschanges toVERIFIED - The
successSmsmessage is sent to the mobile phone - The brand registration fee is charged
- You can now create campaigns
Step 5: Create a Sole Proprietor Campaign
With a verified brand, create a campaign using theSOLE_PROPRIETOR usecase:
Sample messages (sample1, sample2) are required for campaign approval. Include realistic examples of messages you’ll send.
curl
Node
Python
Ruby
Go
Java
Response
ACTIVE immediately. Standard campaigns may require carrier review.
Step 6: Assign a Phone Number
Assign your 10DLC number to the campaign:curl
Node
Python
Ruby
Go
Java
Error Handling
Common Errors
Retrying OTP
If the OTP expires or the user needs a new PIN, simply call the trigger endpoint again:Fees
Webhooks
Subscribe to brand and campaign status updates via webhooks. See 10DLC Event Notifications for details on:10dlc.brand.update— Brand status and identity verification changes10dlc.campaign.update— Campaign approval/rejection10dlc.phone_number.update— Phone number assignment status
Next Steps
Understand throughput limits for Sole Proprietor campaigns Set up webhooks for status updates Full API documentation for brand management Portal walkthrough for non-API usersBrand Registration
Source: https://developers.telnyx.com/docs/messaging/10dlc/brand-registration.mdA brand is your registered business identity in the 10DLC ecosystem. Before you can create messaging campaigns or send A2P messages on US long codes, you must register your brand with The Campaign Registry (TCR) through the Telnyx API. Your brand’s vetting score directly determines your messaging throughput limits.
Prerequisites
- A Telnyx account with API access
- Your API key
- Business information: legal name, EIN/Tax ID, address, phone, email, website
Brand entity types
TCR supports several entity types. Choose the one that matches your business structure:
Sole Proprietor brands have significant limitations: 1 campaign, 1 phone number, low throughput. Use standard registration if your business has an EIN.
Registration flow
Step 1: Create a brand
Register your business identity by providing company details, contact information, and entity type.Required fields
Optional fields
curl
Python
Node
Ruby
Java
.NET
PHP
Go
Brand creation response
Step 2: Retrieve brand details
After creation, check your brand status and details:curl
Python
Node
Ruby
Brand statuses
Step 3: Submit for external vetting
Vetting is performed by a third-party partner (e.g., Campaign Verify) and produces a trust score from 0 to 100 that directly impacts your messaging throughput.curl
Python
Node
Ruby
evpId + vettingClass for a brand that already has a successful vetting (within the last 180 days) or one currently being processed returns 400 with error code 10012 (“Duplicate resource”). Failed vettings are excluded from this check, so you can retry immediately after a real failure. To retrieve existing vettings, use GET /v2/10dlc/brand/{brandId}/externalVetting.
Vetting classes
Vetting score impact on throughput
Your vetting score directly controls your carrier-specific throughput. See the 10DLC Rate Limits guide for detailed carrier tables.
Without vetting, brands default to the lowest throughput tier. Always submit for vetting before creating campaigns.
Step 4: Check vetting results
Vetting typically takes 1–7 business days. You can poll or use webhooks to check the result.curl
Python
Node
Step 5: Update a brand
If your brand details change (address, phone, etc.), update them via the API:curl
Python
Node
List all brands
Retrieve all registered brands on your account:curl
Python
Node
Common rejection reasons and fixes
Cause: ThecompanyName field doesn’t match what the IRS has on file for that EIN.
Fix: Use your exact legal name as registered with the IRS. Check your EIN confirmation letter (CP 575) or search the IRS tax-exempt organization database for non-profits.
Cause: EIN must be in XX-XXXXXXX format (9 digits with a hyphen after the first 2).
Fix: Double-check your EIN. It should look like 12-3456789. Don’t include spaces or extra characters.
Cause: The vetting partner couldn’t access your website, or the website content doesn’t match the registered business.
Fix: Ensure your website is live, publicly accessible (no authentication required), and has content that clearly identifies your business. The domain should ideally match your business email domain.
Cause: The business phone number provided is not a valid, reachable US/CA number.
Fix: Provide a working business phone number in E.164 format (e.g., +15551234567). The number should be answerable during business hours.
Cause: The provided address doesn’t match USPS records or can’t be verified.
Fix: Use your exact business address as registered. Verify it through USPS address lookup.
Cause: A brand with this EIN is already registered (possibly by another CSP or a previous registration).
Fix: You can only have one brand per EIN. If you previously registered through another provider, you may need to import or transfer the brand. Contact Telnyx support for assistance.
Appeal process
If your brand is rejected or receives a low vetting score, you can appeal: Check the brand’sidentityStatus and any associated error messages via the API or Mission Control Portal.
Update your brand information to address the specific rejection reason using the update brand API.
After updating your brand, submit a new external vetting request. Each vetting submission incurs a fee.
For complex cases (EIN transfers, duplicate brands, identity disputes), contact Telnyx support with your brandId and details.
Re-vetting after fixing issues often results in a higher score. The most common improvement is ensuring your website, company name, and EIN all align.
Industry verticals
When creating a brand, specify your industry using one of these vertical values:Webhook notifications
Telnyx sends webhooks for brand lifecycle events. Configure your webhook URL on your messaging profile or via the API.
See 10DLC Event Notifications for payload examples and webhook handling.
Next steps
Register your messaging use case after your brand is vetted. Understand how your vetting score impacts throughput. Registration guide for individuals without an EIN. Track brand and campaign lifecycle via webhooks.Campaign Registration
Source: https://developers.telnyx.com/docs/messaging/10dlc/campaign-registration.mdA 10DLC campaign defines your messaging use case — what you’re sending, who you’re sending to, and how recipients opted in. Every campaign must be registered with The Campaign Registry (TCR) and approved by mobile carriers before you can send messages at scale. This guide walks you through creating campaigns via API and Portal, choosing the right use case, writing sample messages that pass carrier review, and handling rejections. Prerequisites: You need an approved brand before creating campaigns. Your brand’s vetting score affects campaign throughput — see 10DLC Rate Limits.
Campaign use case types
Choose the use case that best describes your messaging. Carriers review this against your sample messages, so accuracy matters.Standard use cases
Special use cases
Choose carefully. Changing a campaign’s use case after registration requires creating a new campaign. Carriers reject campaigns where sample messages don’t match the declared use case.
Create a campaign
Required fields
Optional fields
curl
Python
Node
Ruby
Go
PHP
.NET
Writing sample messages that pass review
Carriers manually review your sample messages. Poorly written samples are the #1 reason campaigns get rejected. Every sample should include opt-out instructions:“Your order #12345 has shipped! Track at https://acme.com/track/12345. Reply STOP to unsubscribe.”Use real-looking content with your actual brand name:
“Hi Sarah, your Acme Corp appointment is confirmed for Tuesday at 2 PM. Reply YES to confirm or HELP for assistance.”If your use case is
DELIVERY_NOTIFICATION, all samples should be about deliveries:
✅ “Your package has shipped via FedEx. Tracking: 1Z999AA10123456784” ❌ “Check out our summer sale! 30% off everything!” (This is marketing, not delivery)Carriers reject vague samples:
❌ “This is a test message” ❌ “Hello, this is a message from our company”Carriers prohibit or restrict:
- Cannabis / CBD messaging
- Gambling content (varies by state)
- Firearms sales
- Payday lending
- Content targeting minors without age gate
messageFlow field should explain exactly how users consent:
“Users sign up on our website at https://acme.com/signup where they enter their phone number and check a box that reads: ‘I agree to receive order updates via SMS from Acme Corp. Msg frequency varies. Msg & data rates may apply. Reply STOP to cancel.’”
MNO provisioning timeline
After TCR approves your campaign, each carrier (MNO) provisions it on their network independently. This affects when you can send messages on each carrier.
You can check provisioning status per carrier via the API:
Check campaign status
curl
Python
Node
Campaign statuses
List all campaigns
curl
Python
Node
Handle campaign rejections
Campaigns can be rejected during carrier review. Common reasons and how to fix them:Resubmitting a rejected campaign
You cannot edit a rejected campaign. Instead, create a new campaign with corrected information:- Review the rejection reason (check Event Notifications webhooks)
- Fix the identified issues in your samples and description
- Create a new campaign via the API or Portal
- Reassign your phone numbers to the new campaign
Campaign compliance best practices
Only send messages that match your registered campaign use case. Sending marketing from aCUSTOMER_CARE campaign risks suspension.
Process STOP requests within seconds. Carriers monitor compliance. See Advanced Opt-In/Out for implementation.
Maintain proof of consent (opt-in records with timestamp, source, and phone number). Carriers may request this during audits.
Don’t exceed your campaign’s allocated throughput. Check 10DLC Rate Limits for your brand score tier.
Set up webhooks for 10DLC events to catch approval, rejection, and suspension events in real time.
Competitor comparison
Next steps
Link phone numbers to your campaign to start sending. Understand throughput based on your brand’s vetting score. Receive real-time webhooks for campaign status changes. Start sending once your campaign is approved.Use Case Examples
Source: https://developers.telnyx.com/docs/messaging/10dlc/campaign-use-cases.mdWriting good sample messages is the #1 factor in getting your 10DLC campaign approved. Carriers reject campaigns when sample messages don’t match the declared use case, lack opt-out language, or look like spam. This guide provides ready-to-use sample messages, compliant opt-in language, and content patterns for every campaign use case type. How carriers review sample messages:
- Must match the declared use case type
- Must include opt-out language (STOP to opt out)
- Must represent actual messages you’ll send
- Vague or generic samples get rejected
Standard use cases
2FA / Two-Factor Authentication
The simplest use case — short, transactional, no marketing content. Sample 1:- Keep messages under 160 characters
- Include the code prominently
- Add an expiry time
- Don’t include marketing content or links
- Brand name should appear in the message
Python
Node.js
Ruby
Java
.NET
PHP
Go
Customer Care
Support conversations, ticket updates, and service messages. Sample 1:- Messages should be reactive (responding to customer actions)
- Include ticket/order numbers for context
- Don’t mix in promotional content
- Keep a helpful, service-oriented tone
- Include brand name in every message
Delivery Notifications
Order confirmations, shipping updates, and delivery status. Sample 1:- Include order/tracking numbers
- Messages should follow the order lifecycle
- Include delivery estimates when available
- Don’t add promotional upsells in delivery messages
Account Notifications
Password changes, billing alerts, account activity. Sample 1:- Focus on account changes the user initiated
- Include specific details (amounts, dates)
- Provide a way to verify or dispute changes
- Never include marketing in account notifications
Marketing
Promotions, sales, product announcements, and brand content. Marketing campaigns receive the most scrutiny. Opt-in must be explicit and separate from terms of service. Sample 1:- Opt-in MUST be separate from ToS (not buried in fine print)
- Include message frequency estimate
- State “consent is not a condition of purchase”
- Link to privacy policy and terms
- Every message must include opt-out language
- Don’t use ALL CAPS excessively
- Include brand name in every message
Security Alerts
Login alerts, fraud detection, and security notifications. Sample 1:- Include specific details (device, location, time)
- Always provide a way to take action
- Keep urgency appropriate — don’t create false panic
- These are high-priority; carriers are lenient but still review
Polling & Voting
Surveys, feedback requests, and interactive polls. Sample 1:- Keep surveys short (1-2 questions per message)
- Make responses simple (numbers, YES/NO, letters)
- Don’t disguise marketing as surveys
- Include clear opt-out in every message
Charity / Nonprofit
Fundraising, awareness campaigns, and donation acknowledgments. Sample 1:- Clearly identify your nonprofit in every message
- Show impact, not just ask for money
- Include donation receipts/acknowledgments
- Link to your organization’s website
Mixed (Most Common)
Multiple message types from a single campaign. This is the most frequently used use case. Sample 1 (transactional):- Each sample should demonstrate a DIFFERENT message type
- Opt-in must mention ALL types of messages (transactional + marketing)
- If you include marketing, follow marketing opt-in rules
- Description should list all message categories
- This is the safest choice if you’re unsure which use case to pick
Special use cases
Low Volume
For brands sending fewer than 6,000 messages per month. Simplified registration with reduced documentation. Same as whatever your primary use case is — low volume is about throughput, not content type. Use samples from the relevant standard use case above.- Best for small businesses with limited messaging needs
- Lower throughput limits (75 messages/minute on T-Mobile)
- Cannot be upgraded to standard — must create a new campaign
- Still requires compliant opt-in and opt-out
Sole Proprietor
For individuals or small businesses without an EIN. See the full Sole Proprietor guide.Emergency
For life-safety alerts. Requires demonstrating genuine emergency nature. Sample 1:- Must be genuinely life-safety related
- Carriers may grant higher throughput
- Don’t abuse this category — misuse leads to suspension
Writing compliant sample messages
Do’s and don’ts
- Include your brand name in every message
- Add opt-out language (STOP to opt out)
- Use specific, realistic content
- Match samples to your declared use case
- Show the actual format you’ll send
- Include 3 distinct sample messages
- Use generic placeholder text (“Hello, this is a test”)
- Mix marketing into transactional use cases
- Use ALL CAPS for entire messages
- Include URL shorteners (bit.ly, tinyurl)
- Copy samples from other brands
- Submit identical or near-identical samples
Opt-out language requirements
Every campaign must support these keywords:
Telnyx handles STOP/START/HELP keyword processing automatically when Advanced Opt-Out is enabled on your messaging profile.
Message flow description
Your campaign’smessage_flow field should clearly describe how users opt in. Carriers look for:
How does the user first provide their phone number? (Website form, checkout, text-to-join keyword, etc.)
How is consent captured? (Checkbox, keyword reply, verbal confirmation, etc.)
What happens after opt-in? (Welcome message, double opt-in confirmation, etc.)
What kinds of messages will the user receive?
Example message flow:
Common rejection reasons
For detailed troubleshooting of campaign rejections, see the 10DLC Troubleshooting Guide.
Related resources
Register your campaign via API or Portal Register your brand with TCR first Fix registration and delivery issuesISV/Reseller Onboarding
Source: https://developers.telnyx.com/docs/messaging/10dlc/isv-reseller-onboarding.mdIf you’re an ISV, reseller, or SaaS platform sending messages on behalf of your customers, you need a partner campaign architecture — not a standard 10DLC registration. This guide covers everything from initial setup through production messaging. Quick links: Architecture overview · Step-by-step setup · Managing customers at scale · Troubleshooting
Who needs this guide?
Direct customer? If you’re sending messages for your own business only, use the standard 10DLC quickstart instead.
Architecture overview
ISV/reseller 10DLC uses a shared campaign model where you register campaigns with your upstream CSP (Campaign Service Provider) and share them to Telnyx for number assignment and messaging.Key concepts
The Campaign Service Provider where you register brands and campaigns with TCR. This could be Telnyx (if you register directly) or another CSP. The messaging provider that sends traffic. Telnyx acts as your downstream CSP — you share campaigns to Telnyx for number assignment. A campaign registered at one CSP and shared to another for traffic delivery. Required for ISV architectures. The TCR process of granting a downstream CSP access to send traffic for a campaign. Sharing must be accepted by the downstream CSP.Native vs. partner campaigns
Prerequisites
Before starting, ensure you have: Sign up and complete account verification. You need a Level 2 verified account. An account with a CSP where you’ll register brands and campaigns (this can be Telnyx or another provider like Campaign Registry direct access). For each customer: legal business name, EIN/tax ID, business address, website, authorized representative contact, and messaging use case details. 10DLC-eligible long code numbers on your Telnyx account. Purchase numbers or use existing inventory.Step-by-step ISV onboarding
Step 1: Register brands for each customer
Each of your customers needs their own brand registered with TCR. A brand represents a business entity. If using Telnyx as your upstream CSP, register brands directly:curl
Python
Node
Ruby
Java
.NET
PHP
Go
BXXXXXX). You’ll need this when sharing campaigns to Telnyx.
Step 2: Submit brand for vetting
Higher vetting scores unlock greater throughput. For ISV use cases, enhanced vetting is strongly recommended.curl
Step 3: Create campaigns for each customer
Create one campaign per customer, selecting the use case that matches the actual message content your platform sends. See the campaign registration docs for the full list of supported use cases.curl
Python
Node
- Sample messages must accurately reflect what your platform sends
- Message flow must describe how end users (not your clients) consent to receive messages
- Each campaign undergoes manual review by TCR — allow 5–10 business days
Step 4: Share campaign to Telnyx
Once your campaign is approved at your upstream CSP, share it to Telnyx. The sharing process depends on your CSP, but the result is a campaign visible in the Telnyx Partner Campaigns API. After sharing, verify the campaign appears on Telnyx:curl
Python
Node
Go
Ruby
Java
PHP
Step 5: Assign phone numbers to the shared campaign
Once the campaign is accepted by Telnyx, assign your 10DLC numbers to it:curl
Python
Node
Step 6: Check sharing status
Monitor whether Telnyx has accepted the shared campaign:curl
Step 7: Send messages
Once numbers are assigned to the accepted campaign, send messages using the standard Send Message API:curl
Managing customers at scale
Multi-tenant architecture patterns
Best for: Agencies, resellers managing distinct businesses. Each customer gets their own brand and campaign. This provides:- Isolated throughput per customer
- Independent compliance status
- Clear separation for TCR
- High-volume customers get dedicated brands + campaigns
- Low-volume customers share a platform campaign
- Migrate customers to dedicated as they grow
Bulk brand registration
For platforms onboarding many customers, automate brand registration:Python
Webhook monitoring for partner campaigns
Set up webhooks to track campaign status changes across all your customers:Python
Partner campaign appeals
When a shared campaign is rejected, the appeal process differs from native campaigns. Partner campaigns use a CSP nudge mechanism: Check the campaign status and rejection details via your upstream CSP. Update the campaign details (description, samples, message flow) at your upstream CSP based on the rejection reason. Your upstream CSP sends aCAMPAIGN_NUDGE event to TCR, which triggers a re-review.
The nudge mechanism is only available for partner campaigns. Native campaigns use the direct appeal API. See 10DLC Event Notifications for details.
Set up webhooks to receive campaign status updates automatically.
Troubleshooting
Cause: Telnyx hasn’t processed the sharing request yet, or there’s a data mismatch. Fix:- Verify the campaign is fully approved at your upstream CSP
- Confirm you shared to the correct downstream CSP (Telnyx’s TCR ID)
- Contact Telnyx support with the TCR Campaign ID
- Check sharing status — must be
ACCEPTED - Verify numbers are long codes (not toll-free or short codes)
- Ensure numbers aren’t already assigned to another campaign
- Check that numbers are on the same Telnyx account
- Compare actual message content against registered samples
- Check 10DLC rate limits for your vetting score
- Ensure opt-out keywords (STOP, etc.) are properly handled
- Review the error code reference for specific guidance
- Register a new brand for the customer (if not already done)
- Submit brand for vetting
- Create a new campaign under their brand
- Wait for campaign approval
- Reassign their phone numbers from the shared campaign to the new dedicated campaign
- Traffic switches immediately — no downtime required
Compliance checklist for ISVs
ISVs have additional compliance responsibilities because you’re sending on behalf of customers. TCR and carriers hold you accountable for your customers’ messaging practices.- Customer vetting — Verify your customers’ business legitimacy before registration
- Content monitoring — Monitor message content for compliance with campaign use case
- Opt-in verification — Ensure customers collect proper consent from end users
- Opt-out processing — STOP/HELP keywords must work across all customer traffic
- Volume management — Don’t exceed throughput limits for your campaign’s vetting score
- Incident response — Have a process to quickly disable a customer’s messaging if they violate policies
- Record retention — Keep opt-in records for at least 4 years per CTIA guidelines
- Sample message accuracy — Registered samples must match actual production messages
Next steps
Understand throughput by vetting score and carrier. Set up webhooks for brand and campaign status changes. Details on campaign use cases and requirements. Full API reference for shared campaign management.Rate Limits & Scores
Source: https://developers.telnyx.com/docs/messaging/10dlc/10dlc-rate-limits.mdYour 10DLC throughput is determined by your brand vetting score and campaign type. Each carrier (AT&T, T-Mobile, Verizon) applies different rate limits. Understanding these limits helps you plan capacity and optimize for higher throughput.
AT&T throughput
AT&T assigns throughput per campaign based on a Message Class, determined by your use case type and vetting score.
Special use cases (fixed throughput regardless of vetting score):
TPM = Throughput Per Minute. AT&T measures throughput in messages per minute, not per second. To convert: 4,500 TPM ≈ 75 MPS.
T-Mobile throughput
T-Mobile uses daily message caps at the brand level, shared across all campaigns under that brand.
T-Mobile caps are per brand, not per campaign. If you have 3 campaigns under one brand, they share the same daily cap. Plan accordingly for high-volume use cases.
Unvetted brands default to the Basic tier (2,000/day) unless the business is listed on the Russell 3000 index.
Verizon throughput
Verizon has not published specific throughput numbers for 10DLC. They use content-based filtering rather than explicit rate limits. Messages that comply with your registered campaign use case are generally delivered without throttling.Vetting score impact
Your brand’s vetting score (0-100) is the single most important factor in determining throughput:Check your brand and campaign scores
curl
Python
Node
Maximize your throughput
The most impactful action. Ensure before vetting:- Website is live and matches your brand information
- EIN matches your legal business name exactly (IRS records)
- Phone number is findable via Google for your business
- Email domain matches your website domain
- Business address is verifiable Some use cases have higher default throughput:
- Social campaigns get 9,000 TPM on AT&T
- Political and Emergency get 4,500 TPM
- Mixed campaigns work for most businesses
Compliance checklist
Carriers can reduce your throughput or reject campaigns that don’t follow these guidelines:Disallowed use cases
The following use cases will be rejected or result in very low throughput:- Unsolicited messaging (cold outreach, lead generation spam)
- Non-direct lending (3rd party auto loans, payday loans)
- Indirect debt collection
- Cannabis or CBD marketing
- Gambling (unless licensed)
- SHAFT content (Sex, Hate, Alcohol, Firearms, Tobacco)
- Sweepstakes and “free giveaway” campaigns
Related resources
Register your brand and campaign for 10DLC messaging. Receive webhooks for brand vetting and campaign status changes. General messaging rate limits for all sender types. Track delivery rates and identify throughput issues.Phone Number Assignment
Source: https://developers.telnyx.com/docs/messaging/10dlc/phone-number-assignment.mdAfter your brand is registered and campaign is approved, you need to assign phone numbers to the campaign before sending messages. Only numbers assigned to an active campaign can send 10DLC A2P messages.
How it works
Numbers not assigned to an active 10DLC campaign will have messages filtered or blocked by carriers on AT&T, T-Mobile, and other major US networks.
Assign a number to a campaign
curl
Python
Node
Ruby
Go
PHP
.NET
Bulk assignment
When assigning multiple numbers to the same campaign, loop through your numbers programmatically:Python
Node
curl
Number pool integration
If you’re using Number Pools, numbers in the pool must also be assigned to a 10DLC campaign. The number pool distributes sending across multiple numbers, but each number still needs campaign registration. Register your campaign via the Campaign Registration guide. Configure your messaging profile with number pool enabled. Every number in the pool must be assigned to the same campaign. Use the bulk assignment method above. List all numbers assigned to your campaign to confirm all pool numbers are included. If a number in your pool is not assigned to a campaign, messages sent from that number will be filtered by carriers. This creates inconsistent delivery — some messages succeed, others fail depending on which pool number is selected.List assigned numbers
curl
Python
Node
Remove a number from a campaign
curl
Python
Node
Troubleshooting
Cause: The phone number isn’t on your Telnyx account or isn’t in E.164 format. Fix:- Verify the number is in your account:
GET /v2/phone_numbers?filter[phone_number]=+15551234567 - Ensure E.164 format:
+1followed by 10 digits (e.g.,+15551234567)
- Check campaign status:
GET /v2/10dlc/campaignBuilder/{campaignId} - Wait for carrier approval (1-5 business days)
- Set up Event Notifications to get notified when the campaign is approved
- Remove the number from the current campaign:
DELETE /v2/10dlc/phoneNumberCampaign/+15551234567 - Assign it to the new campaign
- Wait 24-72 hours for all carriers to propagate
- Check MNO metadata on the campaign for per-carrier status
- Verify the number is sending the same type of content registered in the campaign
- Check Message Detail Records for specific error codes
- Check each error response for the specific reason
- Common issues: number on different account, already assigned, not on messaging profile
- Use the bulk assignment script above with error tracking to identify which numbers failed and why
Next steps
Register your campaign use case before assigning numbers. Distribute sending across multiple numbers automatically. Understand throughput per carrier and brand score. Start sending once numbers are assigned and provisioned.Event Notifications
Source: https://developers.telnyx.com/docs/messaging/10dlc/event-notifications.mdYou can choose to be notified about events on your 10DLC Brands, Campaigns and Phone Numbers by configuring webhooks. For this mechanism to work, you’ll need a publicly accessible HTTP server that can receive our webhook requests at one or more specified URLs. We highly recommend using HTTPS (instead of HTTP). This tutorial walks through setting up a basic application for receiving webhooks.
Configuring webhooks
To receive notifications for brands you need to either provide the webhooks at the creation of the brand or you may update an existing brand. In both cases you have to pass your webhooks in the webhookURL and webhookFailoverURL. webhookFailoverURL is optional. Here is an example of updating the webhooks of a brand: Don’t forget to updateYOUR_API_KEY here.
Types of events
Overall structure of events
Here is an example of a webhook event:
The
meta object contains delivery metadata:
Brand events
Here is a list of all TCR events under the TCR_BRAND_UPDATE type:
Here is an example of a REGISTRATION notification:
Campaign events
Here is a list of TCR events under the TCR_EVENT type:
Here is an example of a campaign REGISTRATION failure notification:
campaignId field in webhooks contains the Telnyx UUID, not the TCR campaign ID. The TCR campaign ID (e.g., C6X6M95) may appear in the description field.
Phone number events
Phone numbers in webhook payloads use E.164 format (e.g.,
+16715455939), which includes the country code prefix.
Here is an example of a successful ASSIGNMENT notification:
status field in STATUS_UPDATE notifications can be: ADDED, DELETED, PENDING, or FAILED.
Here is an example of a DELETION notification:
Campaign Appeals and Nudging Mechanisms
When campaigns are rejected, there are different flows for getting them back into the compliance review queue depending on the campaign type and rejection reason.Native Campaign Appeals
For native campaigns rejected due to external factors (e.g., website compliance issues), customers can use the campaign appeal endpoint after addressing the issues: API Endpoint:TELNYX_FAILED to TCR_ACCEPTED and re-enter the compliance review queue.
Partner Campaign Nudging
For partner campaigns, the appeal process involves the CSP (Campaign Service Provider) sending aCAMPAIGN_NUDGE event after reviewing and approving customer changes:
CAMPAIGN_NUDGE Webhook Payload Example:
CAMPAIGN_NUDGE events originate from TCR and use the TCR campaign ID format (e.g., C4D06C2F) in the campaignId field, unlike other campaign webhooks which use the Telnyx UUID.
Campaign Appeal Scenarios
There are several specific scenarios where campaign appeals may be needed:1. Native Campaign Rejected for Content Issues
When a customer submits a native campaign and Telnyx rejects it due to issues with the campaign content (e.g., unclear sample messages), the customer can make adjustments to their campaign. Using the campaign update endpoint will automatically reset the campaign’s status toTCR_ACCEPTED so it goes back into the compliance team’s review queue.
2. Native Campaign Rejected for External Factors
When a customer submits a native campaign and Telnyx rejects it due to factors outside the campaign object (e.g., website compliance requirements), the customer must:- Fix the external issues (e.g., update website with required privacy policy).
- Use the appeal API endpoint to get their campaign back in the review queue.
3. Partner Campaign Rejected (Any Reason)
For partner campaigns rejected for either content issues or external factors, the process involves the CSP:- Customer makes required adjustments based on rejection reasons.
- CSP reviews the changes and approves them.
- CSP forwards a
CAMPAIGN_NUDGEevent to Telnyx. - Campaign status changes from
TELNYX_FAILEDtoTCR_ACCEPTEDand re-enters compliance review.
4. DCA Rejection for External Factors
When Telnyx accepts a campaign but the Direct Connect Aggregator (DCA) rejects it due to external factors:- Customer makes required external changes (e.g., website updates).
- Customer notifies Telnyx via appropriate appeal mechanism (scenarios 2 or 3).
- Once Telnyx approves the changes, Telnyx generates a nudge webhook that the DCA receives.
- Campaign re-enters DCA review queue.
5. DCA Rejection for Content Issues
When the DCA rejects a campaign due to campaign content issues:- Customer updates campaign content (e.g., sample messages).
- Customer notifies Telnyx via appropriate appeal mechanism (scenarios 1 or 3).
- Once Telnyx approves the changes, Telnyx generates a nudge webhook that the DCA receives.
- Campaign re-enters DCA review queue.
Campaign status flow
The following diagram shows the campaign lifecycle including both success and failure paths:Success path statuses
Failure and suspension statuses
Campaign appeal status flow
The typical status flow for campaign appeals is:- Initial rejection: Campaign status becomes
TELNYX_FAILED. - Customer action: Customer addresses the rejection reasons.
- Appeal submission:
- Native campaigns: Use appeal API endpoint or campaign update.
- Partner campaigns: CSP sends
CAMPAIGN_NUDGE.
- Re-review: Campaign status changes to
TCR_ACCEPTEDand re-enters compliance review.
Process webhooks with SDK examples
Handle 10DLC event notifications in your application to track registration status, respond to failures, and automate workflows:Python
Node
Ruby
Go
PHP
200 response immediately, then process the webhook asynchronously. For production applications, use a message queue (Redis, RabbitMQ, SQS) to decouple webhook receipt from processing.
Webhook delivery
Retry policy
If your webhook endpoint returns a non-2xx HTTP status code or times out, Telnyx will retry delivery. Themeta.attempt field in the webhook payload indicates which delivery attempt this is (starting at 1).
- Default retry attempts: 5
- Default retry interval: 30 seconds between attempts
Best practices
- Return 2xx quickly: Return a 200 response as soon as possible, then process the webhook asynchronously.
- Handle duplicates: Webhooks may be delivered more than once. Use the
idfield to deduplicate. - Use HTTPS: Always use HTTPS endpoints to ensure webhook data is encrypted in transit.
- Verify the source: Consider implementing signature verification for added security.
- Set up failover: Configure a
webhookFailoverURLto receive webhooks if your primary endpoint is unavailable.
Testing webhooks locally
During development, you can use tunneling tools to expose your local server to the internet for webhook testing:- ngrok: Run
ngrok http 3000to create a public URL that forwards to your local port 3000. - Cloudflare Tunnel: Use
cloudflared tunnelfor a similar tunneling solution. - localtunnel: Run
lt --port 3000for a quick temporary URL.
Glossary
Related resources
Get started with 10DLC brand and campaign registration. Understand throughput limits based on vetting scores. Set up a server to receive webhook notifications. Track delivery status and troubleshoot issues.Troubleshooting
Source: https://developers.telnyx.com/docs/messaging/10dlc/troubleshooting.mdThis guide covers the most common 10DLC failures across brand registration, campaign approval, phone number assignment, and message delivery — with specific error codes, root causes, and fixes. Quick links: Brand issues · Campaign issues · Number assignment issues · Delivery issues · Carrier-specific issues
Brand registration failures
Brand registration fails when TCR cannot verify your business identity. TheidentityStatus field on your brand object indicates the result.
Common brand failures and fixes
Error: Brand identity verification failed — company name mismatch. Root cause: ThecompanyName you submitted doesn’t match what the IRS has on file for that EIN.
Fix:
- Look up your exact legal name on the IRS Tax Exempt Organization Search or your incorporation documents
- Update your brand with the exact legal name (including suffixes like “Inc.”, “LLC”)
- Re-submit for vetting
curl
- Verify your address via USPS Address Lookup
- Use the exact USPS-standardized format
- Include suite/unit numbers if applicable
- Update the brand and re-submit
- Website is down or returns errors
- URL redirects to a different domain
- Website content doesn’t match the business name
- Ensure your website is live and loads without errors
- Use the root domain (e.g.,
https://example.com, not a deep link) - Verify the website clearly identifies your business name
- Don’t use placeholder/under-construction pages
- Check your existing brands:
GET /v2/10dlc/brand - If registered under another account, contact Telnyx support to transfer ownership
- If registered through another CSP, you can still create campaigns through Telnyx as a secondary CSP
400 / code 10012. The detail message reads “An external vetting for evpId ‘X’ and vettingClass ‘Y’ already exists for this brand” or “is already being processed for this brand.”
Root cause: A successful vetting for the same (evpId, vettingClass) exists within the last 180 days, or one is currently being processed.
Fix:
- Retrieve existing vettings:
GET /v2/10dlc/brand/{brandId}/externalVetting - To order a different vetting, use a different
vettingClass(for exampleENHANCEDinstead ofSTANDARD) or a differentevpId - Failed vettings are excluded from this check, so you can retry immediately after a real failure
- Successful vettings expire after 6 to 12 months; once expired (TCR
EXPIREDstatus), re-submission is allowed
- Review your brand profile for accuracy — incomplete or inconsistent data lowers scores
- Ensure your website, social media, and public records align with your brand information
- Request a re-vet after updating information (each vetting attempt has a fee)
- See 10DLC Rate Limits for score-to-throughput mapping
- Ensure the phone number on file can receive SMS
- Request a new OTP and complete verification within the time window
- Check that the phone number matches your identity documents
- See the Sole Proprietor guide for detailed steps
Check brand status via API
Python
Node
curl
Campaign rejection reasons
Campaign rejections happen during carrier review. The rejection reason is delivered via 10DLC Event Notifications webhooks.Writing samples that pass review
If you registered as “Customer Care,” every sample should be a customer service message:✅ “Hi Jane, your support ticket #4521 has been resolved. Reply HELP for assistance or STOP to opt out.”
❌ “Flash sale! 50% off today only!” (this is marketing, not customer care)Every sample message should include opt-out instructions:
✅ “Your order #1234 has shipped. Track: https://example.com/track. Reply STOP to unsubscribe.”Carriers reject generic or placeholder text:
❌ “This is a test message” ❌ “Hello {name}, this is {company}”
✅ “Hi Sarah, your appointment at Downtown Clinic is confirmed for March 5 at 2:00 PM. Reply C to confirm or R to reschedule. Reply STOP to opt out.”Provide 2–5 samples that demonstrate different message types within your use case:
- Confirmation messages
- Follow-up messages
- Status update messages
- Opt-in confirmation messages
Resubmitting after rejection
You cannot edit a rejected campaign. Create a new one with corrected information:Python
Phone number assignment failures
After campaign approval, you must assign phone numbers to the campaign. Failures typically involve number eligibility or carrier registration issues. Error: Phone number is not eligible for 10DLC campaign assignment. Root cause: The number may be:- A toll-free number (use toll-free verification instead)
- A short code
- Not provisioned for messaging
- Already assigned to another campaign
- Verify the number type:
GET /v2/phone_numbers/{id} - Ensure it’s a standard long code (10-digit US number)
- Enable messaging on the number if not already configured
- Unassign from any existing campaign before reassigning
- Wait 7 business days before escalating
- Check the number’s registration status via webhooks or API
- If still pending after 7 days, contact Telnyx support
- Ensure your brand vetting score is sufficient
- Verify the campaign isn’t flagged or suspended
- Try reassigning the number after the campaign is fully approved
- Contact Telnyx support if the issue persists
Python
Message delivery failures
Even with approved campaigns and assigned numbers, messages can still fail. These are the most common 10DLC-specific delivery errors.Debugging delivery issues
Python
Node
curl
Carrier-specific issues
Each major US carrier handles 10DLC differently. Here are carrier-specific behaviors to be aware of:AT&T
T-Mobile
Verizon
Diagnostic checklist
Use this checklist when troubleshooting any 10DLC issue:GET /v2/10dlc/brand/{brandId} — confirm identityStatus is VERIFIED or VETTED_VERIFIED
GET /v2/10dlc/campaign/{campaignId} — confirm campaignStatus is ACTIVE
GET /v2/10dlc/phoneNumberCampaign?phoneNumber={number} — confirm the sending number is assigned to the active campaign
Review 10DLC webhooks for rejection, suspension, or status change events
Check MDRs for specific error codes on failed messages
Compare your sending rate against your campaign throughput limits. Vetting score determines your ceiling.
Get help
If you’ve followed this guide and still have issues: Open a support ticket with your brand ID, campaign ID, and error details. Check brand, campaign, and number status in Mission Control. Set up webhooks to catch status changes in real time. Review throughput limits by vetting score tier.RCS
RCS Getting Started
Source: https://developers.telnyx.com/docs/messaging/messages/rcs-getting-started.mdSend rich, interactive messages with RCS (Rich Communication Services). This guide covers the setup process, approval timeline, and how to send your first RCS message.
What is RCS?
RCS is a messaging protocol that delivers app-like experiences in the native messaging app—no app download required. Unlike SMS/MMS, RCS supports:- Rich cards with images, titles, and action buttons
- Carousels for product showcases
- Suggested replies for quick responses
- Read receipts and typing indicators
- High-resolution media (images, video, files)
Prerequisites
Approval process
RCS requires agent registration and carrier approval before you can send messages to the general public. The process is similar to short code approval: Contact sales to start the onboarding process. Provide your brand details, use case, and sample message content. Once submitted, Telnyx moves your agent into a testing stage. During this phase, you can invite beta test numbers using the API to test your integration while waiting for carrier approval. Carriers review and approve your agent. This process typically takes 4-6 weeks, similar to short code approval. Once approved, your RCS Agent can send messages to any RCS-capable device. Testing during approval: You don’t have to wait for full carrier approval to start testing. Once your agent is in testing stage, you can add beta numbers and send test messages via the API.1. Create a Messaging Profile
Navigate to Messaging in the portal. Click Add new profile, give it a name (e.g., “RCS Profile”), and click Save. Copy the Messaging Profile ID—you’ll need it when sending messages.2. Get your API key
Go to API Keys and copy your API key (or create one if needed).3. Send an RCS message
Once your RCS Agent is in testing stage (or fully approved), you can send messages to your beta test numbers or approved destinations. Send a simple text message via RCS:curl
Node
Python
Ruby
Go
Java
.NET
PHP
curl
Node
Python
curl
Node
Python
Response
A successful response looks like this:4. Handle incoming messages
Set up a webhook to receive customer replies. See Receiving RCS Webhooks for details.RCS vs SMS comparison
Next steps
Add AI-powered responses to your RCS agent Handle incoming RCS messages Check if a number supports RCS Explore all RCS parametersRCS with AI Assistant
Source: https://developers.telnyx.com/docs/messaging/messages/rcs-ai-assistant.mdBuild an AI-powered RCS agent that answers customer questions automatically. By connecting your RCS agent to Telnyx AI Assistant, you get intelligent responses powered by your knowledge base—no custom backend code required.
Why RCS + AI Assistant?
Combining RCS with AI Assistant solves two problems:- RCS carrier onboarding is complex — Carriers require functional agents before approval. AI Assistant gives your agent real functionality instantly.
- Building conversational AI is hard — Instead of coding your own NLP/LLM integration, AI Assistant handles it with your knowledge sources.
How it works
The key integration point is the Messaging Profile, which links your RCS Agent to an AI Assistant via theai_assistant_id field.
Prerequisites
- A Telnyx account
- An approved RCS Agent (or one in the approval process)
- Content for your AI Assistant (FAQs, docs, or knowledge base)
1. Create an AI Assistant
Navigate to AI Assistants in the portal. Click Create Assistant and give it a name (e.g., “Support Bot”). Write instructions that define your assistant’s behavior:- Documents: Upload PDFs, text files, or markdown
- Websites: Crawl your help center or documentation
- Custom: Connect via API for dynamic content
Save your assistant and copy the Assistant ID (e.g.,
assistant-11deda65-f3f0-457a-9946-ec021622b061).
2. Create a Messaging Profile with AI
Navigate to Messaging in the portal. Click Add new profile and name it (e.g., “RCS AI Profile”). In the profile settings, find AI Assistant and select your assistant from the dropdown (or enter the Assistant ID). Save the profile and copy the Messaging Profile ID.3. Link your RCS Agent to the AI-enabled profile
Once your RCS Agent is approved by carriers, link it to your AI-enabled messaging profile. If you already have an approved RCS Agent, update it to use your AI-enabled messaging profile:curl
Node
Python
- Your AI Assistant ID
- Your Messaging Profile ID
- Your RCS Agent details
4. Test your AI-powered RCS agent
Once your RCS Agent is approved (or using test numbers), send a message to trigger the AI:curl
Node
Python
- Receives the inbound message via the messaging profile
- Processes it with your configured LLM and knowledge base
- Sends an intelligent response back via RCS
Best practices
RCS messages display on mobile devices. Configure your AI to:- Keep responses concise (under 160 characters when possible)
- Use bullet points for lists
- Avoid long paragraphs
- Check your support ticket history
- Review FAQ page analytics
- Test edge cases and ambiguous questions
Monitoring and analytics
Track your AI Assistant’s performance in the portal:- Conversation logs: Review AI responses and customer satisfaction
- Knowledge gaps: Identify questions the AI couldn’t answer
- Response times: Monitor latency and throughput
Pricing
AI Assistant charges are based on tokens processed. Simple Q&A conversations typically cost fractions of a cent per exchange.
Try it yourself
Experience RCS + AI Assistant firsthand by chatting with our demo bot. Requirements: US phone number and RCS-enabled device (Android with Google Messages, or iOS 18+) {/* Deeplink URL from /v2/messages/rcs/deeplinks API - sms: scheme with @rbm.goog is the Google RCS standard */} Tap to open a conversation with our AI-powered support agent This demo uses an RCS deeplink to start the conversation. The deeplink URL is generated by the Telnyx API and uses the standard Google RCSsms: scheme with an @rbm.goog address:
- Telnyx AI Assistant for natural language understanding
- Knowledge retrieval from our documentation
- RCS rich messaging for a native chat experience
Next steps
Deep dive into AI Assistant configuration Learn RCS fundamentals Send interactive rich cards Create deeplinks for your own agentsSend RCS Messages
Source: https://developers.telnyx.com/docs/messaging/messages/send-an-rcs-message.mdSend rich, interactive messages using RCS (Rich Communication Services). This guide covers sending text, rich cards, carousels, and configuring SMS fallback for non-RCS devices. New to RCS? Start with the RCS Getting Started guide to set up your RCS agent and get approved by Google.
Prerequisites
- A verified RCS agent approved by Google
- A messaging profile with RCS enabled
- Your agent ID (from the RCS agent setup)
Send a text message
The simplest RCS message — plain text with optional suggested replies:curl
Python
Node
Ruby
Go
PHP
Send a rich card
Rich cards display media, text, and action buttons in an interactive format:curl
Python
Node
Card options
Send a carousel
Display multiple cards in a swipeable carousel — ideal for product listings:curl
card_width.
Add suggested actions
Suggestions appear as tappable buttons below your message: Quick reply buttons that send a predefined response back to your webhook:SMS fallback
Not all devices support RCS. Configure automatic SMS fallback for non-RCS recipients:curl
Python
Node
fallback.from number must be a Telnyx number on your messaging profile with SMS capability. The fallback message is plain text only — rich card content is not included.
RCS vs. SMS/MMS comparison
Related resources
Set up your RCS agent and get approved by Google. Check device RCS capability before sending. Handle inbound RCS messages and delivery events. Full API reference for RCS messaging.Capabilities & Deeplinks
Source: https://developers.telnyx.com/docs/messaging/messages/rcs-capabilities.mdCheck whether a recipient’s device supports RCS — and which features it supports — before sending. This lets you adapt your message format (rich card vs. plain text) and fall back to SMS when needed.
Query single number
Check RCS capabilities for a single phone number:curl
Python
Node
Ruby
Go
PHP
Response examples
Feature reference
Bulk capability query
Check up to 100 numbers at once to efficiently segment your audience:curl
Python
Node
Send with automatic fallback
Use capability queries to send the best possible message format:Python
RCS Deeplinks
Deeplinks let users start an RCS conversation from a website, email, or QR code — without having your number saved.Generate a deeplink
curl
Python
Node
Response
Use deeplinks
Embed the deeplink in an HTML button or link. The URL won’t open directly in a browser — it must be an “ tag or button click:Requirements
Related resources
Send text, rich cards, carousels, and suggested actions. Handle inbound RCS messages and delivery events. Set up your RCS agent and get approved. Full API reference for RCS messaging.RCS Deeplinks
Source: https://developers.telnyx.com/docs/messaging/messages/rcs-deeplinks.mdRCS Deeplinks content has been consolidated into the RCS Capabilities & Deeplinks guide. See the RCS Deeplinks section for full documentation including SDK examples and usage patterns.
Quick reference
Generate a deeplink to start an RCS conversation:RCS Webhooks
Source: https://developers.telnyx.com/docs/messaging/messages/receiving-rcs-webhooks.mdTelnyx sends webhooks to notify your application about RCS messaging events — delivery status updates, inbound messages, read receipts, and suggestion responses. This guide covers RCS-specific webhook payloads, how they differ from SMS/MMS, and how to handle them in your application.
Prerequisites
- A Telnyx account with an RCS Agent
- A publicly accessible HTTPS endpoint (or ngrok for local development)
- Your API key and public key (for signature verification)
RCS vs SMS/MMS webhooks
RCS webhooks have significant structural differences from SMS/MMS. Understanding these is critical when building a multi-channel messaging application.
For SMS/MMS webhook handling, see Receiving Webhooks for Messaging.
Webhook URL configuration
RCS webhook routing differs from SMS/MMS:URL priority for outbound status
Ifwebhook_url and webhook_failover_url are provided in the send request body, those are used.
If the messaging profile has webhook URLs configured, those are used.
If neither is configured, no webhook is delivered. Events are still logged in Message Detail Records.
Webhook event types
Delivery status webhooks
When you send an RCS message, Telnyx notifies you as the message progresses through each status.Delivery status flow
Status reference
Example: Delivery receipt payload
Read receipts
RCS uniquely supports read receipts — amessage.read event is sent when the recipient opens and views your message. This is not available with SMS/MMS.
Example: Read receipt payload
Handling read receipts
Use read receipts to:- Track engagement — Know which messages were actually read vs. just delivered
- Trigger follow-ups — Send a follow-up if a message was delivered but not read after a threshold
- Analytics — Calculate read rates for different message types or campaigns
- UI updates — Show “read” indicators in your chat interface (like blue checkmarks)
message.read event doesn’t necessarily mean the message wasn’t read — the user may have disabled read receipts on their device.
Inbound message webhooks
When someone sends an RCS message to your agent, Telnyx delivers amessage.received webhook to the URL configured on your RCS Agent.
Inbound message types
RCS supports richer inbound message types than SMS/MMS:payload.media[], RCS file attachments are nested under payload.body.user_file with both a full-resolution payload and a thumbnail.
postback_data for programmatic routing and text for the user-visible label.
SDK webhook handling examples
Handle RCS webhooks in your application with proper event routing, signature verification, and message type detection.Python
Node
Ruby
Java
.NET
PHP
Go
Building a unified SMS + RCS webhook handler
If your application handles both SMS/MMS and RCS, you need to normalize the different payload structures:Python
Node
Webhook IP allowlist
If your server uses a firewall or ACL, allowlist the Telnyx webhook source subnet:Best practices
Process webhooks asynchronously. Acknowledge receipt immediately and handle the event in a background job. If your server doesn’t respond within 2 seconds, Telnyx retries the webhook. The same webhook may be delivered multiple times (up to 3 attempts). Use theevent.data.id as a deduplication key to avoid processing the same event twice.
Validate the telnyx-signature-ed25519 and telnyx-timestamp headers using your account’s public key. See webhook security for implementation details.
When an RCS message fails (delivery_failed status), automatically fall back to SMS to ensure message delivery. Check the to[].status field in message.finalized events.
Read receipts provide valuable engagement data but aren’t guaranteed. Don’t make critical business logic dependent on receiving a message.read event — some users disable read receipts.
Next steps
Send rich cards, carousels, and suggested actions via RCS. Check device support and RCS feature availability. Compare with the SMS/MMS webhook handling guide. Set up your RCS Agent and start messaging.Quickstart
Source: https://developers.telnyx.com/docs/messaging/whatsapp/quickstart.md
Send Your First WhatsApp Message
Get started with WhatsApp Business messaging via Telnyx in minutes. This guide covers account setup, template creation, and sending your first message with delivery confirmation.Prerequisites
Before sending WhatsApp messages, ensure you have:- Telnyx Account — Sign up and verify your account
- Meta Business Manager Account — Required for WhatsApp Business Platform access
- WhatsApp Business Account (WABA) — Connected via Telnyx’s Embedded Signup
- Verified phone number — Added to your WABA and verified with Meta
- Create a Telnyx account and verify your email
- Navigate to the Portal and complete account verification
- Add billing information to enable message sending
- Generate an API key from Developer Center → API Keys → Create API Key
- Navigate to Messaging → WhatsApp in the Telnyx Portal
- Click Connect WhatsApp Business Account
- Sign in with your Facebook Business Manager credentials
- Select the Business Manager account to connect
- Follow Meta’s prompts to create or select a WhatsApp Business Account
- Verify your business phone number when prompted
\{\{1\}\}), provide sample values in the example field. Meta reviewers use these to evaluate the template. Without sample values, templates are typically rejected.
Complete the business profile (website, description, industry category) before submitting templates. Incomplete profiles increase rejection rates, especially for new WhatsApp Business Accounts.
Create a message template using the API:
cURL
JavaScript
Python
Ruby
cURL
Python
Node.js
Ruby
Go
Java
from field.
Configure webhooks to receive real-time delivery status updates:
- In the Telnyx Portal, navigate to Messaging → Messaging Profiles
- Select your messaging profile
- Set Webhook URL to your endpoint (e.g.,
https://yourapp.com/webhooks/telnyx) - Enable Failover URL for redundancy (optional)
- Save the configuration
Python
Node.js
Verify Message Delivery
Check message delivery through multiple channels:Portal Dashboard
- Navigate to Messaging → Message Logs in the Telnyx Portal
- Filter by Channel: WhatsApp and Date Range
- View delivery status, timestamps, and any error codes
- Click individual messages for detailed delivery information
Webhook Events
Monitor these key webhook events:message.sent— Message successfully submitted to WhatsAppmessage.delivered— Message delivered to recipient’s devicemessage.read— Recipient opened and read the message (when enabled by recipient)message.failed— Message delivery failed (with error details)
API Response
The initial API response includes:Common Issues
Symptoms: API returns a40008 error indicating the template was not found or not approved
Solutions:
- Verify template status in Portal under Messaging → WhatsApp → Send Messages
- Ensure template name matches exactly (case-sensitive)
- Wait for Meta’s approval (typically 24-48 hours for first templates)
- Review Meta’s template guidelines for approval requirements
40008 error indicating the sender phone number is not registered with WhatsApp
Solutions:
- Complete phone number verification in the Telnyx Portal
- Ensure number is added to your WhatsApp Business Account
- Verify the number through Meta’s verification process
- Check that the number hasn’t been used with personal WhatsApp
40008 error. WhatsApp requires a template to initiate conversations outside the 24-hour window
Solutions:
- Use approved message templates for outbound messaging
- Only send free-form messages within 24 hours of customer’s last message
- Check conversation window status via webhook events
- Consider switching to template-based messaging for customer re-engagement
undeliverable with Meta API error details in the response
Solutions:
- Verify recipient has WhatsApp installed and active
- Ensure phone number format includes country code (+1…)
- Check that recipient hasn’t blocked your business number
- Confirm recipient’s WhatsApp account is not banned or restricted
Next Steps
Send templates, text, media, and interactive messages Set up your WhatsApp Business Account and verify your number Handle inbound messages and delivery status callbacksEmbedded Signup
Source: https://developers.telnyx.com/docs/messaging/whatsapp/embedded-signup.md
WhatsApp Embedded Signup
WhatsApp Embedded Signup enables businesses to connect their Facebook Business Manager account to Telnyx and provision WhatsApp Business Account (WABA) resources through a streamlined browser-based workflow.Prerequisites
Before starting the embedded signup process: Required account status:- Active Telnyx account with messaging enabled
- Valid payment method configured
- Account in good standing with no billing issues
- Log in to Telnyx Portal
- Navigate to Messaging → WhatsApp
- Ensure you have admin permissions for your organization
- Facebook Business Manager account (business.facebook.com)
- Admin access to the Business Manager account
- Business verification completed (recommended for production use)
- Each phone number can only be associated with one Business Manager
- Business Manager must have appropriate permissions for WhatsApp Business API
- Account must comply with Facebook Business policies
Signup Flow Overview
The embedded signup process follows a multi-step finite state machine (FSM) that progresses through these states: Each state represents a checkpoint in the signup process with specific completion criteria and potential failure points.Step-by-Step Signup Process
From Telnyx Portal:- Navigate to Messaging → WhatsApp → Getting Started
- Click Connect WhatsApp Business
- Review the permissions and requirements displayed
- Click Begin Setup to start the embedded signup flow
- Telnyx creates a signup session with state
initiated - Portal generates a secure OAuth URL for Facebook authorization
- Session tracking begins for completion monitoring
- Browser redirects to Facebook Business Manager OAuth consent screen
-
Review the requested permissions:
- WhatsApp Business Management — Create and manage WABA
- Business Asset Management — Associate phone numbers and templates
- Webhook Management — Configure message and status webhooks
- Click Continue to grant permissions
- Select target Business Manager if you have multiple
- Facebook validates your Business Manager admin status
- OAuth token is generated and securely transmitted to Telnyx
- Signup state advances to
facebook_auth
- Permission denied: Ensure you have admin access to Business Manager
- Business not verified: Some features require verified Business Manager
- Already connected: Phone number may be connected to another provider
- WABA is created under your Business Manager
- Telnyx is granted the necessary permissions as a solution partner
- Initial configuration is applied (timezone, business category)
- Webhook endpoints are pre-configured for Telnyx integration
- Facebook creates the WABA resource
- Telnyx receives WABA credentials and configuration details
- Signup state advances to
waba_created - WABA settings are synced to Telnyx systems
- Business category: Inherited from Business Manager
- Webhooks: Configured via your messaging profile webhook settings
- Portal displays available phone numbers from your Telnyx inventory
- Select the phone number to register for WhatsApp
- Choose the WABA to associate with the number
- Confirm the registration request
- Must be a Telnyx number with an active messaging profile assigned
- Cannot be currently registered with another WhatsApp provider
- Can be used alongside SMS/voice on the same number — WhatsApp uses a separate API path
- Phone number is submitted to Facebook for WhatsApp registration
- Facebook begins the verification process
- Signup state advances to
phone_registered - Number status changes to “pending verification”
- Number format: E.164 format (+1234567890)
- Verification method: Automatically determined by Facebook
- Processing time: Usually 1-5 minutes for verification
- Carrier validation: Facebook verifies number ownership with telecom provider
- SMS verification: Test SMS may be sent to validate delivery capability
- API validation: Facebook tests webhook delivery and response handling
- Typical duration: 1-15 minutes
- Complex cases: Up to 24 hours for carrier validation
- Failed attempts: May require manual review or different number
- Facebook completes all verification checks
- Number status updates to “verified” in Facebook systems
- Signup state advances to
verified - Number becomes available for sending messages
Signup Completion
When verification succeeds, your WhatsApp integration is ready:Account Status
- WABA Status: Active and ready for messaging
- Phone Number: Verified and enabled for sending/receiving
- Webhooks: Configured and receiving events
- Templates: Ready for submission and approval
Next Steps After Signup
Send templates, text, media, and interactive messages Send your first WhatsApp message end-to-end Handle inbound messages and delivery status callbacksTroubleshooting Common Issues
Error: “You don’t have permission to complete this action” Causes:- Not admin of Business Manager account
- Business Manager doesn’t have WhatsApp permissions
- Account suspended or restricted
- Verify admin access in Business Manager
- Contact Facebook Business Support if account restricted
- Use different Business Manager account
- Check account verification status
- Business Manager doesn’t meet Facebook requirements
- Too many existing WABAs on Business Manager
- Business policy violations
- Complete Business Manager verification
- Review and resolve any policy violations
- Remove unused WABAs from Business Manager
- Contact Telnyx support with signup session ID
- Number registered with another Business Service Provider
- Number previously registered but not properly disconnected
- Number registered to different WABA
- Disconnect number from previous provider
- Contact previous provider to release number
- Use different phone number for registration
- Contact Facebook Business Support for assistance
- Number doesn’t support voice calls or SMS
- Carrier blocking verification attempts
- Number routing issues
- Verify number accepts incoming calls and SMS
- Try different phone number if possible
- Contact carrier to check for blocks
- Wait and retry verification process
- Contact Telnyx support with verification details
- Webhook URL not properly configured
- Firewall blocking webhook delivery
- Invalid webhook signature verification
- Verify webhook URL accessibility from Facebook servers
- Check webhook signature verification implementation
- Review webhook configuration in Portal
- Test webhook endpoint with manual POST requests
- Check logs for delivery attempts and errors
- Ad blockers (uBlock Origin, Adblock Plus, etc.) blocking Facebook/Meta domains
- Privacy extensions (Privacy Badger, Ghostery) blocking third-party scripts
- Browser security settings blocking cross-origin popups
- Temporarily disable ad blockers and privacy extensions for the signup flow
- Add
facebook.comandmeta.comdomains to your extension’s allowlist - Try using a different browser profile without extensions
- Use Chrome Incognito mode (extensions are typically disabled by default)
- Ensure popup blockers allow popups from the Telnyx Portal domain
API Integration
Signup Session Monitoring
Monitor signup progress programmatically using the Signup API:cURL
Webhook Events
Receive real-time signup progress updates:Tech Provider Embedded Signup
Source: https://developers.telnyx.com/docs/messaging/whatsapp/embedded-signup/tech-provider.mdWhatsApp Tech Provider Embedded Signup lets ISVs and SaaS platforms embed Meta’s WhatsApp onboarding flow directly into their own portal. Your end-customers can create and register a WhatsApp Business Account (WABA), claim a phone number, and begin messaging — all without leaving your application. Unlike the standard embedded signup flow, which is designed for direct Telnyx customers, the Tech Provider flow is built for partners who manage multiple end-customers and need programmatic control over WABA provisioning.
Overview
As a Tech Provider, you build the onboarding experience into your own product. The end-customer clicks a button in your portal, completes Meta’s embedded signup flow, and your backend receives the resulting WABA ID and phone number ID. You then register the WABA with Telnyx so that it can use Telnyx’s messaging infrastructure. Telnyx offers two integration paths: a hosted signup option where Telnyx manages the entire signup UI and backend processing (recommended for most Tech Providers), and a custom integration option where you embed Meta’s Facebook SDK directly into your own portal for full control over the experience. See Step 3 for a comparison.Tech Provider vs. Direct Customer
Prerequisites
Before you begin, make sure you have:- A Meta Business Account with admin access
- A Meta Tech Provider App that has been approved by Meta with the following permissions:
whatsapp_business_messagingwhatsapp_business_management
- The Tech Provider onboarding process completed in Meta App Dashboard
- A Telnyx account with an API key
Step 1: Create and configure your Meta Tech Provider App
Go to Meta App Dashboard and create a new app. Select Business as the app type. In your app’s dashboard, add the WhatsApp product. This will generate the permissions you need. Under App Review > Permissions and Features, request the following permissions:
Both permissions require Advanced Access for production use.
Follow Meta’s Tech Provider onboarding guide to complete the Tech Provider registration process. This includes business verification and agreeing to Meta’s Tech Provider terms.
Submit your app for Meta’s App Review. Meta will evaluate your use case and grant (or deny) the requested permissions. This process typically takes several business days.
While waiting for App Review approval, you can test in Development Mode with your own test users. Production use requires Live Mode and Advanced Access permissions.
Step 2: Link your Meta App to Telnyx
Once your Meta App is configured, you need to link it to Telnyx so that WABAs created through your embedded signup flow are registered on Telnyx’s infrastructure. In the Meta App Dashboard, change your app mode from Development to Live. This is required for Telnyx to initiate the partner invitation. Reach out to your Telnyx representative or contact support and provide:- Your Meta App ID (found in your app’s dashboard)
- Your business name as registered with Meta Within 1–2 business days, you’ll receive an email from Meta containing a partner invitation link. Click the link and accept the invitation to link your app with Telnyx. After accepting the invitation, you can switch your app back to Development mode for testing. The link persists regardless of the app mode.
Step 3: Choose your integration path
After your Meta App is linked to Telnyx, you have two ways to onboard your end-customers’ WABAs. Both paths complete the same Meta embedded signup — the difference is where the signup UI lives and how much you build.
With the hosted signup flow, Telnyx hosts the embedded signup page. You generate a time-limited onboarding URL via API and share it with your end-customer. The customer visits the URL, completes Meta’s signup, and Telnyx handles the rest — code exchange, webhook subscription, credit line sharing, and phone number registration. No Facebook SDK, no custom JavaScript.
Step 3A.1: Generate an onboarding URL
Call the Telnyx API to create a JWT-authenticated onboarding URL for your end-customer. The URL is valid for up to 3 days.Request body parameters
This endpoint requires authentication with a Telnyx API key. You can create one in the API Keys page.
Response
Step 3A.2: Share the URL with your end-customer
Send theurl to your end-customer via email, SMS, or embed it as a link in your own portal. When the customer visits the URL:
- Telnyx validates the JWT and renders a signup page branded with your app’s Meta configuration
- The customer clicks Get Started to launch Meta’s embedded signup popup
- The customer signs in to Facebook, creates or selects a WABA, and verifies their phone number
- On completion, Telnyx automatically handles the backend: code exchange, webhook subscription, credit line sharing, and phone number registration
GET /v2/whatsapp/signup/{session_id}/status to track progress and surface it in your own dashboard.
Step 3A.3: Check signup status (optional)
status, state, waba_id, and any errors. Use this to build a progress indicator in your portal or trigger downstream workflows when onboarding completes.
What happens after signup
When the end-customer completes the hosted signup:- Credit line is applied — The WABA is associated with your Telnyx billing account
- WABA is registered — The WhatsApp Business Account is linked to Telnyx’s messaging infrastructure
- Webhooks are subscribed — Telnyx subscribes to Meta webhook events on the WABA’s behalf
- Number is ready for messaging — The phone number can send and receive WhatsApp messages through Telnyx
Step 3B.1: Implement the frontend embedded signup
Meta’s embedded signup flow is triggered from your web application using the Facebook JavaScript SDK. Your frontend launches the signup dialog, the end-customer completes it, and you receive the resulting credentials. Add the Facebook SDK to your web application:FB.login() with the config_id of your WhatsApp Business Configuration. This opens Meta’s embedded signup dialog for your end-customer.
Refer to Meta’s embedded signup documentation for full details on parsing the response. You only need the frontend (web) portion of Meta’s guide — the backend registration is handled by Telnyx in the next step.
Step 3B.2: Register the WABA with Telnyx
Once you have thewaba_id and phone_number_id from the embedded signup flow, send them to Telnyx to register the WABA and activate messaging.
Request
Request body parameters
This endpoint requires authentication with a Telnyx API key via the
Authorization: Bearer header. Use an API key from your Telnyx account — you can create one in the API Keys page.
Response
A successful response confirms that the WABA has been registered with Telnyx:What happens after registration
When the Telnyx API returns a successful response:- Credit line is applied — The WABA is associated with your Telnyx billing account
- WABA is registered — The WhatsApp Business Account is linked to Telnyx’s messaging infrastructure
- Number is ready for messaging — The phone number can send and receive WhatsApp messages through Telnyx
Troubleshooting
- Verify that your app was in Live mode when you contacted Telnyx
- Check your spam and junk folders
- Ensure the email associated with your Meta Business account is correct
- Confirm with your Telnyx representative that they initiated the invitation
- The invitation typically arrives within 1–2 business days
- Review Meta’s rejection reasons carefully in the App Review section of your dashboard
- Common reasons include: insufficient permissions justification, unclear use case description, or missing screencast
- Update your submission with clearer documentation and resubmit
- Ensure your app is functional and testable during the review period
-
Confirm the Facebook SDK is loaded before calling
FB.login() -
Check that your
config_idis correct and matches a WhatsApp Business Configuration in your app -
Ensure your app has the
whatsapp_business_messagingandwhatsapp_business_managementpermissions - Open your browser’s developer console for error messages from the SDK
- Verify you are using a valid Telnyx API key
-
Ensure the
Authorization: Bearer YOUR_API_KEYheader is included in your request - Check that your API key has not expired or been revoked
-
Ensure the
response_typeparameter includescode -
Check that
override_default_response_typeis set totrue - Verify the user completed all steps in the Meta signup flow (business verification, phone number selection)
-
Inspect the full response object in your
FB.login()callback for debug information -
Ensure you’re using the full URL returned by
POST /v2/whatsapp_hosted_signups, including the?token=query parameter - Check that the JWT hasn’t expired — tokens are valid for a maximum of 3 days from creation
- If the token has expired, generate a new one via the API
- Verify the phone number entered by the end-customer is correct and can receive SMS
- Check that the phone number is not already registered with another WhatsApp account
- Try requesting the verification code via phone call instead of SMS
- Ensure the end-customer’s phone carrier is not blocking Meta’s verification messages
Next steps
Send your first WhatsApp message with Telnyx Direct customer embedded signup flow Explore WhatsApp API endpoints Send messages across all channelsSend Messages
Source: https://developers.telnyx.com/docs/messaging/whatsapp/send-messages.mdSend WhatsApp messages using
POST /v2/messages/whatsapp. All message types use the same endpoint — the whatsapp_message object determines the message type.
Request Structure
Every request requires these fields:
The messaging profile is automatically resolved from the
from number. You do not need to pass messaging_profile_id.
The whatsapp_message object must include a type field and the corresponding content object. Supported types: text, template, image, video, document, audio, sticker, location, contacts, interactive, reaction.
Template Messages
Template messages are required to start conversations outside the 24-hour window. Templates must be pre-approved by Meta. Error code40008 indicates the template could not be used for sending. Possible causes include: the template is still pending review, was rejected by Meta, has been paused due to quality issues, or was disabled. Check template status in the Telnyx Portal or via GET /v2/whatsapp/message_templates.
Text, media, and interactive messages can only be sent within a 24-hour conversation window. The window opens when the recipient sends a message to the business number. Outside this window, use an approved template message to initiate the conversation.
For comprehensive template creation guidance, see the Manage Templates guide.
cURL
Python
Node.js
Sending by Template ID
Instead of specifyingname and language, you can reference a template by its Telnyx UUID (template_id). The name and language are resolved automatically from the database.
cURL
GET /v2/whatsapp/message_templates. The id field in the response is the template_id you can use when sending.
Template Components
Templates usecomponents to pass dynamic content into header, body, and button slots:
Media Header Template
To send a template with an image header:document and video types with the same {link, caption, filename} structure.
Text Messages
Send plain text within the 24-hour conversation window. Body must be 1–4096 bytes.cURL
Python
Node.js
preview_url: true to render link previews when the message body contains a URL.
Media Messages
Send images, videos, documents, audio, and stickers. Each media object requires exactly one oflink (URL) or id (Meta media ID). Captions are optional and limited to 1024 bytes.
Image
Document
Video
Audio
Sticker
Location Messages
Share a location pin. Latitude and longitude are passed as strings (decimal format).Contact Messages
Share one or more contact cards (1–257 contacts per message).Interactive Messages
Interactive messages let recipients tap buttons, select from lists, or open URLs. Supportedinteractive.type values:
Quick Reply Buttons
id in the payload.
CTA URL Button
List Messages
Location Request
Reactions
React to a received message with an emoji.Reply Context
Reply to a specific message by includingcontext.message_id:
Callback Tracking
Usebiz_opaque_callback_data to attach tracking data that will be returned in delivery webhooks:
API Response
All message types return the same response structure:Validation Rules
Error Handling
Common WhatsApp errors return error code40008. This is a catch-all code covering template issues (pending, rejected, paused, disabled) and delivery failures. For general API errors, see the Error Codes Reference.
Template, text, media, and interactive messages all use the same endpoint. The type field inside whatsapp_message determines which content object is required.
Next Steps
Send your first WhatsApp message end-to-end Set up your WhatsApp Business Account and verify your number Handle inbound messages and delivery status callbacksManage Templates
Source: https://developers.telnyx.com/docs/messaging/whatsapp/manage-templates.md
Manage WhatsApp Message Templates
WhatsApp requires pre-approved message templates for business-initiated conversations. Use the Telnyx Management API to create, review, and manage templates programmatically. For template best practices and approval tips, see the Approval Tips guide.Template Lifecycle
Templates must be approved by Meta before they can be used. Review typically takes 24-48 hours.List Templates
Retrieve all templates for your WhatsApp Business Account.cURL
Python
Node.js
Filter by Status
Response
Create a Template
Submit a new template for Meta review. Set a display name for the phone number before submitting templates. Templates submitted from numbers without an approved display name are rejected by Meta. Always include sample values in theexample field when your template contains parameters (\{\{1\}\}, \{\{2\}\}). Templates without examples are typically rejected.
Authentication Template
Authentication templates include an OTP code with a copy-code button.cURL
Python
Node.js
Marketing Template
Marketing templates support rich media headers, body text with parameters, and call-to-action buttons.Utility Template
Utility templates are for transactional updates like order confirmations, shipping notifications, and account alerts.Get a Template
Retrieve details of a specific template by ID.Update a Template
Edit a template’s content. Only templates inAPPROVED or REJECTED status can be updated. Updated templates are re-submitted for Meta review.
Editing an approved template resets its status to PENDING while Meta reviews the changes. Your template will be temporarily unavailable for sending.
Delete a Template
Remove a template permanently. This action cannot be undone.Template Categories
Choose the most specific category. Meta may reclassify templates that don’t match their declared category, which can affect pricing and delivery.
Authentication Rules
- Must contain a one-time code or password
- Must include a copy-code or one-tap button
- Cannot include URLs or media (except the OTP button)
- Limited to one code parameter
Naming Rules
- Lowercase letters, numbers, and underscores only
- Maximum 512 characters
- Must be unique within your WABA for each language
- Avoid words like
test,sample,demo— Meta flags these for extra review
Approval Tips
- Always include sample values — Templates with parameters but no
examplefield are almost always rejected - Set a display name first — Templates submitted from numbers without an approved display name get rejected
- Complete your business profile — Add website, description, and category before submitting. Incomplete profiles increase rejection rates
- Edit rejected templates, don’t recreate — Meta enforces a 30-day restriction on reusing template names
- Match category to content — Meta may reclassify miscategorized templates, affecting pricing and delivery
Multi-Language Templates
Create the same template in multiple languages. Each language variant is reviewed independently.Error Handling
Common issues:
- Rejected templates: Review Template Best Practices for approval tips
- Duplicate name: Template names must be unique per language within a WABA
- Invalid parameters: Ensure
examplevalues match parameter count in template body
Next Steps
- Send Messages — Use approved templates to send messages
- Approval Tips — Tips for getting templates approved
- Quickstart — End-to-end setup guide
API Reference (Messaging)
Messages
- Send a message: Send a message with a Phone Number, Alphanumeric Sender ID, Short Code or Number Pool.
- Retrieve a message: Note: This API endpoint can only retrieve messages that are no older than 10 days since their creation. If you require messages older than this, please generat…
- Cancel a scheduled message: Cancel a scheduled message that has not yet been sent. Only messages with
status=scheduledandsend_atmore than a minute from now can be cancelled. - Send a group MMS message
- Send a long code message
- Send a message using number pool
- Schedule a message: Schedule a message with a Phone Number, Alphanumeric Sender ID, Short Code or Number Pool.
- Send a short code message
- Send a message using an alphanumeric sender ID: Send an SMS message using an alphanumeric sender ID. This is SMS only.
- Retrieve group MMS messages: Retrieve all messages in a group MMS conversation by the group message ID.
Whatsapp messaging
Callbacks
Profiles
- List messaging profiles
- Create a messaging profile
- Retrieve a messaging profile
- Update a messaging profile
- Delete a messaging profile
- List phone numbers associated with a messaging profile
- List short codes associated with a messaging profile
Opt-Out Management
- List Auto-Response Settings
- Create auto-response setting
- Get Auto-Response Setting
- Update Auto-Response Setting
- Delete Auto-Response Setting
- List opt-outs: Retrieve a list of opt-out blocks.
Messaging
- Regenerate messaging profile secret: Regenerate the v1 secret for a messaging profile.
- List alphanumeric sender IDs for a messaging profile: List all alphanumeric sender IDs associated with a specific messaging profile.
- Get detailed messaging profile metrics: Get detailed metrics for a specific messaging profile, broken down by time interval.
- Retrieve a messaging hosted number: Retrieve a specific messaging hosted number by its ID or phone number.
- Update a messaging hosted number: Update the messaging settings for a hosted number.
- List messaging hosted numbers: List all hosted numbers associated with the authenticated user.
Short Codes
- List short codes
- Retrieve a short code
- Update short code: Update the settings for a specific short code. To unbind a short code from a profile, set the
messaging_profile_idtonullor an empty string.
Hosted Numbers
- List messaging hosted number orders
- Create a messaging hosted number order
- Retrieve a messaging hosted number order
- Delete a messaging hosted number order: Delete a messaging hosted number order and all associated phone numbers.
- Upload hosted number document
- Validate hosted number codes: Validate the verification codes sent to the numbers of the hosted order. The verification codes must be created in the verification codes endpoint.
- Create hosted number verification codes: Create verification codes to validate numbers of the hosted order. The verification codes will be sent to the numbers of the hosted order.
- Check hosted messaging eligibility
- Delete a messaging hosted number
Number Settings
- Retrieve a phone number with messaging settings
- Update the messaging profile and/or messaging product of a phone number
- List phone numbers with messaging settings
- Bulk update phone number profiles
- Retrieve bulk update status
Verification Requests
- List Verification Requests: Get a list of previously-submitted tollfree verification requests
- Submit Verification Request: Submit a new tollfree verification request
- Get Verification Request: Get a single verification request by its ID.
- Update Verification Request: Update an existing tollfree verification request. This is particularly useful when there are pending customer actions to be taken.
- Delete Verification Request: Delete a verification request
- Get Verification Request Status History: Get the history of status changes for a verification request.
Campaign
- Submit Campaign: Before creating a campaign, use the Qualify By Usecase endpoint to ensure that the brand you want to assign a new campaign to is qualified for the desired use…
- Qualify By Usecase: This endpoint allows you to see whether or not the supplied brand is suitable for your desired campaign use case.
- List Campaigns: Retrieve a list of campaigns associated with a supplied
brandId. - Get campaign: Retrieve campaign details by
campaignId. - Update campaign: Update a campaign’s properties by
campaignId. Please note: only sample messages are editable. - Deactivate campaign: Terminate a campaign. Note that once deactivated, a campaign cannot be restored.
- Submit campaign appeal for manual review: Submits an appeal for rejected native campaigns in TELNYX_FAILED or MNO_REJECTED status. The appeal is recorded for manual compliance team review and the campa…
- Get Campaign Mno Metadata: Get the campaign metadata for each MNO it was submitted to.
- Get campaign operation status: Retrieve campaign’s operation status at MNO level.
- Get OSR campaign attributes
- Get Sharing Status
- Accept Shared Campaign: Manually accept a campaign shared with Telnyx
- Get Campaign Cost
Brands
- List Brands: This endpoint is used to list all brands associated with your organization.
- Create Brand: This endpoint is used to create a new brand. A brand is an entity created by The Campaign Registry (TCR) that represents an organization or a company. It is th…
- Get Brand: Retrieve a brand by
brandId. - Update Brand: Update a brand’s attributes by
brandId. - Delete Brand: Delete Brand. This endpoint is used to delete a brand. Note the brand cannot be deleted if it contains one or more active campaigns, the campaigns need to be i…
- Resend brand 2FA email
- List External Vettings: Get list of valid external vetting record for a given brand
- Order Brand External Vetting: Order new external vetting for a brand.
- Import External Vetting Record: This operation can be used to import an external vetting record from a TCR-approved
- Revet Brand: This operation allows you to revet the brand. However, revetting is allowed once after the successful brand registration and thereafter limited to once every 3…
- Get Brand SMS OTP Status by Brand ID: Query the status of an SMS OTP (One-Time Password) for Sole Proprietor brand verification using the Brand ID.
- Trigger Brand SMS OTP: Trigger or re-trigger an SMS OTP (One-Time Password) for Sole Proprietor brand verification.
- Verify Brand SMS OTP: Verify the SMS OTP (One-Time Password) for Sole Proprietor brand verification.
- Get Brand SMS OTP Status: Query the status of an SMS OTP (One-Time Password) for Sole Proprietor brand verification.
- Get Brand Feedback By Id: Get feedback about a brand by ID. This endpoint can be used after creating or revetting
Enum
Shared Campaigns
- List Shared Campaigns: Retrieve all partner campaigns you have shared to Telnyx in a paginated fashion.
- Get Single Shared Campaign: Retrieve campaign details by
campaignId. - Update Single Shared Campaign: Update campaign details by
campaignId. Please note: Only webhook urls are editable. - Get Sharing Status
- List shared partner campaigns: Get all partner campaigns you have shared to Telnyx in a paginated fashion
Phone Number Campaigns
- List phone number campaigns
- Create New Phone Number Campaign
- Get Single Phone Number Campaign: Retrieve an individual phone number/campaign assignment by
phoneNumber. - Delete Phone Number Campaign: This endpoint allows you to remove a campaign assignment from the supplied
phoneNumber.
Bulk Phone Number Campaigns
- Assign Messaging Profile To Campaign: This endpoint allows you to link all phone numbers associated with a Messaging Profile to a campaign. Please note: if you want to assign phone numbers to a…
- Get Assignment Task Status: Check the status of the task associated with assigning all phone numbers on a messaging profile to a campaign by
taskId. - Get Phone Number Status: Check the status of the individual phone number/campaign assignments associated with the supplied
taskId.
RCS
- Send an RCS message
- List all RCS agents
- Retrieve an RCS agent
- Modify an RCS agent
- Check RCS capabilities (batch)
- Check RCS capabilities
- Add RCS test number: Adds a test phone number to an RCS agent for testing purposes.
- Generate RCS deeplink: Generate a deeplink URL that can be used to start an RCS conversation with a specific agent.
Whatsapp Business Accounts
- List Whatsapp Business Accounts
- Get a single Whatsapp Business Account
- Delete a Whatsapp Business Account
- List phone numbers for a WABA
- Get WABA settings
- Update WABA settings
Whatsapp Phone Numbers
- Initialize Whatsapp phone number verification
- List Whatsapp phone numbers
- Delete a Whatsapp phone number
- Get calling settings for a phone number
- Enable or disable Whatsapp calling for a phone number
- Get phone number business profile
- Update phone number business profile
- Get Whatsapp profile photo
- Upload Whatsapp profile photo
- Delete Whatsapp profile photo
- Resend verification code
- Submit verification code for a phone number
- Get conversation window status for a phone number: Returns whether the 24-hour conversation window is currently open for a given source/destination pair. If window_active is false, only template messages may be…