Sixfab Cellular IoT HAT Setup
Sixfab Raspberry Pi Cellular IoT HAT allows you to send or receive data over LTE-M cellular networks that the Telnyx SIM has access to without needing gateways. LTE-M (Cat M1) is a must-have for those looking to make the most of Low Power Wide Area Network (LPWAN) technology. Meanwhile, some countries already started to shut down 2G networks.
The Quectel BG96, lies on the middle of the Raspberry Pi Cellular IoT HAT. It is an LTE Cat M1/Cat NB1/EGPRS module offering a maximum data rate of 375Kbps downlink and uplink with worldwide coverage. This LTE add-on for Raspberry Pi also supports GNSS and GPS for the need of building location, navigation, tracking, mapping and timing applications.
Prerequisites to complete the Sixfab Cellular IoT HAT setup
- A Telnyx Portal account and active Telnyx SIM card with data plan. Check out this Quickstart Guide to get set up.
- Raspberry Pi 3 Model B or Raspberry Pi 4 (this guide will use 4 but the steps are the same).
- Make sure both the firmware and software are up-to-date on your Pi.
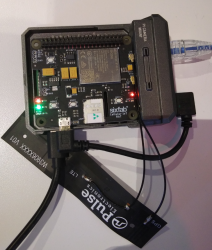
- Install the Sixfab IoT HAT on the Pi using the 40-pin connector and connect the HAT to the Pi's USB port as shown below.
Alright, let's get started!
Instructions for setting up your Sixfab Cellular IoT HAT
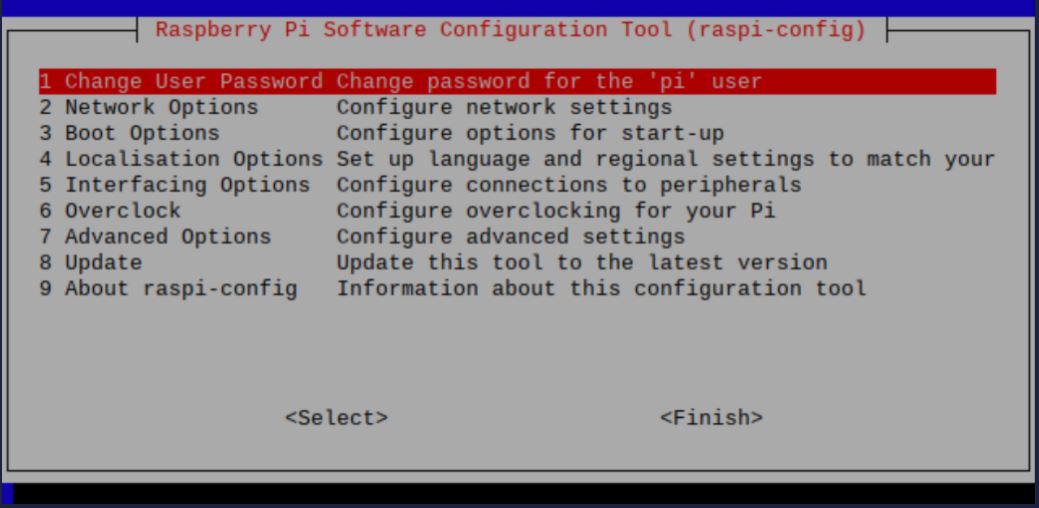
- First, we will enable UART. This will allow us to communicate directly with the device using AT commands. To do that, run this command and then follow the prompts as shown:
sudo raspi-config- Choose Interfacing Options (5):
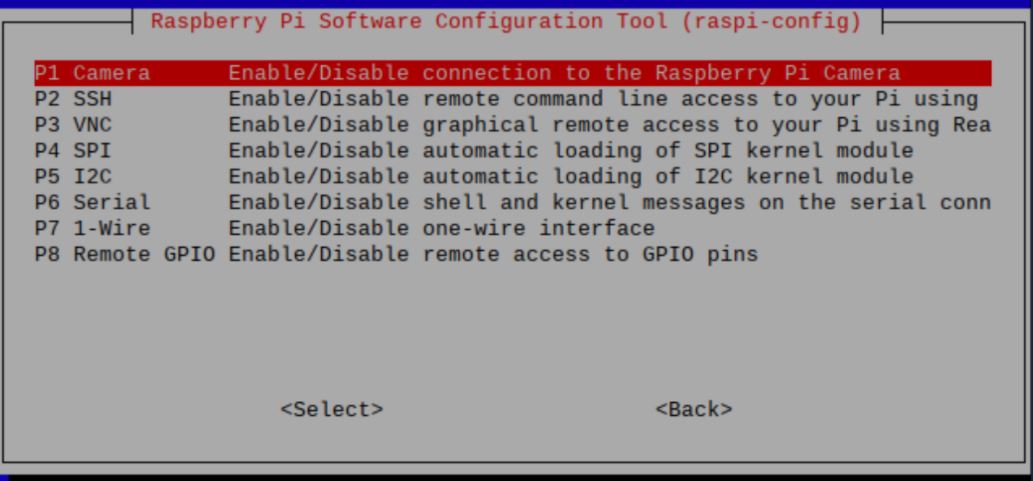
- Choose P6 Serial:
- Press No to the prompt below then Reboot.
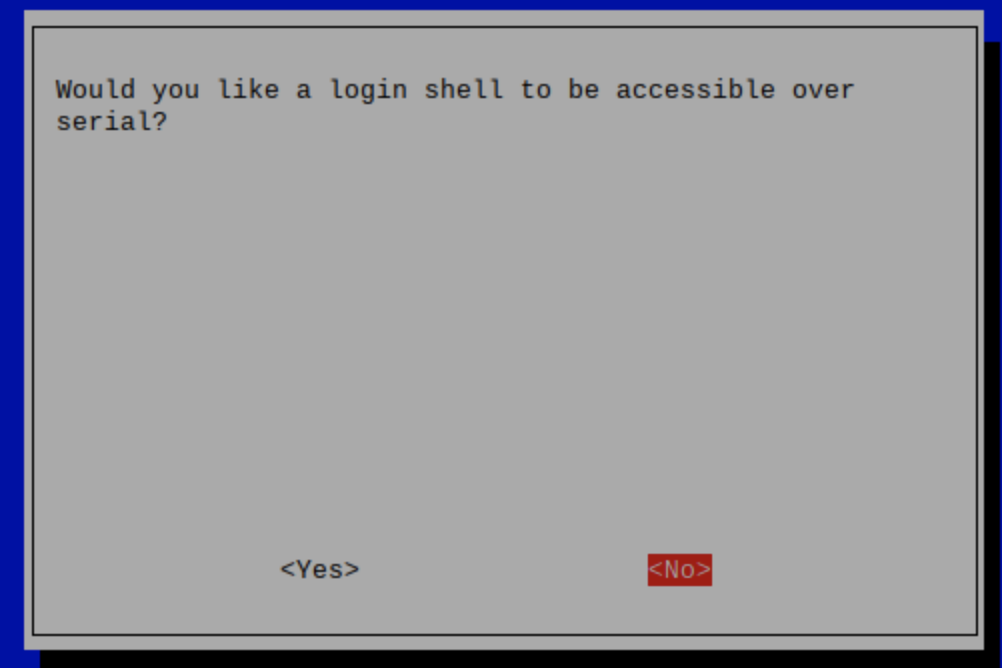
-
Now, let's retreive necessary repository from Sixfab to begin the dependency installation:
git clone https://github.com/sixfab/Sixfab_RPi_CellularIoT_Library.git -
Navigate to the directory, take ownership of the script, and begin the installation:
cd Sixfab_RPi_CellularIoT_Library
sudo python3 setup.py install
NoteAfter pasting the above content, Kindly check and remove any new line added
- We will now work on activating the module and specifying the APN.
wget https://raw.githubusercontent.com/sixfab/Sixfab_PPP_Installer/master/ppp_install_standalone.sh
sudo chmod +x ppp_install_standalone.sh
sudo ./ppp_install_standalone.sh
NoteAfter pasting the above content, Kindly check and remove any new line added
- Once the installation begins, you will be prompted several options. Select the options as follows:
- Choose your HAT --> Cellular IoT HAT
- What is your carrier APN? --> data00.telnyx
- Does your carrier need an username or password? --> n
- What is your device communication PORT? --> ttyUSB3
- Would you like to reconnect automatically on boot? --> This step is optional. We will select "n" for this guide.
- Once the Pi reboots, use the following commands to connect/disconnect from the internet. If you have selected "y" to the reconnect prompt during configuration, your HAT will automatically connect to the network.
sudo pon to connect
sudo poff to disconnect
The Telnyx SIM has access to all network types and many different operators. As a result, it can take them a while to attach to a network for the first time. Once it connects to a network, that network will be added to the list of priority operators so as to ensure a fast connection going forward. Please note that the first attach can take up to 30 minutes.
Troubleshooting your Sixfab Cellular IoT HAT
If you have issues with network connectivity, check ifconfig to see if interface PPP0 is visible (it should be located at the very bottom).
If you do not see this entry, repeat step 3 above. Sixfab's script is designed to skip items when there is an error or a part doesn't run properly.
If you see the PPP0 interface but there is no data connection please try the following steps.
- Try pinging Google DNS at 8.8.8.8.
- If this doesn't work, reboot the Pi and reset the interface.
sudo reboot
sudo ifconfig ppp0 down
sudo ifconfig ppp0 up
NoteAfter pasting the above content, Kindly check and remove any new line added
- If this step fails, run step 3 and 4 from the original setup again with a blank APN, then run the script again with the correct APN (
data00.telnyx). - Check the antenna connection - main & GPS. An improperly seated connection will cause the device to reboot.
- Check if the antenna supports your HAT model.
- Check the Pi's power supply - the HAT itself uses 2 - 6 watts of power. Make sure you are using a sufficient power supply for your Pi. Raspberry Pi 3 requires at least 12W of power. Raspberry Pi 4 requires at least 15W of power.
- Slow internet may cause issues in your setup too. The theoratical speed max for this HAT is about 350 Kbps range as this is the limitation of the CATM1 network. This is normal.