Particle Boron LTE Kit Setup Guid
The Boron is a powerful LTE Cat M1 or 2G/3G enabled development kit that supports cellular networks and Bluetooth LE (BLE). It is based on the Nordic nRF52840 and has built-in battery charging circuitry so it’s easy to connect a Li-Po and deploy your local network in minutes.
This guide will walk you through how to pair a Particle Electron Boron LTE Kit with a Telnyx SIM Card.
Prerequisites to complete the Particle Boron LTE Kit setup:
- A Telnyx Portal account and active Telnyx SIM card with data plan. Check out this Quickstart Guide to get set up.
- An Android or iOS device with internet acccess.
- The Particle Electron Boron device.
- A computer with CLI.
Alright, let's get started!
Instructions for setting up your Particle Boron LTE Kit:
-
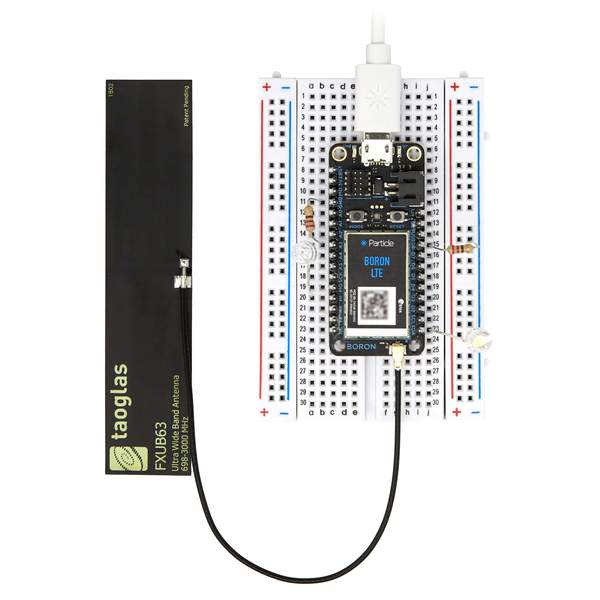
First, connect the LTE antenna to the port located in the front of the Particle Electron Boron device and connect the device to power. The device will automatically go into pairing mode.
-
Download and install the mobile application on your Android or iOS device.
-
Open the Particle Mobile Application and follow the on-screen instructions:
- Click "Get Started".
- Log into your Particle.io account or create an account.
- Press the + button located at the top right of the page and select the device name (i.e. boron-ij3).
Your device will now activate its eSIM and you'll be able to see the device by logging into console.particle.io. Particle.io offers a 3-month free trial with limited free data.
-
Now, let's enable third-party SIM capability on the device. To begin, insert the Telnyx SIM card into the device.
-
Set up CLI environment on your computer using this Particle guide.
-
Place your device in DFU mode. This mode allows you to interact with the device using a computer.
-
Press and hold the "Mode" button then press the "Reset" button once. Keep holding the "Mode" button until the device flashes yellow.
-
Connect your device to the computer via the provided micro-USB cable. Then run the following commands in your CLI environment:
particle update- This command updates the device's firmware (1.5.2 as of this guide).
particle flash --usb tinker- The device, by default, receives commands from the Particle Cloud via a network connection.
- This command allows your computer to control the device instead of the cloud.
-
Repeat Step 6 to place your device into DFU mode.
-
Download this file TelnyxSIM and navigate to the saved location. Then, run the following commands:
-
particle compile boron- This command will compile the .cpp file into a binary file.
-
particle compile boron TelnyxSIM.cpp --saveTo firmware.bin- This command will create a firmware.bin file that you will tell the device to use the Telnyx SIM card.
-
particle flash --usb firmware.bin- This command will flash the firmware.bin on to the device. The device will start using the Telnyx SIM card next time it reboots.
-
-
Repeat Step 6 to place your device into DFU mode and run this command to give back your device its control:
particle flash --usb tinker
-
Once you connect your device into a power adapter, you'll connect to the Telnyx network. It may take up to 2 minutes to reflect network connectivity. You can also verify the connectivity by clicking on your device name in console.particle.io.
That's it! Your Particle Electron Boron LTE device is all set up with a Telnyx SIM card.