

Telnyx Development: Development Tools — Full Documentation
Complete page content for Development Tools (Development section) of the Telnyx developer docs (https://developers.telnyx.com). Root index: https://developers.telnyx.com/llms.txt · Lightweight index for this subsection: https://developers.telnyx.com/development/llms/development-development-tools-llms-txt.md
Postman Setup
Source: https://developers.telnyx.com/development/development-tools/postman-setup.mdPostman is an API platform available as a web or desktop application. A great way to understand an API is to make requests and review the responses. Postman exactly does that by providing a UI for testing and experimenting with API calls without the need to write code. Hence, we recommend using Postman to get started quickly and get the taste of Telnyx APIs. You can easily accomplish this by utilizing our Postman collections. Steps to use these collections:
- Configure your local environment
- Import a collection.
- Send a test request and inspect the responses.
Configure environment
An environment is a set of variables you can use in your Postman requests. You can use environments to group related sets of values together. By the end of this tutorial, you would have imported and configured environment to use with Telnyx collections.- Create an API Key following the below steps.
- Sign up for a free Telnyx account
- Navigate to the API Keys section and create an API Key by clicking Create API Key.
- Sign up at Postman or download and install the Postman application.
- Once signed in to Postman, select an existing workspace or create a new workspace for your Telnyx collections. If you are new to Postman, learn more about creating a workspace here.
-
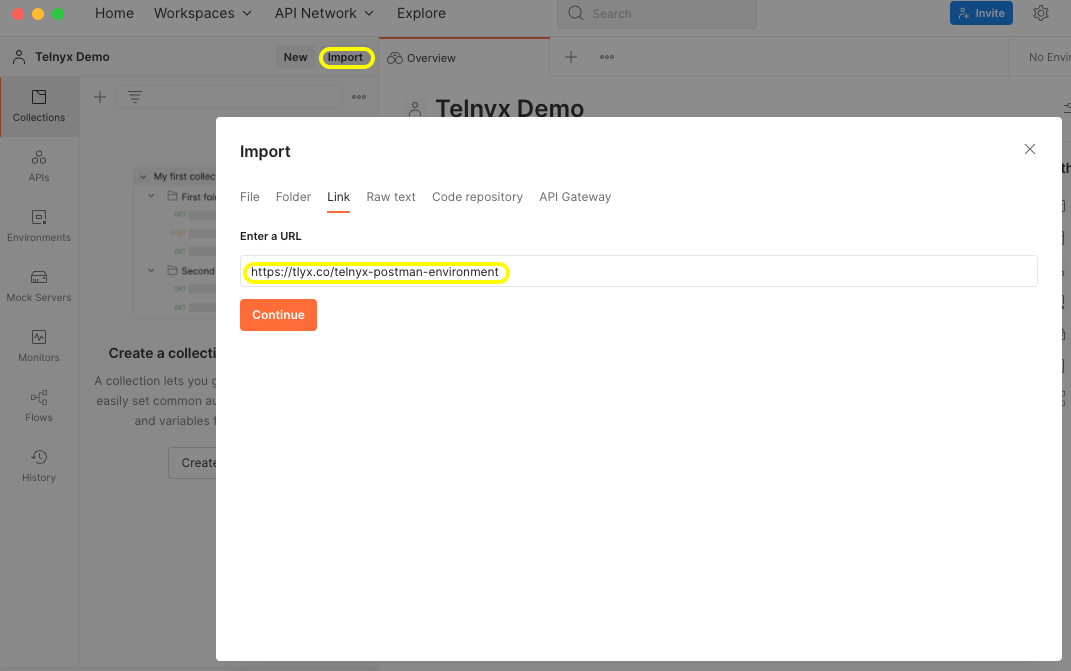
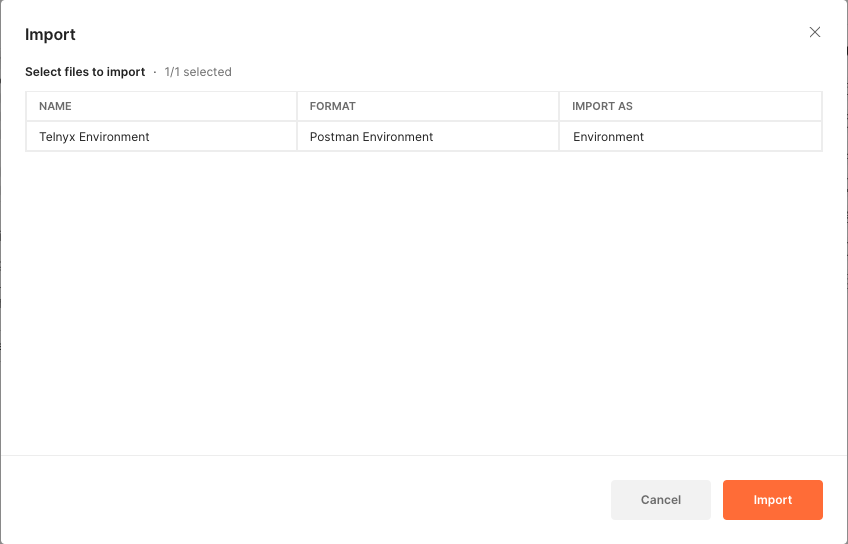
Once you are in your desired workspace, click Import in the top left corner, select Link from the options and paste this link in the Enter a URL text box:
https://tlyx.co/telnyx-postman-environment
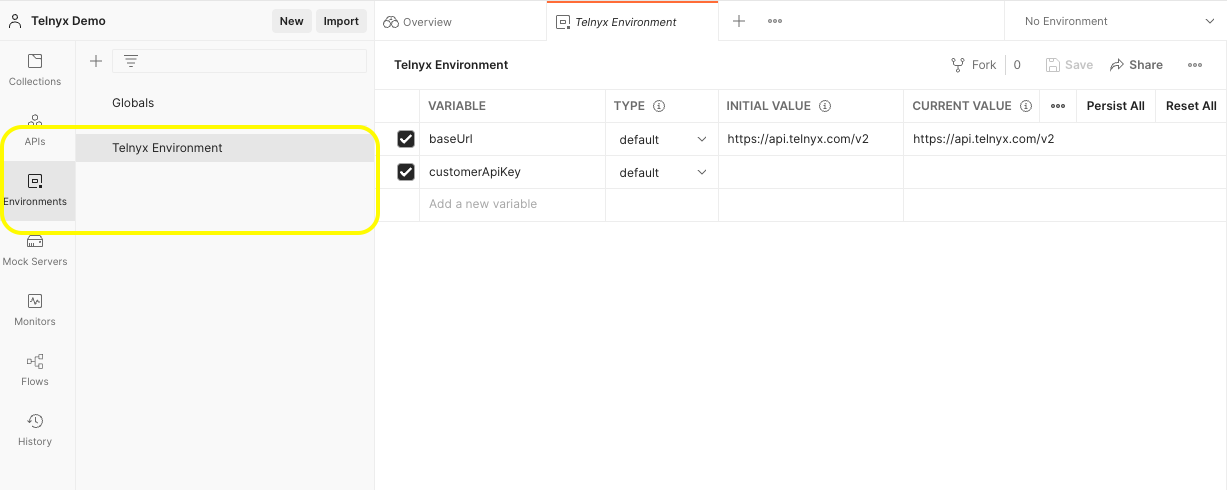
- Go to Environments tab on the left and select
Telnyx Environment
- For the
customerApiKeyvariable, in the Initial Value and Current Value columns, enter your API key that you created earlier in Step 1. - Click Save at the top right to save the value to the environment.
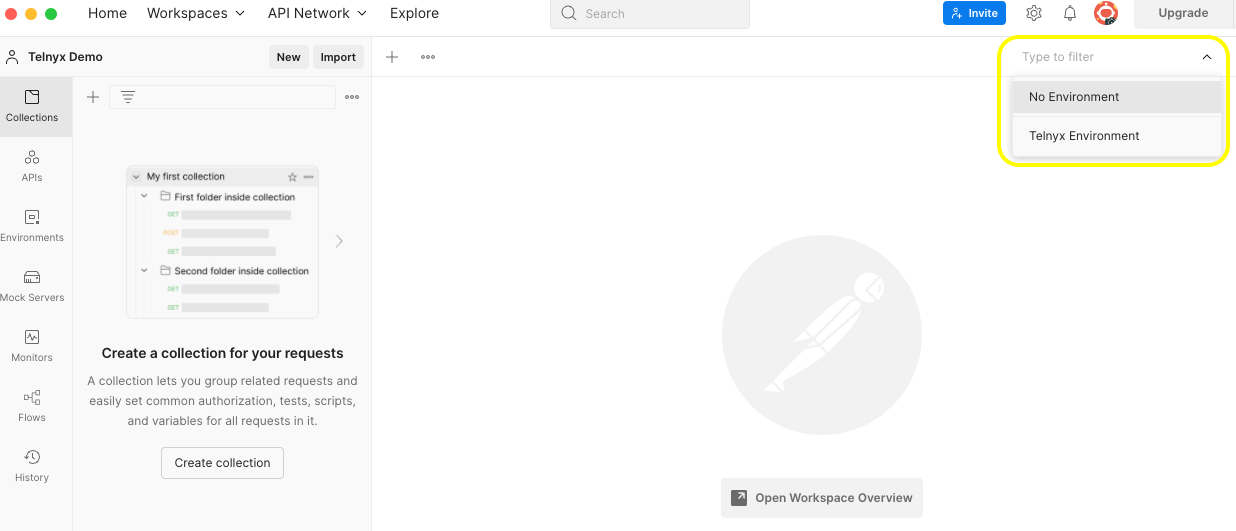
- Click the box in the top right corner that has list of environments and select
Telnyx Environmentfrom the list. Initially it shows up asNo Environment.
Telnyx Environment moving forward.
Import collections
Postman Collections are a group of saved requests. We made it easy to import postman collections by adding aRun in Postman button in all the API reference pages that allows you to fork the collections, test API requests, and see the results immediately without writing any code.
For example, Use the Run in Postman button below to import the Phone Numbers API collection:
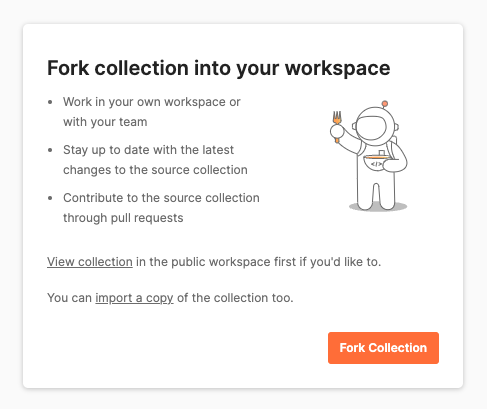
 Then, it should show a dialog box with some information on benefits of forking and links to view/import the collection instead of forking. Click
 Fork Collection
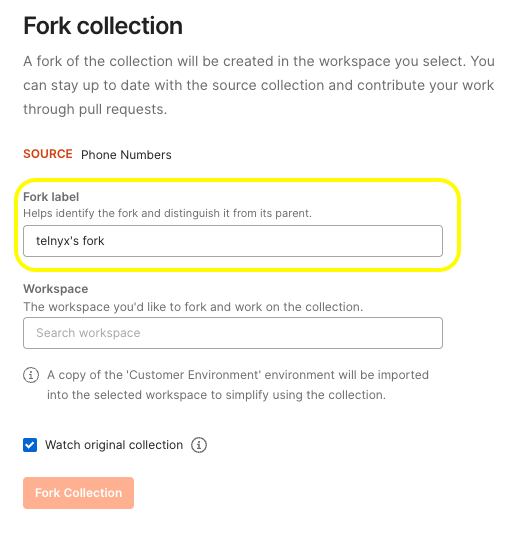
- Fork label: Make sure you provide a relevant label for you to easily identify it.
Eg:
telnyx's fork - Workspace: Choose which workspace you would like this collection to be part of.
- Watch original collection: Checking this box will notify you when updates are made to the collection so you can pull the latest changes made to the collection.
Send request
As you’ve added yourAPI KEY to the environment and imported a collection from the previous steps, you’re now ready to send a request.
Note: Make sure you have selected Telnyx Environment at the top right from the list of environments
As we have imported Phone Numbers API collection from previous steps, let us send a request to list the phone numbers in your account:
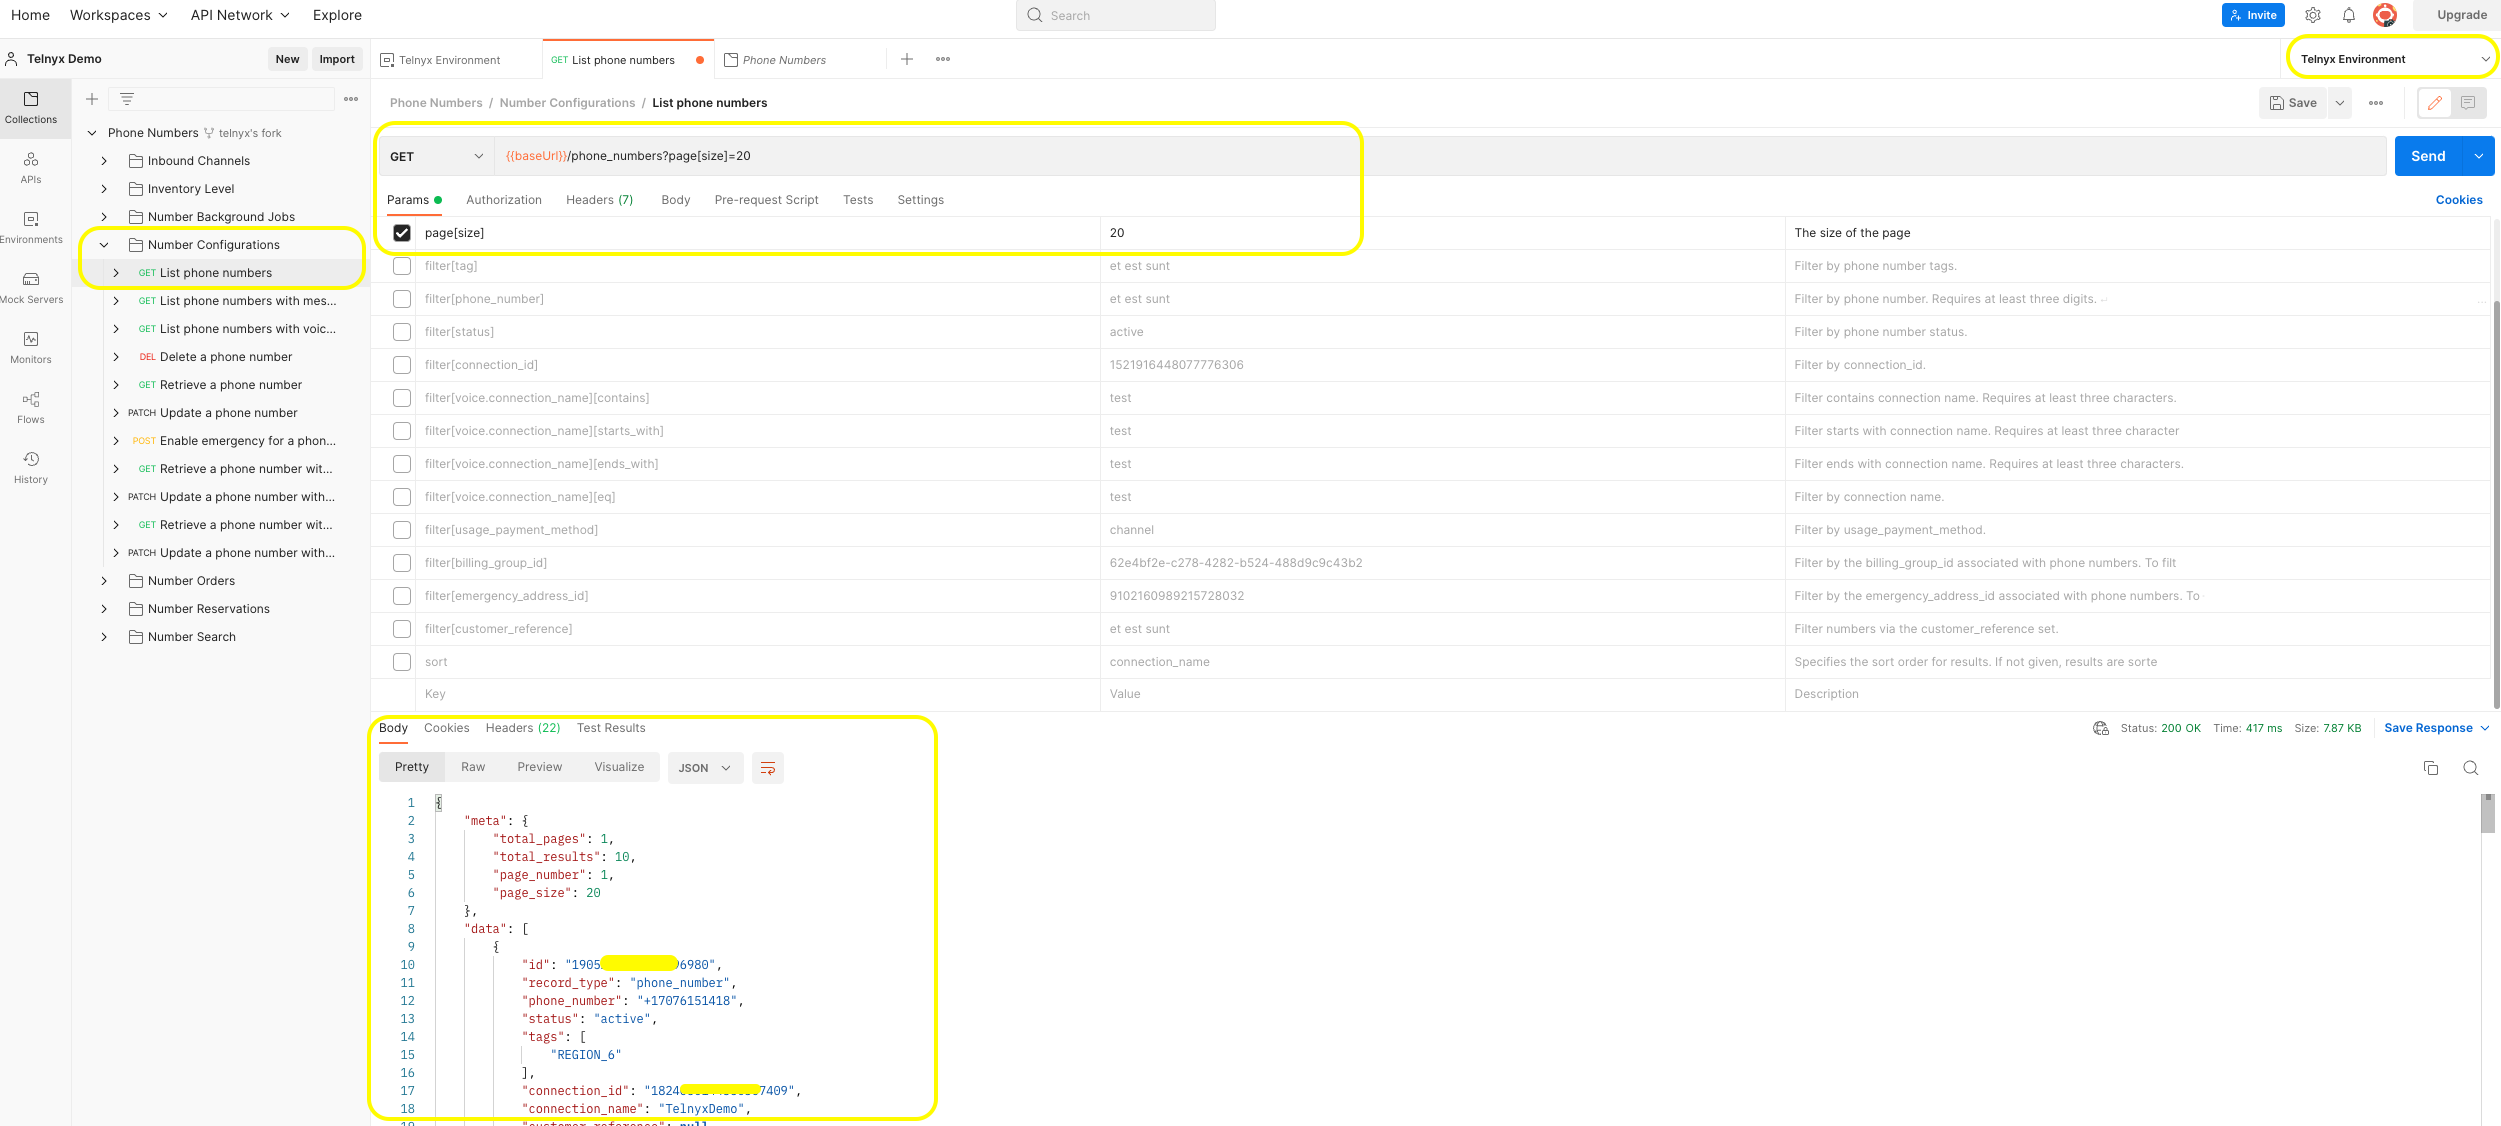
- Once you are in your desired workspace where you imported this collection, Select the Collections tab in Postman on the left and expand the Phone Numbers collection.
- Expand the Number Configurations folder and select List phone numbers. This loads the List phone numbers request into Postman, ready to send.
- Click Send. The result pane automatically displays the results of your request.
-
In case you would like to use any filters, just select the checkbox for any filter you would like from the Params tab, set the value and click Send.
-
You can play with the API and if you want to save the request with the modified parameters or any other data, just click save and it should save your changes in the collection. This change would be local to you and would not effect the original collection you forked from.
If you would like to get the latest changes made to the original collection into your local collection, click on the Phone Numbers collection folder and then click on the three dots beside Save button which gives you a list of options. Select
Pull Changesand it will fetch you the latest updates in that collection.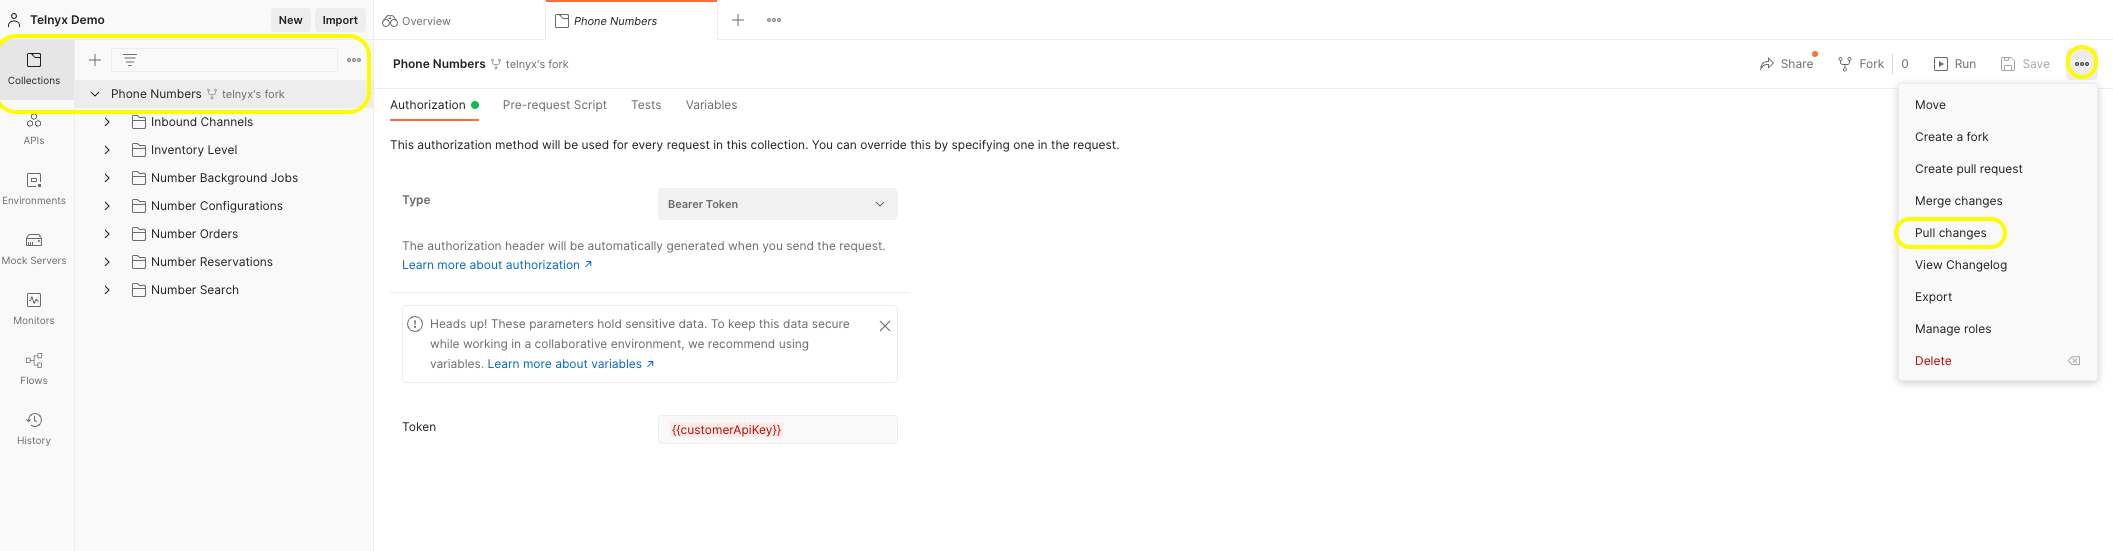
ngrok Setup
Source: https://developers.telnyx.com/development/development-tools/ngrok-setup.mdThis guide walks through how to get ngrok up and running on your machine. To test it out with Telnyx webhooks, you’ll need to sign up. If you’d like to test out your ngrok instance by receiving a webhook associated with an API-enabled phone call, jump to our Receiving Webhooks in Voice API after you complete these steps! ngrok is a popular tunneling tool used to expose a locally running application to the internet. You can download it for free with all of the functionality you need here. This is useful for receiving webhooks to your local applications for testing. For the sake of this tutorial, we’ll assume that your local application is running locally on port
5000. Now you’ll need the ability to send a request to that port from Telnyx. You can easily do this using ngrok when developing your application.
Sign up for ngrok and follow the setup and installation steps to get up and running. The final step in the process is to start an HTTP tunnel to your application. The instructions specify $ ./ngrok http 80, which will tunnel traffic to port 80 on your machine. As our application is running on port 5000, you should use that instead: $ ./ngrok http 5000.
When you run this command, you should see output similar to the following:
ngrok forwarding address
The forwarding addresses will be different for you, but they should still point tolocalhost:5000. Copy the https forwarding address, as you’ll need it to configure your Mission Control Portal.
Messaging With ngrok
For messaging, webhooks set the webhook URL on your messaging profile from the Telnyx Portal Messaging dashboard. Edit your Messaging Profile by clicking the “Basic Options” button [✎]. Select the “Inbound” section and paste the forwarding address from ngrok into the Webhook URL field. Append/webhooks to the end of the URL to direct the request to the webhook endpoint in your local application.
Resending webhooks
For now, you’ll leave “Failover URL” blank, but if you wanted to have Telnyx resend the webhook — if sending to the Webhook URL fails — you can specify an alternate address in this field.Next steps
We hope this guide helped you understand how to use ngrok. Next, why not dive into our API and start sending text messages and making API-enabled phone calls? Create an account and enjoy Telnyx APIs!Node-RED
Source: https://developers.telnyx.com/development/development-tools/node-red.md(aka
@telnyx/node-red-telnyx)

Overview
Node-RED is an open-source flow-based programming tool that provides a visual development environment for building applications by wiring together nodes. It was originally developed by IBM Emerging Technology Services and is now part of the JS Foundation. Node-RED allows users to create applications and services by connecting pre-built nodes together in a flowchart-like manner. Each node represents a specific task or function, such as reading data from a sensor, processing data, making decisions, or interacting with external systems. Users can drag and drop nodes onto a canvas, connect them together, and configure their properties. The flows created in Node-RED are executed by a runtime engine, which runs on a server or device where Node-RED is installed. The runtime executes the flow in a sequential manner, passing data between nodes as it progresses through the flow. The flows can be easily modified and deployed, making it a flexible tool for building and prototyping Internet of Things (IoT) applications, automation workflows, and data integration processes.Start the journey
node-red-telnyx is the Telnyx powerful integration that allows you to combine the capabilities of Node-RED, a flow-based programming tool, with Telnyx, a cloud-based communications platform. With node-red-telnyx, you can create complex workflows and automate various telecommunications tasks. node-red-telnyx can be integrated with other services and platforms through Node-RED’s extensive library of nodes. You can connect Telnyx’s communications capabilities with databases, APIs, messaging platforms, and IoT devices to build end-to-end automation solutions. e.g., you can use node-red-telnyx to send SMS messages programmatically. This can be useful for notifications, alerts, or two-factor authentication (2FA) purposes. You can configure the flow to trigger SMS messages based on specific events or conditions. To get started, sign up for a Portal account, then follow the steps in our quickstart guide to buy an SMS-enabled number.Usage
The package needs to be configured with your MCP account’s API key and some other details you can find in the Telnyx Mission Control Portal.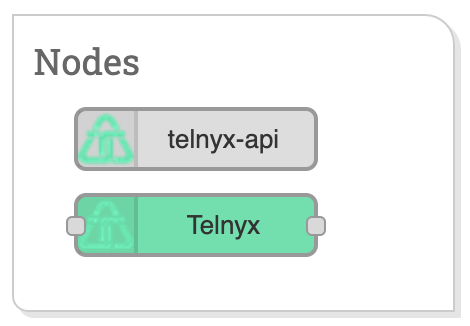
- Alphanumeric: Alphanumeric Sender ID allows you to set your company name or brand as the Sender ID when sending one-way SMS messages to international destinations. Find more information here.
- Two-way: You’ll need an SMS-capable phone number purchased from, or ported into, the Telnyx platform. If purchasing a new number, select the SMS number feature when searching. In general, numbers that are ported in will be messaging-capable. Learn more.
Resources
- Node-RED pages
- Example flows using node-red-telnyx
- Getting Started Video (Coming Soon)
Support
Our team provides open source support in a best effort fashion, ensuring that we offer assistance and guidance to the community based on our expertise and resources. For support, install the@telnyx/node-red-telnyx package from npm and reach out via the Telnyx support center with questions or issues.