Original location: Wireless > IoT > edge-deployment
There are 5 main steps in the setup of this deployment:
- SIM card setup
- Cloud VPN setup
- Cradlepoint IBR200 setup
- Private Wireless Gateway setup
- Cradlepoint SSH configuration

SIM Card Setup
Our first step is to order and register a Telnyx SIM card. SIM cards can be ordered in the mission Control portal and registered via the registration flow in the wireless section. You can learn more about registering a SIM card in our quickstart guide. When the SIM is inserted into the Cradlepoint device, the only custom configuration that is required to connect the SIM is to set the APN todata00.telnyx.
Cloud VPN Setup
Next, we will configure a Wireguard client in a Digital Ocean Droplet to connect into a Cloud VPN on the Telnyx MPLS backbone. Follow the steps in our Digital Ocean Ubuntu Server to Cloud VPN tutorial. When you can successfully ping the server endpoint on the Telnyx network, you can move to the next step.Cradlepoint IBR200 Setup
Before we create and configure a Private Wireless Gateway we will connect our Telnyx SIM card to the internet in our Cradlepoint device. Follow the steps in our Cradlepoint IBR200 Cellular Router Setup Guide. When you can successfully access the public internet via a connected device to the Cradlepoint network, you can move to the next step.Private Wireless Gateway Setup
A Private Wireless Gateway (PWG) must be associated with a Network resource in the portal. The PWG can be created in the Private Wireless Gateways subsection in the Wireless section of the portal. Click the Create PWG button, enter a name and select the Network resource that you used for your Cloud VPN from step 2.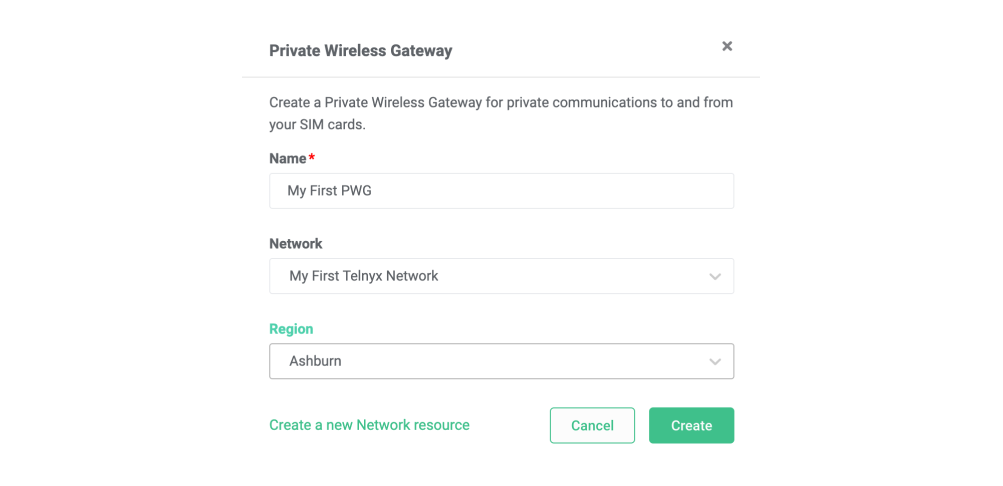
Cradlepoint SSH Configuration
The final step is to enable SSH access on your Cradlepoint device. This is done via the Administration page in the Cradlepoint configuration console. Connect to your Cradlepoint WiFi network and enter the LAN IP address or hostname of the router (assuming you are connecting from the LAN side) into a web browser’s location field. By default, the LAN IP address is192.168.0.1 and the router’s hostname is cp:
Next, navigate to the System section on the left nav menu, and then select Administration.
Select Local Management from the drop-down menu.
Then check the Enable SSH Server entry box.
To access the CLI from your corporate network, select Remote Admin from the Administration drop-down menu, and check Allow Remote SSH Access.
Click Save (if using Local Management) or Submit ( if using Remote Admin).
Allow Weak Cipher Support is off by default. You may need to enable this depending on the SSH version and encryption algorithm that you are using on your server. It can be enabled by navigating to System > Administration > Local Management > Allow Weak Cipher Support.
After pasting the above content, Kindly check and remove any new line added