Overview
In building an outbound dialer solution leveraging Telnyx WebRTC, enable SIP connection credentials with Park Outbound Calls and webhook events to combine front-end WebRTC functionality with backend voice application.Key features
Park Outbound Calls- Combine front-end WebRTC application with backend voice application using Telnyx Voice APIs.
- Enable advanced call flow control and routing.
- Learn more about Park Outbound Calls.
- Monitor SIP connection events in real-time.
- Receive notifications for call events: dialing, answering, bridging, hang-up, voicemail completion.
- Primary/failover URL configuration for reliability.
Required components
- WebRTC Client.
- Backend Server Application.
- SIP Connection with Park Outbound Calls Enabled (select TeXML option when using the TeXML approach).
Frontend implementation
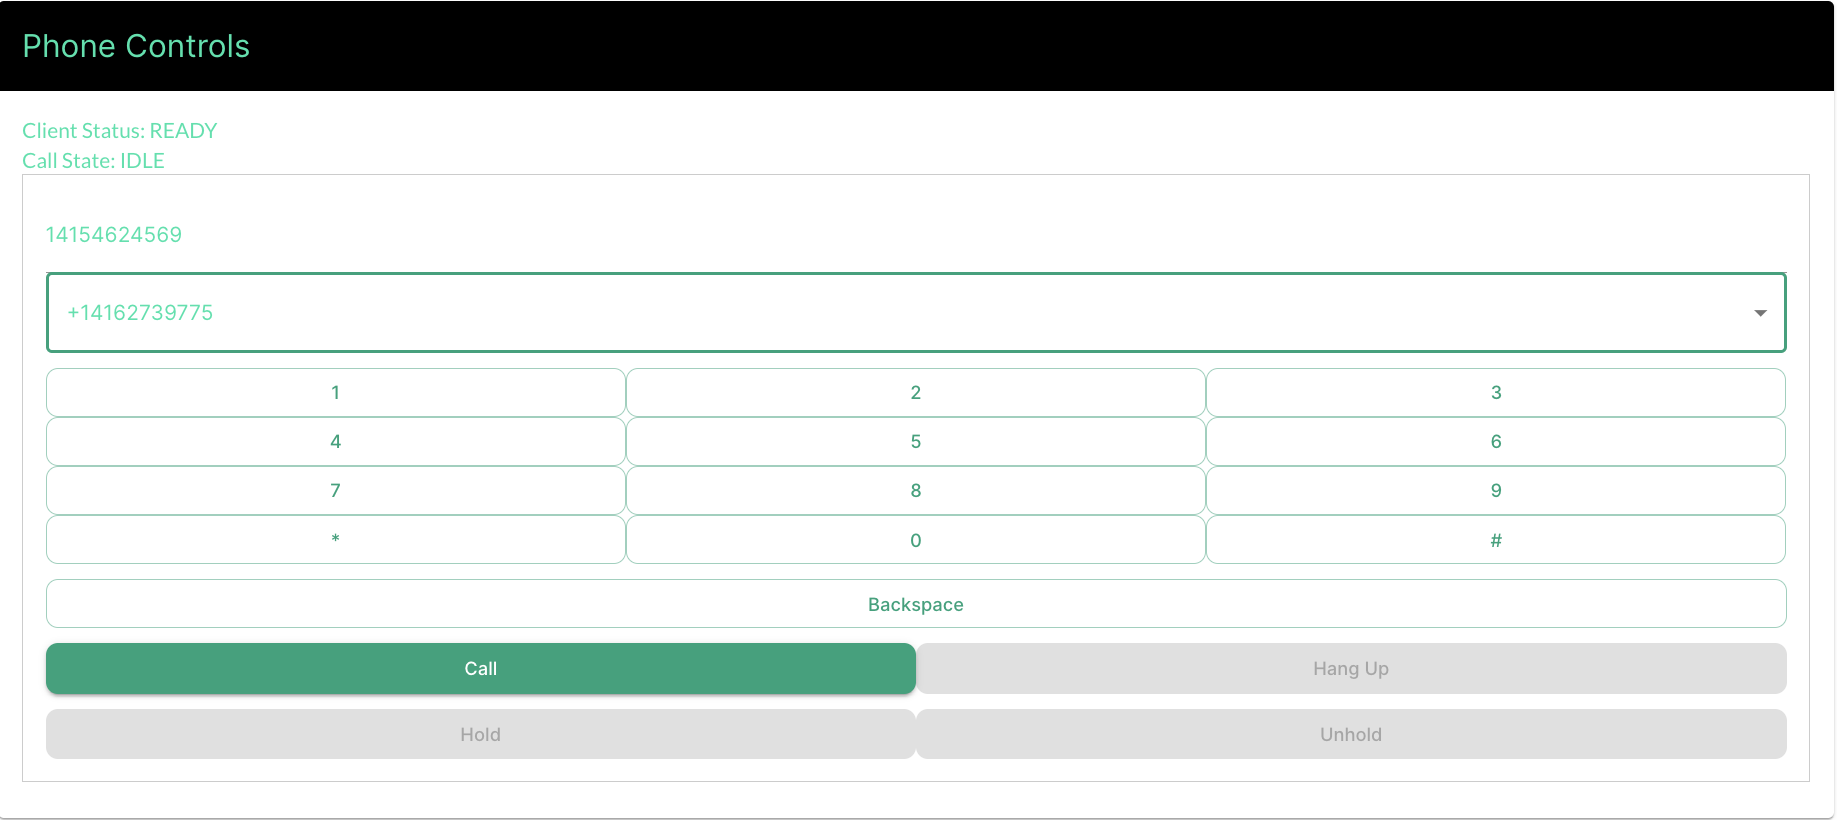
In a typical front-end WebRTC application, there are many components that should be supported. Agent status management: The outbound dialer application should be able to display the agent’s current status, such as, but not limited to, Available, Unavailable, Busy, and Offline. This type of management should not only act as an indicator for other agents but also limit agents’ ability to transfer calls to unavailable agents. This status should also be correlated with the WebRTC client state. This means that when an agent’s status is set to available, the WebRTC client should be fully registered and ready to place outbound calls. This should be handled at a global level, typically using state management frameworks such as Global Context APIs or Redux. Here is an example softphone application (WebRTC client) with an option to change its current state.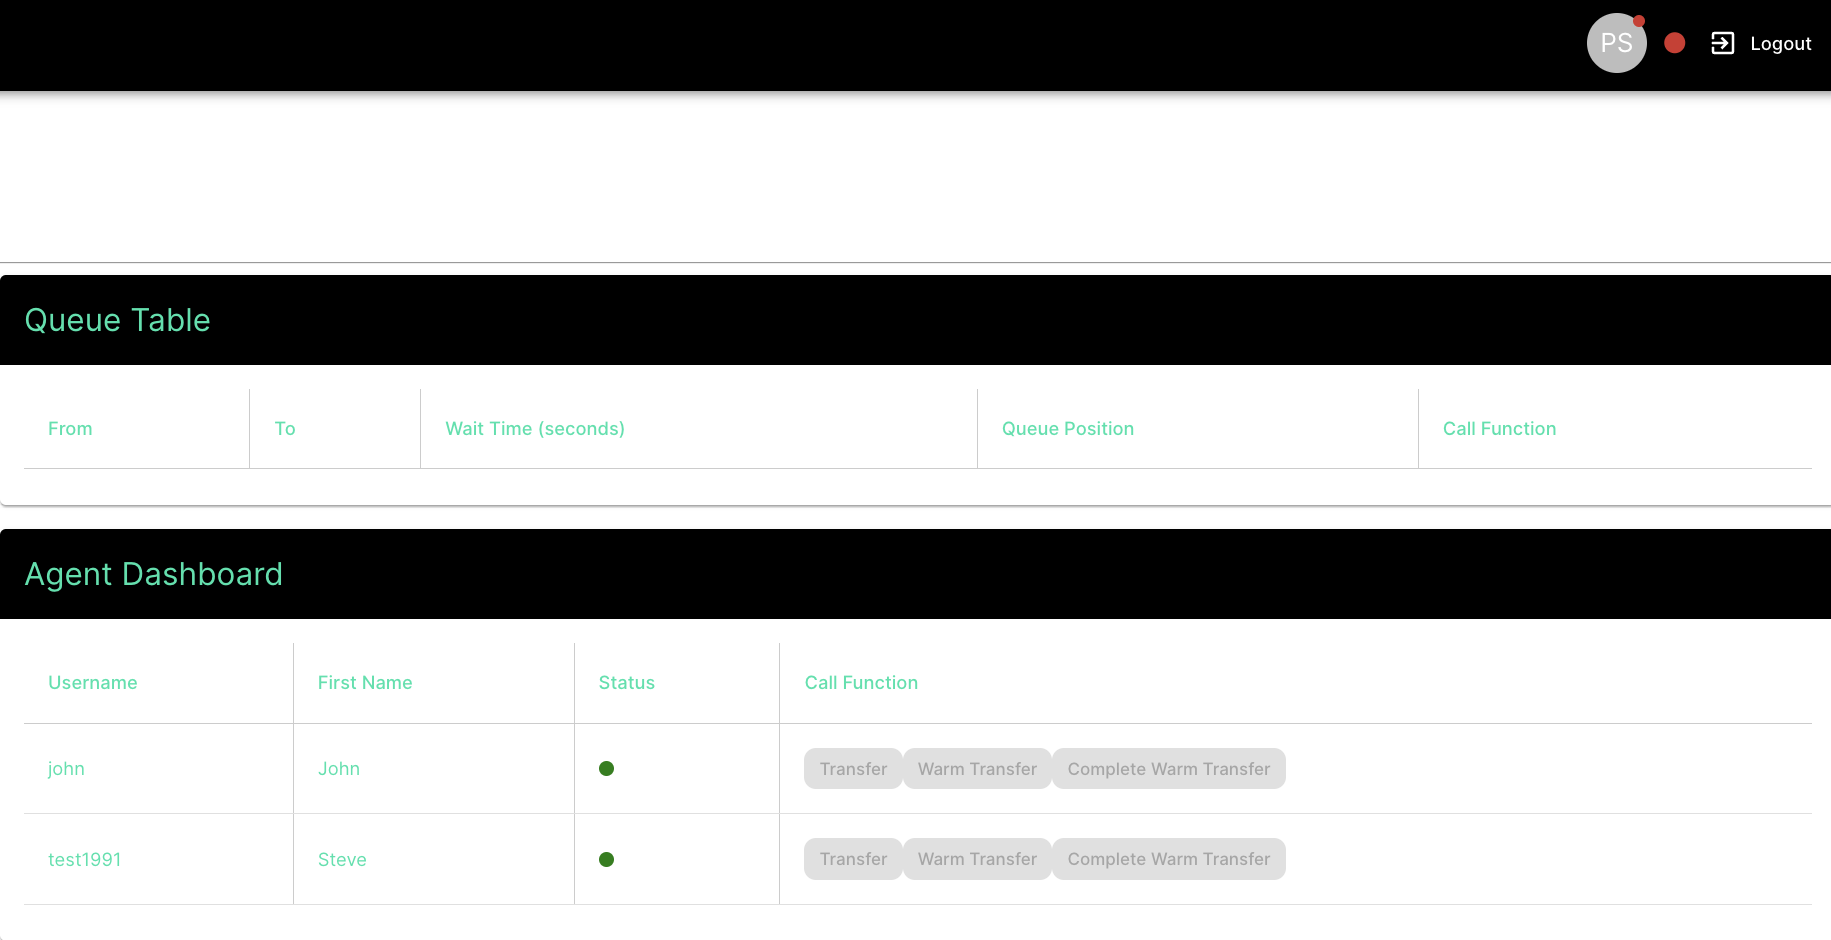
Backend implementation
- Voice API
- TeXML
The backend implementation is a crucial component of a successful call. The following sequence diagram covers a typical outbound call flow using Telnyx Voice API. Below the sequence diagram, I describe each step.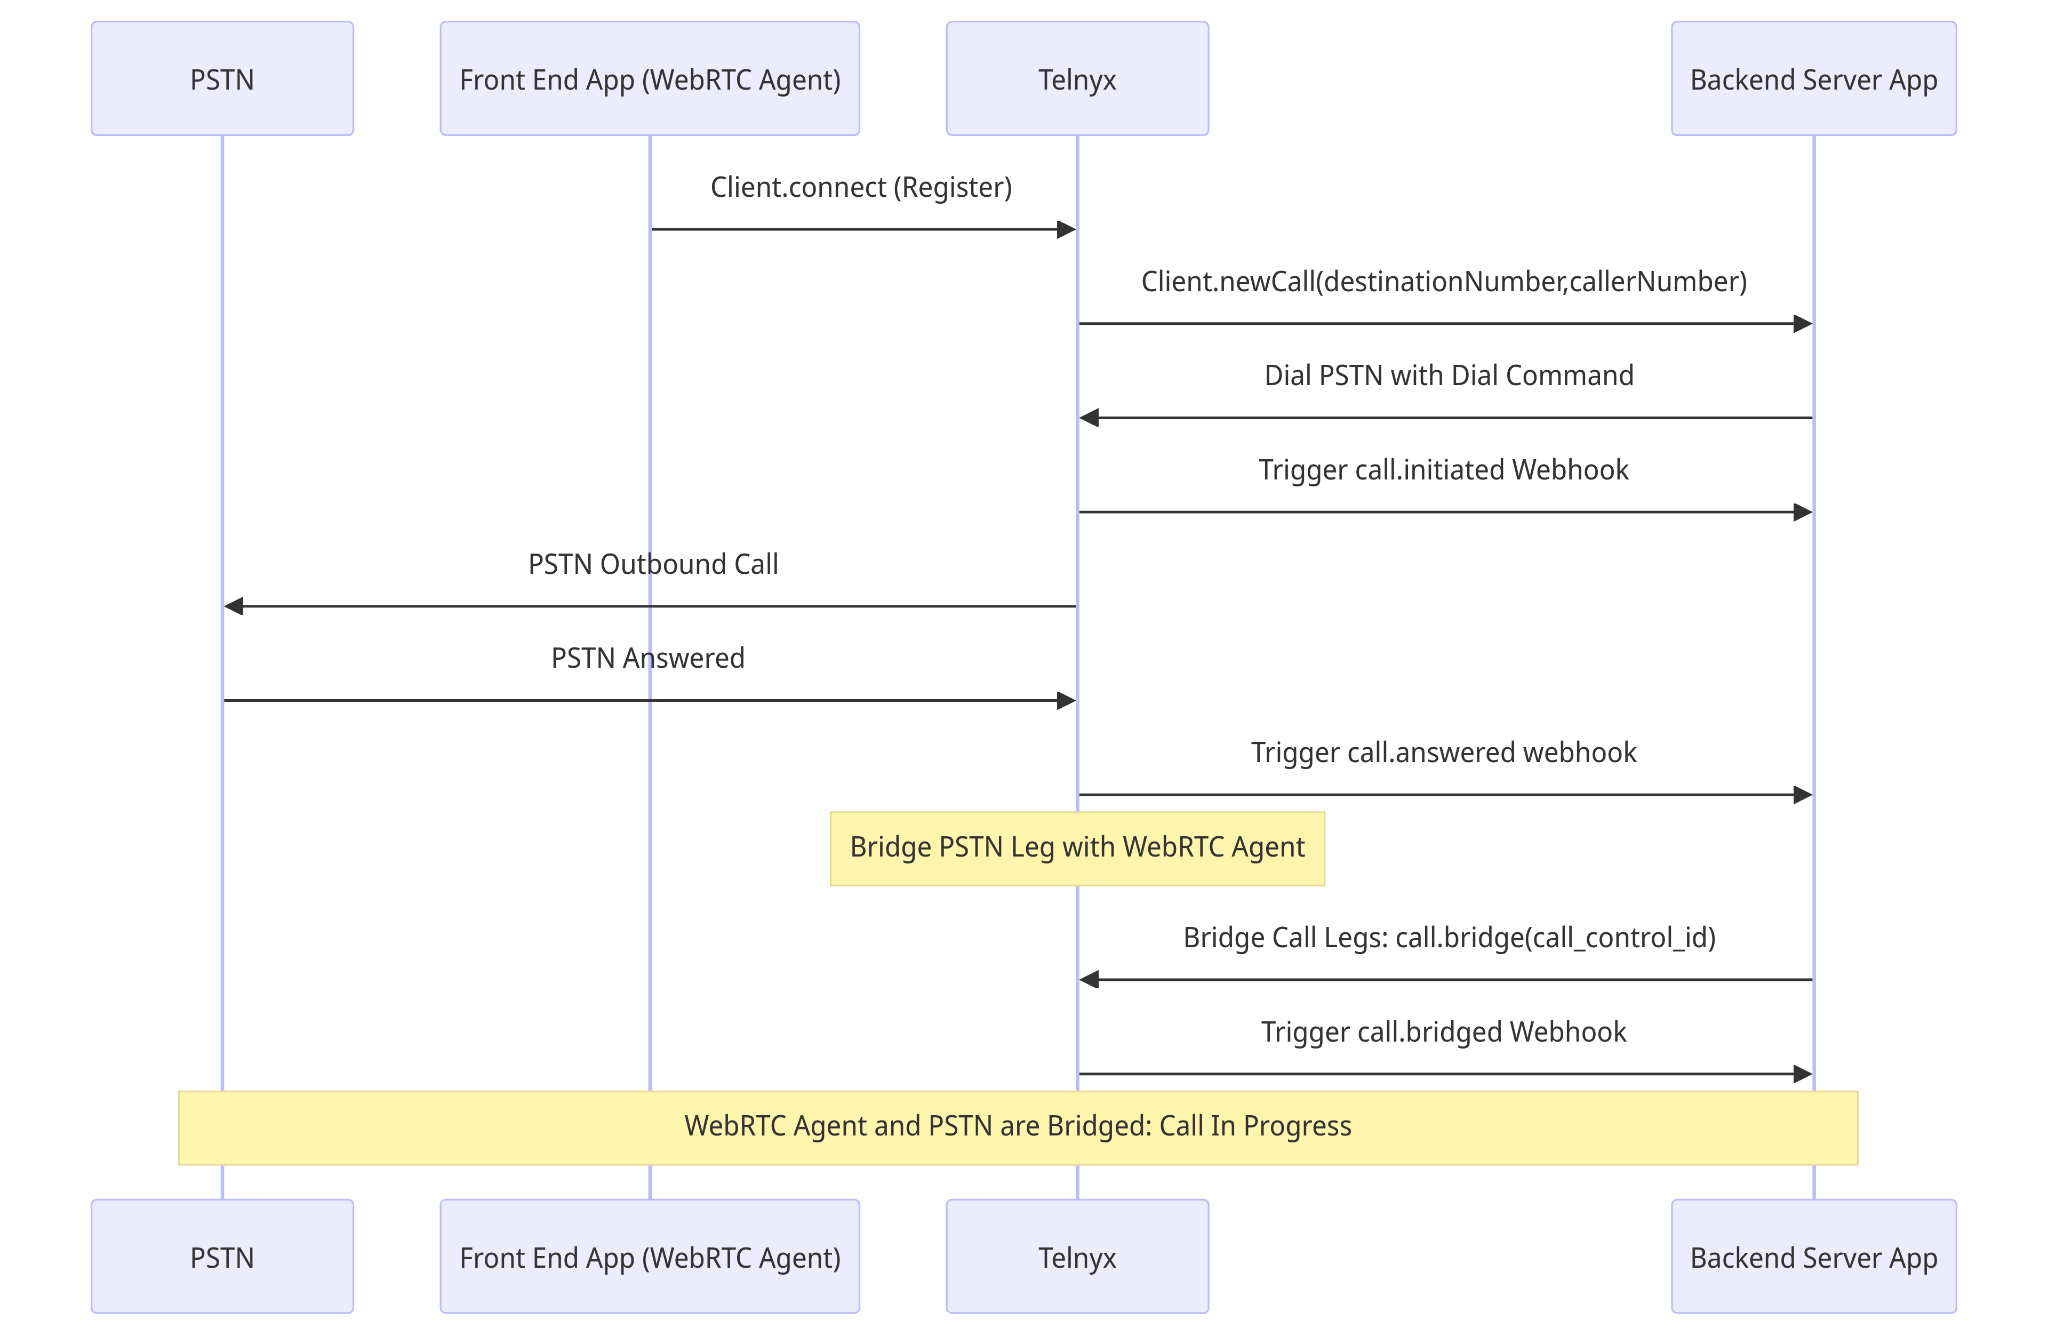
1. Client Registers with Telnyx
The process starts with the WebRTC client (the Front End App) connecting to Telnyx by sending aClient.connect (Register) request. This is essentially the WebRTC client registering with Telnyx to initiate communications.2. Initiating a Call
Once the WebRTC client is connected, it requests to initiate a call by sending aClient.newCall(destinationNumber,callerNumber) method to Telnyx. The request requires the destination number and the caller number. This request is routed from the front-end WebRTC client application to the back-end server application, which acts as the intermediary between the client and Telnyx for controlling call logic.3. Dialing PSTN (command)
The backend server then instructs Telnyx to dial the destination number in the PSTN using theDial PSTN with Dial Command. This command triggers Telnyx to initiate an outbound call to the PSTN.4. Call Initiated (webhook)
Telnyx acknowledges the initiation of the call process by triggering acall.initiated webhook to the backend server. This webhook indicates that the call process has started but does not necessarily mean the call has been answered.5. PSTN Outbound Call
Telnyx makes the outbound call to the destination number in the PSTN network.6. PSTN Answered (webhook)
When the PSTN destination answers the call, Telnyx sends a notification back to the backend server through acall.answered webhook, indicating that the call had been successfully answered on the PSTN side.7. Bridging Call Legs (command)
After the call is answered, the next step is to bridge the call between the WebRTC client and the PSTN to enable two-way communication. The backend server sends a Bridge Call Legs:call.bridge(call_control_id) command to Telnyx, instructing it to connect the two call legs.8. Call Bridged (webhook)
Once the call legs are successfully bridged, Telnyx triggers acall.bridged webhook to the backend server, indicating that the WebRTC agent and the PSTN call are now connected, and the call is in progress.9. Call In Progress
With the bridge established, the WebRTC agent (the user on the front-end client) and the PSTN participant can now communicate. This state continues until either party terminates the call. If the call is ended, Telnyx triggers acall.hangup webhook. An example call.hangup event is provided below.Next steps
- Review WebRTC authentication options.
- Explore Call Control API documentation.
- Learn more about webhook fundamentals.