- Have created an account with Telnyx
- Completed L2 verification
- Purchased a number to be used for voice calls.
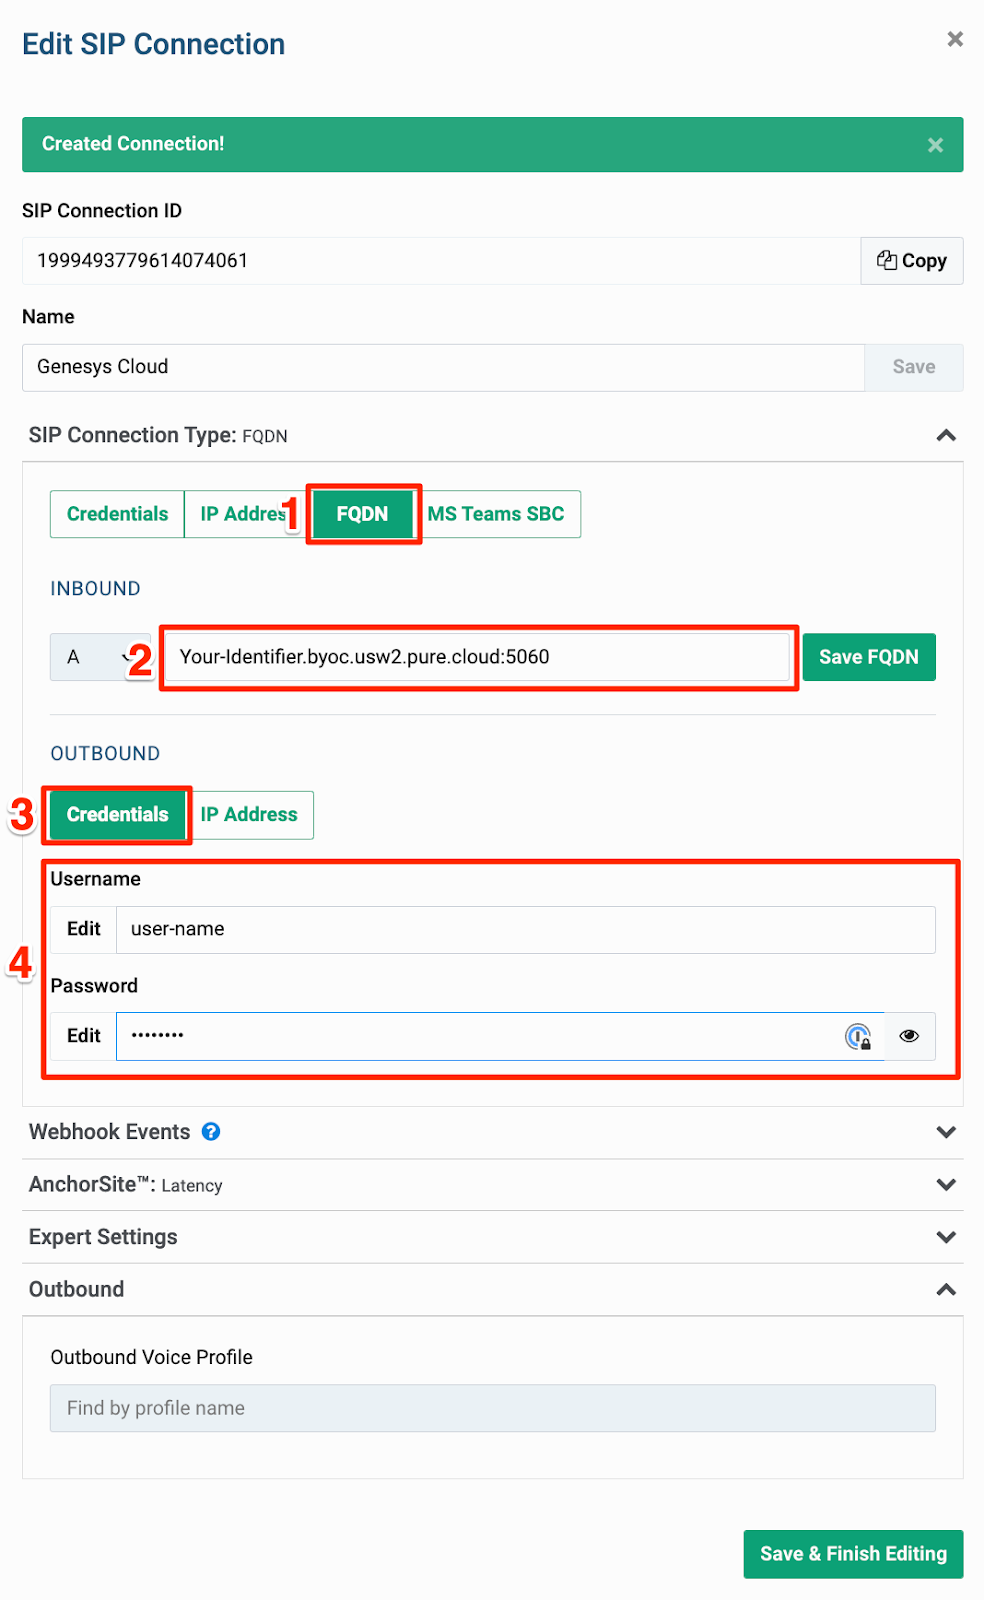
Creating a SIP connection
In the Telnyx Mission Control Portal navigate to the “Voice” tab on the left side menu and select “SIP Trunking”. Click on the “Add SIP Connection” button.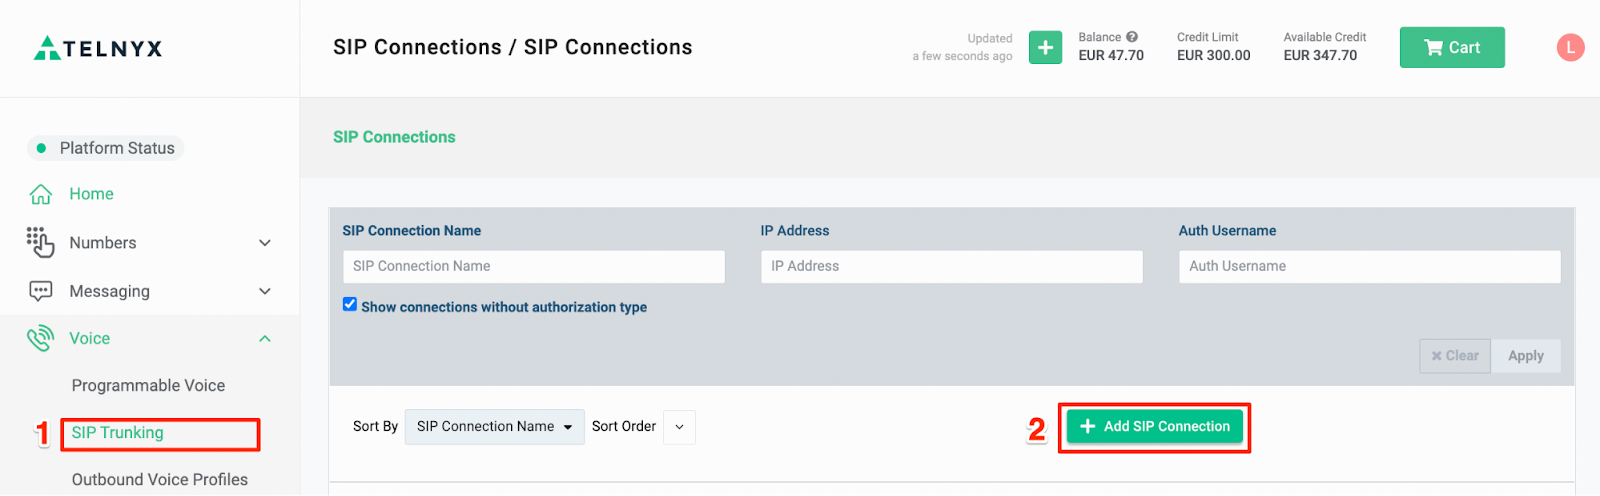

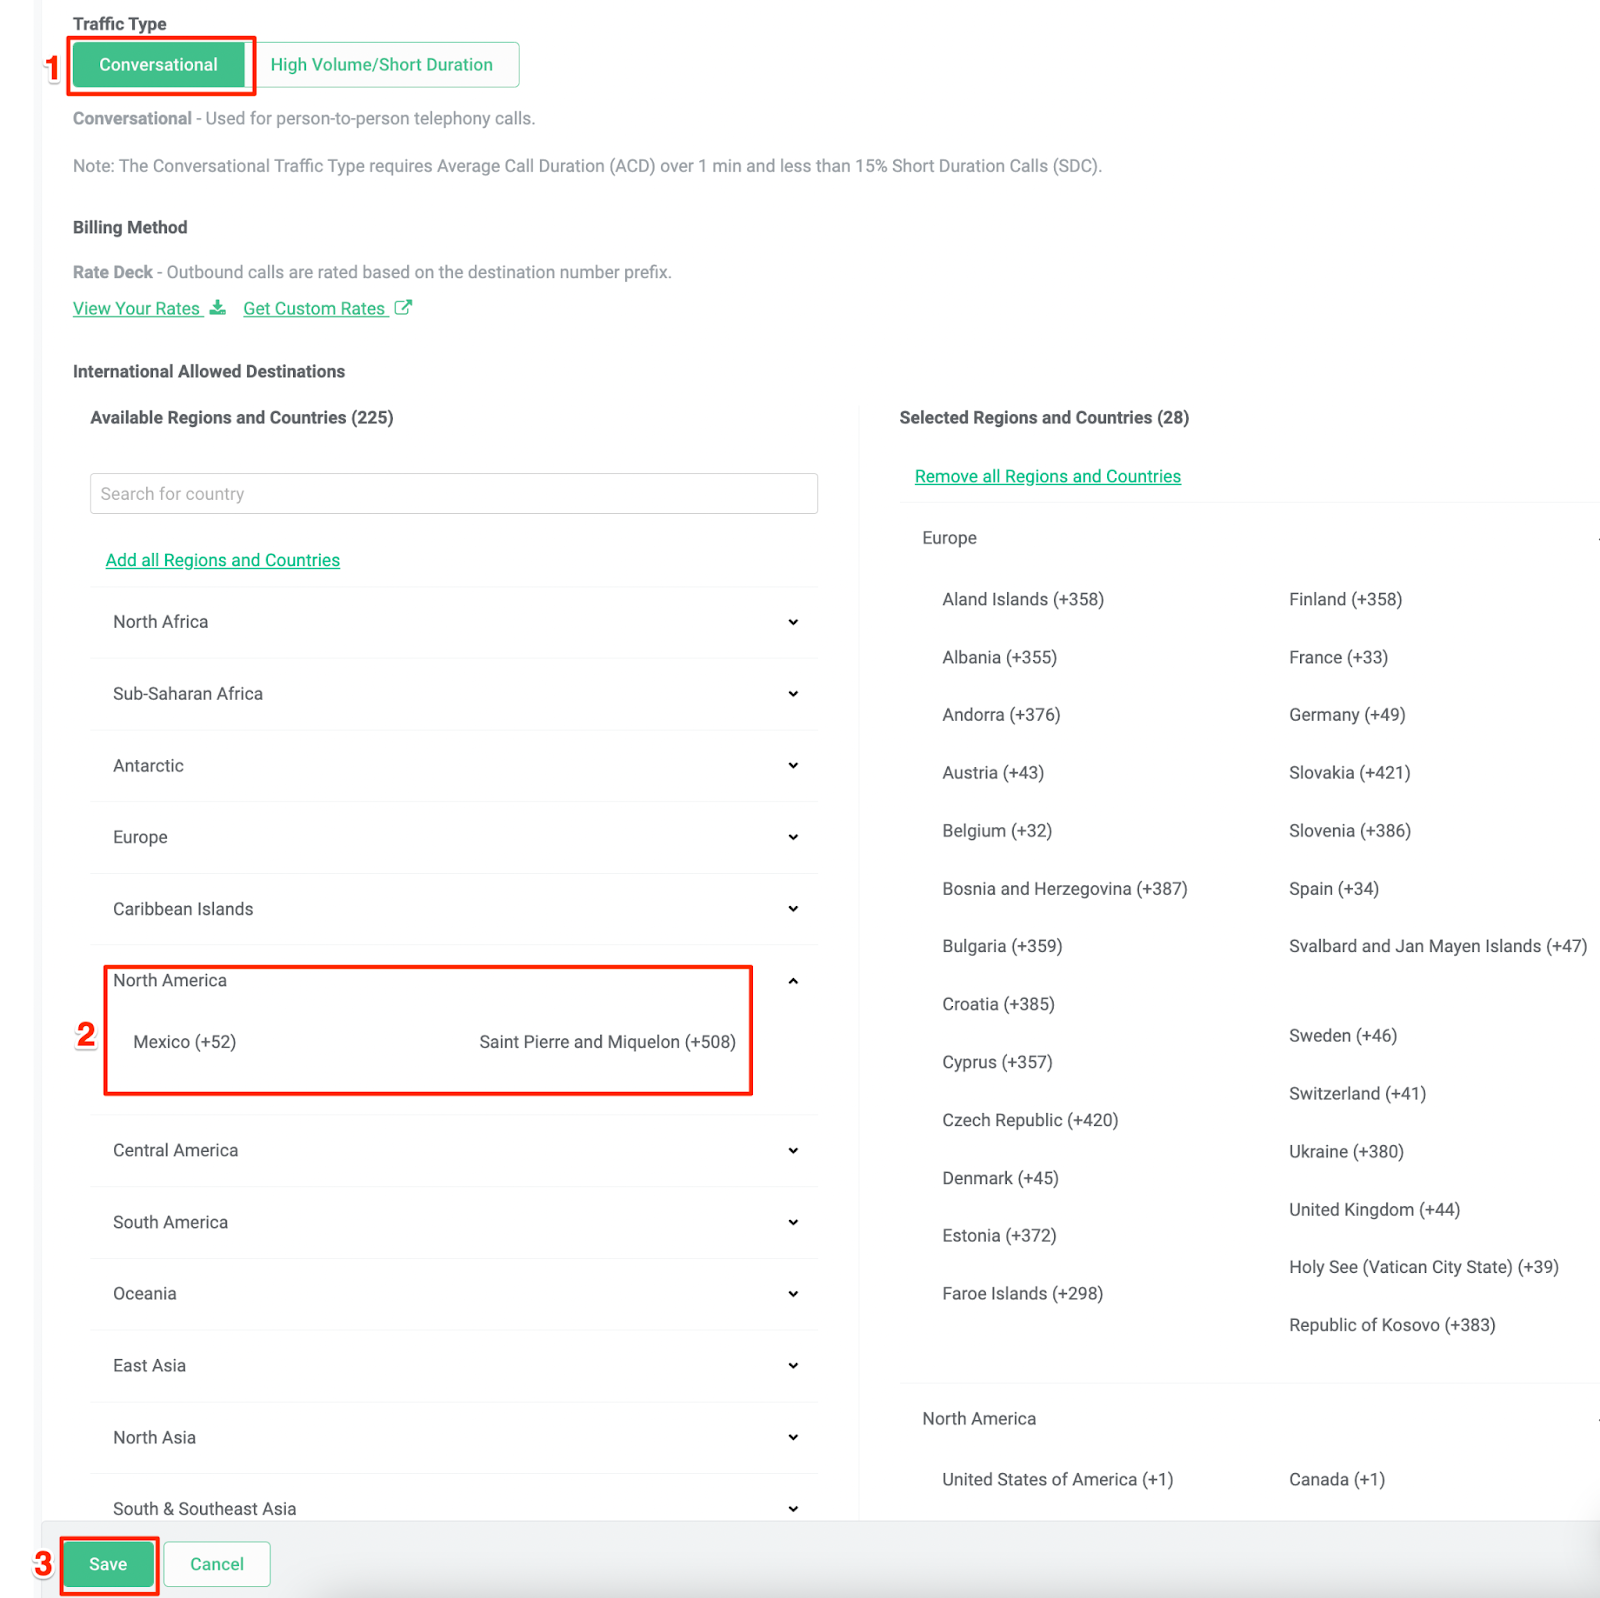
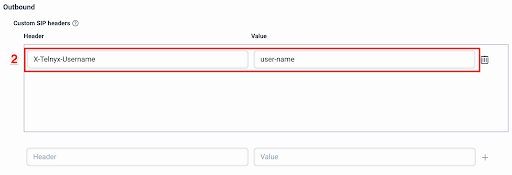
Creating an Outbound Voice Profile
Navigate to the “Outbound Voice Profiles” tab in the “Voice” section. Click the “Add New Profile” button.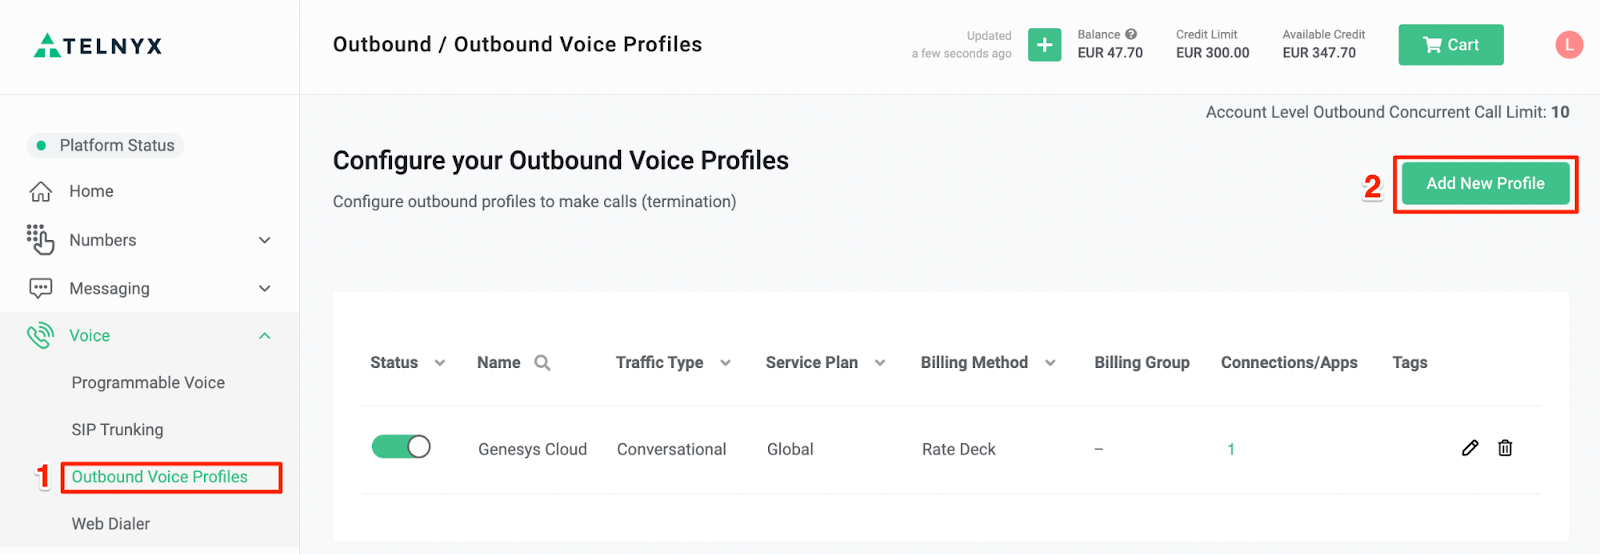

Number configuration
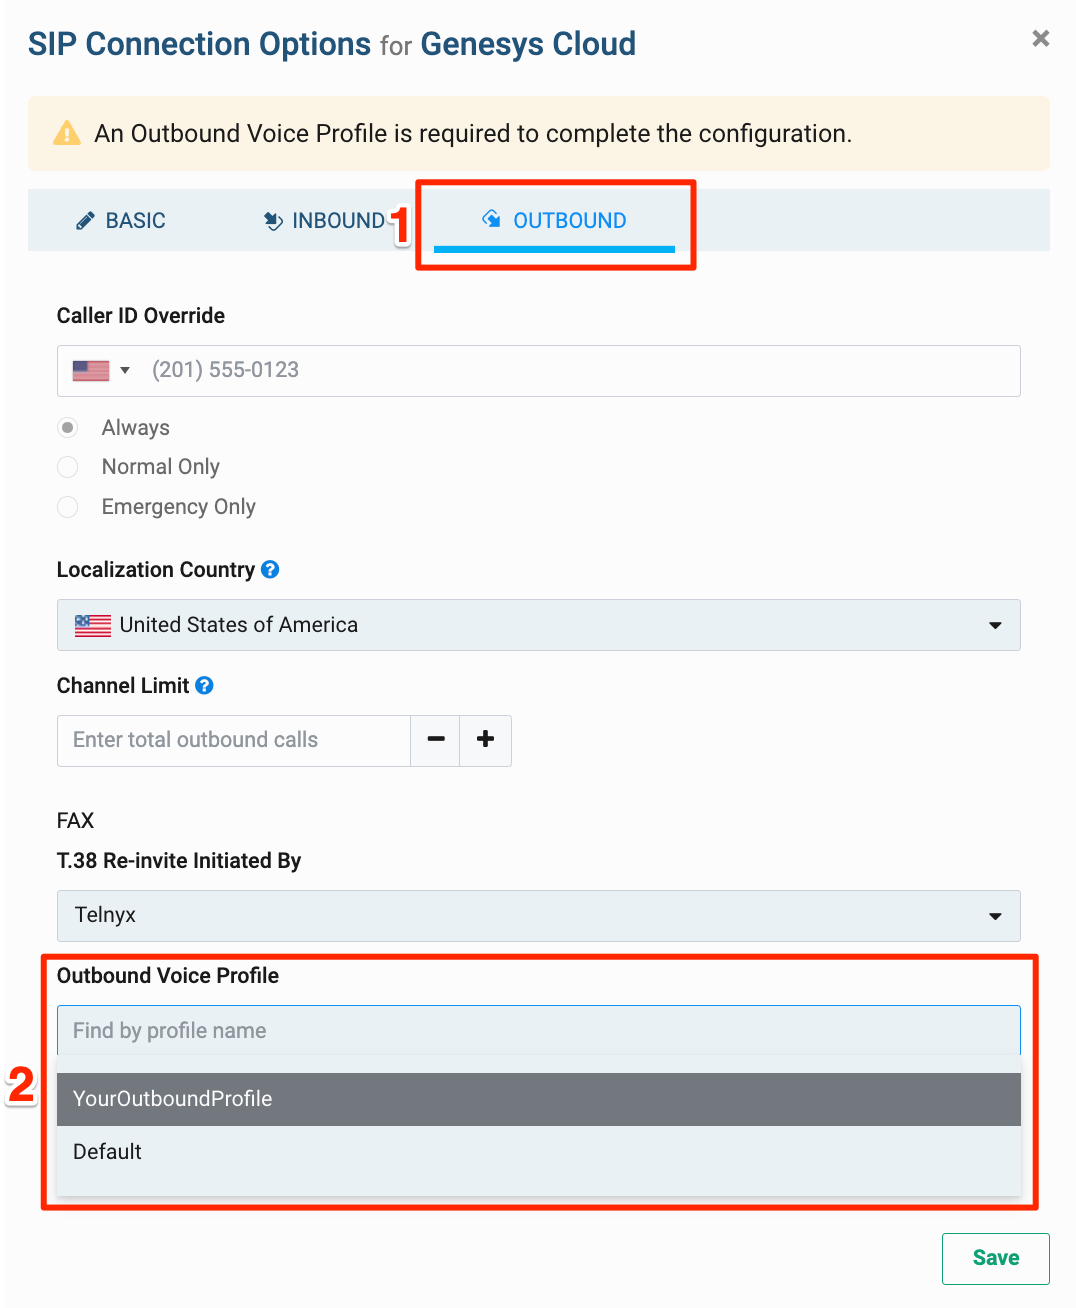
On the left-side meny, select the “Numbers” section and navigate to “My Numbers” tab. For your number purchased select a configured SIP Connection from a dropdown list.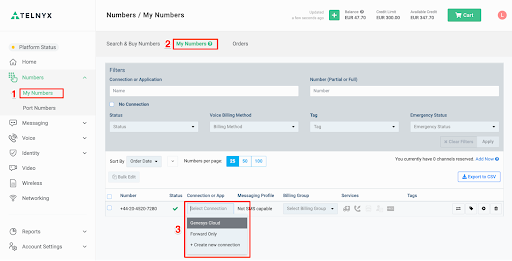
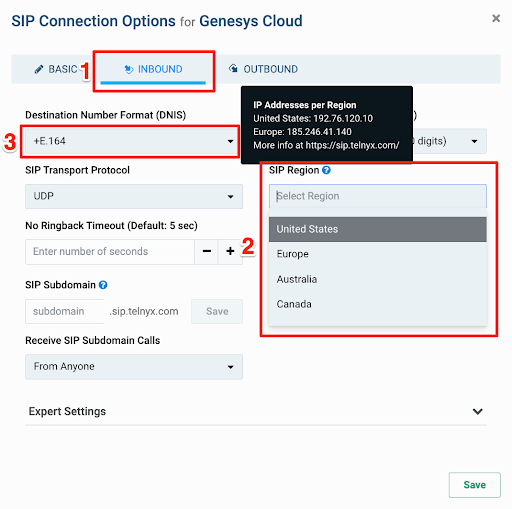
Configuration in Genesys Cloud
Follow the steps below to create a SIP connection to Genesys Cloud organization. Before you get started you need to ensure that:- The BYOC option is enabled in your Genesys Cloud organization
- You have admin rights to setup Trunks
- You have a number purchased and added to “DID Numbers” and routed correctly (for example to the Architect flow)
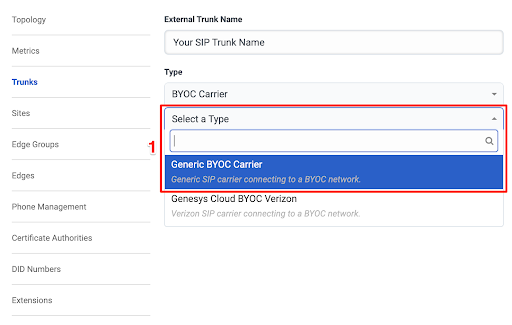
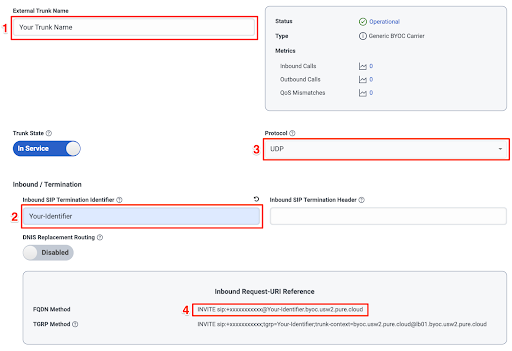
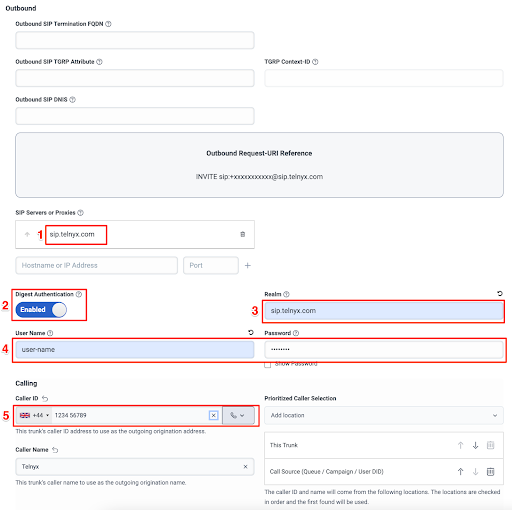
Create a SIP Trunk
Go to the Admin options and select “Trunks”. Provide a name for your SIP trunk and choose “BYOC Carrier” a SIP trunk type.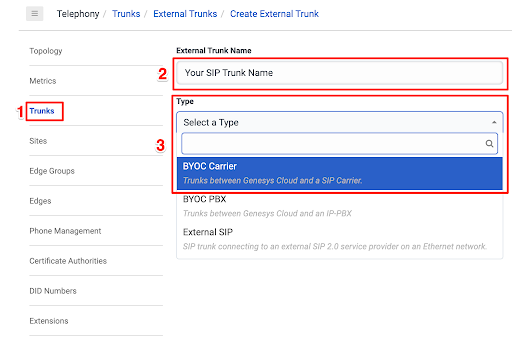
Troubleshooting
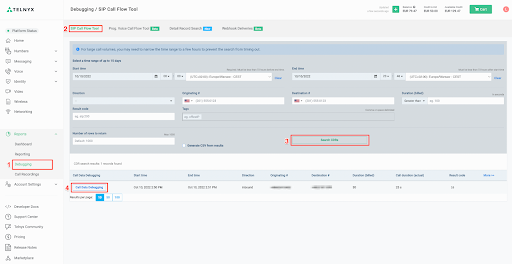
Debugging tools are available in the Telnyx Mission Control Portal where you can troubleshoot any issues with your SIP trunk communication checking SIP call flows, QoS stats and communication to a defined webhooks. To find and use the debugging tools:- Navigate to the “Debugging” menu under “Reporting” in the sidebar
- Select “SIP Call Flow Tool” in the top bar
- Specify your search criteria and press “Search CDRs” button
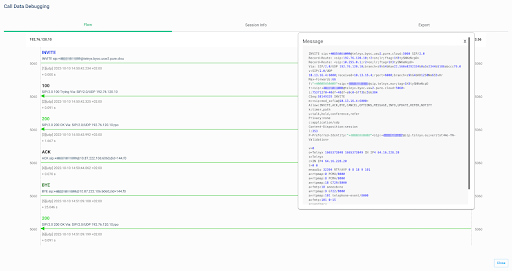
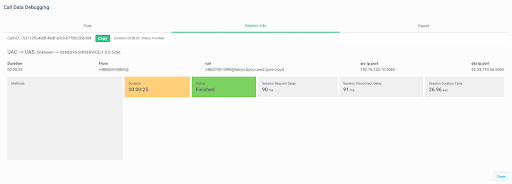
- From the list of listed calls select a one with “Call Data Debugging” button.