What you’ll need to get started with 3CX:
- A Telnyx account : Sign up here with your email address, or register with your Google, Facebook or GitHub account - it only takes a few seconds.
- A download of 3CX Version 16.
How it works
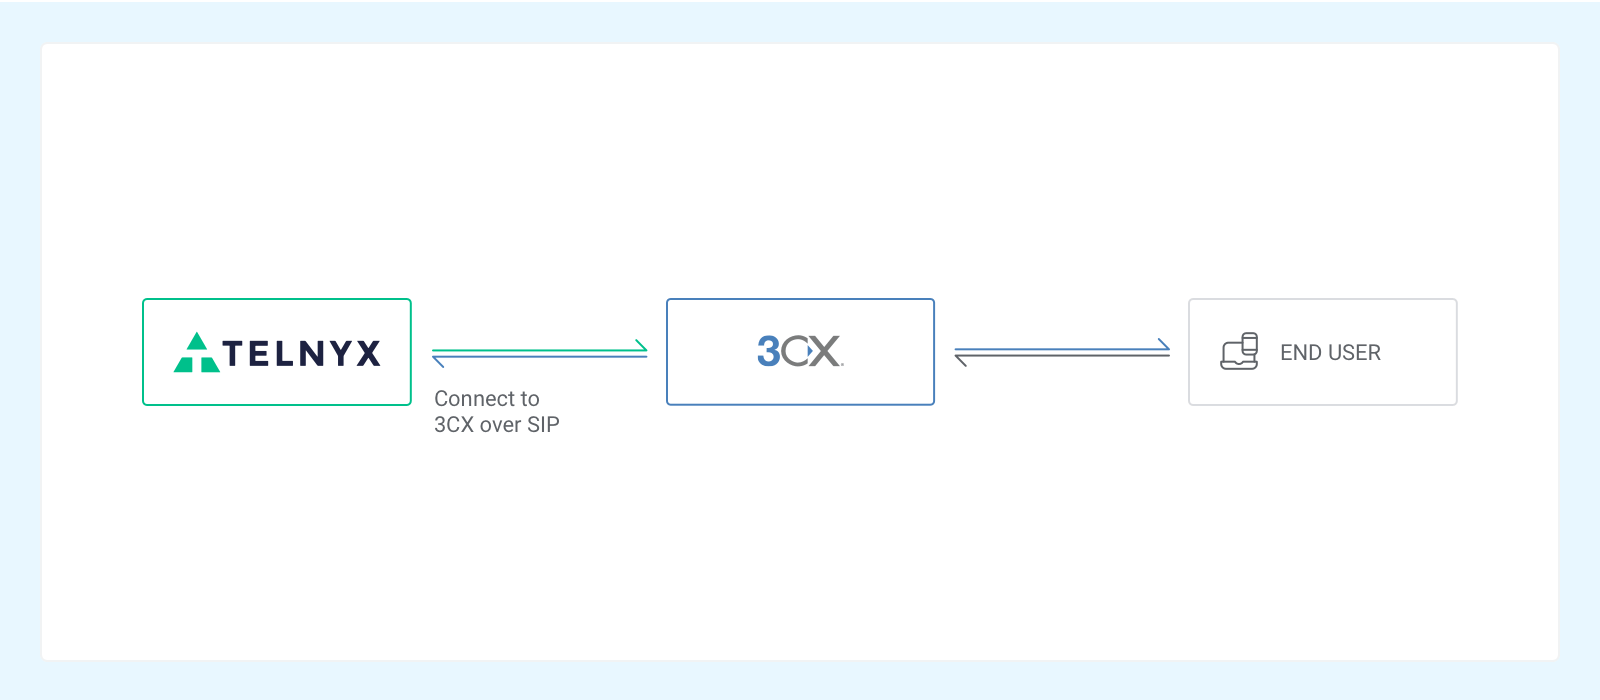
- Set up your Telnyx SIP Trunk Connection.
- Authenticate your SIP Trunk with 3CX.
- Configure your 3CX profile for Inbound and Outbound calling.
Getting Started with Your Telnyx Mission Control Portal
There are four steps needed to set up your Telnyx Mission Control Portal account so that it’s ready to be configured to your PBX phone system, softphone client or softswitch of your choice.Level 1 Verification:
To complete the below steps, you’ll need to be Level 1 verified. Most users will already be Level 1 verified following email confirmation on signup. To check, visit the ‘My Account’ section of your portal account, and navigate to ‘Verifications’. More information on account verification can be found here.Connection Setup
Next, you need to set up a connection to authenticate your client (3CX) with our ( sip.telnyx.com). We have three authentication types on the portal: Credentials, IP Address and FQDN. These steps will walk through the setup of a credentials based connection. For information on IP and FQDN, check out the instructions here.- Go to ‘Connections’ from the side navigation
- Click the ”+ Add Connection” button near the top right corner of the page.
- Enter the name you wish to have for your connection.
- Select “Credentials” as the “Connection Type”. Click here for IP or FQDN setup.
- A username and password will automatically be generated but you change the credentials by clicking the “edit” button to the left. Please make sure you use strong credentials.
- Click “Set Credentials”.
- Click “Done”
DIDs
A DID is required in order to receive inbound calls to your client. After you purchase a DID on your account, you’ll have to assign the connection you wish to receive inbound calls to. Information on assigning DIDs to a connection and DID features can be found here. More details on our number search feature can be found here.Outbound Profile
An outbound profile is required in order to make outbound calls. More information on creating an outbound profile and its features are explained here.Need additional support to get started?
Check out our support guide. Supplementary information for configuring your client, such as the signaling and media IP’s to our SIP proxy can be found at sip.telnyx.com.Setup 3CX for Your Telnyx Connection
Setting up SIP Trunk configurations on the 3CX platform is pretty simple. To connect a SIP Trunk, we need to specify inbound and outbound signaling for Telnyx, set up authentication, add our numbers and set up some headers.3CX Profile Setup
To set up your 3CX profile you need to enter some personal information to configure the 3CX PBX for correct operation. We will highlight some of the important steps you need to look out for here:
- Extension Length: Select how many digits your extension should have.
- Admin Email: Specify an admin email and configure your mail server configuration by specifying a mail provider.
- Timezone: Set the time for the location where the system will be operating.
- Operation: Set up default destination for inbound calls. Default extension number is ‘000’.
- Allowed Countries: Specify to which countries calls can be made.
- Registration: Fill out your personal details here.
Confirm Network Setting
- Go to “Settings” -> “Network”.
- “Ports” Tab: make sure your “SIP Port” is set to 5060.
- “Public IP” Tab: double-check your Public IP is correct and that you have selected the proper Network card Interface.
- Settings —> Click on “Network Settings” —> Public IP tab —> Section : “External IP Configuration”.
Create New SIP Trunk
- Click on “SIP Trunks” from the navigation menu on the left.
- Click “Add SIP Trunk” near the top of the screen.
-
A new pop up will be opened. You need to enter/select all the required details :
- Select Country: Worldwide
- Select Provider in your Country: Telnyx LLC
- Main Trunk No: (Enter the number which you have purchased on your Telnyx Mission Control Portal)
- After entering the details, click on OK.
- This will open the trunk configuration window. Here we will configure for inbound and outbound SIP traffic between our 3CX instance and Telnyx.
-
In the General tab, there are 3 sections to be explained in the following sections:
- Trunk Details
- Authentication
- Route calls to
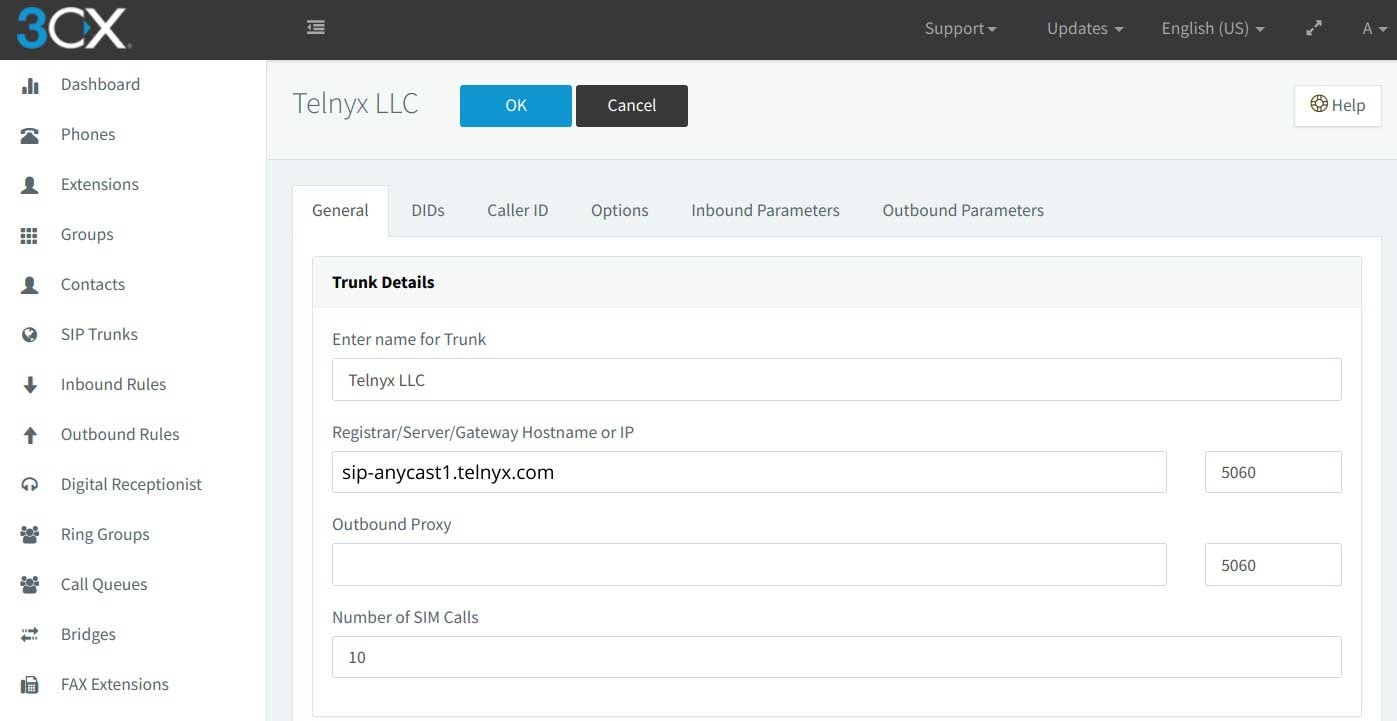
Configure Trunk Details
- Enter name of Trunk: Telnyx LLC
- Registrar/Server/Gateway Hostname or IP: sip-anycast1.telnyx.com:5060 or sip.telnyx.com:5060
- Outbound Proxy: sip.telnyx.com
- Number of SIM Calls: (set your preferred amount of simultaneous call)
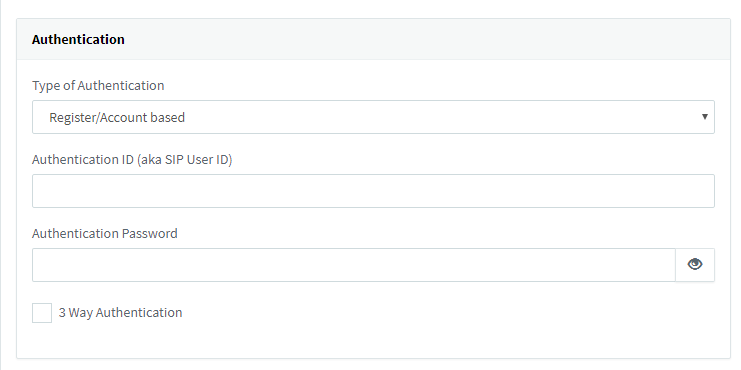
Configure Authentication for Outbound Calling
Here we support two ways of authentication for outbound calling:- Register/Account based : When your connection is authenticated via credentials.
- Type of Authentication: Register/Account based
- Authentication ID (aka SIP user ID): (You need to use the username from the connection which you have created in the Telnyx portal)
- Authentication Password: (You need to use password from the connection which you have created in the Telnyx portal)
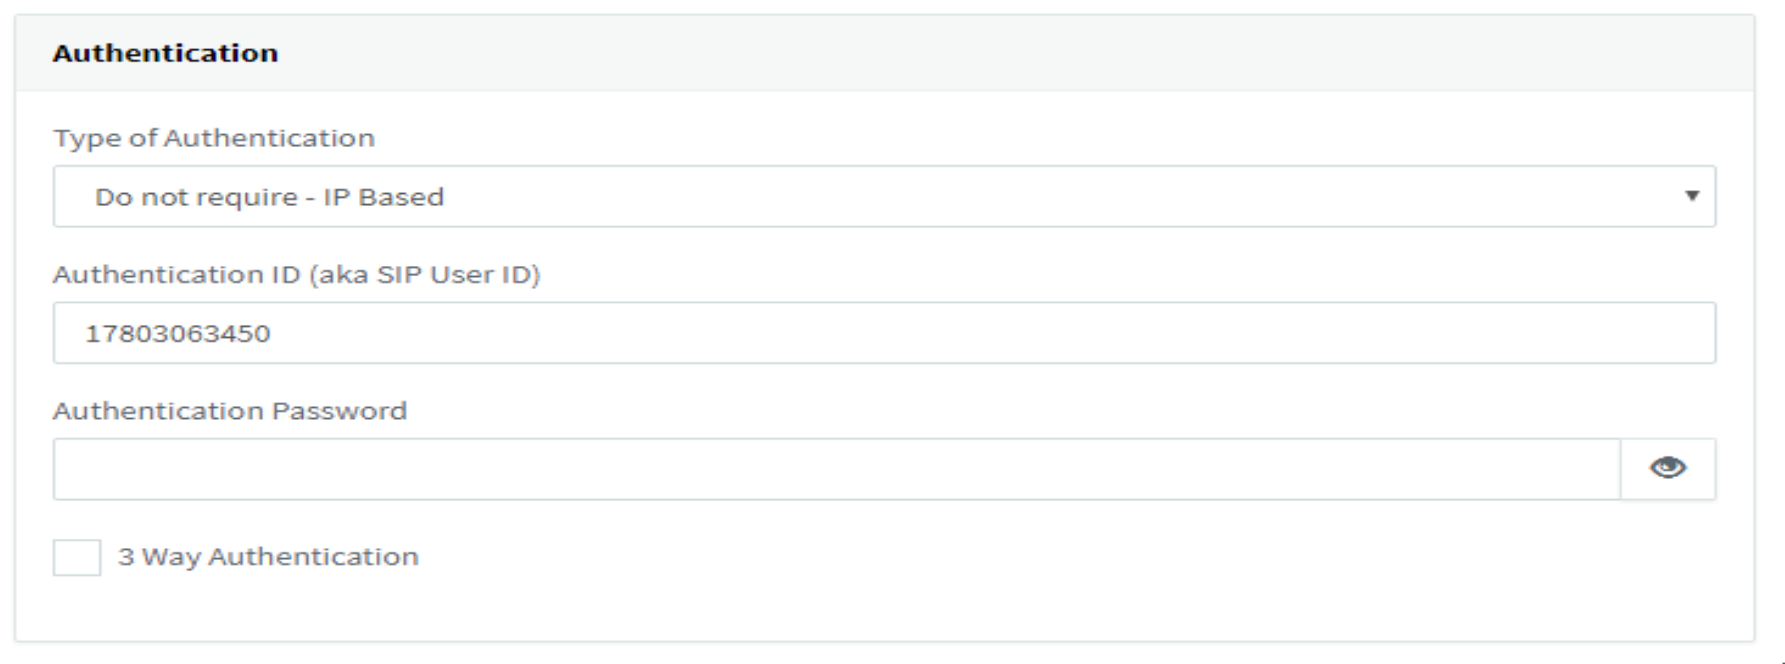
- IP-based : When your connection is authenticated with IP-based or FQDN.
- Type of Authentication: Do not require - IP Based
- Authentication ID (aka SIP user ID): (enter the number which you have purchased on the Telnyx Mission Control Portal)
- Authentication Password: (Leave Blank)
Configuring call routing
- Main Trunk number: By default number will be shown. You need cross verify with the number which you have purchased on telnyx portal.
- Destination for calls during the office hours: (Based on your requirement)
- Destination for calls outside the office hours: (Based on your requirement)

Setup Calling Options:
Under the options tab you can enable or disable calling through the trunk. Additionally, you can edit the list of codecs supported and their preference/priority.- Select the “Options” tab
- For “Require registration for:” select “Do not require”.
- Remove the “GSM-FR” from Assigned Codecs
- Click “Apply”
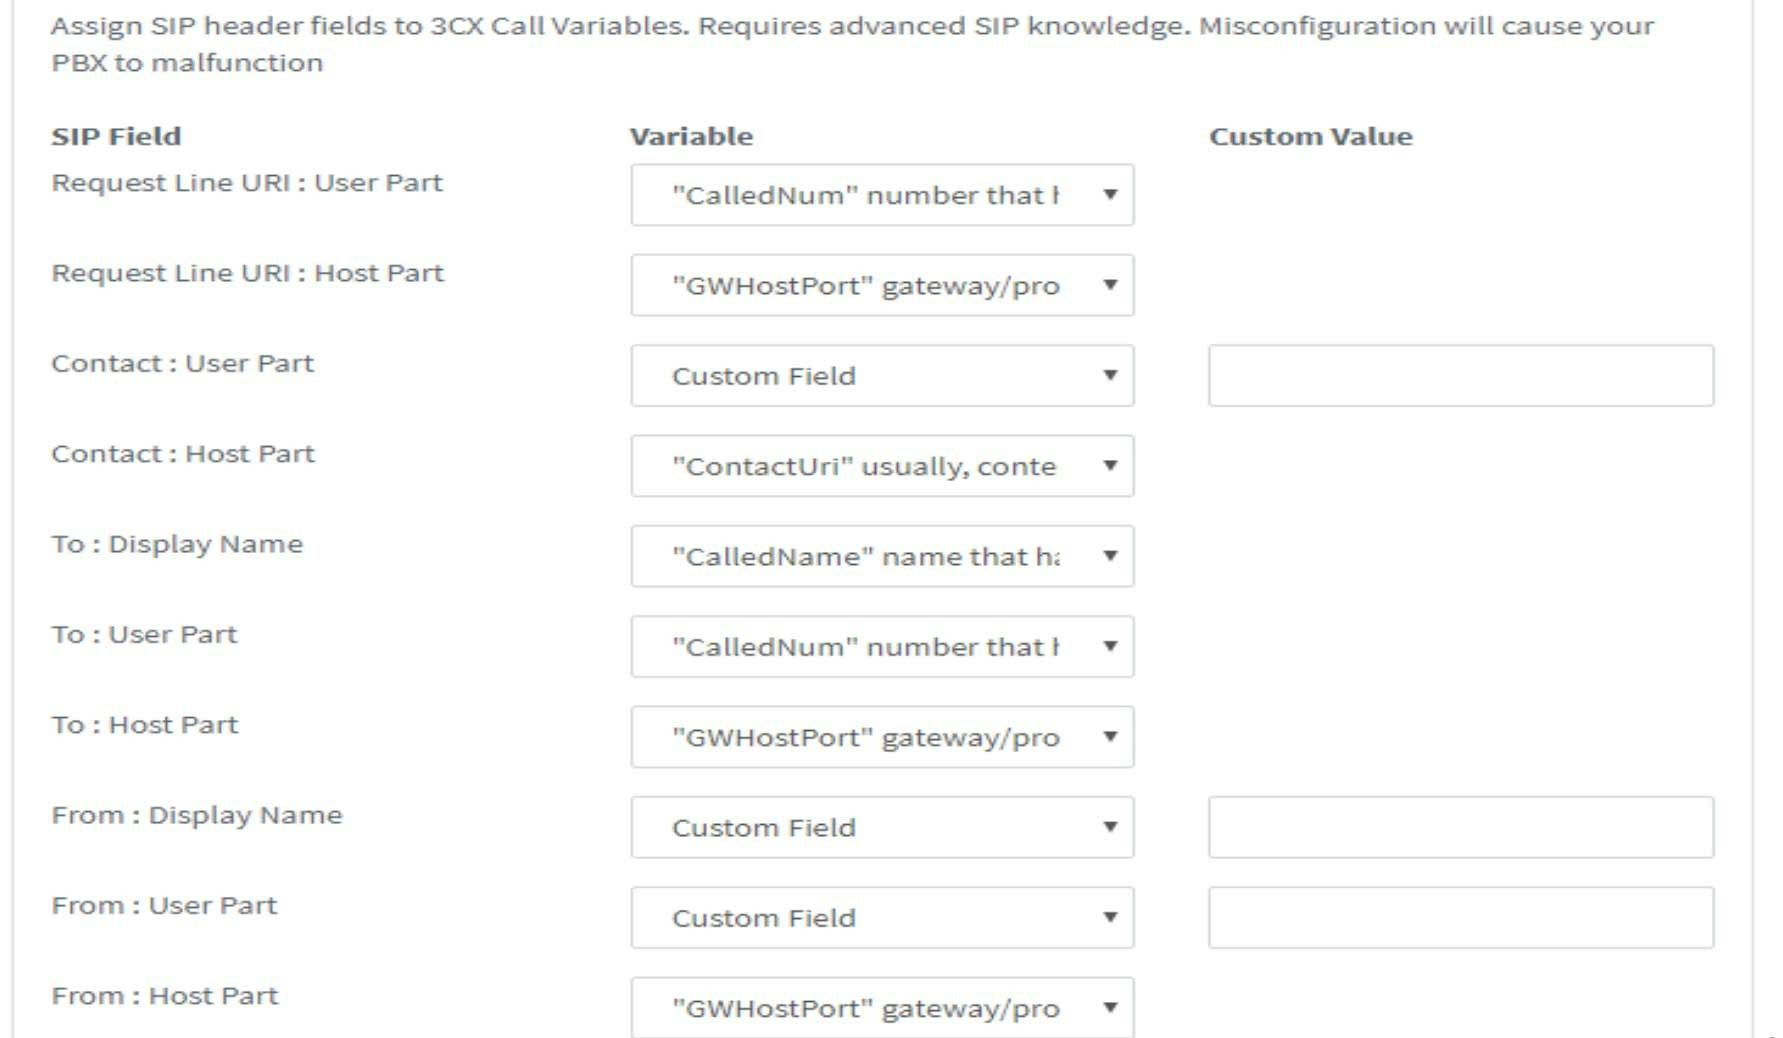
Setup Outbound Parameters:
- For “Contact : User Part” in the SIP Field column Select “Custom Field”.
- To allow private calling - “From: Display Name” and “From : User Part”, select “Custom Field” but leave the Custom values blank.
- Click “Apply”.
- After entering all the details please click on “OK” which is on the top.
- If all the fields are entered correctly the IP trunk will now be live. We can now proceed to our inbound and outbound rules.
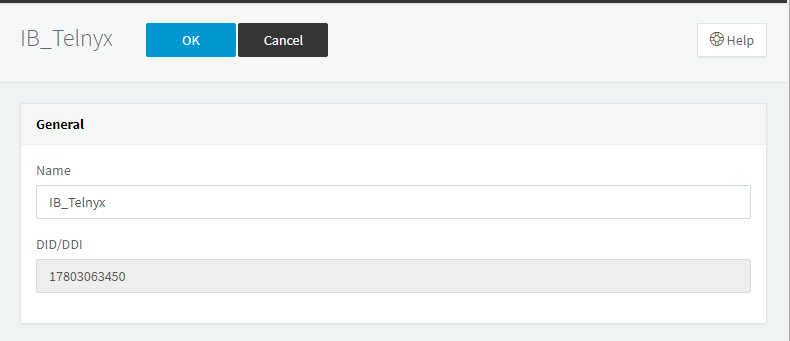
Setup Inbound SIP Rules
- Click on “Inbound Rules” from the navigation menu on the left.
- Click on “+Add DID Rule” near the top of the screen.
- There are 2 sections in this: General & Route Calls too
- General:
- Route Calls to:

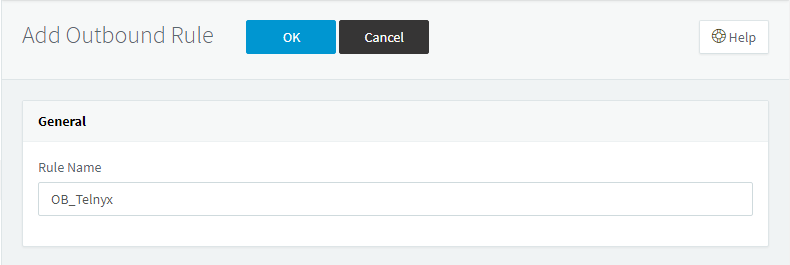
Setup Outbound SIP Rules
- Click on “Outbound Rules” from the navigation menu on the left.
- Click on “+Add” near the top of the screen.
- There are 3 sections in this :
- General
- Apply this rule to these calls
- Make outbound calls on
- General
- For ‘Rule Name’, you can enter any preferred name.
-
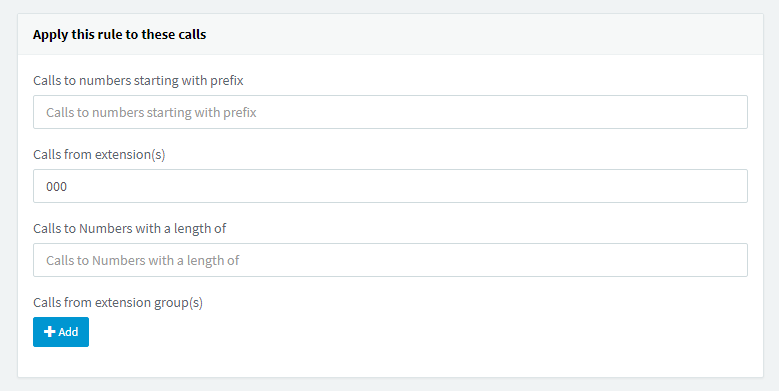
Apply this rule to these calls:
- Calls to numbers starting with prefix : (leave empty)
- Calls from extension(s) : (You need to give the extension numbers)
- Note: ‘000’ is the extension used as an example.
- Calls to Numbers with a length of : (leave empty)
-
Make outbound calls on:
- We need to configure routes in this section. Configure up to 3 routes for calls. The second and third route will be used as backup. For each route, digits can be stripped or added. Strip Digits 0 on Route 1 and Strip Digits 1 digit for remaining 2 routes.
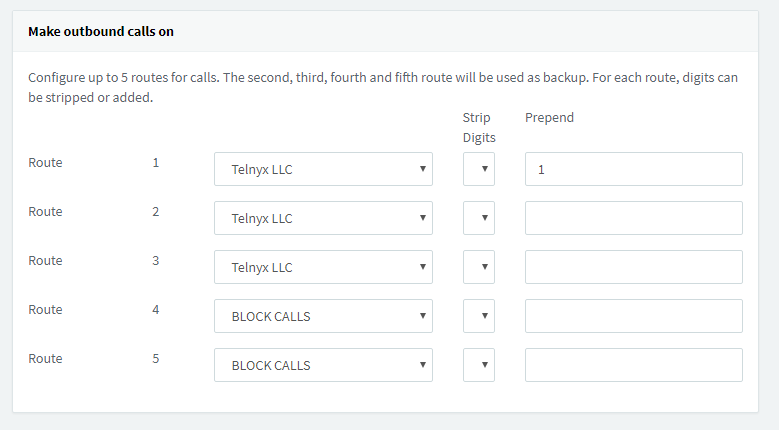
- After completing the configuration, click “OK”.
Support and Additional Resources:
- Check out 3CX’s help section for extra support!
- Looking for additional help? Click the Live Chat icon at your lower right-hand corner and start a chat.