

Overview
The SDK does two main things:- Establishes an active websocket connection to send and receive signaling messages to and from rtc.telnyx.com.
- Establishes a media session for a call
Client Instantiation & Authentication
- Go to webrtc.telnyx.com
- Right click; Inspect; Select Network tab and filter WS traffic
- Follow this page to successfully register the demo app.
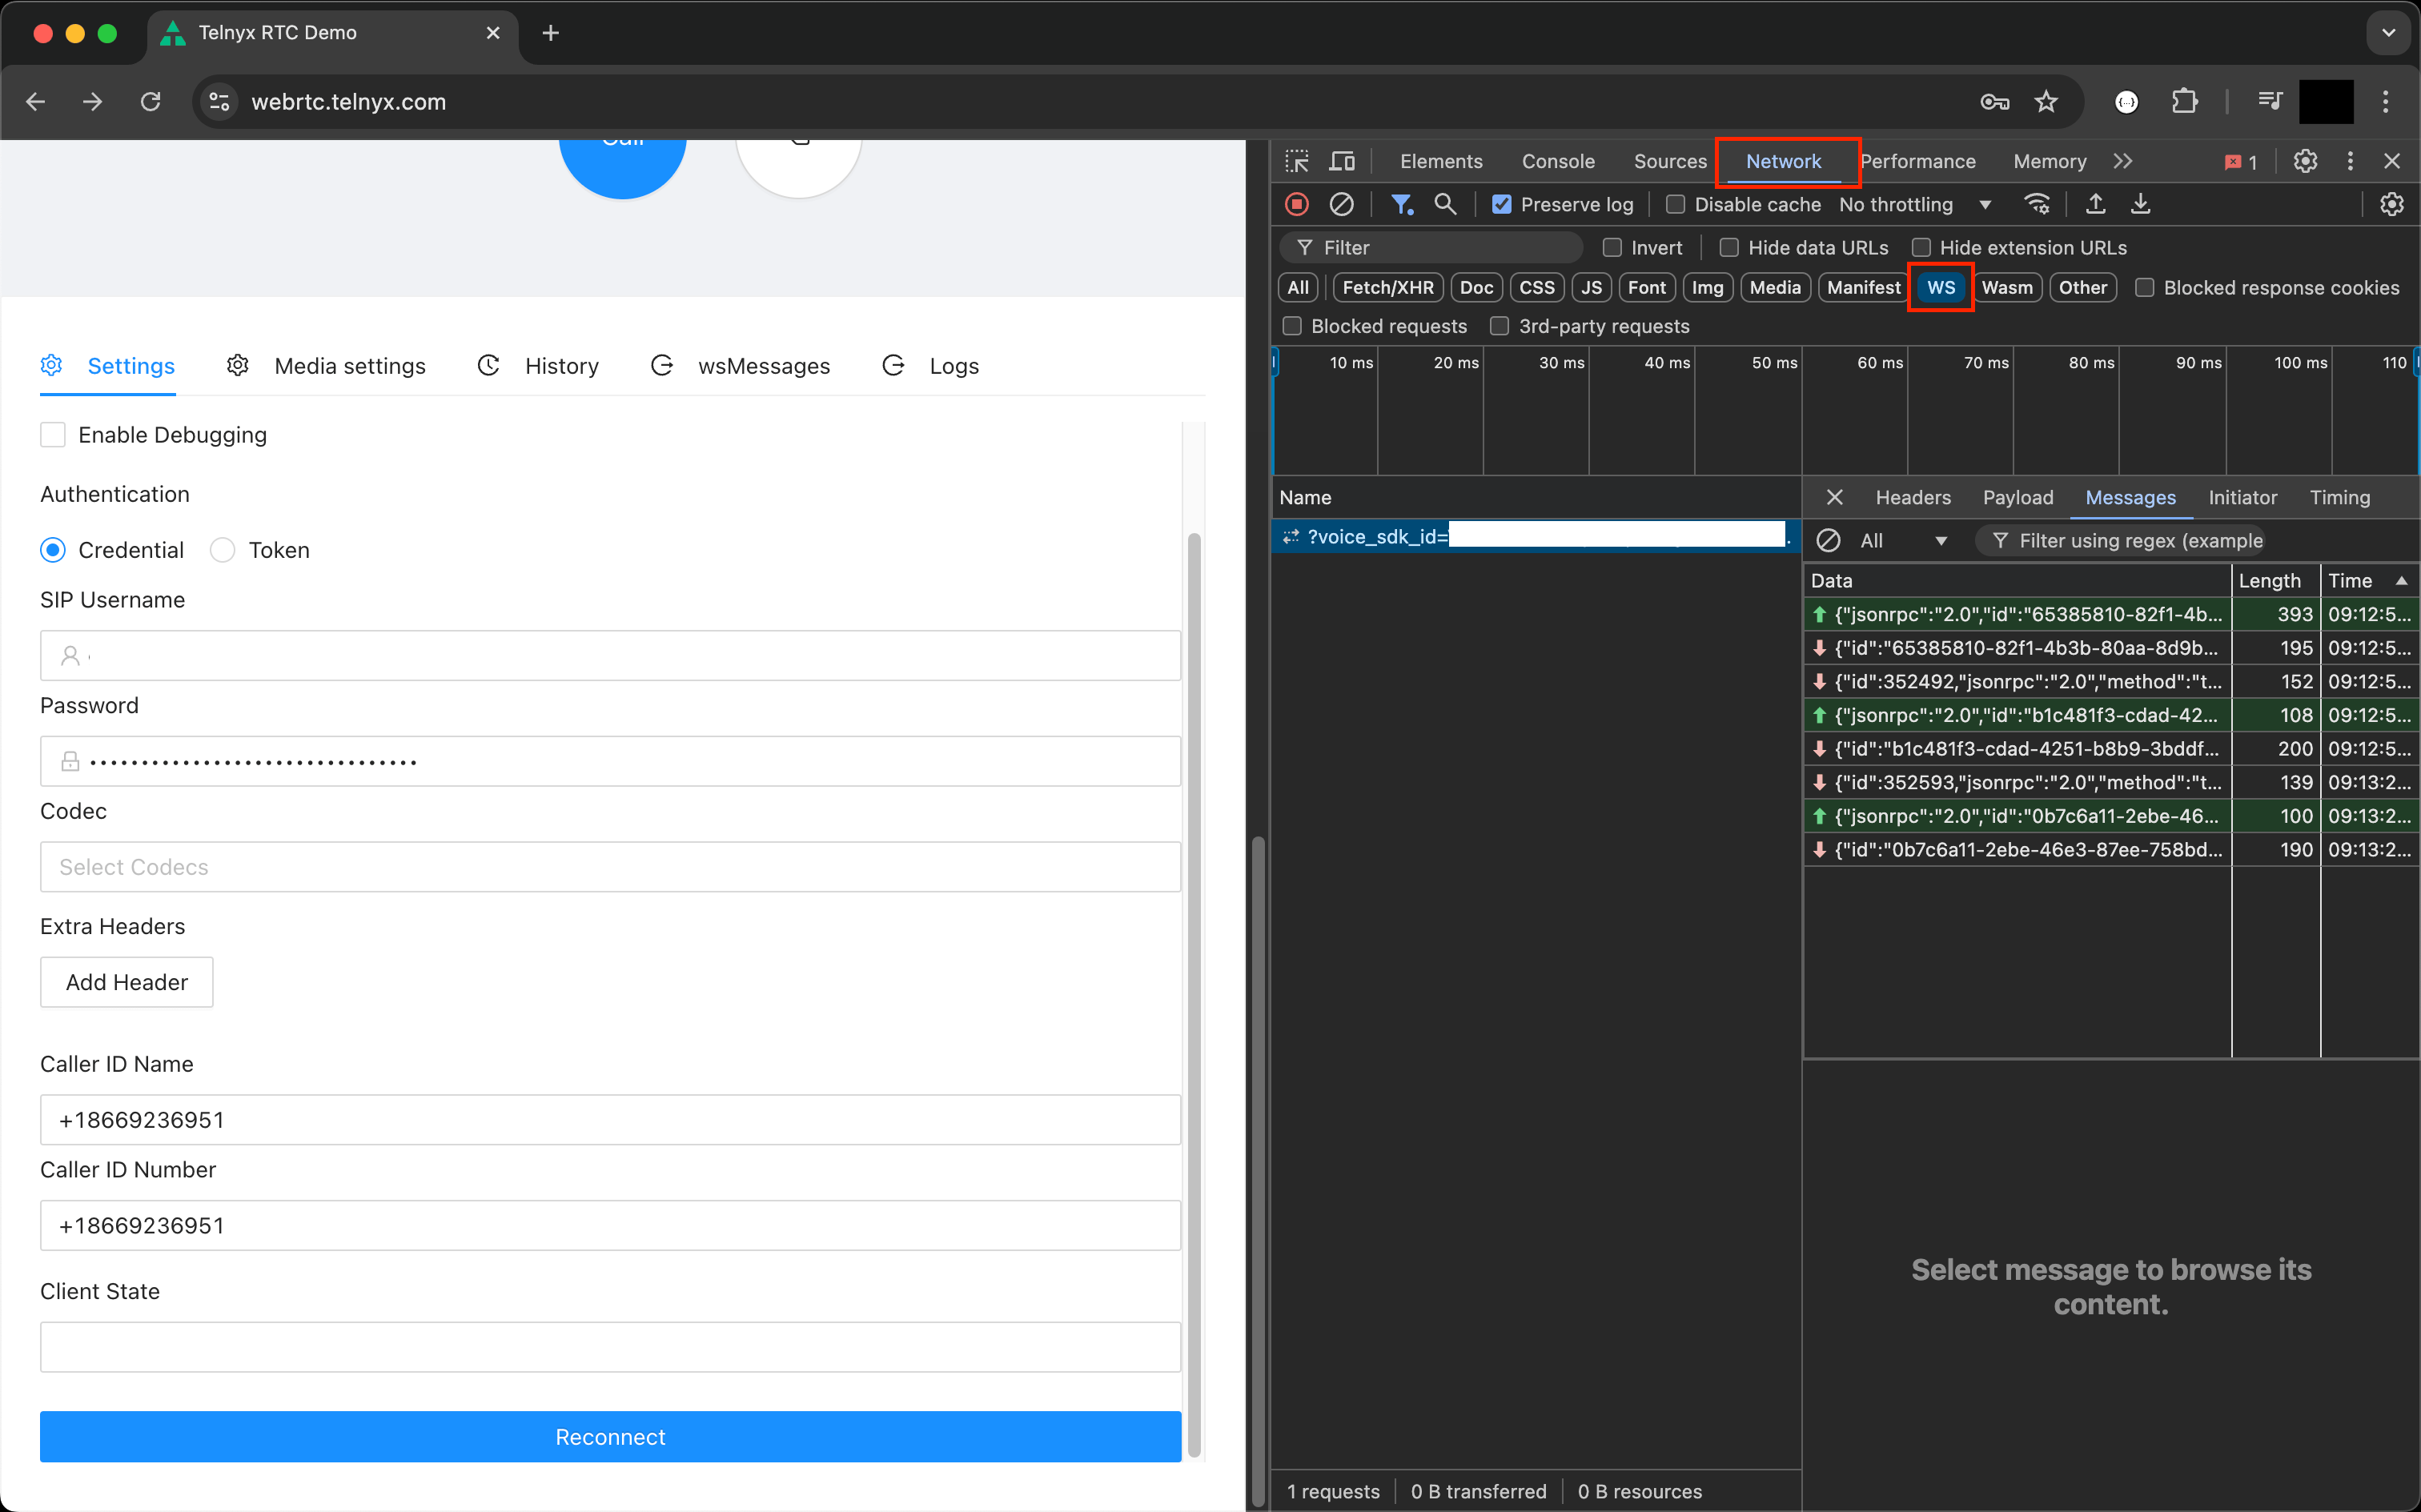
- creates a session object and
- registers handlers for all 4 socket events
connect method on the SDK client …
- Initiates a WebSocket connection to rtc.telnyx.com
- Once the socket is open, the login message is sent to rtc.telnyx.com.
- A
telnyx_rtc.clientReadyevent from rtc.telnyx.com triggers atelnyx_rtc.gateStatequery from the SDK client - A
REGEDevent from rtc.telnyx.com bubbles up astelnyx.ready.
Call Initiation
- In another tab, open chrome://webrtc-internals/
- Fill in “Call destination” with +18008648331 (United Airlines IVR)
- Click “Call”
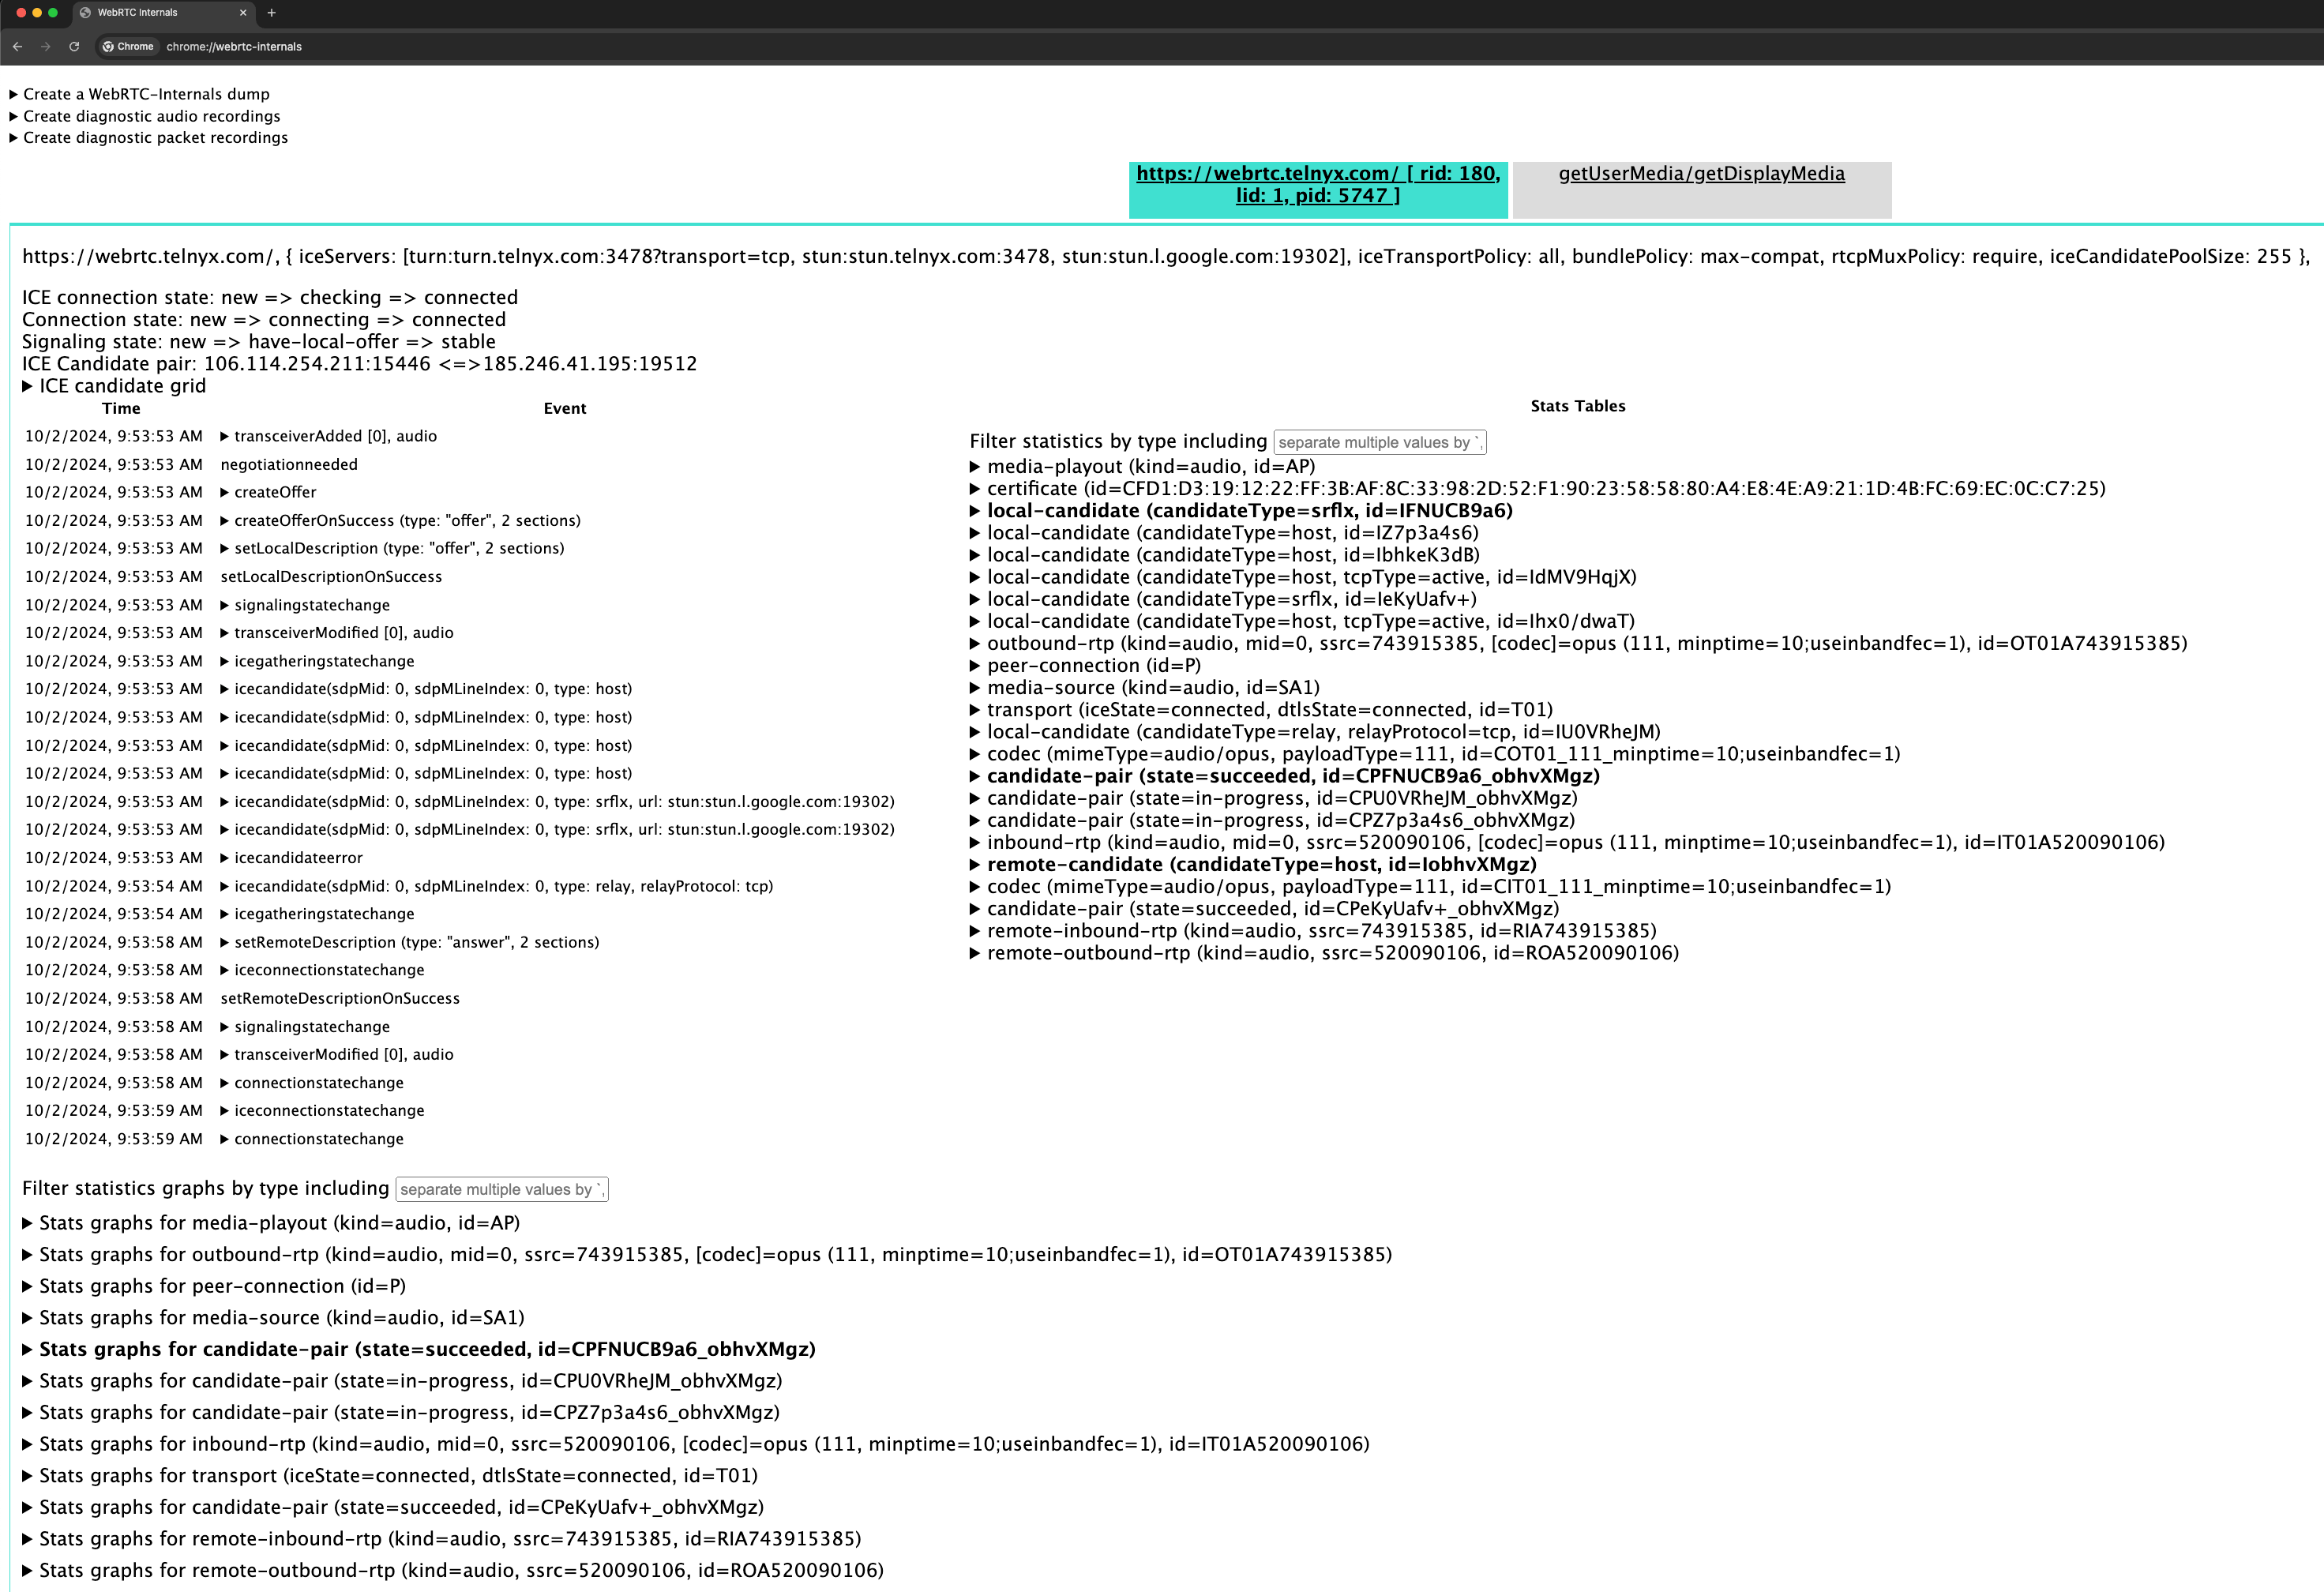
RTCPeerConnectionis instantiated.getUserMediais invoked to obtain user’s permission for audio and eventually theMediaStream
addTransceiveris invoked to add the local stream to the sender of theRTCPeerConnection.
- The previous step triggers the
negotiationneededevent.
- In the event handler, the SDK invokes
createOffer.
- This API call will eventually create a
RTCSessionDescriptionwith information on the local media stream.
- The SDK will then invoke the
setLocalDescriptionto set the SDP of the client peer.
- Concurrently,
createOfferalso kicks off the ICE candidate gathering.
- When all is done,
icecandidateevent triggers withcandidate = nullto indicate the process is completed. Subsequently, the existing local SDP parameters are augmented with the ICE candidates. - At this point, all necessary info are present to send the invite to rtc.telnyx.com.
- As a result, on the websocket, Message #1 through #4 are observed.
- At Message #5, rtc.telnyx.com sends over its SDP in the
telnyx_rtc.mediaevents. - Upon receipt of this message, the SDK invokes
setRemoteDescriptionto set the SDP of the remote peer.
- Finally, two peers of the
RTCPeerConnectionare fully identified. connectionState changes from connecting to connected.
- Media will flow over UDP.