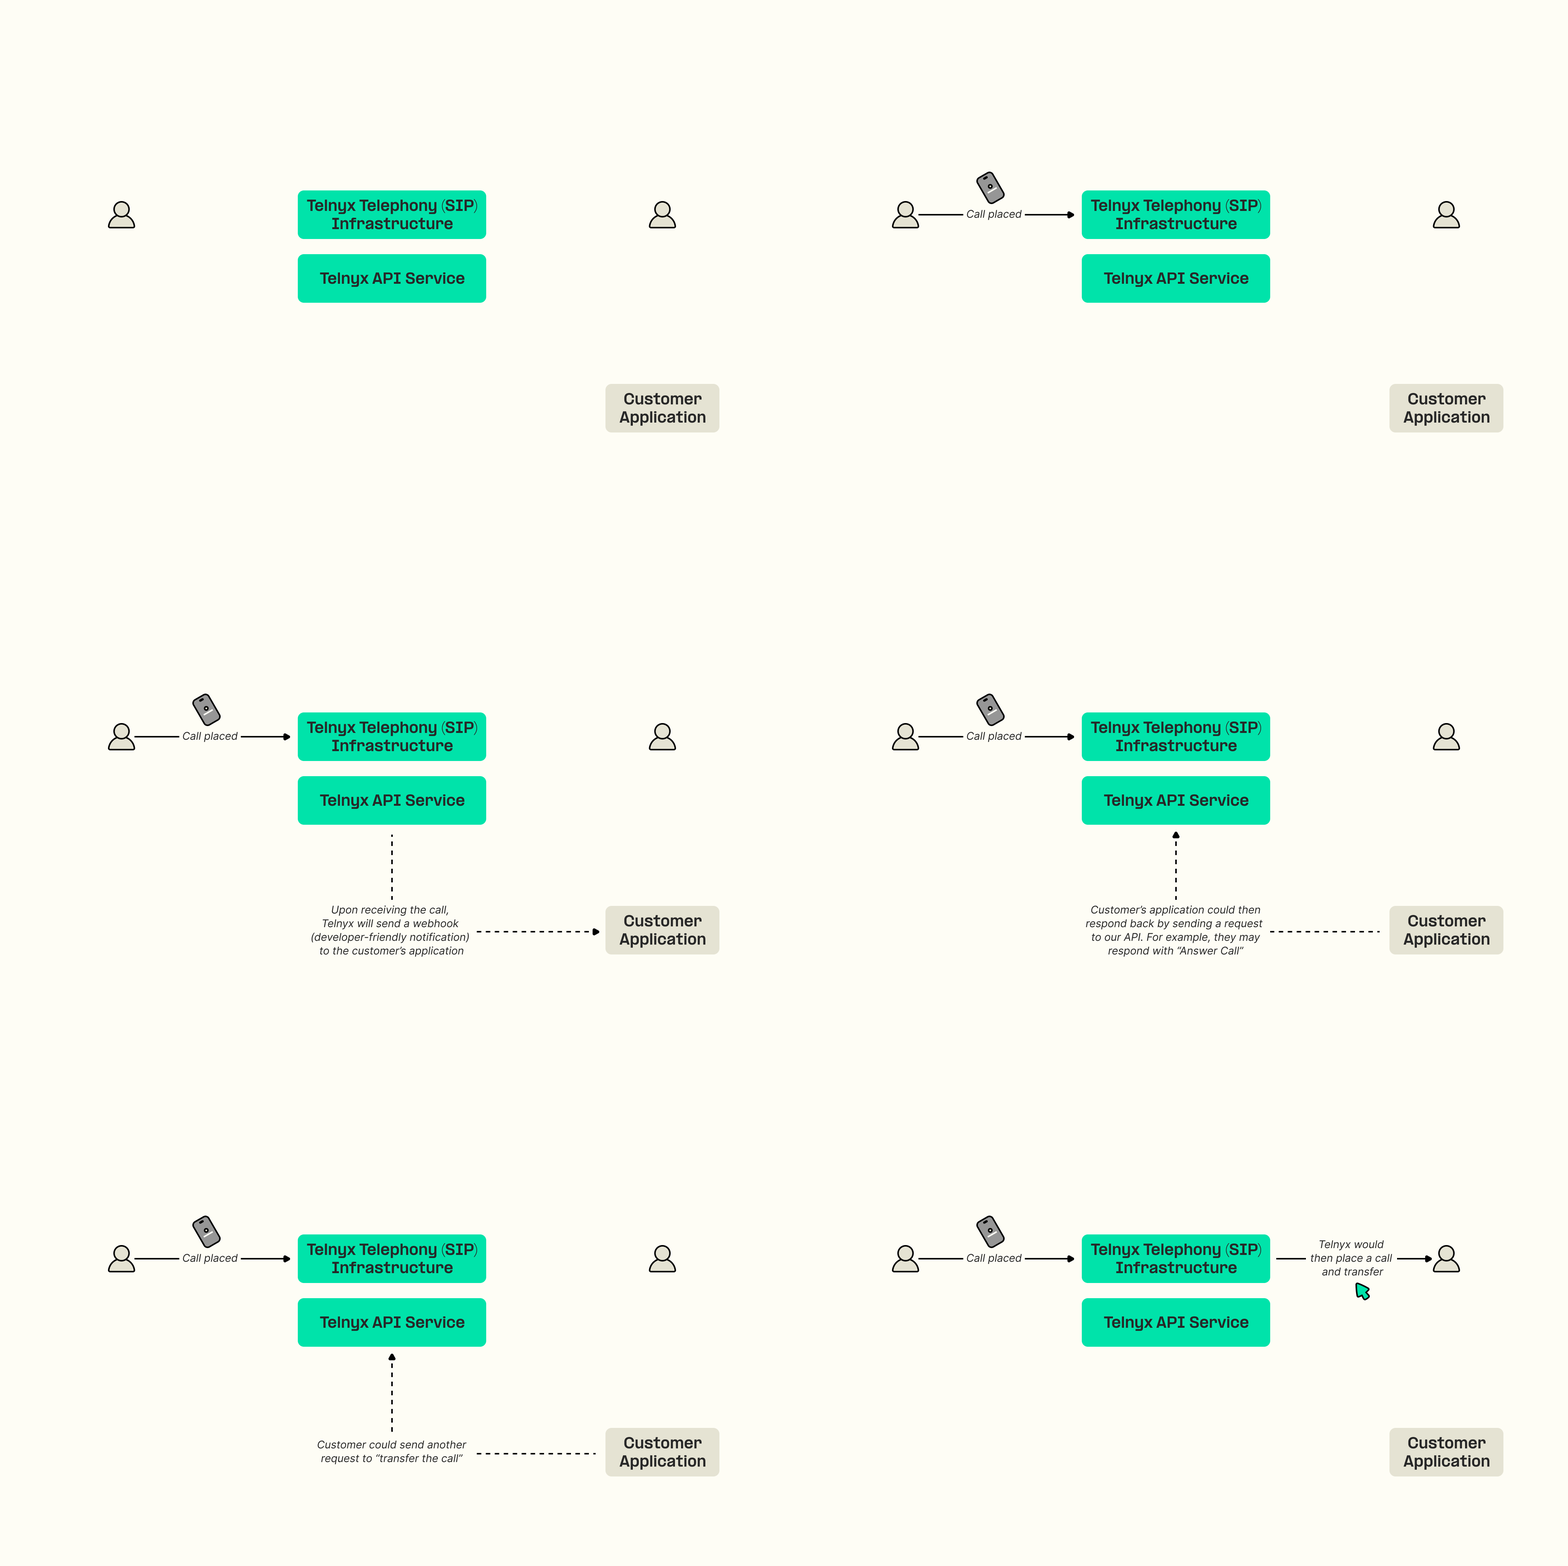
Getting Started with Telnyx Programmable Voice API
Introduction
The Telnyx Programmable Voice API enables you to integrate voice calling capabilities into your applications. It provides a powerful platform for managing both inbound and outbound calls through a range of commands and configurations, offering flexibility for various use cases.
Prerequisites
- A Telnyx account: Sign up if you don't already have an account.
- API key: Obtain your API Key from the Telnyx Mission Control Portal.
- Development setup: Prepare your environment for API integration.
Core Concepts
- Voice APl Applications: They act as the backbone for handling incoming and outgoing calls, providing a flexible framework for various use cases such as call routing and caller verification.
- Outbound Voice Profile: This component is key to configuring outbound calls, including setting up billing and controlling traffic destinations. It's crucial for implementing features like automated outbound calling, call forwarding, and international call management and must be associated with the voice API application. Further details are available in the Outbound Voice Profile section.
- Webhooks: Webhooks in the Telnyx API provide real-time notifications about various call events to your server. They are integral for monitoring call progress, handling call outcomes, and integrating with external systems for actions like database logging or triggering additional workflows. Learn more about implementing webhooks in the Webhooks guide.
The example below demonstrates how to use the Telnyx API to initiate an outbound call.

Requirements
- Telnyx Account and API Key
- Caller and Receiver Numbers in E.164 format (e.g., +1234567890)
- Outbound Voice Profile configured in your Telnyx account
- Voice API Application with a webhook URL set up
Hello World Example
Using a simple HTTP POST request, you can dial a number from a given connection (Voice API application).
curl --location 'https://api.telnyx.com/v2/calls' \
--header 'Accept: application/json' \
--header 'Content-Type: application/json' \
--header 'Authorization: Bearer YourAPIKey' \
--data '{
   "to":"+13125790015",
   "from":"+13125790968",
   "connection_id":"234423"
}'
Next Steps
Navigate to Resources and Tutorials in the left-hand nav bar.
- Resources: This section offers a variety of resources to deepen your understanding of the Programmable Voice API. It includes documentation, code examples, and troubleshooting guides to enhance your skills in voice API implementation.
- Tutorials: Dive deeper into the Voice API to explore its comprehensive features. This section provides detailed information on advanced API functionalities, enabling more complex voice application development and integration.
Additional Resources
Link: Telnyx API documentation Article: What is voice API? Unlocking advanced calling Article: Telnyx Launches Programmable Voice API: Call Control Article: Telnyx vs. Twilio for Programmable Voice
Feedback
Have questions or need help troubleshooting? Our support team is here to assist you. Join our Slack community to connect with other developers and the Telnyx team.