> ## Documentation Index
> Fetch the complete documentation index at: https://developers.telnyx.com/llms.txt
> Use this file to discover all available pages before exploring further.
# Google VXC Setup
> Step-by-step guide to provisioning a Telnyx Virtual Cross Connect (VXC) to Google Cloud Interconnect, including VLAN attachment and BGP setup.
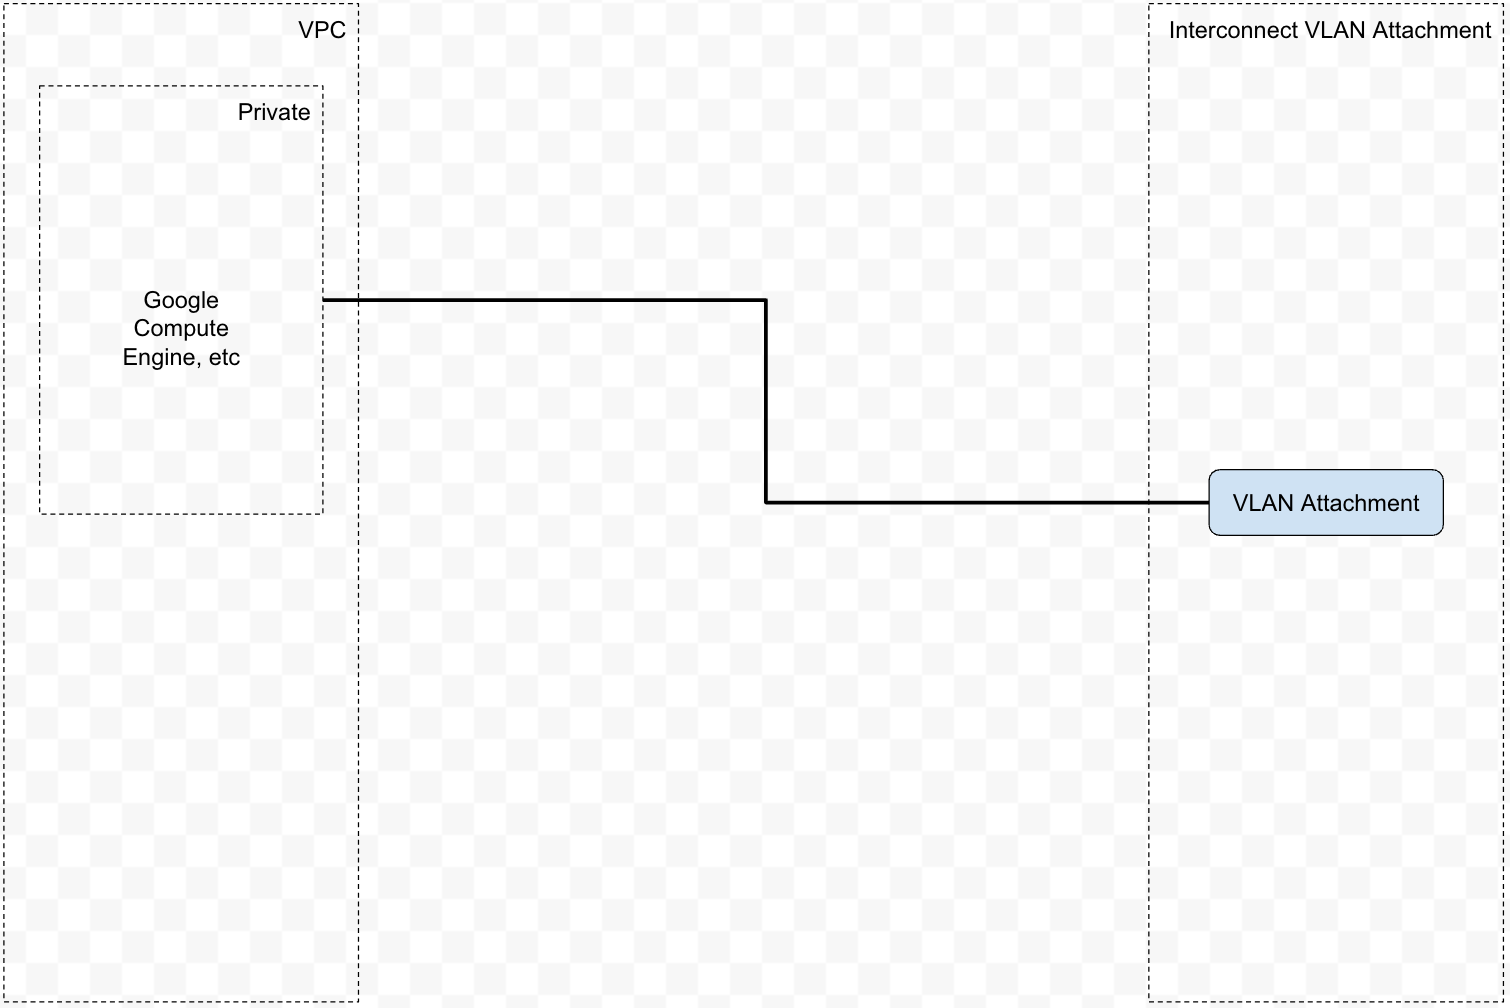
## Architecture
We will construct the following architecture on Google Cloud.
 ## Prerequisites
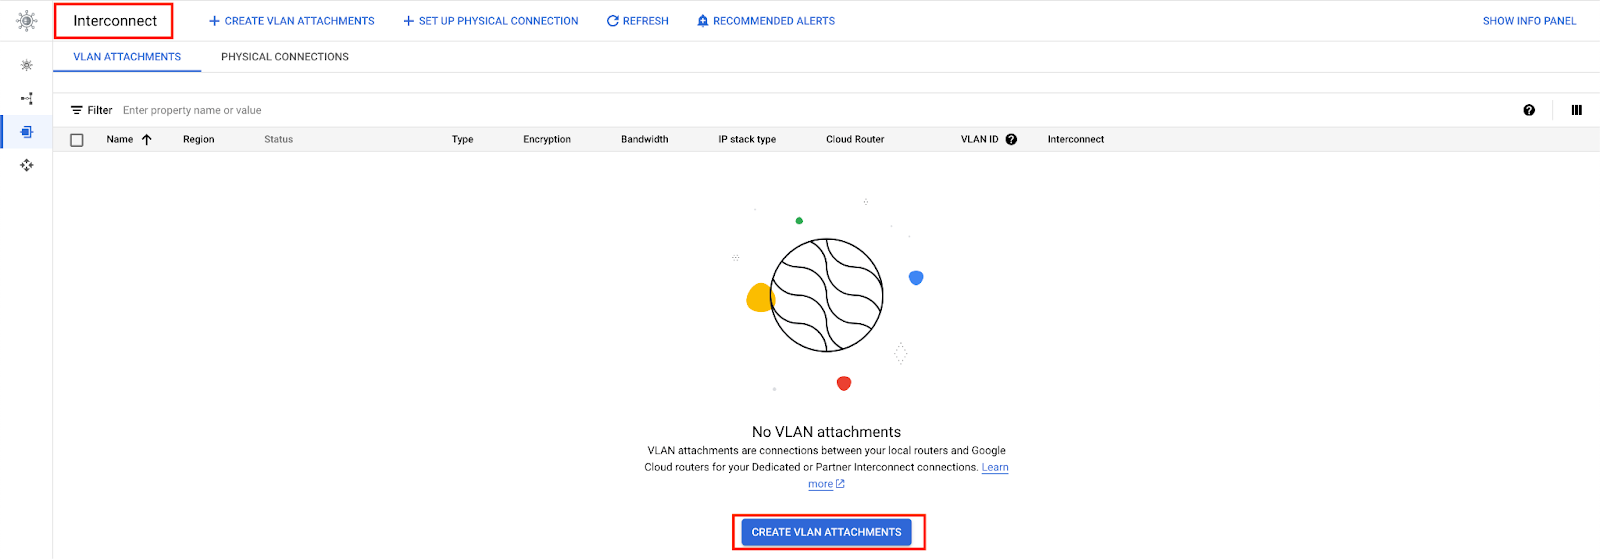
### VLAN Attachment
This step is performed on Google
## Prerequisites
### VLAN Attachment
This step is performed on Google
 Parameters:
* "Partner Interconnect Connection"
* "Set up unencrypted Interconnect"
Parameters:
* "Partner Interconnect Connection"
* "Set up unencrypted Interconnect"

 * "Network": Choose the one you are connecting from
* "Region": Choose the one that there is a Telnyx PoP in proximity
* "MTU": 8896
* "Network": Choose the one you are connecting from
* "Region": Choose the one that there is a Telnyx PoP in proximity
* "MTU": 8896
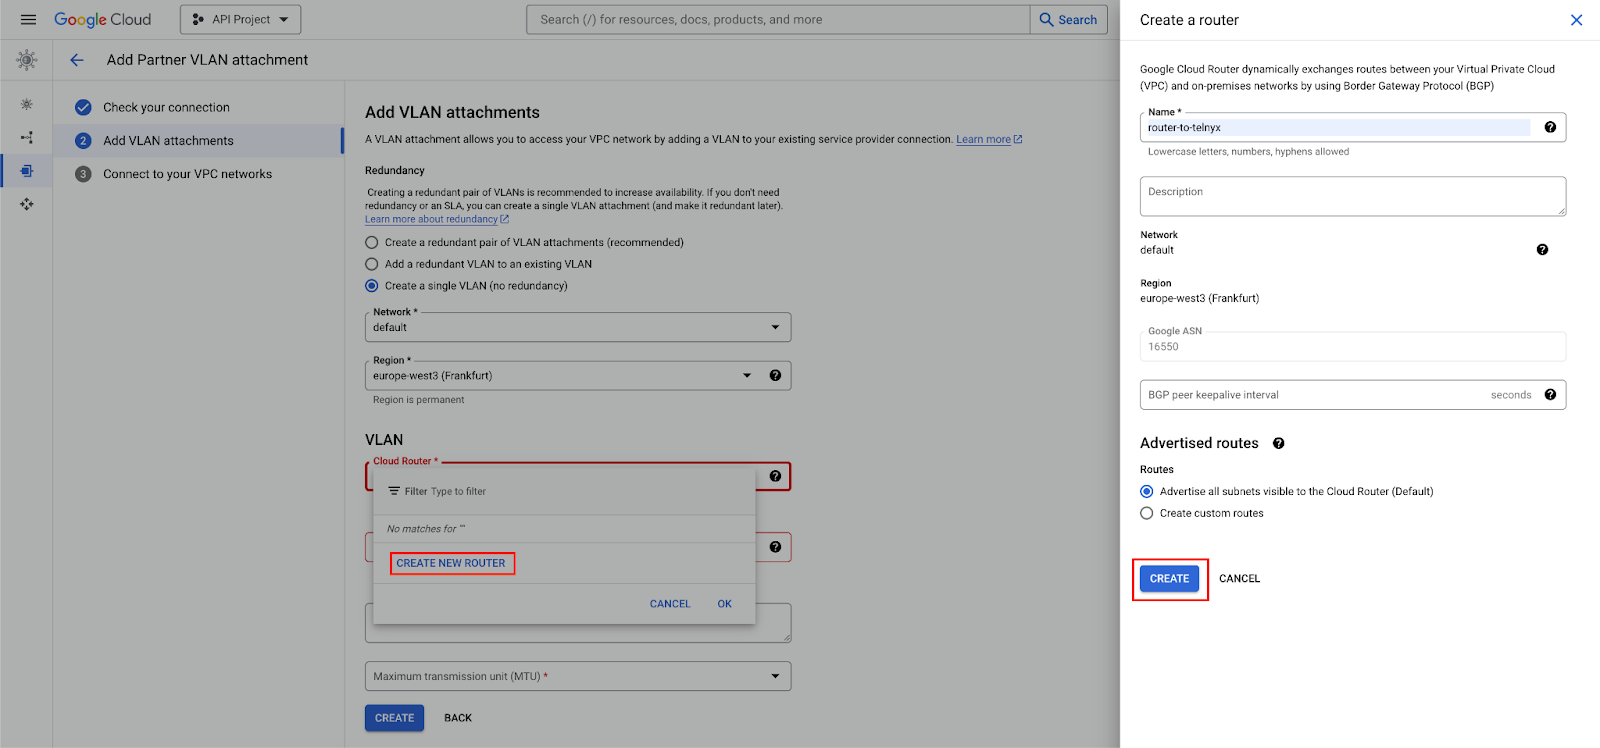
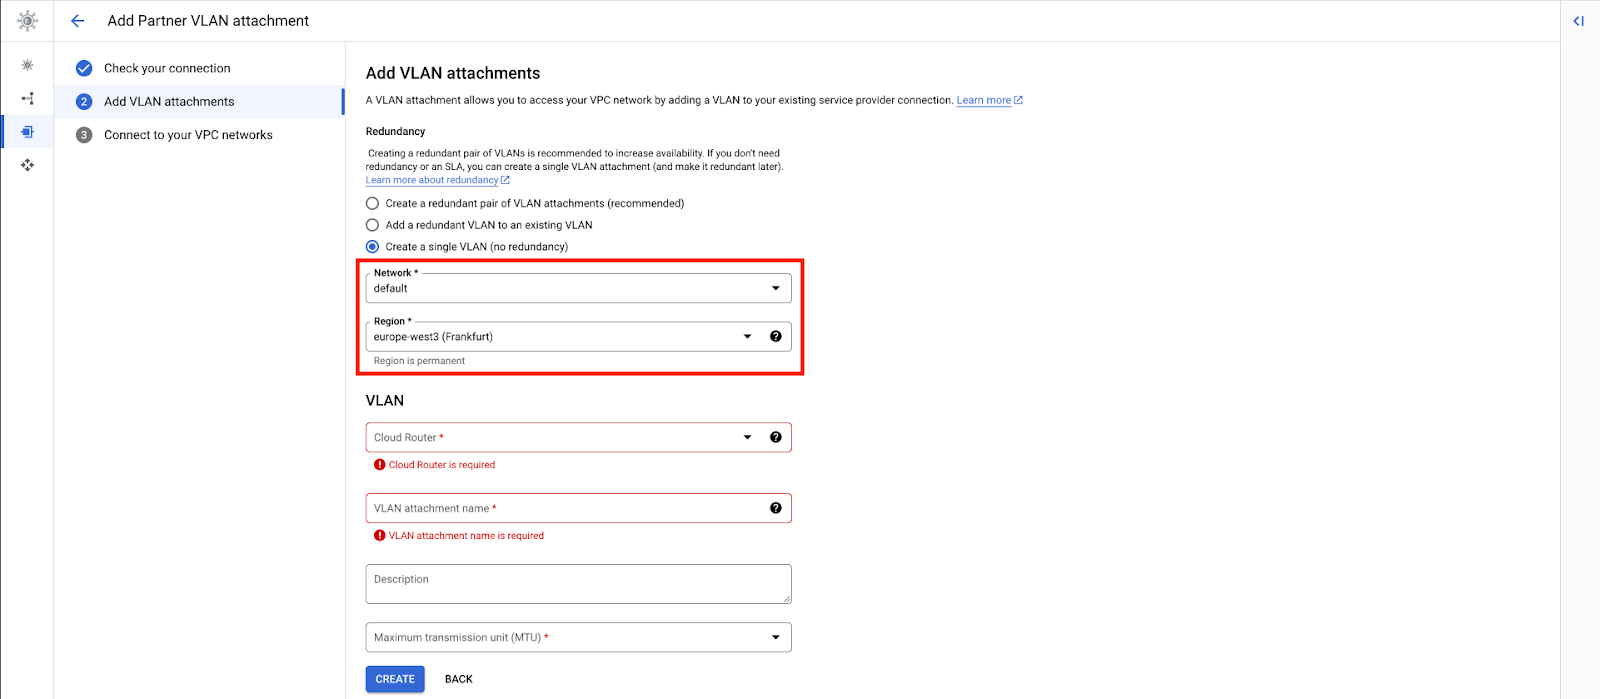 * Create a router or choose an existing one.

 ### Telnyx Network
This step is performed on Telnyx.
If you don't have a network created already, you may follow [this guide](https://developers.telnyx.com/docs/network/networks) to create one.
## Procedure
### Create a VXC resource
This step is performed on Telnyx.
```
POST /v2/virtual_cross_connects HTTP/1.1
Host: api.telnyx.com
Content-Type: application/json
Authorization: Bearer XXX
Content-Length: 286
{
"network_id": "a843547c-3f08-4a7e-8a4b-270c3ffb13f2",
"name": "xd-frankfurt-vxc-gcp",
"cloud_provider": "gce",
"cloud_provider_region": "europe-west3",
"primary_cloud_account_id": "xxxx/europe-west3/2",
"bgp_asn": 16550,
"bandwidth_mbps": 50
}
```
### Activate Connection
This step is performed on Google.
### Telnyx Network
This step is performed on Telnyx.
If you don't have a network created already, you may follow [this guide](https://developers.telnyx.com/docs/network/networks) to create one.
## Procedure
### Create a VXC resource
This step is performed on Telnyx.
```
POST /v2/virtual_cross_connects HTTP/1.1
Host: api.telnyx.com
Content-Type: application/json
Authorization: Bearer XXX
Content-Length: 286
{
"network_id": "a843547c-3f08-4a7e-8a4b-270c3ffb13f2",
"name": "xd-frankfurt-vxc-gcp",
"cloud_provider": "gce",
"cloud_provider_region": "europe-west3",
"primary_cloud_account_id": "xxxx/europe-west3/2",
"bgp_asn": 16550,
"bandwidth_mbps": 50
}
```
### Activate Connection
This step is performed on Google.

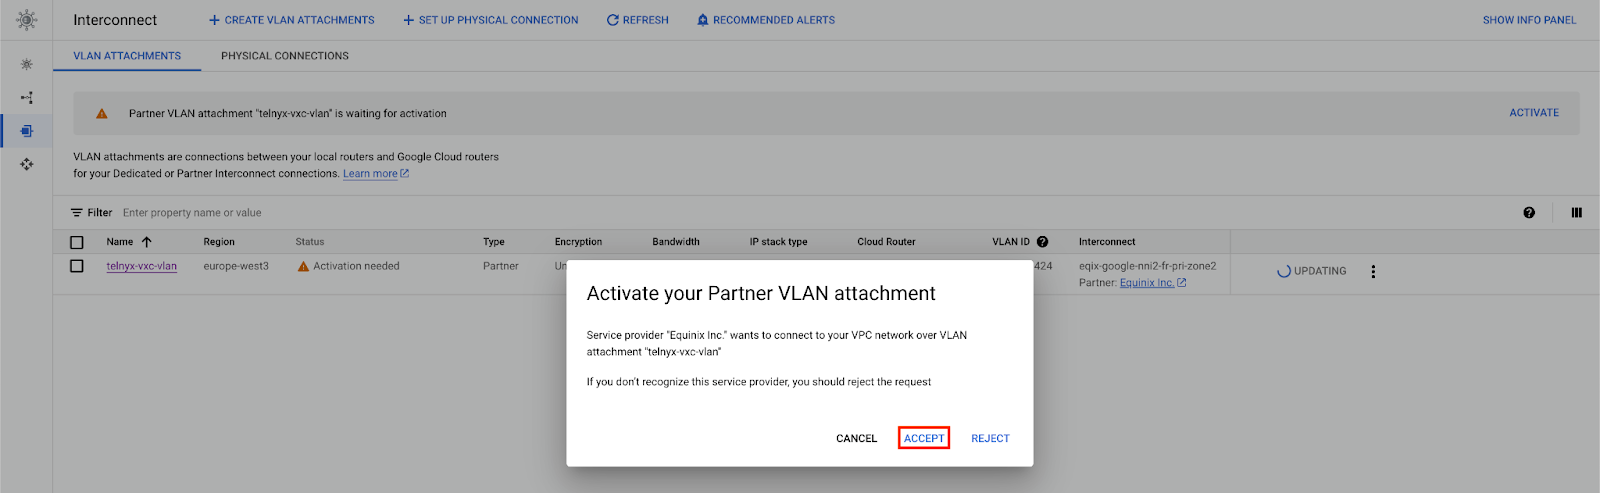
 “Peer ASN”: 63440 (Telnyx)
“MD5 Authentication”: `primary_bgp_key`
“Peer ASN”: 63440 (Telnyx)
“MD5 Authentication”: `primary_bgp_key`
 ### Update BGP Peering
This step is performed on Telnyx.
At this point, the connection is “Down”. We need to take the Google assigned GBP IPs and set them on the VXC.
### Update BGP Peering
This step is performed on Telnyx.
At this point, the connection is “Down”. We need to take the Google assigned GBP IPs and set them on the VXC.
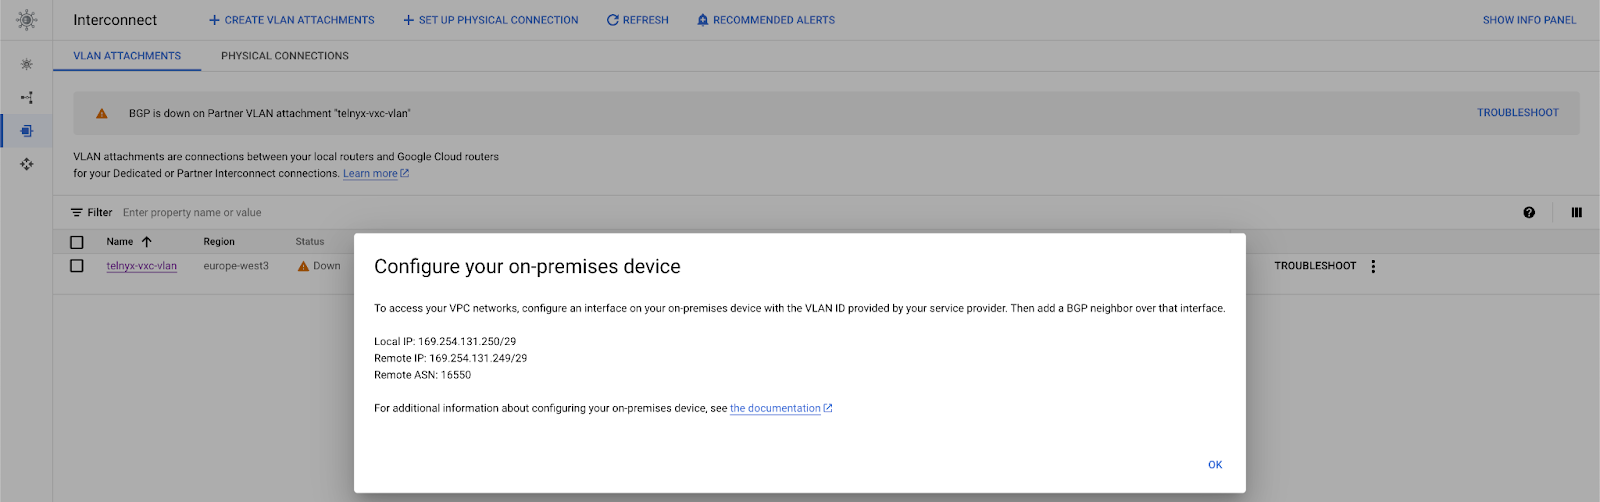
 Use the PATCH method.
* `primary_cloud_ip` — “Cloud Router BGP IP” or “Remote IP” in the “Troubleshooting” page
* `primary_telnyx_ip` — “BGP peer IP” or “Local IP”in the “Troubleshooting” page
```
PATCH /v2/virtual_cross_connects/:vxc_uuid HTTP/1.1
Host: api.telnyx.com
Content-Type: application/json
Authorization: Bearer XXX
Content-Length: 31
{
"primary_enabled": true,
"primary_cloud_ip": "169.254.131.250/29",
"primary_telnyx_ip": "169.254.131.249/29"
}
```
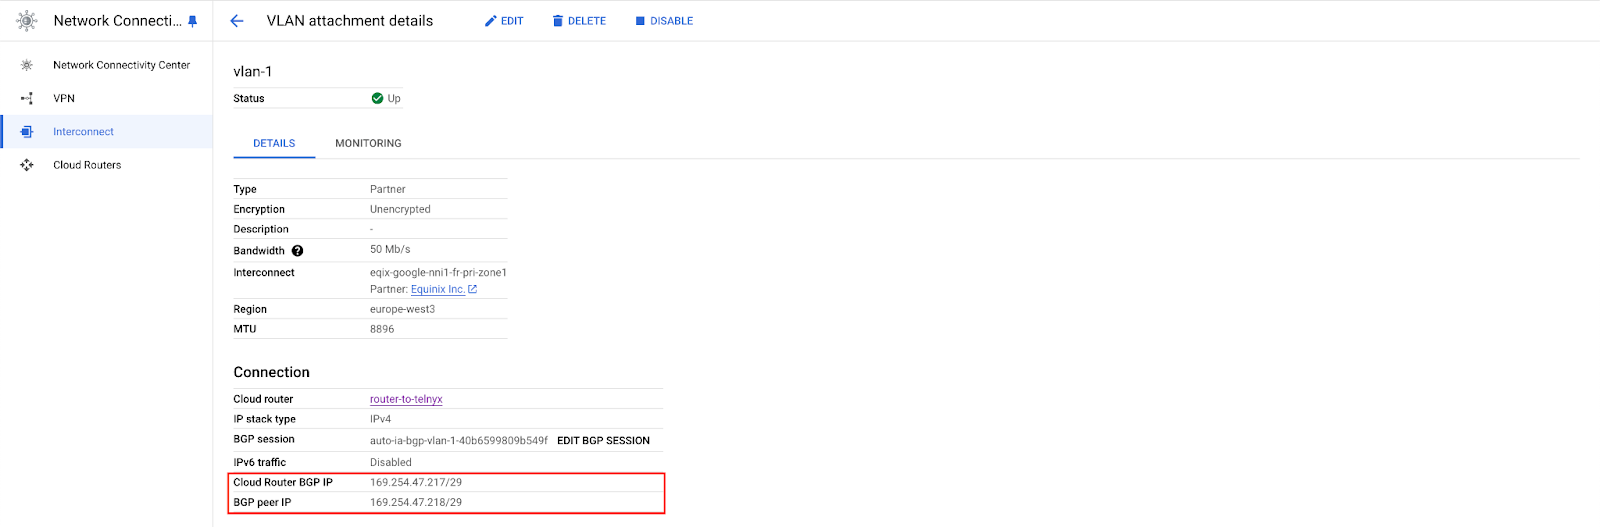
At this point, on Google, it will show the “Status” as “Up”
Use the PATCH method.
* `primary_cloud_ip` — “Cloud Router BGP IP” or “Remote IP” in the “Troubleshooting” page
* `primary_telnyx_ip` — “BGP peer IP” or “Local IP”in the “Troubleshooting” page
```
PATCH /v2/virtual_cross_connects/:vxc_uuid HTTP/1.1
Host: api.telnyx.com
Content-Type: application/json
Authorization: Bearer XXX
Content-Length: 31
{
"primary_enabled": true,
"primary_cloud_ip": "169.254.131.250/29",
"primary_telnyx_ip": "169.254.131.249/29"
}
```
At this point, on Google, it will show the “Status” as “Up”
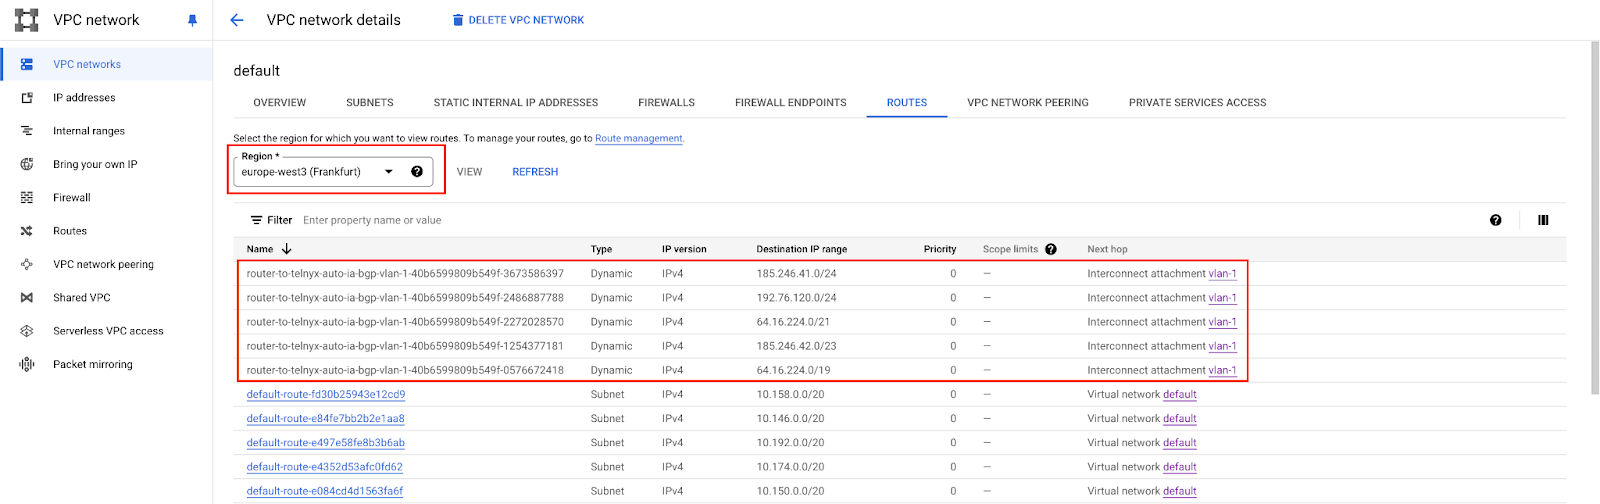
 ### Validate Connection
This step is performed on Google.
* Under VPC networks, you should see the routes advertised over the cloud router created.
* You can also ssh in one of your instances in the same network and perform a traceroute.
### Validate Connection
This step is performed on Google.
* Under VPC networks, you should see the routes advertised over the cloud router created.
* You can also ssh in one of your instances in the same network and perform a traceroute.
 ```bash theme={null}
xxx@instance-20240503-154050:~$ traceroute sip.telnyx.com
traceroute to sip.telnyx.com (192.76.120.10), 30 hops max, 60 byte packets
1 * * *
2 100.65.72.1 (100.65.72.1) 4.393 ms 4.367 ms 4.349 ms
3 64.16.254.51 (64.16.254.51) 114.732 ms 114.715 ms 114.698 ms
4 64.16.247.105 (64.16.247.105) 114.903 ms 114.877 ms 114.860 ms
5 192.76.120.160 (192.76.120.160) 114.843 ms 114.825 ms 114.807 ms
6 sip.telnyx.com (192.76.120.10) 114.857 ms 114.064 ms 114.038 ms
```
```bash theme={null}
xxx@instance-20240503-154050:~$ traceroute sip.telnyx.com
traceroute to sip.telnyx.com (192.76.120.10), 30 hops max, 60 byte packets
1 * * *
2 100.65.72.1 (100.65.72.1) 4.393 ms 4.367 ms 4.349 ms
3 64.16.254.51 (64.16.254.51) 114.732 ms 114.715 ms 114.698 ms
4 64.16.247.105 (64.16.247.105) 114.903 ms 114.877 ms 114.860 ms
5 192.76.120.160 (192.76.120.160) 114.843 ms 114.825 ms 114.807 ms
6 sip.telnyx.com (192.76.120.10) 114.857 ms 114.064 ms 114.038 ms
```