> ## Documentation Index
> Fetch the complete documentation index at: https://developers.telnyx.com/llms.txt
> Use this file to discover all available pages before exploring further.
# AWS VXC Setup
> Step-by-step guide to provisioning a Telnyx Virtual Cross Connect (VXC) to AWS Direct Connect, including VPC setup and BGP configuration.
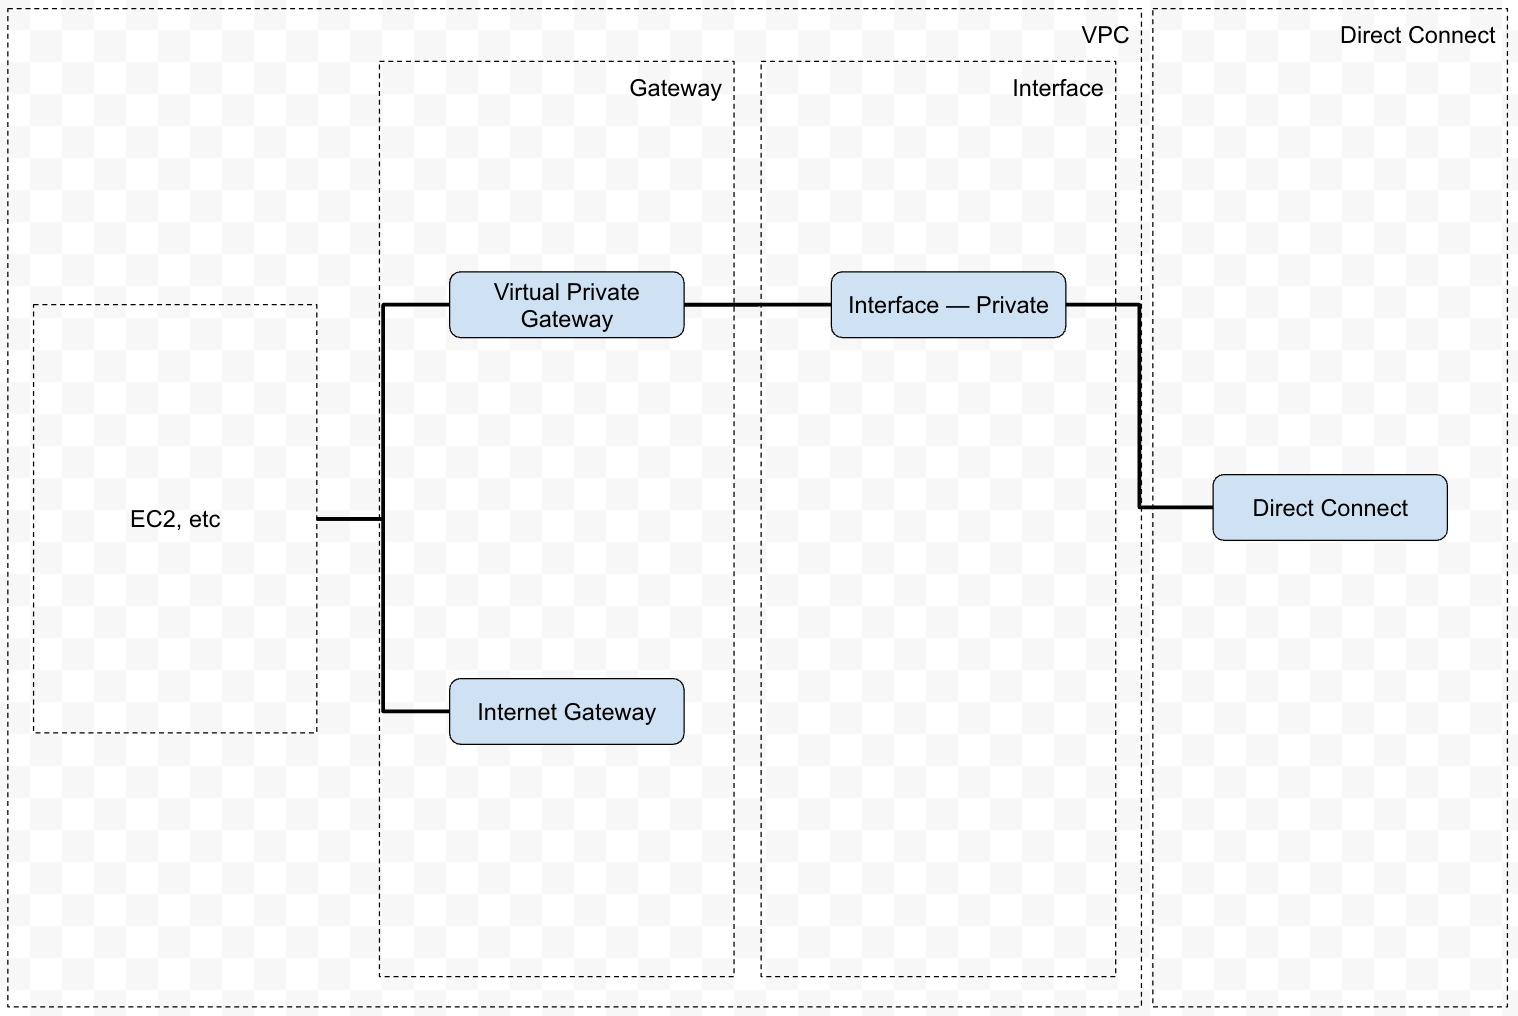
## Architecture
We will construct the following architecture:
 ## Prerequisites
### VPC
This step is performed on AWS.
## Prerequisites
### VPC
This step is performed on AWS.
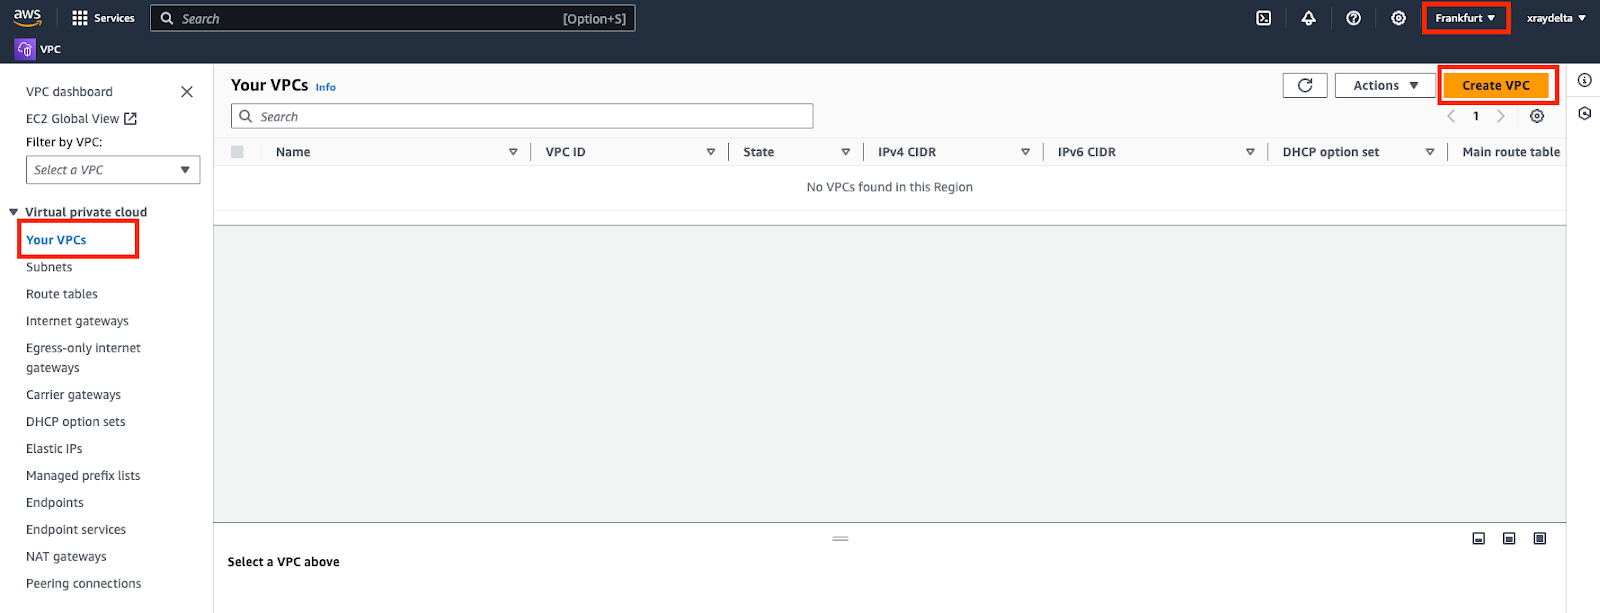 ⚠️ Note: Ensure the intended region is selected. In this example, we are using eu-central-1 as the region.
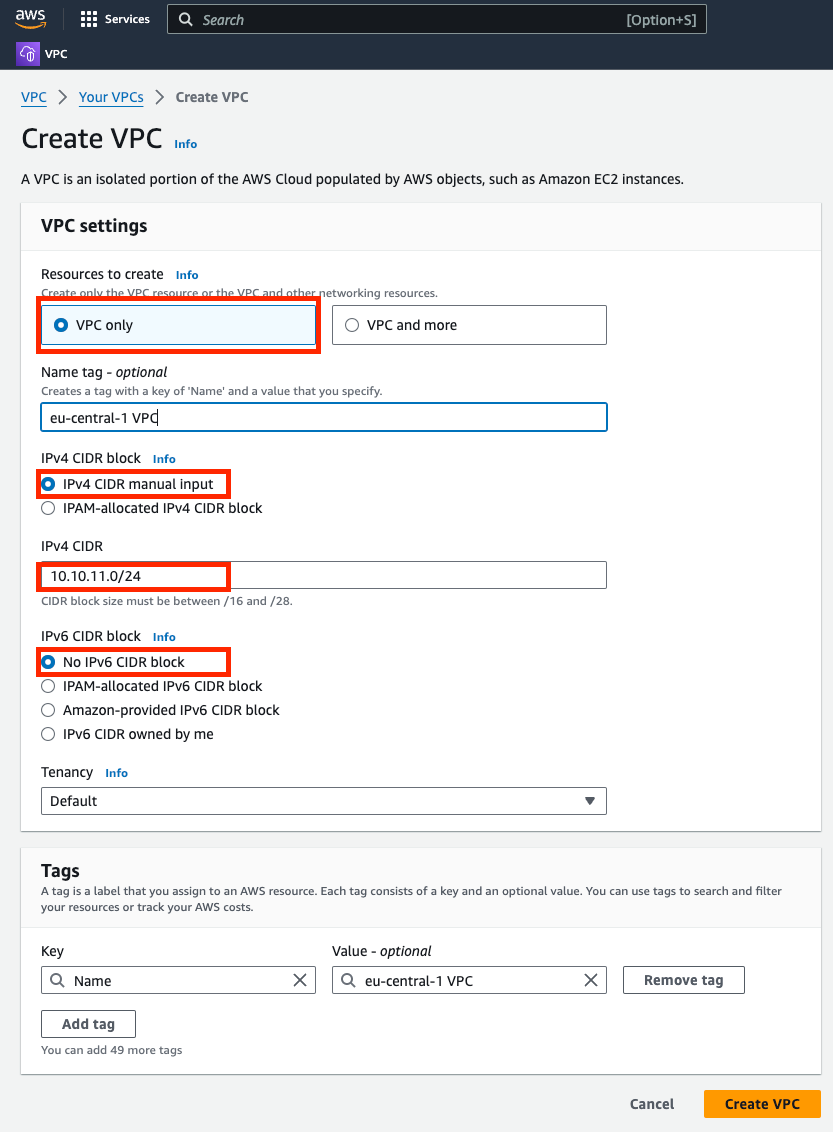 | Parameter | Value |
| ------------------- | --------------------------- |
| Resources to create | VPC only |
| IPv4 CIDR block | IPv4 CIDR manual input |
| IPv4 CIDR | RFC1918, e.g. 10.10.11.0/24 |
| IPv6 CIDR block | No IPv6 CIDR block |
| Tenancy | Default |
### Virtual Private Gateway
This step is performed on AWS.
Create and attach a virtual private gateway to the VPC created.
| Parameter | Value |
| ------------------- | --------------------------- |
| Resources to create | VPC only |
| IPv4 CIDR block | IPv4 CIDR manual input |
| IPv4 CIDR | RFC1918, e.g. 10.10.11.0/24 |
| IPv6 CIDR block | No IPv6 CIDR block |
| Tenancy | Default |
### Virtual Private Gateway
This step is performed on AWS.
Create and attach a virtual private gateway to the VPC created.
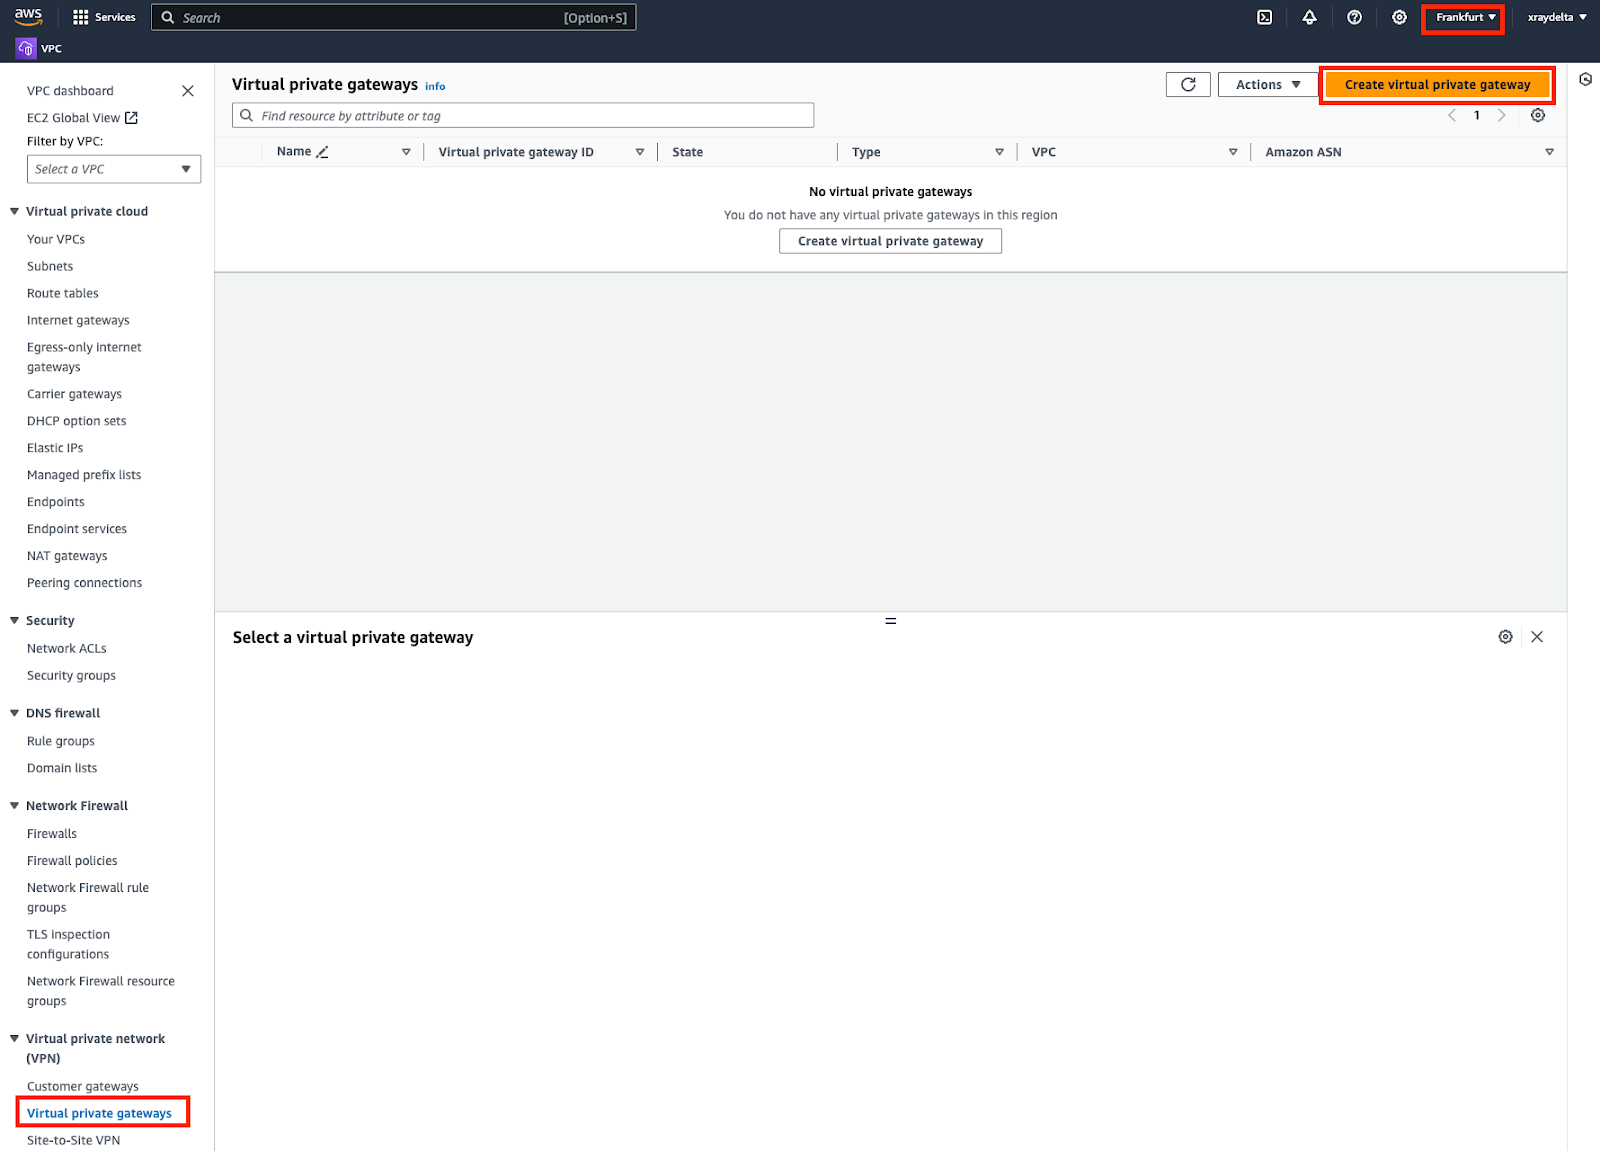 ⚠️ Note: Ensure the intended region is selected. In this example, we are using eu-central-1 as the region.
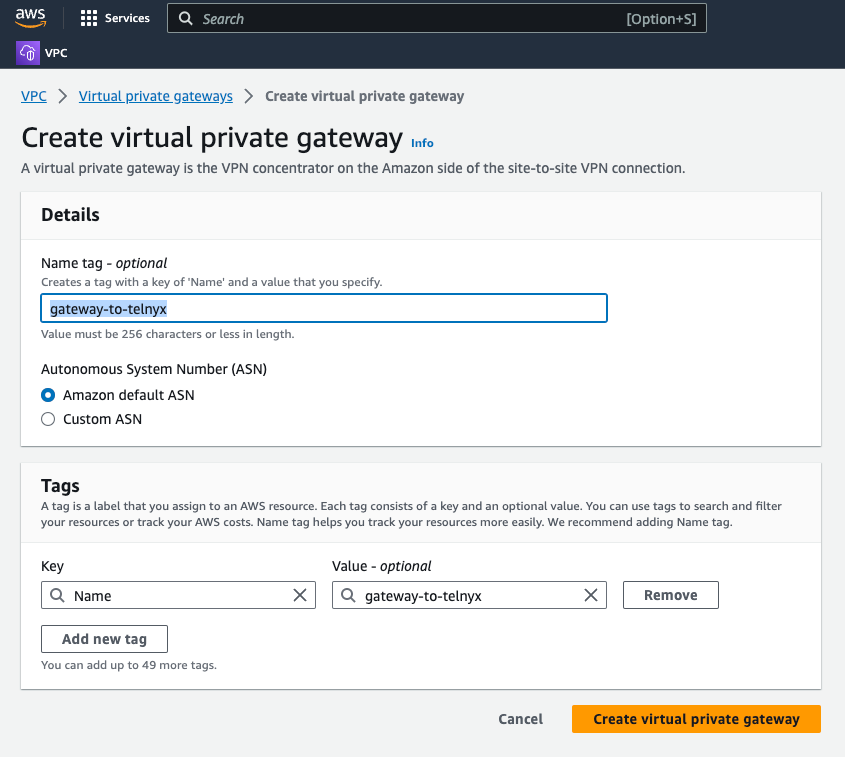 ⚠️ Note: Amazon default ASN value is 64512. You will need this value for VXC creation.
Next, attach the virtual private gateway to the VPC created in the first step.
⚠️ Note: Amazon default ASN value is 64512. You will need this value for VXC creation.
Next, attach the virtual private gateway to the VPC created in the first step.
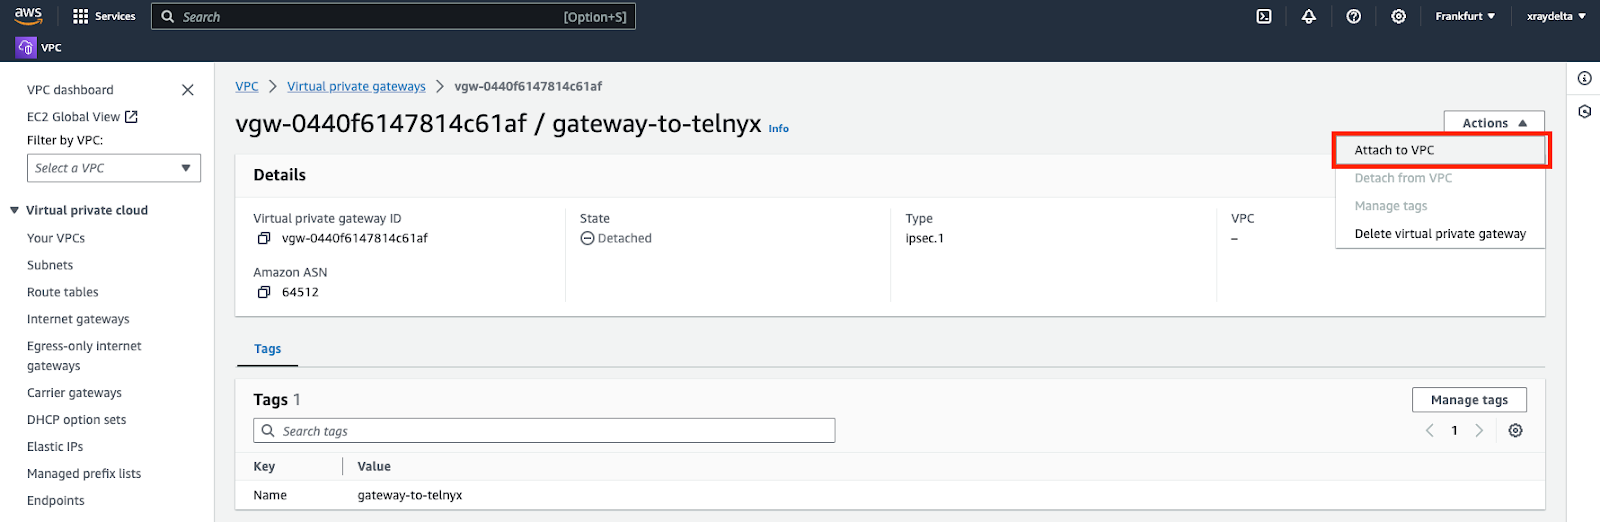
 The state of the virtual private gateway will go from “Detached” to “Attaching” and finally “Attached”.
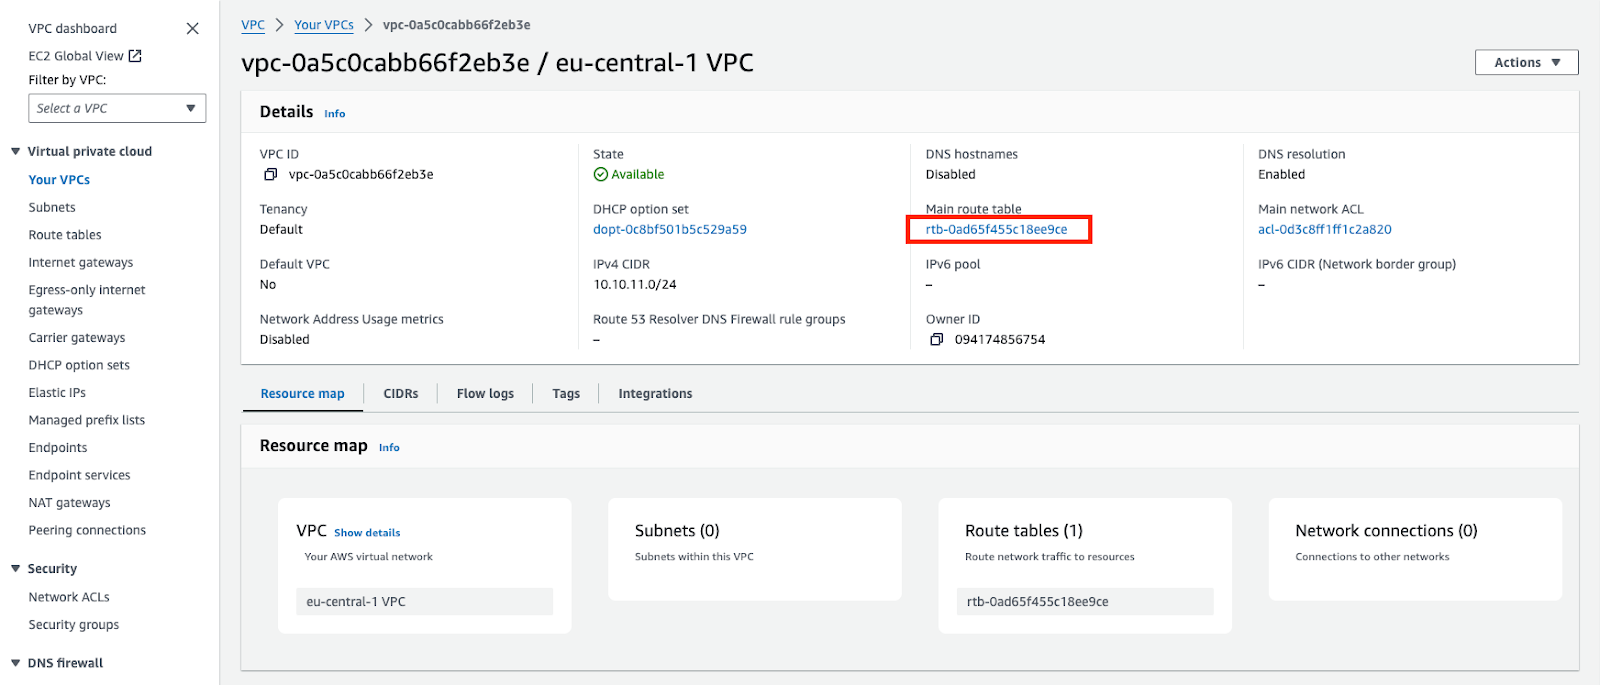
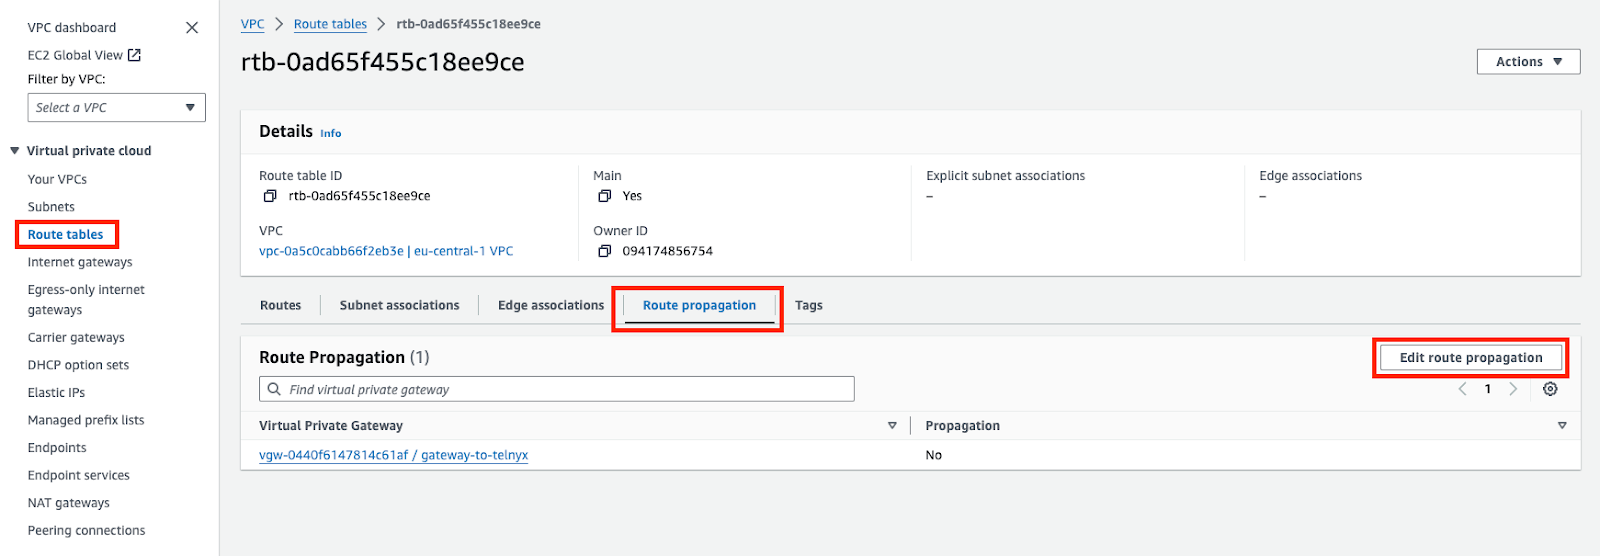
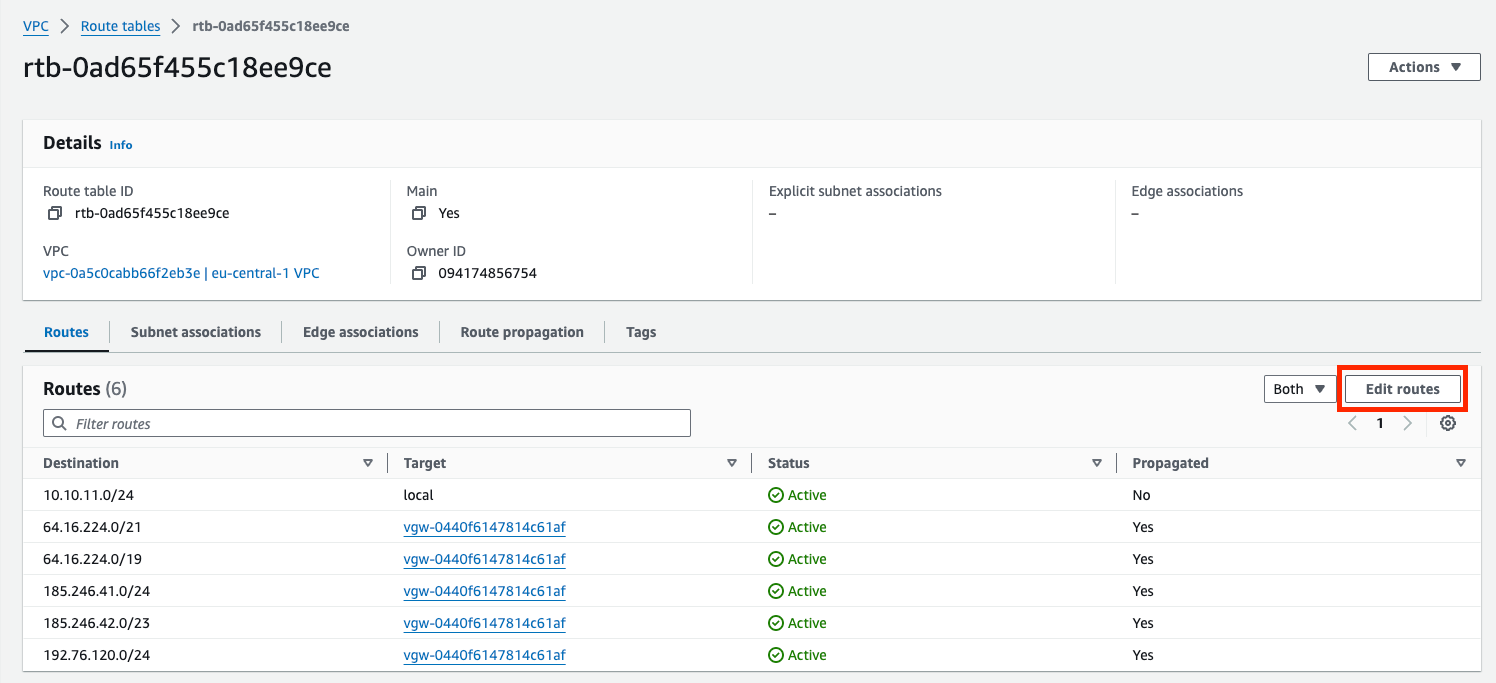
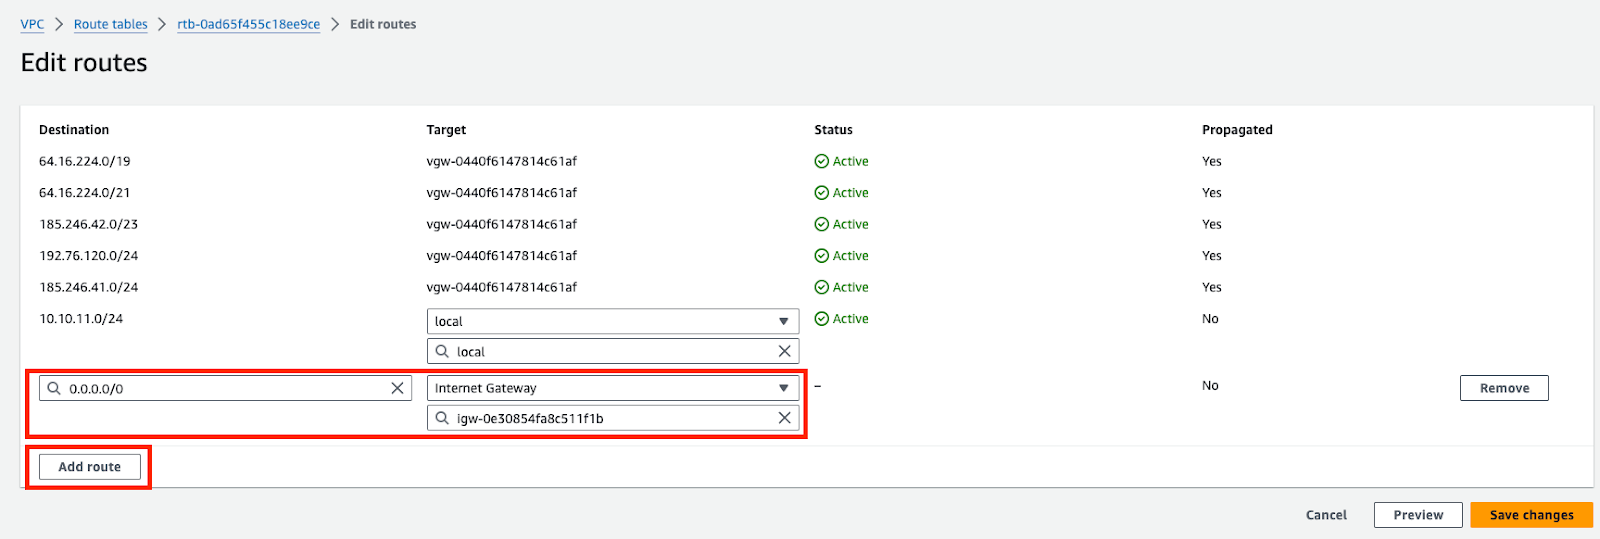
### VPC Route Table
This step is performed on AWS.
The state of the virtual private gateway will go from “Detached” to “Attaching” and finally “Attached”.
### VPC Route Table
This step is performed on AWS.
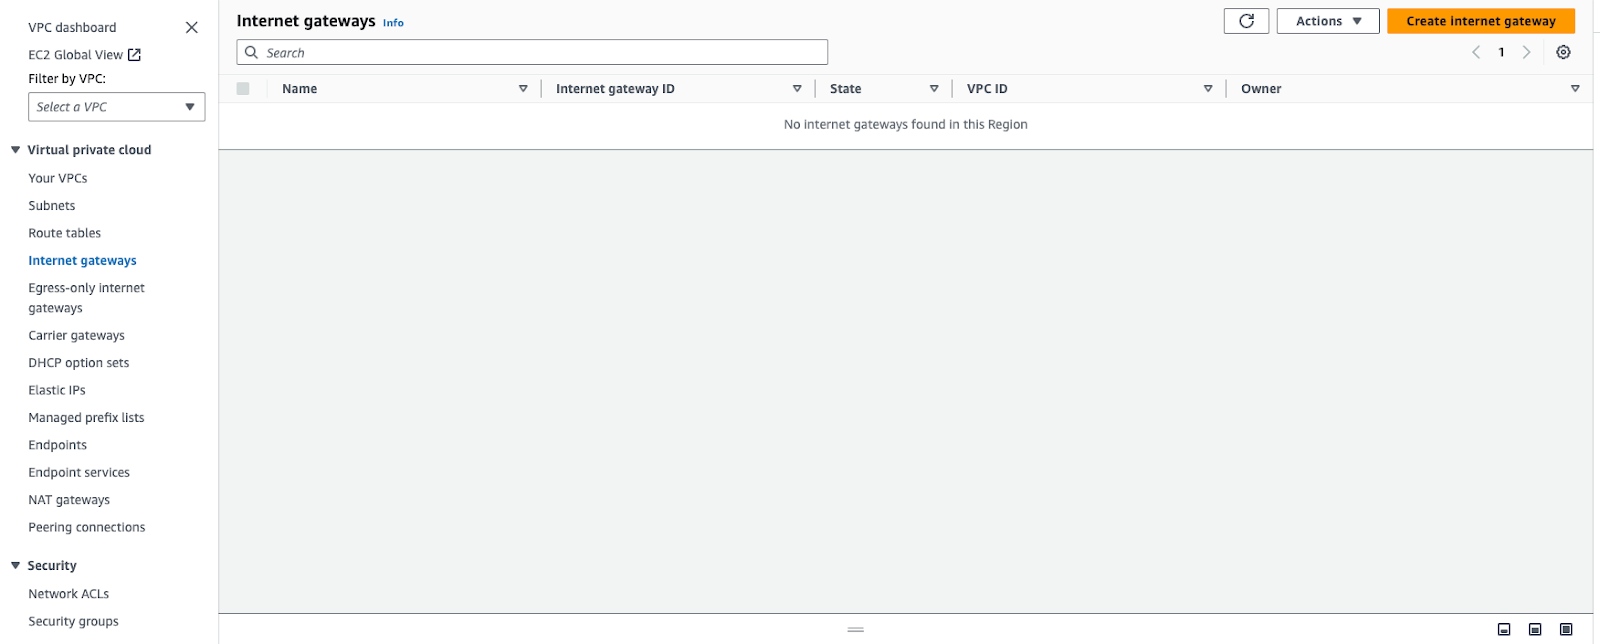
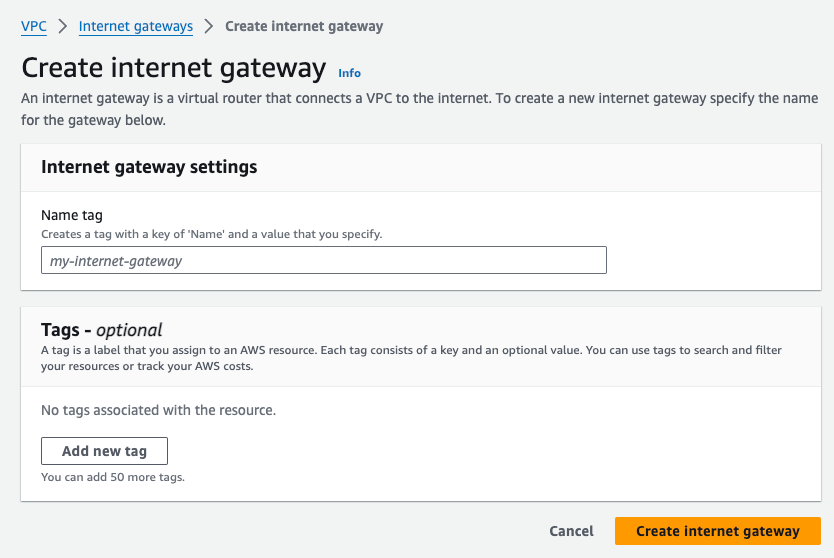
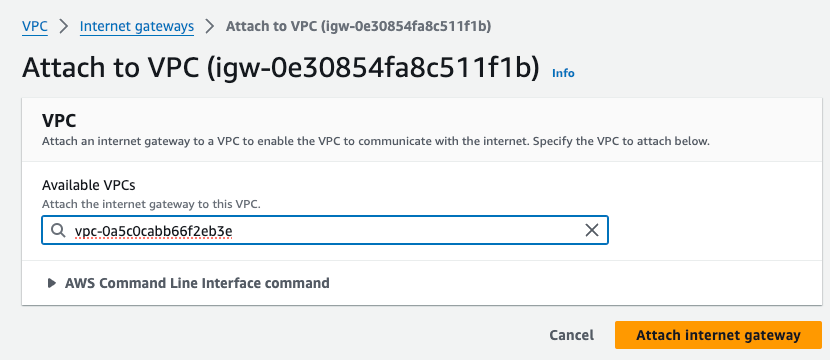
 ### Internet Gateway
This step is performed on AWS.
This is optional. Create and attach an internet gateway to the VPC created.
### Internet Gateway
This step is performed on AWS.
This is optional. Create and attach an internet gateway to the VPC created.

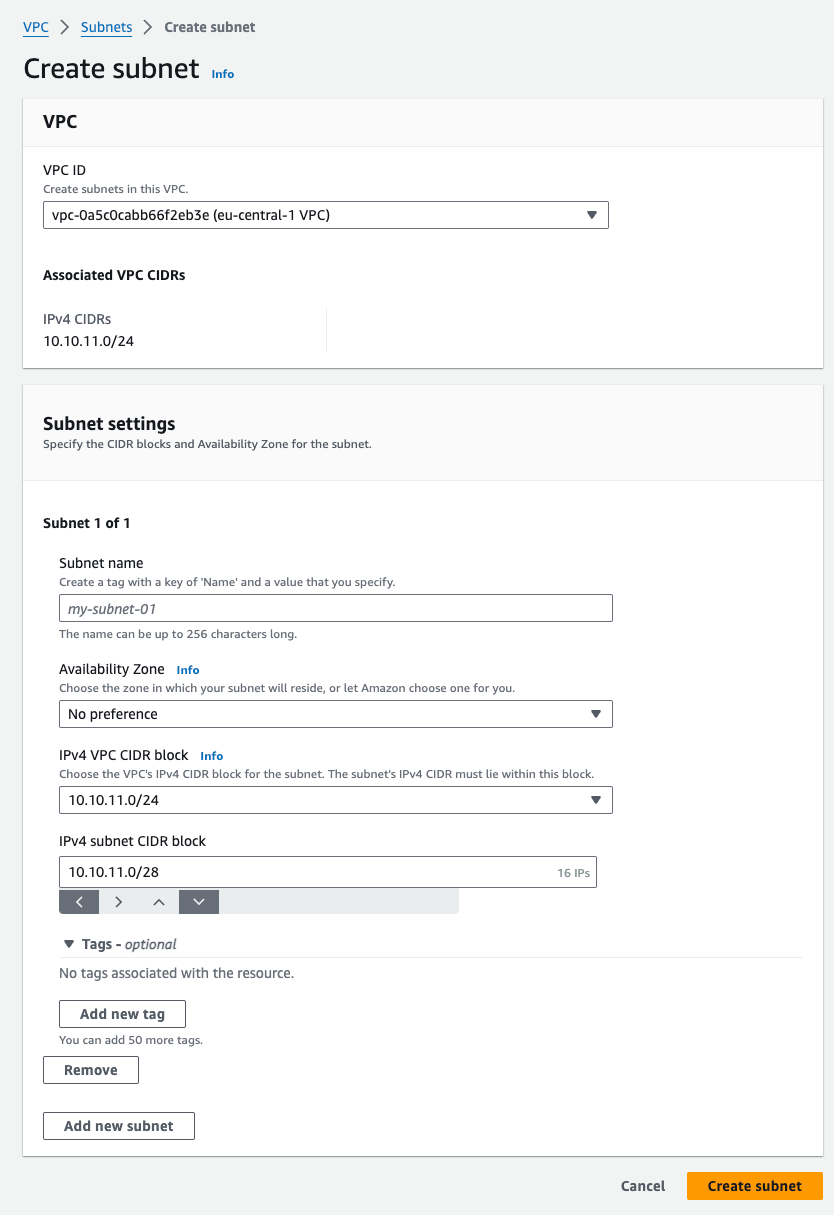
 ### Subnet
This step is performed on AWS.
Assuming you don’t have a subnet setup — Choose the VPC created. Subnet CIDR block should be chosen from within the VPC block.
### Subnet
This step is performed on AWS.
Assuming you don’t have a subnet setup — Choose the VPC created. Subnet CIDR block should be chosen from within the VPC block.
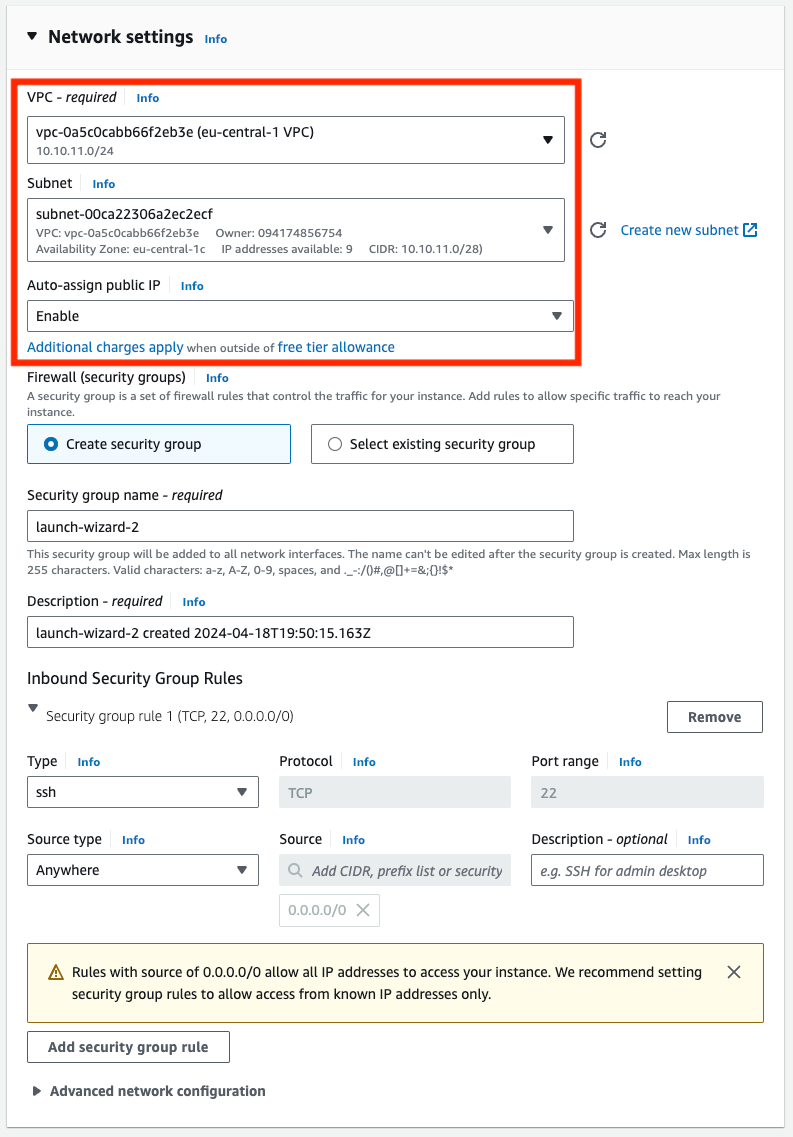
 ### EC2
This step is performed on AWS.
Assuming you don’t have an EC2 instance — spin one up in the same region. Assign the VPC and Subnet created previously. Enable public IP on the instance so you can ssh into it.
### EC2
This step is performed on AWS.
Assuming you don’t have an EC2 instance — spin one up in the same region. Assign the VPC and Subnet created previously. Enable public IP on the instance so you can ssh into it.
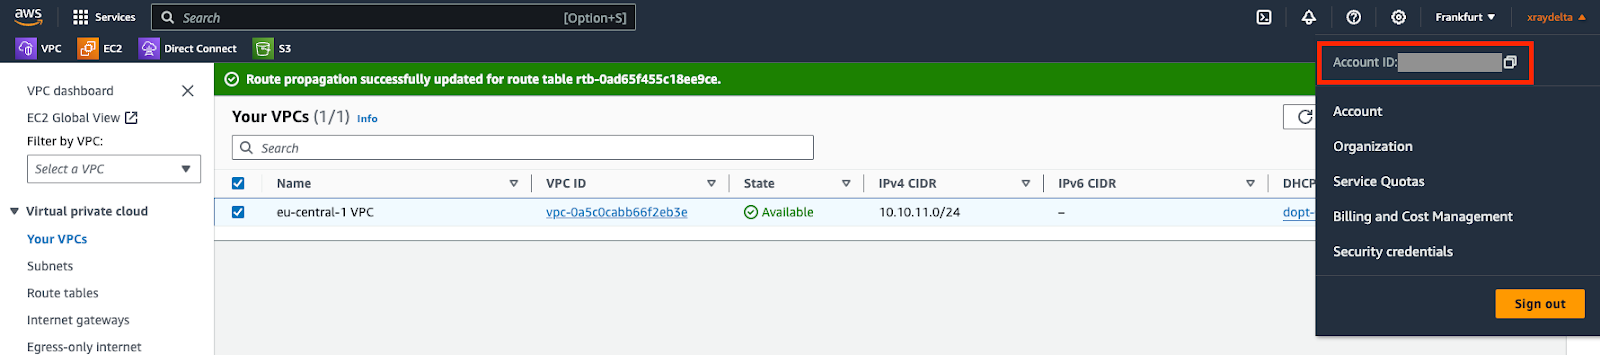
 ### Account ID
This step is performed on AWS.
⚠️ You would need this number when you create the Telnyx VXC later.
### Account ID
This step is performed on AWS.
⚠️ You would need this number when you create the Telnyx VXC later.
 ### Telnyx Network
This step is performed on Telnyx.
If you don't have a network created already, you may follow [this guide](https://developers.telnyx.com/docs/network/networks) to create one.
## Procedure
### Create a VXC resource
This step is performed on Telnyx.
```http request theme={null}
POST /v2/virtual_cross_connects HTTP/1.1
Host: api.telnyx.com
Content-Type: application/json
Authorization: Bearer XXX
Content-Length: 286
{
"network_id": "314ae4ed-04f0-4111-be40-240beb7fdcf0",
"name": "xd-frankfurt-vxc-aws",
"cloud_provider": "aws",
"cloud_provider_region": "eu-central-1",
"primary_cloud_account_id": "YYY",
"bgp_asn": 64512,
"bandwidth_mbps": 50
}
```
| Parameter | Value |
| -------------------------- | ------------------------------------------------------- |
| `cloud_provider` | `aws` |
| `cloud_provider_region` | Match what you selected on the AWS |
| `primary_cloud_account_id` | AWS account ID from the last step |
| `bgp_asn` | AWS’s bgp asn which is 64512 |
| `bandwidth_mbps` | Chosen from available bandwidth of the VXC coverage API |
Take note of the VXC id returned in the response.
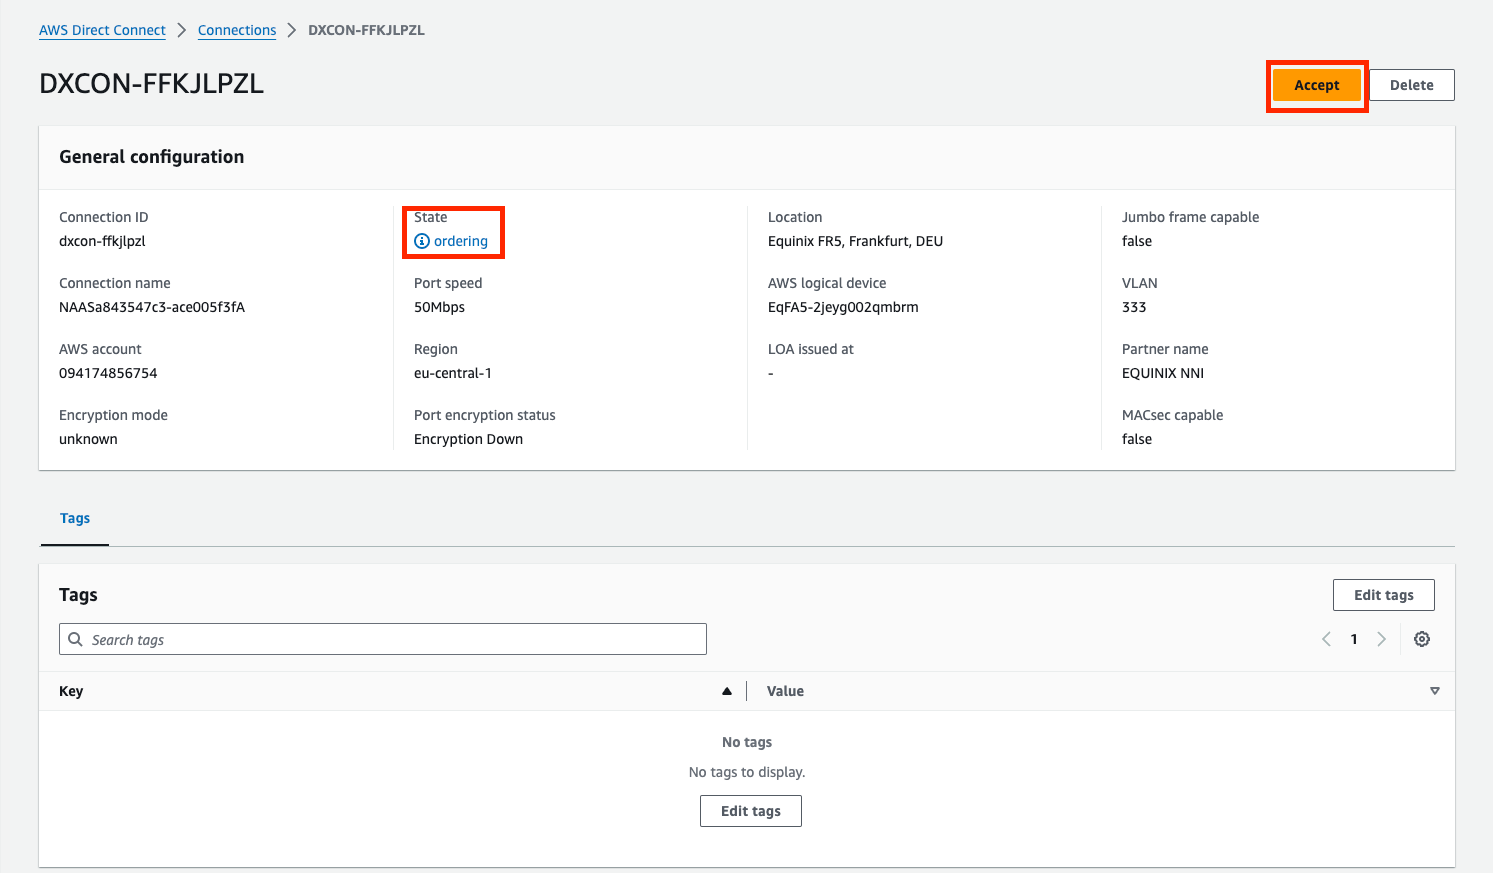
### Direct Connect
This step is performed on AWS.
If you haven’t accepted the connection from your AWS account within 1 hour of the VXC creation, the VXC would be deleted and you will have to start over.
### Telnyx Network
This step is performed on Telnyx.
If you don't have a network created already, you may follow [this guide](https://developers.telnyx.com/docs/network/networks) to create one.
## Procedure
### Create a VXC resource
This step is performed on Telnyx.
```http request theme={null}
POST /v2/virtual_cross_connects HTTP/1.1
Host: api.telnyx.com
Content-Type: application/json
Authorization: Bearer XXX
Content-Length: 286
{
"network_id": "314ae4ed-04f0-4111-be40-240beb7fdcf0",
"name": "xd-frankfurt-vxc-aws",
"cloud_provider": "aws",
"cloud_provider_region": "eu-central-1",
"primary_cloud_account_id": "YYY",
"bgp_asn": 64512,
"bandwidth_mbps": 50
}
```
| Parameter | Value |
| -------------------------- | ------------------------------------------------------- |
| `cloud_provider` | `aws` |
| `cloud_provider_region` | Match what you selected on the AWS |
| `primary_cloud_account_id` | AWS account ID from the last step |
| `bgp_asn` | AWS’s bgp asn which is 64512 |
| `bandwidth_mbps` | Chosen from available bandwidth of the VXC coverage API |
Take note of the VXC id returned in the response.
### Direct Connect
This step is performed on AWS.
If you haven’t accepted the connection from your AWS account within 1 hour of the VXC creation, the VXC would be deleted and you will have to start over.
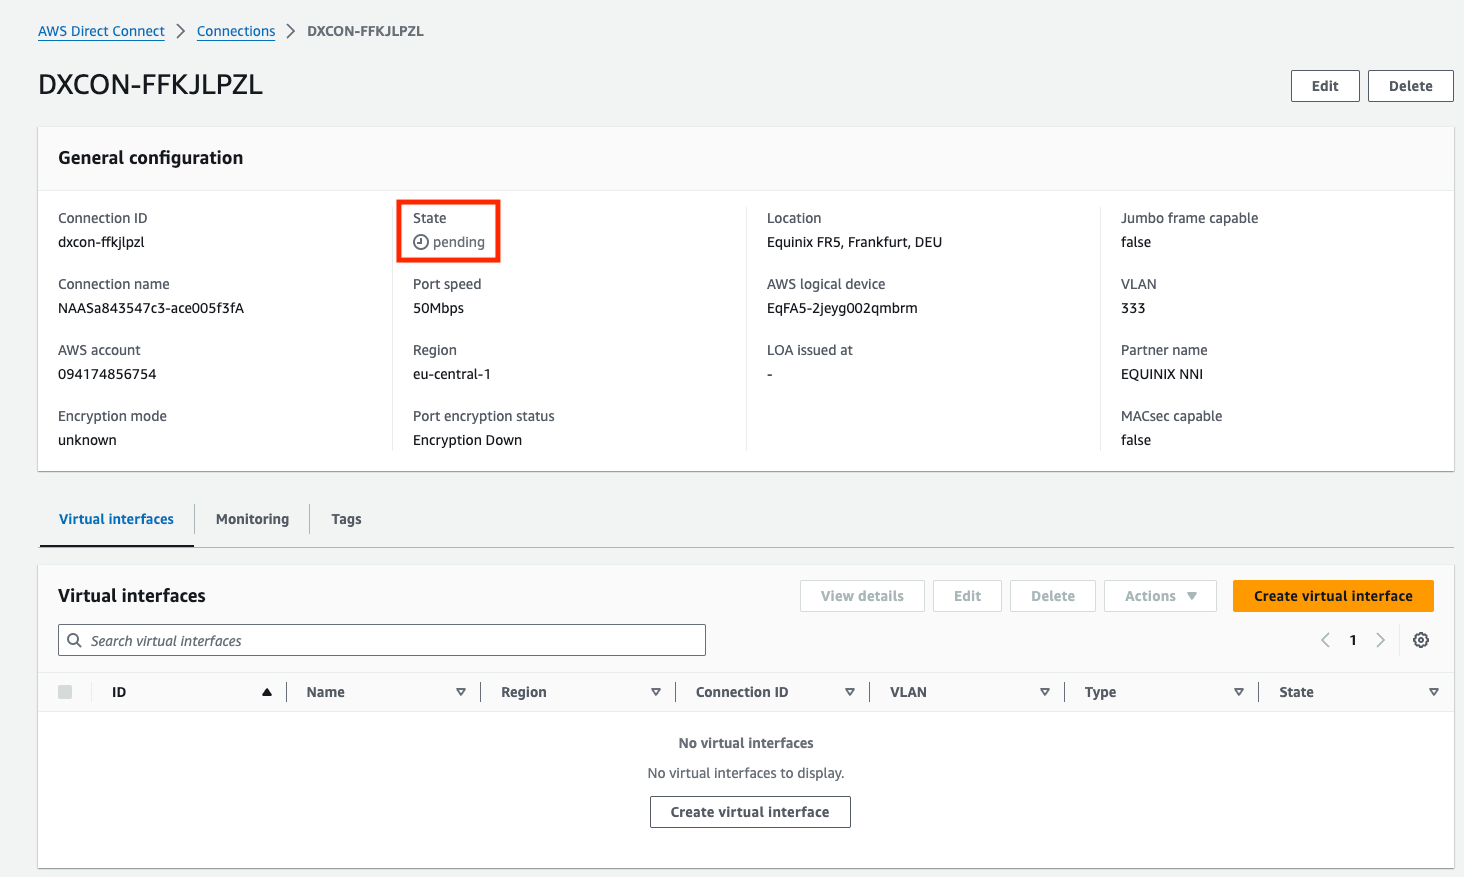 ### Enable Primary Connection
This step is performed on Telnyx.
The connection must be enabled to be used.
```http request theme={null}
PATCH /v2/virtual_cross_connects/:vxc_uuid HTTP/1.1
Host: api.telnyx.com
Content-Type: application/json
Authorization: Bearer XXX
Content-Length: 31
{
"primary_enabled": true
}
```
At this point, the connection on AWS will show as “available”.
### Enable Primary Connection
This step is performed on Telnyx.
The connection must be enabled to be used.
```http request theme={null}
PATCH /v2/virtual_cross_connects/:vxc_uuid HTTP/1.1
Host: api.telnyx.com
Content-Type: application/json
Authorization: Bearer XXX
Content-Length: 31
{
"primary_enabled": true
}
```
At this point, the connection on AWS will show as “available”.
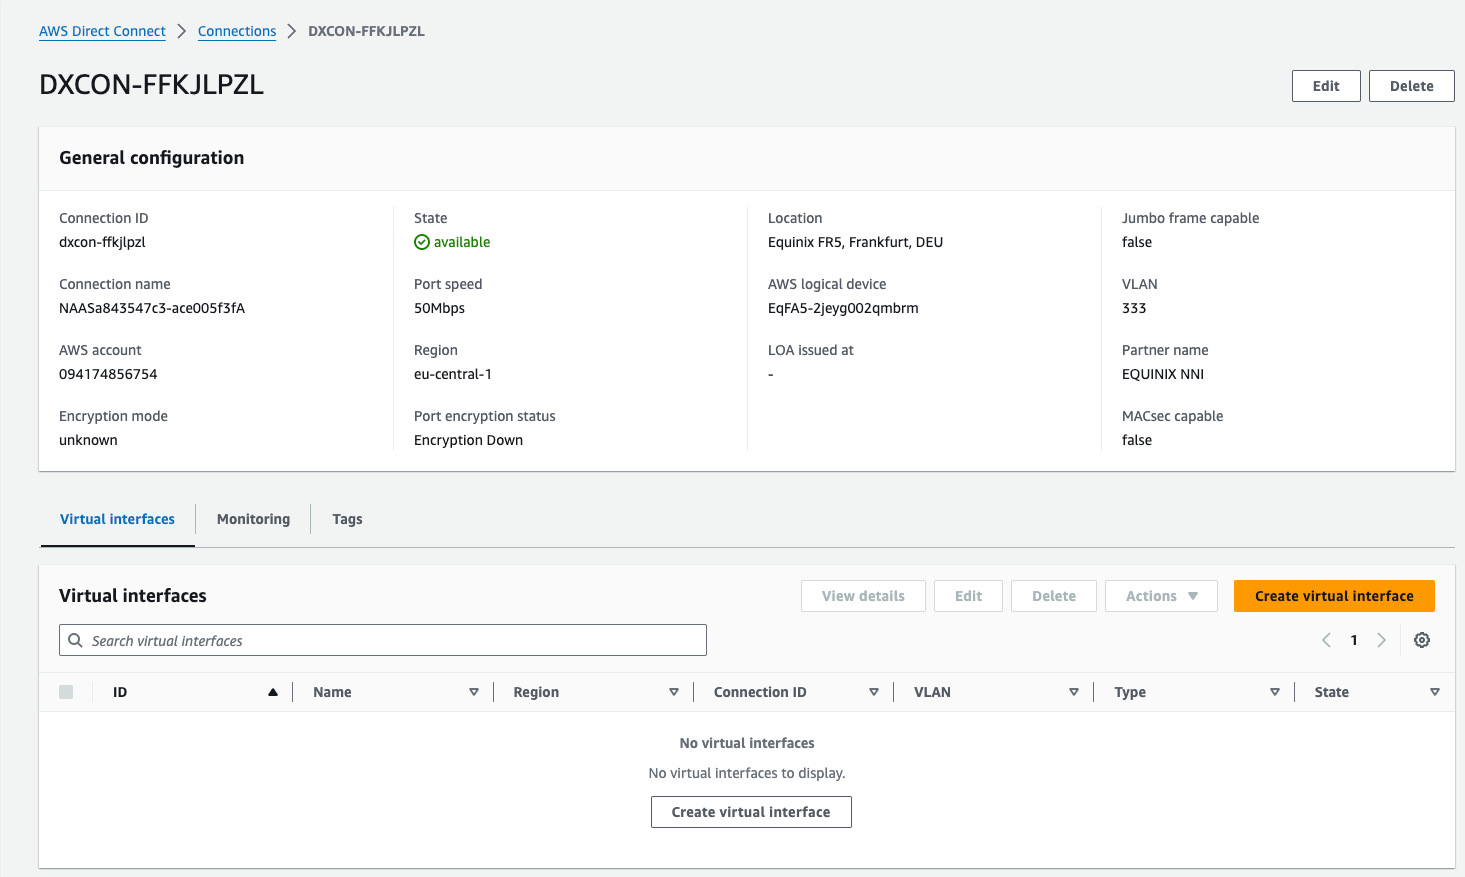 ### Virtual Interface
This step is performed on AWS.
The connection created above needs to have an interface to which to connect.
### Virtual Interface
This step is performed on AWS.
The connection created above needs to have an interface to which to connect.
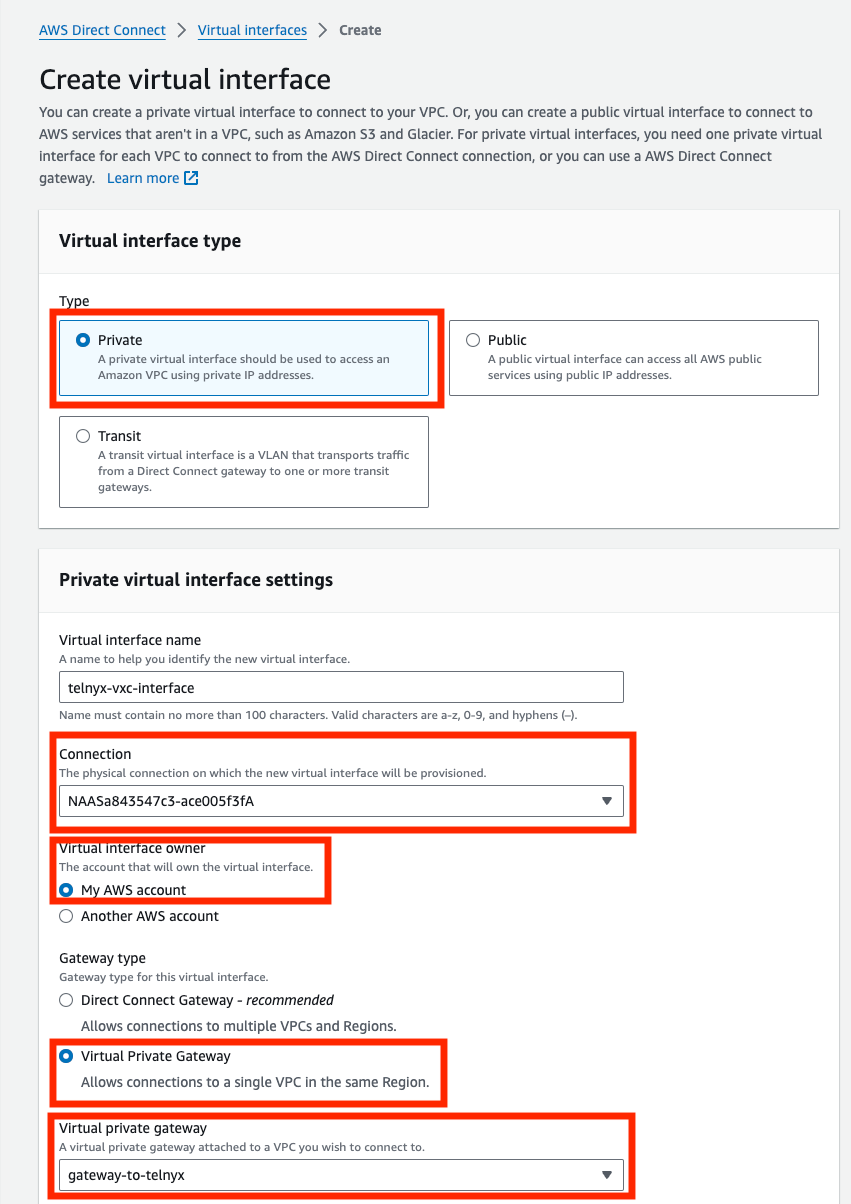
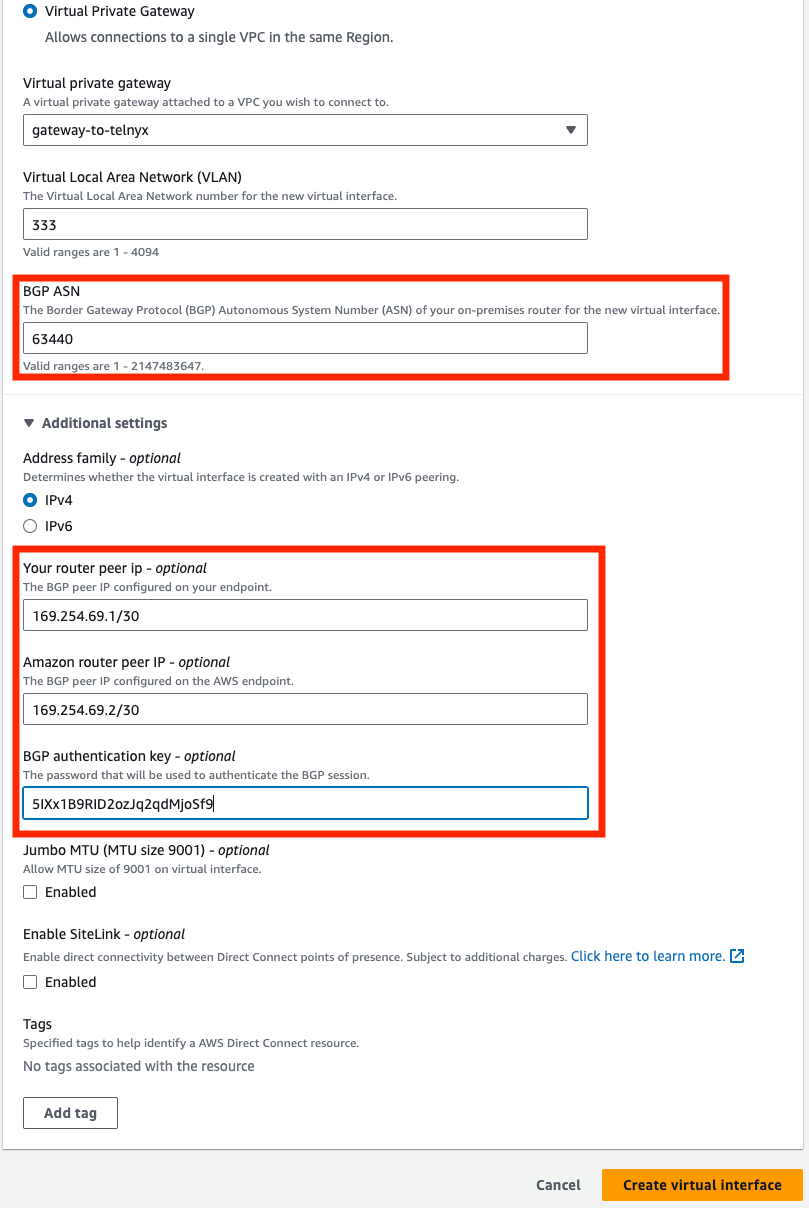 Interface Parameters
| Parameter | Value |
| --------------------------------- | ------------------------------------------------------------------------------------------------------ |
| Type | Private |
| Connection | Choose the Direct Connection you accepted previously. |
| Virtual interface owner | My AWS account |
| Gateway Type | Virtual Private Gateway and select the one you created in Prerequisite – AWS → Virtual Private Gateway |
| BGP ASN | 63440 - Telnyx ASN |
| Your router peer IP - optional | `primary_telnyx_ip` |
| Amazon router peer IP - optional | `primary_cloud_ip` |
| BGP authentication key - optional | `primary_bgp_key` |
Lastly you should see the following – the interface is “available”.
Interface Parameters
| Parameter | Value |
| --------------------------------- | ------------------------------------------------------------------------------------------------------ |
| Type | Private |
| Connection | Choose the Direct Connection you accepted previously. |
| Virtual interface owner | My AWS account |
| Gateway Type | Virtual Private Gateway and select the one you created in Prerequisite – AWS → Virtual Private Gateway |
| BGP ASN | 63440 - Telnyx ASN |
| Your router peer IP - optional | `primary_telnyx_ip` |
| Amazon router peer IP - optional | `primary_cloud_ip` |
| BGP authentication key - optional | `primary_bgp_key` |
Lastly you should see the following – the interface is “available”.
 ### Validate Connection
This step is performed on AWS. ssh into your EC2 instance and either ping or traceroute to one of the IP in the route table of the VPC. You can see the route went over the VXC instead of the public internet.
### Validate Connection
This step is performed on AWS. ssh into your EC2 instance and either ping or traceroute to one of the IP in the route table of the VPC. You can see the route went over the VXC instead of the public internet.
