> ## Documentation Index
> Fetch the complete documentation index at: https://developers.telnyx.com/llms.txt
> Use this file to discover all available pages before exploring further.
# Wireless llms-full.txt
> Complete machine-readable documentation content for the Wireless section for AI agents and LLMs
# Telnyx Wireless — Full Documentation
> SIMs, eSIMs, IoT data plans, VoLTE, and wireless messaging. Complete page content for the Wireless section of the Telnyx developer docs ([https://developers.telnyx.com](https://developers.telnyx.com)).
> Root index: [https://developers.telnyx.com/llms.txt](https://developers.telnyx.com/llms.txt) · Lightweight index for this section: [https://developers.telnyx.com/development/llms/wireless-llms-txt.md](https://developers.telnyx.com/development/llms/wireless-llms-txt.md)
## Overview
### Overview
> Source: [https://developers.telnyx.com/docs/iot-sim/wireless-overview.md](https://developers.telnyx.com/docs/iot-sim/wireless-overview.md)
Telnyx Wireless gives you API control over cellular connectivity. Provision SIMs, route data through private networks, enable VoLTE calling, and send SMS — all programmable, all on one platform.
Order, activate, and manage SIM cards. Group operations, bulk provisioning, and eSIM profiles.
Cellular data with flexible routing — public internet, Private Wireless Gateways, or public IPs for inbound connections.
A second line on one phone, or the full Telnyx voice stack on cellular — Call Control, AI agents, recording, IVR.
SMS, MMS, and RCS on cellular numbers. A real messaging experience — same as any carrier line.
***
## SIMs & eSIMs
### Overview
> Source: [https://developers.telnyx.com/docs/iot-sim/get-started.md](https://developers.telnyx.com/docs/iot-sim/get-started.md)
## SIM Types
All Telnyx SIMs are eUICC-enabled. Three form factors:
| Type | Form Factor | Delivery | Use Case |
| :----------- | :------------------------------- | :-------------------- | :------------------------------------------------ |
| **SIM Card** | Triple-cut plastic (2FF/3FF/4FF) | Shipped | Routers, gateways, traditional devices |
| **eSIM** | Software profile | Over-the-air download | Phones, tablets, laptops — no physical SIM needed |
## Resource Model
Three core resources, all API-managed:
* **SIM Card** — the connectivity entity. Has an ICCID, status, data settings, optional voice flag. Covers both physical SIMs and eSIMs (eSIMs are purchased via a separate endpoint but become the same SIM Card resource with an activation code for OTA provisioning). Everything starts here.
* **SIM Card Group** — bulk management. Apply data limits, network preferences, and Private Wireless Gateway configs to all SIMs in a group at once.
* **Mobile Phone Number** — optional. Created when you enable voice or messaging on a SIM. Controls call forwarding, caller ID, messaging profile.
## SIM Lifecycle
```
Order → Register → `enabled` → [Active Use] → `disabled` / `standby`
```
| Status | MRC | Data | Description |
| :------------- | :-------- | :--- | :--------------------------------------------- |
| **Registered** | \$2/mo | No | SIM exists in your account, not yet on network |
| `enabled` | \$2/mo | Yes | Active on network, consuming data |
| `disabled` | \$0.20/mo | No | Off network, reduced cost, retains config |
| `standby` | \$0.20/mo | No | Same as disabled, ready for quick re-enable |
## Multi-IMSI
Every Telnyx SIM carries multiple IMSIs (Telnyx, Sparkle, BICs, T-Mobile, US Cellular). An on-SIM applet automatically selects the best IMSI per location — local network attachment instead of roaming, lower latency, better rates.
Default is automatic selection. You can override to manual per-SIM or per-group via API if you need to pin a specific IMSI for regulatory or testing purposes.
## Pricing
Three cost components:
| Component | Cost |
| :--------------- | :-------------------------------------------------------------------------------------------------------------------------- |
| **SIM purchase** | $1/SIM, $0.70/eSIM. \$10 shipping outside US mainland. |
| **Monthly** | $2/active SIM, $0.20/disabled or standby |
| **Data** | Tiered by zone and volume. [Full breakdown →](https://support.telnyx.com/en/articles/3296669-programmable-wireless-pricing) |
***
### SIM Cards
> Source: [https://developers.telnyx.com/docs/iot-sim/ordering-sims.md](https://developers.telnyx.com/docs/iot-sim/ordering-sims.md)
## Getting SIMs
### Physical SIMs
Physical SIM orders go through [Mission Control](https://portal.telnyx.com/#/wireless/buy-sim-cards) — you can't order them via API.
1. **Order** — Set quantity, add to cart, and check out. Telnyx ships triple-cut SIM cards (2FF/3FF/4FF) to your address.
2. **Register** — Each physical SIM has a 10-digit registration code printed on the card. Register via the portal ([Register SIM Cards](https://portal.telnyx.com/#/wireless/buy-sim-cards) tab, manual or CSV) or the API ([`POST /actions/register/sim_cards`](/api-reference/sim-cards/register-sim-cards)). During registration you assign a SIM Card Group and optional tags.
3. **Enable** — Once registered, activate the SIM on the network via [`POST /sim_cards/{id}/actions/enable`](/api-reference/sim-cards/request-a-sim-card-enable) or the portal.
After registration, the SIM appears as a standard SIM Card resource. All further management is via the API.
### eSIMs
eSIMs are downloadable SIM profiles for consumer devices (phones, tablets, laptops) — not embedded SIM hardware. For eUICC hardware solutions, contact [Sales](https://telnyx.com/contact-us).
Purchase through [Mission Control](https://portal.telnyx.com/#/wireless/buy-esims) or the API (`POST /actions/purchase_esims`):
* **Portal** — Set quantity, assign a SIM Card Group, choose initial status, add tags. \$0.70 activation fee per eSIM. No cart — purchase is immediate.
* **API** — [`POST /actions/purchase/esims`](/api-reference/sim-cards/purchase-esims). Same parameters, same instant provisioning.
Either way, you get an activation code immediately. Provide it to the device via QR code or direct input for OTA provisioning. No shipping, no registration step.
eSIM activation codes are one-time use. If the device loses the profile, you need a new eSIM purchase — you can't re-download the same profile.
After provisioning, eSIMs become the same SIM Card resource as physical SIMs. All API operations are identical.
## Next Steps
Once you have SIMs in your account, see [Lifecycle](/docs/iot-sim/sim-lifecycle) for state management (enable, disable, standby, delete) and [SIM Card Groups](/docs/iot-sim/sim-card-groups) for fleet configuration.
***
### Lifecycle
> Source: [https://developers.telnyx.com/docs/iot-sim/sim-lifecycle.md](https://developers.telnyx.com/docs/iot-sim/sim-lifecycle.md)
Every SIM follows the same state machine regardless of type (physical or eSIM).
## Status
### User-Controlled
| Status | On Network | Passes Traffic | Notes |
| :--------- | :--------- | :------------- | :--------------------------------------------------- |
| `enabled` | Yes | Yes | Active on the network. |
| `disabled` | No | No | Off the network. IP released. \$0.20/mo holding fee. |
| `standby` | No | No | Off the network. IP preserved. \$0.20/mo. |
**`disabled` vs `standby`** — the only difference is IP preservation. If your application depends on a stable IP (e.g., firewall allowlists, IoT platforms that register by IP), use `standby`. Otherwise `disabled` is fine.
### Transitional
All transitions are asynchronous. While in progress, the SIM reports a transitional status.
| Status | Target |
| :---------------- | :-------------------------- |
| `registering` | → `enabled` (initial setup) |
| `enabling` | → `enabled` |
| `disabling` | → `disabled` |
| `setting_standby` | → `standby` |
Track progress via [SIM Card Actions](/api-reference/sim-card-actions/list-sim-card-actions).
All state changes return `202` with a SIM Card Action — they are not instant. Poll the action status or list actions to confirm completion.
### System-Imposed
Set by Telnyx, not by API calls. The SIM cannot transition while in these states.
| Status | Meaning | How to Exit |
| :-------------------- | :----------------------------------------------------- | :--------------------------------------------------------------------------------------------------------------------------------------------------------------------------------------------------------------------------------------------------------------------------------------------------------------- |
| `data_limit_exceeded` | SIM exceeded its group's data limit. | Raise the data limit via [`PATCH /sim_card_groups/{id}`](/api-reference/sim-card-groups/update-a-sim-card-group) (group level) or [`PATCH /sim_cards/{id}`](/api-reference/sim-cards/update-a-sim-card) (SIM level), or wait for billing cycle reset. Auto-transitions to `intended_status`. |
| `unauthorized_imei` | SIM is in a device not on its `authorized_imeis` list. | Update `authorized_imeis` via [`PATCH /sim_cards/{id}`](/api-reference/sim-cards/update-a-sim-card) to add the current IMEI or clear the list. Then re-enable with [`POST /sim_cards/{id}/actions/enable`](/api-reference/sim-cards/request-a-sim-card-enable). |
| `blocked` | Account-level service interruption (billing). | Resolve account billing issue. Auto-syncs back to intended state. |
| `abolished` | Account-level service interruption (billing). | Resolve account billing issue. Auto-syncs back to intended state. |
## What Puts a SIM Into Each Status
The SIM must have a `sim_card_group_id` before you can enable it or set it to standby.
| Target Status | What Triggers It |
| :---------------------- | :------------------------------------------------------------------------------------------------------------------------------------------------------------------------------------------------------ |
| `enabled` | [Enable SIM](/api-reference/sim-cards/request-a-sim-card-enable) — from `registered`, `disabled`, or `standby` |
| `disabled` | [Disable SIM](/api-reference/sim-cards/request-a-sim-card-disable) — from `enabled` |
| `standby` | [Set Standby](/api-reference/sim-cards/request-setting-a-sim-card-to-standby) — from `enabled` |
| `data_limit_exceeded` | System — SIM exceeded its group or SIM-level data limit. Adjust via [Update Group](/api-reference/sim-card-groups/update-a-sim-card-group) or [Update SIM](/api-reference/sim-cards/update-a-sim-card). |
| `unauthorized_imei` | System — SIM inserted into a device not in its `authorized_imeis` list. Fix via [Update SIM](/api-reference/sim-cards/update-a-sim-card). |
| `blocked` / `abolished` | System — account-level billing interruption. Resolve with Telnyx support. |
## Deletion
[`DELETE /sim_cards/{id}`](/api-reference/sim-cards/deletes-a-sim-card) permanently deregisters the SIM. This is irreversible:
* **Physical SIMs** — the plastic is now waste. You'd need to order and register a new one.
* **eSIMs** — the profile is gone. You'd need to purchase a new eSIM.
Prefer disable or standby if there's any chance you'll need the SIM again.
For eSIMs that can't be uninstalled from a device, pass `report_lost=true` — this is irreversible and the eSIM cannot be re-registered.
***
### SIM Card Groups
> Source: [https://developers.telnyx.com/docs/iot-sim/sim-card-groups.md](https://developers.telnyx.com/docs/iot-sim/sim-card-groups.md)
**Groups vs Bulk Operations** — Groups are ongoing policy; a SIM inherits its group's settings as long as it's a member. Bulk operations are one-time actions on an explicit list of SIMs.
Every SIM belongs to a group and inherits its settings. Set policy on the group instead of updating SIMs individually.
## Default Group
Every account has a default group. SIMs that aren't explicitly assigned land here. Deleting a group moves its SIMs back to default. Moving SIMs between groups after they're active can briefly interrupt connectivity.
## Group Settings
Configurable via [`PATCH /sim_card_groups/{id}`](/api-reference/sim-card-groups/update-a-sim-card-group):
| Setting | Description |
| :----------- | :----------------------------------------------------------------------------------------------------------------------------------- |
| `name` | Display name for the group. |
| `data_limit` | Data cap (`amount` + `unit`). SIMs exceeding this enter `data_limit_exceeded` until the limit is raised or the billing cycle resets. |
## Group Actions
These are async — each returns an action ID. Track progress via [`GET /sim_card_group_actions`](/api-reference/sim-card-group-actions/list-sim-card-group-actions).
| Action |
| :------------------------------------------------------------------------------------------------------------------------------- |
| [Assign Private Wireless Gateway](/api-reference/sim-card-groups/request-private-wireless-gateway-assignment-for-sim-card-group) |
| [Remove Private Wireless Gateway](/api-reference/sim-card-groups/request-private-wireless-gateway-removal-from-sim-card-group) |
| [Assign Wireless Blocklist](/api-reference/sim-card-groups/request-wireless-blocklist-assignment-for-sim-card-group) |
| [Remove Wireless Blocklist](/api-reference/sim-card-groups/request-wireless-blocklist-removal-from-sim-card-group) |
***
### Bulk Operations
> Source: [https://developers.telnyx.com/docs/iot-sim/bulk-sim-actions.md](https://developers.telnyx.com/docs/iot-sim/bulk-sim-actions.md)
**Bulk vs Group** — Bulk actions are one-time operations on an explicit list of SIM IDs. Nothing persists. For ongoing policy that applies to current and future SIMs, use [Groups](/docs/iot-sim/sim-card-groups/index).
## Bulk Actions
All actions are async — submit a list of SIM IDs, get back an action ID, poll for status.
| Action |
| :-------------------------------------------------------------------------------------------- |
| [Bulk Enable Voice](/api-reference/sim-cards/request-bulk-enabling-voice-on-sim-cards) |
| [Bulk Disable Voice](/api-reference/sim-cards/request-bulk-disabling-voice-on-sim-cards) |
| [Bulk Set Public IPs](/api-reference/sim-cards/request-bulk-setting-sim-card-public-ips) |
| [Validate Registration Codes](/api-reference/sim-cards/validate-sim-cards-registration-codes) |
Track progress via [List Bulk SIM Card Actions](/api-reference/sim-card-actions/list-bulk-sim-card-actions). Per-SIM results are included — some may succeed while others fail.
For bulk registration, validate codes first with the validation endpoint. This dry-run catches typos and invalid codes before you commit to a large batch.
***
## Data
### Public IPs
> Source: [https://developers.telnyx.com/docs/iot-sim/public-ips.md](https://developers.telnyx.com/docs/iot-sim/public-ips.md)
By default, SIMs get dynamic private IPs — reachable outbound only. A public static IP makes the SIM reachable from the internet (\$3/mo per SIM).
## Actions
| Action | Endpoint |
| :--------------------------------------------------------------------------------------- | :-------------------------------------------------------- |
| [Get Public IP](/api-reference/sim-cards/get-sim-card-public-ip-definition) | `GET /sim_cards/{id}/public_ip` |
| [Set Public IP](/api-reference/sim-cards/request-setting-a-sim-card-public-ip) | `POST /sim_cards/{id}/actions/set_public_ip` |
| [Remove Public IP](/api-reference/sim-cards/request-removing-a-sim-card-public-ip) | `POST /sim_cards/{id}/actions/remove_public_ip` |
| [Bulk Set Public IPs](/api-reference/sim-cards/request-bulk-setting-sim-card-public-ips) | `POST /sim_cards/actions/bulk_set_public_ips` |
## When to Use
* **Inbound access** — connect *to* your SIM from anywhere (SSH, remote management, server-initiated requests)
* **Firewall allowlists** — stable IP for access control rules
* **Device-as-server** — run services on the device that external systems call into
***
### Private Wireless Gateways
> Source: [https://developers.telnyx.com/docs/iot-sim/private-wireless-gateways.md](https://developers.telnyx.com/docs/iot-sim/private-wireless-gateways.md)
A Private Wireless Gateway (PWG) routes all SIM traffic through your own private network. SIMs connected via a PWG sit inside your private IP space — not on the public internet.
## Why PWG
* **Security** — SIMs are not directly exposed to the internet
* **Control** — route traffic through your own firewall or DLP platform
* **Direct access** — devices are addressable on your corporate network like any other host
## Architecture
PWGs connect to a VRF-defined network on Telnyx's MPLS backbone. Virtual Cross Connects (VXC) or WireGuard interfaces (Cloud VPNs) bridge this to your corporate network. All interfaces on the same VRF can see each other.
 ## API
| Action | Endpoint |
| :----------------------------------------------------------------------- | :------------------------------------------------- |
| [List PWGs](/api-reference/sim-cards/get-all-private-wireless-gateways) | `GET /private_wireless_gateways` |
| [Create PWG](/api-reference/sim-cards/create-a-private-wireless-gateway) | `POST /private_wireless_gateways` |
| [Get PWG](/api-reference/sim-cards/get-a-private-wireless-gateway) | `GET /private_wireless_gateways/{id}` |
| [Delete PWG](/api-reference/sim-cards/delete-a-private-wireless-gateway) | `DELETE /private_wireless_gateways/{id}` |
Assign a PWG to a SIM Card Group via [group actions](/docs/iot-sim/sim-card-groups/index). All SIMs in the group route through the PWG.
## APN-based IP Assignment
| APN | IP Assignment |
| :-------------- | :------------------------------- |
| `data.net` | Static — same IP across sessions |
| `data00.telnyx` | Dynamic — new IP each session |
To use a static IP, your device must connect using the `data.net` APN. Devices on `data00.telnyx` get dynamic IPs.
## Limitations
* **Region** — PWGs are currently only available in Ashburn, VA. More regions coming.
* **IP range** — Default `100.64.199.0/24` (254 concurrent SIMs). Custom ranges coming.
* **Internet access** — PWGs have no internet access by default. Contact support to open your VRF to the internet.
## Setup
See [Private Gateway Setup](/docs/iot-sim/private-wireless-gateway-how-to/index) for step-by-step instructions.
***
### Private Gateway Setup
> Source: [https://developers.telnyx.com/docs/iot-sim/private-wireless-gateway-how-to.md](https://developers.telnyx.com/docs/iot-sim/private-wireless-gateway-how-to.md)
## API
| Action | Endpoint |
| :----------------------------------------------------------------------- | :------------------------------------------------- |
| [List PWGs](/api-reference/sim-cards/get-all-private-wireless-gateways) | `GET /private_wireless_gateways` |
| [Create PWG](/api-reference/sim-cards/create-a-private-wireless-gateway) | `POST /private_wireless_gateways` |
| [Get PWG](/api-reference/sim-cards/get-a-private-wireless-gateway) | `GET /private_wireless_gateways/{id}` |
| [Delete PWG](/api-reference/sim-cards/delete-a-private-wireless-gateway) | `DELETE /private_wireless_gateways/{id}` |
Assign a PWG to a SIM Card Group via [group actions](/docs/iot-sim/sim-card-groups/index). All SIMs in the group route through the PWG.
## APN-based IP Assignment
| APN | IP Assignment |
| :-------------- | :------------------------------- |
| `data.net` | Static — same IP across sessions |
| `data00.telnyx` | Dynamic — new IP each session |
To use a static IP, your device must connect using the `data.net` APN. Devices on `data00.telnyx` get dynamic IPs.
## Limitations
* **Region** — PWGs are currently only available in Ashburn, VA. More regions coming.
* **IP range** — Default `100.64.199.0/24` (254 concurrent SIMs). Custom ranges coming.
* **Internet access** — PWGs have no internet access by default. Contact support to open your VRF to the internet.
## Setup
See [Private Gateway Setup](/docs/iot-sim/private-wireless-gateway-how-to/index) for step-by-step instructions.
***
### Private Gateway Setup
> Source: [https://developers.telnyx.com/docs/iot-sim/private-wireless-gateway-how-to.md](https://developers.telnyx.com/docs/iot-sim/private-wireless-gateway-how-to.md)
 ## Step 1: Set up Cloud VPN
1. Navigate to the [Network section](https://portal.telnyx.com/#/app/next/networking/networks) in the portal. Select "Create Network".
2. Set the network name and click "Create".
3. Add a VPN Interface, create a name, click "Create".
4. Wait for provisioning to complete, click "Next Step".
5. Add a peer for the VPN — choose a name, click "Create Peer".
6. Store the Private Key safely.
7. Skip "Buy global IP" if not needed.
## Step 2: Create a Private Wireless Gateway
## Step 1: Set up Cloud VPN
1. Navigate to the [Network section](https://portal.telnyx.com/#/app/next/networking/networks) in the portal. Select "Create Network".
2. Set the network name and click "Create".
3. Add a VPN Interface, create a name, click "Create".
4. Wait for provisioning to complete, click "Next Step".
5. Add a peer for the VPN — choose a name, click "Create Peer".
6. Store the Private Key safely.
7. Skip "Buy global IP" if not needed.
## Step 2: Create a Private Wireless Gateway
 1. Select "Create PWG Interface" in the Wireless section of the portal.
2. Name it and select the network from Step 1. Region must match the VPN interface.
3. Accept the MRC charge.
4. Wait for status to transition from Provisioning to Provisioned.
5. Create a SIM Group, then edit it and click "Connect PWG" to assign the PWG.
6. Add SIM cards to the group — individually or via bulk action "Manage SIM Cards Setting".
## Step 3: Configure routing
1. Select "Create PWG Interface" in the Wireless section of the portal.
2. Name it and select the network from Step 1. Region must match the VPN interface.
3. Accept the MRC charge.
4. Wait for status to transition from Provisioning to Provisioned.
5. Create a SIM Group, then edit it and click "Connect PWG" to assign the PWG.
6. Add SIM cards to the group — individually or via bulk action "Manage SIM Cards Setting".
## Step 3: Configure routing
 The network default gateway must be set up by the Telnyx Network team manually. Contact support via the Mission Control Portal chat.
Once configured, you can control which external destinations are reachable from devices connected through the PWG, and which are blocked.
***
### Traffic Policies
> Source: [https://developers.telnyx.com/docs/iot-sim/traffic-policy-profiles.md](https://developers.telnyx.com/docs/iot-sim/traffic-policy-profiles.md)
Traffic Policy Profiles define what network traffic your SIMs are allowed (or denied). Assign a profile to filter traffic at the network level before it reaches your devices.
## Profile Types
| Type | Behavior |
| :------------- | :----------------------------------------------------------- |
| **whitelist** | Only listed traffic is allowed. Everything else is blocked. |
| **blacklist** | Listed traffic is blocked. Everything else is allowed. |
| **throttling** | Traffic is allowed but bandwidth-limited to `limit_bw_kbps`. |
## Filter Criteria
Each profile can include one or more of:
* **services** — PCEF service IDs (predefined traffic categories). Use `GET /traffic/policy/profiles/services` to list available services.
* **ip\_ranges** — CIDR notation (`10.0.0.0/8`, `203.0.113.0/24`). Block or allow specific IP ranges.
* **domains** — Domain names (`example.com`, `*.internal.corp`). DNS-level filtering.
At least one of `services`, `ip_ranges`, or `domains` is required when creating a profile.
## Example: IoT Device Lockdown
Whitelist-only profile that restricts a fleet of sensors to your backend servers:
```json theme={null}
{
"type": "whitelist",
"ip_ranges": ["10.100.0.0/16"],
"domains": ["api.yourcompany.com", "telemetry.yourcompany.com"]
}
```
Devices can only reach your internal network and two API endpoints. All other traffic is dropped.
## Example: Bandwidth Throttling
Limit data-hungry devices to prevent runaway costs:
```json theme={null}
{
"type": "throttling",
"limit_bw_kbps": 256
}
```
## Assigning Profiles
Profiles are assigned at the SIM Card Group level. Create the profile via `POST /traffic/policy/profiles`, then reference its ID when configuring the group.
***
### Blocklists
> Source: [https://developers.telnyx.com/docs/iot-sim/wireless-blocklists.md](https://developers.telnyx.com/docs/iot-sim/wireless-blocklists.md)
Wireless Blocklists let you restrict which networks your SIMs can attach to. Assign a blocklist to a SIM Card Group and every SIM in that group is blocked from the listed networks.
## Blocklist Types
| Type | Blocks By | Example Value | Use Case |
| :---------- | :------------------ | :--------------------- | :-------------------------------------------- |
| **country** | ISO country code | `US`, `CN`, `RU` | Geo-fencing — keep devices in allowed regions |
| **mcc** | Mobile Country Code | `310` (US), `234` (UK) | Block all carriers in a country |
| **plmn** | MCC + MNC pair | `31026` (T-Mobile US) | Block a specific carrier |
Use `GET /wireless_blocklist_values` to retrieve all valid values for a given type.
## How It Works
1. **Create a blocklist** — `POST /wireless_blocklists` with a `name`, `type`, and `values` array.
2. **Assign to a SIM Card Group** — Set `wireless_blocklist_id` on the group via `PATCH /sim_card_groups/{id}`.
3. All SIMs in that group are now blocked from the listed networks.
One blocklist per group. Changing the blocklist on a group affects all SIMs in it immediately.
## Common Patterns
**Geo-fencing:** Create a `country` blocklist with countries where your devices shouldn't operate. Useful for compliance, cost control, or preventing stolen device use.
**Carrier avoidance:** Create a `plmn` blocklist to steer SIMs away from expensive or unreliable carriers in a region. The SIM's multi-IMSI applet will select the next best available network.
**Security lockdown:** Block all networks except your target deployment region. Combined with Private Wireless Gateways, this creates a fully controlled connectivity path.
***
### Usage Alerts
> Source: [https://developers.telnyx.com/docs/iot-sim/data-usage-notifications.md](https://developers.telnyx.com/docs/iot-sim/data-usage-notifications.md)
## Data Limits
Limits can be set at two levels:
| Level | Set Via | Scope |
| :-------- | :------------------------------------------------------------------------------------------------ | :---------------------------------------------------------------------------------------------------- |
| **Group** | [`PATCH /sim_card_groups/{id}`](/api-reference/sim-card-groups/update-a-sim-card-group) | All SIMs in the group share the limit. SIMs exceeding it enter `data_limit_exceeded`. Resets monthly. |
| **SIM** | [`PATCH /sim_cards/{id}`](/api-reference/sim-cards/update-a-sim-card) | Per-SIM `data_limit` override. |
## Per-SIM Usage Notifications
Set a threshold on individual SIMs to get notified before they hit their limit.
| Action | Endpoint |
| :--------------------------------------------------------------------------------------------------------- | :--------------------------------------------------------- |
| [List Notifications](/api-reference/sim-cards/list-sim-card-data-usage-notifications) | `GET /sim_card_data_usage_notifications` |
| [Create Notification](/api-reference/sim-cards/create-a-new-sim-card-data-usage-notification) | `POST /sim_card_data_usage_notifications` |
| [Get Notification](/api-reference/sim-cards/get-a-single-sim-card-data-usage-notification) | `GET /sim_card_data_usage_notifications/{id}` |
| [Update Notification](/api-reference/sim-cards/updates-information-for-a-sim-card-data-usage-notification) | `PATCH /sim_card_data_usage_notifications/{id}` |
| [Delete Notification](/api-reference/sim-cards/delete-sim-card-data-usage-notifications) | `DELETE /sim_card_data_usage_notifications/{id}` |
## Monitoring Consumption
* **Per group** — `GET /sim_card_groups/{id}` returns `consumed_data`.
* **Per SIM** — visible in the SIM card detail response.
* **Portal** — Settings page shows real-time consumption per group.
***
### Troubleshooting
> Source: [https://developers.telnyx.com/docs/iot-sim/connectivity-troubleshooting.md](https://developers.telnyx.com/docs/iot-sim/connectivity-troubleshooting.md)
## Step 1: Check device configuration
1. Enable cellular data
2. Set network to 3G/LTE or 4G/LTE only (first registration requires at least 3G)
3. Enable roaming
4. Set APN: **Name:** `Telnyx` **APN:** `data00.telnyx` (leave all other fields blank)
5. Update firmware, then reboot
**Android:** Settings → Mobile Networks → Access Point Names → Add
**iOS:** Settings → Cellular → Mobile Data → APN
## Step 2: Check connectivity logs
View logs via [portal](https://portal.telnyx.com/#/app/wireless/sim-cards) (click SIM ICCID → Connectivity Logs) or API:
```
GET /sim_cards/{id}/wireless_connectivity_logs
```
The `type` column shows `Registration` or `Data`. MCC identifies the country, MNC identifies the carrier.
## Step 3: Diagnose patterns
### No connectivity logs at all
* Connection isn't reaching Telnyx. Device may be on a network Telnyx can't access, misconfigured, or SIM is deactivated.
* **Fix:** Scan networks and manually select one. Verify device config (Step 1). Check SIM status in portal — may be disabled due to data limit or billing.
### Multiple registration attempts, no data
* SIM isn't authenticating.
* **Fix:** Enable data roaming. Verify APN is `data00.telnyx`.
### Registration succeeds but no data sessions
* Data sessions not being created.
* **Fix:** Enable data roaming. Verify APN is `data00.telnyx`.
If issues persist, contact support via the Mission Control Portal.
***
### Detail Records
> Source: [https://developers.telnyx.com/docs/iot-sim/wireless-detail-records.md](https://developers.telnyx.com/docs/iot-sim/wireless-detail-records.md)
Wireless Detail Records (WDRs) provide granular, per-session usage data for your SIM fleet. Each record captures a single data session — when it started, how long it lasted, bytes transferred, and which network was used.
## Generating Reports
WDR reports are async. Request one, poll for completion, download when ready.
1. **Create** — `POST /wireless/detail/records/reports` with a time range:
```json theme={null}
{
"start_time": "2026-04-01T00:00:00Z",
"end_time": "2026-04-07T00:00:00Z"
}
```
2. **Poll** — `GET /wireless/detail/records/reports/{id}` until `status` is `complete`.
3. **Download** — The `report_url` field contains a pre-signed URL to the report file.
## What's in a Report
Each record includes:
| Field | Description |
| :-------------------------------------------- | :------------------------- |
| `sim_card_id` | Which SIM |
| `start_time` / `stop_time` | Session duration |
| `radio_access_technology` | LTE, 3G, etc. |
| `mobile_country_code` + `mobile_network_code` | Which carrier |
| `apn` | Access Point Name used |
| `ipv4` / `ipv6` | IP assigned during session |
| `cell_id` | Cell tower |
## Connectivity Logs
For real-time session visibility (not batch reports), use connectivity logs:
`GET /sim_cards/{id}/wireless_connectivity_logs`
Returns recent sessions for a specific SIM, including IMSI, IMEI, radio technology, and connection state. Useful for debugging why a device can't connect or which network it attached to.
## Use Cases
* **Billing reconciliation** — match data usage against your invoices
* **Anomaly detection** — spot SIMs consuming unexpected data volumes
* **Coverage analysis** — see which carriers your devices attach to by region
* **Troubleshooting** — correlate connectivity issues with specific cells or networks
***
### OTA Updates
> Source: [https://developers.telnyx.com/docs/iot-sim/ota-updates.md](https://developers.telnyx.com/docs/iot-sim/ota-updates.md)
OTA (Over-The-Air) updates let Telnyx push configuration changes to your SIMs remotely. No physical access needed — updates are delivered to the SIM's on-card applet the next time the device connects.
## What Gets Updated
OTA updates handle SIM-level configuration: IMSI profile switches, network preference changes, and applet settings. These are not firmware updates for the device itself — they modify the SIM card's internal state.
The `type` field on each update indicates the operation source and what changed.
## Tracking Updates
List updates for your fleet:
```
GET /ota_updates
```
Or check a specific update:
```
GET /ota_updates/{id}
```
Each update includes:
| Field | Description |
| :------------ | :---------------------------------------------------- |
| `sim_card_id` | Target SIM |
| `type` | Operation type — relates to the source of the request |
| `status` | Current state of the update |
| `settings` | JSON object with the specific changes applied |
| `created_at` | When the update was initiated |
## How It Works
1. Telnyx queues the update for the target SIM.
2. The next time the device attaches to the network, the SIM's applet receives the update.
3. The update applies automatically. Status transitions from pending to complete (or failed).
There's no way to force immediate delivery — it depends on when the device next connects. For always-on devices this is near-instant. For devices that sleep or power cycle, it happens on next wake.
## Multi-IMSI Context
The most common OTA operation is IMSI profile switching. Telnyx SIMs carry multiple IMSIs, and the on-card applet auto-selects the best one per location. OTA updates can override this selection or push updated IMSI profiles when Telnyx adds new carrier partnerships.
***
### AT Commands
> Source: [https://developers.telnyx.com/docs/iot-sim/at-commands.md](https://developers.telnyx.com/docs/iot-sim/at-commands.md)
**Original location:** Wireless > IoT > at-commands
This document contains some useful AT commands to interact with Raspberry Pi HAT cellular modules.
## Prerequisites to complete before running AT commands:
1. Make sure the raspberry Pi is up-to-date and the serial port is enabled. To enable the serial port run this command and then follow the prompts as shown:
* `sudo raspi-config`
* Choose Interfacing Options (5):
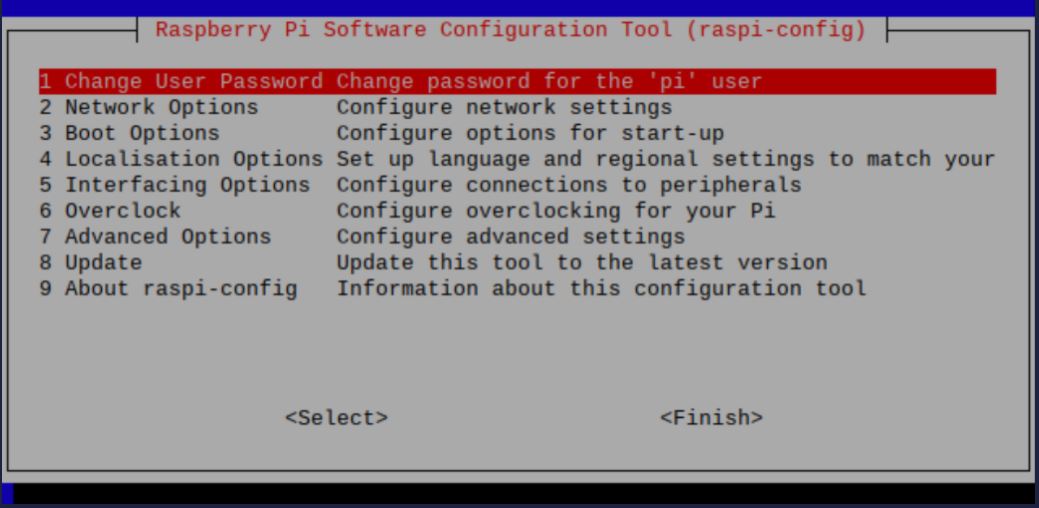
* Choose P6 Serial: 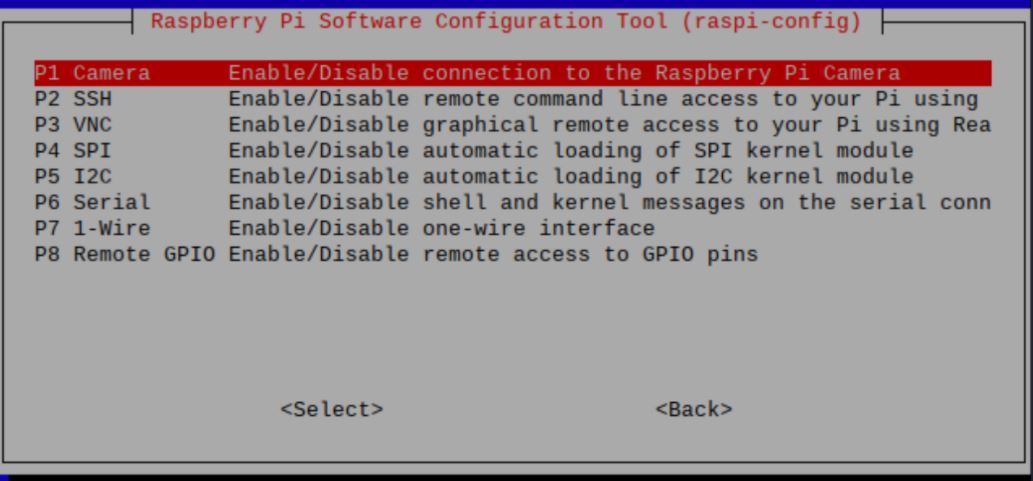
* Press *No* to the prompt below then *Reboot*. 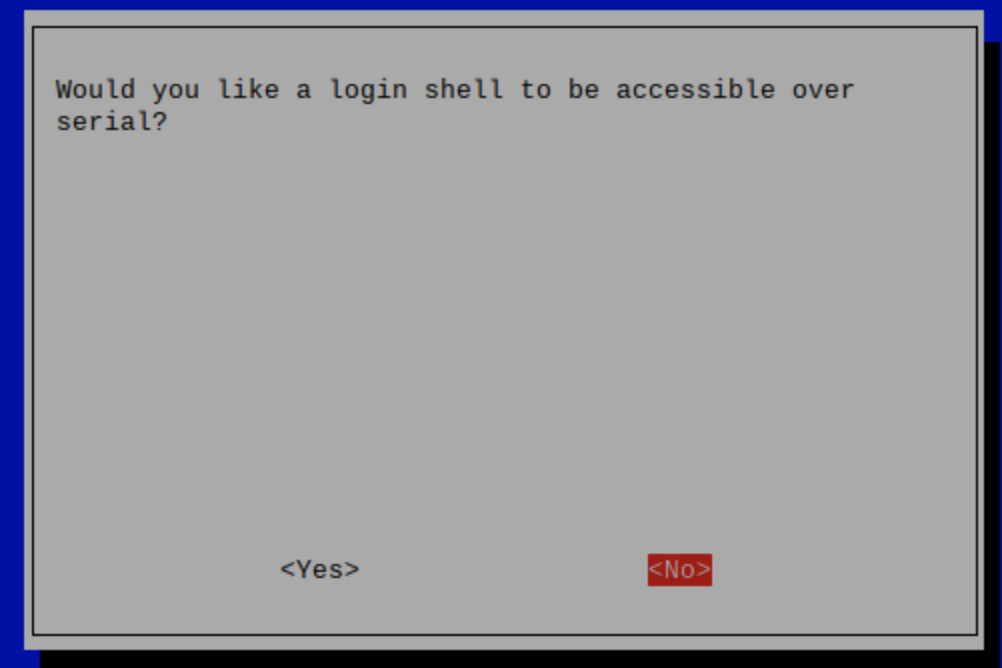
2. The package, `screen`, should be installed by default on your Linux distro. If not, you can install it via, `sudo apt or sudo yum install screen`. You may also use `minicom` if you want additional customization. `screen` defaults to ttyS0 unless otherwise specified.
* Sample Command: `screen ttyUSB3` or `screen ttyS0`
* To see which port your device is connected to, you can run `ls -l /dev`.
* Debian Repository for accessing specific versions:
* [https://packages.debian.org/bullseye/screen](https://packages.debian.org/bullseye/screen)
* [https://launchpad.net/ubuntu/+source/minicom](https://launchpad.net/ubuntu/+source/minicom)
Now that you know how to run AT commands on your device, here are some common commands that you can use.
Commands
What does it do?
Sample Reponses
AT
Same thing as "Hey!" in real life. This is used to check if you are able to communicate with the device.
OK
AT+COPS=?
To see all available carriers. This command will also filter out carriers that are not compatible with the SIM card.
0, 1, "T-Mobile" or 0, 4, "AT\&T"
AT+COPS = (#, #)
Check the current network. Obtain two #'s from the above command. For example, if you want to connect to T-Mobile, you would do AT+COPS=(0,1).
"T-Mobile" or "AT\&T"
AT+CCID
Check the SIM ID IMEI NUMBER
OK
AT+CREG?
Network Registration Status. You can run the AT+CREG=? for available flags.(#, "Current Network Name", PLMN #)
OK
AT+COPS=?
List of available networks. This response is valuable to switch carriers.
(4, "Network Name", PLMN #), (2, "Network Name 2", PLMN #2) ...
AT+COPS = 1, 0 "Carrier Name"
Manually connect to a network. This is also known as PLMN selection.
If all went well, you should get an OK response. If there is an error, it will reply back with CME ERROR. The error usually occurs if your provider's SIM does not support the carrier you are connecting to. Please check with your wireless provider on the list of providers that is supported in your area.
AT+BANDS
Manually select a cellular band. This shouldn't be used often unless you are having issues with network congestion. The numbers seen in the sample result is different for every device.
OK 0100004000 B12 045000000 B5
## Troubleshooting issues with AT commands
Raspberry Pi 4 has intermittent issues recognizing which USB port to use for serial communication. Even if you specify ttyUSB3 or ttyS0, the Pi often thinks that there is a separate serial port located on the device. In order to fix this issue, we recommend using a bluetooth keyboard and mouse - this will mitigate the confusion the Pi goes through.
***
### Raspberry Pi 4G Hat (SIM7600-A)
> Source: [https://developers.telnyx.com/docs/iot-sim/sim7600-a-rasp-pui-hat.md](https://developers.telnyx.com/docs/iot-sim/sim7600-a-rasp-pui-hat.md)
**Original location:** Wireless > IoT > sim7600-a-rasp-pui-hat
The SIM7600A 4G HAT is a 4G communication and GNSS positioning module, which supports LTE CAT4 up to 150Mbps for downlink data transfer. It is pretty low power consumption and can be attached to a Raspberry Pi to empower connectivity for IoT applications.
You can also connect this 4G module with a computer to surf the Internet. It has functionality for sending SMS, global positioning, and high speed internet connections via 4G.
## Prerequisites to complete the SIM7600 4G HAT setup
1. Sign up for a [free Telnyx Portal account](https://telnyx.com/sign-up "Sign Up") and purchase an active Telnyx SIM card with data plan. Check out this [Quickstart Guide](/docs/iot-sim/get-started) to get set up.
2. Raspberry Pi 3 Model B or Raspberry Pi 4 (this guide will use 4 but the steps are the same).
3. Internet connection for initial setup and configuration.
Alright, let's get started!
***
## Preparation steps for the SIM7600 Raspberry Pi 4G HAT setup
First, we are going to start by updating the Raspberry Pi so let's run these commands:
* `sudo apt update -y`
* `sudo apt dist-upgrade -y`
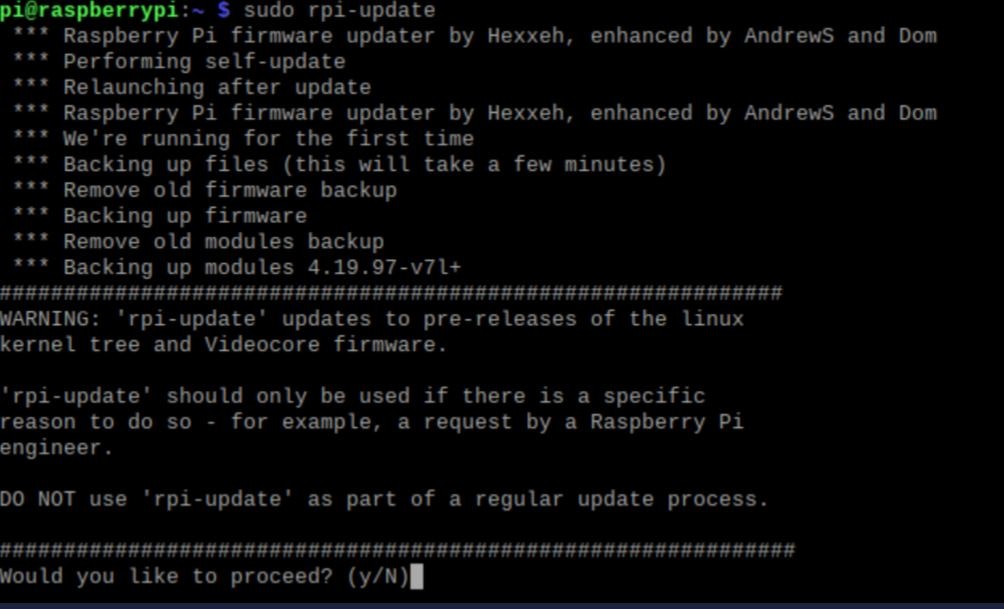
* `sudo rpi-update`
* You may see a prompt like this. Press `Y` and press `enter`:
The network default gateway must be set up by the Telnyx Network team manually. Contact support via the Mission Control Portal chat.
Once configured, you can control which external destinations are reachable from devices connected through the PWG, and which are blocked.
***
### Traffic Policies
> Source: [https://developers.telnyx.com/docs/iot-sim/traffic-policy-profiles.md](https://developers.telnyx.com/docs/iot-sim/traffic-policy-profiles.md)
Traffic Policy Profiles define what network traffic your SIMs are allowed (or denied). Assign a profile to filter traffic at the network level before it reaches your devices.
## Profile Types
| Type | Behavior |
| :------------- | :----------------------------------------------------------- |
| **whitelist** | Only listed traffic is allowed. Everything else is blocked. |
| **blacklist** | Listed traffic is blocked. Everything else is allowed. |
| **throttling** | Traffic is allowed but bandwidth-limited to `limit_bw_kbps`. |
## Filter Criteria
Each profile can include one or more of:
* **services** — PCEF service IDs (predefined traffic categories). Use `GET /traffic/policy/profiles/services` to list available services.
* **ip\_ranges** — CIDR notation (`10.0.0.0/8`, `203.0.113.0/24`). Block or allow specific IP ranges.
* **domains** — Domain names (`example.com`, `*.internal.corp`). DNS-level filtering.
At least one of `services`, `ip_ranges`, or `domains` is required when creating a profile.
## Example: IoT Device Lockdown
Whitelist-only profile that restricts a fleet of sensors to your backend servers:
```json theme={null}
{
"type": "whitelist",
"ip_ranges": ["10.100.0.0/16"],
"domains": ["api.yourcompany.com", "telemetry.yourcompany.com"]
}
```
Devices can only reach your internal network and two API endpoints. All other traffic is dropped.
## Example: Bandwidth Throttling
Limit data-hungry devices to prevent runaway costs:
```json theme={null}
{
"type": "throttling",
"limit_bw_kbps": 256
}
```
## Assigning Profiles
Profiles are assigned at the SIM Card Group level. Create the profile via `POST /traffic/policy/profiles`, then reference its ID when configuring the group.
***
### Blocklists
> Source: [https://developers.telnyx.com/docs/iot-sim/wireless-blocklists.md](https://developers.telnyx.com/docs/iot-sim/wireless-blocklists.md)
Wireless Blocklists let you restrict which networks your SIMs can attach to. Assign a blocklist to a SIM Card Group and every SIM in that group is blocked from the listed networks.
## Blocklist Types
| Type | Blocks By | Example Value | Use Case |
| :---------- | :------------------ | :--------------------- | :-------------------------------------------- |
| **country** | ISO country code | `US`, `CN`, `RU` | Geo-fencing — keep devices in allowed regions |
| **mcc** | Mobile Country Code | `310` (US), `234` (UK) | Block all carriers in a country |
| **plmn** | MCC + MNC pair | `31026` (T-Mobile US) | Block a specific carrier |
Use `GET /wireless_blocklist_values` to retrieve all valid values for a given type.
## How It Works
1. **Create a blocklist** — `POST /wireless_blocklists` with a `name`, `type`, and `values` array.
2. **Assign to a SIM Card Group** — Set `wireless_blocklist_id` on the group via `PATCH /sim_card_groups/{id}`.
3. All SIMs in that group are now blocked from the listed networks.
One blocklist per group. Changing the blocklist on a group affects all SIMs in it immediately.
## Common Patterns
**Geo-fencing:** Create a `country` blocklist with countries where your devices shouldn't operate. Useful for compliance, cost control, or preventing stolen device use.
**Carrier avoidance:** Create a `plmn` blocklist to steer SIMs away from expensive or unreliable carriers in a region. The SIM's multi-IMSI applet will select the next best available network.
**Security lockdown:** Block all networks except your target deployment region. Combined with Private Wireless Gateways, this creates a fully controlled connectivity path.
***
### Usage Alerts
> Source: [https://developers.telnyx.com/docs/iot-sim/data-usage-notifications.md](https://developers.telnyx.com/docs/iot-sim/data-usage-notifications.md)
## Data Limits
Limits can be set at two levels:
| Level | Set Via | Scope |
| :-------- | :------------------------------------------------------------------------------------------------ | :---------------------------------------------------------------------------------------------------- |
| **Group** | [`PATCH /sim_card_groups/{id}`](/api-reference/sim-card-groups/update-a-sim-card-group) | All SIMs in the group share the limit. SIMs exceeding it enter `data_limit_exceeded`. Resets monthly. |
| **SIM** | [`PATCH /sim_cards/{id}`](/api-reference/sim-cards/update-a-sim-card) | Per-SIM `data_limit` override. |
## Per-SIM Usage Notifications
Set a threshold on individual SIMs to get notified before they hit their limit.
| Action | Endpoint |
| :--------------------------------------------------------------------------------------------------------- | :--------------------------------------------------------- |
| [List Notifications](/api-reference/sim-cards/list-sim-card-data-usage-notifications) | `GET /sim_card_data_usage_notifications` |
| [Create Notification](/api-reference/sim-cards/create-a-new-sim-card-data-usage-notification) | `POST /sim_card_data_usage_notifications` |
| [Get Notification](/api-reference/sim-cards/get-a-single-sim-card-data-usage-notification) | `GET /sim_card_data_usage_notifications/{id}` |
| [Update Notification](/api-reference/sim-cards/updates-information-for-a-sim-card-data-usage-notification) | `PATCH /sim_card_data_usage_notifications/{id}` |
| [Delete Notification](/api-reference/sim-cards/delete-sim-card-data-usage-notifications) | `DELETE /sim_card_data_usage_notifications/{id}` |
## Monitoring Consumption
* **Per group** — `GET /sim_card_groups/{id}` returns `consumed_data`.
* **Per SIM** — visible in the SIM card detail response.
* **Portal** — Settings page shows real-time consumption per group.
***
### Troubleshooting
> Source: [https://developers.telnyx.com/docs/iot-sim/connectivity-troubleshooting.md](https://developers.telnyx.com/docs/iot-sim/connectivity-troubleshooting.md)
## Step 1: Check device configuration
1. Enable cellular data
2. Set network to 3G/LTE or 4G/LTE only (first registration requires at least 3G)
3. Enable roaming
4. Set APN: **Name:** `Telnyx` **APN:** `data00.telnyx` (leave all other fields blank)
5. Update firmware, then reboot
**Android:** Settings → Mobile Networks → Access Point Names → Add
**iOS:** Settings → Cellular → Mobile Data → APN
## Step 2: Check connectivity logs
View logs via [portal](https://portal.telnyx.com/#/app/wireless/sim-cards) (click SIM ICCID → Connectivity Logs) or API:
```
GET /sim_cards/{id}/wireless_connectivity_logs
```
The `type` column shows `Registration` or `Data`. MCC identifies the country, MNC identifies the carrier.
## Step 3: Diagnose patterns
### No connectivity logs at all
* Connection isn't reaching Telnyx. Device may be on a network Telnyx can't access, misconfigured, or SIM is deactivated.
* **Fix:** Scan networks and manually select one. Verify device config (Step 1). Check SIM status in portal — may be disabled due to data limit or billing.
### Multiple registration attempts, no data
* SIM isn't authenticating.
* **Fix:** Enable data roaming. Verify APN is `data00.telnyx`.
### Registration succeeds but no data sessions
* Data sessions not being created.
* **Fix:** Enable data roaming. Verify APN is `data00.telnyx`.
If issues persist, contact support via the Mission Control Portal.
***
### Detail Records
> Source: [https://developers.telnyx.com/docs/iot-sim/wireless-detail-records.md](https://developers.telnyx.com/docs/iot-sim/wireless-detail-records.md)
Wireless Detail Records (WDRs) provide granular, per-session usage data for your SIM fleet. Each record captures a single data session — when it started, how long it lasted, bytes transferred, and which network was used.
## Generating Reports
WDR reports are async. Request one, poll for completion, download when ready.
1. **Create** — `POST /wireless/detail/records/reports` with a time range:
```json theme={null}
{
"start_time": "2026-04-01T00:00:00Z",
"end_time": "2026-04-07T00:00:00Z"
}
```
2. **Poll** — `GET /wireless/detail/records/reports/{id}` until `status` is `complete`.
3. **Download** — The `report_url` field contains a pre-signed URL to the report file.
## What's in a Report
Each record includes:
| Field | Description |
| :-------------------------------------------- | :------------------------- |
| `sim_card_id` | Which SIM |
| `start_time` / `stop_time` | Session duration |
| `radio_access_technology` | LTE, 3G, etc. |
| `mobile_country_code` + `mobile_network_code` | Which carrier |
| `apn` | Access Point Name used |
| `ipv4` / `ipv6` | IP assigned during session |
| `cell_id` | Cell tower |
## Connectivity Logs
For real-time session visibility (not batch reports), use connectivity logs:
`GET /sim_cards/{id}/wireless_connectivity_logs`
Returns recent sessions for a specific SIM, including IMSI, IMEI, radio technology, and connection state. Useful for debugging why a device can't connect or which network it attached to.
## Use Cases
* **Billing reconciliation** — match data usage against your invoices
* **Anomaly detection** — spot SIMs consuming unexpected data volumes
* **Coverage analysis** — see which carriers your devices attach to by region
* **Troubleshooting** — correlate connectivity issues with specific cells or networks
***
### OTA Updates
> Source: [https://developers.telnyx.com/docs/iot-sim/ota-updates.md](https://developers.telnyx.com/docs/iot-sim/ota-updates.md)
OTA (Over-The-Air) updates let Telnyx push configuration changes to your SIMs remotely. No physical access needed — updates are delivered to the SIM's on-card applet the next time the device connects.
## What Gets Updated
OTA updates handle SIM-level configuration: IMSI profile switches, network preference changes, and applet settings. These are not firmware updates for the device itself — they modify the SIM card's internal state.
The `type` field on each update indicates the operation source and what changed.
## Tracking Updates
List updates for your fleet:
```
GET /ota_updates
```
Or check a specific update:
```
GET /ota_updates/{id}
```
Each update includes:
| Field | Description |
| :------------ | :---------------------------------------------------- |
| `sim_card_id` | Target SIM |
| `type` | Operation type — relates to the source of the request |
| `status` | Current state of the update |
| `settings` | JSON object with the specific changes applied |
| `created_at` | When the update was initiated |
## How It Works
1. Telnyx queues the update for the target SIM.
2. The next time the device attaches to the network, the SIM's applet receives the update.
3. The update applies automatically. Status transitions from pending to complete (or failed).
There's no way to force immediate delivery — it depends on when the device next connects. For always-on devices this is near-instant. For devices that sleep or power cycle, it happens on next wake.
## Multi-IMSI Context
The most common OTA operation is IMSI profile switching. Telnyx SIMs carry multiple IMSIs, and the on-card applet auto-selects the best one per location. OTA updates can override this selection or push updated IMSI profiles when Telnyx adds new carrier partnerships.
***
### AT Commands
> Source: [https://developers.telnyx.com/docs/iot-sim/at-commands.md](https://developers.telnyx.com/docs/iot-sim/at-commands.md)
**Original location:** Wireless > IoT > at-commands
This document contains some useful AT commands to interact with Raspberry Pi HAT cellular modules.
## Prerequisites to complete before running AT commands:
1. Make sure the raspberry Pi is up-to-date and the serial port is enabled. To enable the serial port run this command and then follow the prompts as shown:
* `sudo raspi-config`
* Choose Interfacing Options (5):

* Choose P6 Serial: 
* Press *No* to the prompt below then *Reboot*. 
2. The package, `screen`, should be installed by default on your Linux distro. If not, you can install it via, `sudo apt or sudo yum install screen`. You may also use `minicom` if you want additional customization. `screen` defaults to ttyS0 unless otherwise specified.
* Sample Command: `screen ttyUSB3` or `screen ttyS0`
* To see which port your device is connected to, you can run `ls -l /dev`.
* Debian Repository for accessing specific versions:
* [https://packages.debian.org/bullseye/screen](https://packages.debian.org/bullseye/screen)
* [https://launchpad.net/ubuntu/+source/minicom](https://launchpad.net/ubuntu/+source/minicom)
Now that you know how to run AT commands on your device, here are some common commands that you can use.
Commands
What does it do?
Sample Reponses
AT
Same thing as "Hey!" in real life. This is used to check if you are able to communicate with the device.
OK
AT+COPS=?
To see all available carriers. This command will also filter out carriers that are not compatible with the SIM card.
0, 1, "T-Mobile" or 0, 4, "AT\&T"
AT+COPS = (#, #)
Check the current network. Obtain two #'s from the above command. For example, if you want to connect to T-Mobile, you would do AT+COPS=(0,1).
"T-Mobile" or "AT\&T"
AT+CCID
Check the SIM ID IMEI NUMBER
OK
AT+CREG?
Network Registration Status. You can run the AT+CREG=? for available flags.(#, "Current Network Name", PLMN #)
OK
AT+COPS=?
List of available networks. This response is valuable to switch carriers.
(4, "Network Name", PLMN #), (2, "Network Name 2", PLMN #2) ...
AT+COPS = 1, 0 "Carrier Name"
Manually connect to a network. This is also known as PLMN selection.
If all went well, you should get an OK response. If there is an error, it will reply back with CME ERROR. The error usually occurs if your provider's SIM does not support the carrier you are connecting to. Please check with your wireless provider on the list of providers that is supported in your area.
AT+BANDS
Manually select a cellular band. This shouldn't be used often unless you are having issues with network congestion. The numbers seen in the sample result is different for every device.
OK 0100004000 B12 045000000 B5
## Troubleshooting issues with AT commands
Raspberry Pi 4 has intermittent issues recognizing which USB port to use for serial communication. Even if you specify ttyUSB3 or ttyS0, the Pi often thinks that there is a separate serial port located on the device. In order to fix this issue, we recommend using a bluetooth keyboard and mouse - this will mitigate the confusion the Pi goes through.
***
### Raspberry Pi 4G Hat (SIM7600-A)
> Source: [https://developers.telnyx.com/docs/iot-sim/sim7600-a-rasp-pui-hat.md](https://developers.telnyx.com/docs/iot-sim/sim7600-a-rasp-pui-hat.md)
**Original location:** Wireless > IoT > sim7600-a-rasp-pui-hat
The SIM7600A 4G HAT is a 4G communication and GNSS positioning module, which supports LTE CAT4 up to 150Mbps for downlink data transfer. It is pretty low power consumption and can be attached to a Raspberry Pi to empower connectivity for IoT applications.
You can also connect this 4G module with a computer to surf the Internet. It has functionality for sending SMS, global positioning, and high speed internet connections via 4G.
## Prerequisites to complete the SIM7600 4G HAT setup
1. Sign up for a [free Telnyx Portal account](https://telnyx.com/sign-up "Sign Up") and purchase an active Telnyx SIM card with data plan. Check out this [Quickstart Guide](/docs/iot-sim/get-started) to get set up.
2. Raspberry Pi 3 Model B or Raspberry Pi 4 (this guide will use 4 but the steps are the same).
3. Internet connection for initial setup and configuration.
Alright, let's get started!
***
## Preparation steps for the SIM7600 Raspberry Pi 4G HAT setup
First, we are going to start by updating the Raspberry Pi so let's run these commands:
* `sudo apt update -y`
* `sudo apt dist-upgrade -y`
* `sudo rpi-update`
* You may see a prompt like this. Press `Y` and press `enter`:
 Once all of the steps are complete, reboot your Pi using `sudo reboot` command.
With the updates out of the way, let's start on installing prerequisite software and libraries: *libqmi-utils* and *udhcpc* are first up. Install them by running this command: `sudo apt install libqmi-utils && udhcpc`
*libqmi-utils* installs libraries that allow you to interact with Qualcomm-based modems. SIM7600 comes with a Qualcomm MDM9607 chipset.
*udhcpc* is used for modem DHCP leasing. The cellular network gives a unique IP to the HAT and the Pi will have its own IP. This is used to solve IP addressing conflicts between the Pi and the HAT.
Now we will enable UART to communicate with the device. To do that, run this command and then follow the prompts as shown:
* `sudo raspi-config`
* Choose Interfacing Options (5):
Once all of the steps are complete, reboot your Pi using `sudo reboot` command.
With the updates out of the way, let's start on installing prerequisite software and libraries: *libqmi-utils* and *udhcpc* are first up. Install them by running this command: `sudo apt install libqmi-utils && udhcpc`
*libqmi-utils* installs libraries that allow you to interact with Qualcomm-based modems. SIM7600 comes with a Qualcomm MDM9607 chipset.
*udhcpc* is used for modem DHCP leasing. The cellular network gives a unique IP to the HAT and the Pi will have its own IP. This is used to solve IP addressing conflicts between the Pi and the HAT.
Now we will enable UART to communicate with the device. To do that, run this command and then follow the prompts as shown:
* `sudo raspi-config`
* Choose Interfacing Options (5):
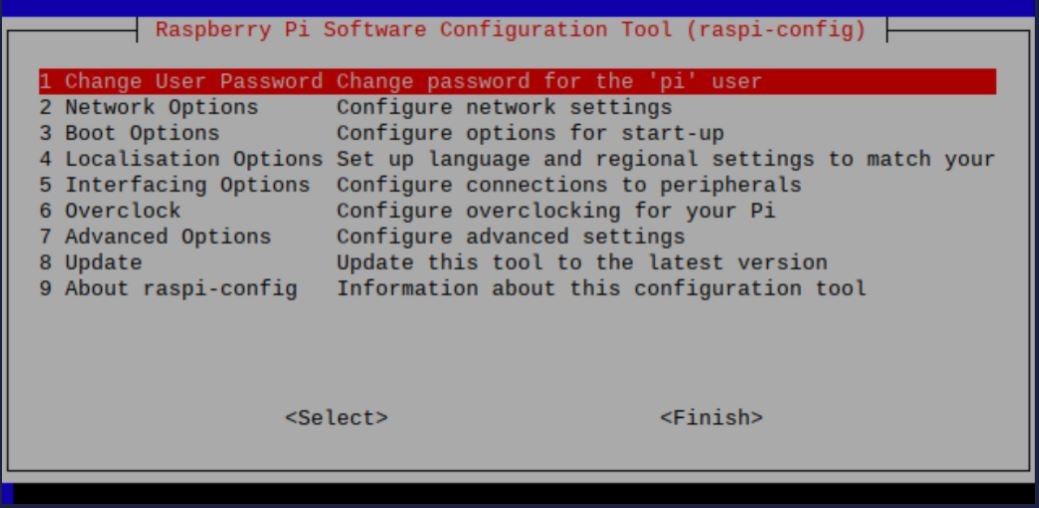 * Choose P6 Serial:
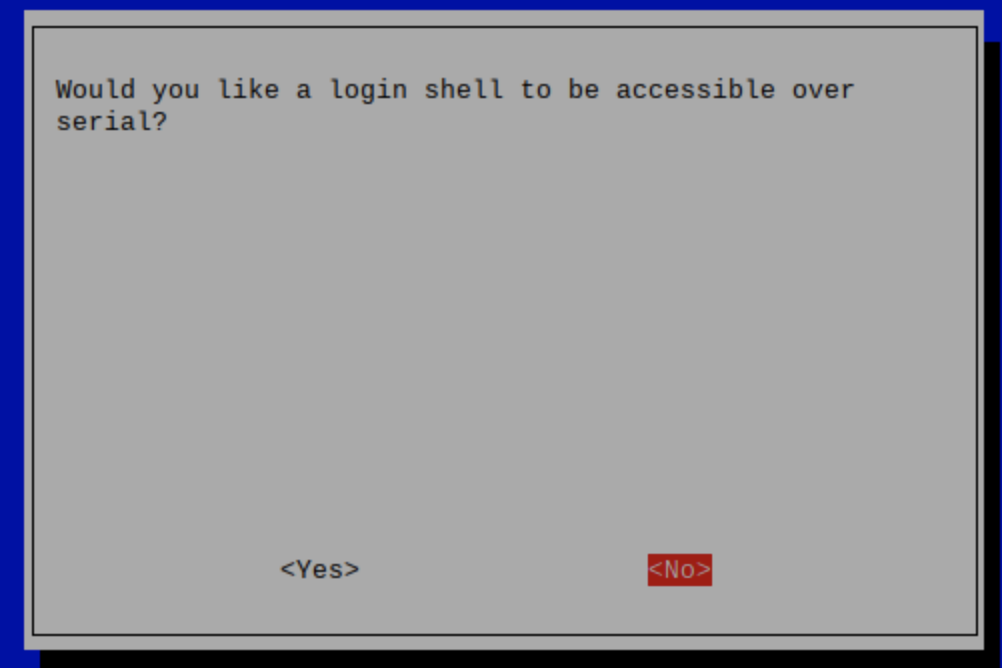
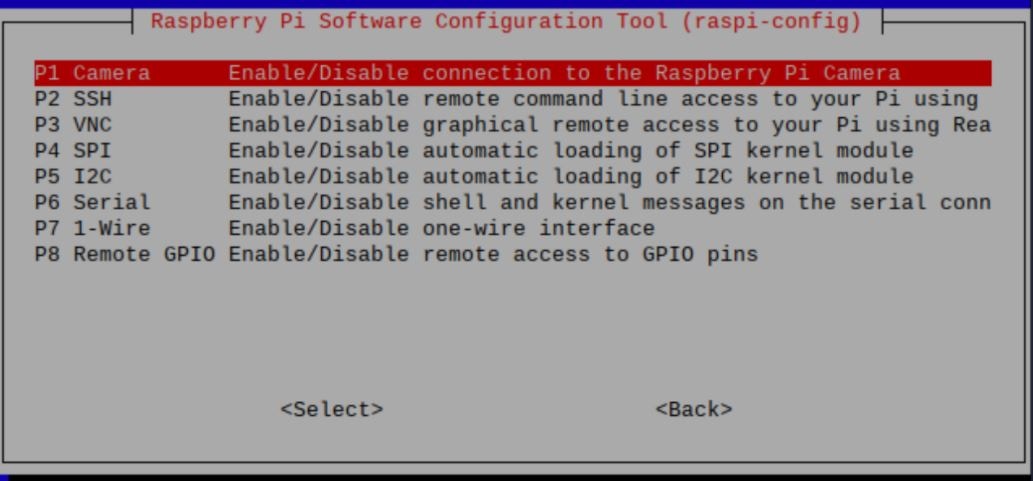 * Press *No* to the prompt below then *Reboot*.
  ## Configuration of the SIM7600 module
Next, we're going to configure the SIM7600A module. To turn on the module we will be using the qmicli commands which are used to control Qualcomm devices. This command will activate the device: `sudo qmicli -d /dev/cdc-wdm0 --dms-set-operating-mode='online'`
Now let's verify that the module is online. These are sample commands you can send to the device:
* `qmicli -d /dev/cdc-wdm0 --dms-get-operating-mode`
* Response: Online or Offline
* `qmicli -d /dev/cdc-wdm0 --nas-get-signal-strength`
* Response: Signal strength and signal quality values
* `qmicli -d /dev/cdc-wdm0 --nas-get-home-network`
* Response: Carrier name or carrier PLMN
You should now see a WWAN0 interface in net-stats (`ifconfig`). Unless specified by user, WWAN0 is the default interface this device uses.
We're now going to configure the module to use raw-ip protocol with the following commands:
* `sudo ip link set wwan0 down`
* `echo 'Y' | sudo tee /sys/class/net/wwan0/qmi/raw_ip`
* `sudo ip link set wwan0 up`
And connecting to a mobile network:
```bash theme={null}
sudo qmicli --device=/dev/cdc-wdm0 --device-open-proxy --wds-start-network="ip-type=4,apn=data00.telnyx" --client-no-release-cid
```
After pasting the above content, Kindly check and remove any new line added
Finally, let's set the default route and IP using udhcpc: `sudo udhcpc -i wwan0`
And tell the udhcpc library to receive a DHCP lease from the network using WWAN0: `ip a s wwan0`
> The Telnyx SIM has access to all network types and many different operators. As a result, it can take them a while to attach to a network for the first time. Once it connects to a network, that network will be added to the list of priority operators so as to ensure a fast connection going forward. Please note that the first attach can take up to 30 minutes.
You are connected to the Internet! Open up your web browser and browse away!
***
Make sure to [sign up for a free Telnyx account ](https://telnyx.com/sign-up "Sign Up")to get started with SIM7600-A Raspberry Pi 4G!
***
### Sixfab Raspberry Pi 3G/4G Hat
> Source: [https://developers.telnyx.com/docs/iot-sim/sixfab-rasp-pi-hat.md](https://developers.telnyx.com/docs/iot-sim/sixfab-rasp-pi-hat.md)
**Original location:** Wireless > IoT > sixfab-rasp-pi-hat
The Sixfab 3G/4G & LTE Base HAT grants your Raspberry Pi or 40-pin Pi compatible single-board-computer a super-simple interface bridge between mini PCIe cellular modems. If you’re looking for a Raspberry Pi LTE HAT for IoT applications like location tracking or global device deployments this is a great device. This add-on also board allows you to create a remote controllable LTE Wi-Fi Hotspot, high-speed GPS tracking and more.
From low-power consumption LTE-M to ultra-high-speed LTE-Advanced mini PCIe cards supported by this HAT. Both UART and USB communication with modules are available on the shield.
This guide assumes that you have a fresh installation of Raspbian OS. Some parts of this guide were obtained from [Sixfab's official tutorial website](https://sixfab.com/shop/).
## Instructions for setting up your Sixfab Raspberry Pi 3G/4G HAT
1. First, let's make sure that the Raspberry Pi is up to date. You can do that by running the below commands:
After pasting the below content, Kindly check and remove any new line added
```bash theme={null}
sudo apt update && sudo apt upgrade
sudo apt dist-upgrade
sudo apt install raspberrypi-kernel-headers
reboot
```
2. Next, we're going to obtain the required repository from the Sixfab quickstart script: `wget https://raw.githubusercontent.com/sixfab/Sixfab_RPi_3G-4G-LTE_Base_Shield/master/tutorials/QMI_tutorial/qmi_install.sh`
3. Now let's take ownership of the script and install it. In this step, you may be prompted to enter an APN. Enter `data00.telnyx` as the APN and you are good to go!
```bash theme={null}
chmod +x qmi_install.sh
sudo ./qmi_install.sh
```
After pasting the above content, Kindly check and remove any new line added
4. Reboot your device and then let's get connected.
5. To get connected to the internet, navigate to the following directory: `cd /files/quectel-CM`
6. Then mark the device as "online" with the below command. This tells the device to relay its initial "online" status message to the network. Once the network acknowledges the message, your device should obtain a valid IP address from the network; thus, have an internet connection.
```bash theme={null}
sudo ./quectel-CM -s internet
```
After pasting the above content, Kindly check and remove any new line added
> The Telnyx SIM has access to all network types and many different operators. As a result, it can take them a while to attach to a network for the first time. Once it connects to a network, that network will be added to the list of priority operators so as to ensure a fast connection going forward. Please note that the first attach can take up to 30 minutes.
***
## Troubleshooting your Sixfab Raspberry Pi 3G/4G HAT
If the device doesn't connect to the internet, this means that the device either doesn't know which APN to use or the Raspberry Pi has trouble communicating with the device. In this case, we are going to let the device handle the disconnect/reconnect process automatically.
To set up this auto-connect process follow this steps:
1. Make sure the sixfab hat is connected.
2. Obtain required repository: `wget https://raw.githubusercontent.com/sixfab/Sixfab_RPi_3G-4G-LTE_Base_Shield/master/tutorials/QMI_tutorial/install_auto_connect.sh`
3. Take ownership of the script and install.
```bash theme={null}
chmod +x install_auto_connect.sh
sudo ./install_auto_connect.sh
```
After pasting the above content, Kindly check and remove any new line added
4. Now, it will ask for an APN. Please make sure to double check the APN as a misspelling in this step may cause connectivity issues.
5. Verify that the module is active and online: `sudo systemctl status qmi_reconnect.service`
***
### Sixfab Cellular IoT HAT
> Source: [https://developers.telnyx.com/docs/iot-sim/sixfab-cellular-iot-hat.md](https://developers.telnyx.com/docs/iot-sim/sixfab-cellular-iot-hat.md)
**Original location:** Wireless > IoT > sixfab-cellular-iot-hat
Sixfab Raspberry Pi Cellular IoT HAT allows you to send or receive data over LTE-M cellular networks that the Telnyx SIM has access to without needing gateways. LTE-M (Cat M1) is a must-have for those looking to make the most of Low Power Wide Area Network (LPWAN) technology. Meanwhile, some countries already started to shut down 2G networks.
The Quectel BG96, lies on the middle of the Raspberry Pi Cellular IoT HAT. It is an LTE Cat M1/Cat NB1/EGPRS module offering a maximum data rate of 375Kbps downlink and uplink with worldwide coverage. This LTE add-on for Raspberry Pi also supports GNSS and GPS for the need of building location, navigation, tracking, mapping and timing applications.
## Prerequisites to complete the Sixfab Cellular IoT HAT setup
1. A Telnyx Portal account and active Telnyx SIM card with data plan. Check out this [Quickstart Guide](/docs/iot-sim/get-started) to get set up.
2. Raspberry Pi 3 Model B or Raspberry Pi 4 (this guide will use 4 but the steps are the same).
3. Make sure both the firmware and software are up-to-date on your Pi.
4. Install the Sixfab IoT HAT on the Pi using the 40-pin connector and connect the HAT to the Pi's USB port as shown below.
## Configuration of the SIM7600 module
Next, we're going to configure the SIM7600A module. To turn on the module we will be using the qmicli commands which are used to control Qualcomm devices. This command will activate the device: `sudo qmicli -d /dev/cdc-wdm0 --dms-set-operating-mode='online'`
Now let's verify that the module is online. These are sample commands you can send to the device:
* `qmicli -d /dev/cdc-wdm0 --dms-get-operating-mode`
* Response: Online or Offline
* `qmicli -d /dev/cdc-wdm0 --nas-get-signal-strength`
* Response: Signal strength and signal quality values
* `qmicli -d /dev/cdc-wdm0 --nas-get-home-network`
* Response: Carrier name or carrier PLMN
You should now see a WWAN0 interface in net-stats (`ifconfig`). Unless specified by user, WWAN0 is the default interface this device uses.
We're now going to configure the module to use raw-ip protocol with the following commands:
* `sudo ip link set wwan0 down`
* `echo 'Y' | sudo tee /sys/class/net/wwan0/qmi/raw_ip`
* `sudo ip link set wwan0 up`
And connecting to a mobile network:
```bash theme={null}
sudo qmicli --device=/dev/cdc-wdm0 --device-open-proxy --wds-start-network="ip-type=4,apn=data00.telnyx" --client-no-release-cid
```
After pasting the above content, Kindly check and remove any new line added
Finally, let's set the default route and IP using udhcpc: `sudo udhcpc -i wwan0`
And tell the udhcpc library to receive a DHCP lease from the network using WWAN0: `ip a s wwan0`
> The Telnyx SIM has access to all network types and many different operators. As a result, it can take them a while to attach to a network for the first time. Once it connects to a network, that network will be added to the list of priority operators so as to ensure a fast connection going forward. Please note that the first attach can take up to 30 minutes.
You are connected to the Internet! Open up your web browser and browse away!
***
Make sure to [sign up for a free Telnyx account ](https://telnyx.com/sign-up "Sign Up")to get started with SIM7600-A Raspberry Pi 4G!
***
### Sixfab Raspberry Pi 3G/4G Hat
> Source: [https://developers.telnyx.com/docs/iot-sim/sixfab-rasp-pi-hat.md](https://developers.telnyx.com/docs/iot-sim/sixfab-rasp-pi-hat.md)
**Original location:** Wireless > IoT > sixfab-rasp-pi-hat
The Sixfab 3G/4G & LTE Base HAT grants your Raspberry Pi or 40-pin Pi compatible single-board-computer a super-simple interface bridge between mini PCIe cellular modems. If you’re looking for a Raspberry Pi LTE HAT for IoT applications like location tracking or global device deployments this is a great device. This add-on also board allows you to create a remote controllable LTE Wi-Fi Hotspot, high-speed GPS tracking and more.
From low-power consumption LTE-M to ultra-high-speed LTE-Advanced mini PCIe cards supported by this HAT. Both UART and USB communication with modules are available on the shield.
This guide assumes that you have a fresh installation of Raspbian OS. Some parts of this guide were obtained from [Sixfab's official tutorial website](https://sixfab.com/shop/).
## Instructions for setting up your Sixfab Raspberry Pi 3G/4G HAT
1. First, let's make sure that the Raspberry Pi is up to date. You can do that by running the below commands:
After pasting the below content, Kindly check and remove any new line added
```bash theme={null}
sudo apt update && sudo apt upgrade
sudo apt dist-upgrade
sudo apt install raspberrypi-kernel-headers
reboot
```
2. Next, we're going to obtain the required repository from the Sixfab quickstart script: `wget https://raw.githubusercontent.com/sixfab/Sixfab_RPi_3G-4G-LTE_Base_Shield/master/tutorials/QMI_tutorial/qmi_install.sh`
3. Now let's take ownership of the script and install it. In this step, you may be prompted to enter an APN. Enter `data00.telnyx` as the APN and you are good to go!
```bash theme={null}
chmod +x qmi_install.sh
sudo ./qmi_install.sh
```
After pasting the above content, Kindly check and remove any new line added
4. Reboot your device and then let's get connected.
5. To get connected to the internet, navigate to the following directory: `cd /files/quectel-CM`
6. Then mark the device as "online" with the below command. This tells the device to relay its initial "online" status message to the network. Once the network acknowledges the message, your device should obtain a valid IP address from the network; thus, have an internet connection.
```bash theme={null}
sudo ./quectel-CM -s internet
```
After pasting the above content, Kindly check and remove any new line added
> The Telnyx SIM has access to all network types and many different operators. As a result, it can take them a while to attach to a network for the first time. Once it connects to a network, that network will be added to the list of priority operators so as to ensure a fast connection going forward. Please note that the first attach can take up to 30 minutes.
***
## Troubleshooting your Sixfab Raspberry Pi 3G/4G HAT
If the device doesn't connect to the internet, this means that the device either doesn't know which APN to use or the Raspberry Pi has trouble communicating with the device. In this case, we are going to let the device handle the disconnect/reconnect process automatically.
To set up this auto-connect process follow this steps:
1. Make sure the sixfab hat is connected.
2. Obtain required repository: `wget https://raw.githubusercontent.com/sixfab/Sixfab_RPi_3G-4G-LTE_Base_Shield/master/tutorials/QMI_tutorial/install_auto_connect.sh`
3. Take ownership of the script and install.
```bash theme={null}
chmod +x install_auto_connect.sh
sudo ./install_auto_connect.sh
```
After pasting the above content, Kindly check and remove any new line added
4. Now, it will ask for an APN. Please make sure to double check the APN as a misspelling in this step may cause connectivity issues.
5. Verify that the module is active and online: `sudo systemctl status qmi_reconnect.service`
***
### Sixfab Cellular IoT HAT
> Source: [https://developers.telnyx.com/docs/iot-sim/sixfab-cellular-iot-hat.md](https://developers.telnyx.com/docs/iot-sim/sixfab-cellular-iot-hat.md)
**Original location:** Wireless > IoT > sixfab-cellular-iot-hat
Sixfab Raspberry Pi Cellular IoT HAT allows you to send or receive data over LTE-M cellular networks that the Telnyx SIM has access to without needing gateways. LTE-M (Cat M1) is a must-have for those looking to make the most of Low Power Wide Area Network (LPWAN) technology. Meanwhile, some countries already started to shut down 2G networks.
The Quectel BG96, lies on the middle of the Raspberry Pi Cellular IoT HAT. It is an LTE Cat M1/Cat NB1/EGPRS module offering a maximum data rate of 375Kbps downlink and uplink with worldwide coverage. This LTE add-on for Raspberry Pi also supports GNSS and GPS for the need of building location, navigation, tracking, mapping and timing applications.
## Prerequisites to complete the Sixfab Cellular IoT HAT setup
1. A Telnyx Portal account and active Telnyx SIM card with data plan. Check out this [Quickstart Guide](/docs/iot-sim/get-started) to get set up.
2. Raspberry Pi 3 Model B or Raspberry Pi 4 (this guide will use 4 but the steps are the same).
3. Make sure both the firmware and software are up-to-date on your Pi.
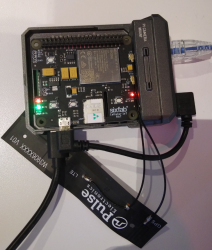
4. Install the Sixfab IoT HAT on the Pi using the 40-pin connector and connect the HAT to the Pi's USB port as shown below.
 Alright, let's get started!
***
## Instructions for setting up your Sixfab Cellular IoT HAT
1. First, we will enable UART. This will allow us to communicate directly with the device using AT commands. To do that, run this command and then follow the prompts as shown:
* `sudo raspi-config`
* Choose Interfacing Options (5):
* Choose P6 Serial:
* Press *No* to the prompt below then *Reboot*.
2. Now, let's retreive necessary repository from Sixfab to begin the dependency installation: `git clone https://github.com/sixfab/Sixfab_RPi_CellularIoT_Library.git`
3. Navigate to the directory, take ownership of the script, and begin the installation:
```bash theme={null}
cd Sixfab_RPi_CellularIoT_Library
sudo python3 setup.py install
```
After pasting the above content, Kindly check and remove any new line added
4. We will now work on activating the module and specifying the APN.
```bash theme={null}
wget https://raw.githubusercontent.com/sixfab/Sixfab_PPP_Installer/master/ppp_install_standalone.sh
sudo chmod +x ppp_install_standalone.sh
sudo ./ppp_install_standalone.sh
```
After pasting the above content, Kindly check and remove any new line added
5. Once the installation begins, you will be prompted several options. Select the options as follows:
* Choose your HAT --> Cellular IoT HAT
* What is your carrier APN? --> data00.telnyx
* Does your carrier need an username or password? --> n
* What is your device communication PORT? --> ttyUSB3
* Would you like to reconnect automatically on boot? --> This step is optional. We will select "n" for this guide.
6. Once the Pi reboots, use the following commands to connect/disconnect from the internet. If you have selected "y" to the reconnect prompt during configuration, your HAT will automatically connect to the network.
`sudo pon` to connect
`sudo poff` to disconnect
> The Telnyx SIM has access to all network types and many different operators. As a result, it can take them a while to attach to a network for the first time. Once it connects to a network, that network will be added to the list of priority operators so as to ensure a fast connection going forward. Please note that the first attach can take up to 30 minutes.
***
## Troubleshooting your Sixfab Cellular IoT HAT
If you have issues with network connectivity, check `ifconfig` to see if interface PPP0 is visible (it should be located at the very bottom).
If you do not see this entry, repeat step 3 above. Sixfab's script is designed to skip items when there is an error or a part doesn't run properly.
If you see the PPP0 interface but there is no data connection please try the following steps.
1. Try pinging Google DNS at 8.8.8.8.
2. If this doesn't work, reboot the Pi and reset the interface.
```bash theme={null}
sudo reboot
sudo ifconfig ppp0 down
sudo ifconfig ppp0 up
```
After pasting the above content, Kindly check and remove any new line added
3. If this step fails, run step 3 and 4 from the original setup again with a blank APN, then run the script again with the correct APN (`data00.telnyx`).
4. Check the antenna connection - main & GPS. An improperly seated connection will cause the device to reboot.
5. Check if the antenna supports your HAT model.
6. Check the Pi's power supply - the HAT itself uses 2 - 6 watts of power. Make sure you are using a sufficient power supply for your Pi. Raspberry Pi 3 requires at least 12W of power. Raspberry Pi 4 requires at least 15W of power.
7. Slow internet may cause issues in your setup too. The theoratical speed max for this HAT is about 350 Kbps range as this is the limitation of the CATM1 network. This is normal.
***
### Particle Boron LTE Kit
> Source: [https://developers.telnyx.com/docs/iot-sim/particle-boron-lte-kit.md](https://developers.telnyx.com/docs/iot-sim/particle-boron-lte-kit.md)
**Original location:** Wireless > IoT > particle-boron-lte-kit
The Boron is a powerful LTE Cat M1 or 2G/3G enabled development kit that supports cellular networks and Bluetooth LE (BLE). It is based on the Nordic nRF52840 and has built-in battery charging circuitry so it’s easy to connect a Li-Po and deploy your local network in minutes.
This guide will walk you through how to pair a Particle Electron Boron LTE Kit with a Telnyx SIM Card.
## Prerequisites to complete the Particle Boron LTE Kit setup:
1. A Telnyx Portal account and active Telnyx SIM card with data plan. Check out this [Quickstart Guide](/docs/iot-sim/get-started) to get set up.
2. An Android or iOS device with internet acccess.
3. The Particle Electron Boron device.
4. A computer with CLI.
Alright, let's get started!
***
## Instructions for setting up your Sixfab Cellular IoT HAT
1. First, we will enable UART. This will allow us to communicate directly with the device using AT commands. To do that, run this command and then follow the prompts as shown:
* `sudo raspi-config`
* Choose Interfacing Options (5):
* Choose P6 Serial:
* Press *No* to the prompt below then *Reboot*.
2. Now, let's retreive necessary repository from Sixfab to begin the dependency installation: `git clone https://github.com/sixfab/Sixfab_RPi_CellularIoT_Library.git`
3. Navigate to the directory, take ownership of the script, and begin the installation:
```bash theme={null}
cd Sixfab_RPi_CellularIoT_Library
sudo python3 setup.py install
```
After pasting the above content, Kindly check and remove any new line added
4. We will now work on activating the module and specifying the APN.
```bash theme={null}
wget https://raw.githubusercontent.com/sixfab/Sixfab_PPP_Installer/master/ppp_install_standalone.sh
sudo chmod +x ppp_install_standalone.sh
sudo ./ppp_install_standalone.sh
```
After pasting the above content, Kindly check and remove any new line added
5. Once the installation begins, you will be prompted several options. Select the options as follows:
* Choose your HAT --> Cellular IoT HAT
* What is your carrier APN? --> data00.telnyx
* Does your carrier need an username or password? --> n
* What is your device communication PORT? --> ttyUSB3
* Would you like to reconnect automatically on boot? --> This step is optional. We will select "n" for this guide.
6. Once the Pi reboots, use the following commands to connect/disconnect from the internet. If you have selected "y" to the reconnect prompt during configuration, your HAT will automatically connect to the network.
`sudo pon` to connect
`sudo poff` to disconnect
> The Telnyx SIM has access to all network types and many different operators. As a result, it can take them a while to attach to a network for the first time. Once it connects to a network, that network will be added to the list of priority operators so as to ensure a fast connection going forward. Please note that the first attach can take up to 30 minutes.
***
## Troubleshooting your Sixfab Cellular IoT HAT
If you have issues with network connectivity, check `ifconfig` to see if interface PPP0 is visible (it should be located at the very bottom).
If you do not see this entry, repeat step 3 above. Sixfab's script is designed to skip items when there is an error or a part doesn't run properly.
If you see the PPP0 interface but there is no data connection please try the following steps.
1. Try pinging Google DNS at 8.8.8.8.
2. If this doesn't work, reboot the Pi and reset the interface.
```bash theme={null}
sudo reboot
sudo ifconfig ppp0 down
sudo ifconfig ppp0 up
```
After pasting the above content, Kindly check and remove any new line added
3. If this step fails, run step 3 and 4 from the original setup again with a blank APN, then run the script again with the correct APN (`data00.telnyx`).
4. Check the antenna connection - main & GPS. An improperly seated connection will cause the device to reboot.
5. Check if the antenna supports your HAT model.
6. Check the Pi's power supply - the HAT itself uses 2 - 6 watts of power. Make sure you are using a sufficient power supply for your Pi. Raspberry Pi 3 requires at least 12W of power. Raspberry Pi 4 requires at least 15W of power.
7. Slow internet may cause issues in your setup too. The theoratical speed max for this HAT is about 350 Kbps range as this is the limitation of the CATM1 network. This is normal.
***
### Particle Boron LTE Kit
> Source: [https://developers.telnyx.com/docs/iot-sim/particle-boron-lte-kit.md](https://developers.telnyx.com/docs/iot-sim/particle-boron-lte-kit.md)
**Original location:** Wireless > IoT > particle-boron-lte-kit
The Boron is a powerful LTE Cat M1 or 2G/3G enabled development kit that supports cellular networks and Bluetooth LE (BLE). It is based on the Nordic nRF52840 and has built-in battery charging circuitry so it’s easy to connect a Li-Po and deploy your local network in minutes.
This guide will walk you through how to pair a Particle Electron Boron LTE Kit with a Telnyx SIM Card.
## Prerequisites to complete the Particle Boron LTE Kit setup:
1. A Telnyx Portal account and active Telnyx SIM card with data plan. Check out this [Quickstart Guide](/docs/iot-sim/get-started) to get set up.
2. An Android or iOS device with internet acccess.
3. The Particle Electron Boron device.
4. A computer with CLI.
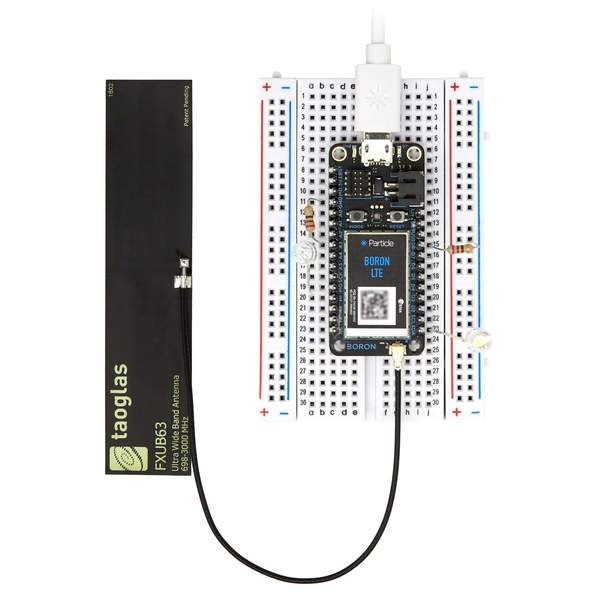 Alright, let's get started!
***
## Instructions for setting up your Particle Boron LTE Kit:
1. First, connect the LTE antenna to the port located in the front of the Particle Electron Boron device and connect the device to power. The device will automatically go into pairing mode.
2. Download and install the mobile application on your [Android](https://docs.particle.io/quickstart/boron/) or [iOS](https://apps.apple.com/us/app/particle-iot/id991459054) device.
3. Open the Particle Mobile Application and follow the on-screen instructions:
* Click "Get Started".
* Log into your Particle.io account or create an account.
* Press the + button located at the top right of the page and select the device name (i.e. boron-ij3).
Your device will now activate its eSIM and you'll be able to see the device by logging into console.particle.io. Particle.io offers a 3-month free trial with limited free data.
4. Now, let's enable third-party SIM capability on the device. To begin, insert the Telnyx SIM card into the device.
5. Set up CLI environment on your computer using this [Particle guide](https://docs.particle.io/tutorials/developer-tools/cli).
6. Place your device in DFU mode. This mode allows you to interact with the device using a computer.
7. Press and hold the "Mode" button then press the "Reset" button once. Keep holding the "Mode" button until the device flashes yellow.
8. Connect your device to the computer via the provided micro-USB cable. Then run the following commands in your CLI environment:
* `particle update`
* This command updates the device's firmware (1.5.2 as of this guide).
* `particle flash --usb tinker`
* The device, by default, receives commands from the Particle Cloud via a network connection.
* This command allows your computer to control the device instead of the cloud.
9. Repeat Step 6 to place your device into DFU mode.
10. Download this file [TelnyxSIM](https://assets.ctfassets.net/4b49ta6b3nwj/2UDzHa6KD1Uf6OkKidxtxD/a620b9e24f5c0997be7e593ae39180ec/TelnyxSIM.cpp) and navigate to the saved location. Then, run the following commands:
* `particle compile boron`
* This command will compile the .cpp file into a binary file.
* `particle compile boron TelnyxSIM.cpp --saveTo firmware.bin`
* This command will create a firmware.bin file that you will tell the device to use the Telnyx SIM card.
* `particle flash --usb firmware.bin`
* This command will flash the firmware.bin on to the device. The device will start using the Telnyx SIM card next time it reboots.
11. Repeat Step 6 to place your device into DFU mode and run this command to give back your device its control:
* `particle flash --usb tinker`
12. Once you connect your device into a power adapter, you'll connect to the Telnyx network. It may take up to 2 minutes to reflect network connectivity. You can also verify the connectivity by clicking on your device name in console.particle.io.
That's it! Your Particle Electron Boron LTE device is all set up with a Telnyx SIM card.
***
### Nordic nRF9160 DK
> Source: [https://developers.telnyx.com/docs/iot-sim/nordic-semiconductor.md](https://developers.telnyx.com/docs/iot-sim/nordic-semiconductor.md)
**Original location:** Wireless > IoT > nordic-semiconductor
The nRF9160 DK is an affordable, pre-certified single-board development kit for evaluation and development on the nRF9160 SiP for LTE-M, NB-IoT and GPS. This guide will walk through the steps to take in order to connect a Telnyx SIM to the nRF9160 development kit.
## Updating the firmware of the nRF9160:
1. Download the latest board and SIP modem firmware for this device [here](https://www.nordicsemi.com/Products/Development-hardware/nrf9160-dk/download).
2. Once both firmwares are downloaded, open up your file manager and extract the board firmware. The zip file has the file name: `nrf9160dk_fw_0000-00-00_xxxxxxx.zip.` Do NOT extract the SIP modem firmware labeled `mfw_nrf9160_x.x.x.zip.`
3. Download and install the latest nRF Connect application for your operating system [here](https://www.nordicsemi.com/Products/Development-tools/nrf-connect-for-desktop/download#infotabs).
4. Once installed, open up the application and install the following modules:
* LTE Link Monitor
* Programmer
* Trace Collector
Alright, let's get started!
***
## Instructions for setting up your Particle Boron LTE Kit:
1. First, connect the LTE antenna to the port located in the front of the Particle Electron Boron device and connect the device to power. The device will automatically go into pairing mode.
2. Download and install the mobile application on your [Android](https://docs.particle.io/quickstart/boron/) or [iOS](https://apps.apple.com/us/app/particle-iot/id991459054) device.
3. Open the Particle Mobile Application and follow the on-screen instructions:
* Click "Get Started".
* Log into your Particle.io account or create an account.
* Press the + button located at the top right of the page and select the device name (i.e. boron-ij3).
Your device will now activate its eSIM and you'll be able to see the device by logging into console.particle.io. Particle.io offers a 3-month free trial with limited free data.
4. Now, let's enable third-party SIM capability on the device. To begin, insert the Telnyx SIM card into the device.
5. Set up CLI environment on your computer using this [Particle guide](https://docs.particle.io/tutorials/developer-tools/cli).
6. Place your device in DFU mode. This mode allows you to interact with the device using a computer.
7. Press and hold the "Mode" button then press the "Reset" button once. Keep holding the "Mode" button until the device flashes yellow.
8. Connect your device to the computer via the provided micro-USB cable. Then run the following commands in your CLI environment:
* `particle update`
* This command updates the device's firmware (1.5.2 as of this guide).
* `particle flash --usb tinker`
* The device, by default, receives commands from the Particle Cloud via a network connection.
* This command allows your computer to control the device instead of the cloud.
9. Repeat Step 6 to place your device into DFU mode.
10. Download this file [TelnyxSIM](https://assets.ctfassets.net/4b49ta6b3nwj/2UDzHa6KD1Uf6OkKidxtxD/a620b9e24f5c0997be7e593ae39180ec/TelnyxSIM.cpp) and navigate to the saved location. Then, run the following commands:
* `particle compile boron`
* This command will compile the .cpp file into a binary file.
* `particle compile boron TelnyxSIM.cpp --saveTo firmware.bin`
* This command will create a firmware.bin file that you will tell the device to use the Telnyx SIM card.
* `particle flash --usb firmware.bin`
* This command will flash the firmware.bin on to the device. The device will start using the Telnyx SIM card next time it reboots.
11. Repeat Step 6 to place your device into DFU mode and run this command to give back your device its control:
* `particle flash --usb tinker`
12. Once you connect your device into a power adapter, you'll connect to the Telnyx network. It may take up to 2 minutes to reflect network connectivity. You can also verify the connectivity by clicking on your device name in console.particle.io.
That's it! Your Particle Electron Boron LTE device is all set up with a Telnyx SIM card.
***
### Nordic nRF9160 DK
> Source: [https://developers.telnyx.com/docs/iot-sim/nordic-semiconductor.md](https://developers.telnyx.com/docs/iot-sim/nordic-semiconductor.md)
**Original location:** Wireless > IoT > nordic-semiconductor
The nRF9160 DK is an affordable, pre-certified single-board development kit for evaluation and development on the nRF9160 SiP for LTE-M, NB-IoT and GPS. This guide will walk through the steps to take in order to connect a Telnyx SIM to the nRF9160 development kit.
## Updating the firmware of the nRF9160:
1. Download the latest board and SIP modem firmware for this device [here](https://www.nordicsemi.com/Products/Development-hardware/nrf9160-dk/download).
2. Once both firmwares are downloaded, open up your file manager and extract the board firmware. The zip file has the file name: `nrf9160dk_fw_0000-00-00_xxxxxxx.zip.` Do NOT extract the SIP modem firmware labeled `mfw_nrf9160_x.x.x.zip.`
3. Download and install the latest nRF Connect application for your operating system [here](https://www.nordicsemi.com/Products/Development-tools/nrf-connect-for-desktop/download#infotabs).
4. Once installed, open up the application and install the following modules:
* LTE Link Monitor
* Programmer
* Trace Collector
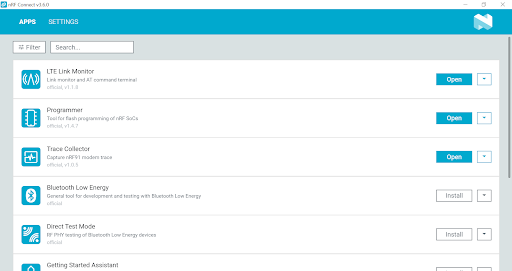 5. Look at the front of the device and make sure it's in debug mode as shown below.
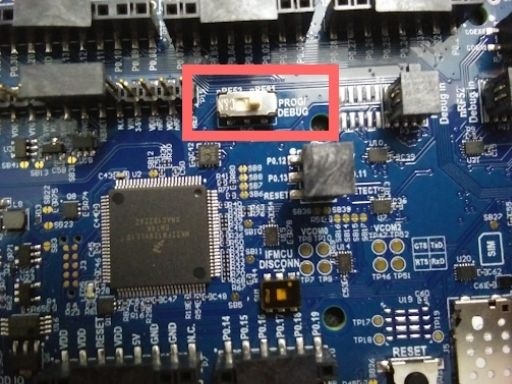 6. Connect the device to the computer via a microUSB cable and turn on the device using the power switch located at the bottom left corner of the device.
7. Open up the `Programmer` application and select the device denoted `PCA10090`.
8. Drag and drop the firmware file into the file memory layout box then select `Erase & write` to update the firmware. The left box will show patterns when the update is in progress. Once the update is complete, the left box will display a `Device is connected` message.
6. Connect the device to the computer via a microUSB cable and turn on the device using the power switch located at the bottom left corner of the device.
7. Open up the `Programmer` application and select the device denoted `PCA10090`.
8. Drag and drop the firmware file into the file memory layout box then select `Erase & write` to update the firmware. The left box will show patterns when the update is in progress. Once the update is complete, the left box will display a `Device is connected` message.
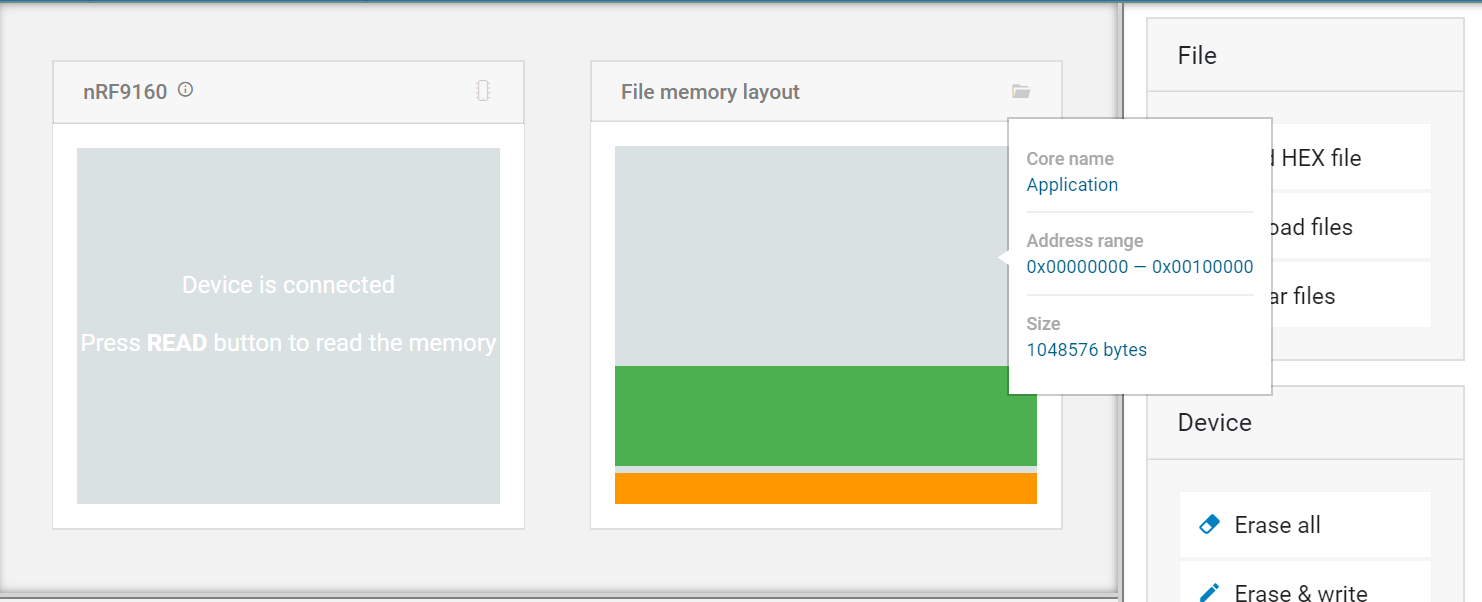 9. Now, we'll update the modem firmware. Scroll the right toolbar to the bottom of the screen. Select `Update modem` under the Cellular Modem section and click on the SIP modem firmware that was downloaded in step 1. Then click `Write`.
* The zip file has the following filename: `mfw_nrf9160_x.x.x.zip.`
9. Now, we'll update the modem firmware. Scroll the right toolbar to the bottom of the screen. Select `Update modem` under the Cellular Modem section and click on the SIP modem firmware that was downloaded in step 1. Then click `Write`.
* The zip file has the following filename: `mfw_nrf9160_x.x.x.zip.`
 10. Once the modem updates are complete, turn off the device by using the power switch located at the bottom left corner and disconnect the device from the computer.
## Connecting the nRF9160 device to your Telnyx SIM:
1. Insert your Telnyx SIM card into the nRF9160 device (this device uses nano-sim). Make sure to insert in the correct orientation as notated on the development kit.
10. Once the modem updates are complete, turn off the device by using the power switch located at the bottom left corner and disconnect the device from the computer.
## Connecting the nRF9160 device to your Telnyx SIM:
1. Insert your Telnyx SIM card into the nRF9160 device (this device uses nano-sim). Make sure to insert in the correct orientation as notated on the development kit.
 2. Connect the nRF9160 device to the computer and power on the device.
3. Open up the nRF Connect application and launch `LTE Link Monitor`.
4. In the `Select Device` dropdown menu, select `PCA10090`. The LTE Link Monitor display will update and run preselected AT commands. Allow 10-15 seconds for it to complete and the device will automatically connect to the network.
Verify connectivity in the information tab located on the right side of your display.
2. Connect the nRF9160 device to the computer and power on the device.
3. Open up the nRF Connect application and launch `LTE Link Monitor`.
4. In the `Select Device` dropdown menu, select `PCA10090`. The LTE Link Monitor display will update and run preselected AT commands. Allow 10-15 seconds for it to complete and the device will automatically connect to the network.
Verify connectivity in the information tab located on the right side of your display.
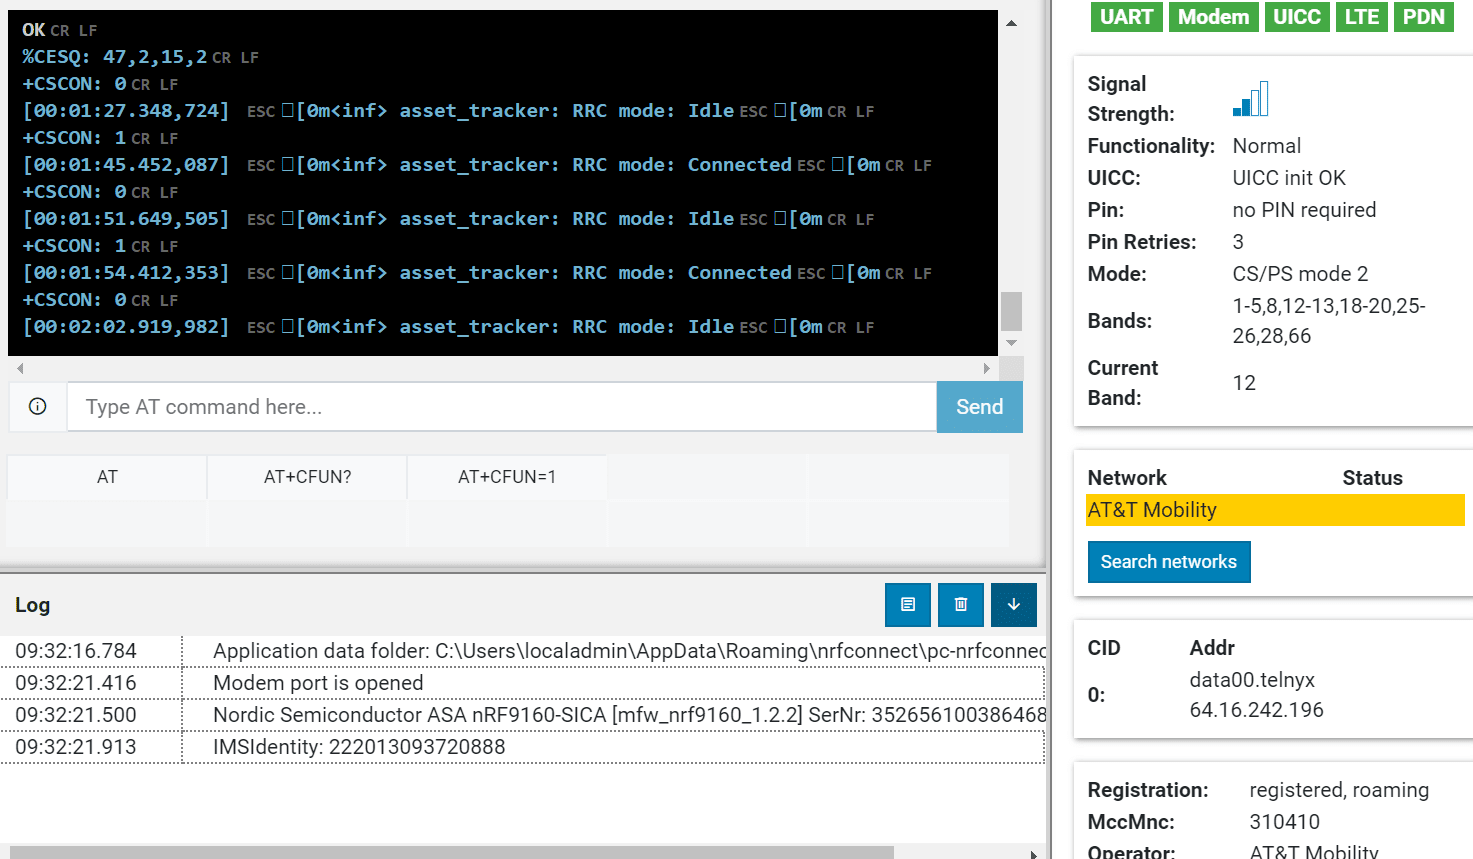 That's it! You've connected the Telnyx SIM to the nRF9160 development kit.
***
### Cradlepoint IBR200
> Source: [https://developers.telnyx.com/docs/iot-sim/cradlepoint-ibr200-cellular.md](https://developers.telnyx.com/docs/iot-sim/cradlepoint-ibr200-cellular.md)
**Original location:** Wireless > IoT > cradlepoint-ibr200-cellular
The compact, semi-ruggedized IBR200 LTE router is designed for secure, cloud-managed IoT networking. The IBR200 enables use of low-cost M2M/IoT data plans via the Telnyx Wireless SIM, and with NetCloud Perimeter, addresses the biggest gap in IoT: security. It comes with NetCloud Perimeter and advanced security for PCI-compliant networking of vulnerable IoT devices.
This guide will walk you through how to set up the CradlePoint IBR200 cellular router with a Telnyx SIM Card.
## Prerequisites to complete the Cradlepoint IBR200 Cellular Router setup
1. A Telnyx Portal account and active Telnyx SIM card with data plan. Check out this [Quickstart Guide](/docs/iot-sim/get-started) to get set up.
2. The Cradlepoint IBR200 device (as shown below).
3. A Netcloud Essentials Cloud subscription is required for full functionality of this Cradlepoint modem. Without this, many of its features will be disabled. This guide, however, will walk you through basic connectivity which does NOT require the subscription.
That's it! You've connected the Telnyx SIM to the nRF9160 development kit.
***
### Cradlepoint IBR200
> Source: [https://developers.telnyx.com/docs/iot-sim/cradlepoint-ibr200-cellular.md](https://developers.telnyx.com/docs/iot-sim/cradlepoint-ibr200-cellular.md)
**Original location:** Wireless > IoT > cradlepoint-ibr200-cellular
The compact, semi-ruggedized IBR200 LTE router is designed for secure, cloud-managed IoT networking. The IBR200 enables use of low-cost M2M/IoT data plans via the Telnyx Wireless SIM, and with NetCloud Perimeter, addresses the biggest gap in IoT: security. It comes with NetCloud Perimeter and advanced security for PCI-compliant networking of vulnerable IoT devices.
This guide will walk you through how to set up the CradlePoint IBR200 cellular router with a Telnyx SIM Card.
## Prerequisites to complete the Cradlepoint IBR200 Cellular Router setup
1. A Telnyx Portal account and active Telnyx SIM card with data plan. Check out this [Quickstart Guide](/docs/iot-sim/get-started) to get set up.
2. The Cradlepoint IBR200 device (as shown below).
3. A Netcloud Essentials Cloud subscription is required for full functionality of this Cradlepoint modem. Without this, many of its features will be disabled. This guide, however, will walk you through basic connectivity which does NOT require the subscription.
 Alright, let's get started!
***
## Instructions for setting up your Cradlepoint IBR200 Cellular Router:
1. First, insert the Telnyx SIM card into your Cradlepoint device. The device only accepts the standard SIM card (the largest size from your Telnyx SIM card kit).
2. Power on the device by connecting the device to its charging adapter.
3. Open up your preferred web browser and navigate to 192.168.0.1. This is the router's default gateway. You'll be prompted to log into the device. The default credentials are:
* Username: admin
* Password: the serial number located on the label at the bottom of the device.
Alright, let's get started!
***
## Instructions for setting up your Cradlepoint IBR200 Cellular Router:
1. First, insert the Telnyx SIM card into your Cradlepoint device. The device only accepts the standard SIM card (the largest size from your Telnyx SIM card kit).
2. Power on the device by connecting the device to its charging adapter.
3. Open up your preferred web browser and navigate to 192.168.0.1. This is the router's default gateway. You'll be prompted to log into the device. The default credentials are:
* Username: admin
* Password: the serial number located on the label at the bottom of the device.
 4. Click on "Connection Manager" tab.
5. Click "Add".
6. In this step you'll specify the WAN Interface Profile. Configure the profile as shown below:
* Profile name: Telnyx SIM
* Type: Modem
* Leave everything else unchecked
4. Click on "Connection Manager" tab.
5. Click "Add".
6. In this step you'll specify the WAN Interface Profile. Configure the profile as shown below:
* Profile name: Telnyx SIM
* Type: Modem
* Leave everything else unchecked
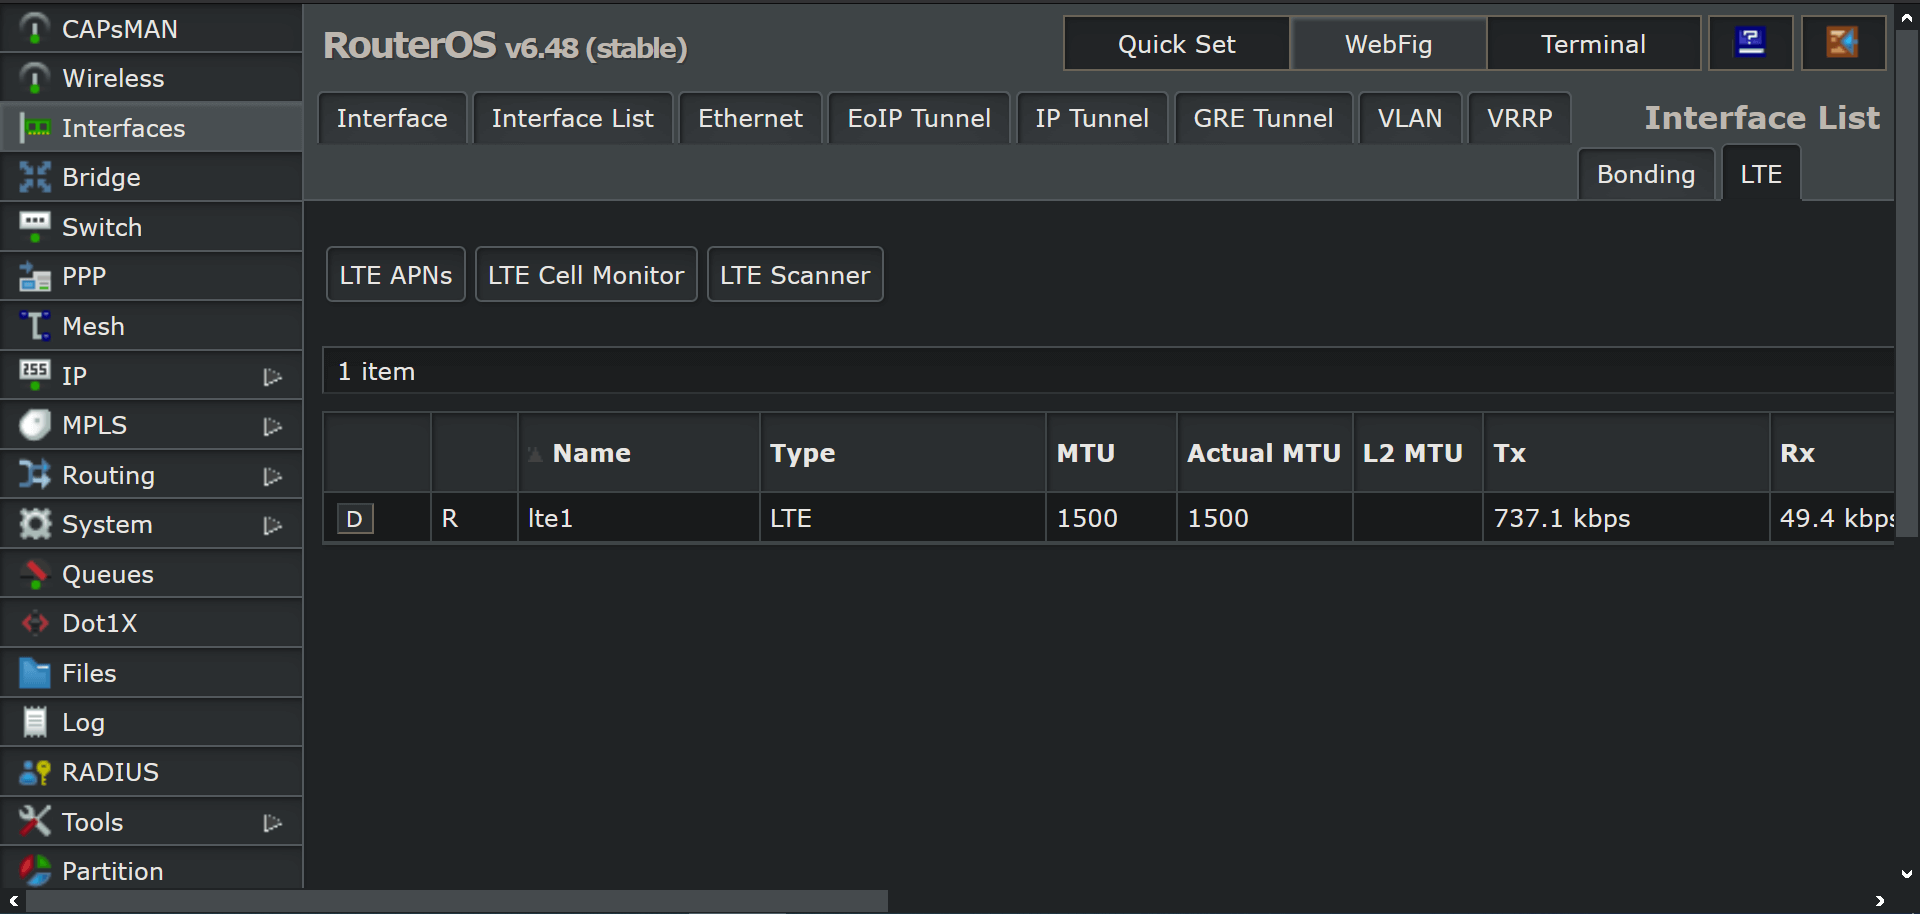 7. On the next page, click on "SIM/APN/Auth". In this step, you'll specify the APN to use with the Telnyx SIM Card. Configure the items as shown below:
* SIM Card Lock: No Pin Required
* Access Point Name (APN): Default Override
* data00.telnyx
7. On the next page, click on "SIM/APN/Auth". In this step, you'll specify the APN to use with the Telnyx SIM Card. Configure the items as shown below:
* SIM Card Lock: No Pin Required
* Access Point Name (APN): Default Override
* data00.telnyx
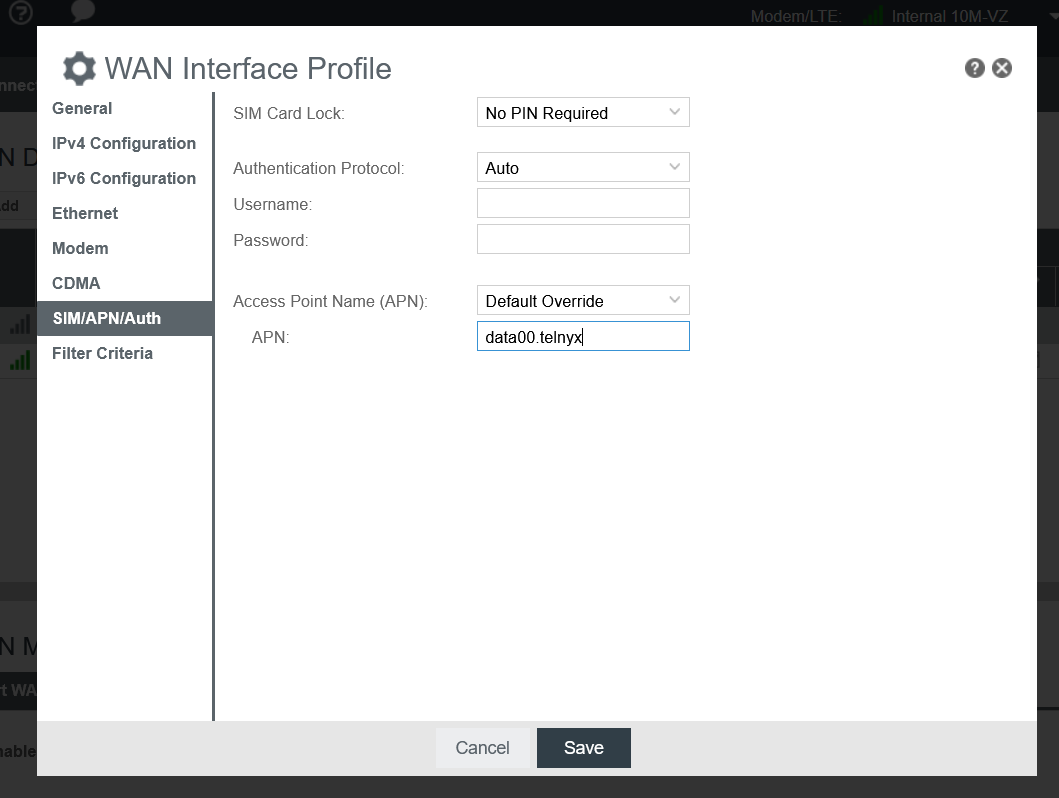 8. Once you hit "Save" it'll take a few minutes for your device to receive connection. You can verify connectivity by heading to "Connection Manager" tab.
> The Telnyx SIM has access to all network types and many different operators. As a result, it can take them a while to attach to a network for the first time. Once it connects to a network, that network will be added to the list of priority operators so as to ensure a fast connection going forward. Please note that the first attach can take up to 30 minutes.
That's it! Your CradlePoint IBR200 cellular router is all set up with a Telnyx SIM card.
***
### Pepwave Max BR1 Mini LTE
> Source: [https://developers.telnyx.com/docs/iot-sim/pepwave-max-br1-mini-lte.md](https://developers.telnyx.com/docs/iot-sim/pepwave-max-br1-mini-lte.md)
**Original location:** Wireless > IoT > pepwave-max-br1-mini-lte
The Pepwave MAX BR1 Mini is the latest industrial-grade, 4G LTE router from Peplink. This capable router is heavy on features while keeping a lightweight, small footprint, suitable for installation just about anywhere.
Whether the BR1 Mini is installed in a vehicle, used in M2M deployments, or will provide cellular backup or Out of Band Management to a home or office, it has great performance and works seamlessly with Telnyx Wireless SIMs.
This guide will walk you through how to set up the Pepwave Max BRI Mini LTE cellular router with a Telnyx SIM card.
Note: this is a standalone setup guide; it does not utilize the InControl Cloud Controller.
## Prerequisites to complete the Pepwave MAX BR1 Mini setup
1. A Telnyx Portal account and active Telnyx SIM card with data plan. Check out this [Quickstart Guide](/docs/iot-sim/get-started) to get set up.
2. The Pepwave Max BRI Mini LTE Device.
3. A computer.
4. The latest firmware, which can be obtained [here](https://www.peplink.com/support/downloads).
8. Once you hit "Save" it'll take a few minutes for your device to receive connection. You can verify connectivity by heading to "Connection Manager" tab.
> The Telnyx SIM has access to all network types and many different operators. As a result, it can take them a while to attach to a network for the first time. Once it connects to a network, that network will be added to the list of priority operators so as to ensure a fast connection going forward. Please note that the first attach can take up to 30 minutes.
That's it! Your CradlePoint IBR200 cellular router is all set up with a Telnyx SIM card.
***
### Pepwave Max BR1 Mini LTE
> Source: [https://developers.telnyx.com/docs/iot-sim/pepwave-max-br1-mini-lte.md](https://developers.telnyx.com/docs/iot-sim/pepwave-max-br1-mini-lte.md)
**Original location:** Wireless > IoT > pepwave-max-br1-mini-lte
The Pepwave MAX BR1 Mini is the latest industrial-grade, 4G LTE router from Peplink. This capable router is heavy on features while keeping a lightweight, small footprint, suitable for installation just about anywhere.
Whether the BR1 Mini is installed in a vehicle, used in M2M deployments, or will provide cellular backup or Out of Band Management to a home or office, it has great performance and works seamlessly with Telnyx Wireless SIMs.
This guide will walk you through how to set up the Pepwave Max BRI Mini LTE cellular router with a Telnyx SIM card.
Note: this is a standalone setup guide; it does not utilize the InControl Cloud Controller.
## Prerequisites to complete the Pepwave MAX BR1 Mini setup
1. A Telnyx Portal account and active Telnyx SIM card with data plan. Check out this [Quickstart Guide](/docs/iot-sim/get-started) to get set up.
2. The Pepwave Max BRI Mini LTE Device.
3. A computer.
4. The latest firmware, which can be obtained [here](https://www.peplink.com/support/downloads).
 Alright, let's get started!
***
## Instructions for setting up your Pepwave MAX BR1 Mini
1. To start, insert the Telnyx SIM card into either SIM A or SIM B slot on the device and power on the device.The device only accepts the standard size SIM card (the largest SIM card included in the kit).
2. Connect to the device either via the WiFi credentials listed on the unit below the device or via the WAN/LAN Ethernet port located on the back of the device.
3. Navigate to `192.168.50.1`, this is the default gateway of the device. Now, log in, the default username and password are both `admin`.
4. Update the device firmware by navigating to `System`, then `Firmware`, and uploading the firmware file. This may take up to 8 minutes.
Alright, let's get started!
***
## Instructions for setting up your Pepwave MAX BR1 Mini
1. To start, insert the Telnyx SIM card into either SIM A or SIM B slot on the device and power on the device.The device only accepts the standard size SIM card (the largest SIM card included in the kit).
2. Connect to the device either via the WiFi credentials listed on the unit below the device or via the WAN/LAN Ethernet port located on the back of the device.
3. Navigate to `192.168.50.1`, this is the default gateway of the device. Now, log in, the default username and password are both `admin`.
4. Update the device firmware by navigating to `System`, then `Firmware`, and uploading the firmware file. This may take up to 8 minutes.
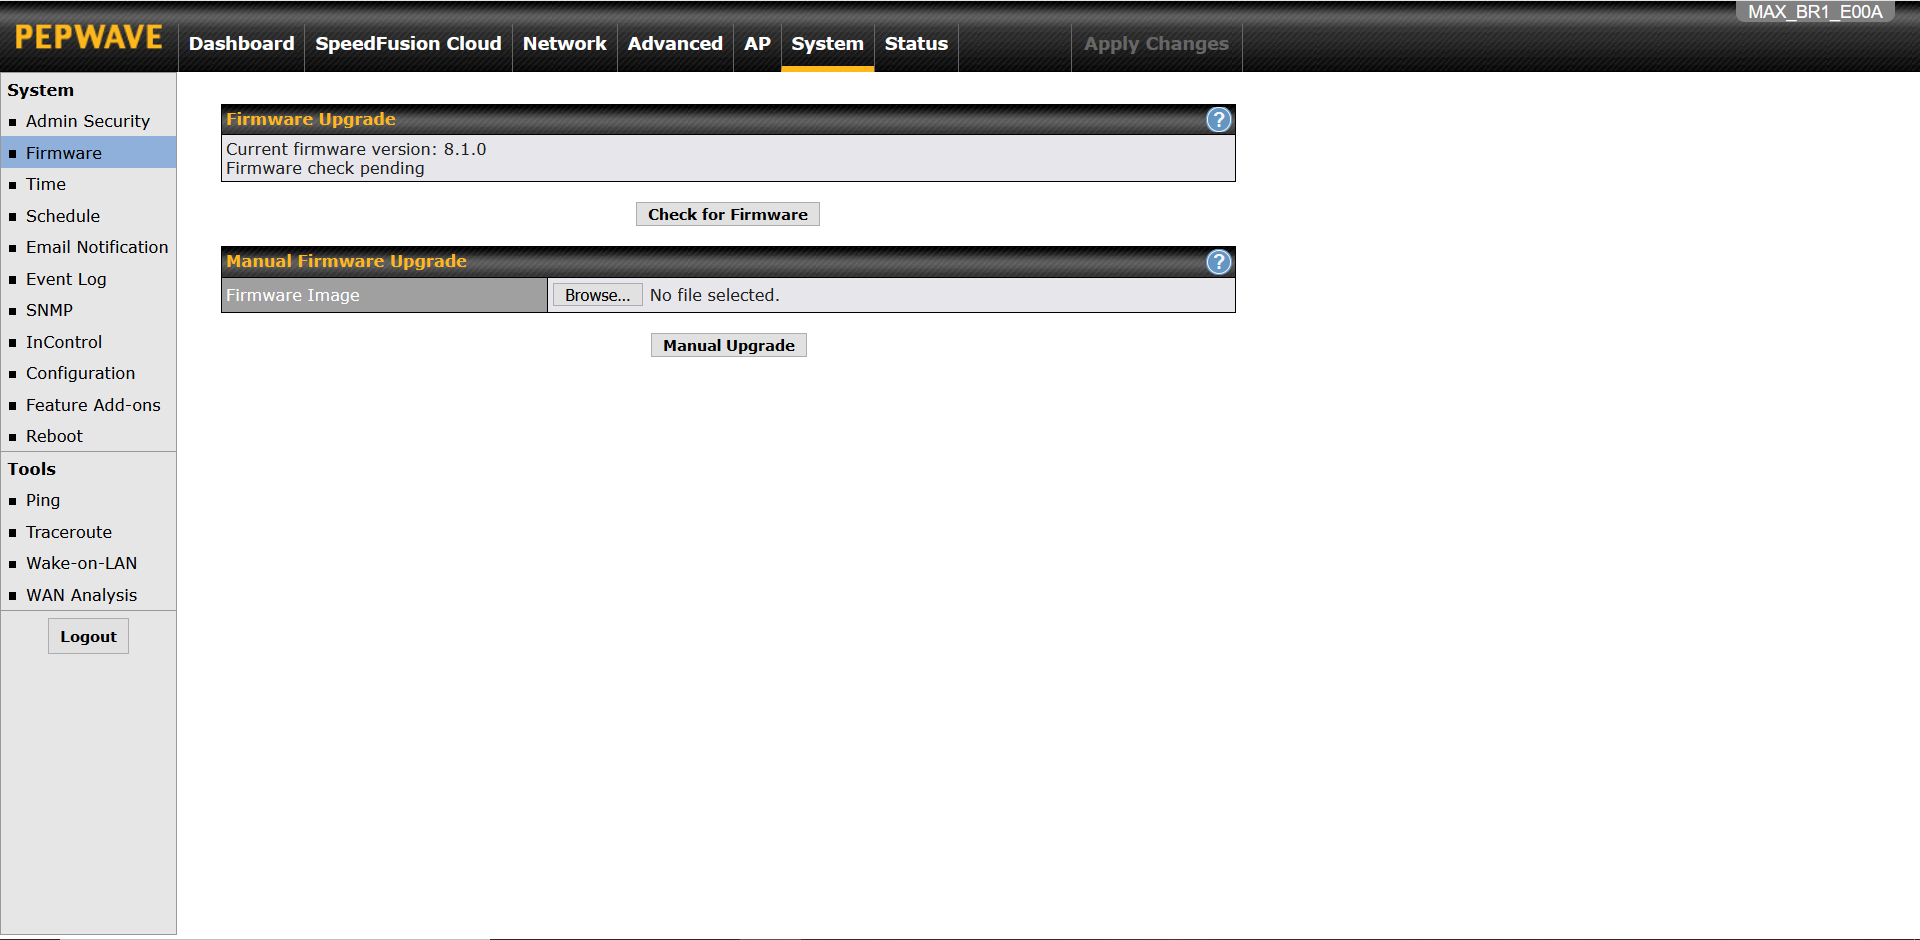 5. Once the update process is complete, you'll be directed to the `Dashboards` tab. Click on `Details` under WAN Connection Status. Then, scroll down to `Cellular Settings` and make modifications as shown below:
* SIM Card: Specified in Step 1 of this guide
* LTE/3G: Auto
* Band Selection: Auto
* Data Roaming: Checked, Any Countries
* APN: Custom, data00.telnyx
* Username: Leave blank
* Password: Leave blank
5. Once the update process is complete, you'll be directed to the `Dashboards` tab. Click on `Details` under WAN Connection Status. Then, scroll down to `Cellular Settings` and make modifications as shown below:
* SIM Card: Specified in Step 1 of this guide
* LTE/3G: Auto
* Band Selection: Auto
* Data Roaming: Checked, Any Countries
* APN: Custom, data00.telnyx
* Username: Leave blank
* Password: Leave blank
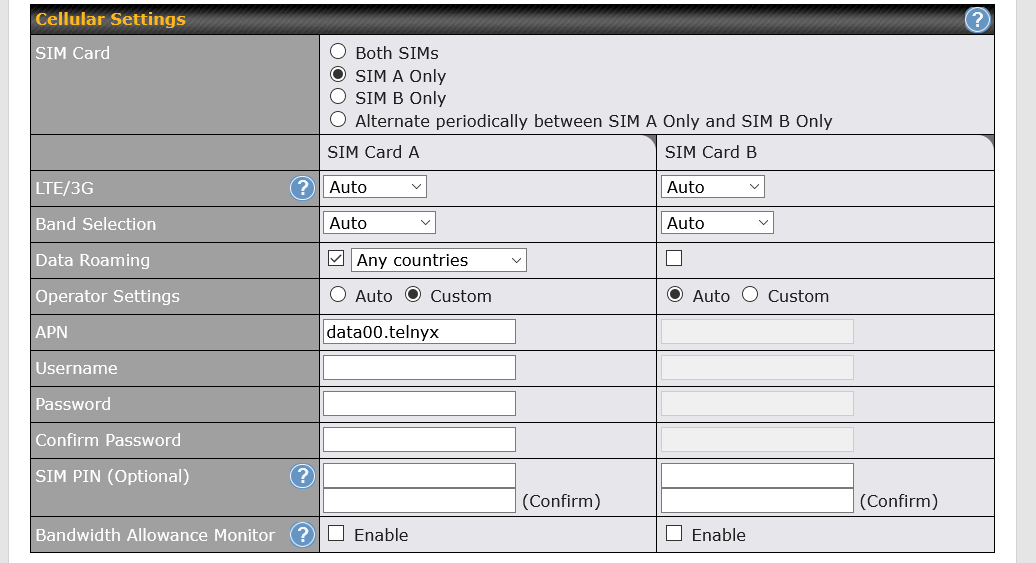 6. Scroll down to the end of this page and press `Save and Apply`.
7. It'll take about 2 minutes to connect and you can verify connectivity by checking the `WAN Connection Status` under the `Dashboards` tab. This will show that you're connected to Telecom Italia Mobile.
That's it! You've just set up your Pepwave Max BRI Mini LTE cellular router with a Telnyx SIM card.
***
### GL-MiFi 4G Smart Router
> Source: [https://developers.telnyx.com/docs/iot-sim/glmifi-router.md](https://developers.telnyx.com/docs/iot-sim/glmifi-router.md)
**Original location:** Wireless > IoT > glmifi-router
This guide will walk you through how to pair a GL-MiFi 4G Smart Router with a Telnyx SIM Card.
## Prerequisites to complete the GL-MiFi 4G Smart Router setup:
1. A Telnyx Portal account and active Telnyx SIM card with data plan. Check out this [Quickstart Guide](/docs/iot-sim/get-started) to get set up.
2. GL-MiFi device.
3. A computer with a browser.
Alright, let's get started!
***
## Instructions for setting up your GL-MiFi 4G device:
1. First, insert the SIM card into the device. Look at the picture below for the proper placement of the SIM card, the gold chip should be facing up.
2. Power on the device and connect either via the Ethernet port or WiFi connection.The default WiFi credentials are located on a label at the bottom of the device.
3. Navigate to the device’s default gateway at `192.168.8.1` and log into the device. You'll be prompted to set an admin password but if you don't see the prompt, the default password is `admin`.
4. Once you’ve logged in, click on `manual setup` located in the Cellular Modem Overview section. Enter the following details as shown below and click `Apply`.
* Device: `/dev/cdc-wdm0`
* APN: `data00.telnyx`
5. The device will now attach to the Telnyx network. You can verify the connectivity by checking the front page of the default gateway as shown below. You'll notice that the device now shows a `Disconnect` button as well as IP address and data usage.
6. Scroll down to the end of this page and press `Save and Apply`.
7. It'll take about 2 minutes to connect and you can verify connectivity by checking the `WAN Connection Status` under the `Dashboards` tab. This will show that you're connected to Telecom Italia Mobile.
That's it! You've just set up your Pepwave Max BRI Mini LTE cellular router with a Telnyx SIM card.
***
### GL-MiFi 4G Smart Router
> Source: [https://developers.telnyx.com/docs/iot-sim/glmifi-router.md](https://developers.telnyx.com/docs/iot-sim/glmifi-router.md)
**Original location:** Wireless > IoT > glmifi-router
This guide will walk you through how to pair a GL-MiFi 4G Smart Router with a Telnyx SIM Card.
## Prerequisites to complete the GL-MiFi 4G Smart Router setup:
1. A Telnyx Portal account and active Telnyx SIM card with data plan. Check out this [Quickstart Guide](/docs/iot-sim/get-started) to get set up.
2. GL-MiFi device.
3. A computer with a browser.
Alright, let's get started!
***
## Instructions for setting up your GL-MiFi 4G device:
1. First, insert the SIM card into the device. Look at the picture below for the proper placement of the SIM card, the gold chip should be facing up.
2. Power on the device and connect either via the Ethernet port or WiFi connection.The default WiFi credentials are located on a label at the bottom of the device.
3. Navigate to the device’s default gateway at `192.168.8.1` and log into the device. You'll be prompted to set an admin password but if you don't see the prompt, the default password is `admin`.
4. Once you’ve logged in, click on `manual setup` located in the Cellular Modem Overview section. Enter the following details as shown below and click `Apply`.
* Device: `/dev/cdc-wdm0`
* APN: `data00.telnyx`
5. The device will now attach to the Telnyx network. You can verify the connectivity by checking the front page of the default gateway as shown below. You'll notice that the device now shows a `Disconnect` button as well as IP address and data usage.
 6. To check your connectivity, you can also check the fourth icon on the left of the overview diagram. It will indicate `I TIM`.
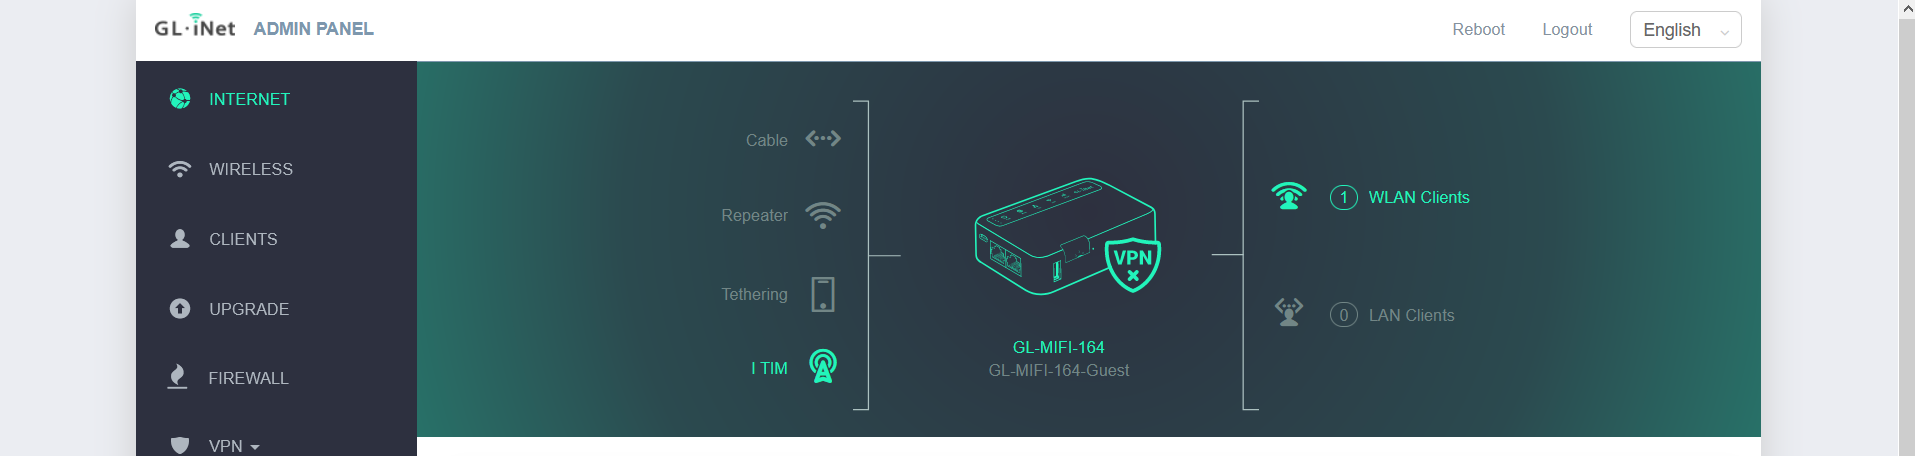 That's it! Your GL-MiFi 4G Smart Router is all set up with a Telnyx SIM card.
***
### Mikrotik wAP LTE Kit
> Source: [https://developers.telnyx.com/docs/iot-sim/mikrotik-wap-lte.md](https://developers.telnyx.com/docs/iot-sim/mikrotik-wap-lte.md)
**Original location:** Wireless > IoT > mikrotik-wap-lte
This guide will walk you through configuring the Mikrotik LTE Kit US router using a Telnyx SIM.
## Prerequisites to Set Up Mikrotik wAP LTE kit
1. An active Telnyx SIM card
2. Mikrotik LTE kit router
3. A computer
4. Latest routerOS firmware, which you can obtain [here.](https://mikrotik.com/product/wap_lte_kit_us#fndtn-downloads "Mikrotik Downloads")
## Setting Up Mikrotik wAP LTE kit
Note: Please insert the SIM card into router only when instructed to do so.
### Part I: Firmware Update
* We will begin by updating the routerOS firmware to the latest version (6.48 as of 2.4.21).
* Remove the SIM card from the device.
* Connect your computer to the device via either the WiFi or the Ethernet interface and log into the default gateway at 192.168.88.1. The default username and password are shown below.
* Username: admin
* Password: (blank)
* Once you log in, you will see the admin console as shown below.
That's it! Your GL-MiFi 4G Smart Router is all set up with a Telnyx SIM card.
***
### Mikrotik wAP LTE Kit
> Source: [https://developers.telnyx.com/docs/iot-sim/mikrotik-wap-lte.md](https://developers.telnyx.com/docs/iot-sim/mikrotik-wap-lte.md)
**Original location:** Wireless > IoT > mikrotik-wap-lte
This guide will walk you through configuring the Mikrotik LTE Kit US router using a Telnyx SIM.
## Prerequisites to Set Up Mikrotik wAP LTE kit
1. An active Telnyx SIM card
2. Mikrotik LTE kit router
3. A computer
4. Latest routerOS firmware, which you can obtain [here.](https://mikrotik.com/product/wap_lte_kit_us#fndtn-downloads "Mikrotik Downloads")
## Setting Up Mikrotik wAP LTE kit
Note: Please insert the SIM card into router only when instructed to do so.
### Part I: Firmware Update
* We will begin by updating the routerOS firmware to the latest version (6.48 as of 2.4.21).
* Remove the SIM card from the device.
* Connect your computer to the device via either the WiFi or the Ethernet interface and log into the default gateway at 192.168.88.1. The default username and password are shown below.
* Username: admin
* Password: (blank)
* Once you log in, you will see the admin console as shown below.
 * Click on Files → Browse and upload the .npk firmware file.
 * Reboot the device by clicking System → Reboot.
* The device will apply the latest firmware automatically during the booting procedure.
### Part II (Router Configuration)
* Navigate to Interface → LTE.
* Click LTE APNs → Add New.
* Name: Telnyx
* APN: data00.telnyx
* IP Type: IPv4
* Use Peer DNS: Check
* Add Default Route: Check
* Leave all other settings as their default values.
* Click Apply then OK.
* Go back to the LTE tab under Interfaces and click on the LTE module.
Apply the APN created above using the dropdown menu and enable roaming by checking the Allow Roaming box.
* Reboot the device by clicking System → Reboot.
* The device will apply the latest firmware automatically during the booting procedure.
### Part II (Router Configuration)
* Navigate to Interface → LTE.
* Click LTE APNs → Add New.
* Name: Telnyx
* APN: data00.telnyx
* IP Type: IPv4
* Use Peer DNS: Check
* Add Default Route: Check
* Leave all other settings as their default values.
* Click Apply then OK.
* Go back to the LTE tab under Interfaces and click on the LTE module.
Apply the APN created above using the dropdown menu and enable roaming by checking the Allow Roaming box.
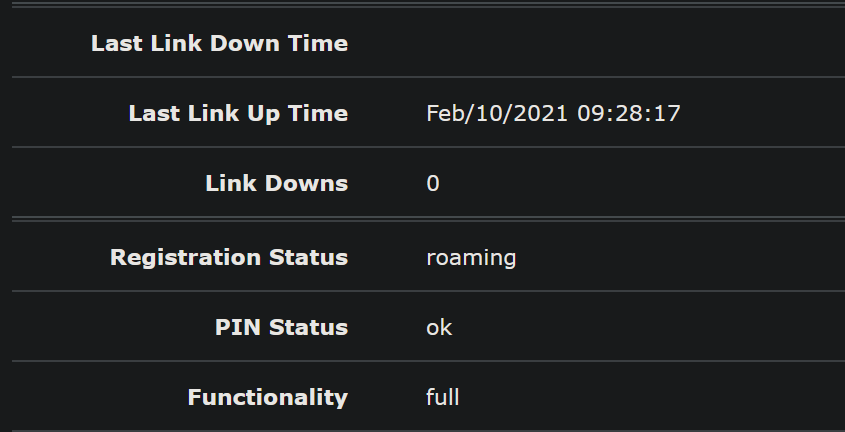 * Press Apply then OK.
* Insert the Telnyx SIM card. After roughly 45 seconds, the device will attach to the network. You can verify connectivity by going to Interfaces → LTE → Click on the LTE module then scroll down to registration status. It will display “roaming”.
* Press Apply then OK.
* Insert the Telnyx SIM card. After roughly 45 seconds, the device will attach to the network. You can verify connectivity by going to Interfaces → LTE → Click on the LTE module then scroll down to registration status. It will display “roaming”.
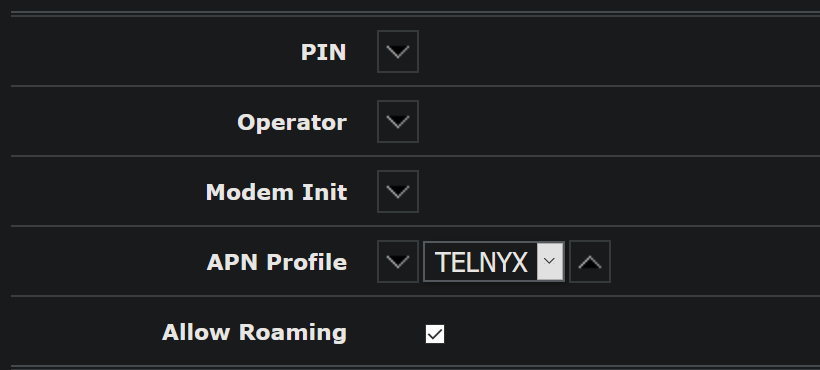 ***
### Edge Device Deployment
> Source: [https://developers.telnyx.com/docs/iot-sim/edge-deployment.md](https://developers.telnyx.com/docs/iot-sim/edge-deployment.md)
**Original location:** Wireless > IoT > edge-deployment
In this tutorial, we are going to deploy a Cradlepoint IBR200 to the edge of our corporate network in Digital Ocean. We will then open the Cradlepoint device up for SSH access via a private IP address from within our network.
For this tutorial, the SIM card in the Cradlepoint device will only have access to our corporate network in Digital Ocean and will not have access to the public internet directly. In a follow-up tutorial, we will showcase how to open the SIM up to the public internet.
There are 5 main steps in the setup of this deployment:
1. [SIM card setup](#sim-card-setup)
2. [Cloud VPN setup](#cloud-vpn-setup)
3. [Cradlepoint IBR200 setup](#cradlepoint-ibr200-setup)
4. [Private Wireless Gateway setup](#private-wireless-gateway-setup)
5. [Cradlepoint SSH configuration](#cradlepoint-ssh-configuration)
Before we jump into the steps, let's explore the design of this system first. Below is a diagram of our final setup.
To ensure that we have direct access to the Cradlepoint device via a private IP address in our corporate network, we are going to connect a Digital Ocean Droplet (a Linux server) to a VRF-defined network on the Telnyx MPLS backbone via a Wireguard client. We will then spin up a private packet gateway in the Telnyx mobile core just for this SIM card and add that packet gateway to the same VRF-defined network that the Wireguard client is connected to. We will finally configure the Cradlepoint device to accept SSH access and connect directly into our Cradlepoint CLI via the private IP address that the packet gateway gives the SIM on our VRF-defined network.
## SIM Card Setup
Our first step is to order and register a Telnyx SIM card. SIM cards can be ordered in the mission Control portal and registered via the registration flow in the wireless section. You can learn more about registering a SIM card in our [quickstart guide](/docs/iot-sim/get-started).
When the SIM is inserted into the Cradlepoint device, the only custom configuration that is required to connect the SIM is to set the APN to `data00.telnyx`.
## Cloud VPN Setup
Next, we will configure a Wireguard client in a Digital Ocean Droplet to connect into a Cloud VPN on the Telnyx MPLS backbone. Follow the steps in our Digital Ocean Ubuntu Server to Cloud VPN tutorial.
When you can successfully ping the server endpoint on the Telnyx network, you can move to the next step.
## Cradlepoint IBR200 Setup
Before we create and configure a Private Wireless Gateway we will connect our Telnyx SIM card to the internet in our Cradlepoint device. Follow the steps in our [Cradlepoint IBR200 Cellular Router Setup Guide](/docs/iot-sim/cradlepoint-ibr200-cellular).
When you can successfully access the public internet via a connected device to the Cradlepoint network, you can move to the next step.
## Private Wireless Gateway Setup
A Private Wireless Gateway (PWG) must be associated with a Network resource in the portal. The PWG can be created in the [Private Wireless Gateways subsection](https://portal.telnyx.com/#/app/wireless/private-wireless-gateways) in the Wireless section of the portal.
Click the Create PWG button, enter a name and select the Network resource that you used for your Cloud VPN from [step 2](#cloud-vpn-setup).
***
### Edge Device Deployment
> Source: [https://developers.telnyx.com/docs/iot-sim/edge-deployment.md](https://developers.telnyx.com/docs/iot-sim/edge-deployment.md)
**Original location:** Wireless > IoT > edge-deployment
In this tutorial, we are going to deploy a Cradlepoint IBR200 to the edge of our corporate network in Digital Ocean. We will then open the Cradlepoint device up for SSH access via a private IP address from within our network.
For this tutorial, the SIM card in the Cradlepoint device will only have access to our corporate network in Digital Ocean and will not have access to the public internet directly. In a follow-up tutorial, we will showcase how to open the SIM up to the public internet.
There are 5 main steps in the setup of this deployment:
1. [SIM card setup](#sim-card-setup)
2. [Cloud VPN setup](#cloud-vpn-setup)
3. [Cradlepoint IBR200 setup](#cradlepoint-ibr200-setup)
4. [Private Wireless Gateway setup](#private-wireless-gateway-setup)
5. [Cradlepoint SSH configuration](#cradlepoint-ssh-configuration)
Before we jump into the steps, let's explore the design of this system first. Below is a diagram of our final setup.
To ensure that we have direct access to the Cradlepoint device via a private IP address in our corporate network, we are going to connect a Digital Ocean Droplet (a Linux server) to a VRF-defined network on the Telnyx MPLS backbone via a Wireguard client. We will then spin up a private packet gateway in the Telnyx mobile core just for this SIM card and add that packet gateway to the same VRF-defined network that the Wireguard client is connected to. We will finally configure the Cradlepoint device to accept SSH access and connect directly into our Cradlepoint CLI via the private IP address that the packet gateway gives the SIM on our VRF-defined network.
## SIM Card Setup
Our first step is to order and register a Telnyx SIM card. SIM cards can be ordered in the mission Control portal and registered via the registration flow in the wireless section. You can learn more about registering a SIM card in our [quickstart guide](/docs/iot-sim/get-started).
When the SIM is inserted into the Cradlepoint device, the only custom configuration that is required to connect the SIM is to set the APN to `data00.telnyx`.
## Cloud VPN Setup
Next, we will configure a Wireguard client in a Digital Ocean Droplet to connect into a Cloud VPN on the Telnyx MPLS backbone. Follow the steps in our Digital Ocean Ubuntu Server to Cloud VPN tutorial.
When you can successfully ping the server endpoint on the Telnyx network, you can move to the next step.
## Cradlepoint IBR200 Setup
Before we create and configure a Private Wireless Gateway we will connect our Telnyx SIM card to the internet in our Cradlepoint device. Follow the steps in our [Cradlepoint IBR200 Cellular Router Setup Guide](/docs/iot-sim/cradlepoint-ibr200-cellular).
When you can successfully access the public internet via a connected device to the Cradlepoint network, you can move to the next step.
## Private Wireless Gateway Setup
A Private Wireless Gateway (PWG) must be associated with a Network resource in the portal. The PWG can be created in the [Private Wireless Gateways subsection](https://portal.telnyx.com/#/app/wireless/private-wireless-gateways) in the Wireless section of the portal.
Click the Create PWG button, enter a name and select the Network resource that you used for your Cloud VPN from [step 2](#cloud-vpn-setup).
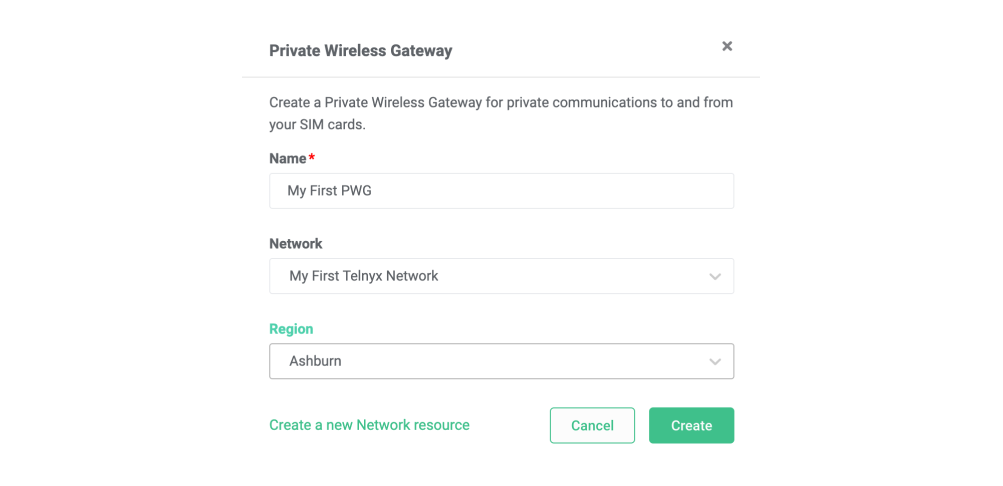 The PWG may take up to 15 minutes to create. This is due to the number of automated network configurations that are required to deploy an entirely new Dockerized PGW instance into our wireless mobile core.
When the PWG status changes to **provisioned**, we can associate our SIM Group. This can be done by navigating to the relevant SIM Group and setting the PWG to the one we just created. For the sake of this tutorial, it is best to associate a SIM group with just the SIM that you have inserted into your Cradlepoint device. By default, the SIMs in this SIM group will lose access to the public internet when added to the new PGW in our wireless mobile core.
Now that you have your SIM card associated with a new packet gateway via the PWG resource that you created on the same network as your Cloud VPN we can ping the IP of our SIM card from the Digital Ocean Droplet. Log into your Digital Ocean Ubuntu Server and ping the IP that your SIM is showing in the portal. The SIM card IP address can be viewed in the drill-down view for that SIM. When you have a successful ping working between your Digital Ocean server and SIM card in your Cradlepoint device, you can move on to the next step.
## Cradlepoint SSH Configuration
The final step is to enable SSH access on your Cradlepoint device. This is done via the Administration page in the Cradlepoint configuration console.
Connect to your Cradlepoint WiFi network and enter the LAN IP address or hostname of the router (assuming you are connecting from the LAN side) into a web browser's location field. By default, the LAN IP address is `192.168.0.1` and the router's hostname is `cp`:
Next, navigate to the **System** section on the left nav menu, and then select **Administration**.
Select **Local Management** from the drop-down menu.
Then check the **Enable SSH Server** entry box.
To access the CLI from your corporate network, select **Remote Admin** from the **Administration** drop-down menu, and check **Allow Remote SSH Access**.
Click **Save** *(if using Local Management)* or **Submit** *( if using Remote Admin)*.
*Allow Weak Cipher Support* is off by default. You may need to enable this depending on the SSH version and encryption algorithm that you are using on your server. It can be enabled by navigating to **System > Administration > Local Management > Allow Weak Cipher Support**.
Now that you have enabled SSH on the Cradlepoint device, you should be able to access the device from your Digital Ocean server.
From your Linux server run:
```bash theme={null}
ssh admin@[SIM_CARD_IP]
```
After pasting the above content, Kindly check and remove any new line added
Enter the password that you used to access the Cradlepoint management console.
You should now have access to the Cradlepoint CLI without any internet access.
***
## VoLTE
### Overview
> Source: [https://developers.telnyx.com/docs/iot-sim/voice-enabled-iot.md](https://developers.telnyx.com/docs/iot-sim/voice-enabled-iot.md)
**Beta** — VoLTE is in beta. API reference and detailed configuration docs coming soon.
Add a real phone number to any eSIM-capable device. No second phone, no SIP client, no app — just a native cellular line with full API control.
***
### Phone Numbers
> Source: [https://developers.telnyx.com/docs/iot-sim/mobile-phone-numbers.md](https://developers.telnyx.com/docs/iot-sim/mobile-phone-numbers.md)
When you enable voice on a SIM, Telnyx assigns a Mobile Phone Number — a real +E.164 number. Inbound calls ring the device natively. Outbound calls show your number as caller ID.
## Enabling Voice
Voice is enabled per-SIM via action endpoints, not by patching a field.
| Action | Endpoint |
| :--------------------------------------------------------------------------------------- | :----------------------------------------------------- |
| [Enable Voice](/api-reference/sim-cards/request-a-sim-card-enable) | `POST /sim_cards/{id}/actions/enable_voice` |
| [Disable Voice](/api-reference/sim-cards/request-a-sim-card-disable) | `POST /sim_cards/{id}/actions/disable_voice` |
| [Bulk Enable Voice](/api-reference/sim-cards/request-bulk-enabling-voice-on-sim-cards) | `POST /sim_cards/actions/bulk_enable_voice` |
| [Bulk Disable Voice](/api-reference/sim-cards/request-bulk-disabling-voice-on-sim-cards) | `POST /sim_cards/actions/bulk_disable_voice` |
`enable_voice` accepts an optional `connection_id` to associate with a Mobile Voice Connection.
## Mobile Phone Number
Once voice is enabled, manage the assigned number via:
| Action | Endpoint |
| :-------------------------------------------------------------------------------- | :------------------------------------------- |
| [List Numbers](/api-reference/mobile-phone-numbers/list-mobile-phone-numbers) | `GET /mobile_phone_numbers` |
| [Get Number](/api-reference/mobile-phone-numbers/retrieve-a-mobile-phone-number) | `GET /mobile_phone_numbers/{id}` |
| [Update Number](/api-reference/mobile-phone-numbers/update-a-mobile-phone-number) | `PATCH /mobile_phone_numbers/{id}` |
### Configurable Settings
| Setting | Description |
| :----------------------- | :------------------------------------------------- |
| `call_forwarding` | Forward calls on no-answer, busy, or unconditional |
| `call_recording` | Record inbound, outbound, or both |
| `caller_id_name_enabled` | Enable CNAM lookup on outbound calls |
| `cnam_listing` | Register business name for inbound CNAM display |
| `noise_suppression` | AI noise reduction on calls |
| `inbound_call_screening` | Filter inbound calls before connecting |
| `connection_id` | Associate with a Mobile Voice Connection |
| `customer_reference` | Your own reference string |
| `tags` | Arbitrary tags for filtering |
| `inbound` / `outbound` | Routing configuration per direction |
## Mobile Voice Connection
The voice application attached to a number — controls webhooks, API version, and routing.
| Action | Endpoint |
| :---------------------------------------------------------------------------------------- | :------------------------------------------------ |
| [List Connections](/api-reference/mobile-phone-numbers/list-mobile-voice-connections) | `GET /mobile_voice_connections` |
| [Create Connection](/api-reference/mobile-phone-numbers/create-a-mobile-voice-connection) | `POST /mobile_voice_connections` |
| [Get Connection](/api-reference/mobile-phone-numbers/retrieve-a-mobile-voice-connection) | `GET /mobile_voice_connections/{id}` |
| [Update Connection](/api-reference/mobile-phone-numbers/update-a-mobile-voice-connection) | `PATCH /mobile_voice_connections/{id}` |
| [Delete Connection](/api-reference/mobile-phone-numbers/delete-a-mobile-voice-connection) | `DELETE /mobile_voice_connections/{id}` |
### Connection Settings
| Setting | Description |
| :--------------------------- | :------------------------------------ |
| `webhook_event_url` | Where call events are sent |
| `webhook_event_failover_url` | Backup URL if primary fails |
| `webhook_timeout_secs` | How long to wait for webhook response |
| `outbound` / `inbound` | Routing configuration per direction |
| `active` | Whether the connection is active |
***
### Forwarding, Recording & Screening
> Source: [https://developers.telnyx.com/docs/iot-sim/call-forwarding-recording.md](https://developers.telnyx.com/docs/iot-sim/call-forwarding-recording.md)
All settings below are configured via [`PATCH /mobile_phone_numbers/{id}`](/api-reference/mobile-phone-numbers/update-a-mobile-phone-number).
## Call Forwarding
Set the `call_forwarding` object to route calls when the device is unavailable.
| Type | Behavior |
| :-------------- | :------------------------------------------------- |
| `unconditional` | All calls forward immediately — device never rings |
| `no_answer` | Forward after timeout (device rings first) |
| `busy` | Forward when line is in use |
Forward to any number — landline, mobile, SIP connection, or Call Control application.
## Call Recording
Set `call_recording` to record inbound, outbound, or both.
Recordings are accessible through the standard Telnyx Recordings API — same storage, retrieval, and webhooks as Call Control recordings.
## Inbound Call Screening
Inbound Call Screening automatically blocks or flags inbound calls based on caller reputation and SHAKEN/STIR attestation. The feature is free on any number.
### How it works
Screening evaluates three factors:
| Factor | Description |
| :-------------------------- | :------------------------------------------------------------------------------------------------------------------- |
| **Number Reputation** | Cross-references caller identity against CallerAPI, Nomorobo, and YouMail databases |
| **Number Validation** | Checks whether the originating number is valid and exists |
| **SHAKEN/STIR Attestation** | Validates Caller ID authenticity — screens calls with Attestation C (unauthenticated) or Invalid (certificate error) |
### Handling modes
| Mode | Behavior |
| :--------- | :------------------------------------------------------------------------------------------------------------------------------------------------------- |
| **Flag** | Call connects but displays "SPAM LIKELY" in the From and P-Asserted-ID headers. A custom SIP header carries the screening status for your routing logic. |
| **Reject** | Call is blocked at the network level and never reaches your infrastructure. |
### Enabling call screening
1. Log in to the [Mission Control Portal](https://portal.telnyx.com).
2. Go to **My Numbers**, select a number, and click **Edit**.
3. Under the **Voice** tab, enable **Inbound Call Screening** and choose Flag or Reject.
You can also enable it via `PATCH /mobile_phone_numbers/{id}` by setting the `inbound_call_screening` field.
### Webhook integration
Enable webhooks to receive the `call_screening_result` field in the `call.initiated` webhook payload.
Number reputation screening applies to US and Canada calls. SHAKEN/STIR screening applies to North America.
## Other Settings
| Setting | Description |
| :------------------ | :--------------------------------------- |
| `noise_suppression` | AI noise reduction for loud environments |
## Example
```json theme={null}
{
"call_forwarding": {
"forwarding_type": "no_answer",
"forwarding_number": "+15551234567",
"timeout_secs": 30
},
"call_recording": {
"inbound": "enabled",
"outbound": "disabled"
},
"noise_suppression": "enabled"
}
```
***
## Messaging
### Overview
> Source: [https://developers.telnyx.com/docs/iot-sim/messaging-settings.md](https://developers.telnyx.com/docs/iot-sim/messaging-settings.md)
Coming soon.
***
## API Reference (Wireless)
### SIM Cards
* [Get all SIM cards](https://developers.telnyx.com/api-reference/sim-cards/get-all-sim-cards.md): Get all SIM cards belonging to the user that match the given filters.
* [Get SIM card](https://developers.telnyx.com/api-reference/sim-cards/get-sim-card.md): Returns the details regarding a specific SIM card.
* [Update a SIM card](https://developers.telnyx.com/api-reference/sim-cards/update-a-sim-card.md): Updates SIM card data
* [Deletes a SIM card](https://developers.telnyx.com/api-reference/sim-cards/deletes-a-sim-card.md): The SIM card will be decommissioned, removed from your account and you will stop being charged.\
The PWG may take up to 15 minutes to create. This is due to the number of automated network configurations that are required to deploy an entirely new Dockerized PGW instance into our wireless mobile core.
When the PWG status changes to **provisioned**, we can associate our SIM Group. This can be done by navigating to the relevant SIM Group and setting the PWG to the one we just created. For the sake of this tutorial, it is best to associate a SIM group with just the SIM that you have inserted into your Cradlepoint device. By default, the SIMs in this SIM group will lose access to the public internet when added to the new PGW in our wireless mobile core.
Now that you have your SIM card associated with a new packet gateway via the PWG resource that you created on the same network as your Cloud VPN we can ping the IP of our SIM card from the Digital Ocean Droplet. Log into your Digital Ocean Ubuntu Server and ping the IP that your SIM is showing in the portal. The SIM card IP address can be viewed in the drill-down view for that SIM. When you have a successful ping working between your Digital Ocean server and SIM card in your Cradlepoint device, you can move on to the next step.
## Cradlepoint SSH Configuration
The final step is to enable SSH access on your Cradlepoint device. This is done via the Administration page in the Cradlepoint configuration console.
Connect to your Cradlepoint WiFi network and enter the LAN IP address or hostname of the router (assuming you are connecting from the LAN side) into a web browser's location field. By default, the LAN IP address is `192.168.0.1` and the router's hostname is `cp`:
Next, navigate to the **System** section on the left nav menu, and then select **Administration**.
Select **Local Management** from the drop-down menu.
Then check the **Enable SSH Server** entry box.
To access the CLI from your corporate network, select **Remote Admin** from the **Administration** drop-down menu, and check **Allow Remote SSH Access**.
Click **Save** *(if using Local Management)* or **Submit** *( if using Remote Admin)*.
*Allow Weak Cipher Support* is off by default. You may need to enable this depending on the SSH version and encryption algorithm that you are using on your server. It can be enabled by navigating to **System > Administration > Local Management > Allow Weak Cipher Support**.
Now that you have enabled SSH on the Cradlepoint device, you should be able to access the device from your Digital Ocean server.
From your Linux server run:
```bash theme={null}
ssh admin@[SIM_CARD_IP]
```
After pasting the above content, Kindly check and remove any new line added
Enter the password that you used to access the Cradlepoint management console.
You should now have access to the Cradlepoint CLI without any internet access.
***
## VoLTE
### Overview
> Source: [https://developers.telnyx.com/docs/iot-sim/voice-enabled-iot.md](https://developers.telnyx.com/docs/iot-sim/voice-enabled-iot.md)
**Beta** — VoLTE is in beta. API reference and detailed configuration docs coming soon.
Add a real phone number to any eSIM-capable device. No second phone, no SIP client, no app — just a native cellular line with full API control.
***
### Phone Numbers
> Source: [https://developers.telnyx.com/docs/iot-sim/mobile-phone-numbers.md](https://developers.telnyx.com/docs/iot-sim/mobile-phone-numbers.md)
When you enable voice on a SIM, Telnyx assigns a Mobile Phone Number — a real +E.164 number. Inbound calls ring the device natively. Outbound calls show your number as caller ID.
## Enabling Voice
Voice is enabled per-SIM via action endpoints, not by patching a field.
| Action | Endpoint |
| :--------------------------------------------------------------------------------------- | :----------------------------------------------------- |
| [Enable Voice](/api-reference/sim-cards/request-a-sim-card-enable) | `POST /sim_cards/{id}/actions/enable_voice` |
| [Disable Voice](/api-reference/sim-cards/request-a-sim-card-disable) | `POST /sim_cards/{id}/actions/disable_voice` |
| [Bulk Enable Voice](/api-reference/sim-cards/request-bulk-enabling-voice-on-sim-cards) | `POST /sim_cards/actions/bulk_enable_voice` |
| [Bulk Disable Voice](/api-reference/sim-cards/request-bulk-disabling-voice-on-sim-cards) | `POST /sim_cards/actions/bulk_disable_voice` |
`enable_voice` accepts an optional `connection_id` to associate with a Mobile Voice Connection.
## Mobile Phone Number
Once voice is enabled, manage the assigned number via:
| Action | Endpoint |
| :-------------------------------------------------------------------------------- | :------------------------------------------- |
| [List Numbers](/api-reference/mobile-phone-numbers/list-mobile-phone-numbers) | `GET /mobile_phone_numbers` |
| [Get Number](/api-reference/mobile-phone-numbers/retrieve-a-mobile-phone-number) | `GET /mobile_phone_numbers/{id}` |
| [Update Number](/api-reference/mobile-phone-numbers/update-a-mobile-phone-number) | `PATCH /mobile_phone_numbers/{id}` |
### Configurable Settings
| Setting | Description |
| :----------------------- | :------------------------------------------------- |
| `call_forwarding` | Forward calls on no-answer, busy, or unconditional |
| `call_recording` | Record inbound, outbound, or both |
| `caller_id_name_enabled` | Enable CNAM lookup on outbound calls |
| `cnam_listing` | Register business name for inbound CNAM display |
| `noise_suppression` | AI noise reduction on calls |
| `inbound_call_screening` | Filter inbound calls before connecting |
| `connection_id` | Associate with a Mobile Voice Connection |
| `customer_reference` | Your own reference string |
| `tags` | Arbitrary tags for filtering |
| `inbound` / `outbound` | Routing configuration per direction |
## Mobile Voice Connection
The voice application attached to a number — controls webhooks, API version, and routing.
| Action | Endpoint |
| :---------------------------------------------------------------------------------------- | :------------------------------------------------ |
| [List Connections](/api-reference/mobile-phone-numbers/list-mobile-voice-connections) | `GET /mobile_voice_connections` |
| [Create Connection](/api-reference/mobile-phone-numbers/create-a-mobile-voice-connection) | `POST /mobile_voice_connections` |
| [Get Connection](/api-reference/mobile-phone-numbers/retrieve-a-mobile-voice-connection) | `GET /mobile_voice_connections/{id}` |
| [Update Connection](/api-reference/mobile-phone-numbers/update-a-mobile-voice-connection) | `PATCH /mobile_voice_connections/{id}` |
| [Delete Connection](/api-reference/mobile-phone-numbers/delete-a-mobile-voice-connection) | `DELETE /mobile_voice_connections/{id}` |
### Connection Settings
| Setting | Description |
| :--------------------------- | :------------------------------------ |
| `webhook_event_url` | Where call events are sent |
| `webhook_event_failover_url` | Backup URL if primary fails |
| `webhook_timeout_secs` | How long to wait for webhook response |
| `outbound` / `inbound` | Routing configuration per direction |
| `active` | Whether the connection is active |
***
### Forwarding, Recording & Screening
> Source: [https://developers.telnyx.com/docs/iot-sim/call-forwarding-recording.md](https://developers.telnyx.com/docs/iot-sim/call-forwarding-recording.md)
All settings below are configured via [`PATCH /mobile_phone_numbers/{id}`](/api-reference/mobile-phone-numbers/update-a-mobile-phone-number).
## Call Forwarding
Set the `call_forwarding` object to route calls when the device is unavailable.
| Type | Behavior |
| :-------------- | :------------------------------------------------- |
| `unconditional` | All calls forward immediately — device never rings |
| `no_answer` | Forward after timeout (device rings first) |
| `busy` | Forward when line is in use |
Forward to any number — landline, mobile, SIP connection, or Call Control application.
## Call Recording
Set `call_recording` to record inbound, outbound, or both.
Recordings are accessible through the standard Telnyx Recordings API — same storage, retrieval, and webhooks as Call Control recordings.
## Inbound Call Screening
Inbound Call Screening automatically blocks or flags inbound calls based on caller reputation and SHAKEN/STIR attestation. The feature is free on any number.
### How it works
Screening evaluates three factors:
| Factor | Description |
| :-------------------------- | :------------------------------------------------------------------------------------------------------------------- |
| **Number Reputation** | Cross-references caller identity against CallerAPI, Nomorobo, and YouMail databases |
| **Number Validation** | Checks whether the originating number is valid and exists |
| **SHAKEN/STIR Attestation** | Validates Caller ID authenticity — screens calls with Attestation C (unauthenticated) or Invalid (certificate error) |
### Handling modes
| Mode | Behavior |
| :--------- | :------------------------------------------------------------------------------------------------------------------------------------------------------- |
| **Flag** | Call connects but displays "SPAM LIKELY" in the From and P-Asserted-ID headers. A custom SIP header carries the screening status for your routing logic. |
| **Reject** | Call is blocked at the network level and never reaches your infrastructure. |
### Enabling call screening
1. Log in to the [Mission Control Portal](https://portal.telnyx.com).
2. Go to **My Numbers**, select a number, and click **Edit**.
3. Under the **Voice** tab, enable **Inbound Call Screening** and choose Flag or Reject.
You can also enable it via `PATCH /mobile_phone_numbers/{id}` by setting the `inbound_call_screening` field.
### Webhook integration
Enable webhooks to receive the `call_screening_result` field in the `call.initiated` webhook payload.
Number reputation screening applies to US and Canada calls. SHAKEN/STIR screening applies to North America.
## Other Settings
| Setting | Description |
| :------------------ | :--------------------------------------- |
| `noise_suppression` | AI noise reduction for loud environments |
## Example
```json theme={null}
{
"call_forwarding": {
"forwarding_type": "no_answer",
"forwarding_number": "+15551234567",
"timeout_secs": 30
},
"call_recording": {
"inbound": "enabled",
"outbound": "disabled"
},
"noise_suppression": "enabled"
}
```
***
## Messaging
### Overview
> Source: [https://developers.telnyx.com/docs/iot-sim/messaging-settings.md](https://developers.telnyx.com/docs/iot-sim/messaging-settings.md)
Coming soon.
***
## API Reference (Wireless)
### SIM Cards
* [Get all SIM cards](https://developers.telnyx.com/api-reference/sim-cards/get-all-sim-cards.md): Get all SIM cards belonging to the user that match the given filters.
* [Get SIM card](https://developers.telnyx.com/api-reference/sim-cards/get-sim-card.md): Returns the details regarding a specific SIM card.
* [Update a SIM card](https://developers.telnyx.com/api-reference/sim-cards/update-a-sim-card.md): Updates SIM card data
* [Deletes a SIM card](https://developers.telnyx.com/api-reference/sim-cards/deletes-a-sim-card.md): The SIM card will be decommissioned, removed from your account and you will stop being charged.\
The SIM card won't be able to connect to the network after…
* [Register SIM cards](https://developers.telnyx.com/api-reference/sim-cards/register-sim-cards.md): Register the SIM cards associated with the provided registration codes to the current user's account.\
\
* [Purchase eSIMs](https://developers.telnyx.com/api-reference/sim-cards/purchase-esims.md): Purchases and registers the specified amount of eSIMs to the current user's account.\
\
* [Request a SIM card enable](https://developers.telnyx.com/api-reference/sim-cards/request-a-sim-card-enable.md): This API enables a SIM card, connecting it to the network and making it possible to consume data.\
* [Request a SIM card disable](https://developers.telnyx.com/api-reference/sim-cards/request-a-sim-card-disable.md): This API disables a SIM card, disconnecting it from the network and making it impossible to consume data.\
* [Request setting a SIM card to standby](https://developers.telnyx.com/api-reference/sim-cards/request-setting-a-sim-card-to-standby.md): The SIM card will be able to connect to the network once the process to set it to standby has been completed, thus making it possible to consume data.\
* [Request bulk disabling voice on SIM cards.](https://developers.telnyx.com/api-reference/sim-cards/request-bulk-disabling-voice-on-sim-cards.md): This API triggers an asynchronous operation to disable voice on SIM cards belonging to a specified SIM Card Group.\
* [Request bulk enabling voice on SIM cards.](https://developers.telnyx.com/api-reference/sim-cards/request-bulk-enabling-voice-on-sim-cards.md): This API triggers an asynchronous operation to enable voice on SIM cards belonging to a specified SIM Card Group.\
* [Request bulk setting SIM card public IPs.](https://developers.telnyx.com/api-reference/sim-cards/request-bulk-setting-sim-card-public-ips.md): This API triggers an asynchronous operation to set a public IP for each of the specified SIM cards.\
* [Validate SIM cards registration codes](https://developers.telnyx.com/api-reference/sim-cards/validate-sim-cards-registration-codes.md): It validates whether SIM card registration codes are valid or not.
* [Get SIM card public IP definition](https://developers.telnyx.com/api-reference/sim-cards/get-sim-card-public-ip-definition.md): It returns the public IP requested for a SIM card.
* [Request setting a SIM card public IP](https://developers.telnyx.com/api-reference/sim-cards/request-setting-a-sim-card-public-ip.md): This API makes a SIM card reachable on the public internet by mapping a random public IP to the SIM card. \
\
* [Request removing a SIM card public IP](https://developers.telnyx.com/api-reference/sim-cards/request-removing-a-sim-card-public-ip.md): This API removes an existing public IP from a SIM card. \
\
* [List SIM card data usage notifications](https://developers.telnyx.com/api-reference/sim-cards/list-sim-card-data-usage-notifications.md): Lists a paginated collection of SIM card data usage notifications. It enables exploring the collection using specific filters.
* [Create a new SIM card data usage notification](https://developers.telnyx.com/api-reference/sim-cards/create-a-new-sim-card-data-usage-notification.md): Creates a new SIM card data usage notification.
* [Get a single SIM card data usage notification](https://developers.telnyx.com/api-reference/sim-cards/get-a-single-sim-card-data-usage-notification.md): Get a single SIM Card Data Usage Notification.
* [Updates information for a SIM Card Data Usage Notification](https://developers.telnyx.com/api-reference/sim-cards/updates-information-for-a-sim-card-data-usage-notification.md): Updates information for a SIM Card Data Usage Notification.
* [Delete SIM card data usage notifications](https://developers.telnyx.com/api-reference/sim-cards/delete-sim-card-data-usage-notifications.md): Delete the SIM Card Data Usage Notification.
* [List wireless connectivity logs](https://developers.telnyx.com/api-reference/sim-cards/list-wireless-connectivity-logs.md): This API allows listing a paginated collection of Wireless Connectivity Logs associated with a SIM Card, for troubleshooting purposes.
### SIM Card Orders
* [Get all SIM card orders](https://developers.telnyx.com/api-reference/sim-card-orders/get-all-sim-card-orders.md): Get all SIM card orders according to filters.
* [Create a SIM card order](https://developers.telnyx.com/api-reference/sim-card-orders/create-a-sim-card-order.md): Creates a new order for SIM cards.
* [Get a single SIM card order](https://developers.telnyx.com/api-reference/sim-card-orders/get-a-single-sim-card-order.md): Get a single SIM card order by its ID.
* [Preview SIM card orders](https://developers.telnyx.com/api-reference/sim-card-orders/preview-sim-card-orders.md): Preview SIM card order purchases.
### SIM Card Actions
* [List SIM card actions](https://developers.telnyx.com/api-reference/sim-card-actions/list-sim-card-actions.md): This API lists a paginated collection of SIM card actions. It enables exploring a collection of existing asynchronous operations using specific filters.
* [Get SIM card action details](https://developers.telnyx.com/api-reference/sim-card-actions/get-sim-card-action-details.md): This API fetches detailed information about a SIM card action to follow-up on an existing asynchronous operation.
* [List bulk SIM card actions](https://developers.telnyx.com/api-reference/sim-card-actions/list-bulk-sim-card-actions.md): This API lists a paginated collection of bulk SIM card actions. A bulk SIM card action contains details about a collection of individual SIM card actions.
* [Get bulk SIM card action details](https://developers.telnyx.com/api-reference/sim-card-actions/get-bulk-sim-card-action-details.md): This API fetches information about a bulk SIM card action. A bulk SIM card action contains details about a collection of individual SIM card actions.
### SIM Card Groups
* [Get all SIM card groups](https://developers.telnyx.com/api-reference/sim-card-groups/get-all-sim-card-groups.md): Get all SIM card groups belonging to the user that match the given filters.
* [Create a SIM card group](https://developers.telnyx.com/api-reference/sim-card-groups/create-a-sim-card-group.md): Creates a new SIM card group object
* [Get SIM card group](https://developers.telnyx.com/api-reference/sim-card-groups/get-sim-card-group.md): Returns the details regarding a specific SIM card group
* [Update a SIM card group](https://developers.telnyx.com/api-reference/sim-card-groups/update-a-sim-card-group.md): Updates a SIM card group
* [Delete a SIM card group](https://developers.telnyx.com/api-reference/sim-card-groups/delete-a-sim-card-group.md): Permanently deletes a SIM card group
* [Request Private Wireless Gateway removal from SIM card group](https://developers.telnyx.com/api-reference/sim-card-groups/request-private-wireless-gateway-removal-from-sim-card-group.md): This action will asynchronously remove an existing Private Wireless Gateway definition from a SIM card group. Completing this operation defines that all SIM ca…
* [Request Wireless Blocklist removal from SIM card group](https://developers.telnyx.com/api-reference/sim-card-groups/request-wireless-blocklist-removal-from-sim-card-group.md): This action will asynchronously remove an existing Wireless Blocklist to all the SIMs in the SIM card group.
* [Request Private Wireless Gateway assignment for SIM card group](https://developers.telnyx.com/api-reference/sim-card-groups/request-private-wireless-gateway-assignment-for-sim-card-group.md): This action will asynchronously assign a provisioned Private Wireless Gateway to the SIM card group. Completing this operation defines that all SIM cards in th…
* [Request Wireless Blocklist assignment for SIM card group](https://developers.telnyx.com/api-reference/sim-card-groups/request-wireless-blocklist-assignment-for-sim-card-group.md): This action will asynchronously assign a Wireless Blocklist to all the SIMs in the SIM card group.
### SIM Card Group Actions
* [List SIM card group actions](https://developers.telnyx.com/api-reference/sim-card-group-actions/list-sim-card-group-actions.md): This API allows listing a paginated collection a SIM card group actions. It allows to explore a collection of existing asynchronous operation using specific fi…
* [Get SIM card group action details](https://developers.telnyx.com/api-reference/sim-card-group-actions/get-sim-card-group-action-details.md): This API allows fetching detailed information about a SIM card group action resource to make follow-ups in an existing asynchronous operation.
### Private Wireless Gateways
* [Get all Private Wireless Gateways](https://developers.telnyx.com/api-reference/private-wireless-gateways/get-all-private-wireless-gateways.md): Get all Private Wireless Gateways belonging to the user.
* [Create a Private Wireless Gateway](https://developers.telnyx.com/api-reference/private-wireless-gateways/create-a-private-wireless-gateway.md): Asynchronously create a Private Wireless Gateway for SIM cards for a previously created network. This operation may take several minutes so you can check the P…
* [Get a Private Wireless Gateway](https://developers.telnyx.com/api-reference/private-wireless-gateways/get-a-private-wireless-gateway.md): Retrieve information about a Private Wireless Gateway.
* [Delete a Private Wireless Gateway](https://developers.telnyx.com/api-reference/private-wireless-gateways/delete-a-private-wireless-gateway.md): Deletes the Private Wireless Gateway.
### Wireless Blocklists
* [Get all Wireless Blocklists](https://developers.telnyx.com/api-reference/wireless-blocklists/get-all-wireless-blocklists.md): Get all Wireless Blocklists belonging to the user.
* [Create a Wireless Blocklist](https://developers.telnyx.com/api-reference/wireless-blocklists/create-a-wireless-blocklist.md): Create a Wireless Blocklist to prevent SIMs from connecting to certain networks.
* [Get a Wireless Blocklist](https://developers.telnyx.com/api-reference/wireless-blocklists/get-a-wireless-blocklist.md): Retrieve information about a Wireless Blocklist.
* [Update a Wireless Blocklist](https://developers.telnyx.com/api-reference/wireless-blocklists/update-a-wireless-blocklist.md): Update a Wireless Blocklist.
* [Delete a Wireless Blocklist](https://developers.telnyx.com/api-reference/wireless-blocklists/delete-a-wireless-blocklist.md): Deletes the Wireless Blocklist.
* [Get all possible wireless blocklist values](https://developers.telnyx.com/api-reference/wireless-blocklists/get-all-possible-wireless-blocklist-values.md): Retrieve all wireless blocklist values for a given blocklist type.
### Traffic Policy Profiles
* [Get all traffic policy profiles](https://developers.telnyx.com/api-reference/traffic-policy-profiles/get-all-traffic-policy-profiles.md): Get all traffic policy profiles belonging to the user that match the given filters.
* [Create a traffic policy profile](https://developers.telnyx.com/api-reference/traffic-policy-profiles/create-a-traffic-policy-profile.md): Create a new traffic policy profile. At least one of `services`, `ip_ranges`, or `domains` must be provided.
* [Get a traffic policy profile](https://developers.telnyx.com/api-reference/traffic-policy-profiles/get-a-traffic-policy-profile.md): Returns the details regarding a specific traffic policy profile.
* [Update a traffic policy profile](https://developers.telnyx.com/api-reference/traffic-policy-profiles/update-a-traffic-policy-profile.md): Updates a traffic policy profile.
* [Delete a traffic policy profile](https://developers.telnyx.com/api-reference/traffic-policy-profiles/delete-a-traffic-policy-profile.md): Deletes the traffic policy profile.
* [Get all available traffic policy profile services](https://developers.telnyx.com/api-reference/traffic-policy-profiles/get-all-available-traffic-policy-profile-services.md): Get all available PCEF services that can be used in traffic policy profiles.
### Reporting
* [Get all Wireless Detail Records (WDRs) Reports](https://developers.telnyx.com/api-reference/reporting/get-all-wireless-detail-records-wdrs-reports.md): Returns the WDR Reports that match the given parameters.
* [Create a Wireless Detail Records (WDRs) Report](https://developers.telnyx.com/api-reference/reporting/create-a-wireless-detail-records-wdrs-report.md): Asynchronously create a report containing Wireless Detail Records (WDRs) for the SIM cards that consumed wireless data in the given time period.
* [Get a Wireless Detail Record (WDR) Report](https://developers.telnyx.com/api-reference/reporting/get-a-wireless-detail-record-wdr-report.md): Returns one specific WDR report
* [Delete a Wireless Detail Record (WDR) Report](https://developers.telnyx.com/api-reference/reporting/delete-a-wireless-detail-record-wdr-report.md): Deletes one specific WDR report.
### OTA updates
* [List OTA updates](https://developers.telnyx.com/api-reference/ota-updates/list-ota-updates.md)
* [Get OTA update](https://developers.telnyx.com/api-reference/ota-updates/get-ota-update.md): This API returns the details of an Over the Air (OTA) update.